2025 The Year In Pictures

The year 2025 was like no other.  Starting with a knee replacement operation in January, shortly after we finally found a new house in March and moved to the lovely dark skies of Somerset at the end of June.  Unfortunately, the ensuing turmoil left only a limited time for astronomy.  Notwithstanding, I was able to supplement images from Redhill and our new home in Wookey, with some excellent data from Texas, USA and Chile to produce, what I hope you will agree, is an exciting 2026 calendar. 

For other pictures and information, go to my website https://watchthisspaceman.com/ or a video of the calendar can be found here on YouTube https://www.youtube.com/watch?v=gn3ls_s71lQ   and is best accessed on a PC or smart TV screen. Background music this year is Massive Attack’s track Atlas Air.

 COVERNIGHT SKY MONTAGE AT CASTLE FARM OBSERVATORY:

All these images (at the top of the page) were taken at various times from the same location at our house in Wookey, Somerset.  Clockwise from bottom left: (1) Nightscape of a small coppice looking south (2) Double Cluster – a pair of open star clusters in the Perseus constellation (3) Star trails (4) Sunset looking west. 

JANUARYTHE GREAT ORION NEBULA, M42 (1)
 
The Orion Nebula is a gigantic cosmic cloud of interstellar dust and gas, which is the basis for the birth of numerous new stars or a “star nursery”.  Being the brightest nebula in the northern hemisphere and just over 1,300 light-years distance from Earth, it can be seen with the naked eye on a clear night.
FEBRUARYFLAMING STAR NEBULA, IC405 (1)
 
This nebula is illuminated by a powerfully bright blue variable star, AE Aurigae. The object’s epithet comes from the brightly lit ripples of gas and dust at the top of the image, illuminated by AE Aurigae and glowing hydrogen gas. This “runaway star” was ejected by a collision two million years ago from the Triangulum region of The Great Orion Nebula.
MARCHCRAB NEBULA, M1 (3)
 
This small but beautiful supernova Remnant (SNR) was the result of the explosion of the star CM Tau just over 970 years ago.  Located at the centre of the nebula, the remaining Crab Pulsar neutron star spins at the rate of 30 times per second.        
 
APRILPINWHEEL GALAXY, M101 (3)
 
At nearly twice the size of the Milky Way and containing at least an estimated trillion stars, M101 is the second largest galaxy of the Messier catalogue and certainly one of the highlights of the spring galaxy season. 
MAY SCULPTOR GALAXY, NGC 253 (3)
 
One of the advantages of obtaining data from Texas, USA, is that it enables views of objects in the Southern Hemisphere that are impossible from the UK.  Also known as the Silver Dollar, it is one of the brightest galaxies in the night sky, which results from very high rates of star formation that are fed by the abundance of thick dust lanes.
 
JUNENEEDLE GALAXY, NGC 4546 (3)
 
Seen edge-on from Earth, the Needle Galaxy is thought to be a barred spiral galaxy, some 33% larger than the Milky Way. It has at least two satellite galaxies and 240 globular clusters. Seen through a telescope the Needle Galaxy appears like a thin streak drawn across the dark night sky but look closer and its detailed magnificence is revealed.

JULYWIZARD NEBULA, NGC 7380 (2)
 
Formed only a few million years ago, the gases of this young emission nebula glow due to intense radiation from hot, massive stars within. Interwoven within this glowing gas are dark, dense regions of dust that sculpt the nebula’s dramatic and somewhat mystical appearance, in this case a wizard – which marks my first image from Somerset.
 
AUGUSTLOBSTER CLAW & BUBBLE NEBULAE, SH2-157 & NGC 7635 (2)

Located in the Perseus Arm of the Milky Way, the Lobster consists of ionized hydrogen gas energized by ultraviolet radiation from nearby hot, young stars. The nebula’s distinctive claw-like shape arises from intricate filaments of glowing gas and dark dust. Nearby the Bubble Nebula owes its distinctive looks to a single, massive star, which emits fierce stellar winds that sweep up the surrounding gas into a nearly perfect, glowing shell.

SEPTEMBERMILKY WAY (2)
 
The night sky in Somerset is three times darker than Redhill, providing significantly better astronomy views.  In this case a spectacular image of the Milky Way’s galactic centre. 

OCTOBERTHE CYGNUS WALL (2)
 
The Wall is a prominent ridge located within the much larger North America Nebula in the Cygnus constellation. It is an active star-forming region, about 20 light-years long, composed of gas and dust that glows from the energy of young stars.
  
NOVEMBERGREAT BARRED GALAXY, NGC 1365 (4)

A double-barred spiral galaxy located 56-million light-years away, spans over 200,000 light-years across, twice the Milky Way. The most distinctive feature is its massive central bar, which plays a crucial role in channelling gas and dust into the galactic core. As a Seyfert galaxy the nucleus is extremely bright due to energetic processes around its black hole. 
 
DECEMBERCORONA AUSTRALIS, NGC 6729 (4)

This spectacular image is a combined reflection and emission nebula, set within the Australis Molecular Cloud. This wonderful, hazy looking nebula unusually exhibits both variable brightness and morphology over time.

 Image Data Source: (1)Redhill, Surrey (2)Castle Farm, Somerset (3)USA (4)Chile               
HAPPY NEW YEAR + CLEAR SKIES FOR 2026

New World

It’s early days at my new Castle Farm Observatory and I’m still feeling my way into the benefits of Somerset’s superior darkness, which is noticeably better than my previous home in Surrey.  But my new Bortle 4 location is not without some issues: there are a couple of nearby streetlights that can now find its way to my observatory since autumn leaves have fallen, occasional vehicle lights pass by and, inevitably, sections of the sky are obscured by our house and trees. 

Westerly view from Castle Farm Observatory

After more than 12-years of imaging almost exclusively looking south, I must now adjust imaging plans looking southwest or north, which are my main sightlines in Somerset. This might seem a minor issue but as the sky moves around an axis defined in the north by the Polaris star, it thus follows an inclined equatorial grid relative to Earth and the impact on potential imaging plans can be quite profound. Previously looking southwards, the transit of objects during the night (and day) was from the east to west horizons, which on a clear night enabled up to 6-hours imaging of a single object, compared with a westerly view which only catches the latter period of the aforesaid transit.  As a result, objects I used to image say from November onwards now only appear in the available (western) section of sky two or three months later. On a more positive note, I am now able to image circumpolar objects looking high and northwards for the first time, which has literally opened new world of possibilities.

Given the aforesaid issues, I recently chose to image an old favourite which is currently in a favourable position at this time of the year, the North America Nebula (NAN), located high in the early evening night sky looking due west. Spanning some 100 light-years, NAN is a great narrowband object, which by using the Hubble SHO palette always results in an exciting and colourful image.

Over two nights I manged to obtain nearly 9-hours of good data, which at my previous Bortle 6 Surrey observatory would probably be the equivalent of more than 12 hours.  The final processed SHO image brings all three channels into a delicate balance: vibrant without being garish, detailed without overwhelming noise. The iconic “Gulf of Mexico” region forms a deep void in the nebula, which becomes even more pronounced with the various gradients of blue converging around its dark centre.  But on this occasion, I was particularly keen to emphasize details of the fabulous Cygnus Wall (see cropped image below), situated in the lower right corner of the main image i.e. ‘West Texas and Mexico’!

The Cygnus Wall is a striking, heavily sculpted region within the North America Nebula, which itself is worthy of image, which would require a larger telescope. The dense ridge of gas and dust glows brightly as nearby young, massive stars bombard it with intense ultraviolet radiation, causing it to ionize and shine.  Its dramatic pillars, ridges, and cavities resemble a cosmic coastline, shaped by stellar winds and ongoing star formation. For some reason it’s been 8-years since I last imaged NAN, except with my Samyang widefield rig, but with the excellent night skies of Somerset I feel sure I’ll be back sooner next time, perhaps with a bigger telescope?


Interstellar Maelstrom: M42

I get a warm feeling at the first view of the Orion constellation each year.  Just viewed with the naked eye, late at night against a clear black sky it is a wonderful sight that somehow seems strangely reassuring but for the astronomer and especially astrophotographers, there are many exciting targets that hold great promise, principal of which is M42 the Great Orion Nebula.  This winter my first view of Orion was last October, rising from the eastern horizon in the early morning, just as I was about to go to bed after a late-night imaging session. Unfortunately, it was more than two months before the weather relented and I was finally able to snatch an albeit brief image of the said Orion Nebula. 

M42 and other nearby diffuse & reflection nebula (M43 & NGC1975 AKA the Running Man Nebula) is one of the most famous star-forming regions, which being the brightest nebula in the northern hemisphere and just over 1,300 light years distance from Earth, can itself also been seen with the naked eye on a clear night.  To my surprise, I hadn’t imaged this beguiling object for 6-years, during which much had changed: a new mount, camera & filters + I had learned a few more processing tricks.

The Orion Nebula is a gigantic cosmic cloud of interstellar dust and gas, which is the basis for the birth of numerous new stars or a “star nursery” (see starless image below) .  Moreover, these powerful, young stars unleash vast streams of ultraviolet radiation that sculpt the nebula into a myriad of fantastic shapes, further highlighted by a red tint that arises due to the presence of hydrogen gas.  For astronomers, such activities reveal much about the processes of how stars and planetary systems are formed from collapsing clouds of gas and dust.

Known as the Trapezium, four stars tightly located at the centre of M42 are very difficult to image, because of the overpowering bright white light that obscures this area from sight.  However, for astrophotographers the elusive nature of the Triangulum is therefore considered to be the ultimate measure of a good Orion Nebula image.  To overcome this problem, the key is to image the nebula across a range of exposures, from very short to long, which can then be compiled into a single final photograph that equally captures details of bright and darker areas alike.

Although poor weather conditions limited the shoot to a relatively short integration time, I’m pleased to say that the subsequent application of various new processing techniques (*see footnote for details) has created an exciting final image, full of detail and colour, as well as the aforesaid Triangulum, that I believe does justice to this magnificent object that is surely the real star of the winter night sky. 

  • Blemish Blaster by Seti Astro – helps remove inevitable blemishes of the starless image created by StarXTerminator process, which I found much easier to use than PixInsight’s Clone Stamp mostly with better results too;
  • Star Stretch also by Seti Astro – Makes the often-tricky action of stretching star images from StarXTerminator a complete doddle;
  • Astro Image Detail by Hidden Light Photography – An excellent script that makes a great job of teasing out detail from the nebula, that results in a really exciting final image.     


2024 The Year In Pictures

Long periods of bad weather made 2024 one of the most difficult years for my astrophotography but, I am pleased to say that this, the 11th calendar is another belter!  Purchased in 2014, I continue to use a William Optics GT81 telescope for most images taken from home, but this means that I’m running out of suitable targets for this equipment.  Part of the answer has been to upgrade related equipment and improve my processing, which I hope you will see reflected in this year’s images.  Moreover, I have used new skills and techniques to process the better-quality data in new ways – I hope you like the results?

Below is a brief summary of the calendar images used this year but for other pictures and more detailed information, please refer elsewhere to this website, my Flickr page or Astrobin page. In addtion, a video of the calendar can be viewed HERE on YouTube, which is best accessed on a PC or smart TV screen. The background music this year is from Jean-Michel Jarre’s Oxygène album.

 COVERASTRO IMAGING MONTAGE: This colourful splash is a random selection of images, mostly taken from Redhill over the past +10-years of my astrophotography.
JANUARYSEAGULL NEBULA, IC 2177:  Located 3,650 light-years from Earth is the emission and reflection nebula complex of the so-called Seagull Nebula, some 200 light-years in size.  It’s been 8-years since imaging this object and for good reason.  From my location, the bird flies very low on the southern horizon and thus spends much of its time behind houses, trees, and tall hedges!
FEBRUARYTAURUS MOLECULAR CLOUD:  Located northeast of the Pleiades, below (south) the California Nebula (see November), spanning more than 30o of the night sky is the Taurus Molecular Cloud (TMC), a rich area of dark nebulae punctuated by bright areas of new star formation.  The TMC is thought to be the nearest star forming region to Earth which, if you look carefully, includes numerous complex dark and reflection nebulae and the odd galaxy.
MARCHHIND’S VARIABLE NEBULA & HYADES, NGC 1555*:  Discovered by the English astronomer John Russell Hind in 1852 this nebula is situated 400 light-years away in the constellation of Taurus, between the stars of Aldebaran and the Pleiades.  The nebula is a Herbig-Haro object – a bright patch of nebulosity in which new stars are forming – which often change in apparent size and brightness.
 
APRILLEO GALAXY CLUSTER:  With few exceptions, galaxies are located very far from Earth, making them very small from our perspective and a challenge for my equipment.  However, here I imaged the spectacular Leo Galaxy Cluster, a mere 330 million light-years from Earth. Containing at least 70 major galaxies, the Leo Cluster unusually consists mostly of spiral galaxies.  The bright elliptical galaxy near the centre of the image, has one of the largest known black holes in the universe, which is about 10 billion times more massive than our sun!
MAY IRIS NEBULA, NGC 7023*:  While the focus of the image is the alluring bright blue reflection nebula, careful processing reveals that this celestial flower is enveloped within a vast region of interstellar dust.
 
JUNESOMBRERO GALAXY, MESSIER 104:  Seen from Redhill, the Sombrero galaxy is even lower in the summer sky than the aforesaid Seagull, transiting between the trees and along the top of our +15-foot hedge!  An unbarred galaxy, its bright bulbous centre is encircled by dark dust lanes, which viewed side-on from Earth creates the appearance of a sombrero hat or perhaps a flying saucer?
JULYPuWe-1*:  Is a very faint planetary nebula in the Lynx constellation, discovered in 1980 by Purgathofer & Weinberger.  It is one of the largest planetary nebulae visible, with a diameter like the full moon and at 1,200 light-years, is one of the closest to Earth.  A planetary nebula is a region of cosmic gas and dust formed from the cast-off outer layers of a dying star; despite the name, planetary nebulae have nothing to do with planets.
AUGUSTNORTH AMERICA & PELICAN NEBULAE: It’s at this time of the year (August) I usually turn my attention to the Cygnus constellation and the plethora of imaging opportunities it provides, which inevitably tend to be narrowband targets. Interstellar dust illuminated by large bright areas of star formation are responsible for the formation of both these popular objects.
SEPTEMBERFORSAKEN NEBULA, IC 5068:  This complex area is known for the graphically shaped streaks of cold, dark dust clouds that criss-cross the dense, brightly coloured gas regions of nebulosity.  Situated within the adjacent Cygnus molecular cloud just below the Pelican Nebula and close to other more famous objects, this low emission nebula is unfortunately known as the Forsaken Nebula!
OCTOBERTHE CHINESE CHARACTER, LDN 673*:  It might seem paradoxical but often it is the absence of light that makes an image interesting.  About 600 million light-years from Earth, within the Aquila constellation, is Lynd’s Dark Nebula (LDN) 673.  Some 7-light years in size, this fragmented dark molecular cloud complex contrasts against the colourful molecular clouds and stars of the Milky Way, which is reminiscent of a Chinese character.
  
NOVEMBERCALIFORNIA NEBULA, NGC 1499:  Located in the Perseus constellation, in the Orion arm of the Milky Way 1,000 light-years from Earth, NGC 1499 is a large emission nebula about 100 light-years long.  First imaged in 2016, new improved data and processing now discloses the full grandeur of this object.
 
DECEMBERROSETTE NEBULA, NGC 2244: Approximately 5,000 light-years away, the vast cloud of gas and dust had been sculpted into the distinctive rose-like shape, while meanwhile a central star cluster has blown-away a large hollow within the molecular cloud.  Revisiting this old favourite for the fourth time since 2015, here I have experimented with an unusual colour palette combination that has produced an exciting alternative image of the night sky’s rose.
                 Footnote: All images taken from Redhill, Surrey or at a dark sky site in
          New Mexico, USA shown by an asterisk*
HAPPY NEW YEAR + CLEAR SKIES FOR 2025

Changing Times: AM5 mount & more

My astrophotography journey started just over 10-years ago and looking back, it’s clear that my timing was fortuitous, as over this period we have seen several developments that have completely transformed the hobby for amateurs. 

  • Wide availability of high-quality telescopes for relatively modest prices
  • Development of CMOS sensor cameras
  • Major advances of image capture and processing software
  • Introduction of AI to image processing

And the changes just keep coming.

When not imaging or processing, I’m sure that many astrophotographers spend too much time looking online at new equipment, particularly telescopes and cameras!  However, when my journey started in about 2014, it didn’t take long to discover that perhaps the mount is the most important piece of equipment.  I started observing with a Skywatcher 150PL on a EQ3-2 mount ( see above ) but soon thereafter discovered astrophotography, which required the addition of a small motor for tracking.  It was fun but completely inadequate for good imaging, so then moved onto a William Optics GT81 triplet refractor on a Skywatcher AZ-EQ6 GT mount ( see below ), which completely changed everything and, more importantly, gradually resulted in better images.

My trusty, but oh so heavy AZ-EQ6 GT mount

I continue to use the AZ-EQ6 GT, which technically remains an excellent mount, but it is very heavy and frankly has become more and more tedious to set-up and take down each time, whilst moreover, my back is finding it too much hard work.  It is said that necessity is the mother of invention and so a completely new type of mount slowly emerged on the market last year, that is now becoming nothing less than a revolution. It seems too good to be true, but its features are:

  • Small & light weight
  • High load capacity that doesn’t require counterweights
  • No need to be balanced
  • High torque
  • Low if any backlash

Apart from the weight issue, commonly used GEM mounts are based on worm gears, which inevitably suffer from backlash, that can be a major problem for astrophotography.  Although this can be minimised with good set-up and various software, it will always remain a problem.  The new harmonic drive or strain wave mounts are based on completely different technology, that surprisingly has been used for many years in avionics and robotics, making it tried and tested technology.    A strain wave mount uses a flexible spline and a rotating elliptical plug to transmit motion and achieve high precision and torque, which allows for large payloads in a compact and portable package ( see images immediately below ) . Click HERE for more technical information. Initially there were only a few manufacturers of Harmonic / Strain Wave mounts but now the word’s out and all manufacturers are rushing to join the game.

Over the past decade the Chinese technology company ZWO Optical have emerged as a dominant force and leading innovator in astrophotography; I’ve been using various excellent ZWO CMOS cameras since 2015.  It was therefore no surprise that ZWO were amongst the first to launch a Harmonic Drive mount, initially the AM3 then the AM5 which is what I purchased earlier this year; the main difference between the two is capacity, the AM5 being greater.  For various reasons, personal and being busy imaging with the AZ-EQ6 GT, I only got round to using the AM5 in August ( see below) and have not been disappointed.

One of ZWO’s quirks is that, where possible, their equipment is often only compatible with other ZWO products.  It can be a bit of a problem but given the quality of their equipment I’m not usually put off.  Notwithstanding, the AM5 will fit some other tripods but in this case, I chose to purchase the excellent and super lightweight ZWO TC40 carbon fibre tripod, together with the ZWO PE200 pier extension, which reduces the likelihood of the OTA / camera colliding with the tripod.  Like my previous experience of ZWO equipment, everything is well designed and exceptionally well made.  Moreover, it is substantially lighter than my AZ-EQ6 mount!

Although not essential, to reduce the set-up / take-down time as well as provide convenient integrated control and capture software, I also chose to get ZWO’s well tested and popular ASIair Plus, which can easily be attached either to the mount or scope. Basically, it is a very small astrophotography computer / controller, which can also help manage various power requirements such as cameras and dew straps.  Finally, and because for now I wanted to piggyback my existing William Optics GT81 scope which uses a Lodestar X2 guiding camera that is incompatible with the ZWO equipment, I added a dedicated 50mm William Optics 50mm guide scope with a ZWO ASI120MM mini guide camera.

The AM5 mount, ASIair plus (on the left) and OTA rig. It looks busy but once the rig is established it just lifts into place and connects in less than 5 minutes and you’re ready to go!

Finally, only in recent weeks have I had the chance and weather conditions to set-up and try out this new equipment.  The early results have been good so far and I hope the limited integration time of the image here will be just a taster of what is to come.  The AM5 itself has been a breeze to use and its light weight and set-up is clearly going to revolutionise my astrophotography but the ASIair plus is also a significant game changer that I’m still getting to grips with. 

The ASIair plus delivers an excellent and mostly, easy-to-use experience, which with time I’m sure I’ll get to love but to miniaturise and streamline operating compared to my current set-up and control equipment and software, I find it lacking in finesse.  Notwithstanding, it is an incredible piece of equipment that works very well with the AM5 mount.  I am particularly impressed by the Polar Alignment and Meridian Flip functions, of which the latter is just amazing!

All-in-all the weight and convenience of the AM5 together with the other ZWO equipment is likely to result in a better and importantly, fun time when imaging.  In particular, with a truly portable set-up I’m hoping to revisit the end of my garden, from where I can see the north sky and all its objects, hitherto obscured by my house, and maybe even get to image at some dark sites, we shall see – these are certainly changing times, which so far I’ve really enjoying.

Howling Wolf

lunar eclipse mosaic 210119x

I have a theory that at or about the time of each full moon the night sky is almost always clear, I don’t have the data but it just seems that way most of the time.  As an astrophotographer I am more than usually aware of the full moon as it makes all except narrowband imaging impossible, when it floods the night sky with its brilliant white light.  Apart from a brief and somewhat futile attempt on 14th December – the Moon and mixed cloud curtailed imaging on that occasion – my last astronomy at Fairvale Observatory was on the 17th October, thereafter being plagued by persistent cloud and bad weather; after a promising start at Les Granges Observatory in early November no further astronomy was possible during the rest of the week due to cloud and poor weather conditions.  I’m beginning to think I need a new hobby, one that is not weather dependent at least!

Given the disappointing lack of astronomy conditions I paid little attention to the upcoming lunar eclipse on the early morning of 21st January.  However, as the day approached various weather forecasts were inevitably mixed but at least two out of five held some promise of clear skies during part of the eclipse.  I therefore started to at least undertake some preliminary planning, only to discover that much of the eclipse might be obscured by houses and tall trees to the west of my location; Plan-B was to travel to nearby Reigate Priory Park which has a decent westerly outlook closer to the horizon.

As it turned out on the 20th a clear, sunny but cold and clear day preceded a clear evening and at about 3 a.m. on the 21st shortly before the action was due to start, the sky was still clear, thankfully proving my theory correct on this occasion.  Furthermore, my concerns over obscured views turned out to be mostly unfounded, with the Moon higher in the sky than envisaged and good sightlines up until the end of totality, at which time the cloud eventually rolled in anyway.  As a result I was able to enjoy over two hours viewing and imaging time, which encompassed the entire penumbral and totality stages of the eclipse.

Having obtained excellent images of the last lunar eclipse on 28th September 2015, tracking with a DSRL and the William Optics GT81 + another static, tripod fitted DSLR and 250mm zoom lens, this time I decided to adopt a different, more mobile set-up, in case Plan-B was necessary.  In 2017 I purchased a Canon 300mm f/4 L-Series telephoto lens to use for astronomy and wildlife photography.  The Canon’s Series-L lenses are a high quality, professional line especially made for APS-C cameras such as the 700D.  With no less than 15 lens elements and a fixed focal length, the picture quality for terrestrial imaging is fantastic, further assisted by a very accurate and quite image stabilizer.

This time I mounted the lens directly onto the tripod, with the camera further back so as to provide good balance between the two components.  As the autofocus and IS functions cannot be used in a dark sky for astrophotography, focus can be tricky and a compromise is required between the aperture setting for sharpness and a low ISO for quality.  As I discovered last time, the light quality diminishes significantly whilst the eclipse progresses across the face of the Moon and the aforesaid settings need to be constantly adjusted to compensate, especially during totality.  In the end I was pleased with the outcome of imaging the so-called Super Blood Wolf Moon (see mosaic above and image below).

img_1235x

As pleasing as imaging the eclipse is, like a solar eclipse viewing is an entirely different experience.  It is a pleasure to just watch the whole phenomena play out but the dramatic changes of light also has a profound effect on both the night sky itself and, in particular, the very nature of the Moon as perceived by the naked eye. On a clear night the full moon floods the night sky with its very bright light, thereby effectively hiding all but the very brightest of stars from view.  As the penumbral stage progresses (see diagram below) for about an hour the dark night sky is slowly revealed in all its glory, it’s as if someone has pulled the curtains and a new world has appeared.

total-lunar-eclipse-jan-2019-plot

Furthermore, as the moon darkens and eventually enters totality it takes on a completely different and eerie feeling, as well as a red hue caused by Raleigh scattering.  As is often the case with astrophotography the camera sensor is able to capture much greater colour and detail than the naked eye can see, thus producing beautiful images of one of nature’s best shows.  However, to the naked eye the moon takes on a different, somewhat strange nature during totality – something of a 3D effect occurs as it seems to float in the night sky like a big red balloon – something that an image cannot ever capture, making the night time adventure more exciting and worth all the effort.

Lunar eclipses are not that rare but we now have to wait 10-years for the next one in the UK which will take place on 20th December 2029, with or without cloud!

IMAGING DETAILS
Object Lunar eclipse – Super Blood Wolf Moon
Distance <238,000 miles (30,000 miles closer than usual)
Size 31’or 1/2o  
Apparent Magnitude -12.74  @ mean full moon
 
Scope / Lens  Canon L-Series 300mm f/4
Mount Manfrotto tripod
Camera Canon 700D  
Capture & Processing Manual, Photoshop CS3- Extended
Exposures x50:  Penumbral f/8   1/125’   ISO 100     Totality f/5.6  0.80’   ISO 400    
    
Location & Darkness Fairvale Observatory – Redhill – Surrey – UK        Typically Bortle 5
Date & Time 21st January 2019 @ approx. 03.30h  
Weather <= 1oC   RH <=95%                  🌙   Eclipse

Antipodean Astronomy Adventures

IMG_9050 (Large)

I’ve recently returned from visiting family on an extended trip to Aotearoa – Maori for New Zealand – and whilst travelling around used the opportunity to learn something about astronomy in that part of the world (NZ Astro Directory).  Of course, the main difference Down Under is that it’s currently summer, plus everything in the night sky is upside down.

IMG_0003crop anotate

Topsy Turvy – everything’s in the wrong place ! Red arrow = Betelgeuse, Yellow arrow = Orion Nebula

It’s obvious really but relatively speaking the sky has not changed, you’re just  personally inverted compared to the Northern Hemisphere – which from the point of view of astronomy takes some getting used to when looking at otherwise familiar objects such as the Moon or Orion Constellation.  Although being their summer, at our principal location of latitude of 38o on North Island there was more than four hours of astronomical darkness even on the December solstice; viewed from the perspective of the Northern hemisphere, it is interesting to note that this is about the same latitude as Athens or the Korean DMZ!

Moon Man

It’s all about perspective – obvious really!

Although the weather was mostly very good, I was struck by how frequently the sky at night was cloudy – just like good old Blighty – it is after all also known as The Land of the Long White Cloud by the Maori.  Notwithstanding, as a country with only 4.85 million people most of the country is rural or even desolate, so that when the skies are clear the darkness and seeing conditions can be quite spectacular.  Viewing conditions are particularly good on South Island around the Lake Tekapo and Mt Cook district where a number of astronomy ventures are based, including the University of Canterbury’s Mt John Observatory – shown at the beginning of this blog.  For practical reasons I was restricted to taking only limited equipment – DSLR & lenses + Gorilla Pod & ball head + Vixen Polarie tracker + 10×50 binoculars – but was still able to obtain some pleasing images during the trip.

IMG_9081 (Large)

Mt Cook from near our campsite – the night sky here was fantastic

Early on it became evident that New Zealand seems to have all the right conditions required for the formation of lenticular clouds (altocumulus lenticularis).  I’m presuming this is related to its somewhat exposed position between the South Pacific Ocean and Tasman Sea, thus providing favourable wind and moisture conditions which are then influenced by the mountainous tectonic terrain that runs along the spine of South Island and the volcanic topography of North Island.  Whatever it is it works, providing really beautiful and often spectacular sights of these elusive and somewhat rare high altitude cloud phenomena.

IMG_9097 (Large)

Lenticular clouds south of Mt Cook – South Island 

IMG_9457 (Large)

Lenticular clouds near Te Awamutu – North Island 

Prior to arriving in New Zealand I tried unsuccessfully to link up with some local astronomy clubs.  However, close to our base near Te Awamutu on North Island I was able to visit the Te Awamutu Space Centre at nearby Kihikihi.

IMG_20180115_130500614

The Te Awamutu Space Centre – Kihikihi

Conceived and run by the enthusiastic Brit Dave Owen (well he wasn’t going to be a Kiwi was he?), the Centre is an eclectic and interesting collection of space, space programme, astronomy and related educational items (see below).

Essentially the Centre is an outreach programme, which would be of interest to anyone in general, young and old, as well as the seasoned astronomer.  I particularly found the area on New Zealand astronomy & astronomers, astronauts and the historical role of Maoris in astronomy very  interesting.

Pliades

Maori star names of Mataraki (Pleiades)

As we travelled the length and breadth of the country with the tantalising promise of some very dark skies, I was keen to view and image the Milky Way and particularly the Large and Small Magellanic Clouds, which are only visible from the Southern Hemisphere. Thwarted for a while by cloud cover I eventually got my first look at all these features whilst camping near the base of the 3,724 metre Mt Cook on South Island.  The sight did not disappoint but I was unfortunately unable to obtain any images on this occasion.

No worries (as they say in New Zealand – frequently!), a few nights later whilst camping at the improbably named Slab Hut Creek (site of old alluvial gold workings) west of the historic mining town of Reefton, I was at last able to image all these features.  Remotely situated in the middle of woods adjacent to the aforesaid gold creek, the night sky was inky black, albeit with some passing cloud from time-to-time.  Furthermore, located in the centre of the opening were two very large quartz boulders, which provided an ideal platform on which to set up the camera and Gorilla Pod.

IMG_9280 (Large)

A few tons of conveniently placed quartz helped imaging later in the night!

I didn’t get much sleep that night but it was a magical experience and I was thrilled to image both the Milky Way and Magellanic Clouds not individually but together.  As an added bonus we were also able to successfully undertake some gold panning during the day in the creek!

IMG_9244 (Large)

The Milky Way at Slab Hut Creek with the Large & Small Magellanic Clouds

IMG_9265 (Large)

Thereafter I was hindered for the next few weeks by Christmas events and the inevitable full moon at the start of January, though the ISS did pass directly overhead on one evening (New Zealand from the ISS).  However, 10-days later back on North Island at our cottage in the Waipa district, I was eventually able to view and image once again the wonderful sight of the Milky Way + Magellanic Clouds + Southern Cross at the same time – sky chart and image below.

Ohaupo Sky

IMG_9984 (Large)

From our base on North Island: The Milky Way & Magellanic Clouds (right) + Southern Cross just above the left-hand side of the roof line 

When the conditions are right the night sky in New Zealand is truly outstanding. I would have liked to spend time there with the full astronomy set-up and camera that I use in the UK but for now I was very pleased to experience and enjoy Antipodean astronomy, it really is worth the long journey.

Brave New World

brave-new-world-16-638 CROP

In my quest to understand astronomy and in particular the big picture, I have just successfully completed another MOOC course at the University of Edinburgh on the Higgs Boson and particle physics.  From earlier studies which included the Special Theory of Relativity and the Universe, the next step was obvious: moving from the very big to the very small in order to better grasp where we might be with the elusive unified theory and I was not disappointed. An added bonus to the course was the participation of Professor Peter Higgs himself, in which he discussed how he had arrived at his conclusions and the development of subsequent matters that led to the actual discovery of the Higgs Boson at the Large Hadron Collider in Cern, Switzerland in 2012; watching and listening to him speak felt like having a personal chat with Einstein and was quite a privilege!

regular_6831d527-0d4e-4c39-be8e-d4200ffcebbb

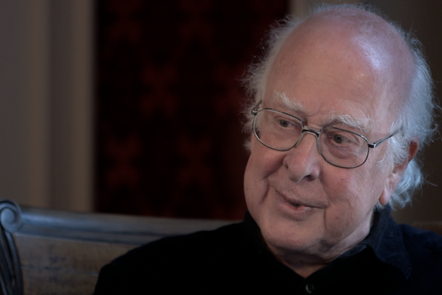
A chat with Professor Peter Higgs!

Frankly I found the nature of the subject very difficult and at times bewildering but its potential impact on astronomy was finally something of an epiphany for me.  The Higgs and related items results in two profound results:

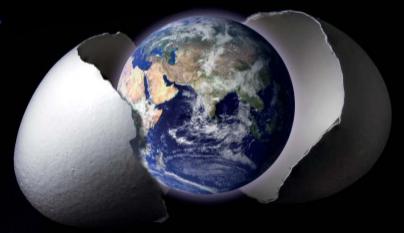
  • There was no Big Bang.
  • The existence of a multiverse, of which our Universe is but a part.

I am not sufficiently able to articulate how these conclusions are arrived at nor is this the place, but when the full content of particle theory, the Higgs, General Relativity are applied to cosmology, the aforementioned outcome is, like all good science, simple and beautiful – click here for lecture notes Higgsmooc part1  + Higgsmooc part2  and accompanying presentations 7.11_Quantum Vacuum_& Cosmology + 7.12_The HB_scalarfieldsand inflation.

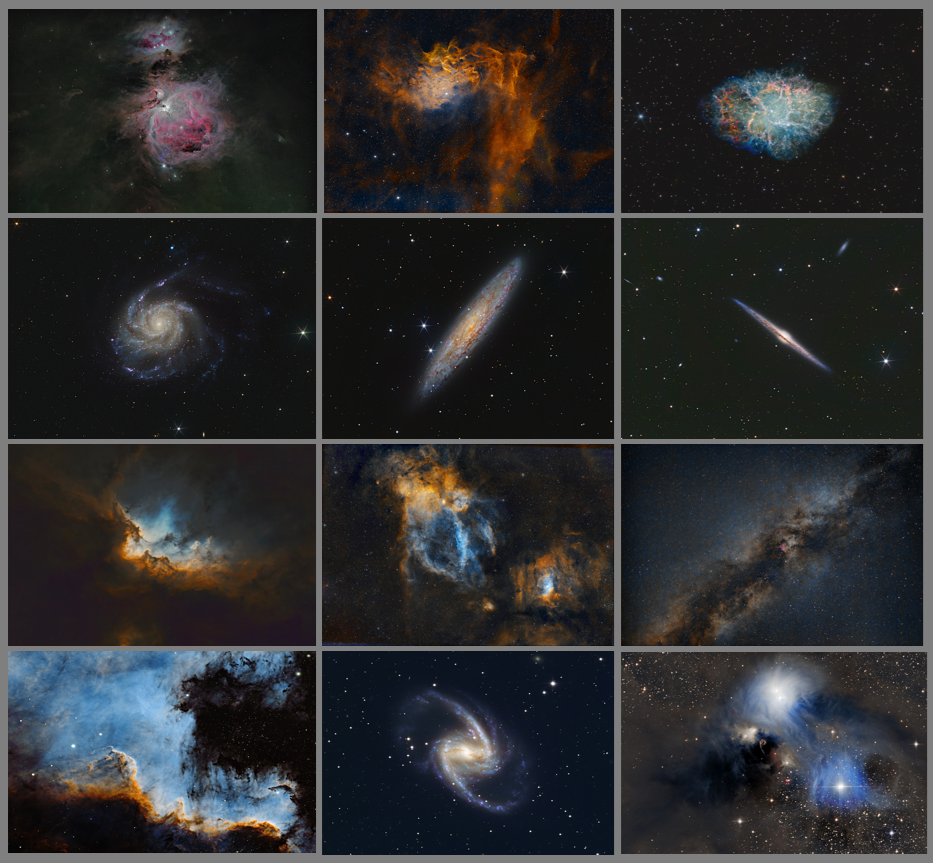
I’m pleased to say there have also been other breakthroughs for me since achieving first light with the ZWO 1600MM-Cool CMOS camera.  I am still at the experimental stage and with the spectacle of the winter sky rapidly departing, suitable objects are much more limited, with the few remaining HII objects low and very far to the west of the early evening sky.  However, before the Milky Way disappeared completely I managed to obtain some useful imaging experience by targeting some old favourites.

M42

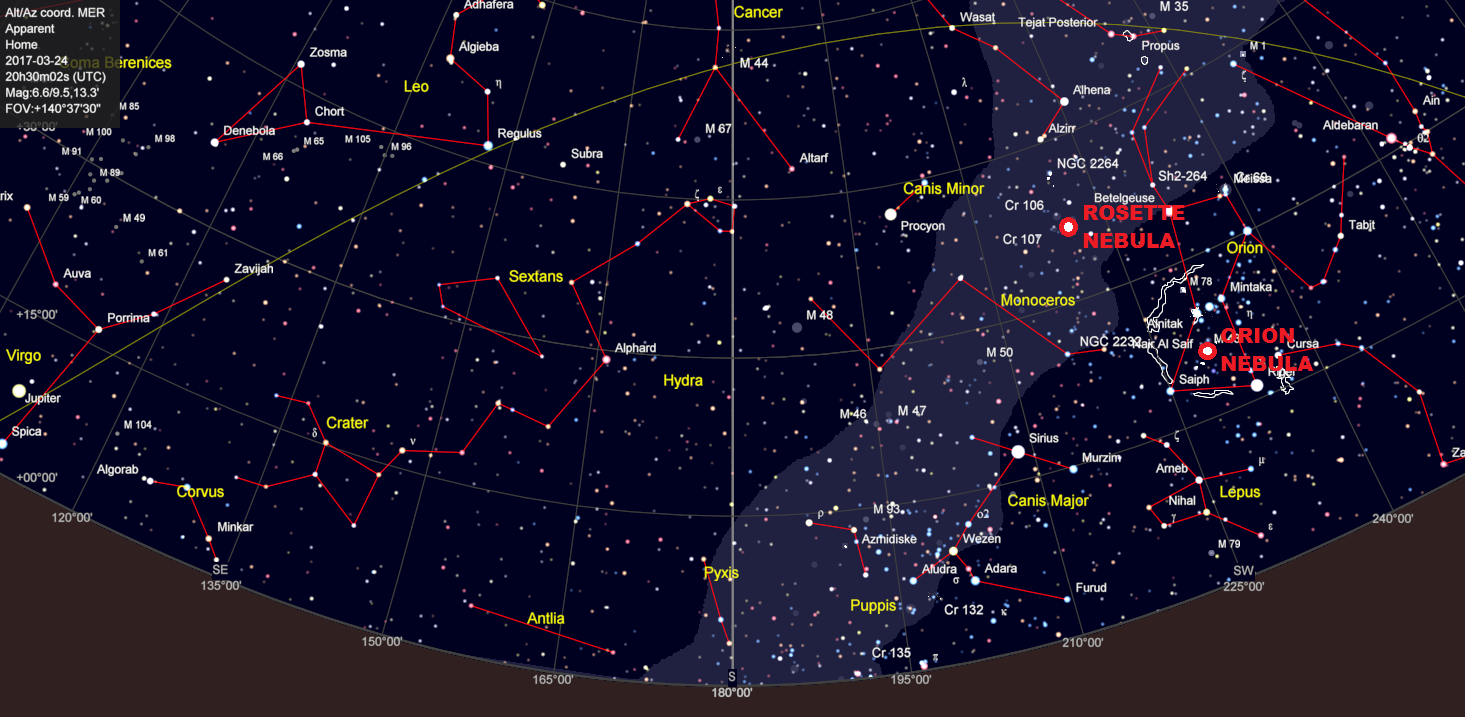
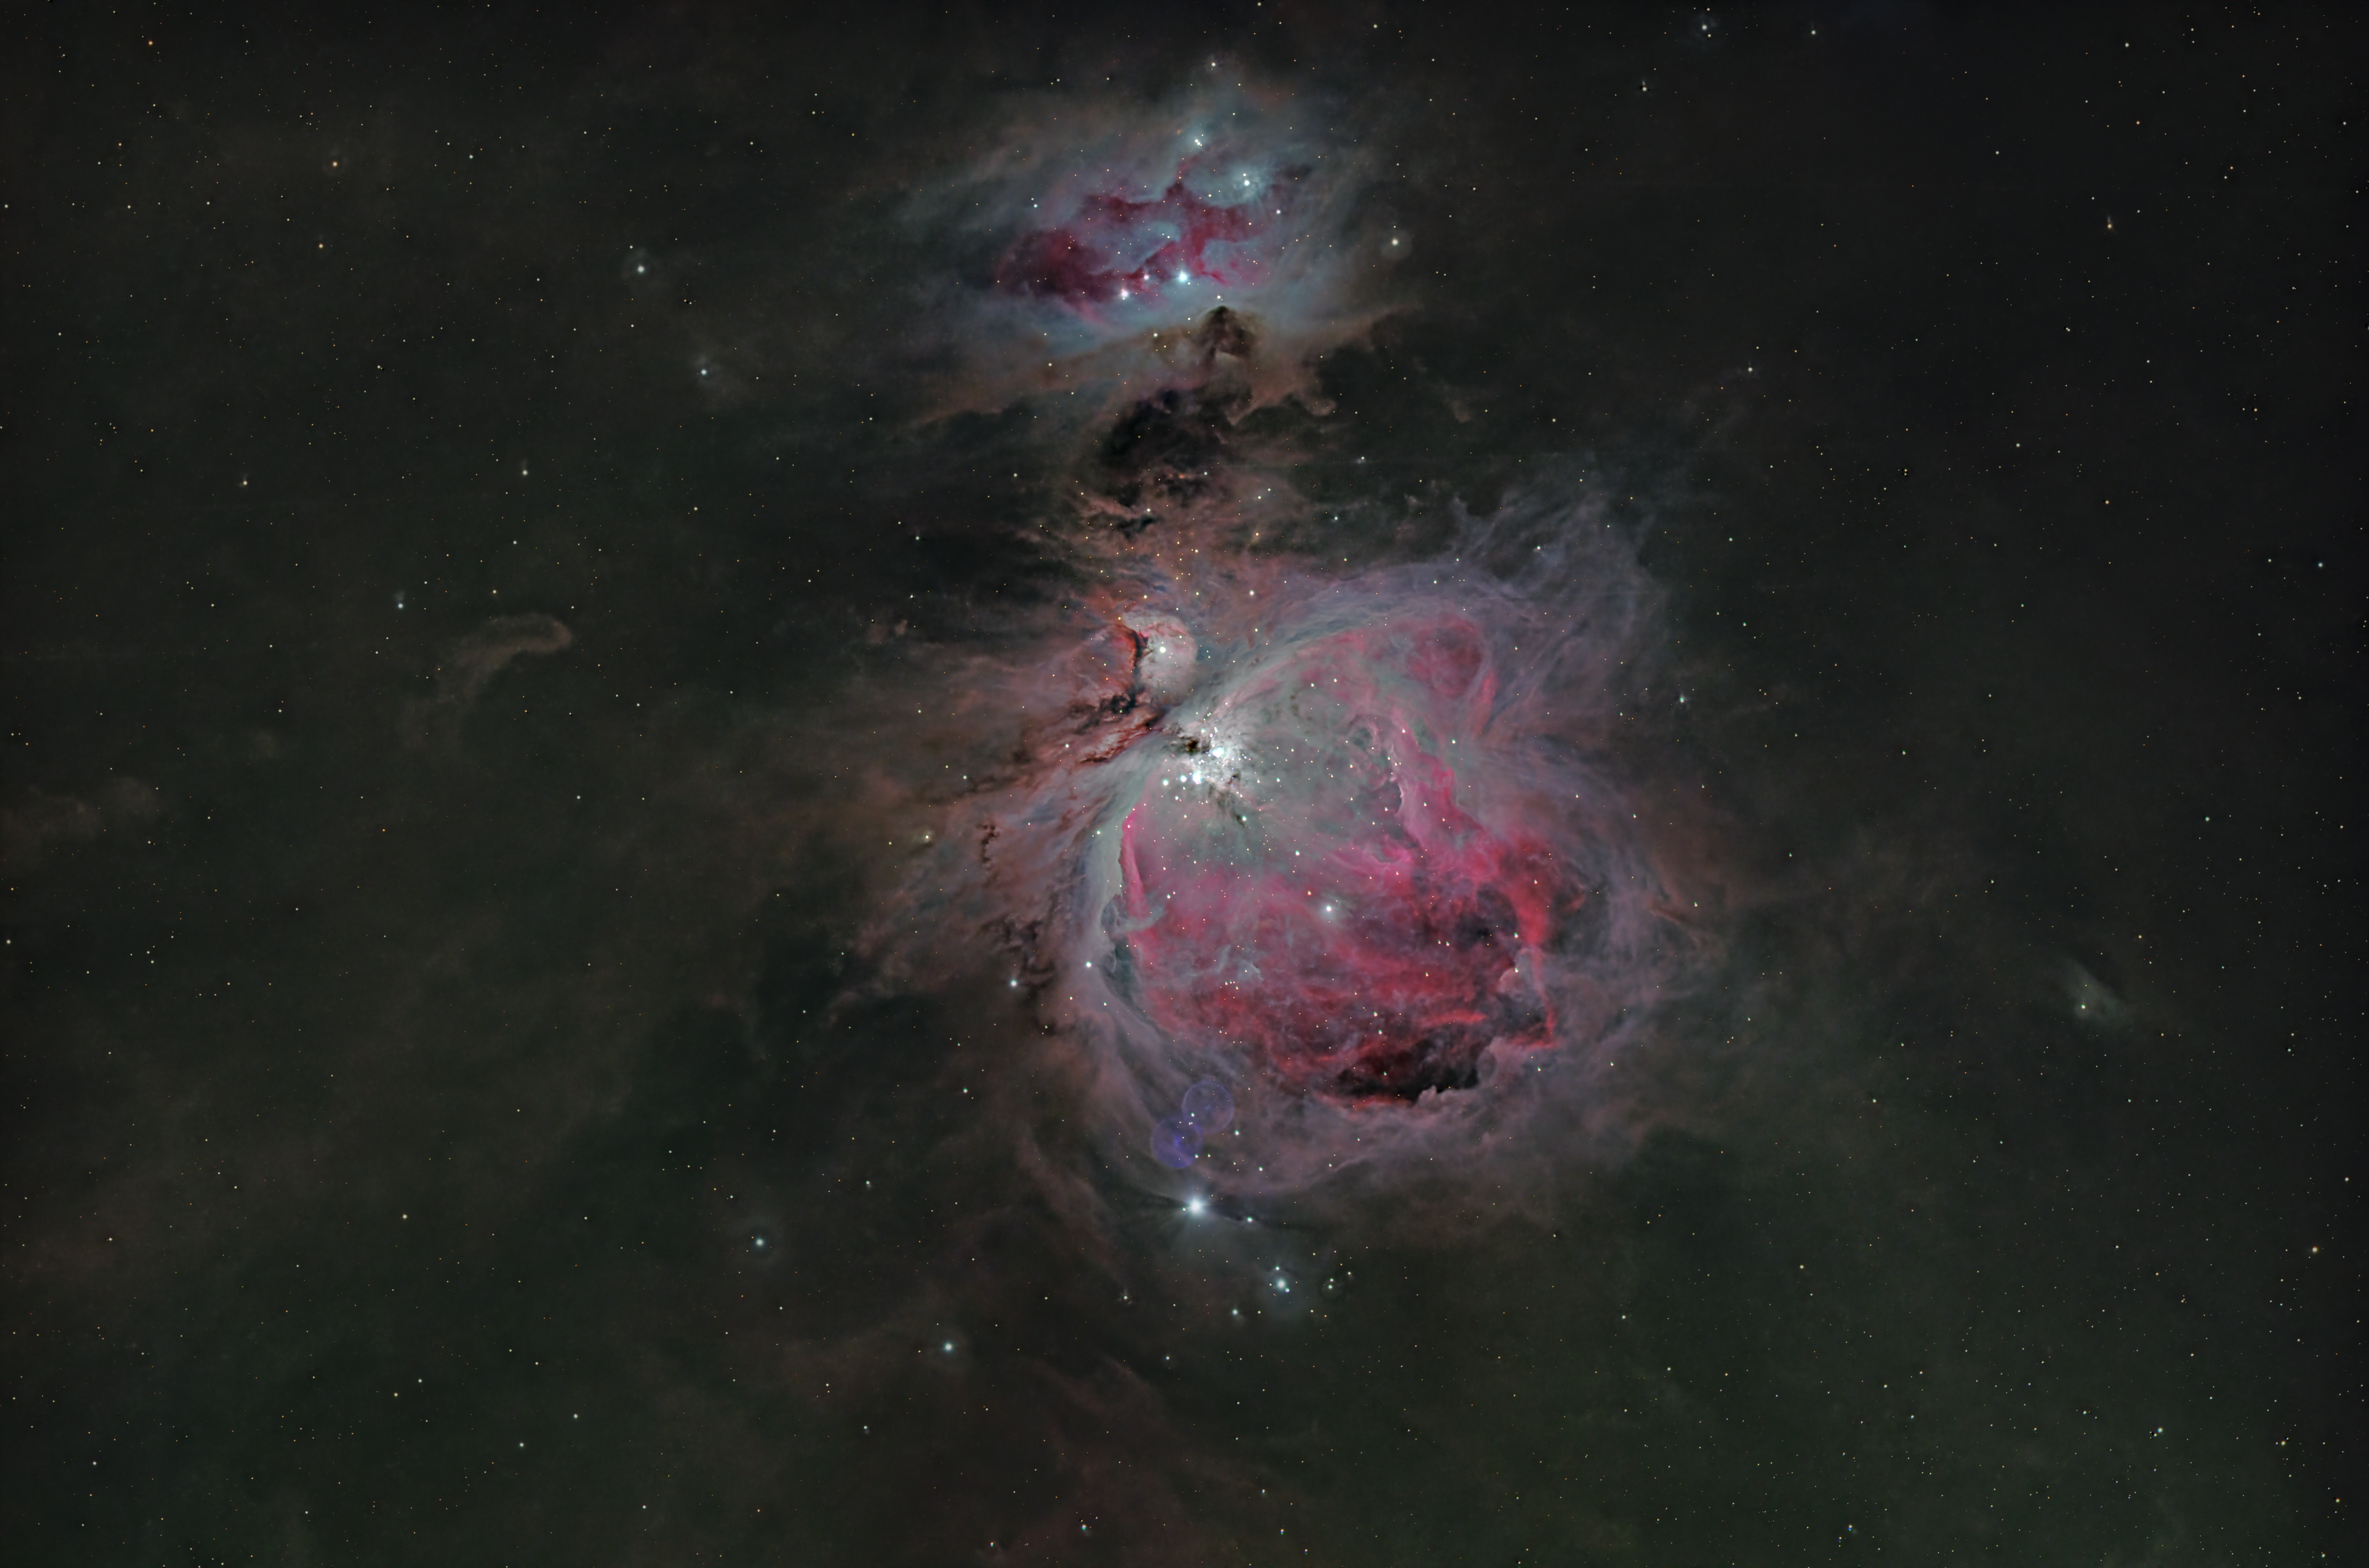
Passing Shots: Orion & Rosette Nebulae

Having already battled a number of issues with the new camera – basic LRGB image capture, using Astro Astronomy Tools, achieving focus, guiding, alignment, processing and post-processing – for the moment everything has come together, including some warmer nights and clear skies.  Over a few evenings I therefore undertook imaging in LRGB as well as Ha, OIII and SII, with some excellent results that augur well for the future.

The camera’s sensitivity and ability to image at short exposures enables much less imaging time than conventionally used with CCD cameras – one of the reasons I decided to purchase this camera.  In addition, shorter exposures make perfect alignment and tracking less important, though still a desirable set-up.  The downside is it produces a prodigious number of images, which leads to a somewhat challenging processing burden – but it’s worth it.

Despite my DSLR experience, CCD processing and especially post-processing, is significantly more complex.  I was surprised to find only one decent online video on LRGB processing by Rankin Studio, without which the task would have been even more difficult and taken much longer to learn – thanks David.  Ironically I have found narrowband processing easier, probably because there are just less filters and resulting image sets required, however, the restricted wavelength also provides whole new opportunities that I’ve already started to exploit.

Picture saved with settings embedded.

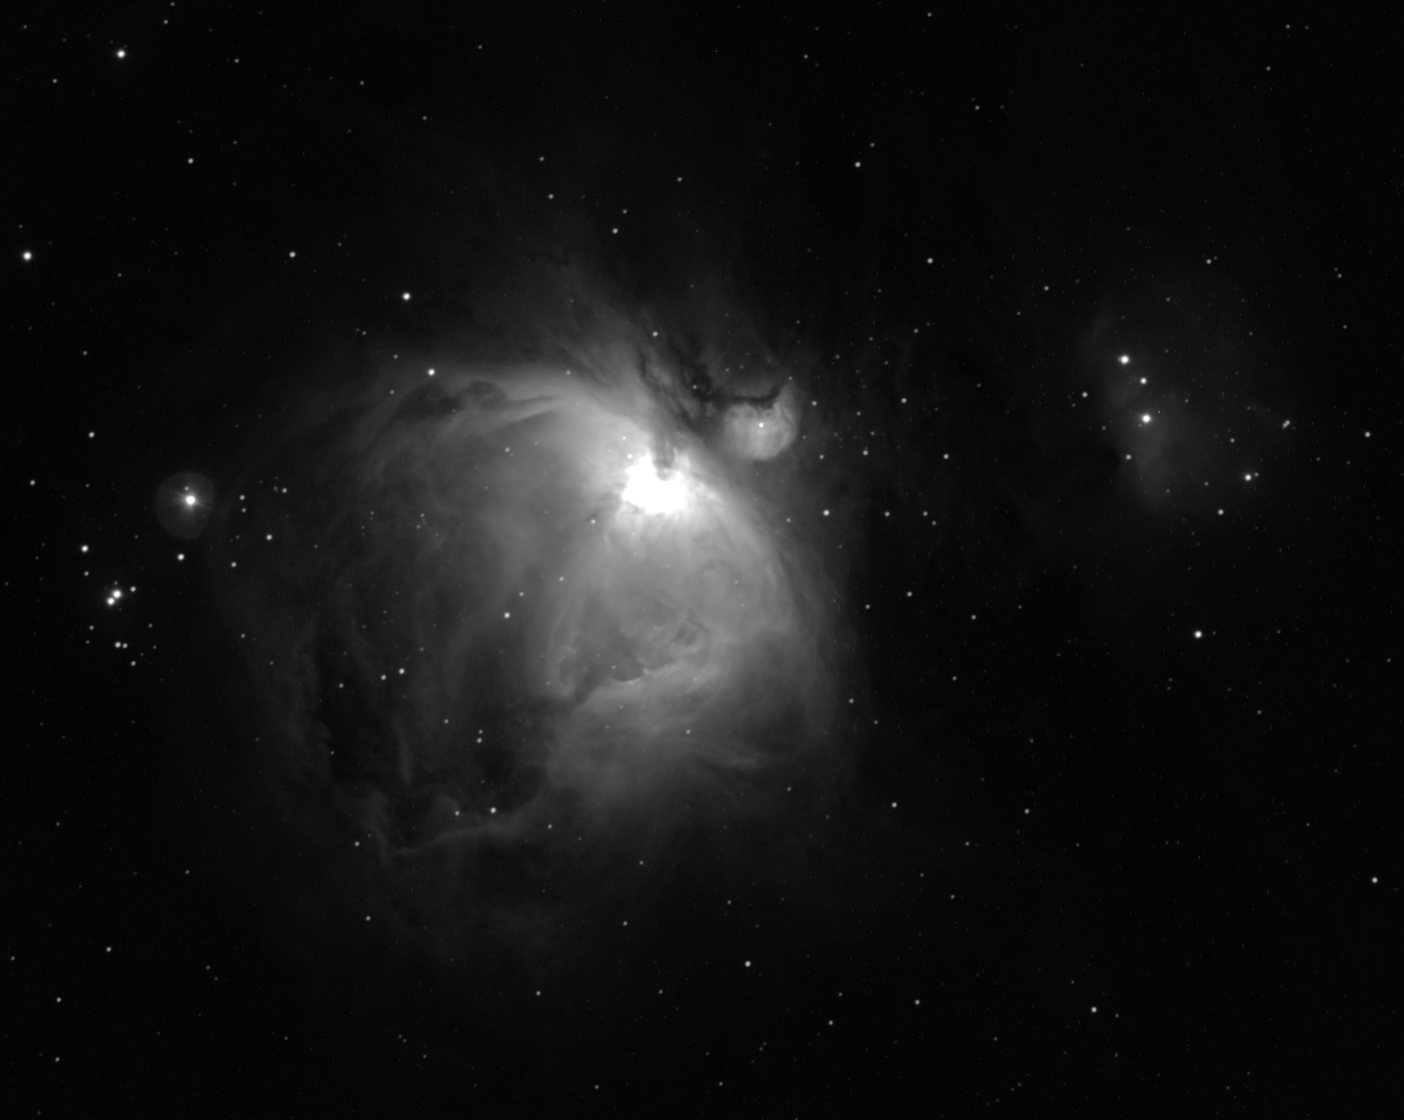
Orion Nebula + M43 & Running Man Nebulae in Ha: William Optics GT 81 & ZWO 1600MM-Cool + x0.80 field flattener | 15 x 180sec Gain 139 Offset 21 @ -18C & full calibration | 25th March 2017

Just before they disappear from our night sky until next winter I was fortunate to be able to image both the Horsehead and Orion nebulae, everyone’s favourites and I’m no exception.  With limited time available in the early evening sky it was only possible to capture a limited number of images before it moved outside my view in the west but even with these few images the power of the camera has already become self-evident.

Picture saved with settings embedded.

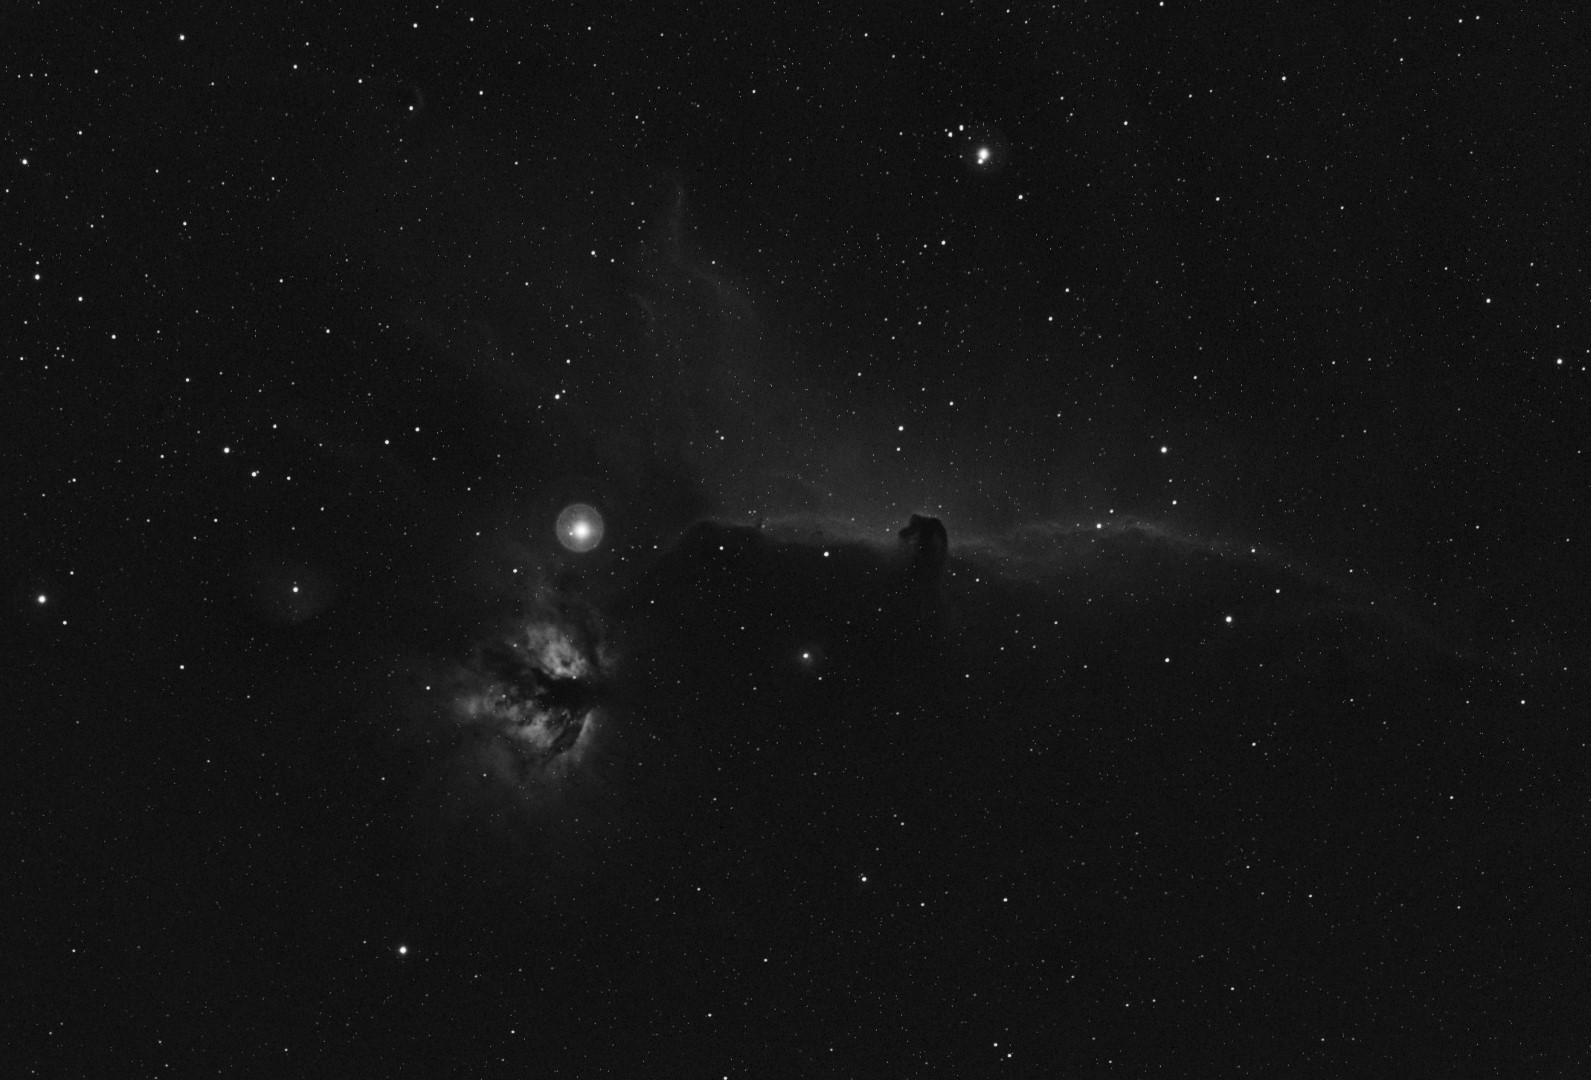
Horsehead Nebula in Ha: William Optics GT81 & ZWO 1600MM-Cool + x0.80 field flattener | 19 x 180 secs Gain 139 Offset 21 @ -18C & full calibration | 27th March 2017

Given the need to use less filters and thus less time I have started out with narrowband imaging – as a completely new medium for me that holds great promise aesthetically and scientifically, I was also keen to give it a try and on this occasion used Ha and OIII.  Having sorted an earlier problem with the EFW managing the filters is a breeze and can easily be automatically sequenced in the APT capture software.  Notwithstanding, as previously indicated image capture is really only just the start – though good data is always the key to the final image – and processing and post-processing is both complex and takes considerable time.

M42 Bicolour & balance

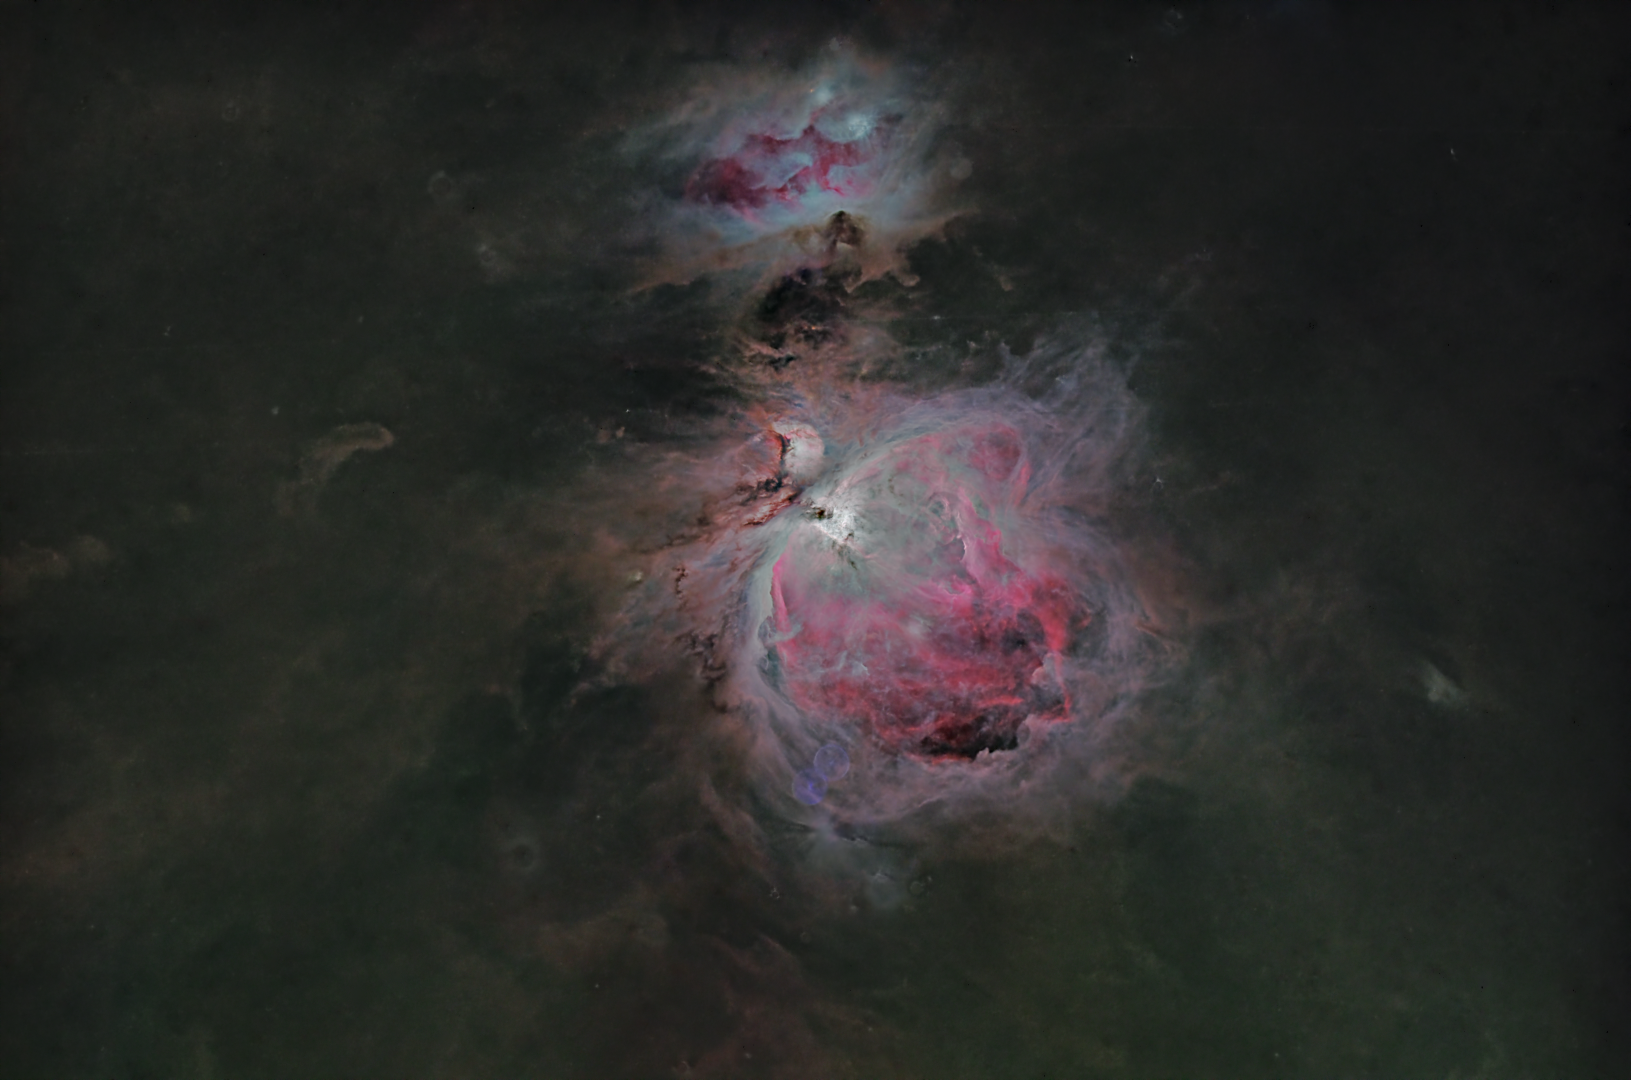
Orion Nebula in bi-colour: Ha red channel + OIII green and blue channels

On this occasion the individual Ha subs are themselves very revealing, showing new details when compared with previous DSLR images.  But it is with the bi-colour image that the exciting opportunities provided by using narrowband imaging become apparent – I can see I’m going to enjoy this!  I’ve also taken the opportunity to further explore and understand the nature of these types of images and their constituent parts by manipulating the colour channels, with some startling results.

NGC 2244 HOS-1LCLCrop (Large)

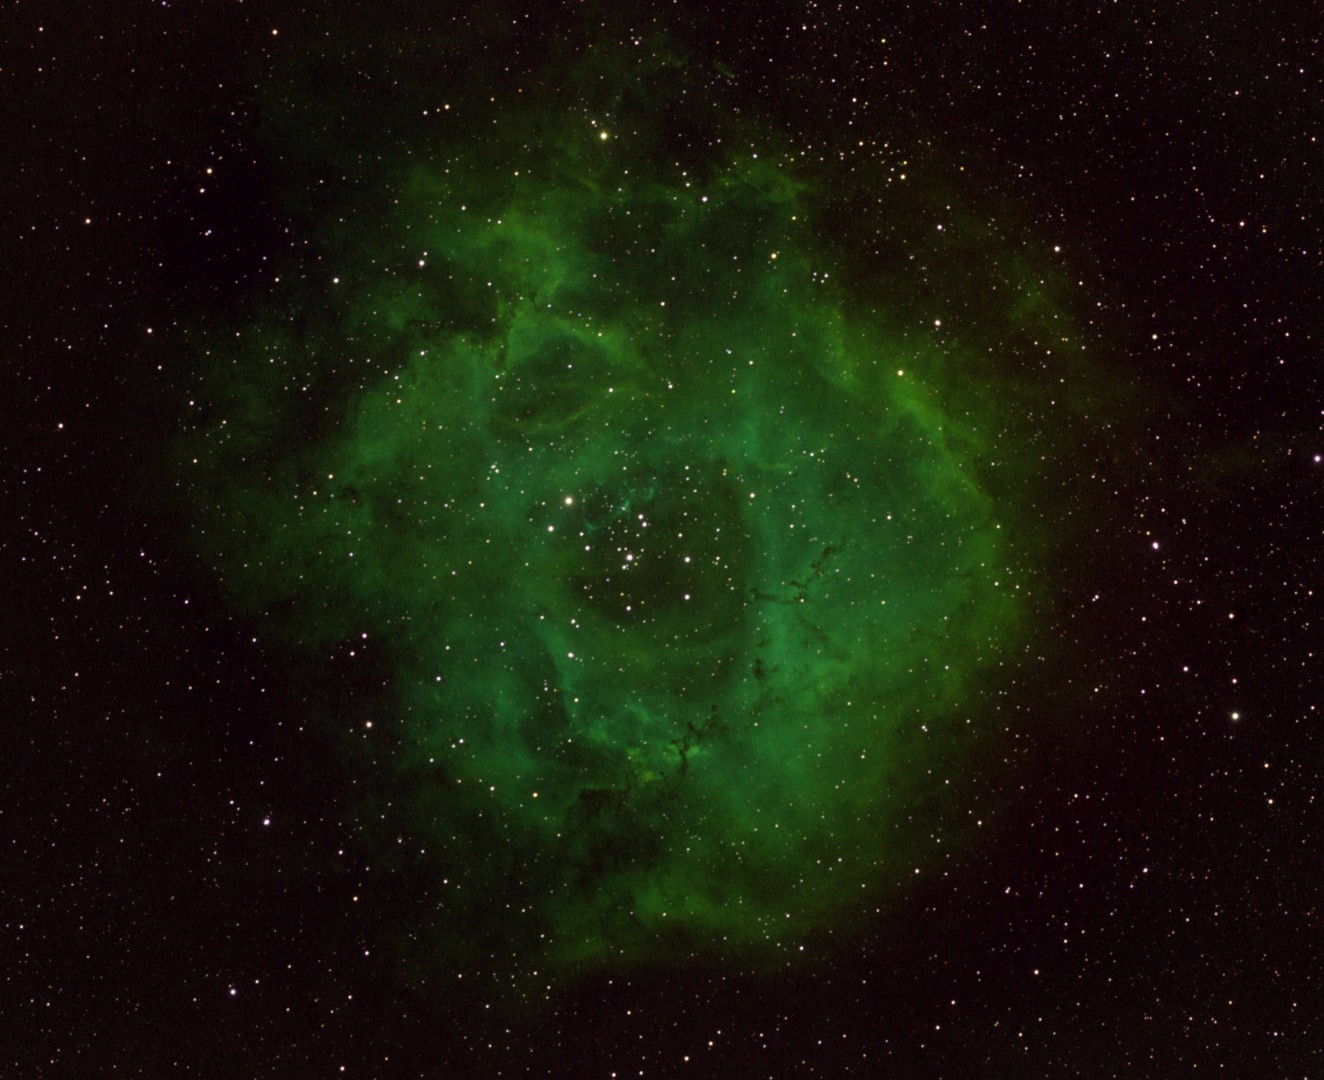
Rosette Nebula in HOS: William Optics GT 81 & ZWO 1600MM-Cool + x0.80 Field Flattener | 15 x 180 sec Gain 300 Offset 10 Ha, OIII & SII @ -20C + calibration | 24th March 2017

Not far from M42 is another of my favourites which I’d already used to achieve First Light with this camera using Ha – the Rosette Nebula (NGC 2237, 2238, 2239, 2244 & 2246).  This time I decided to use all the narrowband filters – Ha 656nm, OIII 672nm, SII 500nm all 7nm bandpass – and subsequently experimented with processing using the Hubble Palette with stunning results.  As the name indicates, this technique was originally developed for processing images taken with the Hubble Space Telescope which put simply, uses different mixes of each narrowband filter in different processing channels e.g. Ha in the red channel, OII in green and SII in blue, for short known as HSO.

NGC 2244 SHO Final1

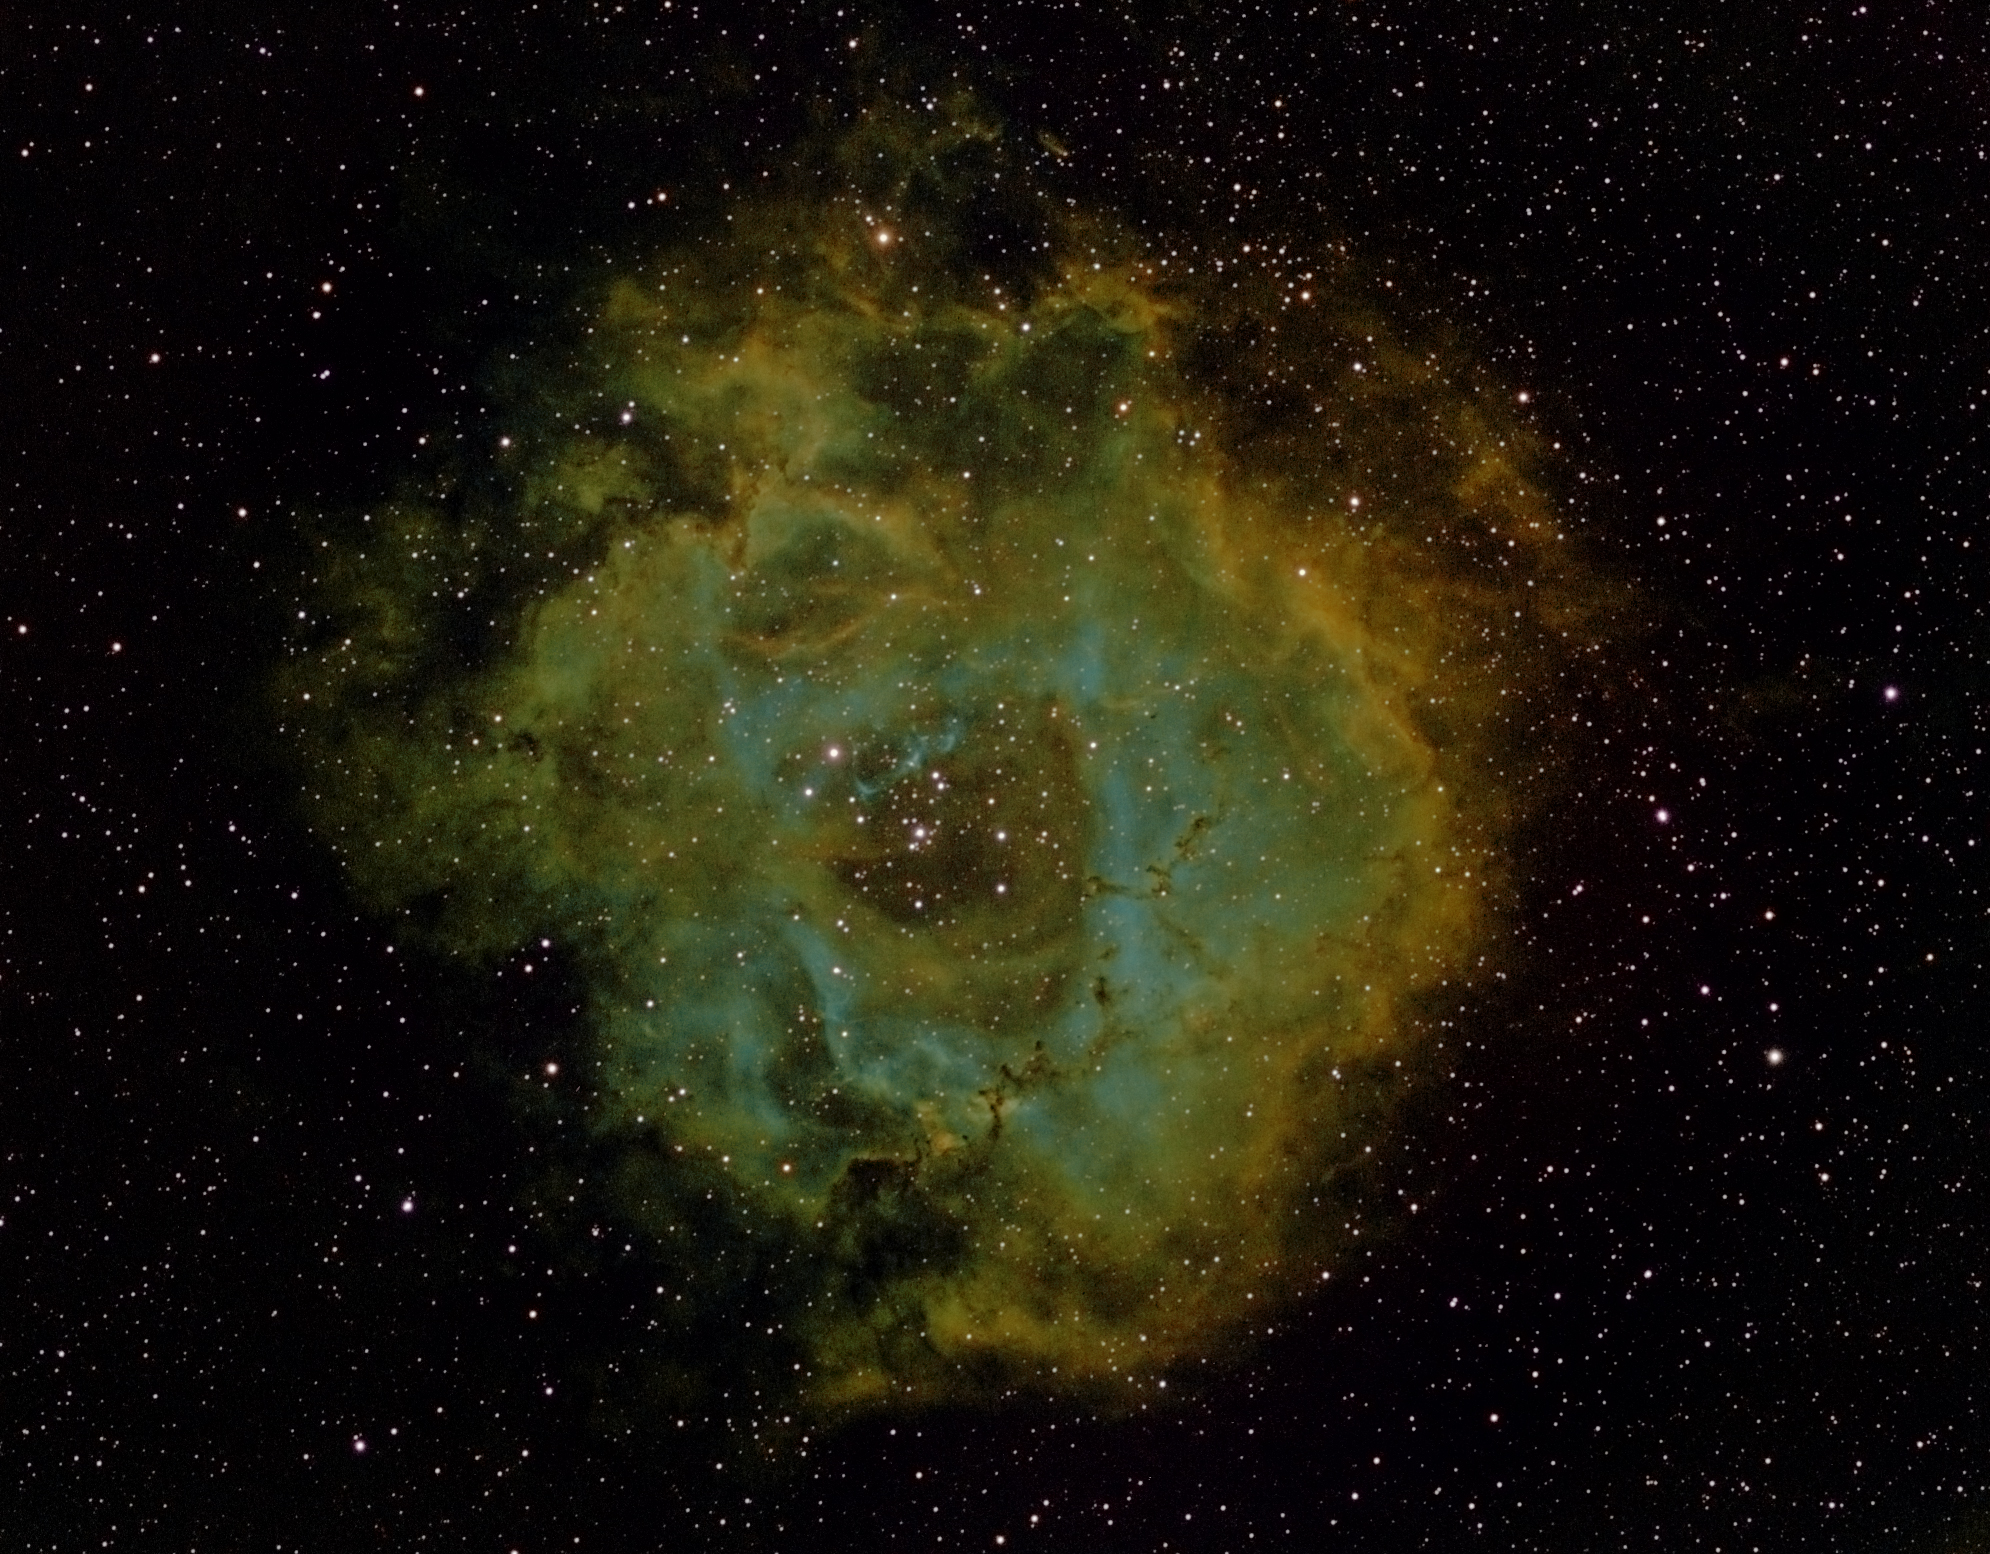
Rosette Nebula in  SHO

The outcome of my new adventure into narrowband imaging has been nothing less than a revelation.  Like so much of my preceding astroimaging, I knew about much of it before but doing it yourself and seeing the results is both exciting and very satisfying; like Peter Higgs I feel I have entered a new world!

Arctic Antics

img_8084-large

The globe pictured above on the island of Vikingen marks the location of the Arctic Circle off the western Norwegian coast.  However, surprisingly the position of the Arctic Circle is not fixed – as of 28 February 2017 it was 66°33′46.6″ north of the Equator but changes depending on the Earth’s axial tilt, which itself varies within 2° over a 40,000-year period due to differing tidal forces that occur as the Moon’s  orbit changes around Earth.  The region north of the Arctic Circle is famous for the midnight sun in the summer and its corresponding 24-hour darkness during the winter months, with major implications for life itself, as well as contrasting scenery and photographic conditions unique to this hostile region.

450px-arctic_circle-svg

During the last two weeks of February, when the return of limited daylight has just begun to mark the end of winter, I travelled by ship along the entire western and northern coast of Norway close to the Russian border, spending much of the time within the Arctic Circle.  The area is famous for its beautiful scenery, in particular the fjords which typify the coastline and for time immemorial have posed a significant challenge to all seafarers passing this way.

Our ship, the Richard With, was named after the Norwegian captain who in 1893 pioneered this difficult sea passage which we took from Bergen to Kirkenes and back.  Today a fleet of 12 ships are operated by the original Norwegian company Hurtigruten on a daily basis providing ferry transport for goods, vehicles and personnel, as well as a base for tourists seeking a view of the Northern Lights – in all the ship stops at over 30 ports in each direction.

kb_l4_map_desktop_us

Apart from the scenery, during the winter months the area north of the Arctic Circle is probably best known for the occurrence of the Aurora Borealis or Northern Lights (Norwegian – Nord Lys).  A view of this feature is treasured by all who see them but for astrophotographers it will be one of their ‘must do’ images to acquire.  The Aurora is caused by a solar wind originating from the Sun that consists of charged particles, which when drawn downwards at the Earth’s poles by the planet’s magnetosphere ‘excites’ atmospheric atoms which produce different coloured lights depending on the type of gas which is excited by the charged particles; a similar feature occurs around the South Pole called the Aurora Australis and is also now known to occur on Saturn and Jupiter.  The lights are mostly green in colour (ʎ 557.7 nm), sometimes red (ʎ 630 nm) or blue (428 ʎ nm) and less commonly pink, ultraviolet or yellow, depending on the altitude and type of excited gas – which is mostly either oxygen or nitrogen.  The resulting aurora takes the form of rapidly moving clouds or often curtains of light that dart across the night sky, constantly changing shape under the influence of the Earth’s magnetic field and does not disappoint when seen.

The Northern Lights are best imaged with a standard DSLR camera on a sturdy tripod, using a wide angle lens at full aperture, set at between ISO 800 to 1,600 and exposures of about 8 secs to 25 secs, depending on the brightness and quality of the light and the speed of movement of the aurora; focus and all other control needs to be operated manually for best results.  On land a tracking mount, such as a Vixen Polarie, could be used to improve sharpness but on a moving ship set-up and technique is a more difficult.

In this case exposure needs to be carefully balanced in order to account for the ships movement – forwards + up-and-down on the water – and the quality of the aurora light.  As exposures will always need to be greater than a few seconds, star trails are unavoidable and have to be dealt with in post processing as best as possible. I found imaging directly forwards or to the rear of the ship helped minimise this effect but still trails were still inevitable. Experimenting with various settings I found about 12 to 15 seconds exposure and ISO 1,600 generally worked quite well but varied depending on the sea conditions and nature of the aurora at any time.

At such high latitudes it is still very cold in February and warm head-to-feet-to-hands clothing is absolutely essential.  On this occasion, together with wind chill the temperature at the ships bow ranged from between -20oC to -30oC (that’s a minus sign!), making camera control very difficult and uncomfortable!  I tried using an intervalometer for remote shooting but as settings have to be changed frequently by hand it was not very practical; I’m sure on land it would prove much more helpful.  Furthermore, much of the time I had to hold the tripod down with some force as the wind was very severe.

Notwithstanding, I’m very pleased with the results shown below and would love to return again one day, perhaps in the summer – it is a truly different and very special part of the world – hat’s off to Richard With and all those who still sail these waters.

img_7634hpass-largeimg_7768x-large

img_7754star-crop-largeimg_8063x-large


Reflections – 2016

2016 was the second full year of Watch This Space Man (WTSM) and once again it’s been something of a mixed period.  Faced with a major, apparently insoluble problem, by mid-year I actually thought of giving up but by year-end it’s all come good again, in fact very good.   Reflections is a look back at the ups-and-downs of the past year, astronomically speaking and a peek into the next twelve months, which one way or another could determine the future of my astrophotography.

wtsm-visitor-map

I have been astonished by the interest in this website, with some 7,000 visits and 14,000 page views from more than 65 different countries during the year, the list is quite amazing.  Though I write this blog for myself, I am increasingly aware of this unsolicited readership – you are all most welcome and I would be very pleased to hear from anyone who would like to get in touch with queries, comments or just to say hello – contact details are in the Contact drop-down section of the About main menu.

reflections-2016

JANUARY TO MARCH

The year started poorly, got much worse, then finally improved. Using my recently acquired Vixen Polarie I was pleased to start the year with an image of Barnard’s Loop, something notoriously difficult to photograph and had previously eluded me.  Sadly I was not so successful with the Milky Way and have reluctantly come to the obvious conclusion that this can only be imaged in much darker skies than I’m ever likely to experience located just to the south of London and close to Gatwick airport!

As Orion starts to move on after Christmas and especially from February, I struggle to find suitable imaging targets; Coma Berenices and other constellations at this time contain numerous galaxies but they’re mostly too small for my William Optics GT81 and otherwise what might be doable I have already done before.  Notwithstanding, after looking carefully I came across two HII nebulae still lurking in the early evening.  The size and Ha-light of NGC 2174 Monkey Head Nebula and IC 2177 Seagull Nebula, provided just what I was looking for.  Located close to Gemini and Monoceros constellations, both these DSOs are within the part of the Milky Way section of the sky, an area that thankfully produces many other similar opportunities at this time of the year for a modded DSLR camera.

Picture saved with settings embedded.

Monkey Head Nebula

It’s often the small things that either alone or cumulatively can help transform the outcome with astrophotography.  The quarterly period finished by acquiring two new pieces of equipment, one which could help improve the set-up and operation of the mount, the other which I hoped would help me move to the next level of imaging.

  • When working in the dark and worse still in the cold, the ergonomics and general convenience of operating the equipment becomes paramount.  Since starting to use EQMOD-ASCOM and Cartes du Ciel for mount control and tracking, I encountered the problem of having to be in two places at the same time; in this case co-ordinating adjustments at the mount and the computer, in particular when making and syncing star alignments.  The answer to this conundrum was a gamepad, which I purchased for a nominal sum on eBay and after watching the inimitable Chris Shillito’s video on setting up and using a gamepad with EQMOD-ASCOM, have never looked back.  By using the gamepad the telescope can now be manually slewed, centred and synced on any object whilst remaining at the scope, thereby making the process of alignment much quicker and convenient.

  • At the end of 2015 it was my intention to start guiding in the coming year, a prerequisite for the long exposures necessary to increase data capture and thus hopefully improve image quality.  I had originally intended to use my ZWO ASI120 MC camera together with a William Optics 50mm guidescope for this purpose but there always seemed to be other problems to overcome first and to be honest, I was somewhat intimidated about tackling the black art of guiding.  I was finally prompted to do something about this when in March a second-hand Starlight Express Lodestar X2 autoguide camera came up on the UK Astronomy Buy & Sell.  From previous research I knew this was considered to be a very good and popular guiding camera, so as it had only just been posted on the website, I immediately went for it and was successful – timing is everything.  Inevitably I had problems setting-up and in particular getting the camera to focus – which was my own fault – but by the end of March I was guiding!  Truth is my guiding at this stage was not very good and I needed to look further into using the PHD2 guiding software but nonetheless, the equipment was at least now working together!

No

Date Object*

Name

1 07/01/16 Orion Barnard’s Loop
2 14/01/16 Orion Barnard’s Loop
3 02/02/16 Catalina Comet
4 02/02/16 Milky Way  
5 10/02/16 IC 2087 Dark nebula
6 NGC 2174 Monkey Head Nebula
7 IC 2177 Seagull Nebula

*Record of quarterly photographic images taken in 2016

APRIL TO JUNE

After finishing the previous quarter on something of a high note by getting PHD2 working for the first time, I was now hopeful that from herein my exposures and thus images would show improvement – unfortunately I was soon to be very disappointed.

In April we went on a trip to the Southwestern USA – something of a geological pilgrimage for my wife and I (we are both geologists) – to see the Grand Canyon, Monument Valley, Bryce Canyon and Zion National Park as well as many other similar areas.  Prior to going I had purchased a Sigma 10mm-20mm wide-angle lens in anticipation of all the big views that are characteristic of the region and was not disappointed by the lens or the scenery.

Being largely an uninhabited wilderness area, I also took the Vixen Polarie with a plan to at last capture images of the Milky Way.  Unfortunately, whilst I had checked the sky beforehand on Cartes du Ciel, I think I must have made an error with the dates.  We did get clear skies but unfortunately it turned out to be a full moon whilst there, which ruled out any hope of seeing, let alone imaging the Milky Way; oh well there’s always another day and it’s not going anywhere in the meantime.  Notwithstanding I did manage some pleasing nightscapes at Monument Valley and Bryce Canyon.

IMG_6235 (Large)

Given my initial guiding success prior to visiting the USA, I had been looking forwards to getting to grips with improving guiding and imaging on my return.  Furthermore, on 6th May there was a rare solar transit of Mercury and in preparation, the week before I set up and tested all the equipment and then successfully took some test images of the Sun using a Baader solar filter.  All was well on the appointed day which was also fortunately clear and sunny, so that shortly before contact I was all set and ready to try and capture the movement of a small black dot (Mercury) across the face of the Sun.  Unfortunately it was not to be and the weeks that followed almost marked the end of my still nascent hobby of astrophotography!

In short, EQMOD crashed when I turned on the DSLR camera to image the transit!  I tried re-booting and checked every other piece of equipment numerous times but to no avail.  I subsequently spent weeks trying to track down the problem, checking and re-checking every cable, piece of equipment and updating or reinstalling all the relevant software without success.  The nature of the problem strongly suggested there was a conflict between EQMOD-ASCOM and the camera and I therefore turned to the EQMOD forum for help, without success.  Somewhat late in the day and by now desperate, I posted the issue on SGL and quickly received a reply from someone who had had a very similar problem, which though also very difficult to identify, turned out to be a very small break in the outer cover of the DSLR AC/DC power adapter cable.  It’s not clear to me why this matters but I bought a new adapter and as they say, Bob’s your uncle, it worked!  I have looked very carefully at my adapter and cable and can see nothing wrong but am very thankful for the advice.

acdc

AC/DC Adapter: How can something as basic as this cause so much disruption?

It seems ridiculous that this very minor problem was nearly terminal but just in case it happens again I have since bought another spare power adapter.  Together with my daughter’s wedding in early June and the adapter meltdown, imaging for two of the three months during this period was almost non-existent.  Still by July I was ready to start again but by then there was no astronomical darkness!

No

Date Object

Name

8 April USA Monument Valley etc
9 06/06/16 M5 Globular cluster
10 M13 Globular cluster
11 M57 Ring Nebula

JULY TO SEPTEMBER

After the carnage of the last quarter, I was then unable to resume imaging in July due to travel commitments.  So I used what time was available to improve my knowledge of PHD2 and once again, check everything was now working ready for the return of astronomical darkness and better night skies from 20th July; I am of course now paranoid of another similar breakdown.  At the start of August I manged to obtain a just passable image of the Eagle Nebula for the first time.  Then shortly afterwards on the evening of 11th / 12th August, clear skies produced a decent night for viewing and imaging a few of this year’s Perseids meteor shower.  But it was at month-end and continuing into September that my imaging in 2016 finally took off.

m27-comps-paintfile

At that time the weather was consistently dry and warm, providing more than a week of clear skies and almost nightly imaging.  Dark nebulae are interesting features I’d hitherto not recognised as imaging opportunities and was therefore intrigued to successfully image the E-Nebula at this time.  Thereafter I used the opportunity of the weather window to experiment with PHD2 by using M27 the Dumbbell or Apple Core Nebula as a control imaging object.  Of course, each year is different but I’ll try to use any similar conditions in the future to sort out and develop old and new techniques, such unusual moments are precious for UK astronomers.  At the end of nearly two tiring weeks I had PHD2 working quite well and have not looked back since.  As a result of this work soon thereafter obtained good images of the Andromeda Galaxy, as well as the Veil, Crescent and Ring Nebulae.

No

Date Object

Name

12 07/08/16 M16 Eagle Nebula
13   M11 Globular
14   B142-3 Dark E-Nebula
15 11/08/16 Perseids  
16 23/08/16 LDN 673 Dark Nebula
17   NGC 6781 Planetary Nebula
18   M27 Dumbbell Nebula
19   Albireo Double star
20   Moon  
21 28/08/16 M11 Globular cluster
22   NGC 6905 Blue Flash Neb
23   Albireo Double star
24   15 Aquilea Double star
25   NGC 6960 W Veil / Witch’s Broom
26   M32 Andromeda Galaxy
27 29/08/16 M27 Dumbbell Neb
28   NGC 6960 W Veil / Witch’s Broom
29   NGC 7814 Pegasus galaxy
30   M15 Globular
31   M27 Dumbbell Nebula
32   M27 Dumbbell Nebula
33 08/0916 M27 Dumbbell Nebula
34   M27 Dumbbell Nebula
35   NGC 6960 W Veil / Witch’s Broom
36   NGC 6960 W Veil / Witch’s Broom
37   M31 Andromeda Galaxy
38 11/09/16 NGC 6888 Crescent Nebula
39   NGC 6992 Eastern Veil  (NGC 6995)
40 13/09/16 M57 Ring Nebula

OCTOBER TO DECEMBER

Normal conditions resumed later in September and into the final quarter in the form of overcast skies.  A minor break in the weather allowed a crack at the M33 Triangulum Galaxy towards the end of October but only in late November did another clear period occur, by which time the winter sky had arrived and temperatures had fallen to nearly 0oC.

Picture saved with settings embedded.

M33 Triangulum Galaxy – consisting of some 40-billion stars, the photons in this image have travelled 3-million light years in order to reach my camera sensor! | WO GT81 + modded Canon EOS 550D & FF guided | 18 x 300 secs @ ISO 800 & full calibration | 22nd October 2016

Unfortunately I am unable to establish a permanent observatory here at Fairvale and have to take-out the bring-in all the astronomy equipment each time.  Apart from being inconvenient this has two practical disadvantages: (i) it can be uncomfortable even unpleasant working outside in such temperatures, and (ii) it is necessary to polar and star align every time; on occasion when using SynScan and EQMOD-ASCOM it can take up to 2-hours before starting imaging.  Fortunately, I think I have now sorted out both these problems which should greatly help in the future.

By re-configuring the computer, mount and camera wiring, combined with establishing a wireless link between my tablet and the computer, once set-up I can now control most of the functions from indoors.  The comfort of being indoors benefits operating in general and especially thinking, which can be quite difficult when astroimaging and made even harder when it is cold.

With prolonged periods of clear weather in the second-half of the year, I was sometimes able to set-up and leave the equipment for a few days under a waterproof cover, which meant that from day-to-day I could be up-and-running each time in less than 30 minutes!  However, I expect this will only rarely be possible and nightly set-ups are likely to continue to be the norm.  Fortunately, I have also recently discovered two techniques that should help both streamline and improve star and polar alignment in the future.

In addition to guiding, PHD2 has a very good polar alignment facility that eliminates the use of the SynScan handset and enables the procedure to be carried out from the computer; it can also be undertaken without sight of the Polaris star, which is a major problem at Fairvale Observatory where it is totally obscured by my house.  At times when the mount can be left outside, I can also save and subsequently re-use the star-alignment model in EQMOD-ASCOM.  All-in-all these and other procedures have made a very positive impact on my astronomy and astroimaging.  The outcome of these changes led to a decent sequence of imaging with which to finish the year and, furthermore, hopefully provides a strong foundation for continuing improvements in 2017.

No

Date Object

Name

41 22/10/16 M15 Globula cluster
42   M33 Triangulum Spiral Galaxy
43 28/11/16 M45 Pleiades
44   NGC 2024 Horsehead Nebula
45   M42 Orion Nebula
46 29/11/16 Hyades Open star cluster
47   NGC 2244 Rosette Nebula
48 30/11/16 NGC 1499 California Nebula
49   IC 405 Flaming Star Nebula
50 03/12/16 M74 Spiral Galaxy
51   M77 Spiral Galaxy
52   M1 Crab Nebula
53   IC 2118 Witch’s Head
54   M78 Reflection Nebula
55 04/12/16 SH2-264 Lamda Orionis
56   SH2-261 Lower’s Nebula

ETCETERA

A few other astronomy and imaging related matters helped shape the past year for me. After  coming across WTSM, I was surprised to be contacted by the Purley Photography Camera Club to give a lecture on astrophotography in March.  I’m pleased to say the event went very well and, furthermore, the process of compiling the presentation beforehand helped expand my own knowledge of the subject too.

TTT Cover

In May I received a sun dial installed on a carved Purbeck Stone plinth as a retirement present.  As a time piece it’s accuracy is limited but it is a beautiful addition to my garden and solar astronomy for which I am very grateful.  By coincidence, later in the year I also came across a simple but charming sun dial set into the ground by the upper lake at Earlswood Common, a short walk from my home and  Fairvale Observatory.  Intriguingly it works by standing on a central stone, located depending on the season, and then uses your own shadow to read off the time – clever.

In September we visited Lacock Abbey in Wiltshire, home of William Fox Talbot in the 19th Century – photography pioneer and notable for developing photographic fixing and printing.  The photography museum there is very good and it was fascinating to see his place of work in the house, where the very first photographic print is also displayed.  His contribution to photography  is unique and today he is generally recognised as the father of modern photography.

william-henry-fox-talbot-with-camera-141697035181903901-141210123557

As  a Londoner born and bread, I like to think I know the city well and over my lifetime have visited most of its unique sites, old and new.  However, for some inexplicable reason I had never been to Westminster Abbey, so decided to put that right in November.  It is, of course, a building of unparalleled history, with numerous graves and memorials of centuries of kings & queens, as well as scientists, explorers, poets, actors etc.  Noteworthy amongst these for the astronomer is the physicist and mathematician Sir Isaac Newton and  Second Astronomer Royal, Edmond Halley.

I must next give mention to the man who throughout the year dominated my reading, learning and thinking – Albert Einstein.  His work during the early part 20th Century still dominates today’s physics and astronomy.  We continue to make ground breaking discoveries that substantiate and build on his ideas that were originally postulated over 100-years ago.  Pictures only recently obtained using the the Hubble telescope have spectacularly demonstrated the effect of gravitation lensing and in 2016 for the first time ever the existence of gravitational waves was confirmed.  This year I therefore decided to understand the man and his work better.  During the first half of the 2016 I read Walter Isaacson’s excellent biography of Einstein and have recently completed and 8-week Stanford University course on the Special Theory of Relativity.  They were both very enjoyable, immensely interesting and time well spent.

Finally, this Christmas I was surprised and very pleased to receive a printed, bound copy of the WTSM blog for the period since its inception on 5th August 2014 until 10th November 2016.  A lot of work has gone into producing this blog and I’ve always been concerned that somehow something might go wrong with the website or internet and it would all be lost. This book now safely preserves in print all the blogs and images posted during the aforementioned period.  The production is generally very good and I have already enjoyed re-reading some of my blogs once again.

img_20161227_122915516

WTSM: The Book!

Favourite Images

As a result of the aforementioned issues, 2016 has certainly been a year of two halves.  Having resolved the equipment problem and started to employ some very useful new techniques and software, I was eventually able to obtain some good images. My personal favourites in no particular order are shown here below:

Picture saved with settings embedded.

Barnard’s Loop & Lamda Orionis Nebula : Vixen Polarie & modded Canon 550D + Sigma UWA @ 20mm | 11 x 240 secs @ ISO 1,600 + darks | 7th January 2016

IMG_6219L1C1 (Large)

Monument Valley by Night: order of buttes same as daytime photo above. Canon 700D + 10mm Sigma wide-angle lens | 20 x 15 secs @ ISO 6,400 | 10th April 2016

Picture saved with settings embedded.

B142/3 Barnard Dark E-Nebula

Picture saved with settings embedded.

M27 Apple Core Nebula | William Optics GT81 + 50mm Guide Scope & 10-point EQMOD-ASCOM alignment model | modded Canon 550D + Field Flattener | 3 x 300 secs @ ISO 1,600 & full calibration, 90% cropped | 30th August 2016

Picture saved with settings embedded.

M31 | WO GT81 + modded Canon 550D & FF | 10 x 300 secs @ ISAO 1,600, darks + flats | 8th September 2016


Round-up & goals for 2017

Despite the frankly awful start to the year, astronomically speaking 2016 finished on something of a high.  Furthermore, contrary to initial indications I was in the end partially successful in achieving some of my objectives set out at the beginning of last year:

RECORD CARD – 2016
Goal Specifics / Results Outcome
Increase imaging exposure times Improved equipment set-up and alignment and successfully started autoguiding with exposure times of up to 8-minutes. DONE


Improve processing Started using newer version of Photoshop CS2 + other related software. Improvement with post-processing using online tutorials and Nik Syzmanek’s booklet Shooting Stars. GETTING THERE


Start widefield imaging Purchased Vixen Polarie, with portability put to use in the USA but did not make UK dark sky sites as planned. GETTING THERE


img_20161130_234303293

Getting better: PHD2 working screen 30th November 2016, DEC is good but room for improvement with the RA settings. Notwithstanding, the impact of tracking and image quality is noticeable.

download

I’m concerned about setting more goals or the forthcoming year but I think it helps, so here goes:

  • Improve processing: As the headmaster’s report would say “room for improvement” and I will try.  I have purchased Warren Keller’s book Inside PixInsight, considered by many to be the gold standard of post-processing software but is a nightmare to learn – this may be a step too far for now, we’ll have to see – maybe 2018?
  • Expand and improve widefield imaging: First – use the Vixen Polarie as had been intended last year to obtain nightscape images at UK dark-site locations.  Second – look at ways of using a widefield set-up with the mount more successfully.
  • Start LRGB imaging: I spent a lot of time in 2016 considering the question – what next? I am keen to image smaller DSO objects, in particular galaxies and was on the verge of purchasing a larger telescope – probably another refractor.  However, after attending a talk by Nik Syzmanek, one of Britain’s foremost astrophotographers, I have come to the conclusion that the next step should probably be a move to LRGB imaging, which if successful probably has the greatest potential to improve my pictures – let’s hope so.

Looking back 2016 was a funny old year, which for me was defined by three experiences:

Despite two wonderful periods at the end of August and November the weather for astronomy was mostly awful, with cloud cover for weeks on-end and when it was clear, it was a full moon – frustrating or what?

I had already learned that patience and perseverance are required in large quantities for astroimaging but the equipment break-down in May and June was so severe and apparently insoluble that, together with the aforementioned cloudy skies, I really thought of giving up.

However, this time there is a happy ending: after I finally solved the equipment problem and started autoguiding, I feel I have eventually made some great strides with my imaging in 2016 which, furthermore, holds much promise for the coming year and I hope can record in WTSM’s Reflections at the end of 2017.

Watch this space!