Icelandic Aurora

It’s just over 6-years since my last arctic adventure, which was a trip along the Norwegian coast by ship from Bergen to Kirkenes and back, stopping along the way for deliveries and pick-ups at 30-ports.  On that occasion we had good views of the Aurora Borealis whilst at sea somewhere north of the Arctic Circle and with some difficulty, I was eventually able to obtain some images (see below). Standing outside on ther deck at +70o North latitude in February was incredibly cold, making camera operation difficult, whilst the ship’s movement from side-to-side and up-and-down was hardly conducive to photography of the night sky!

This time, I’m just back from circumnavigating the island of Iceland by car from mid to late-March, which is described more fully on my other website Round The Bend here.  It was timed to avoid the worst of winter conditions and, with darkness quickly disappearing as Spring / Summer beckoned, maybe still get a chance to see and image the Northern Lights again – this time on terra firma.  Despite such planning, severe snow, ice and very strong winds were common for much of the time but, when it was clear the scenery was spectacular and, on a couple of evenings later in the trip, the Aurora Borealis put on a great show.

Situated just below the Arctic Circle, mostly between 64o and 66o latitude, Iceland is well known both for its geology and sightings of the Aurora Borealis or Northern Lights.  As a geologist, I travelled to Iceland primarily to view the rocks and though it was getting late in the season, I was also keen to see the Aurora again if possible.  Given the days of bad weather it was therefore fortunate to have clear skies and good views of the Northern Lights on two separate evenings whilst on the south coast, first at Gerdi near Jökulsárlόn and later just south of Kirkjubaejarkklaustur.

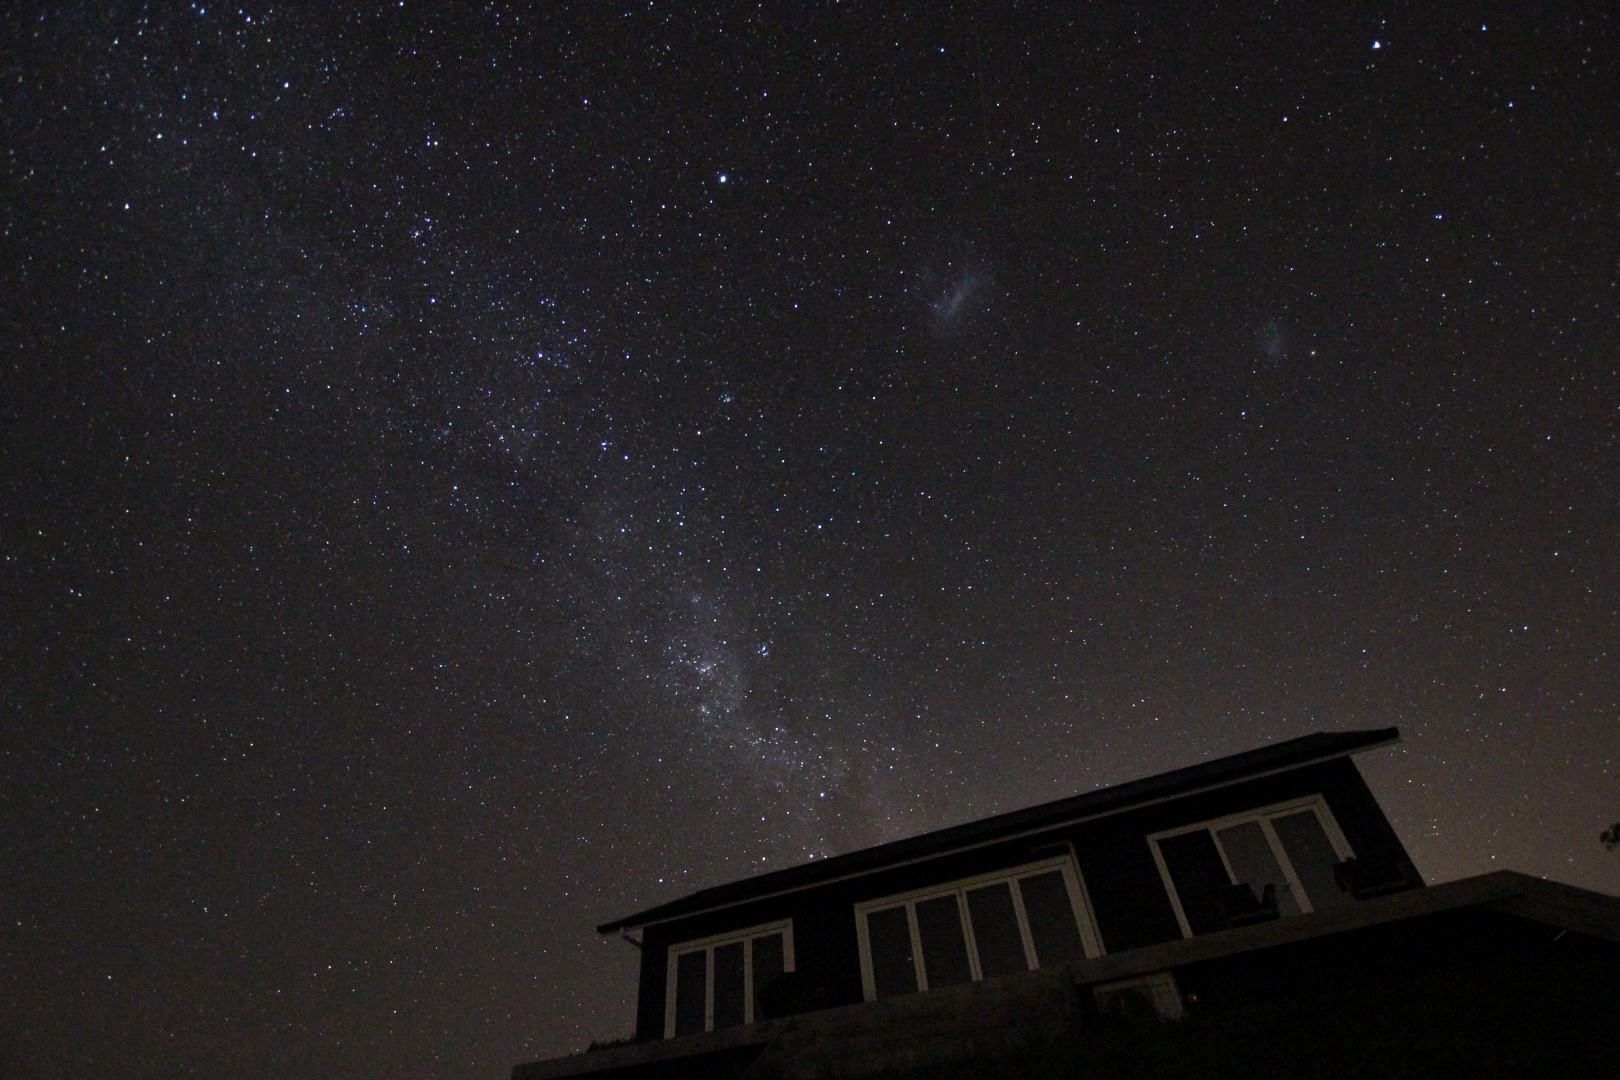
Despite my previous experience, each aurora is different and on this occasion I found using a Canon 700D DSLR mounted on a Gorilla Pod, using a Sigma wide-angle lens set at a focal length of 10mm f3.5 + ISO 3,200 and 10 second exposures generally produced a good image.  It seemed that we were on the southern edge of the aurora on the first night at Gerdi (see top of the page), which was therefore weaker but exhibited a striking purple colour (helium).  The following night the aurora was much stronger, this time mostly green (oxygen) with red and purple fringing (nitrogen & helium) and generally much more active, resulting in some great views with the naked eye and even better images (see below).

Reflections 2019

The website Watch This Space (Man) began in 2015 as I started out in astronomy and is a record of my personal journey, comments and thoughts.  Apart from the main blog, the website also contains links to other astrophotographers, astronomy tools, astronomy weather, and scientific papers etc., which can be accessed from the top menu.

Whilst there is a photo gallery of my work in this website, an overview of the better images can be found in the My Astrophotography FLICKR album, which can be found in the GALLERY menu.  Furthermore, this year I took the plunge and joined the Astrobin community, where my images can be found using the appropriate link also in the GALLERY menu.

Heat Map 2019

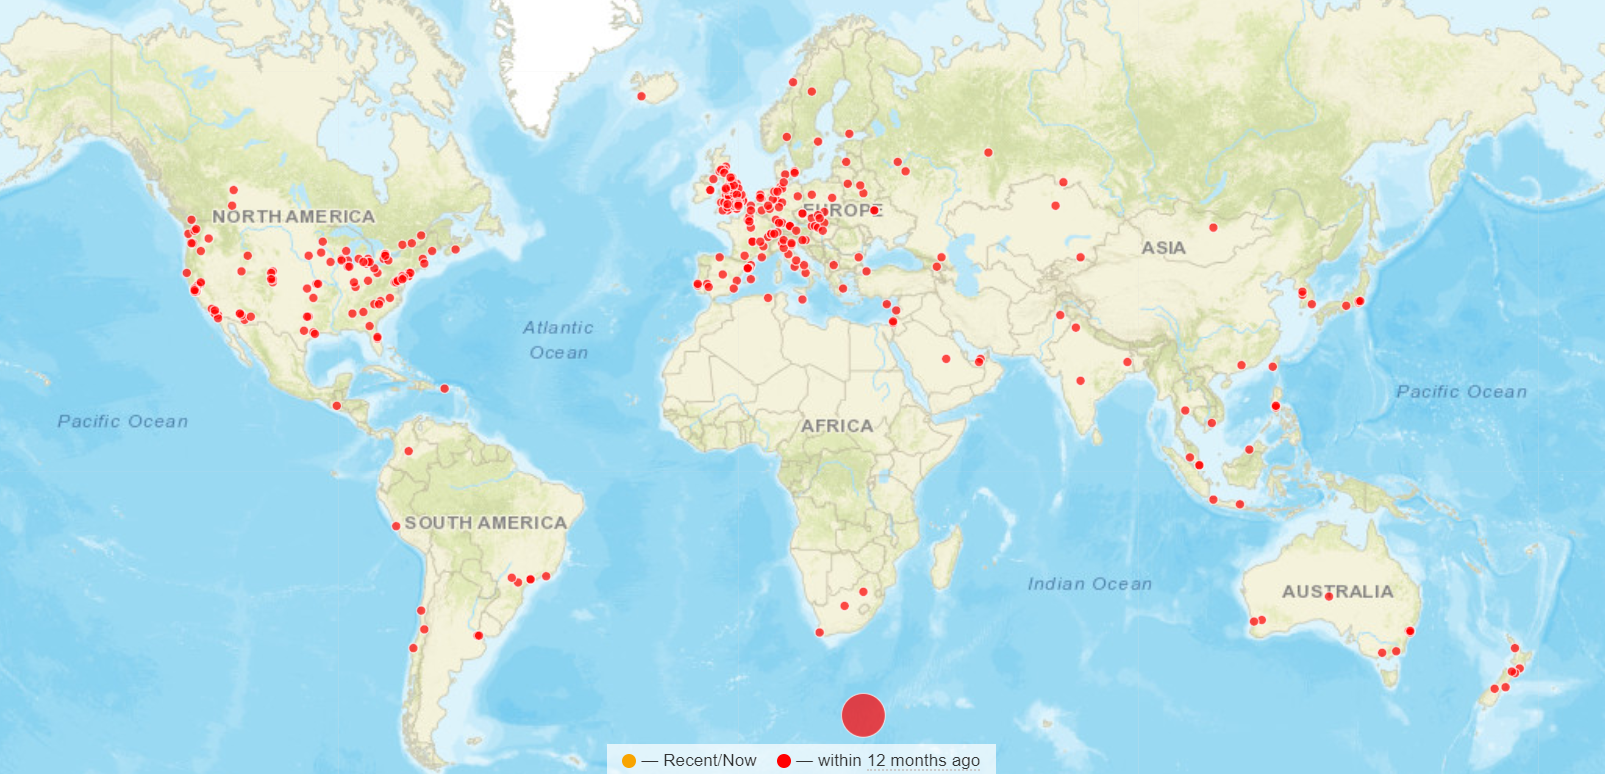
During the past year the site was visited from 64 different countries, literally from every corner of the world.  I always like to hear from anybody out there – comments, questions, help or just to say hello  – and can be contacted via details given in the ABOUT menu section or just leave a comment on any item if you prefer.

Reflections 2019 BannerX

Reflections is compiled at the end of each year as a review of my astronomy and astrophotography during the previous twelve months, together with some thoughts on possible future developments.

Overview, Images & Goals for 2020

The past year’s plan was simple: build-on and experiment with developments from the previous year, in particular using Plate Solving to achieve longer integration times and explore further the north sky, which I could now see from the new Shed Observatory and operates during the spring and summer months.

By routinely using Plate Solving integration times, now obtained over a number of nights or even months, have increased by up to four-fold compared to previous years.  As a result I concentrated on less objects but for longer time, achieving between 6 to 8 hours of subs on some occasions, the limiting factor as ever being British weather.  Although quite modest compared to those able to use fixed observatories, or in clear, dry climates with Bortle 1 or 2 skies, I was very pleased with the positive impact this had on my images.

Starting astronomy and astrophotography somewhat late in the day a few years ago, like many others after retirement, the learning curve was steep and often frustrating.  There were times I’ve almost considered giving up but with perseverance I’ve made progress and often get great pleasure from some of the results, as well as just enjoying and learning about this wonderful subject.  For me it is just a hobby but recognising some of my achievements and abilities acquired since starting out in 2014, I was especially proud this year to be elected a Fellow of the Royal Astronomical Society.  For all the help in reaching this point, I’d like to thank all those who have helped me from the astronomy community, wherever they are.

RAS logo

Favourite Images

My weakness in astrophotography remains processing but having at last obtained some good integration times, this year I made a greater effort to improve these techniques – with some success.  Adopting the theme less is more, I imaged just 17 different objects this year – of which nine were full narrow or broadfband images, with the rest being  experimental or DSLR – with a total integration time of 65 hours (2018: 25 objects & 43 hours).  The resulting images turned out well, achieving Picture of the Week on the British Astronomical Association website on six occasions.  It’s therefore difficult to choose favourites from this select group based on merit alone, so this year’s favourites (see below) represent those good images that also mark a significant milestone in my astrophotography.  Detailed reviews of these and all other images from 2019 are discussed in dedicated articles that can be found via the Blog Index under the ABOUT dropdown menu.

SHO2 CompF (Large)

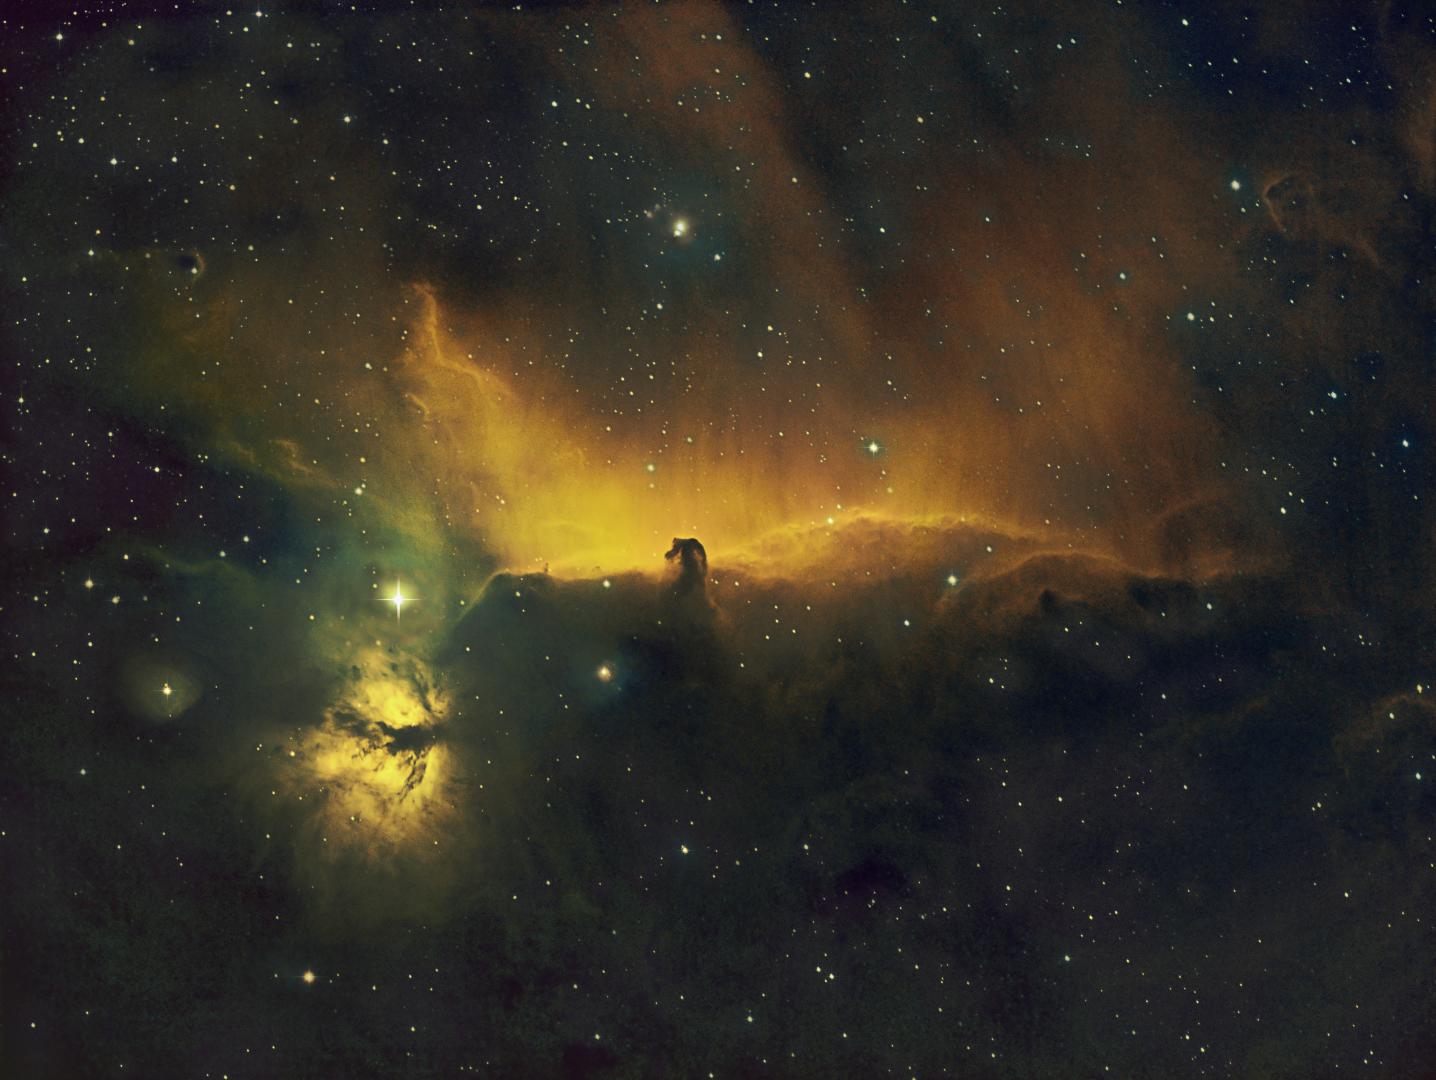
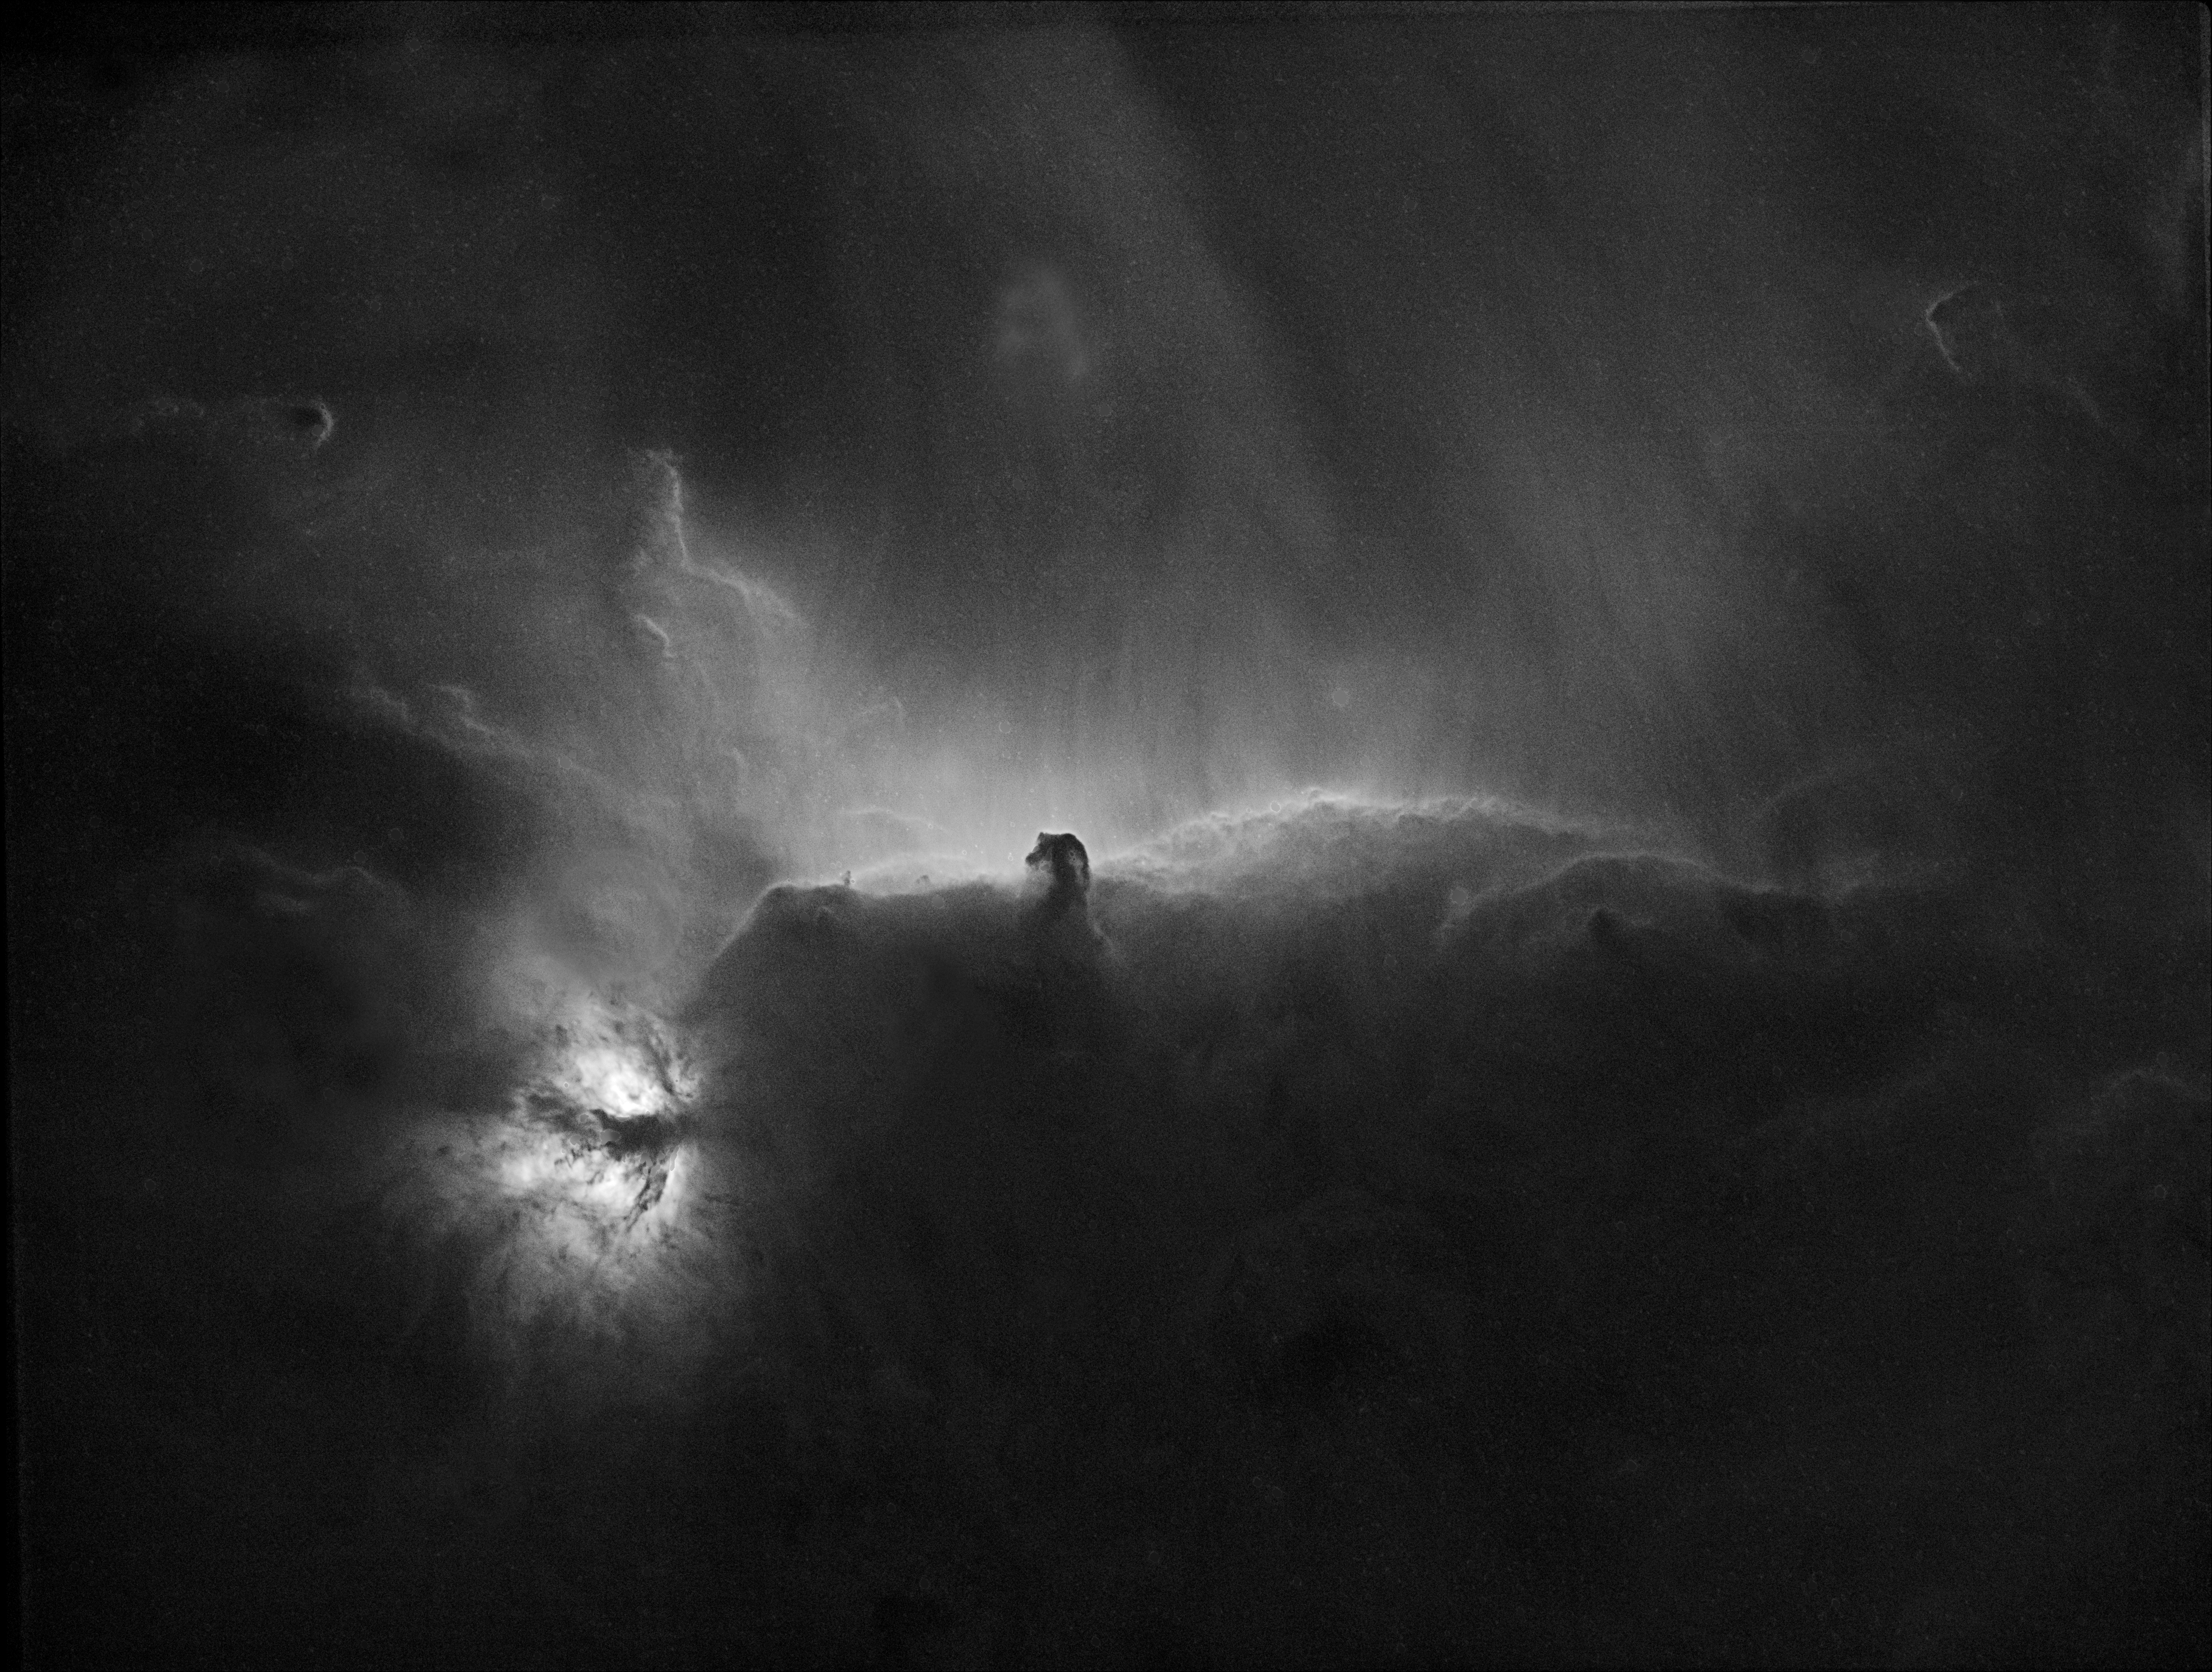
Horsehead & Flame Nebula: Usually imaged in LRGB broadband, this narrowband SHO version produced a very different affect and colours, whilst also showing the beauty of the accompanying clouds of interstellar gas and dust.  Taken over three nights, at nearly 7-hours, this image was also one of my longest integration times to date.     

M101 HaLRGB final Closeup

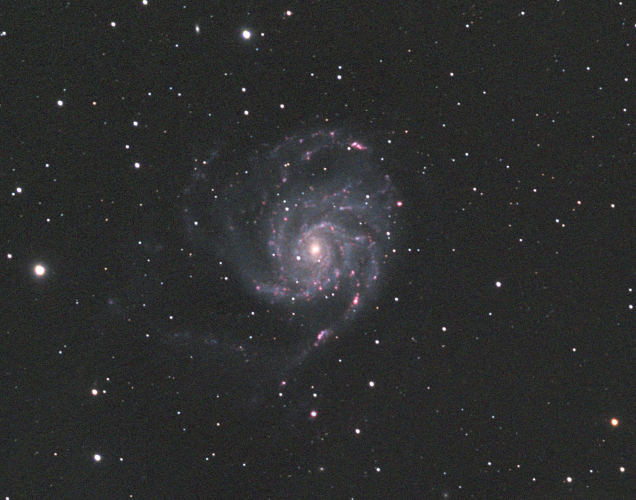
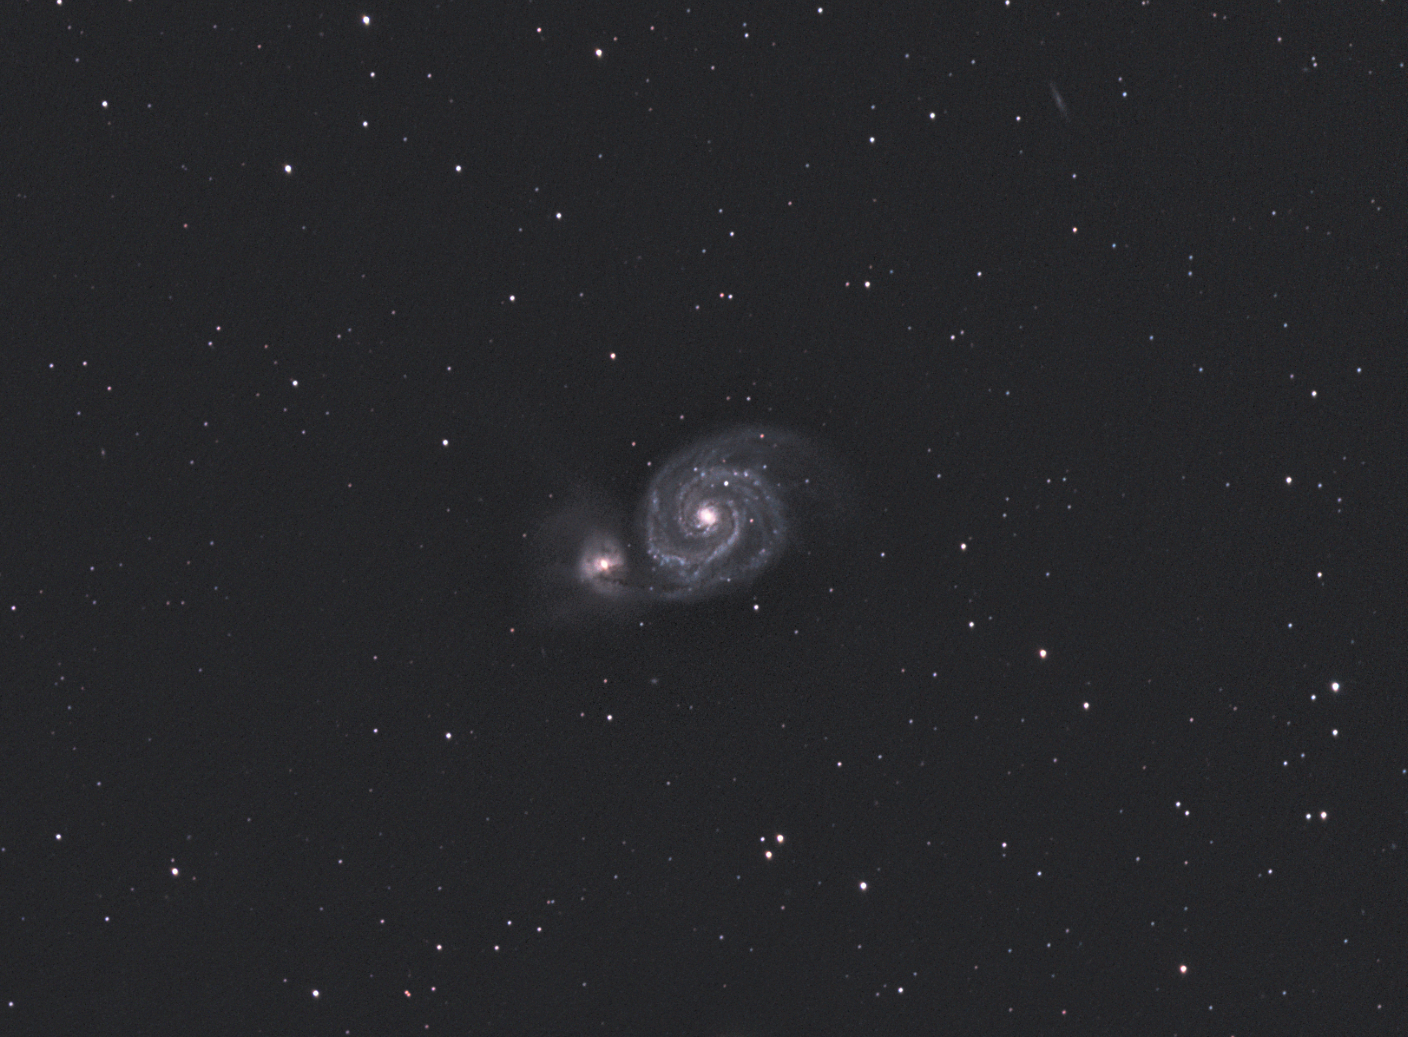
M101 Pinwheel Galaxy: Given Bortle 5-6 skies, being on the Gatwick Airport flightpath and a using a small refractor, I struggle to image galaxies and often LRGB images in general from Fairvale Observatory.  However, on this occasion the combination of 5-hours HaLRGB subs and new processing techniques to enhance the colours, M101 proved the exception and is perhaps my first decent classic spiral galaxy imaged from home.  Moreover, the HII regions light up along the spiral arms with the addition of Ha wavelength, producing a dazzling and dynamic image. 

Picture saved with settings embedded.

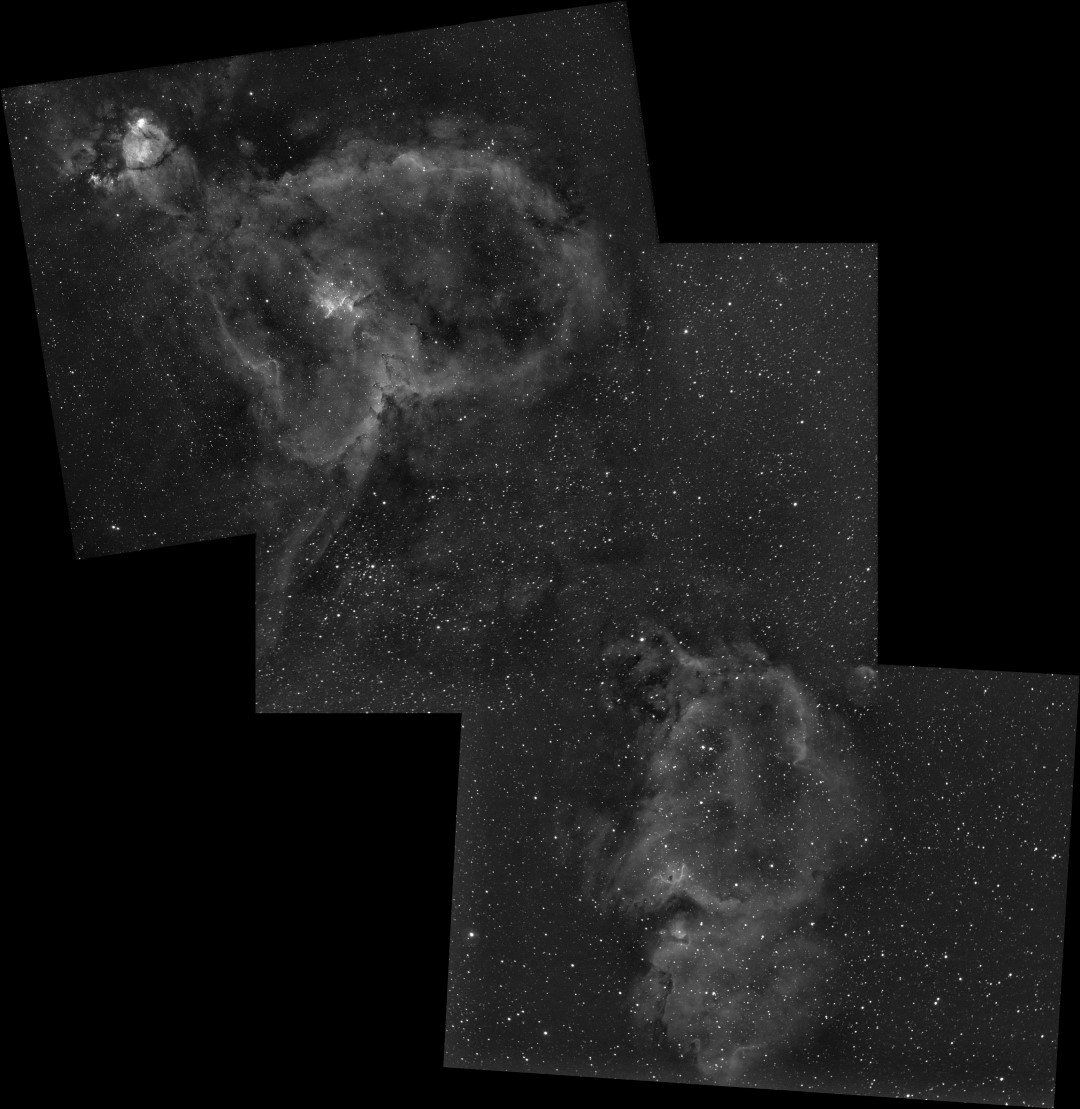
Heart & Soul Nebula:  Combining existing data from 2018 of the Heart Nebula and new 2019 data of the Soul Nebula + the intervening space, this is my first albeit modest mosaic, which promises to open up significant possibilities in the future. 

RECORD CARD – 2019
Goal Specifics / Results Outcome
Improve broadband and narrowband imaging


Achieved major increase of image integration times and overall quality. MUCH, MUCH BETTER


Improve processing Continuing to make slow improvements, with greater use of new Photoshop techniques. BETTER


Expand & Improve Widefield Imaging Despite some good images of the Milky Way in the USA, I never used the Vixen Polarie tracking mount and did not make it to any other dark sky sites  = disappointing. FAILED


My objectives in 2019 mostly went well in (see above), so here goes for 2020:

  • Imaging: There’s always scope to improve imaging techniques but probably most of all I still need to improve guiding quality and increase exposure and image integration times even further.
  • Mosaic: Expand the use of mosaic imaging using Plate Solving and new CdC planning software.
  • Improve processing: I expect this will continue to be something of a challenge for some time to come unless I go to the dark side and adopt software such as PixInsight & / or APP.
  • New Observatory: Unfortunately this will not be a fixed obsy whilst I continue to live here at Fairvale which is unsuitable.  However, I’m hopeful that another location between the Main (North) Observatory and the Shed Observatory might open up the north sky better and by getting away from the high hedges that surround the garden allow longer imaging sessions than can be currently obtained at the Shed.
  • Other: My mind is always thinking about larger telescopes or a dual rig and / or a new high-end encoded mount but probably not until I make further progress with the above goals and / or move to a better dark sky location – dreaming is part of astrophotography = watch this space!

Although you never know, I don’t see any major breakthroughs in the coming year but more of the same – revisiting familiar objects in order to obtain new image versions based on greater integration time and hopefully using mosaic techniques to build-out images in order to encompass wider areas of the sky.  This year I was surprised to discover objects that I had hitherto considered out of reach from my location (M101, M51 etc.), as well as exciting features that were completely new to me and still hold great promise e.g. DWB 111 AKA the Propeller Nebula.

Looking back I’m very happy to say 2019 was an excellent year for astronomy and astrophotography, almost certainly my best yet.  You can’t ask for more than that and I hope that WTSM’s Reflections 2020 will record further such success.

Watch this space!

wtsm logo


2019 CHRONICLE 

Below is a quarter by quarter summary of my astronomy and astrophotography for the year, followed by an imaging record.

JANUARY TO MARCH

Towards the end of 2018 I decided to undertake a project, with the prime objective to gather a much longer period of integration than hitherto achieved by using my newly developed skill of Plate Solving.  I’d previously imaged the Horsehead and Flame Nebula in the more traditional colour palette, either with a modded DSLR or by LRGB broadband.  However, I’d recently seen this iconic image undertaken using the Hubble Palette to great affect and was inspired to do the same myself. Thereafter, for more than 2-months the clouds rolled in and I thought my project would then be impossible, not least because by now Orion had crossed the Meridian in the early evening and imaging times were at best limited.  But as is often the case with astrophotography everything suddenly changed and it was game on!

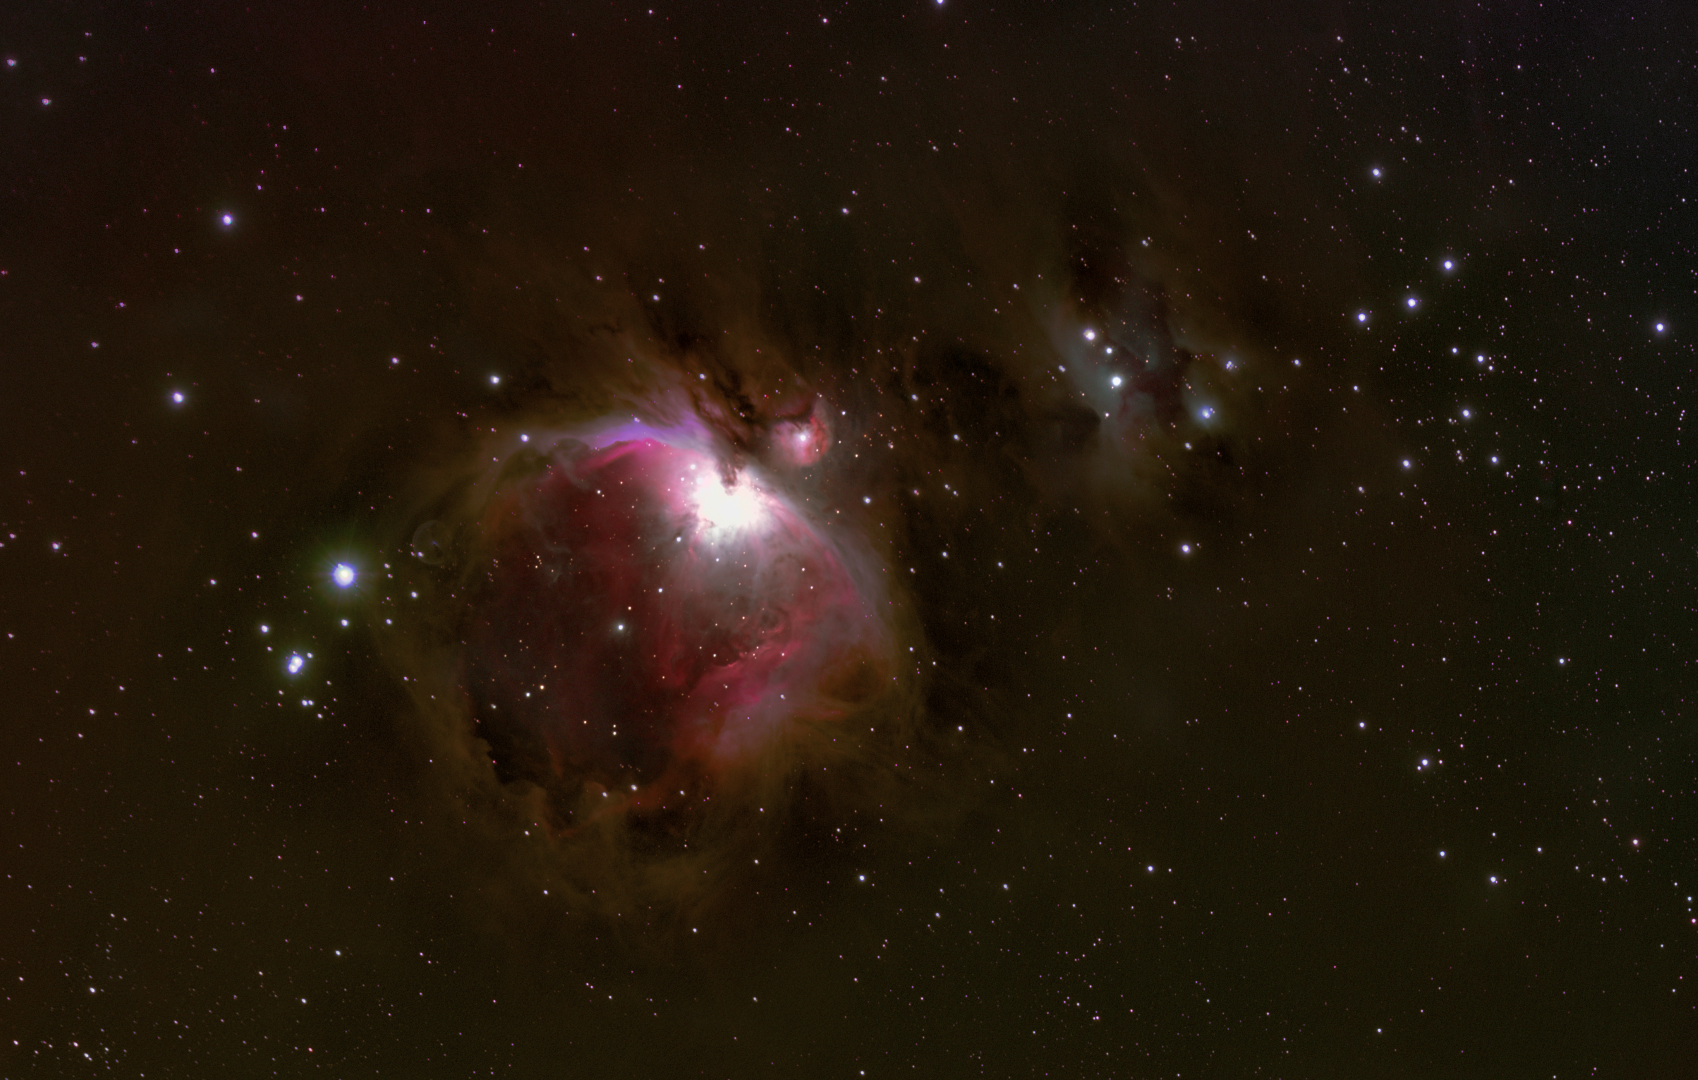
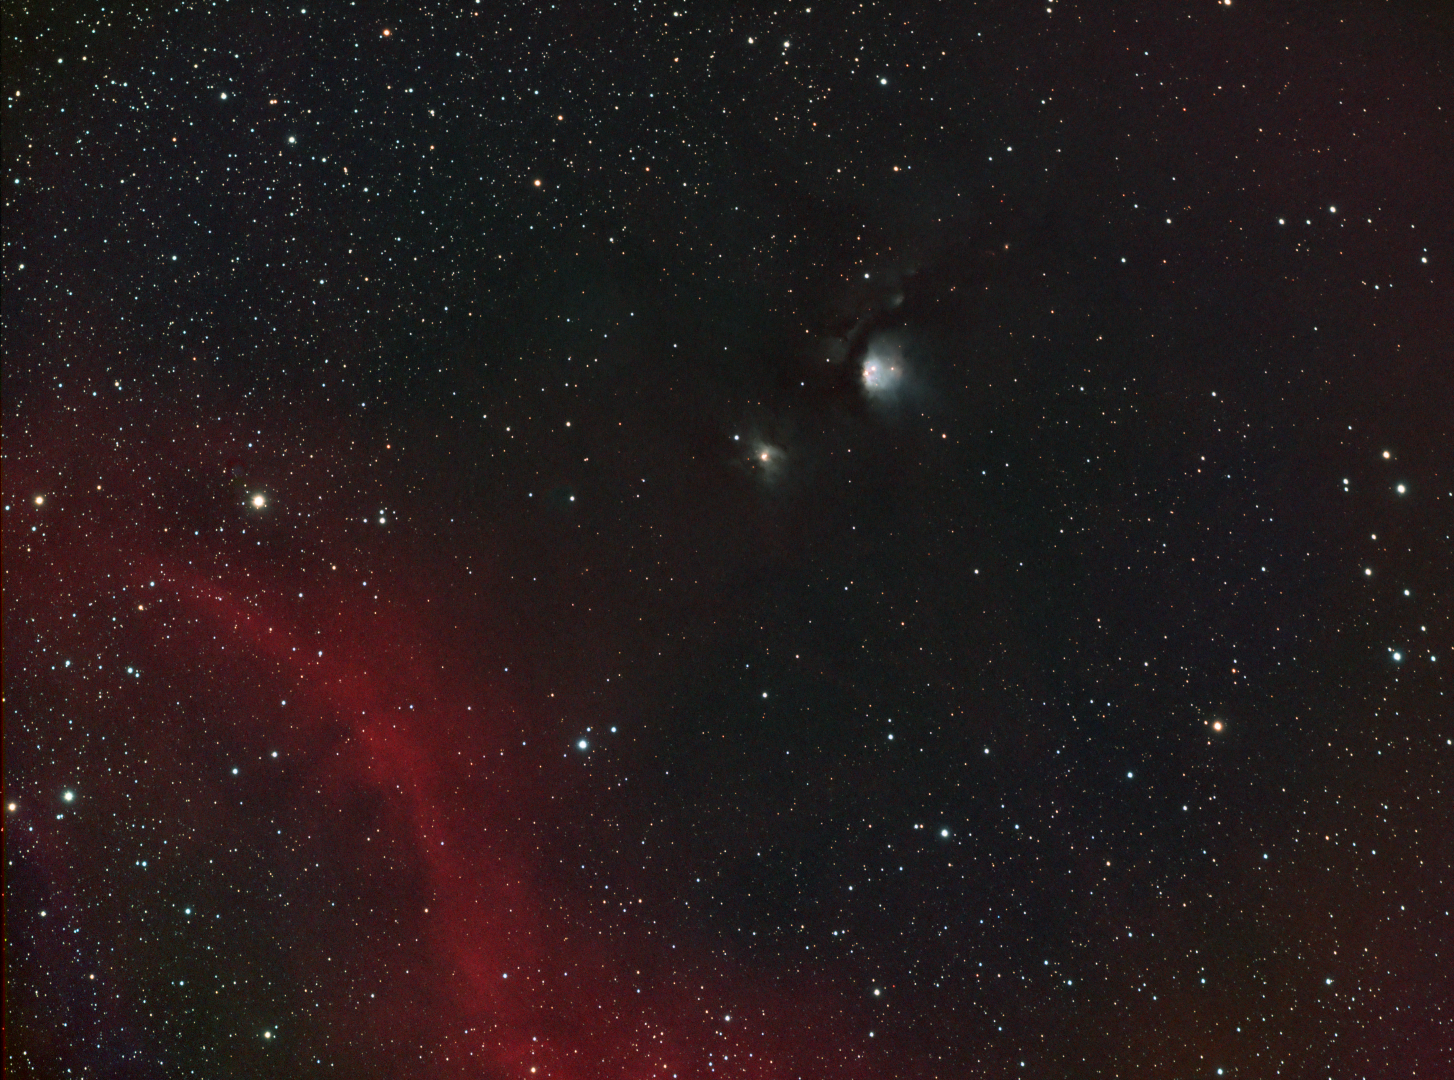
The first evening of clear skies since 11th November 2018 coincided with the full lunar eclipse on 21st January, which I was therefore able to image once again.  Then six days later a very untypical clear and quite warm period of weather arrived and I was able to complete my intended project after all, with further time to image both the Great Orion Nebula and the reflection nebula M78 + Barnard’s Loop (see images below).

HaLRGB2FINALcrop (Large)

Combined +180 degrees 3+5min HaLRGB (Large)

Achieving much longer integration times of between 5 and nearly 8-hours, the impact on the resulting images was transformative.  I was especially pleased with the outcome of the Horsehead project in SHO (see Favourites Images section) but found the Ha-only starless version of the same scene (see below) particularly mesmerising, as the large HII structures throughout this region bring the image to life.

NGC 2024 Ha Starless2

By the end of February the night sky at 51o latitude has moved inexorably on to the so-called Galaxy Season, which provides something of a dearth of imaging opportunities for my 81mm telescope.  However, with a good patch of weather at the end of March, whilst experimenting with the Leo Group I noticed that small areas of Ursa Major region could be seen directly above for a couple of hours, which to my surprise opened up a whole new world of possibilities hitherto considered unavailable.  Shortly after I managed to obtain almost 5-hours of data on M101 the Pinwheel Galaxy, which is one of my best galaxy images taken from Fairvale Observatory (see Favourite Images section).

APRIL TO JUNE

Having discovered the albeit limited possibilities of seeing Ursa Major, I moved to the Shed Observatory early in April, which by then afforded slightly better views of the same area of sky and thereby to my great joy provided the possibility of imaging the wonderful Whirlpool Galaxy, M51.  Unfortunately time was somewhat limited but it was better than nothing and I was thrilled to obtain an image of this wonderful object for the first time.  Weather permitting I’ll be back for more data in 2020 with which to build on the promising result obtained this year.

LRGB Image FINALX2 (Large)

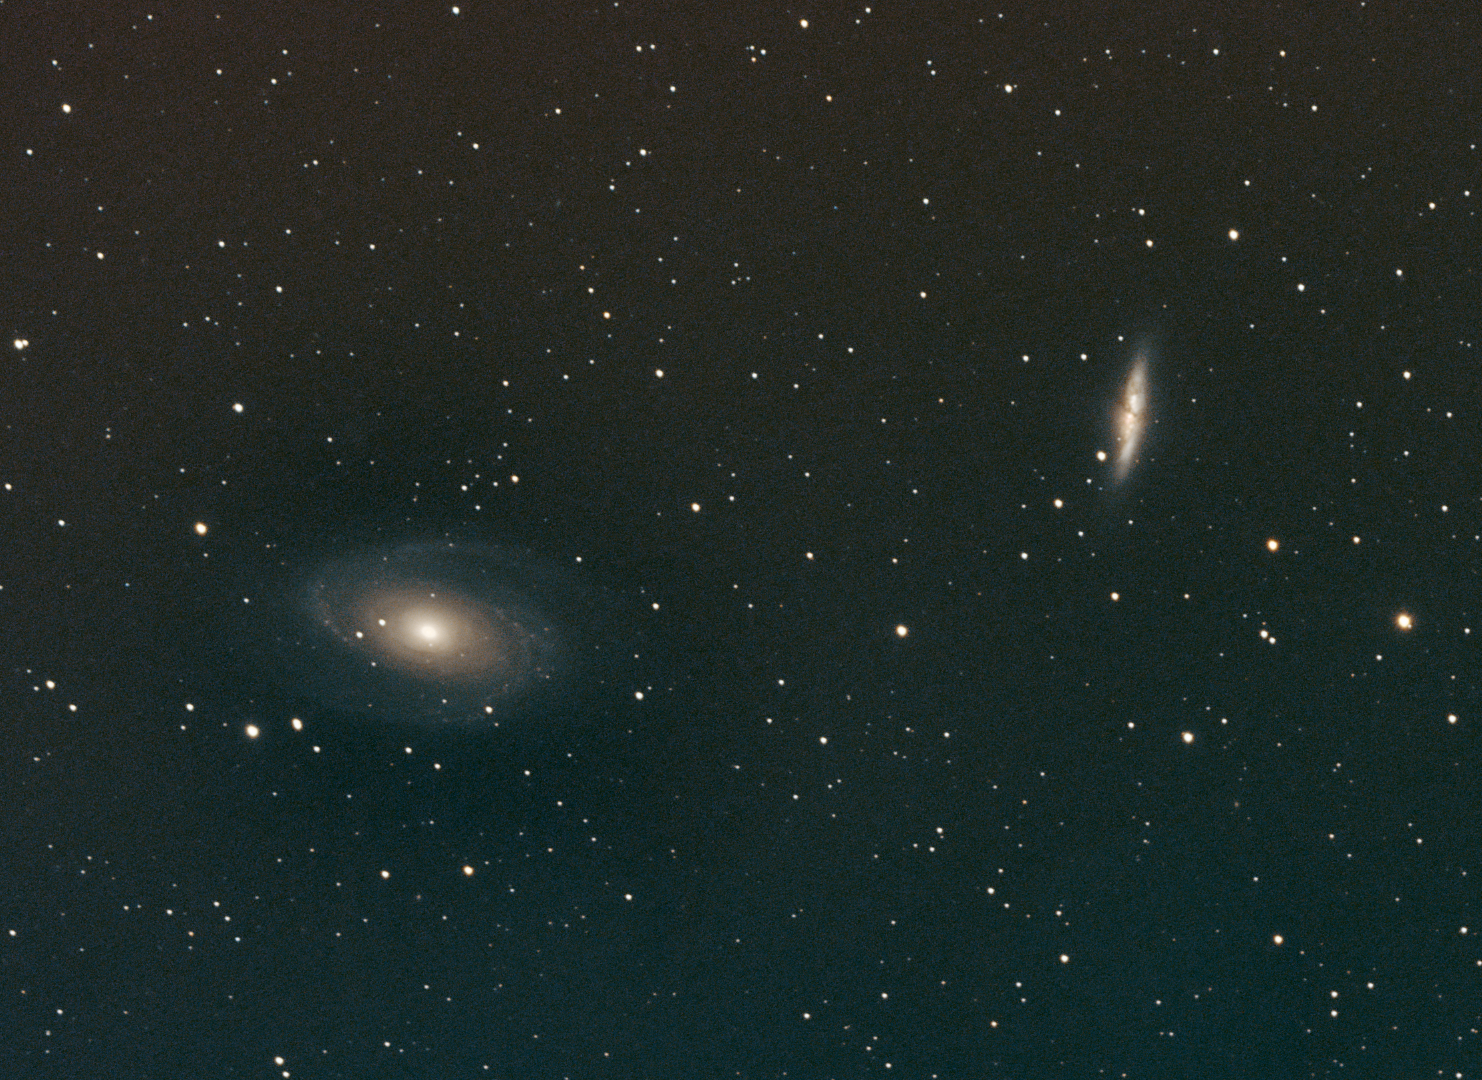
By the end of April just 8-weeks away from the summer solstice astronomical darkness is in short supply.  Fortunately having moved earlier to the Shed Observatory this year, I was in a good position to return to inaging the Bodes and Cigar Galaxies (see below), which had been my first ever image of north sky objects in 2018.

LRGBFinal (Large)

JULY TO SEPTEMBER

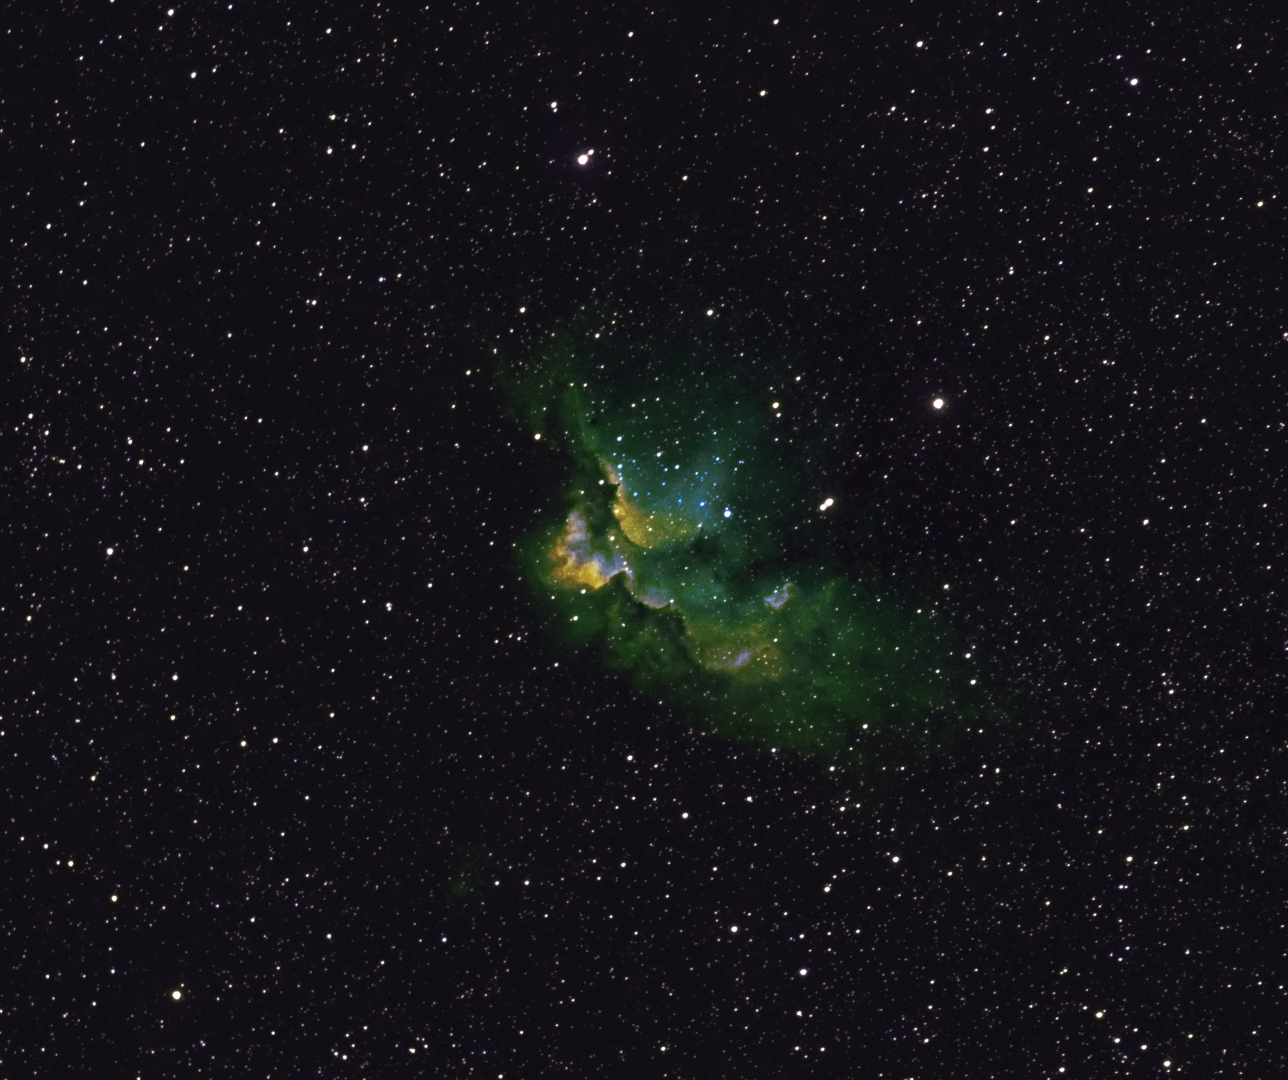
From May until late July the absence of Astronomical darkness makes astronomy difficult and frankly having progressed from the time of being a beginner, it is quite refreshing to take a break.  Therefore it was only after an evening viewing the partial eclipse on 16th July and a brief experiment with the Wizzard Nebula (something for the future) at the beginning of August, that much later I returned to astrophotography seriously.

SHO2SCcrop (Large)

Having messed up imaging the Soul Nebula with poor framing in 2018 and being at the Shed Observatory, I decided to re-image the Soul properly, together with some of the adjacent sky in order to combine the new data with last year’s adjacent Heart Nebula to form a mosaic of both objects.  I don’t know why but this was my first attempt at a mosaic.  Only very recently has integrated software for mosaic planning combining  Cartes de Ciel and Astrophotography Tool for image capture has been released.  However, on this occasion I planned and implemented the said mosaic imaging manually, with a satisfying outcome (see Favourite Images section) but with the new software now available I hope to embark on more extensive mosaic projects in the near future.

This year’s astrophotography has followed two themes, the aforementioned ‘less is more’ with the aim of producing better images using much greater integration times.  The second has been largely determined by chance, being the discovery of new objects that had hitherto either been unknown to me or considered to be out of view from Fairvale Observatory; the combination of my house, very high hedges + trees and adjacent houses obscures large swathes of the night sky.  Earlier in the year such chance had led me to the M101 and M51 galaxies and in the autumn it was first the iconic Pacman Nebula and then an exciting area of Cygnus constellation.

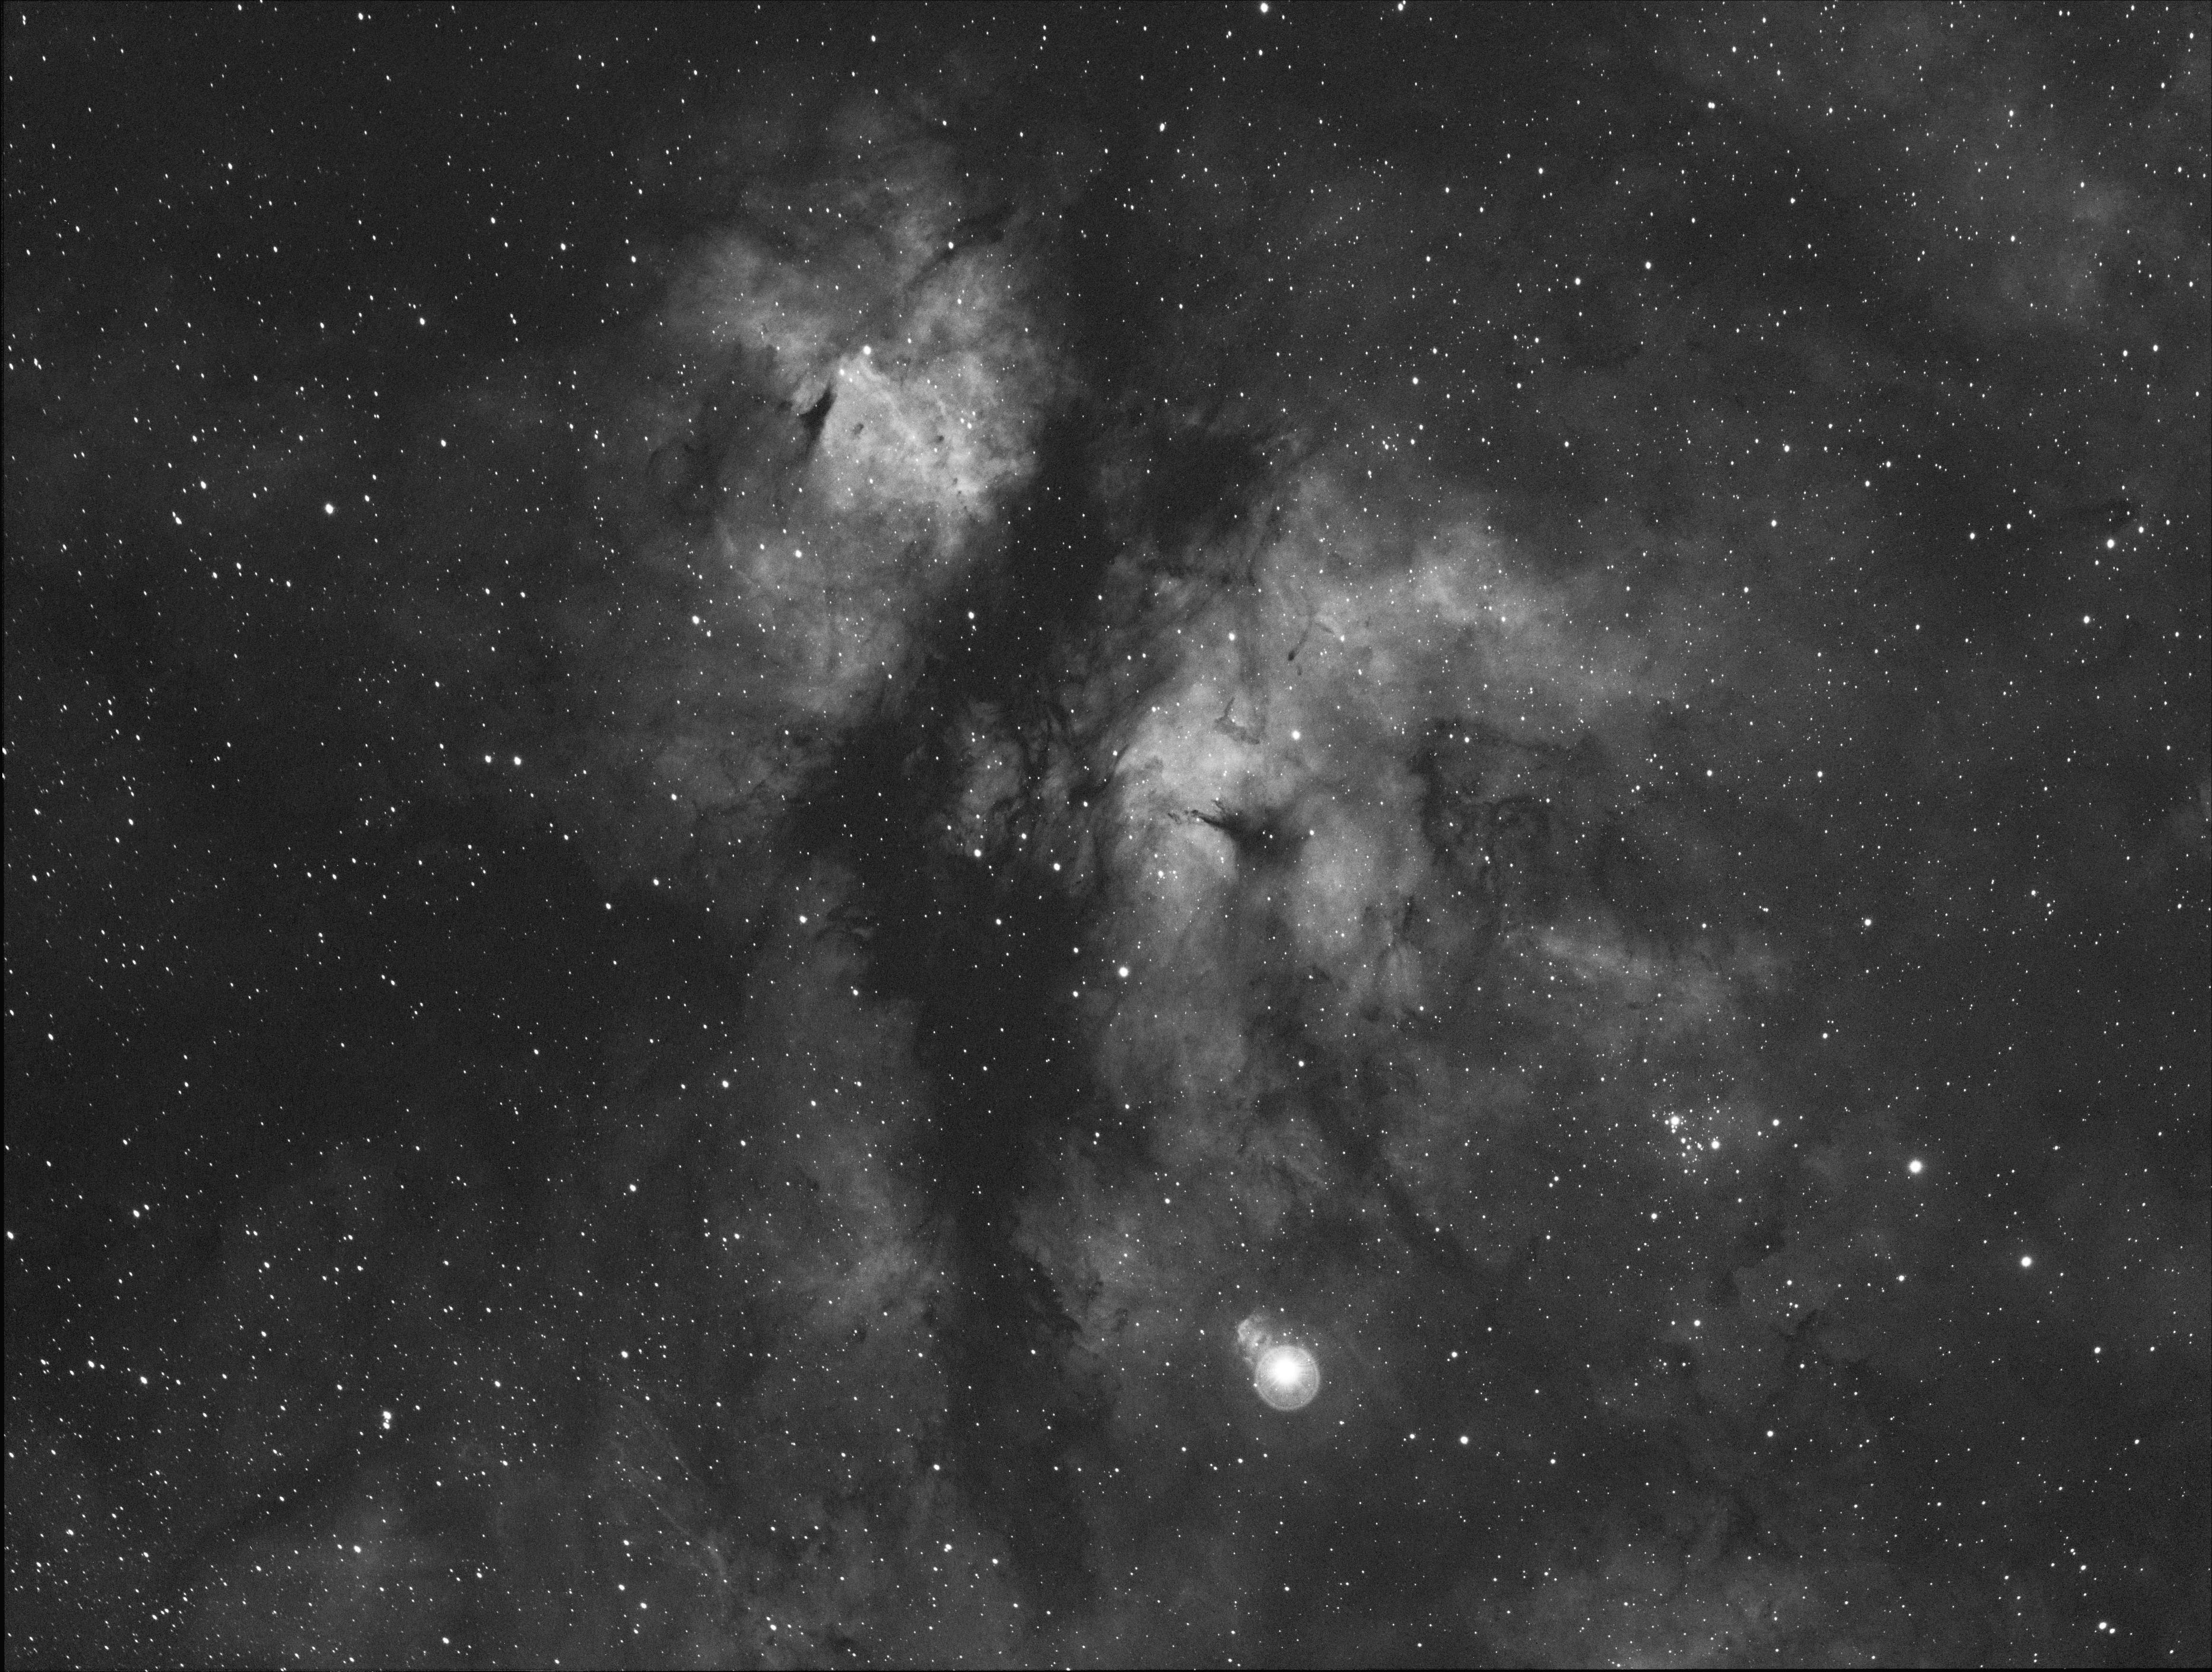
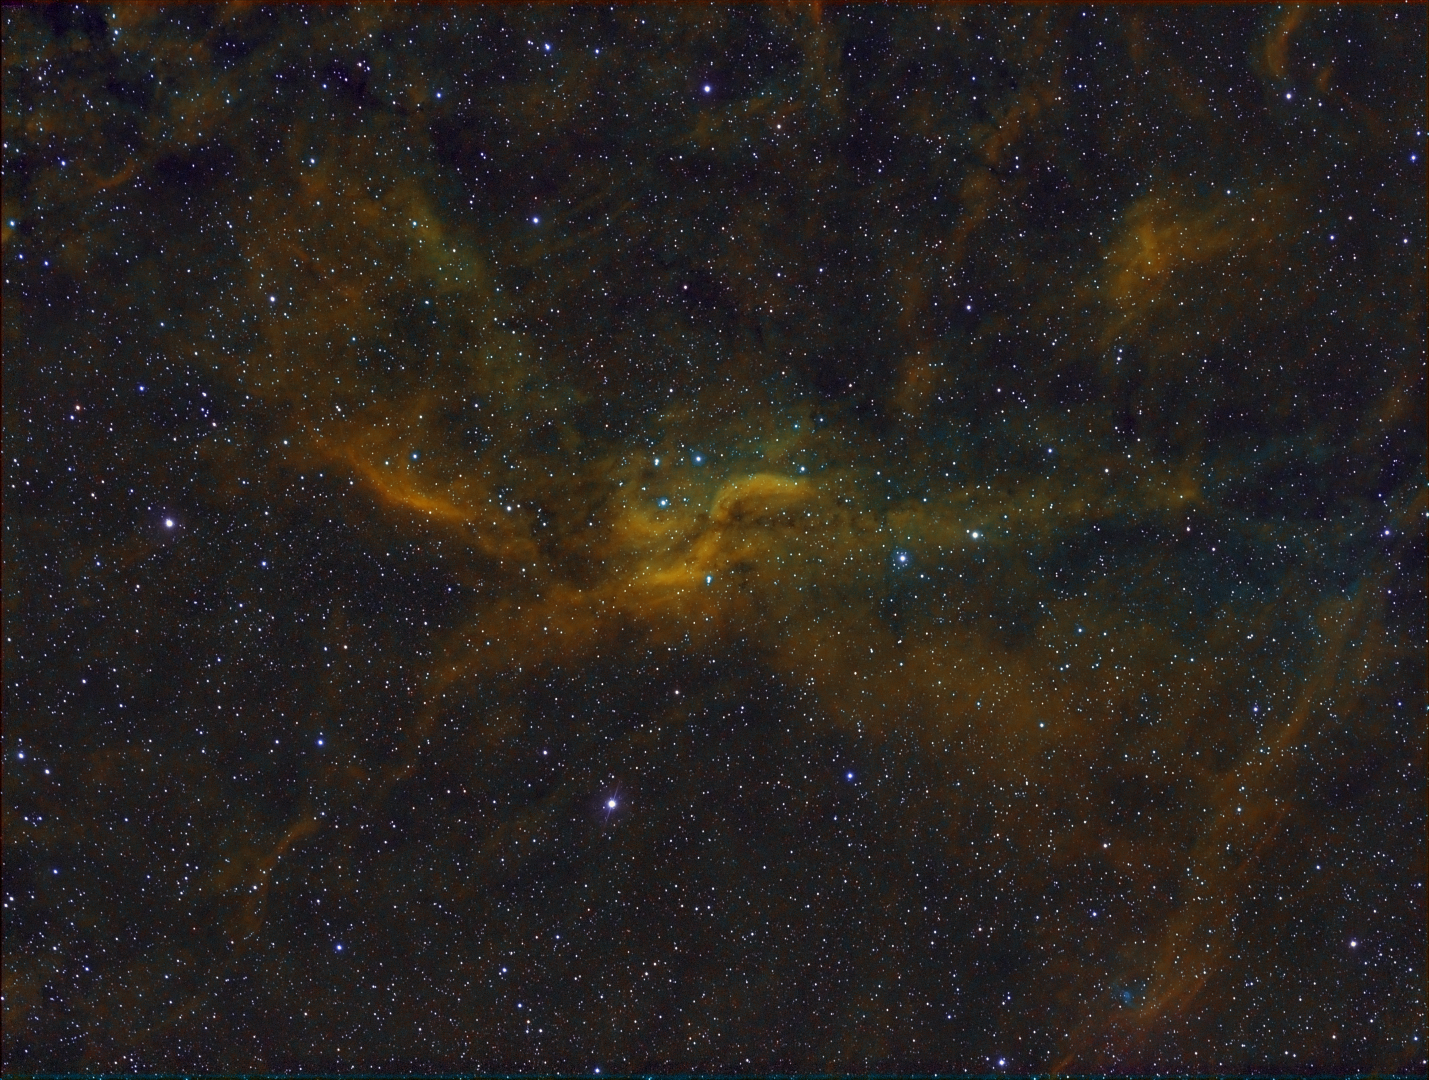
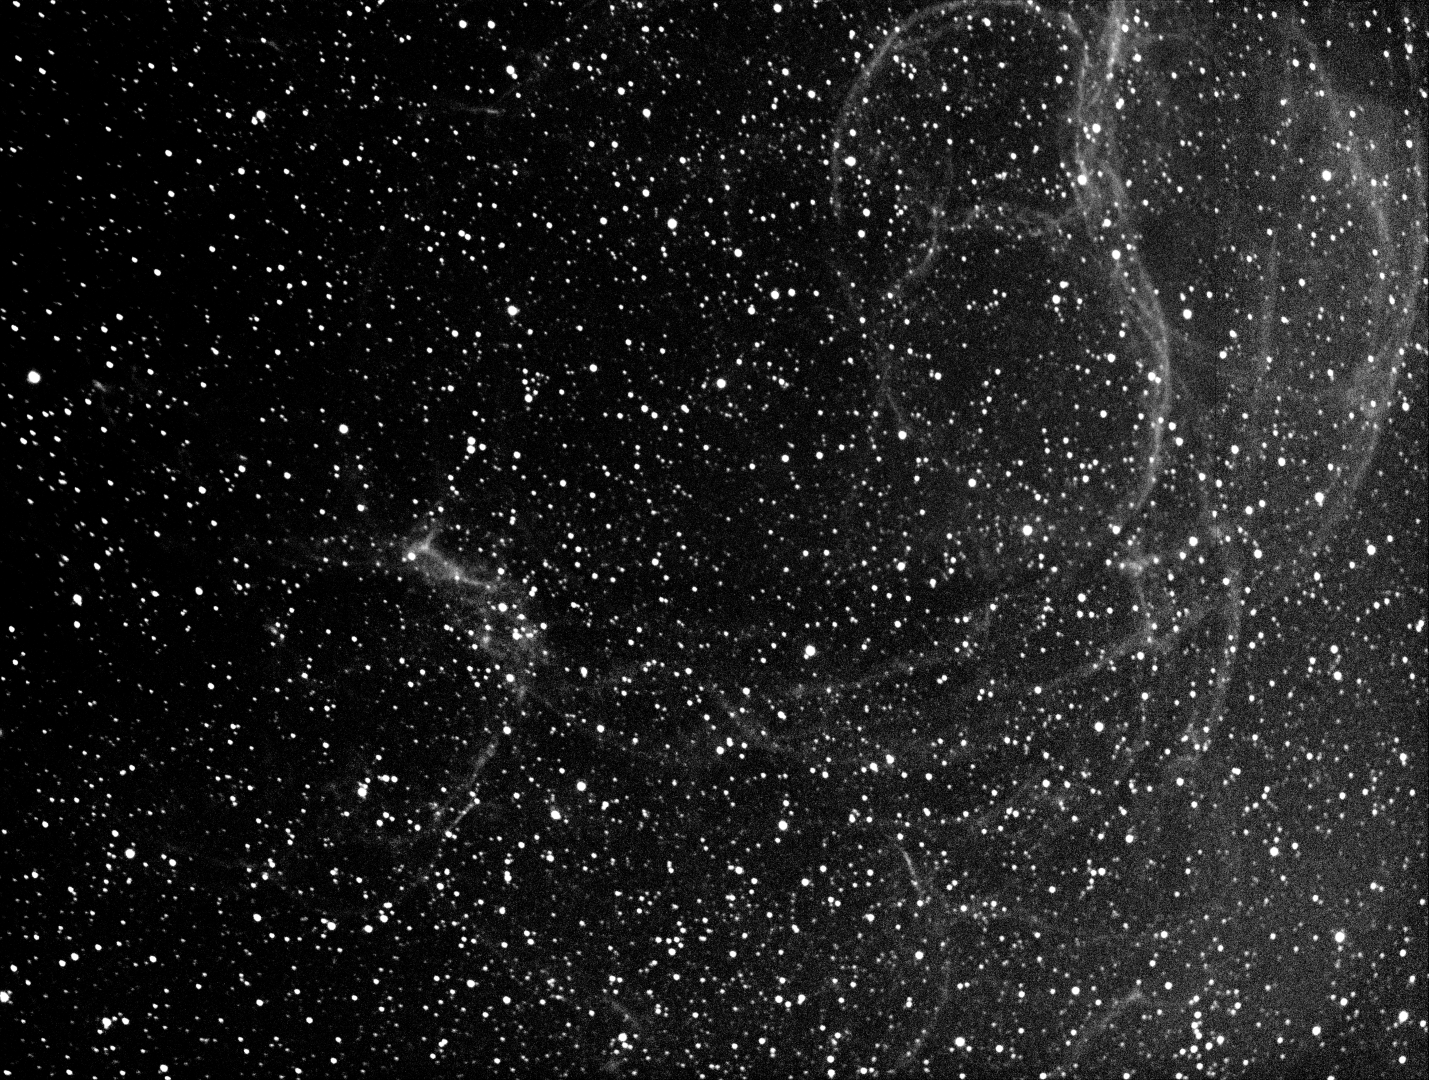
Pacman is not particularly large for my equipment but nevertheless produced a decent narrowband image, my last from the Shed Observatory for this year.  Not until late September did the clouds again relent for my next project that initially seemed something of a long shot but actually turned out very well.  The Propeller Nebula is located in a vast HII region of the Cygnus Constellation, which from my point-of-view was a complete surprise.  At some 25 arc seconds the nebula is again on the small side for my equipment but the complexity of the adjacent HII region transforms the wider image into something really spectacular (SHO version below), which I certainly intend to visit again next year to build on the current data and explore further afield the HII region which presents exciting possibilities.

SHO F HLVG (Large)

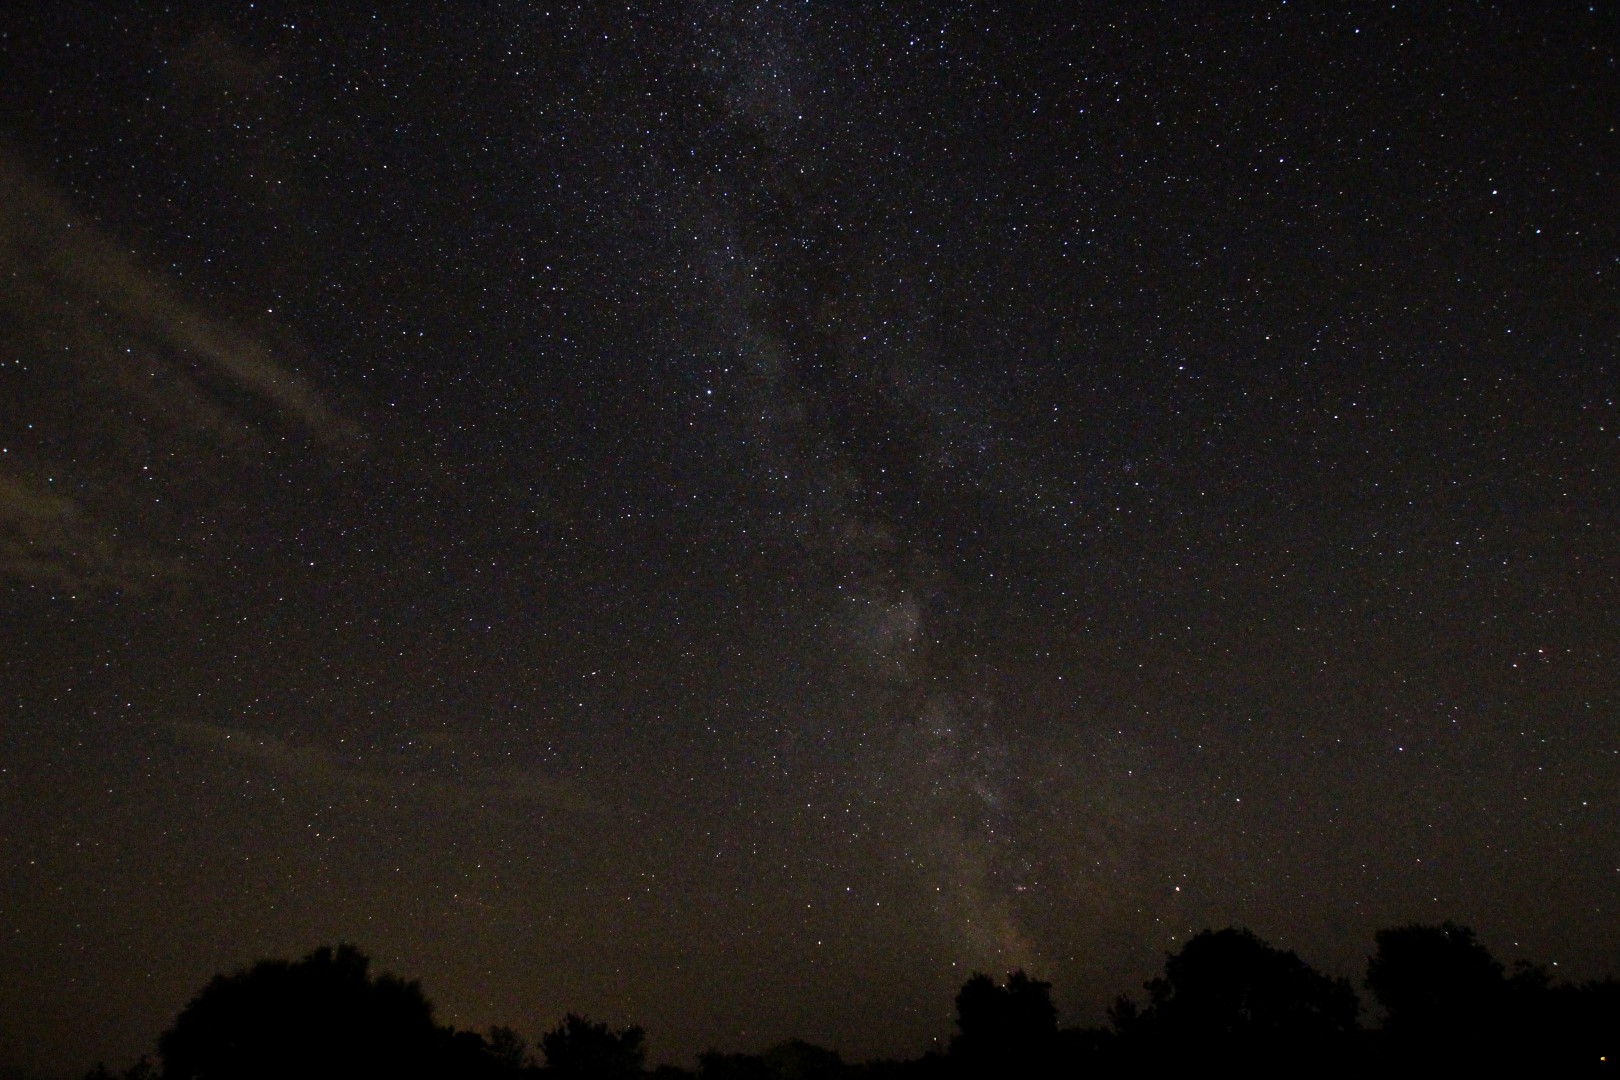
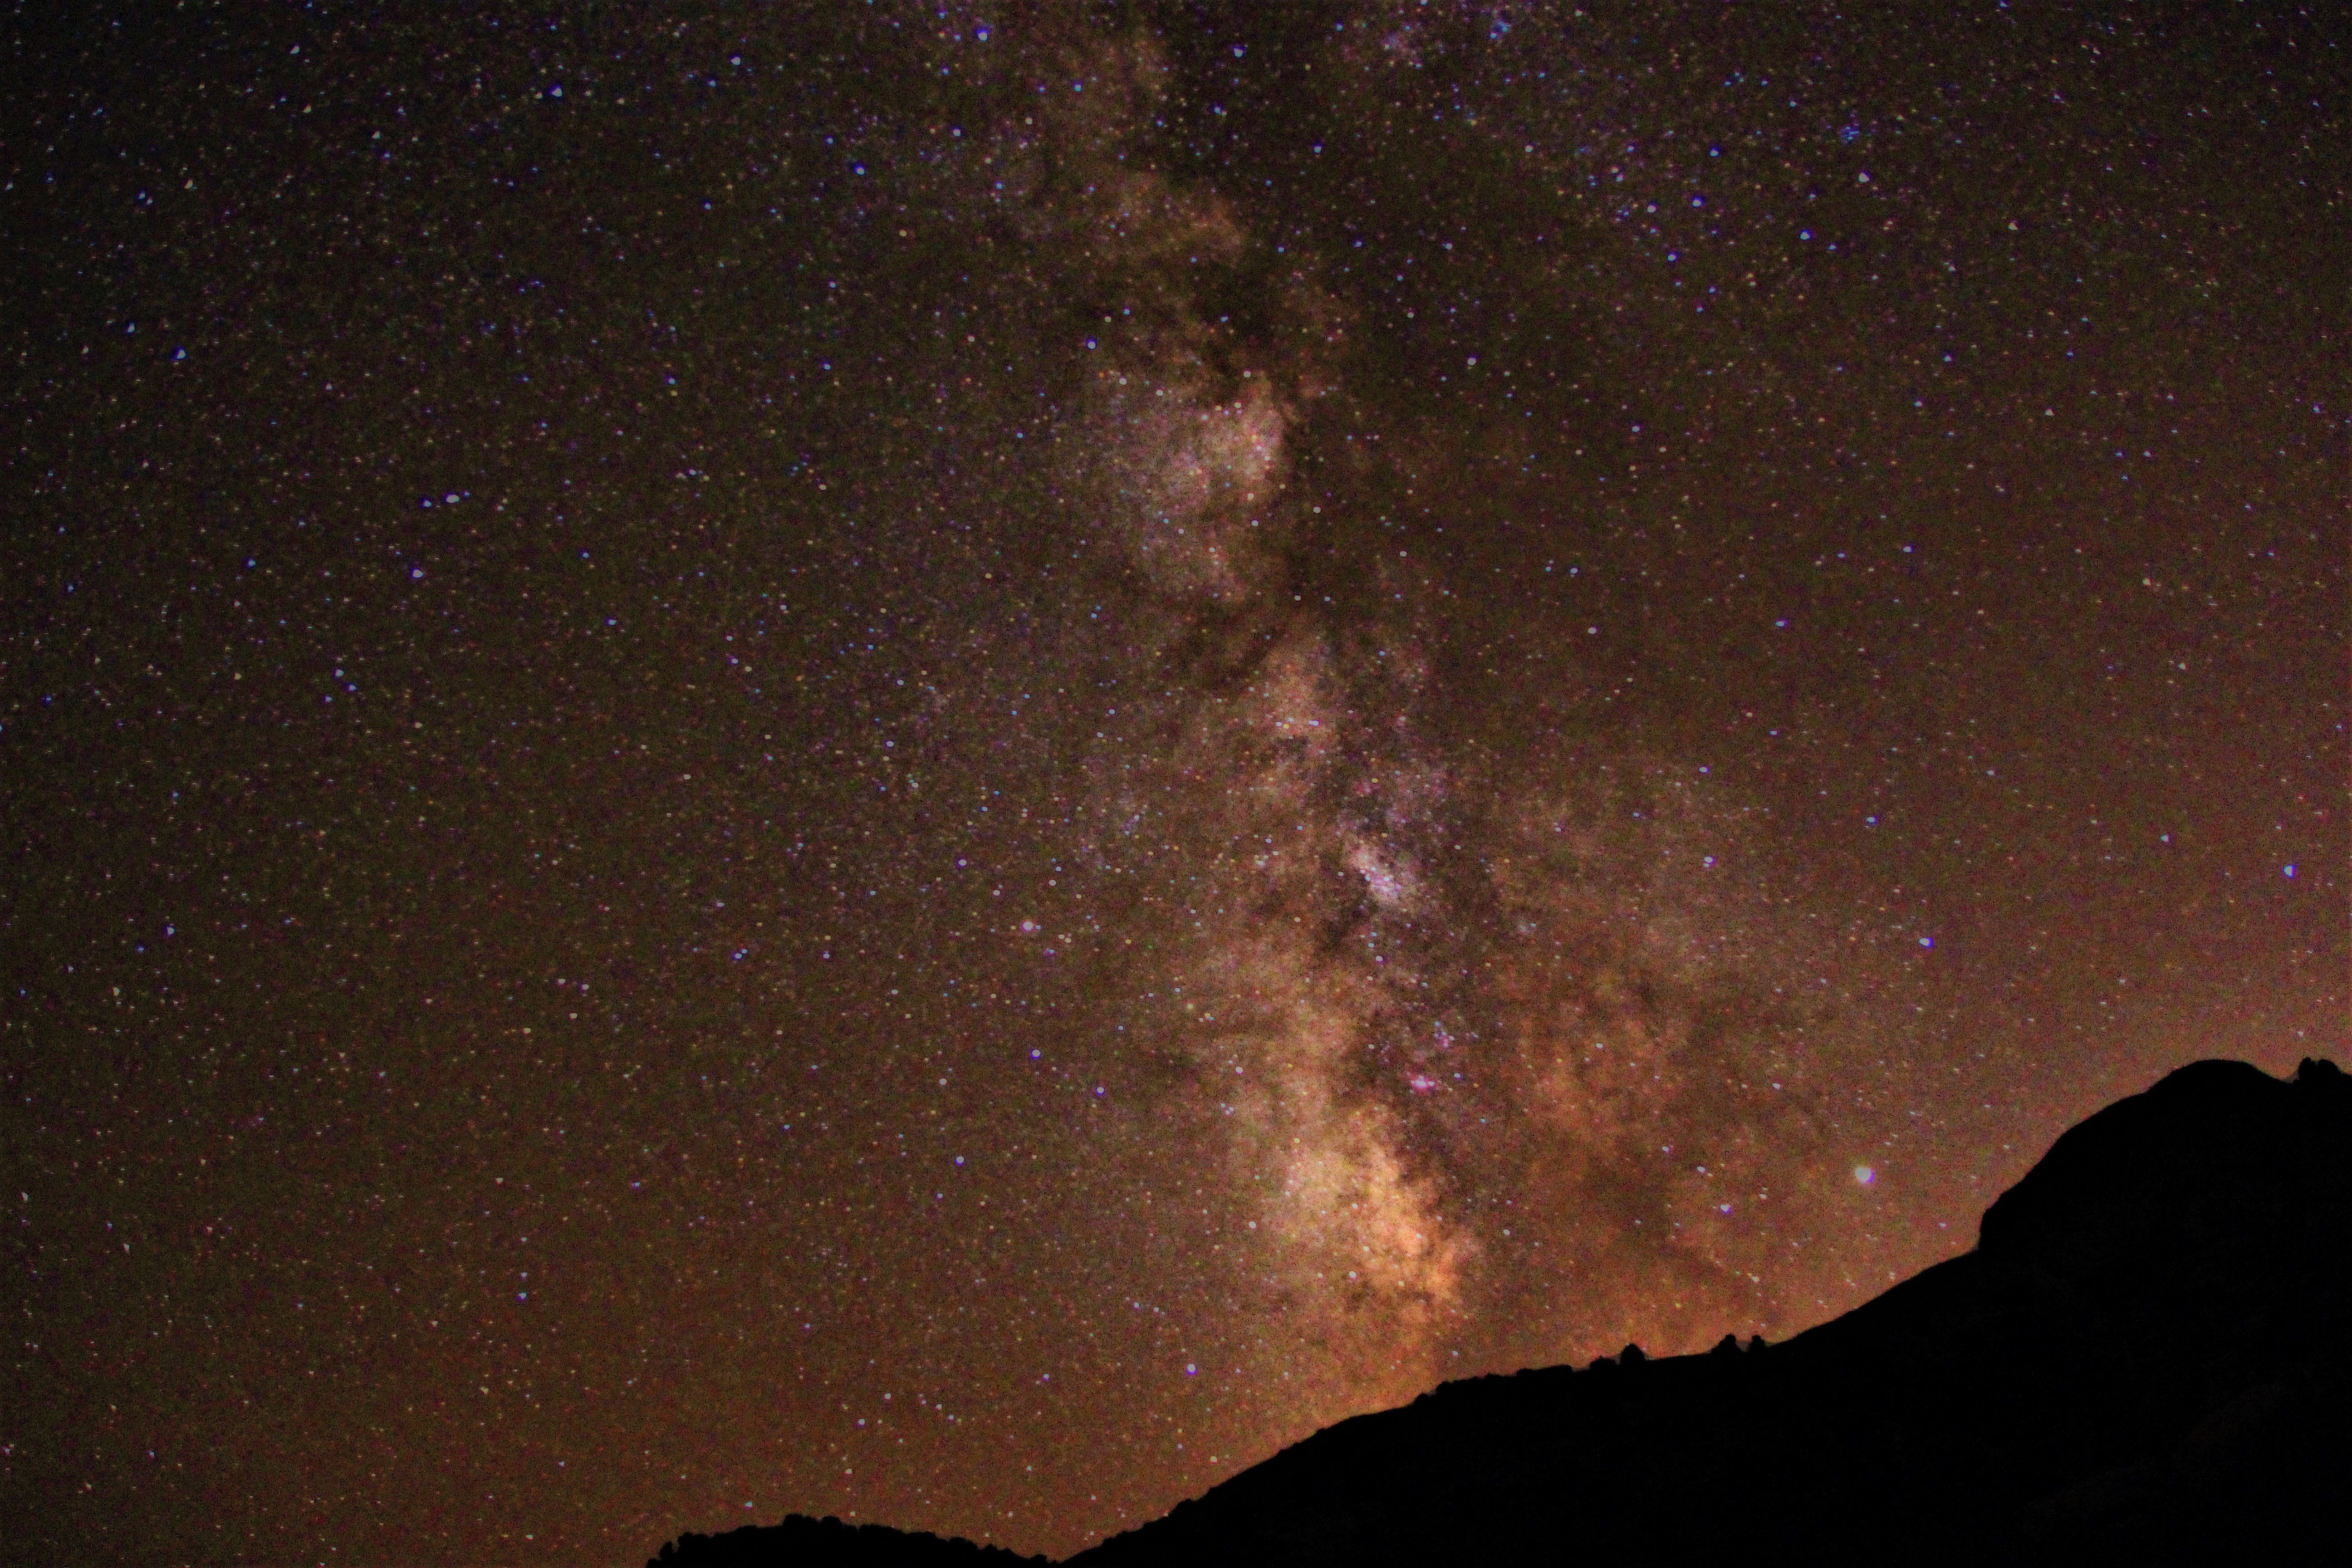
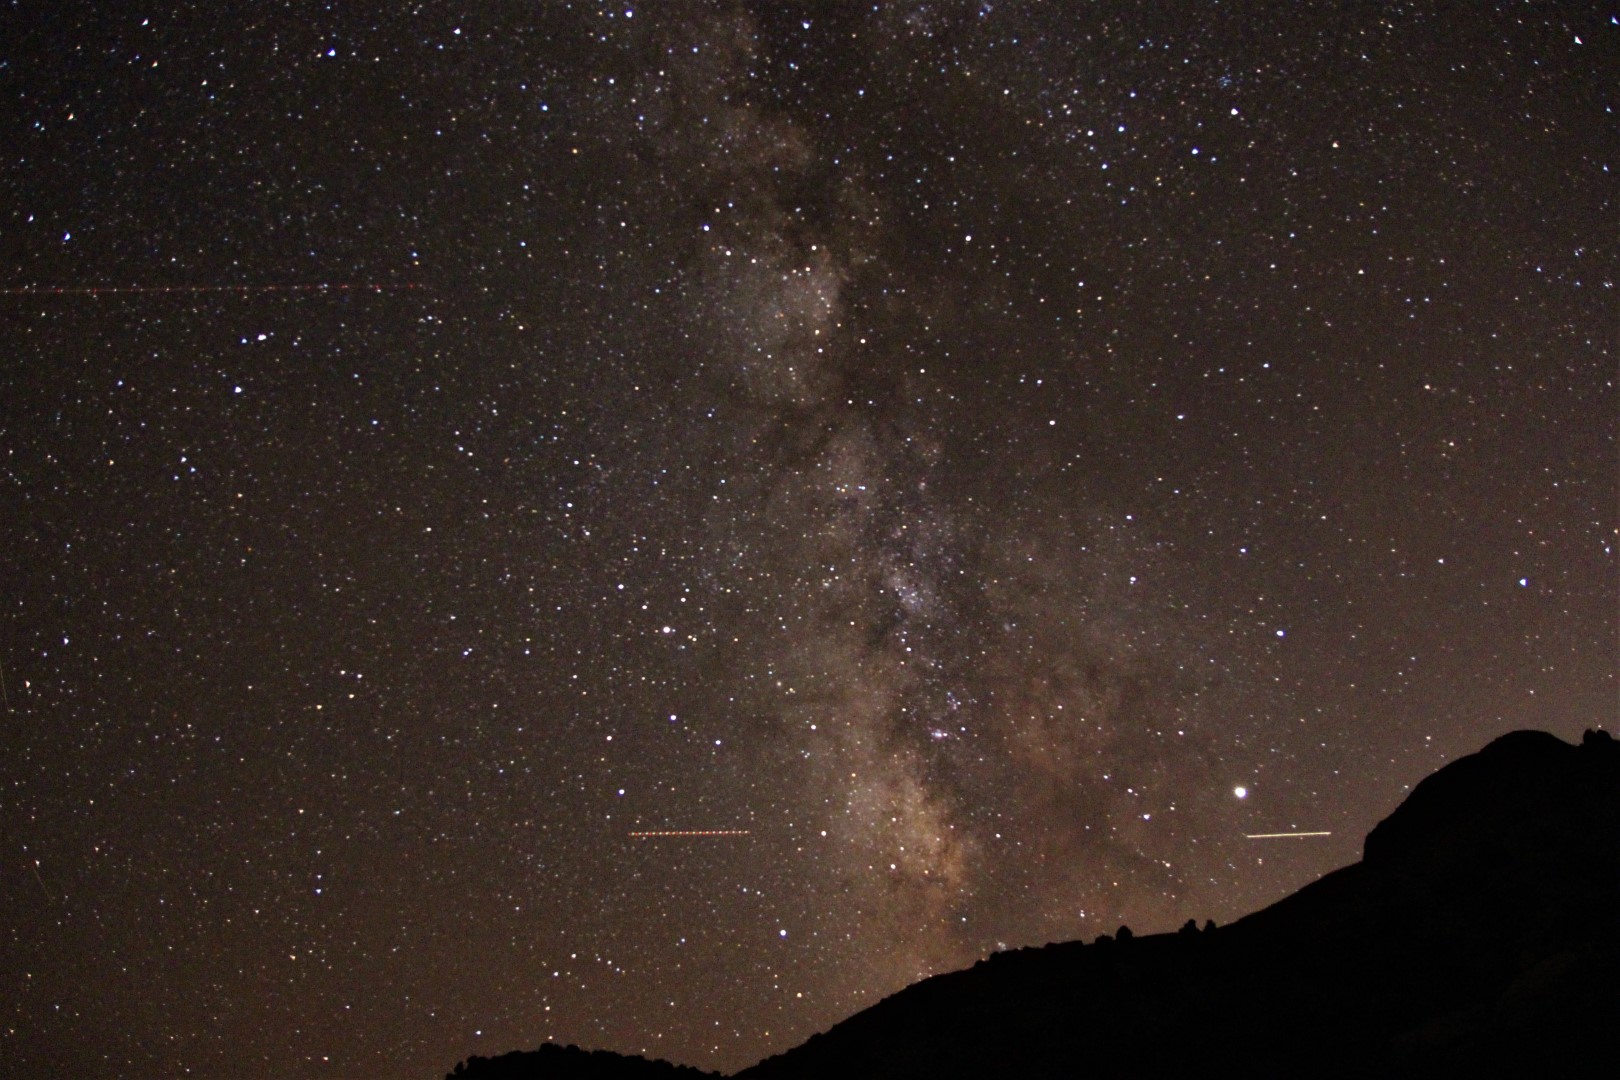
A subsequent long trip to the USA stopped all astronomy in Surrey but a couple of evenings out in Wyoming and Utah produced some incredible dark skies and DSLR Milky Way images (see below).  Despite the remoteness of Spilt Mountain in the UTAH section of the Dinosaur National Monument – designated a Dark Sky Area – whilst imaging at 20 second exposures only one-in-ten images were without a plane track, very sad.

IMG_2345 ComboX

OCTOBER TO DECEMBER

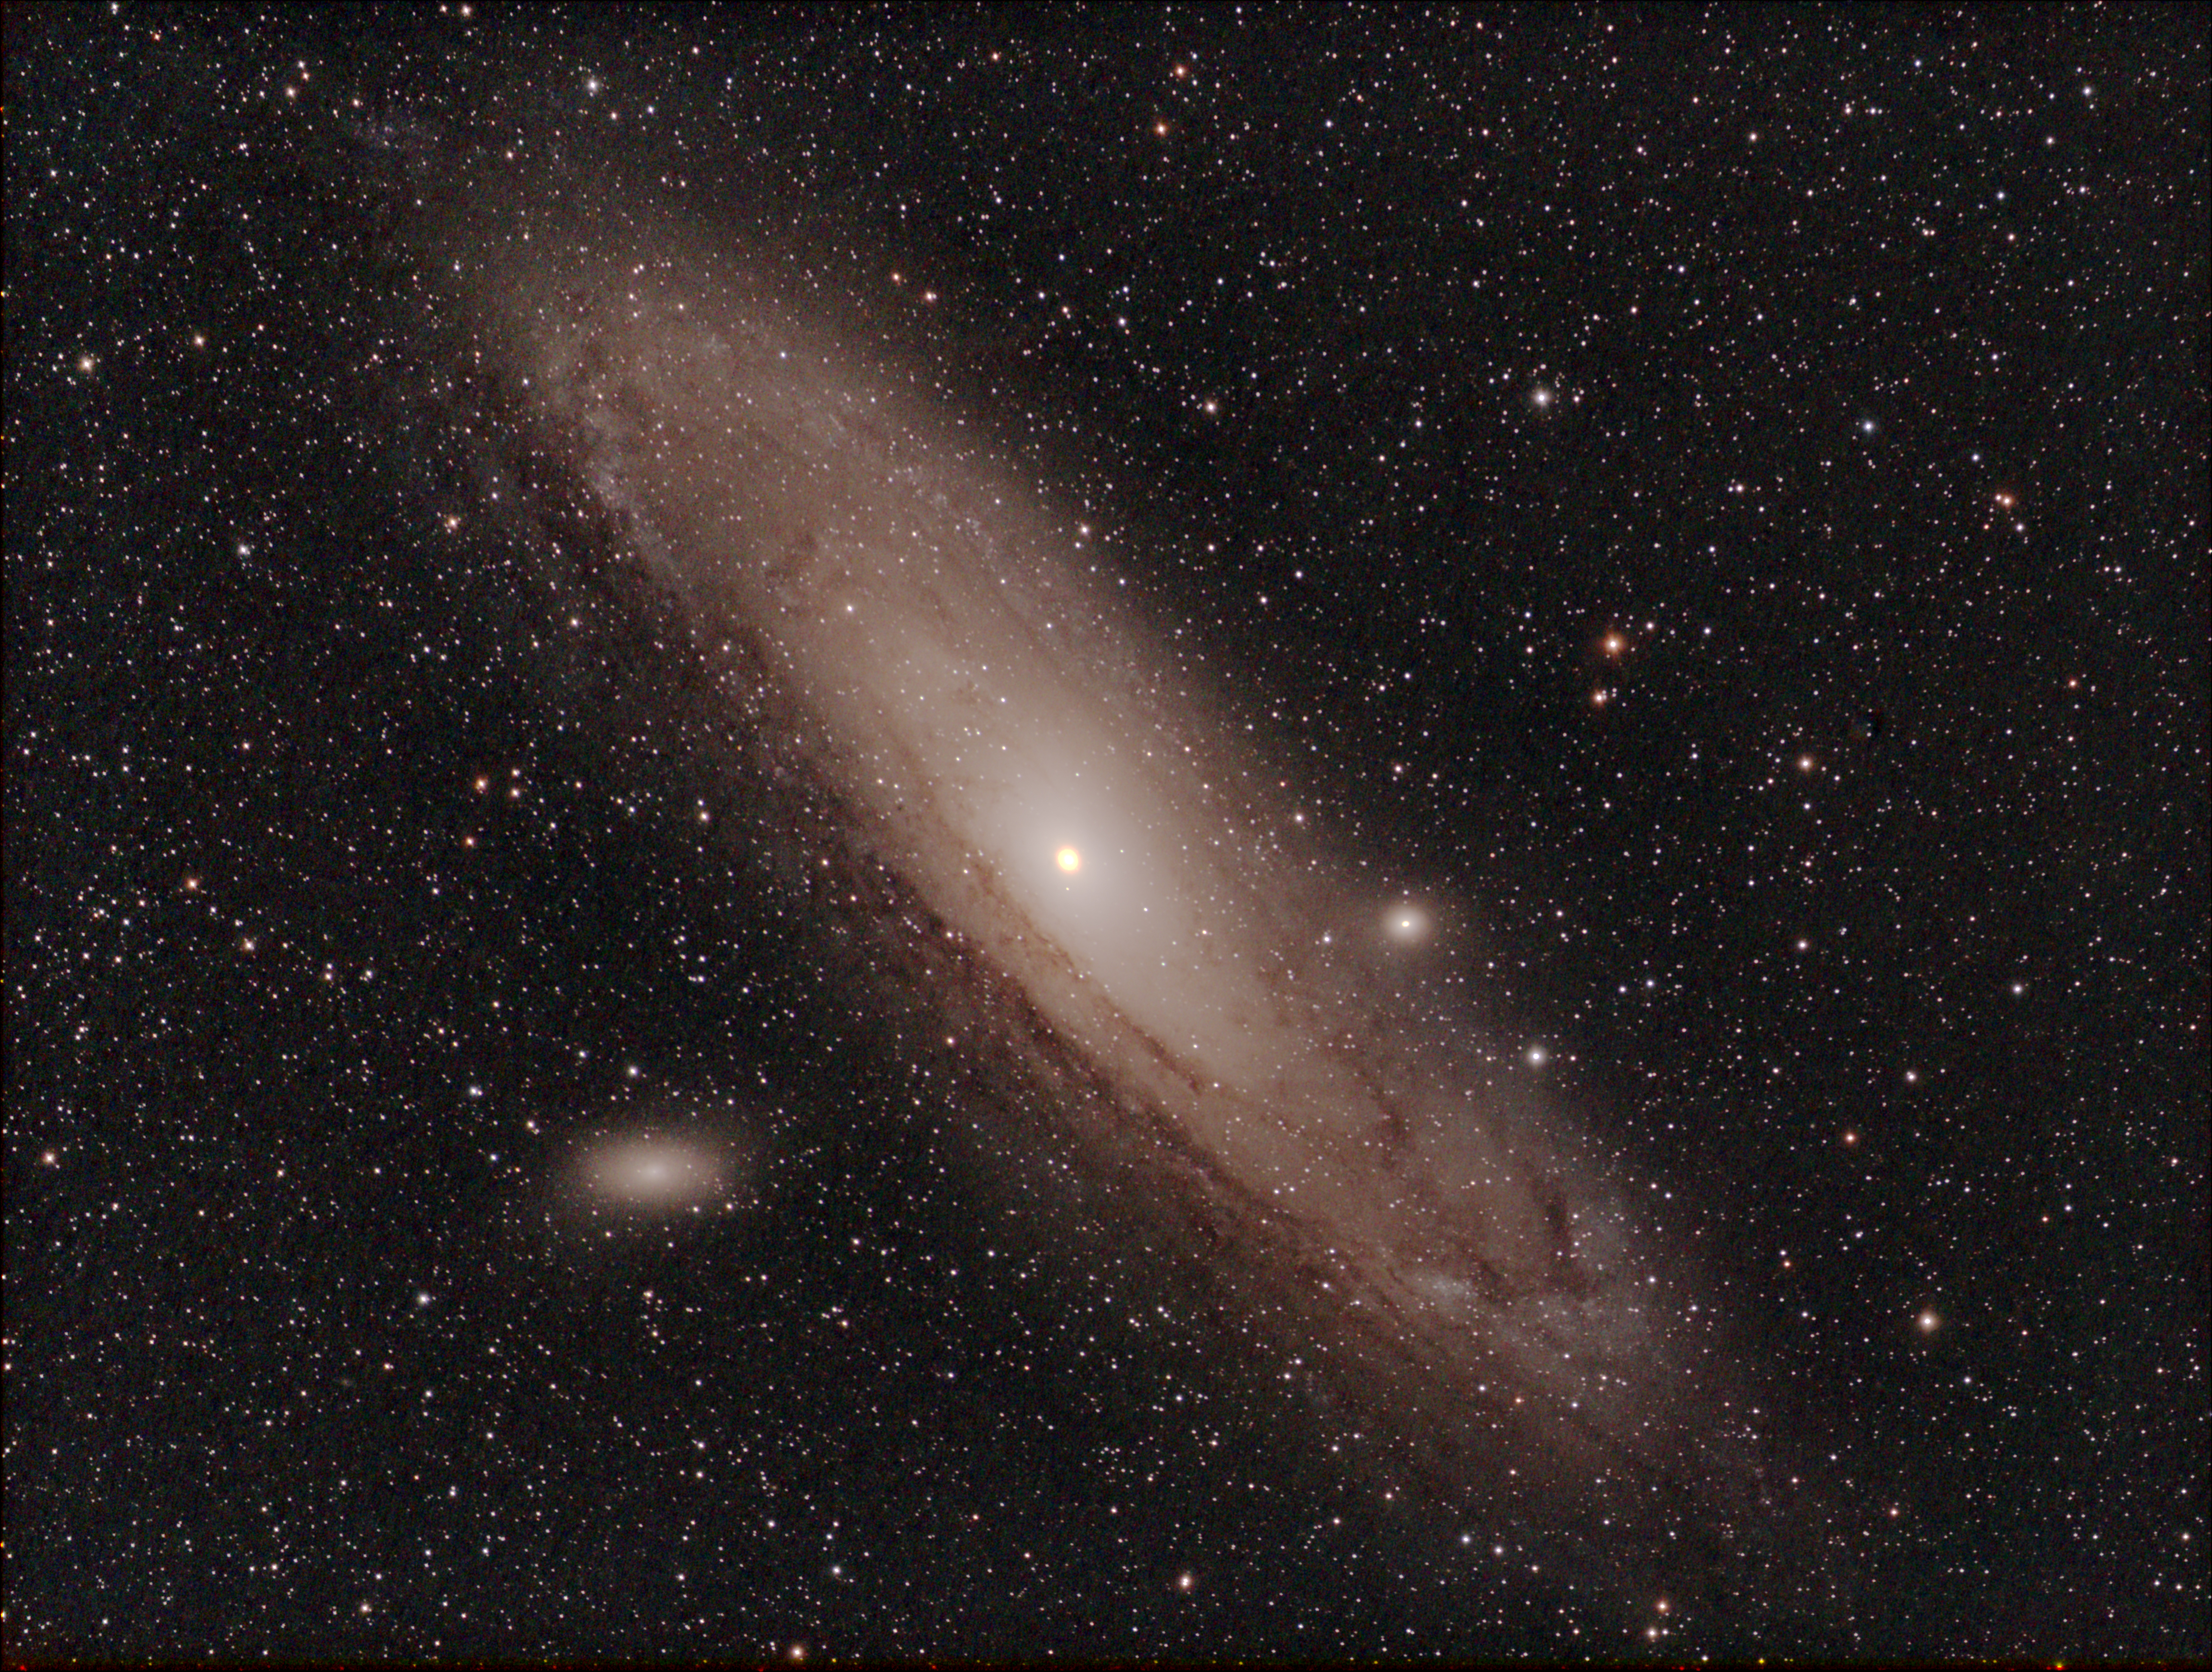
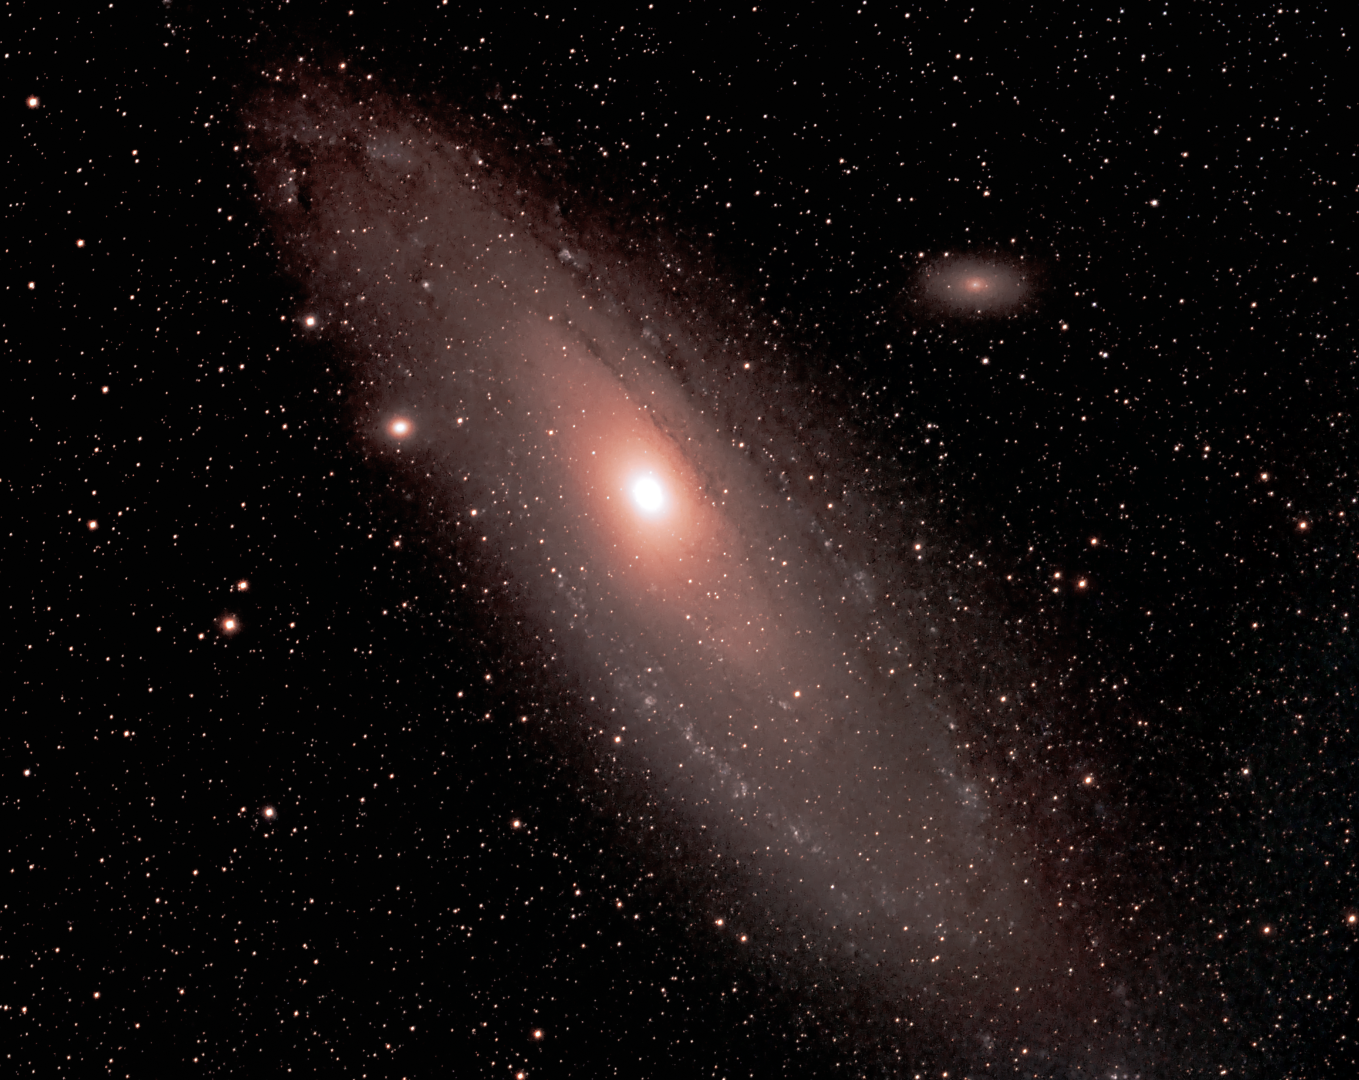
Prior to the arrival of Orion and other fun objects of the mid-winter night skies, imaging opportunities are sparse with my equipment but it’s been a couple of years since I last imaged M31 the Andromeda Galaxy and therefore for two evenings in late October it was time to give our neighbour the extended integration treatment.  At 7½ hours data acquisition went well but although the processed image is probably my best yet of this object, there’s room for improvement, which I suspect will require a move to more advanced processing software?

HaLRGBx5b (Large)

ASTROMINAGING RECORD 2019

No Date Type Object Name
       
1 21/01/19 DSLR Full Lunar Eclipse  
       
2 27/01/19* NB  Barnard-33 &

 NGC 2024

Horsehead & Flame Nebula
       
3 23/02/19* Combo M42 Great Orion Nebula
       
4 25/02/19* Combo M78 Reflection Nebula Orion
       
5 12/03/19 BB NGC443/444 Jellyfish Nebula
       
6 24/03/19 Combo M95/96/105 Leo-1 Group
       
7 29/03/19* Combo M101 Pinwheel Galaxy
       
8 10/04/19 Combo M51 Whirlpool Galaxy
       
9 13/04/19 BB M81 & m82 Bodes & Cigar Galaxies
       
10 16/07/19 DSLR Partial Lunar Eclipse  
       
11 02/08/19 NB NGC 7380 Wizzard Nebula
       
12 23/08/19* BB IC 1848 Soul Nebula +

Mosaic Link

       
13 26/08/19 NB NGC 281 PacMan Nebula
       
14 05/09/19* NB DWB 111 Propeller Nebula
       
15 Sept DSLR Milky Way Split Mountain Utah
       
16 22/10/19* Combo M31 Andromeda Galaxy
       
17 18/11/19 BB M74 Galaxy
       
18 18/11/18 NB SH2-240 Spaghetti Nebula
       

*multiple evenings        Combo = HaLRGB       Underlined = BAA published

POSTSCRIPT

The ones that got away – imaged but not seen in WTSM this year – warts and all

RHB_2ajelly (Medium)

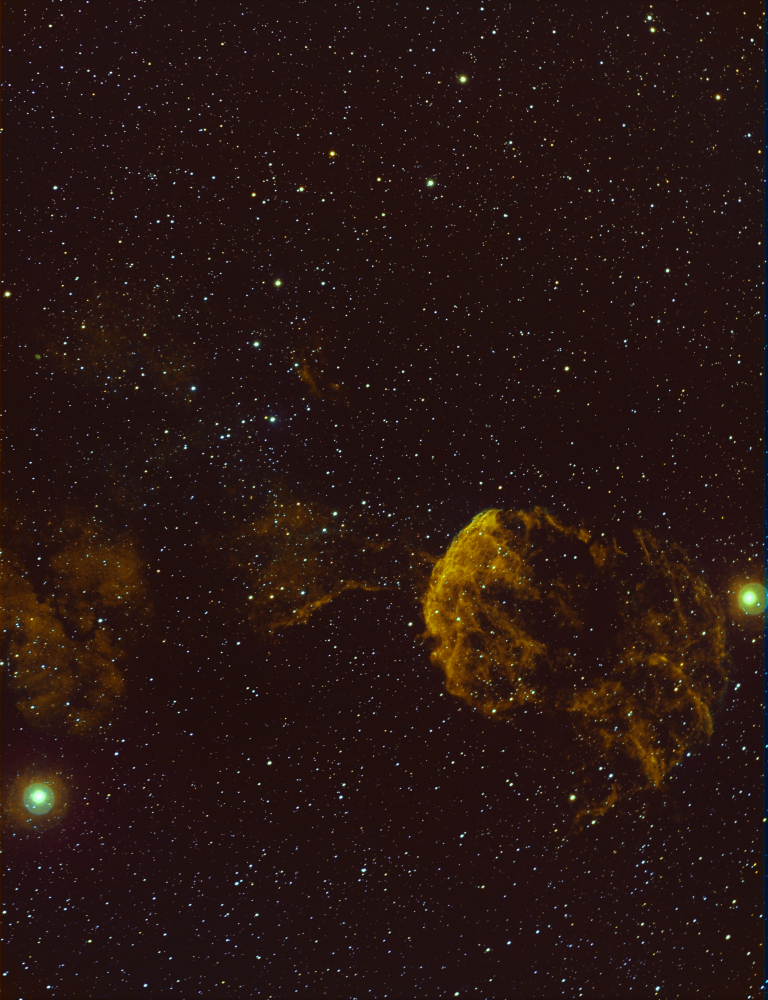
I saw some wonderful narrowband versions of the supernova remnant IC 443 Jellyfish Nebula this year, in particular adopting a wider view to incoporate its sentinel-like parner stars Tejat (Mu Geminorum) left and the tripple star Propus (Eta Geminorum) right, together with the reflection nebula IC 444 in the background.  As an experiment I think it may hold promise but will require a lot more integration time to improve the quality, colour and bring out more of IC 444.

M95_96_105 (Medium)

I’ve tried the Leo-1 group (M95/96/105) before but, as they say, if you don’t succeed try again.  Unfortunately the passage of time didn’t help – I need a larger telescope to do these critters justice! 

IMG_2336 (Large)

Dinosaur National Monument – Split Mountain, Utah.  Even at this wonderfully remote location, which is one of the darkest places in the USA, passing planes still get in the way of a good image – just like at Fairvale Observatory

M74 LRGBx (Medium)

At <=10 arc minutes the spiral galaxy M74 is too much for my equipment.

SH2-240 AB combined Ha Stretch (Large)

Located between the constellations Auriga and Gemini, SH2-240, Simeis 147 AKA the Spaghetti Nebula is a very large (+3 degrees) supernova remnant but it’s very low brightness makes imaging extremely difficult.  In fact prior to and during capture in Ha-wavelength, I had no idea if it was even within the image frame.  Aggressive stretching shows that it was there but only much darker skies and probably longer exposure time is likely to produce a more viable picture. 


Howling Wolf

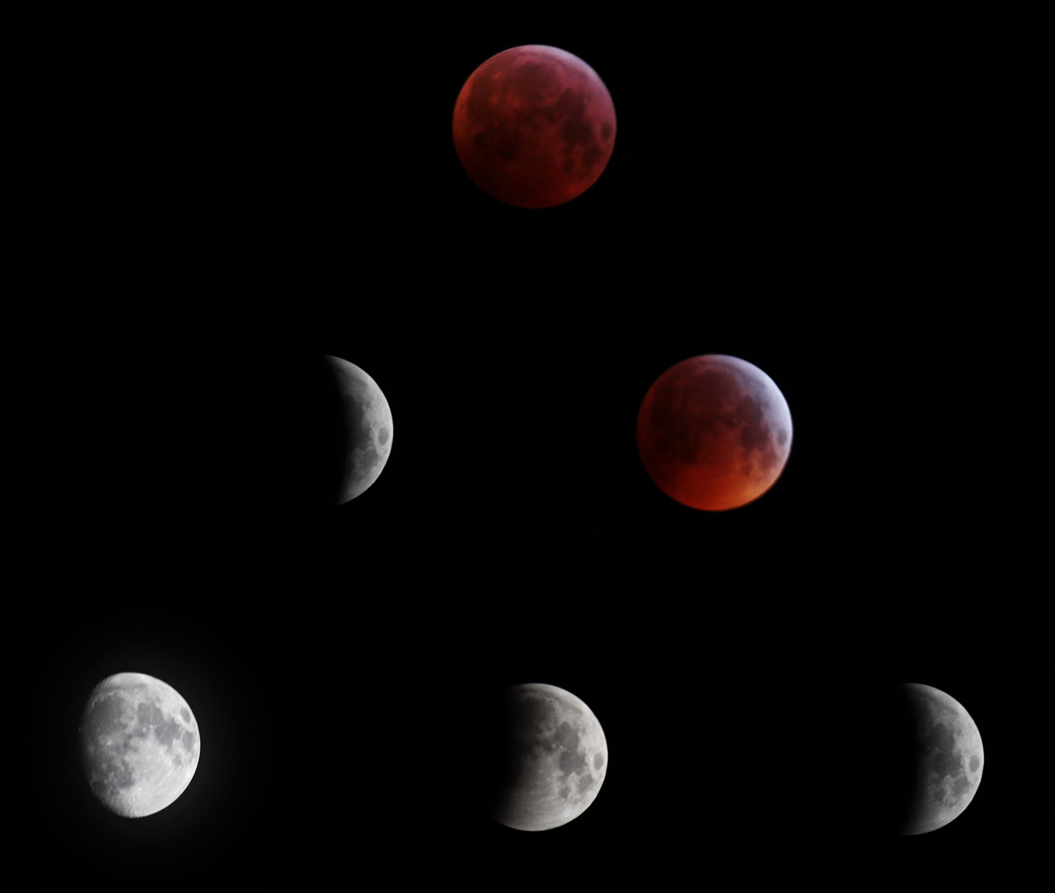
lunar eclipse mosaic 210119x

I have a theory that at or about the time of each full moon the night sky is almost always clear, I don’t have the data but it just seems that way most of the time.  As an astrophotographer I am more than usually aware of the full moon as it makes all except narrowband imaging impossible, when it floods the night sky with its brilliant white light.  Apart from a brief and somewhat futile attempt on 14th December – the Moon and mixed cloud curtailed imaging on that occasion – my last astronomy at Fairvale Observatory was on the 17th October, thereafter being plagued by persistent cloud and bad weather; after a promising start at Les Granges Observatory in early November no further astronomy was possible during the rest of the week due to cloud and poor weather conditions.  I’m beginning to think I need a new hobby, one that is not weather dependent at least!

Given the disappointing lack of astronomy conditions I paid little attention to the upcoming lunar eclipse on the early morning of 21st January.  However, as the day approached various weather forecasts were inevitably mixed but at least two out of five held some promise of clear skies during part of the eclipse.  I therefore started to at least undertake some preliminary planning, only to discover that much of the eclipse might be obscured by houses and tall trees to the west of my location; Plan-B was to travel to nearby Reigate Priory Park which has a decent westerly outlook closer to the horizon.

As it turned out on the 20th a clear, sunny but cold and clear day preceded a clear evening and at about 3 a.m. on the 21st shortly before the action was due to start, the sky was still clear, thankfully proving my theory correct on this occasion.  Furthermore, my concerns over obscured views turned out to be mostly unfounded, with the Moon higher in the sky than envisaged and good sightlines up until the end of totality, at which time the cloud eventually rolled in anyway.  As a result I was able to enjoy over two hours viewing and imaging time, which encompassed the entire penumbral and totality stages of the eclipse.

Having obtained excellent images of the last lunar eclipse on 28th September 2015, tracking with a DSRL and the William Optics GT81 + another static, tripod fitted DSLR and 250mm zoom lens, this time I decided to adopt a different, more mobile set-up, in case Plan-B was necessary.  In 2017 I purchased a Canon 300mm f/4 L-Series telephoto lens to use for astronomy and wildlife photography.  The Canon’s Series-L lenses are a high quality, professional line especially made for APS-C cameras such as the 700D.  With no less than 15 lens elements and a fixed focal length, the picture quality for terrestrial imaging is fantastic, further assisted by a very accurate and quite image stabilizer.

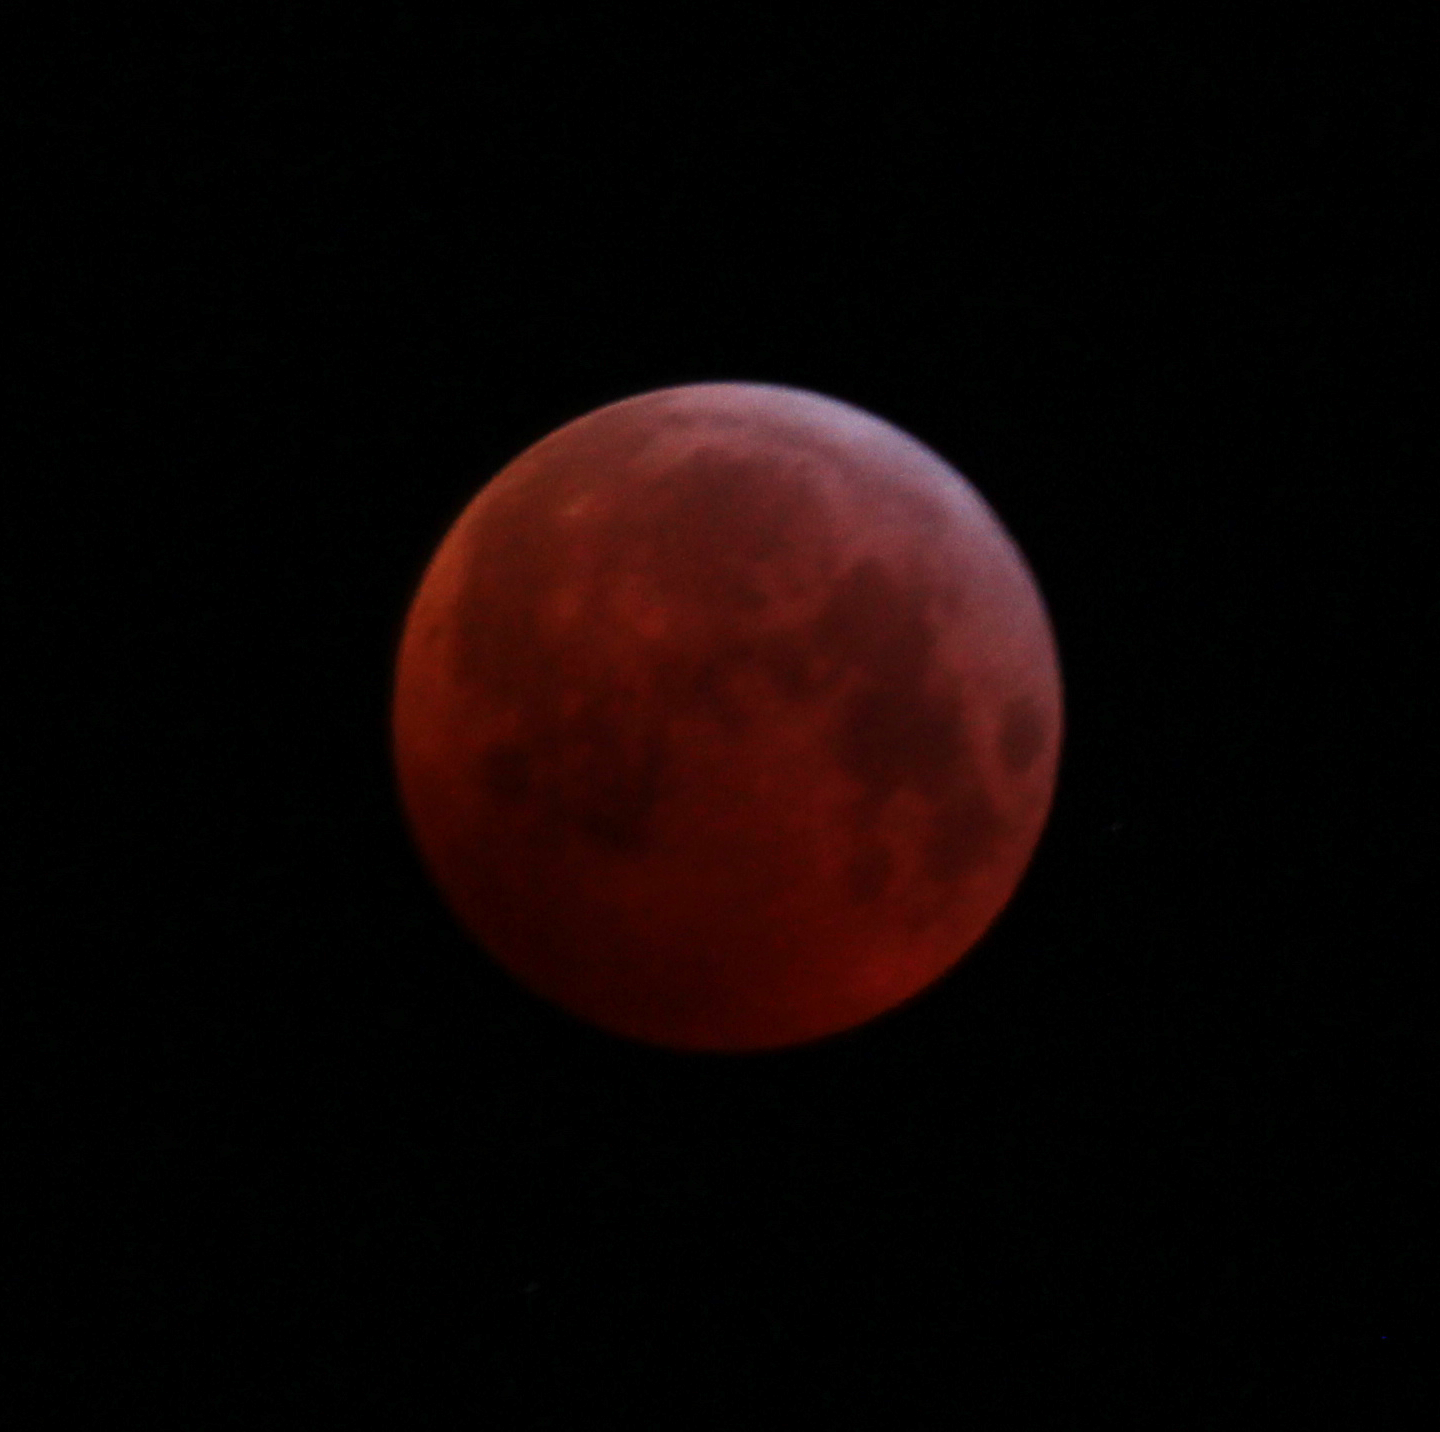
This time I mounted the lens directly onto the tripod, with the camera further back so as to provide good balance between the two components.  As the autofocus and IS functions cannot be used in a dark sky for astrophotography, focus can be tricky and a compromise is required between the aperture setting for sharpness and a low ISO for quality.  As I discovered last time, the light quality diminishes significantly whilst the eclipse progresses across the face of the Moon and the aforesaid settings need to be constantly adjusted to compensate, especially during totality.  In the end I was pleased with the outcome of imaging the so-called Super Blood Wolf Moon (see mosaic above and image below).

img_1235x

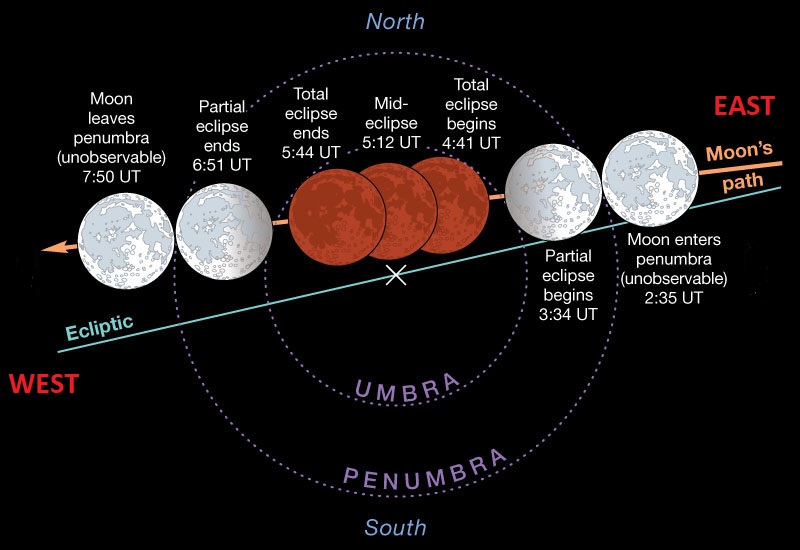
As pleasing as imaging the eclipse is, like a solar eclipse viewing is an entirely different experience.  It is a pleasure to just watch the whole phenomena play out but the dramatic changes of light also has a profound effect on both the night sky itself and, in particular, the very nature of the Moon as perceived by the naked eye. On a clear night the full moon floods the night sky with its very bright light, thereby effectively hiding all but the very brightest of stars from view.  As the penumbral stage progresses (see diagram below) for about an hour the dark night sky is slowly revealed in all its glory, it’s as if someone has pulled the curtains and a new world has appeared.

total-lunar-eclipse-jan-2019-plot

Furthermore, as the moon darkens and eventually enters totality it takes on a completely different and eerie feeling, as well as a red hue caused by Raleigh scattering.  As is often the case with astrophotography the camera sensor is able to capture much greater colour and detail than the naked eye can see, thus producing beautiful images of one of nature’s best shows.  However, to the naked eye the moon takes on a different, somewhat strange nature during totality – something of a 3D effect occurs as it seems to float in the night sky like a big red balloon – something that an image cannot ever capture, making the night time adventure more exciting and worth all the effort.

Lunar eclipses are not that rare but we now have to wait 10-years for the next one in the UK which will take place on 20th December 2029, with or without cloud!

IMAGING DETAILS
Object Lunar eclipse – Super Blood Wolf Moon
Distance <238,000 miles (30,000 miles closer than usual)
Size 31’or 1/2o  
Apparent Magnitude -12.74  @ mean full moon
 
Scope / Lens  Canon L-Series 300mm f/4
Mount Manfrotto tripod
Camera Canon 700D  
Capture & Processing Manual, Photoshop CS3- Extended
Exposures x50:  Penumbral f/8   1/125’   ISO 100     Totality f/5.6  0.80’   ISO 400    
    
Location & Darkness Fairvale Observatory – Redhill – Surrey – UK        Typically Bortle 5
Date & Time 21st January 2019 @ approx. 03.30h  
Weather <= 1oC   RH <=95%                  🌙   Eclipse

Heart Of Darkness

HHOO hlvg (Large)

Aside from all the paraphernalia required for astrophotography, two other critical items are essential to start imaging: clear skies and darkness.  This year astronomical darkness ceased on 25th May at Fairvale Observatory and remained absent for the next 8-weeks  whilst Earth performed its annual summer gyration about the Sun, culminating on 21st June with the solstice.  As a result this period is typically quite a barren time for astronomers, especially for those in the higher latitudes where the sun does not set for the entire 24-hour day.  Some options during this time are:  give up, stop imaging and use the time to sort out equipment, if you have the right equipment change to solar astronomy or just enjoy what happens to be about in the less than dark sky.  This year I chose the latter, during what has been a very hot summer, often with continuously clear skies for days-on-end.

Planets June 2018

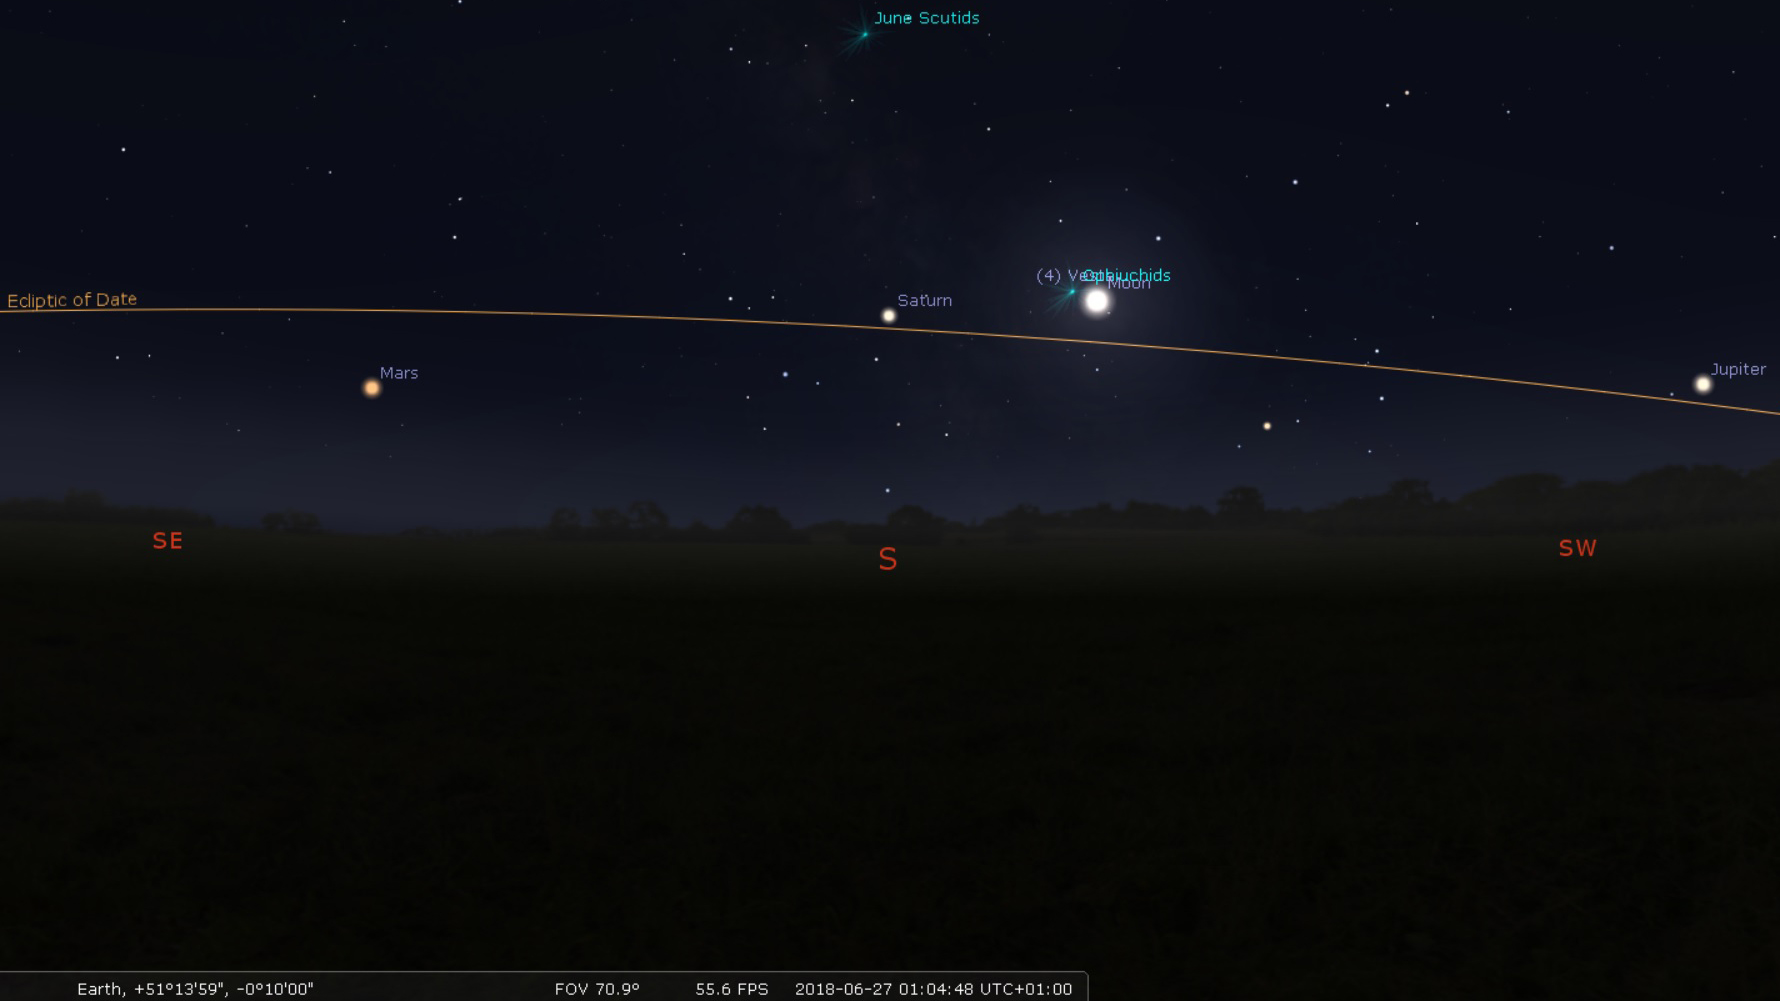
From the early evening we’ve been treated to views of all the planets of the Solar System, as during the short nights one-by-one they transited along the ecliptic, though were relatively low in the sky seen from the UK.  In order of appearance, the main show (see above) each night has been that of Jupiter, followed by Saturn and finally at about 2.00 a.m. (June) Mars – which this year was an unusually large, unusually bright  red disc as it reached its closest orbit relative to Earth for almost 60,000 years – all of which could be clearly seen with the naked eye.  Unable to sleep in the hot weather, night after night I was able to view and sometimes imaged the aforesaid planets with a DSLR camera as they moved across the night sky.

Shortly after darkness started to return on 20th July came two further special events.  First on 27th July a lunar eclipse, that despite all the previous clear nights was ironically obscured by cloud cover over most of the UK!  Fortunately, clear skies returned for 13th August and the annual Perseids meteor shower, which on this occasion produced some of the best meteor trails I have personally experienced.

And so, with astronomical darkness back and the chance to return to the recently established Fairvale Observatory South AKA The Shed Observatory, it was time to resume my hitherto brief imaging experience of the northern sky again.  As a newcomer to this part of the night sky there were considerable new imaging possibilities to explore but only one I now wanted to capture – the Heart Nebula or IC 1805 (also known as the Running Dog Nebula when viewed from a different angle).

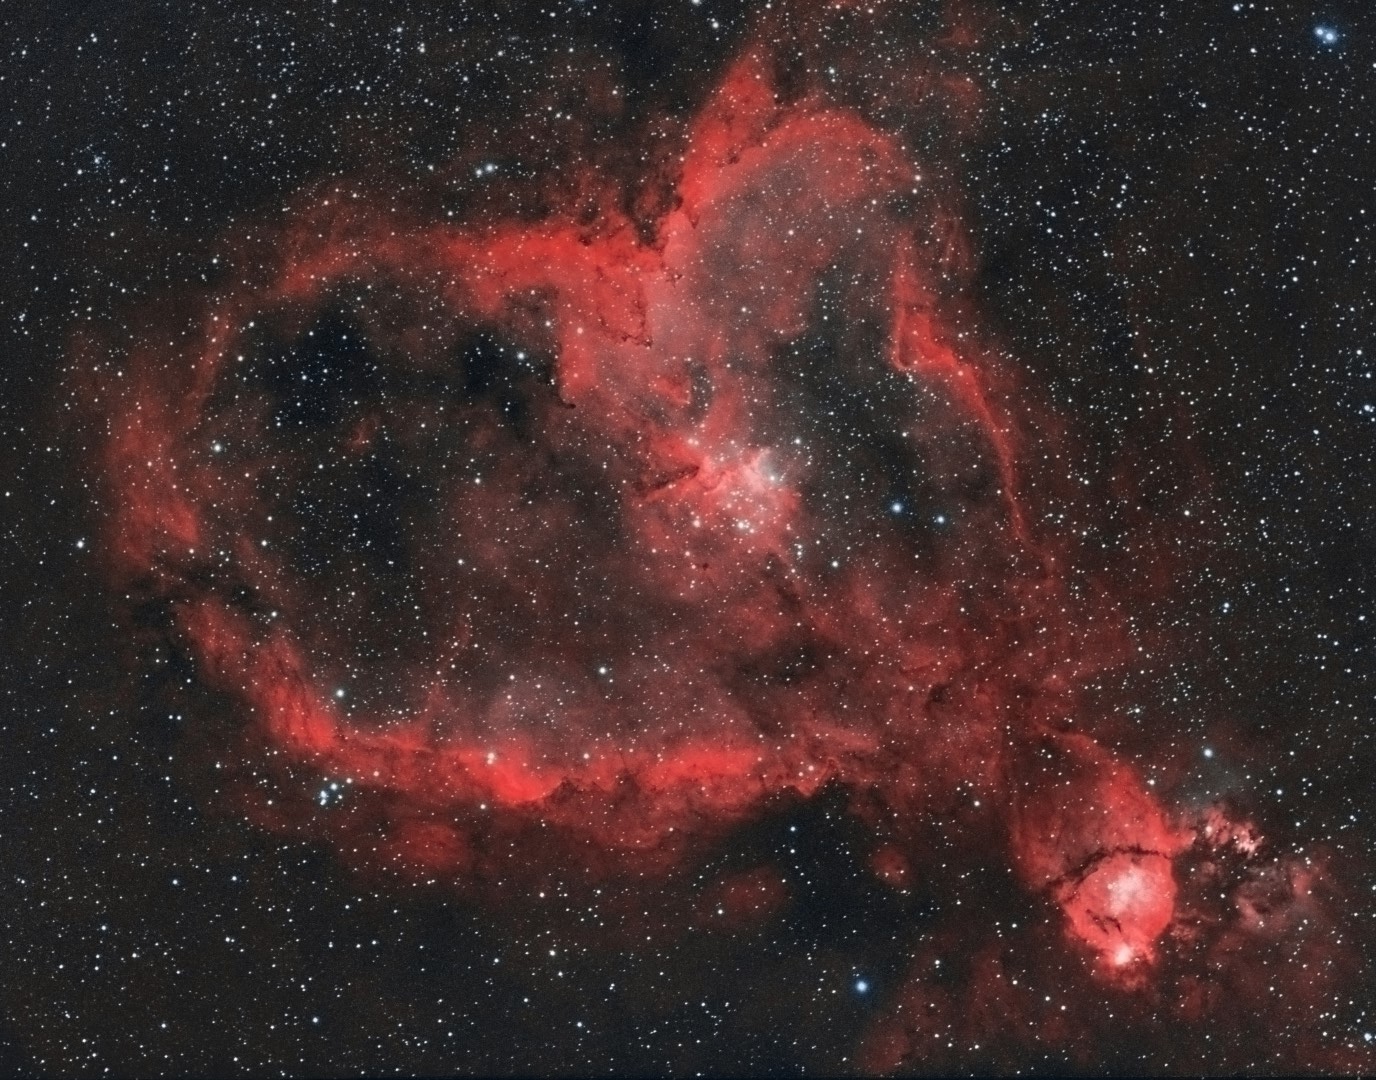
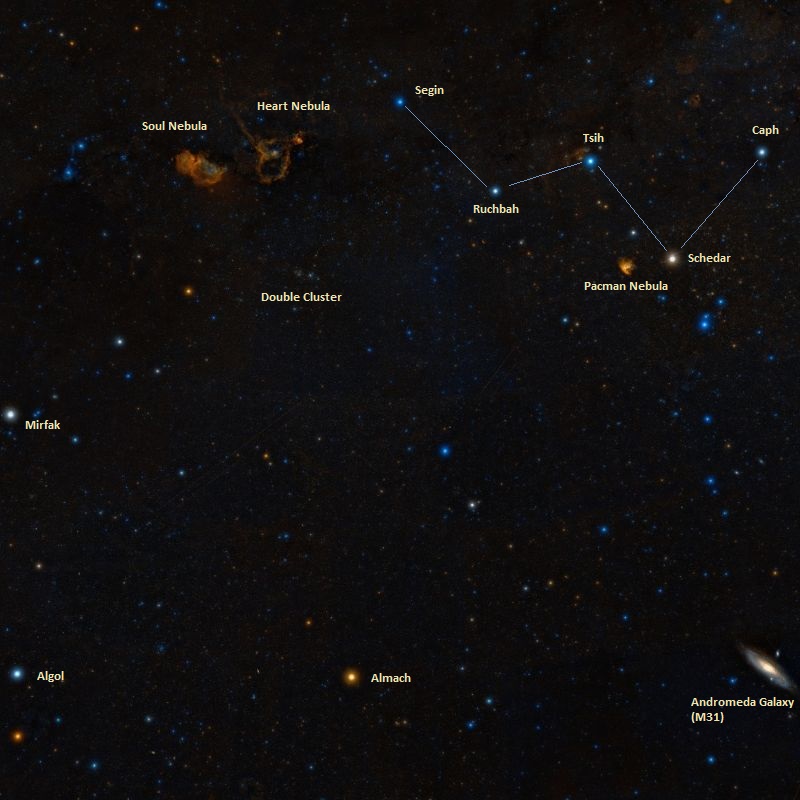
Heart-and-Soul-location The Heart and nearby Soul Nebula are situated in a busy region of the sky (see above – from Wikisky), which also contains seven open clusters of young stars, as well as the Pacman Nebula and galaxies of Maffei 1 & 2 and M31 Andromeda.  The discovery of a bright fish-shaped HII object – known as the Fishhead Nebula IC 1795 or NGC 896 at the edge of the main object – preceded that of the Heart Nebula itself in 1787 by William Herschel.  The Heart Nebula has a red glow, a result of intense radiation emanating from a small cluster of large, hot, young (1.5 My) bright-blue stars at the centre known as Melotte-15.  The stellar wind and stream of charged particles that flow out from these newborn stars then creates the characteristic heart-shape of the nebula from the stellar dust and hydrogen gas clouds.

Picture saved with settings embedded.

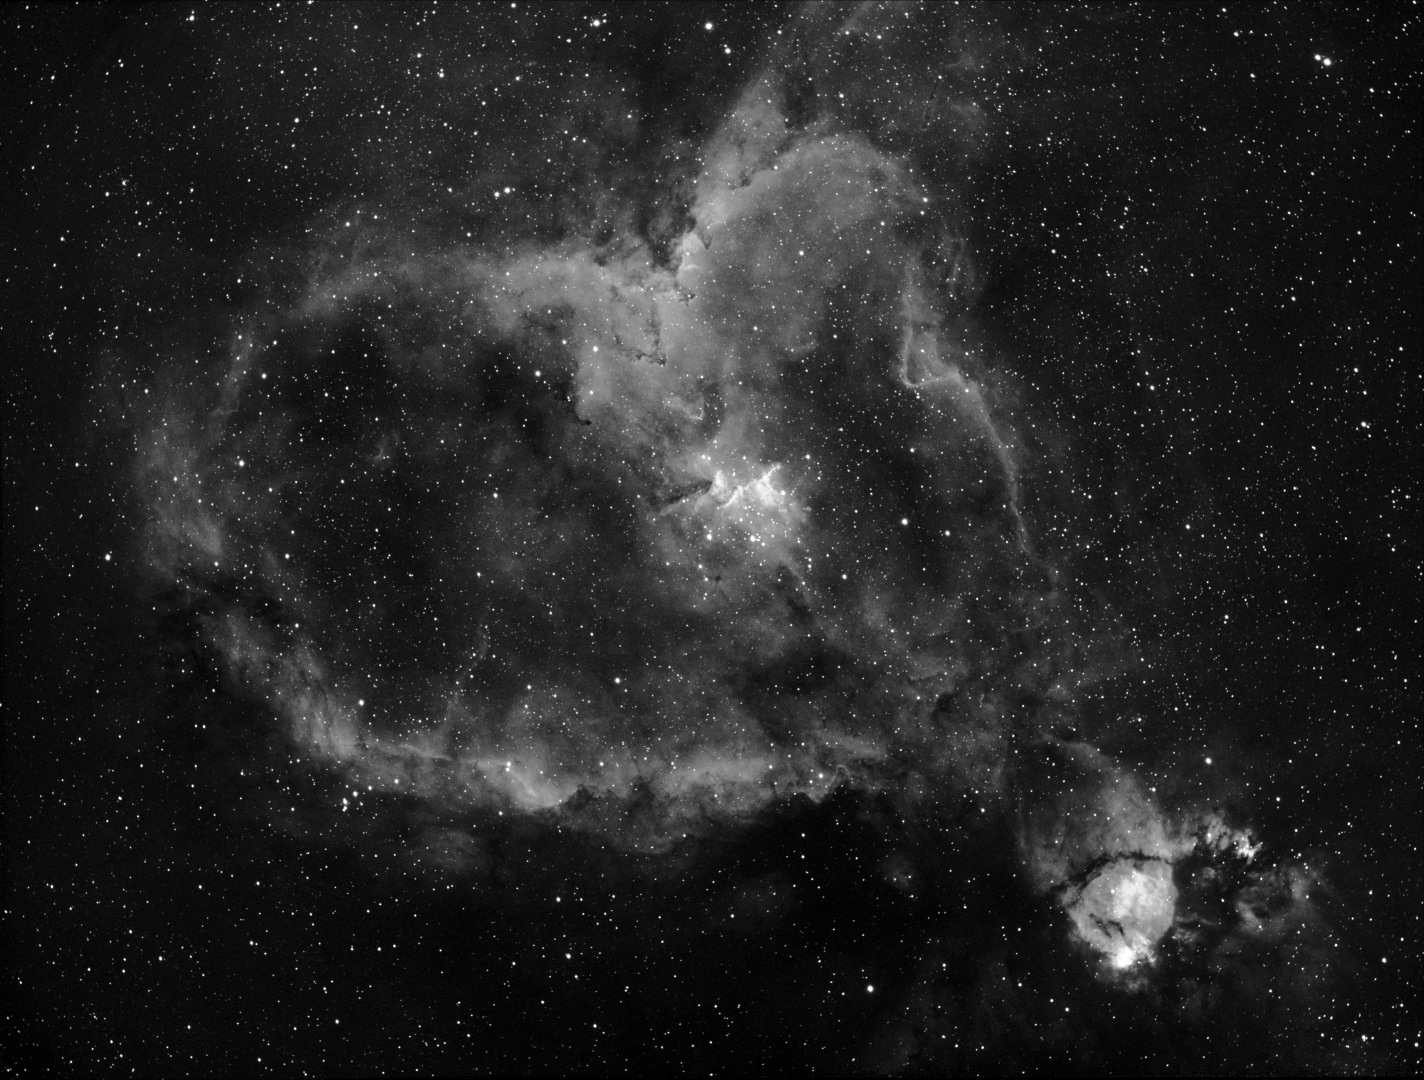
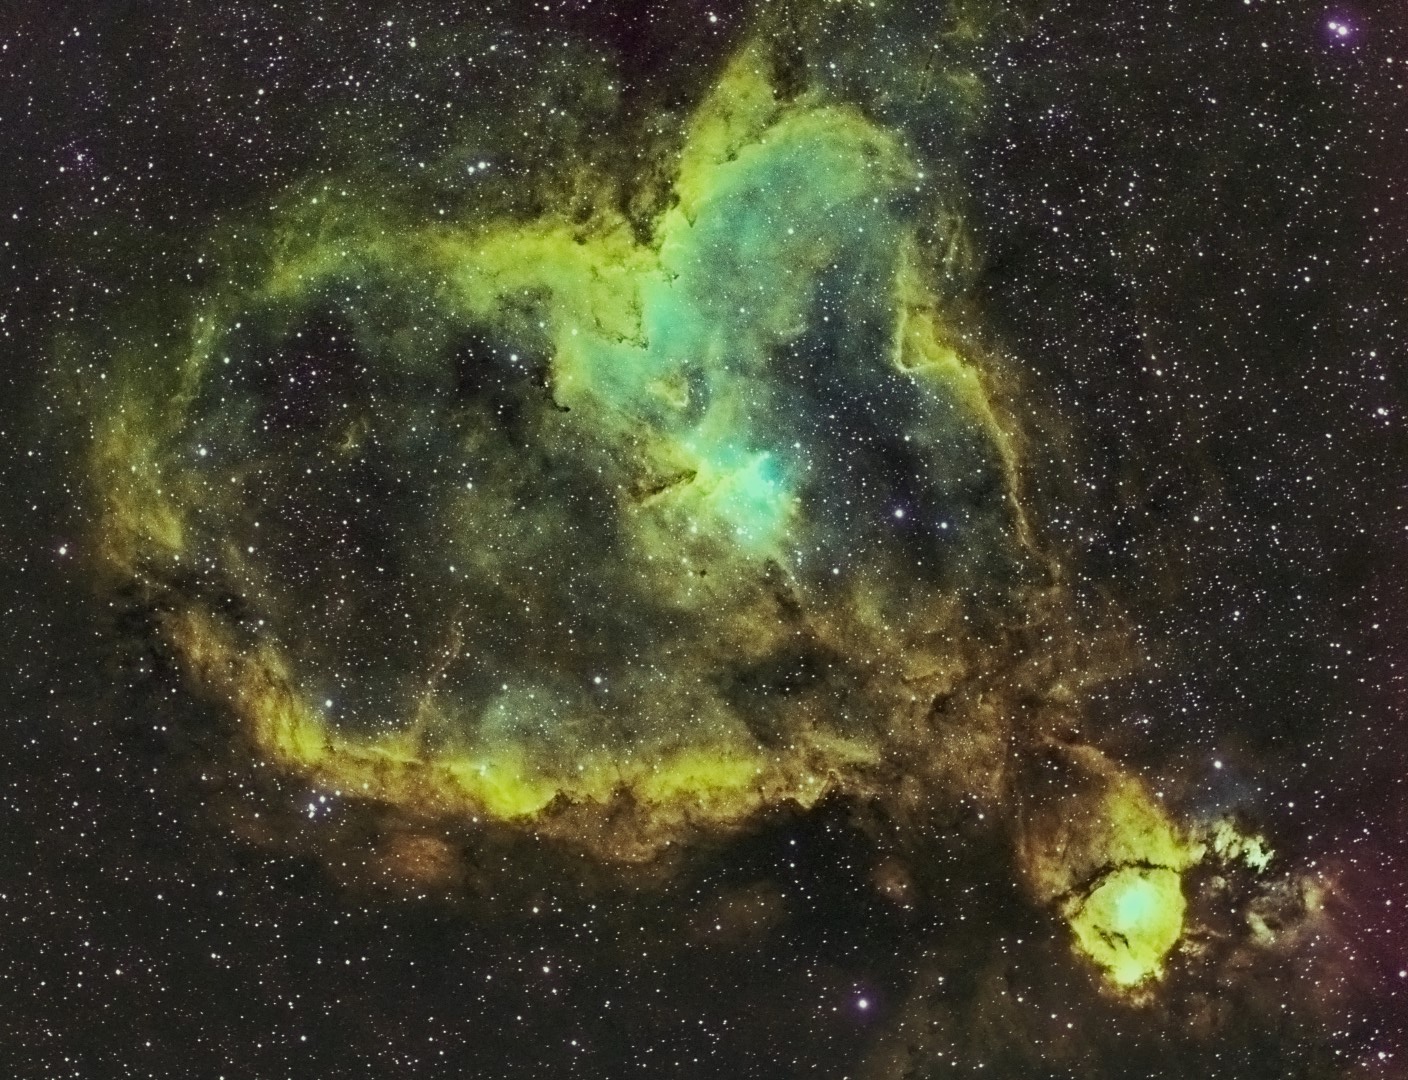
Located in the Perseus arm of the Milky Way in the Cassiopeia constellation, this large emission nebula is an excellent object for narrowband imaging at all wavelengths and is also well framed in the field-of-view of my telescope-camera combination; the images presented here are rotated 180 degrees to achieve the correct orientation to see the heart shape, with the Fishhead Nebula located in the bottom right corner.  Not surprisingly this large HII object produces strong Ha subs, which make a pleasing stand-alone image (above section). But the OIII and especially SII wavelengths are also very good, resulting in very good HHOO bi-colour (top-of-the-page) and SHO (below) images too.

SHO end3Final (Large)

The limited time I’ve had to image the northern sky for the first time this year has already proved to be exciting and bodes well for the future.  On this occasion I’ve been very pleased with my first imaging results of the Heart Nebula, which is a superb object for my equipment and am sure to return next year given suitably clear skies and, of course, darkness.

IMAGING DETAILS
Object Heart Nebula IC 1805    AKA Running Dog Nebula   Sharpless 2-190
Constellation Cassiopeia
Distance 7,500 light-years
Size 150’ x 150’  =  2.5o or 200 light-years
Apparent Magnitude +18.3
 
Scope  William Optics GT81 + Focal Reducer FL 382mm  f4.72
Mount SW AZ-EQ6 GT + EQASCOM computer control
Guiding William Optics 50mm guide scope
  + Starlight Xpress Lodestar X2 guide camera & PHD2 control
Camera ZWO1600MM-Cool (mono)   CMOS sensor
  FOV 2.65o x 2.0o Resolution 2.05”/pix  Max. image size 4,656 x 3,520 pix   
EFW ZWOx8 + ZWO LRGB & Ha OIII SII 7nm filters 
Capture & Processing Astro Photography Tool + PS2,  Deep Sky Stacker & Photoshop CS2, HLVG
Image Location             & Orientation Centre  RA 02:33:09    DEC 61:24:23 

Top = South   Right = West   Bottom = North   Left = East  

Exposures 20 x 300 sec Ha + 10×300 sec OIII & SII  (Total time: 200 minutes)   
  @ 139 Gain   21  Offset @ -20oC    
Calibration 5 x 300 sec Darks  20 x 1/4000 sec Bias  10 x Flats Ha-OIII-SII  @ ADU 25,000  
Location & Darkness Fairvale Observatory – Redhill – Surrey – UK        Typically Bortle 5
Date & Time 16th & 17th  August 2018 @ +23.30h  
Weather Approx. 12oC   RH <=95%


Antipodean Astronomy Adventures

IMG_9050 (Large)

I’ve recently returned from visiting family on an extended trip to Aotearoa – Maori for New Zealand – and whilst travelling around used the opportunity to learn something about astronomy in that part of the world (NZ Astro Directory).  Of course, the main difference Down Under is that it’s currently summer, plus everything in the night sky is upside down.

IMG_0003crop anotate

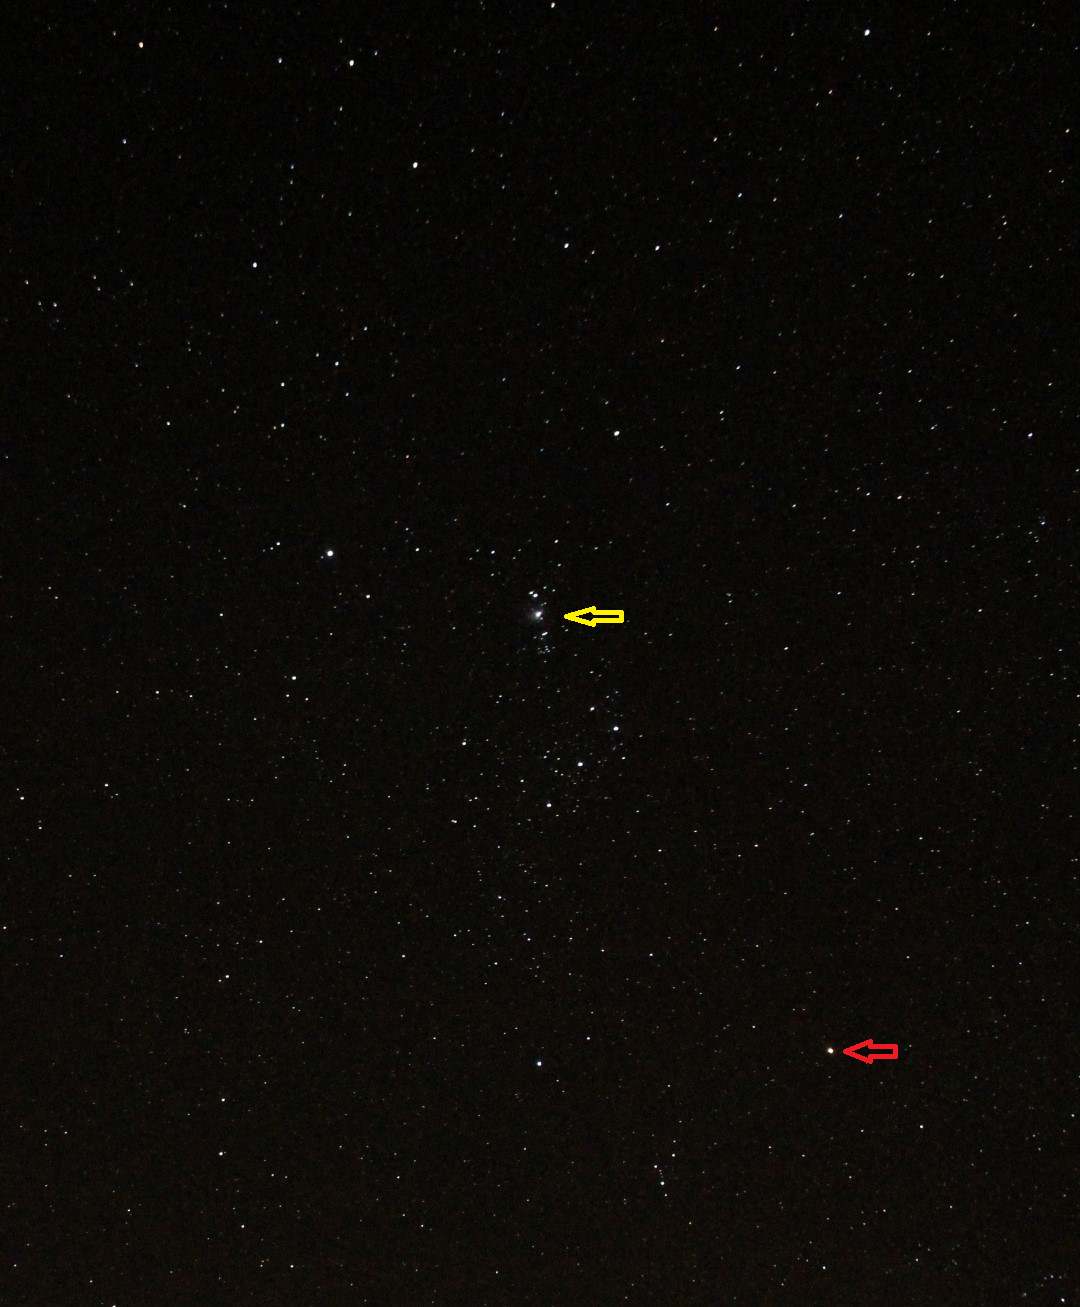
Topsy Turvy – everything’s in the wrong place ! Red arrow = Betelgeuse, Yellow arrow = Orion Nebula

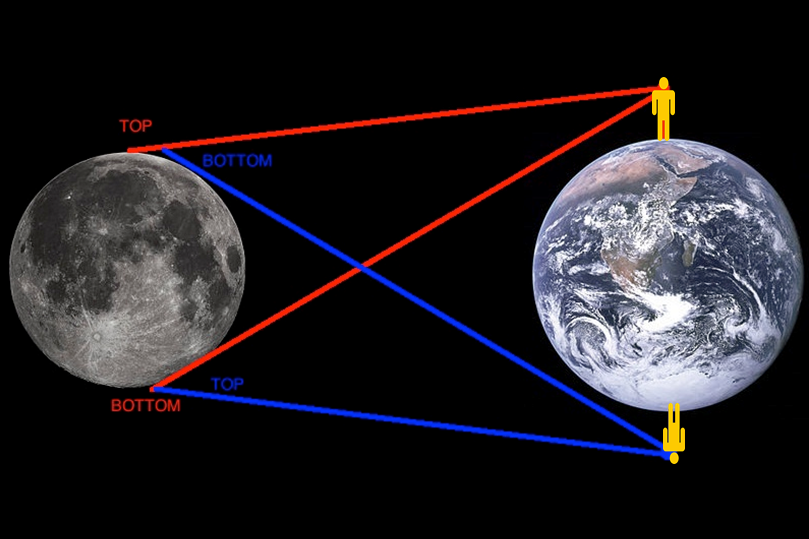
It’s obvious really but relatively speaking the sky has not changed, you’re just  personally inverted compared to the Northern Hemisphere – which from the point of view of astronomy takes some getting used to when looking at otherwise familiar objects such as the Moon or Orion Constellation.  Although being their summer, at our principal location of latitude of 38o on North Island there was more than four hours of astronomical darkness even on the December solstice; viewed from the perspective of the Northern hemisphere, it is interesting to note that this is about the same latitude as Athens or the Korean DMZ!

Moon Man

It’s all about perspective – obvious really!

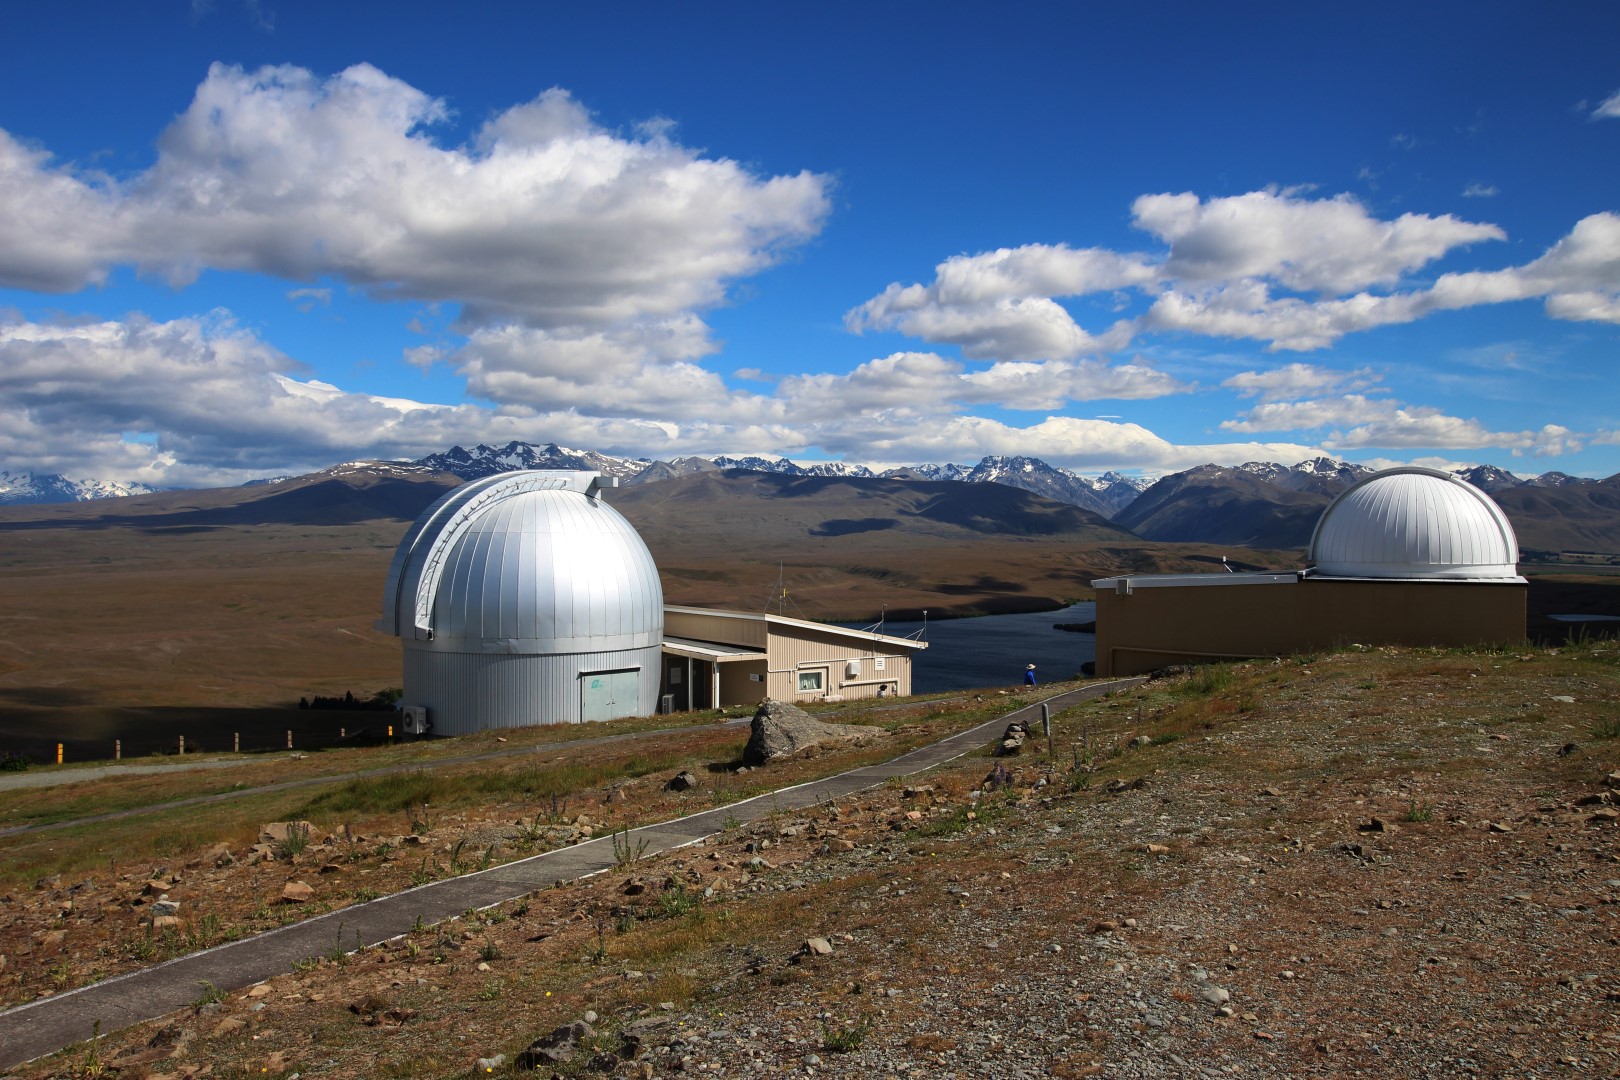
Although the weather was mostly very good, I was struck by how frequently the sky at night was cloudy – just like good old Blighty – it is after all also known as The Land of the Long White Cloud by the Maori.  Notwithstanding, as a country with only 4.85 million people most of the country is rural or even desolate, so that when the skies are clear the darkness and seeing conditions can be quite spectacular.  Viewing conditions are particularly good on South Island around the Lake Tekapo and Mt Cook district where a number of astronomy ventures are based, including the University of Canterbury’s Mt John Observatory – shown at the beginning of this blog.  For practical reasons I was restricted to taking only limited equipment – DSLR & lenses + Gorilla Pod & ball head + Vixen Polarie tracker + 10×50 binoculars – but was still able to obtain some pleasing images during the trip.

IMG_9081 (Large)

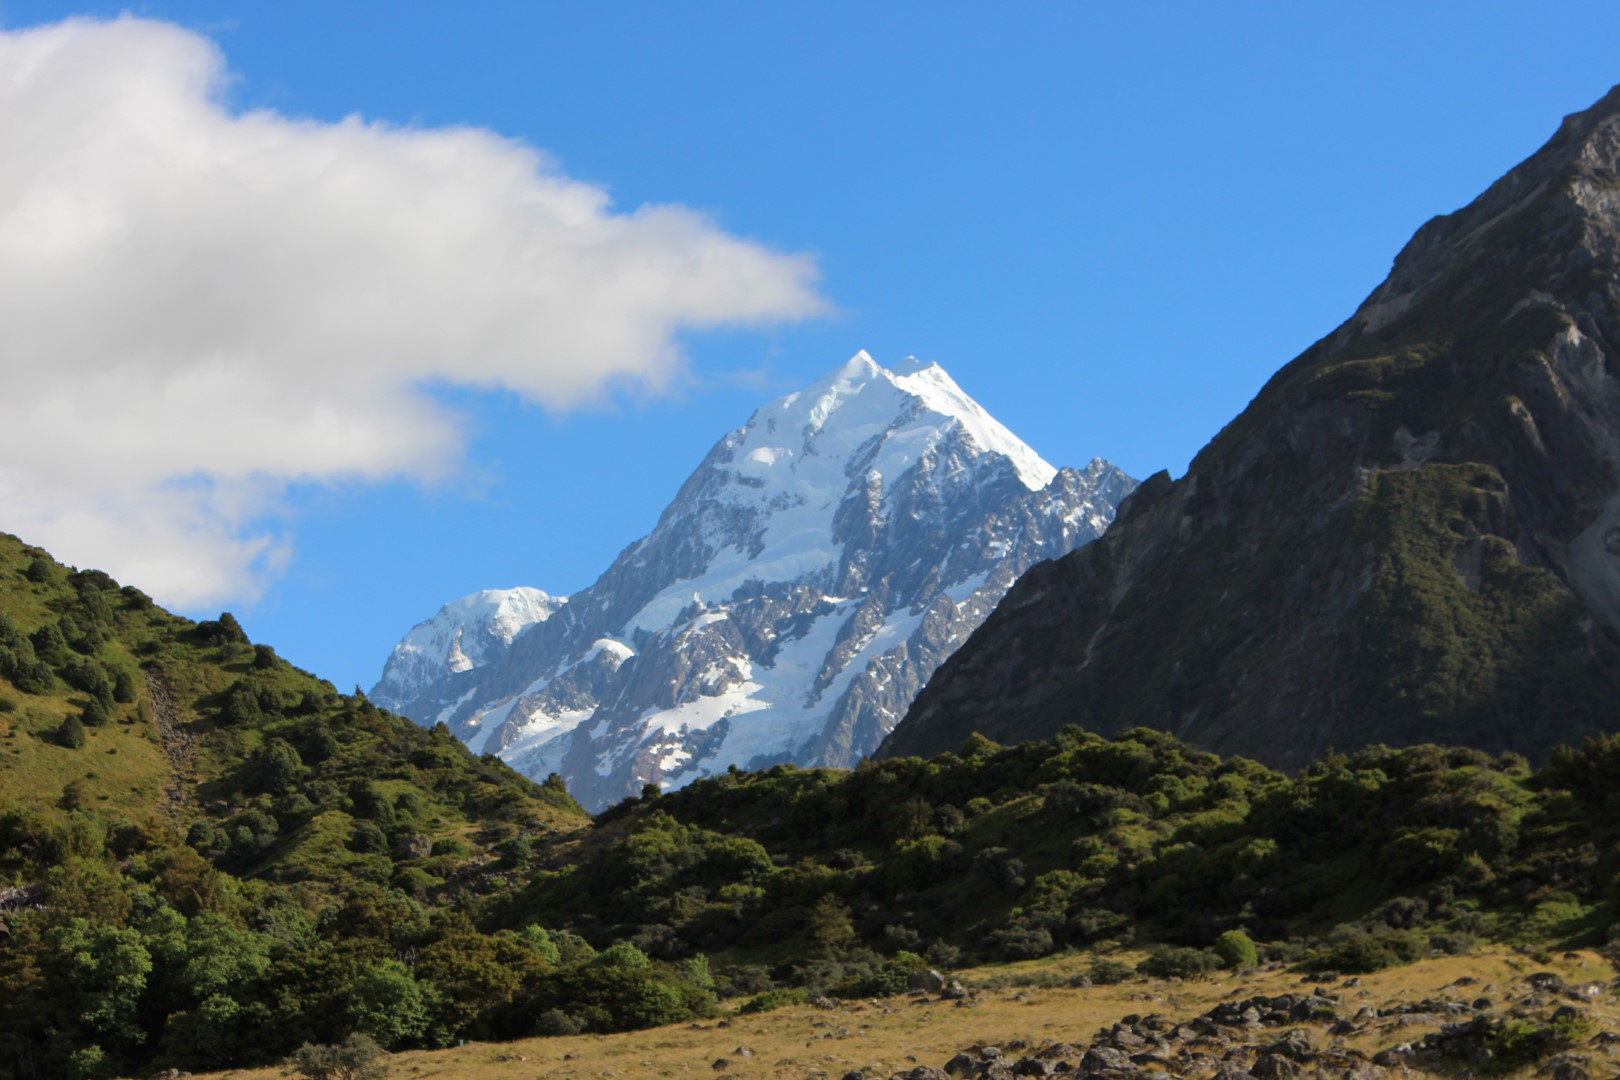
Mt Cook from near our campsite – the night sky here was fantastic

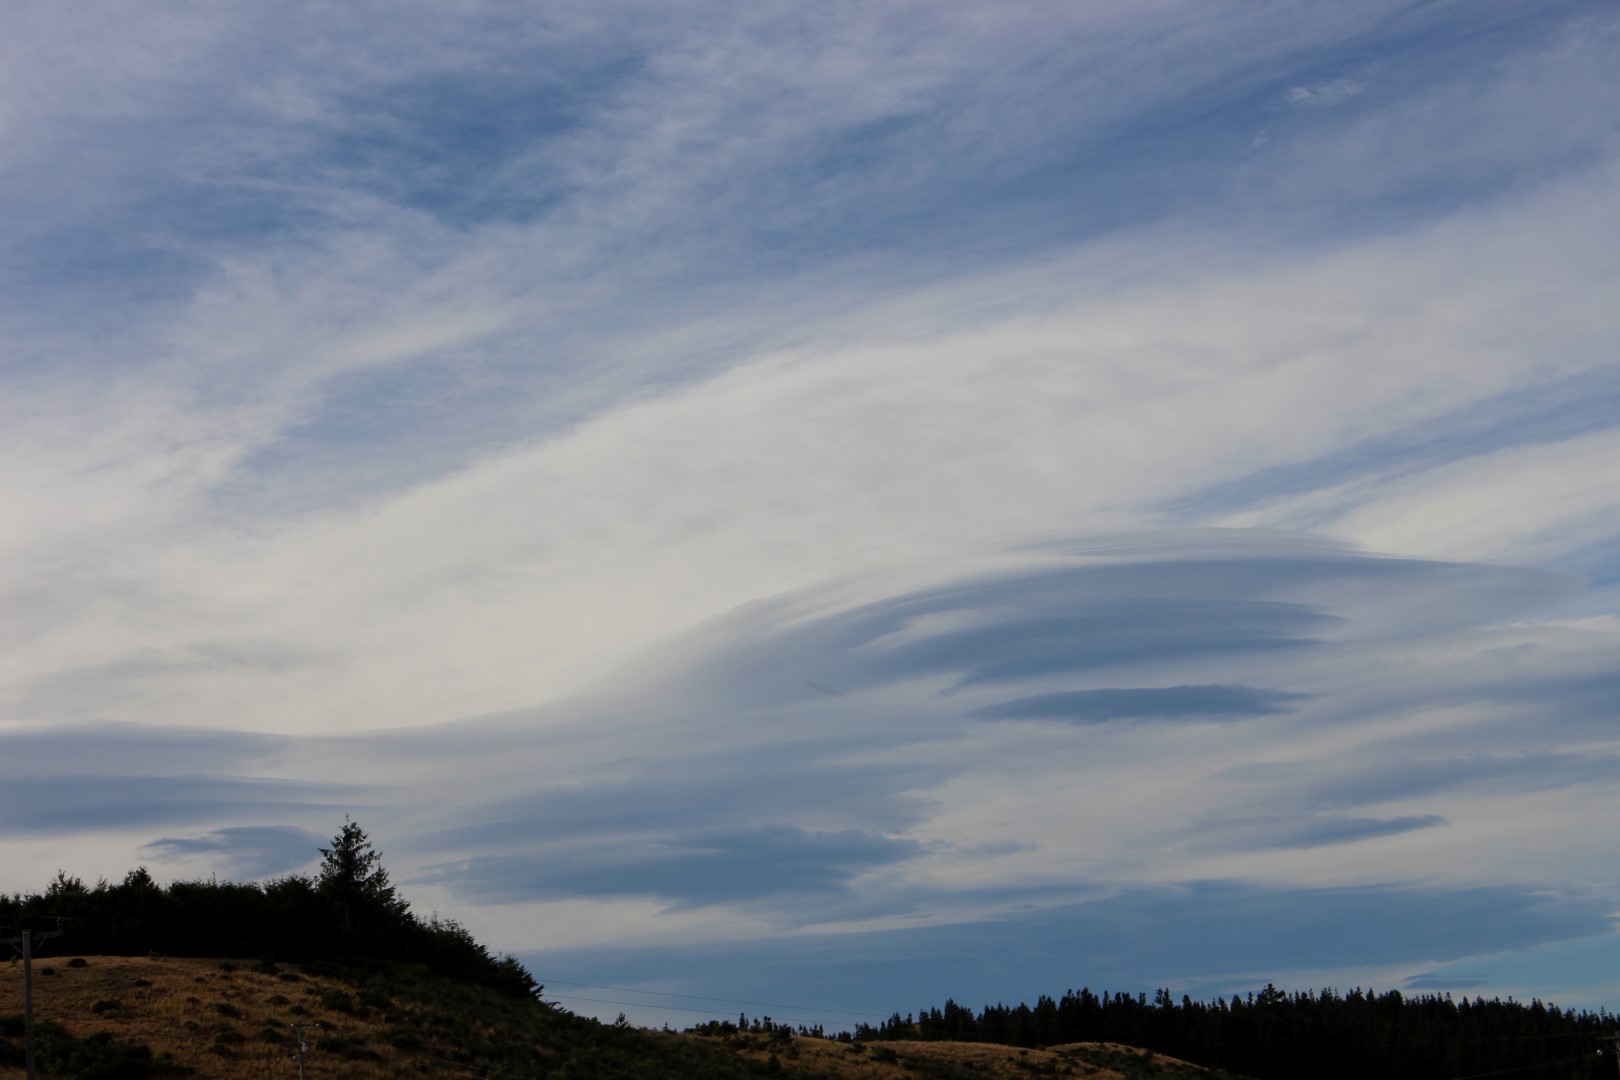
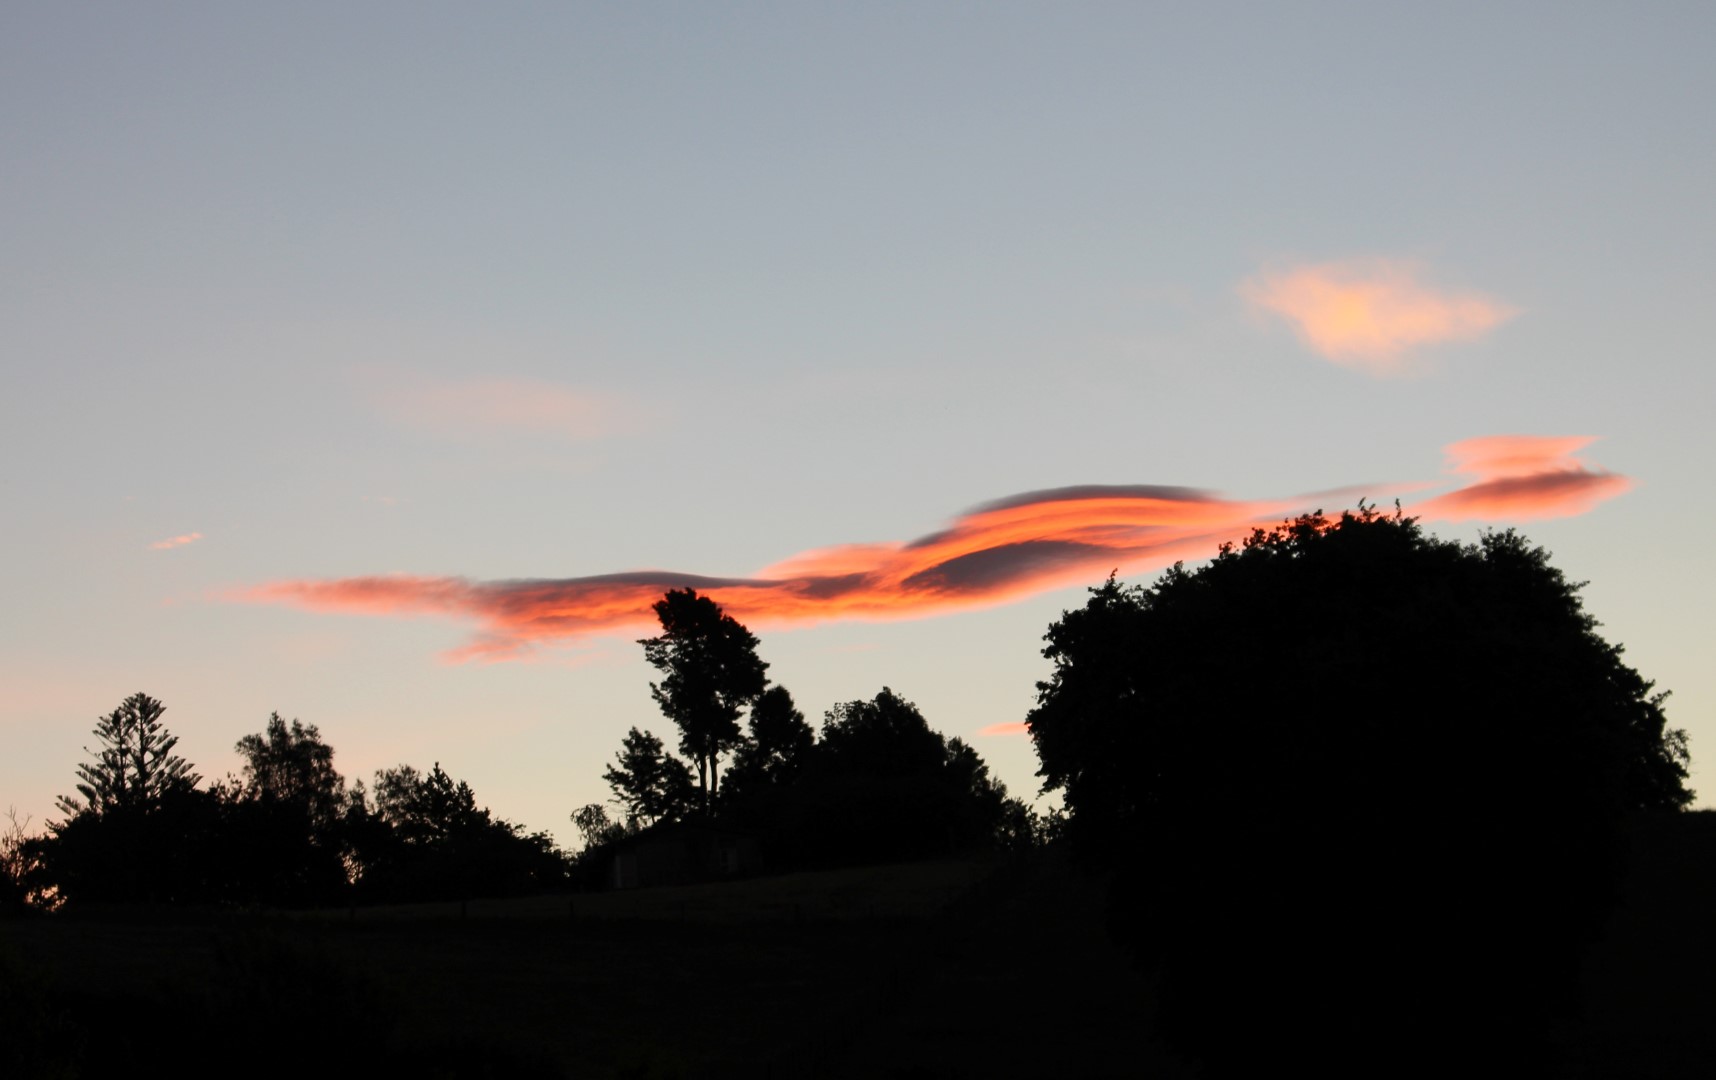
Early on it became evident that New Zealand seems to have all the right conditions required for the formation of lenticular clouds (altocumulus lenticularis).  I’m presuming this is related to its somewhat exposed position between the South Pacific Ocean and Tasman Sea, thus providing favourable wind and moisture conditions which are then influenced by the mountainous tectonic terrain that runs along the spine of South Island and the volcanic topography of North Island.  Whatever it is it works, providing really beautiful and often spectacular sights of these elusive and somewhat rare high altitude cloud phenomena.

IMG_9097 (Large)

Lenticular clouds south of Mt Cook – South Island 

IMG_9457 (Large)

Lenticular clouds near Te Awamutu – North Island 

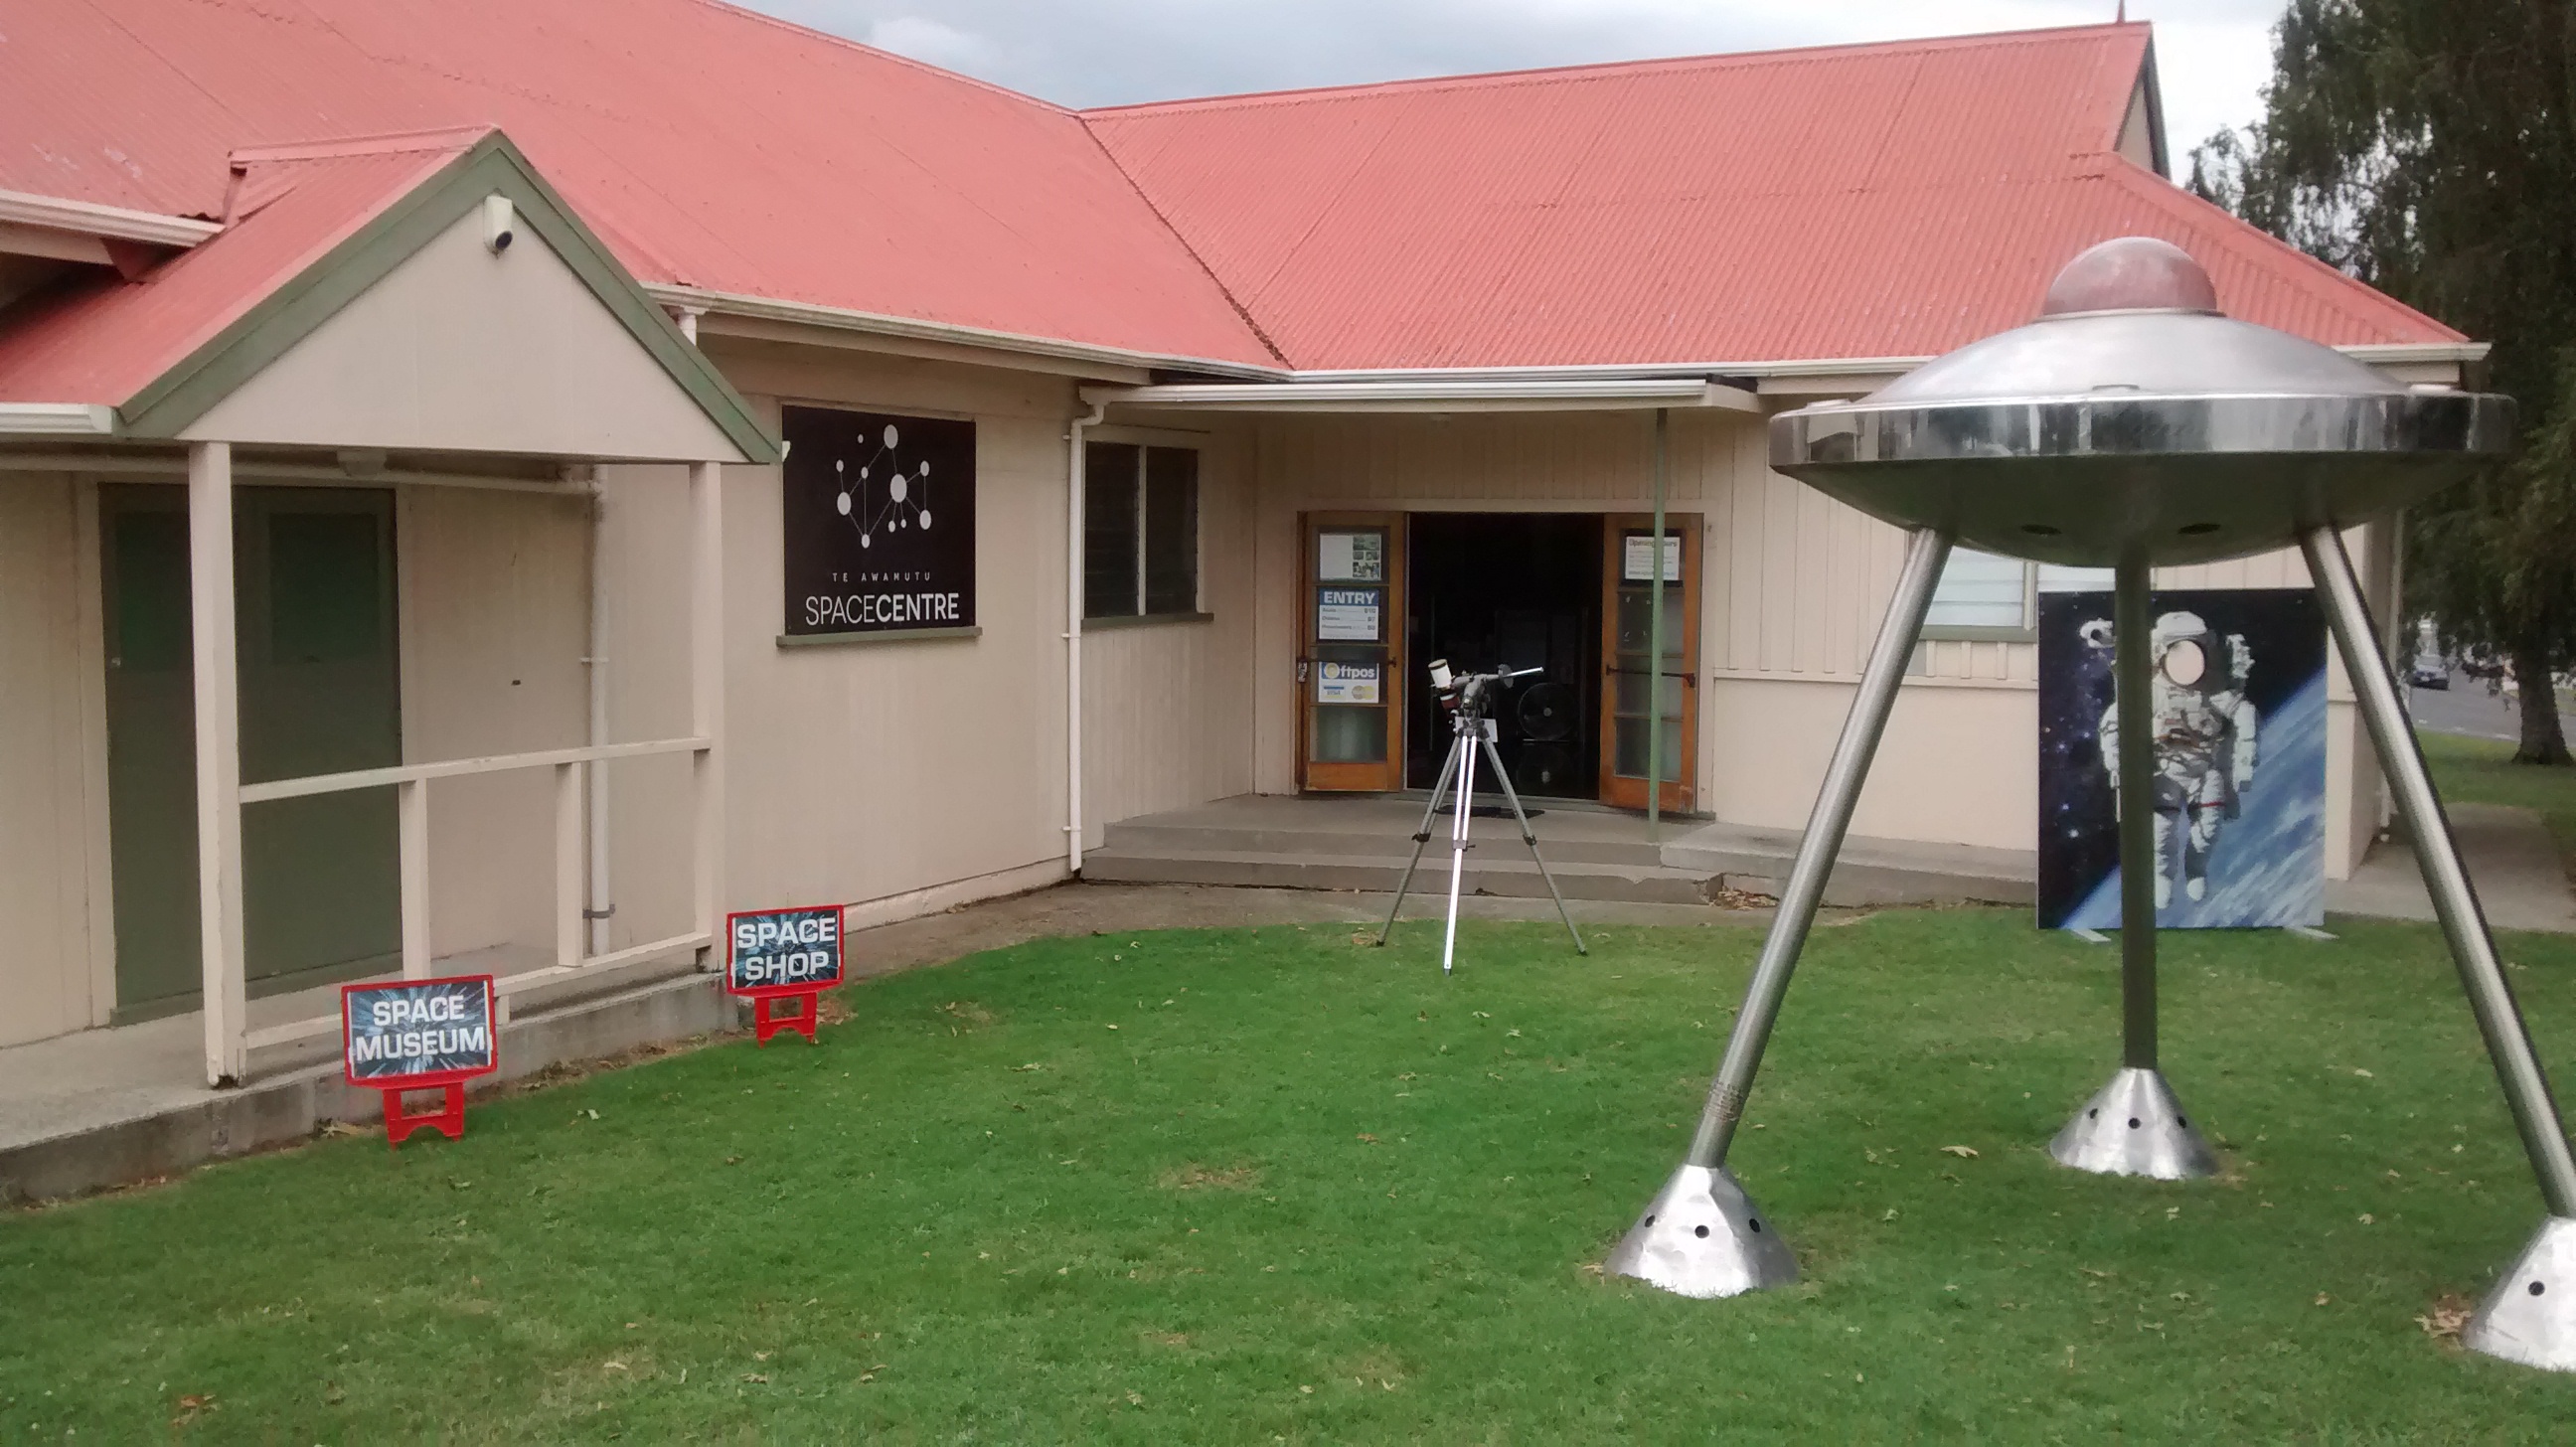
Prior to arriving in New Zealand I tried unsuccessfully to link up with some local astronomy clubs.  However, close to our base near Te Awamutu on North Island I was able to visit the Te Awamutu Space Centre at nearby Kihikihi.

IMG_20180115_130500614

The Te Awamutu Space Centre – Kihikihi

Conceived and run by the enthusiastic Brit Dave Owen (well he wasn’t going to be a Kiwi was he?), the Centre is an eclectic and interesting collection of space, space programme, astronomy and related educational items (see below).

Essentially the Centre is an outreach programme, which would be of interest to anyone in general, young and old, as well as the seasoned astronomer.  I particularly found the area on New Zealand astronomy & astronomers, astronauts and the historical role of Maoris in astronomy very  interesting.

Pliades

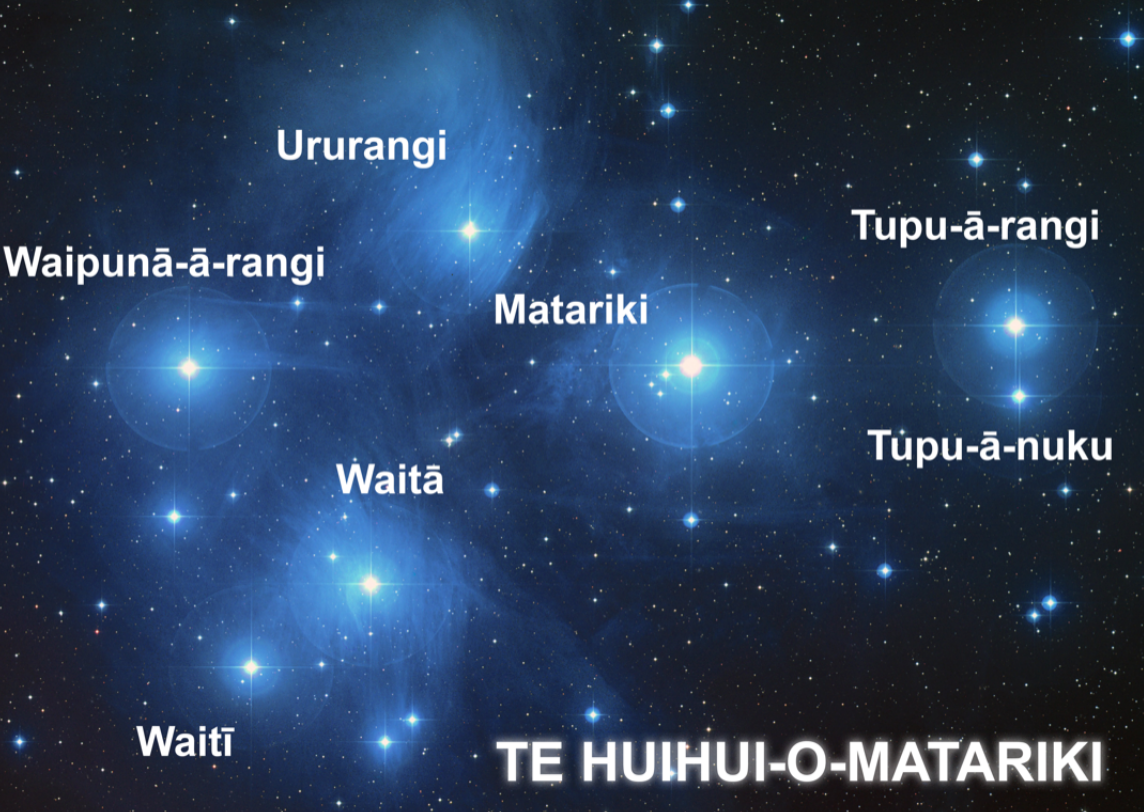
Maori star names of Mataraki (Pleiades)

As we travelled the length and breadth of the country with the tantalising promise of some very dark skies, I was keen to view and image the Milky Way and particularly the Large and Small Magellanic Clouds, which are only visible from the Southern Hemisphere. Thwarted for a while by cloud cover I eventually got my first look at all these features whilst camping near the base of the 3,724 metre Mt Cook on South Island.  The sight did not disappoint but I was unfortunately unable to obtain any images on this occasion.

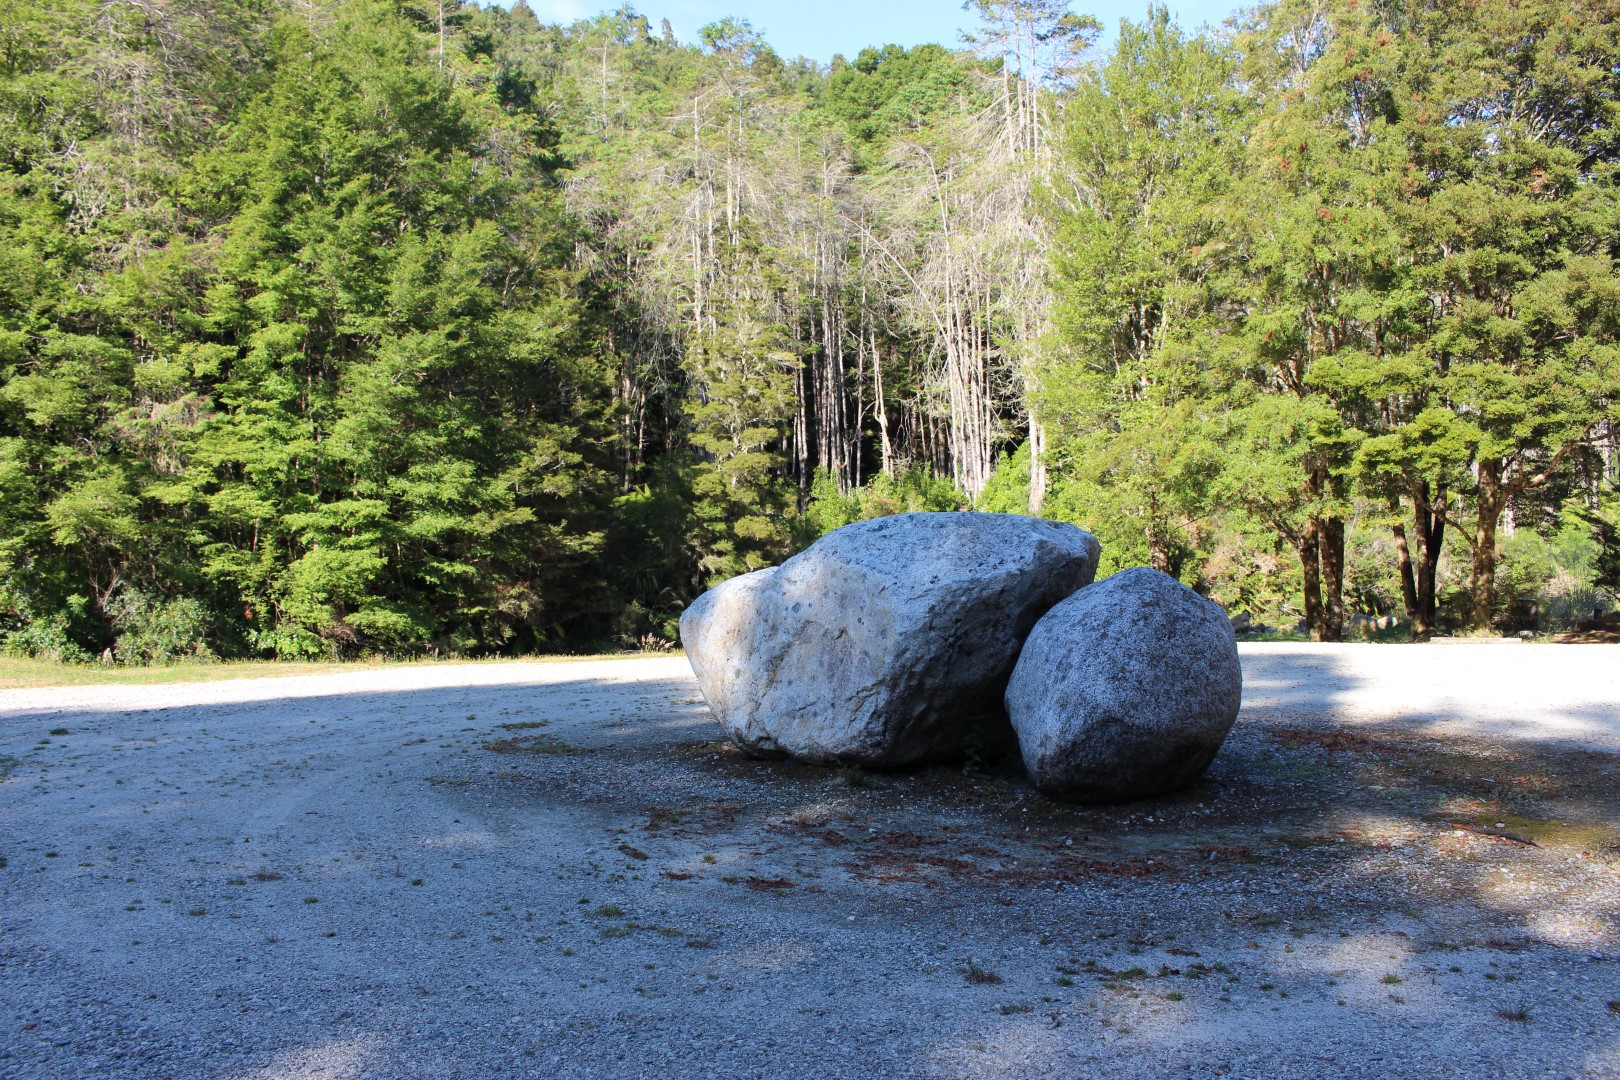
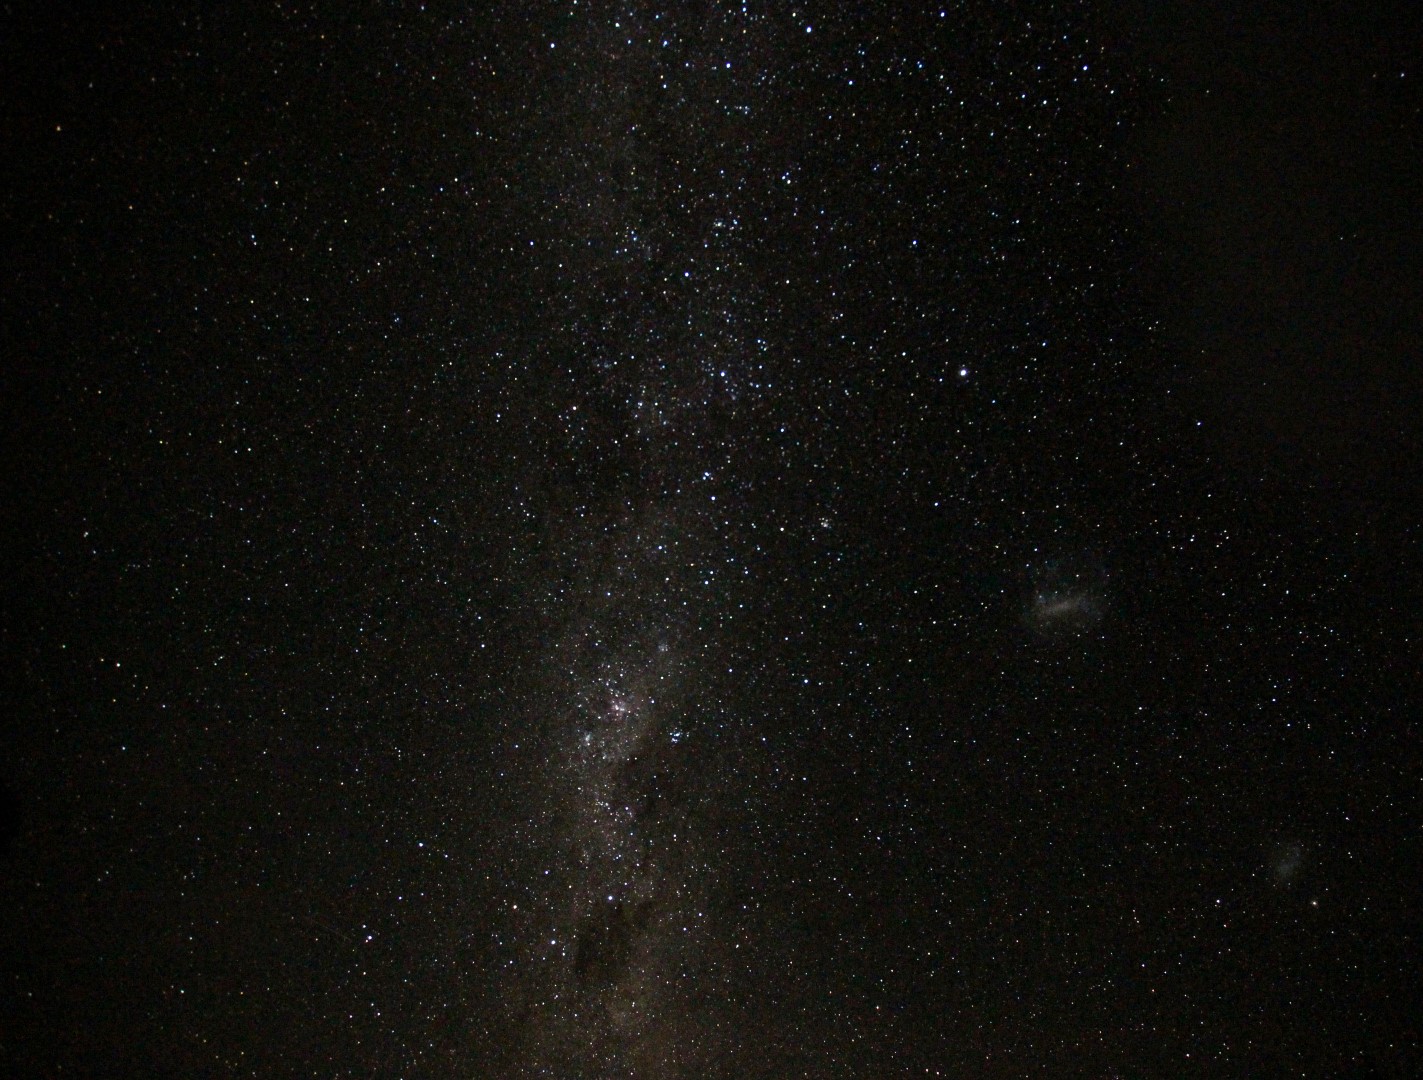
No worries (as they say in New Zealand – frequently!), a few nights later whilst camping at the improbably named Slab Hut Creek (site of old alluvial gold workings) west of the historic mining town of Reefton, I was at last able to image all these features.  Remotely situated in the middle of woods adjacent to the aforesaid gold creek, the night sky was inky black, albeit with some passing cloud from time-to-time.  Furthermore, located in the centre of the opening were two very large quartz boulders, which provided an ideal platform on which to set up the camera and Gorilla Pod.

IMG_9280 (Large)

A few tons of conveniently placed quartz helped imaging later in the night!

I didn’t get much sleep that night but it was a magical experience and I was thrilled to image both the Milky Way and Magellanic Clouds not individually but together.  As an added bonus we were also able to successfully undertake some gold panning during the day in the creek!

IMG_9244 (Large)

The Milky Way at Slab Hut Creek with the Large & Small Magellanic Clouds

IMG_9265 (Large)

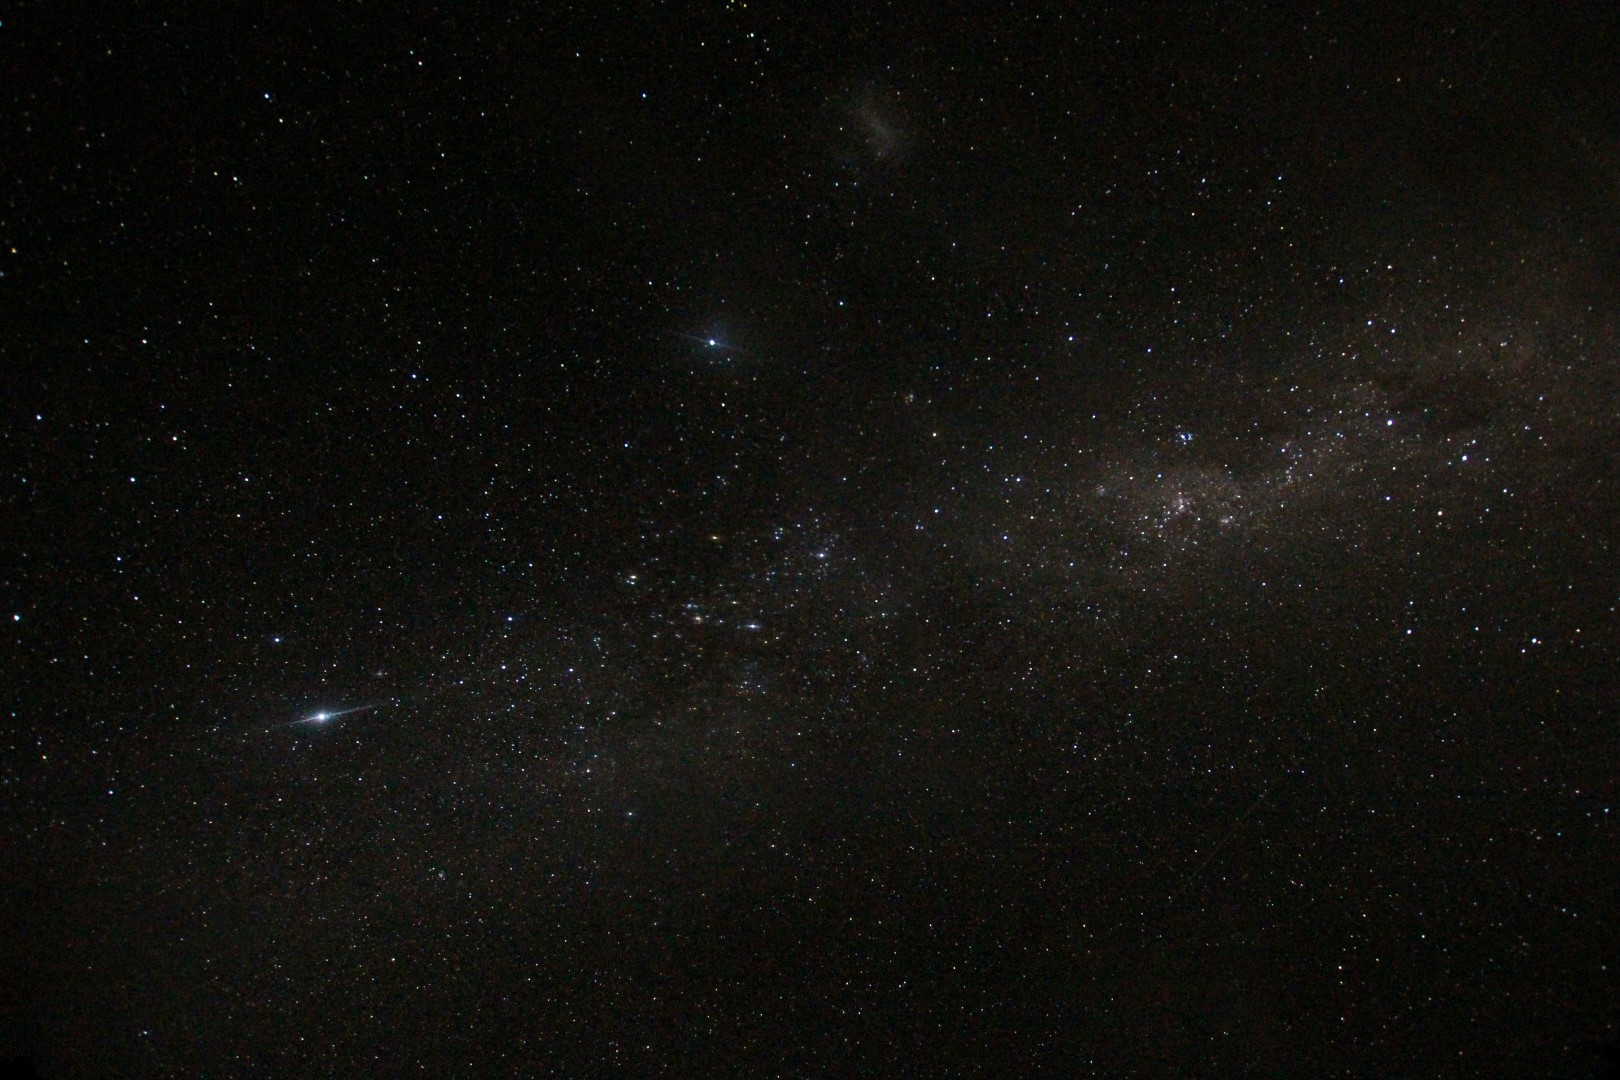
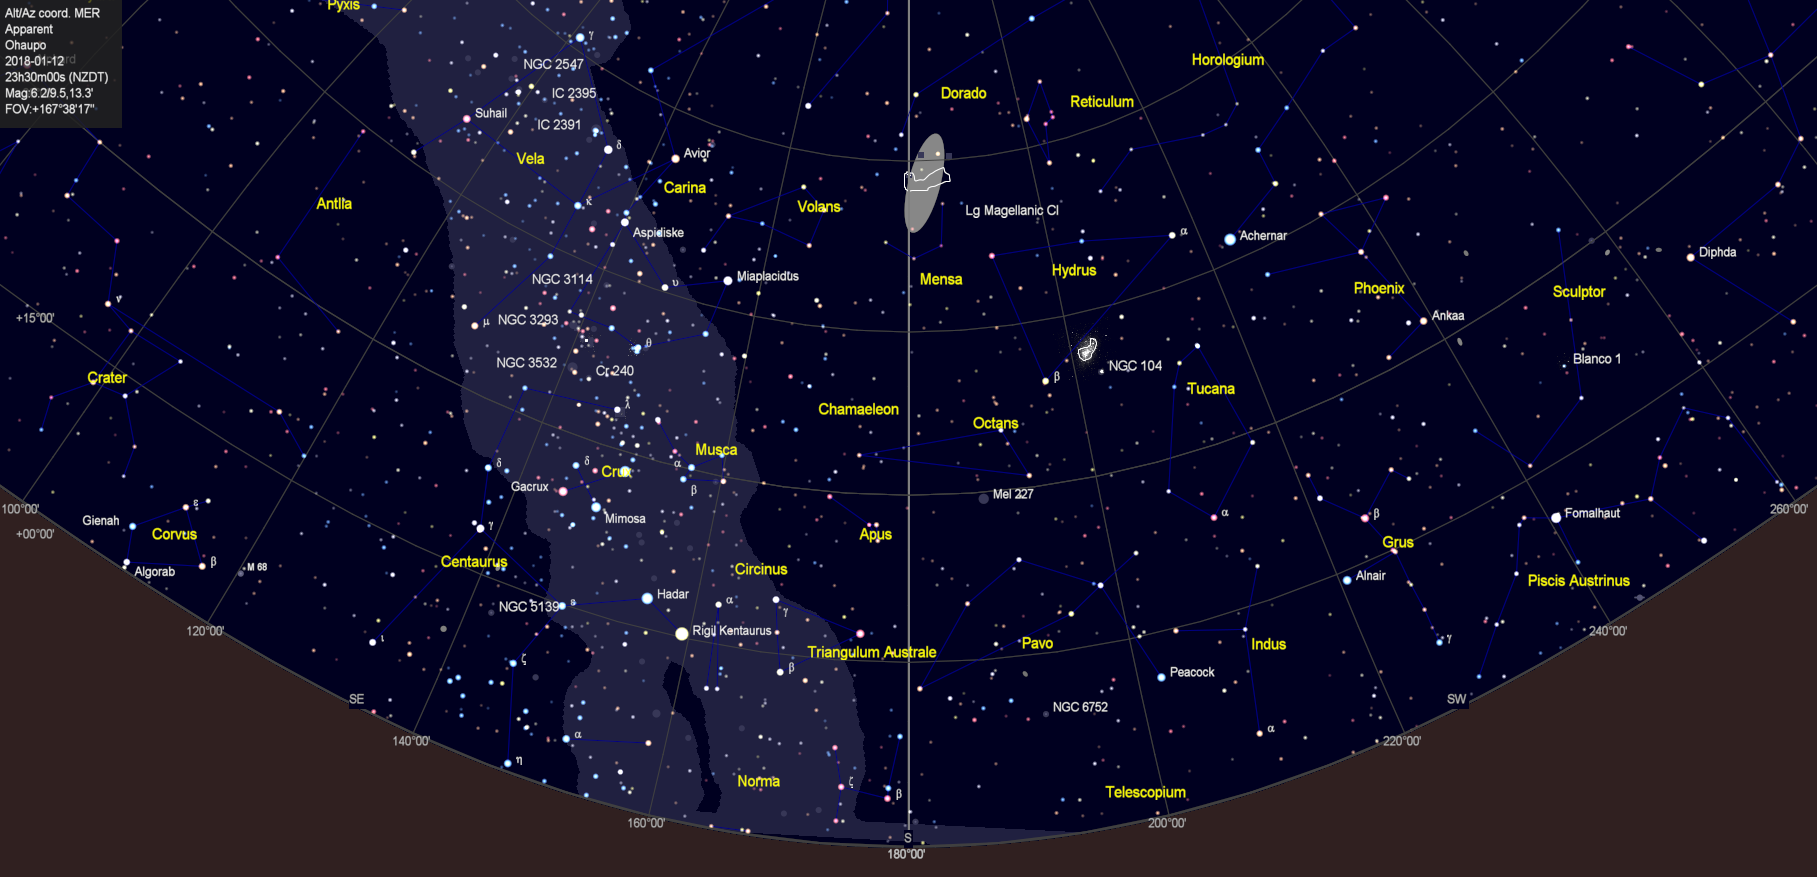
Thereafter I was hindered for the next few weeks by Christmas events and the inevitable full moon at the start of January, though the ISS did pass directly overhead on one evening (New Zealand from the ISS).  However, 10-days later back on North Island at our cottage in the Waipa district, I was eventually able to view and image once again the wonderful sight of the Milky Way + Magellanic Clouds + Southern Cross at the same time – sky chart and image below.

Ohaupo Sky

IMG_9984 (Large)

From our base on North Island: The Milky Way & Magellanic Clouds (right) + Southern Cross just above the left-hand side of the roof line 

When the conditions are right the night sky in New Zealand is truly outstanding. I would have liked to spend time there with the full astronomy set-up and camera that I use in the UK but for now I was very pleased to experience and enjoy Antipodean astronomy, it really is worth the long journey.

Reflections – 2017

Following some important developments, I think it’s fair to say that the past year has hopefully marked an appreciable turning point for my astrophotography.  Reflections is a summary of my astronomy last year, in particular astrophotography, as well as some thoughts about how I hope to progress in the 2018.

I’m again pleased that there is continuing interest in Watch This space (Man) – A personal discovery of the Universe through astronomy and astrophotography.  This is a personal journey and I’m glad to see there is also regular activity in many of the older blogs, which altogether illustrate what I expect many others have experienced during their own personal journeys? For those starting out or with related interests, I hope they will find these pieces interesting, instructive and perhaps even inspiring; it’s not an easy hobby but when it works – it usually does with patience, perseverance and help from the wider community –  the experience is  very rewarding, often exciting and mostly fun.

I’m aware that many of my blogs can sometimes be on the long side, that’s because I want to thoroughly document and discuss the matters rather than superficially comment on them.  However, I am mindful that from time-to-time there are issues that can best be covered in a more concise manner or just events that speak for themselves and can therefore be brief, for which purpose I have now introduced the AstroBites section.  Unfortunately, despite the best of intentions, I’ve so far only used this item occasionally but hopefully will rectify the situation next year.

I’m always tinkering with the website, so even if you’re a regular visitor take a look around from time-to-time.  There is a photo gallery but for a simpler view of some of my better images I’ve recently added a FLICKR album, which is accessible from the Gallery menu.  The sharp eyed may also note that in response to new imaging techniques, I have changed the image and technical details summary for each picture; I find this information invaluable when looking at other astrophotographer’s images, as it can be very helpful when starting out in general or when using similar equipment or imaging the same object for the first time.

Once again the site attracted much interest from all corners of the world, which are summarised in the map below.  Please do get in touch if you have and relevant thoughts, queries or just to say – hello – contact details are in the ABOUT section of the main menu.
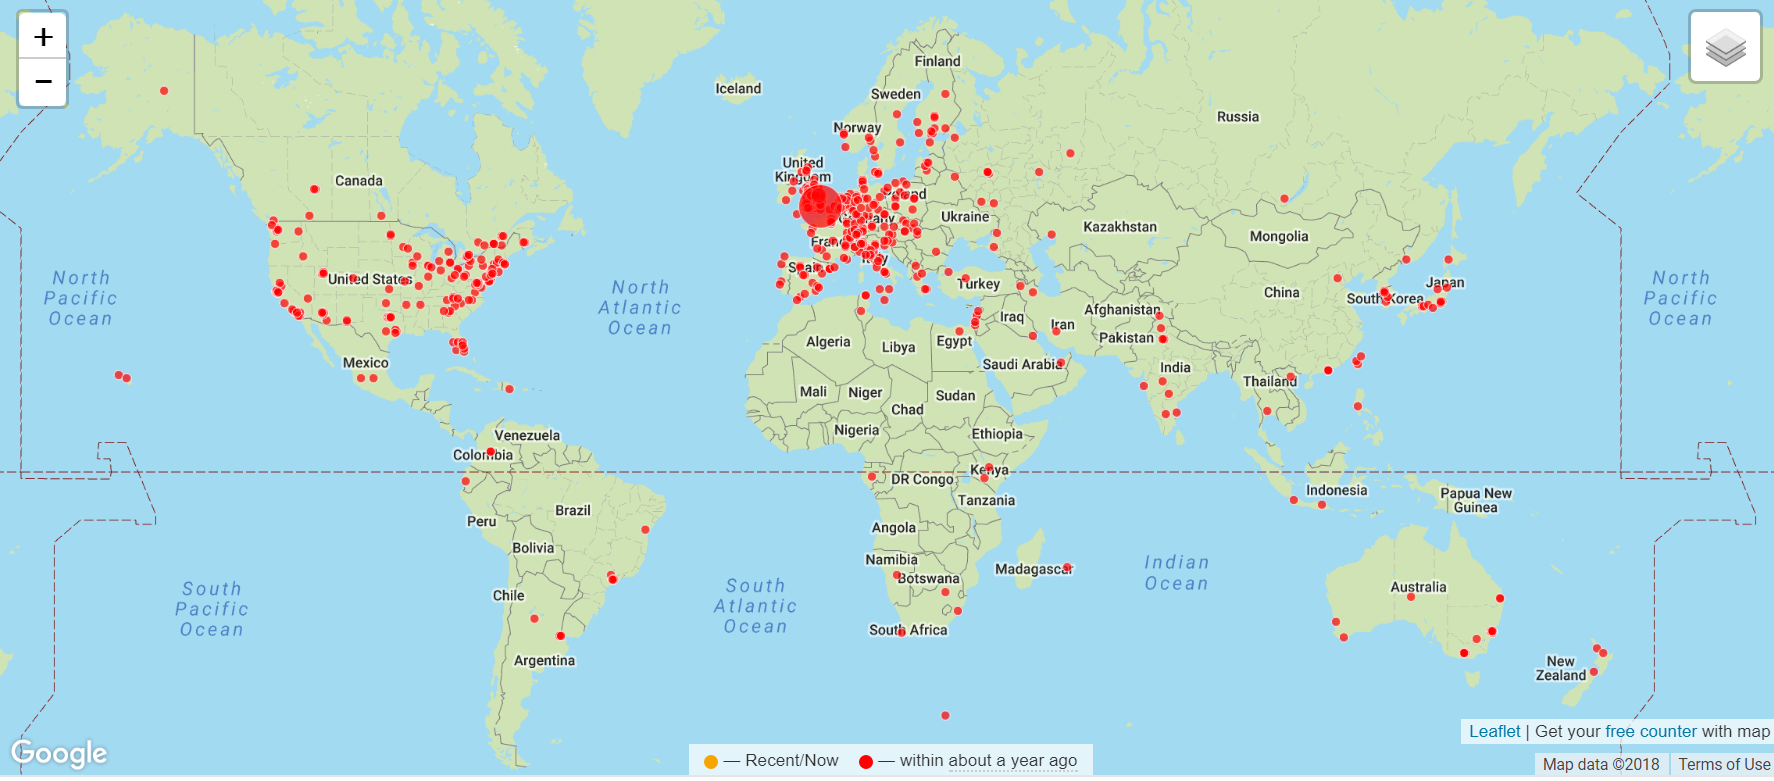

WTSM Heat Map

Reflections Crop

JANUARY TO MARCH

After overcoming some major technical problems that almost brought my nascent hobby to a premature end in 2016, I felt I needed to consider what would be the best way forwards thereafter.  My initial inclination was a larger telescope in order to get at those faint fuzzies but most of all I just wanted better quality images.  In the past this would inevitably result in acquiring a CCD mono camera and all that means in terms of very exacting technical issues and very long exposures, neither of which I was prepared to take on, or at least only to a degree – life’s too short and the UK weather too cloudy!

However, during the latter part of 2016 something of a game changer was emerging in the world of astrophotography and after following developments online for a few months, I was persuaded that the new ZWO1600MM-Cool mono camera could also give me what I wanted, without many of the issues of a conventional CCD camera.  As a result I purchased the aforesaid camera and matching x8 EFW just before Christmas in 2016  and eagerly awaited clear skies in the New Year.  Unfortunately it wasn’t that simple – now there’s a surprise!

The crucial benefits of the new CMOS based ZWO camera are three-fold: (i) very low read noise and high sensitivity achieved with, (ii) relatively short exposures – sometimes as little as 30 to 60 seconds, (iii) larger field-of-view compared to a CCD. Wow!  Unfortunately there was still much to sort out, notably the image train, image capture and processing, all of which differ considerably from a DSLR camera.  Notwithstanding, eventually first light (see image below) was achieved in March and it was immediately obvious that this was going to fulfil my astrophotography dreams and more for now – hopefully!
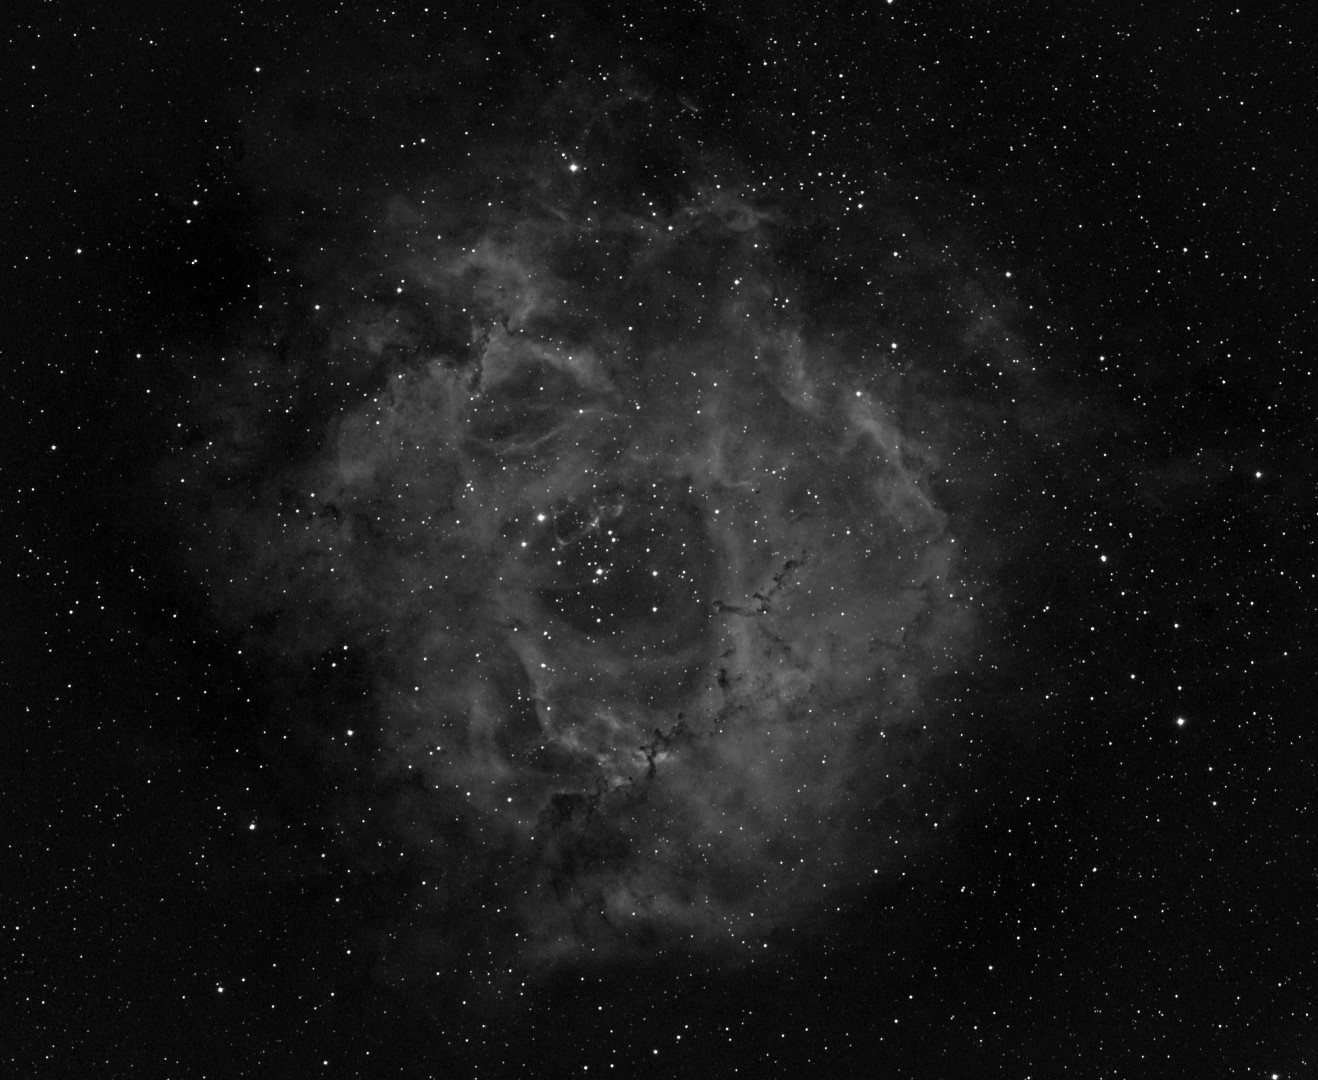
Picture saved with settings embedded.

Rosette Nebula in Ha | William Optics GT81 + ZWO ASI 1600MM-Cool & 0.80 focal reducer guided | 15 x 180 secs + darks & bias calibration Gain 300, Offset 10 | 21st March 2017

Using mostly narrowband filters – more on that later – I was initially able to obtain some exciting and very promising images of classic HII-region objects just before they disappeared over the western horizon; thereafter followed weeks of frustration whilst I waited for other suitable objects to appear – timing is everything.  The ZWO1600 camera is very good for most deep sky objects, nebulae, galaxies and globular clusters but with the William Optics GT81 the combination is best suited to larger targets.  As a result by late winter and early spring, when smaller objects such as galaxies dominate the night sky, it became necessary to find something else to do for the next few months.
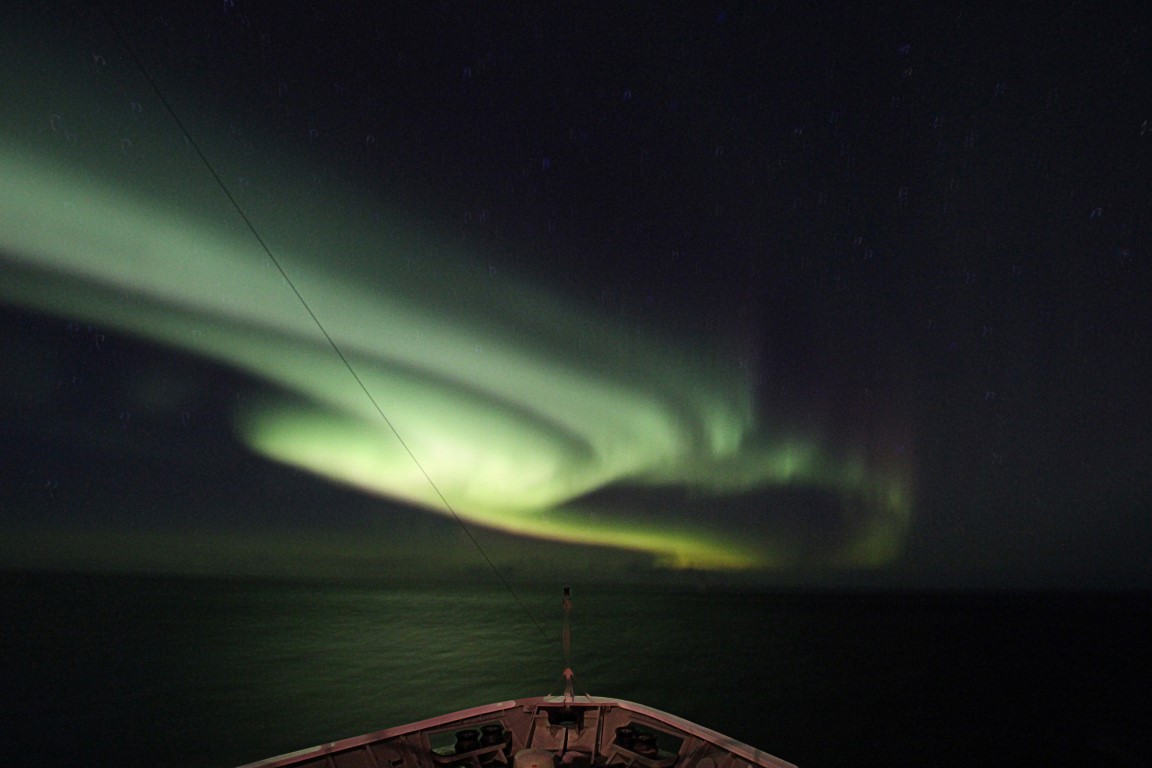
Aurora Borealis Northern Norway February 2017 I’ve previously worked north of the Arctic Circle in Sweden and Russia but in February I took a more relaxed ferry trip along the west and north coast of Norway from Bergen to Kirkenes, close to the Russian border.  Given the time of year it was of course very cold and the nights long but the ship was comfortable and the scenery spectacular.  However, once north of Tromsø the real show began in the form of the Aurora Borealis AKA the Northern Lights.  This natural light show lived up to expectations and with some difficulty I managed to obtain numerous images of the spectacle – the problem being imaging from a moving ship in severe cold, which with wind chill was well below -20oC – but it was worth it and made for an exciting end to my winter astrophotography.

No Date Type* Object Name
1 20/01/17 DSLR M45 Pleiades
2 20/01/17 N NGC 2244 Rosette Nebula
3 22/01/17 DSLR M45 Pleiades
4 22/01/17 N IC 434 Horsehead & Flame Nebula
5 21/03/17 N NGC 2244 Rosette Nebula
6 21/03/17 B M65 Leo Triplet
7 24/03/17 B NGC 4874 Coma Cluster
8 25/03/17 N M42 Orion Nebula
9 27/03/17 N IC 434 Horsehead Nebula

Record of quarterly photographic images taken in 2017

*Type: DSLR colour, B Broadband LRGB, N Narrowband Ha-OIII-SII, V Video

APRIL TO JUNE

The period from April until the end of July can be a frustrating time of the year for astronomers, except those with an interest and the equipment for solar imaging.  Other than just giving up for a while, the secret is to abandon normal pursuits and just make the best of whats on offer, which is exactly what I did this year.  After limited success  attempting some of the larger galaxies in early Spring, I moved on to webcam imaging Jupiter and Saturn, insofar as is possible with my small telescope.  At about this time I also managed to capture the comet C/2015 V2 (Johnson), my second one after previously imaging C/2014 Q2 Comet Lovejoy in early 2015.  As I had not attempted such objects for more than two years and was more than a bit rusty with the different imaging and processing techniques, the results were varied but is was still good fun, which I hope to repeat in 2018 depending on what’s around at the time.

I also used the much improved weather and extra spare time afforded to go over the basics of my mount-telescope-computer set-up: balance, leads, equipment alignment, computer updates etc.  I inspected and replaced some old cables, wherever possible using cold-resistant silicon leads.  Following last year’s catastrophic camera power lead failure, I am now aware of the damage that cold can do to cables and pay greater attention in order to avoid repeating such problems.  I was also aware that with the change to the ZWO camera and using autoguiding routinely there had been a noticeable increase in cables, which I therefore tidied and strapped with Velcro bands to restrict unnecessary movement and snagging.
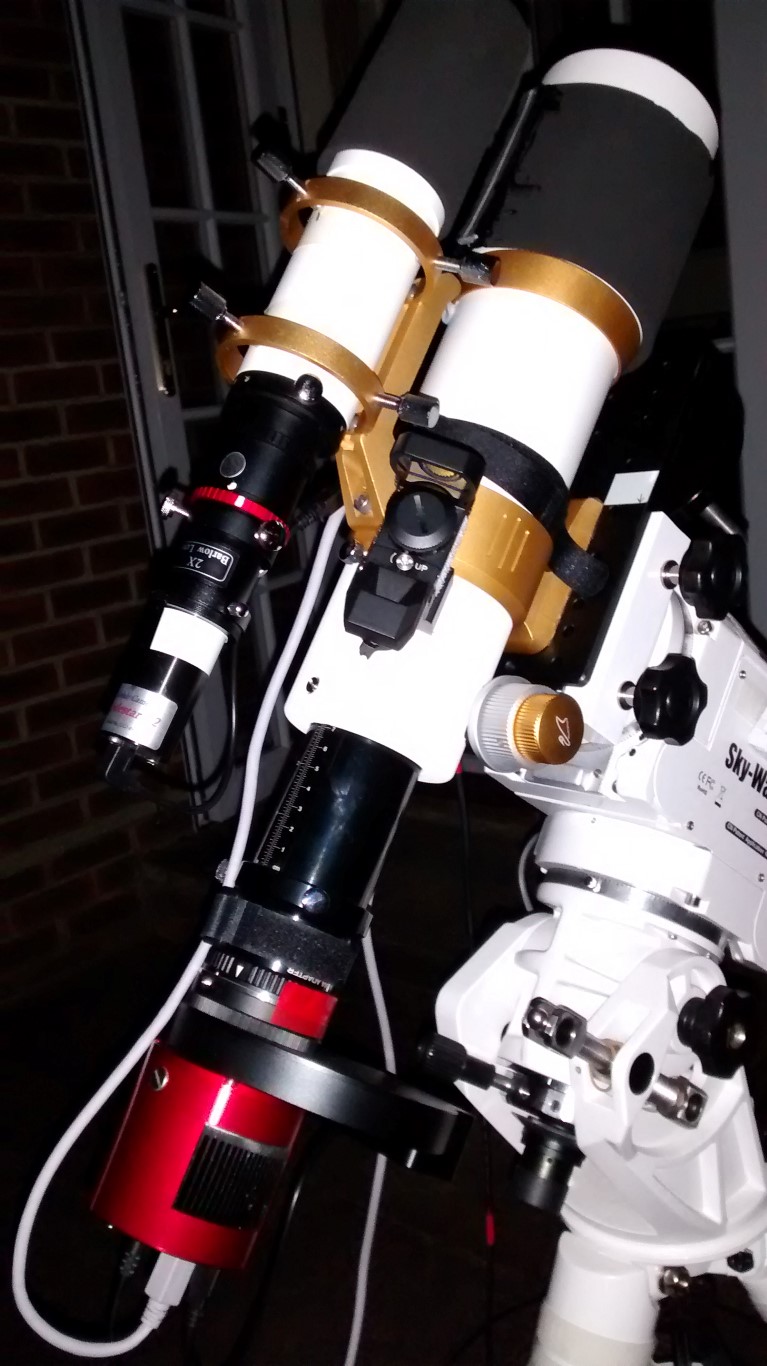
IMG_20170324_194502542 (Medium) The overall impact of these changes has transformed my working practices, making set-up and dismantling quicker, more efficient and more effective, itself a huge improvement.  In addition, I’ve also been able to move the mount and image capture controls indoors, which being more convenient and comfortable has made operating conditions and results much better.  Astrophotography inevitably becomes more complex and working in a warm environment with access to a cup of tea really does improve the outcome when working, in particular when resolving problems.  Given the significant benefits achieved from this housekeeping, in the future I intend to repeat this exercise each summer – it really pays off.
Veil SHO GxCcropHub

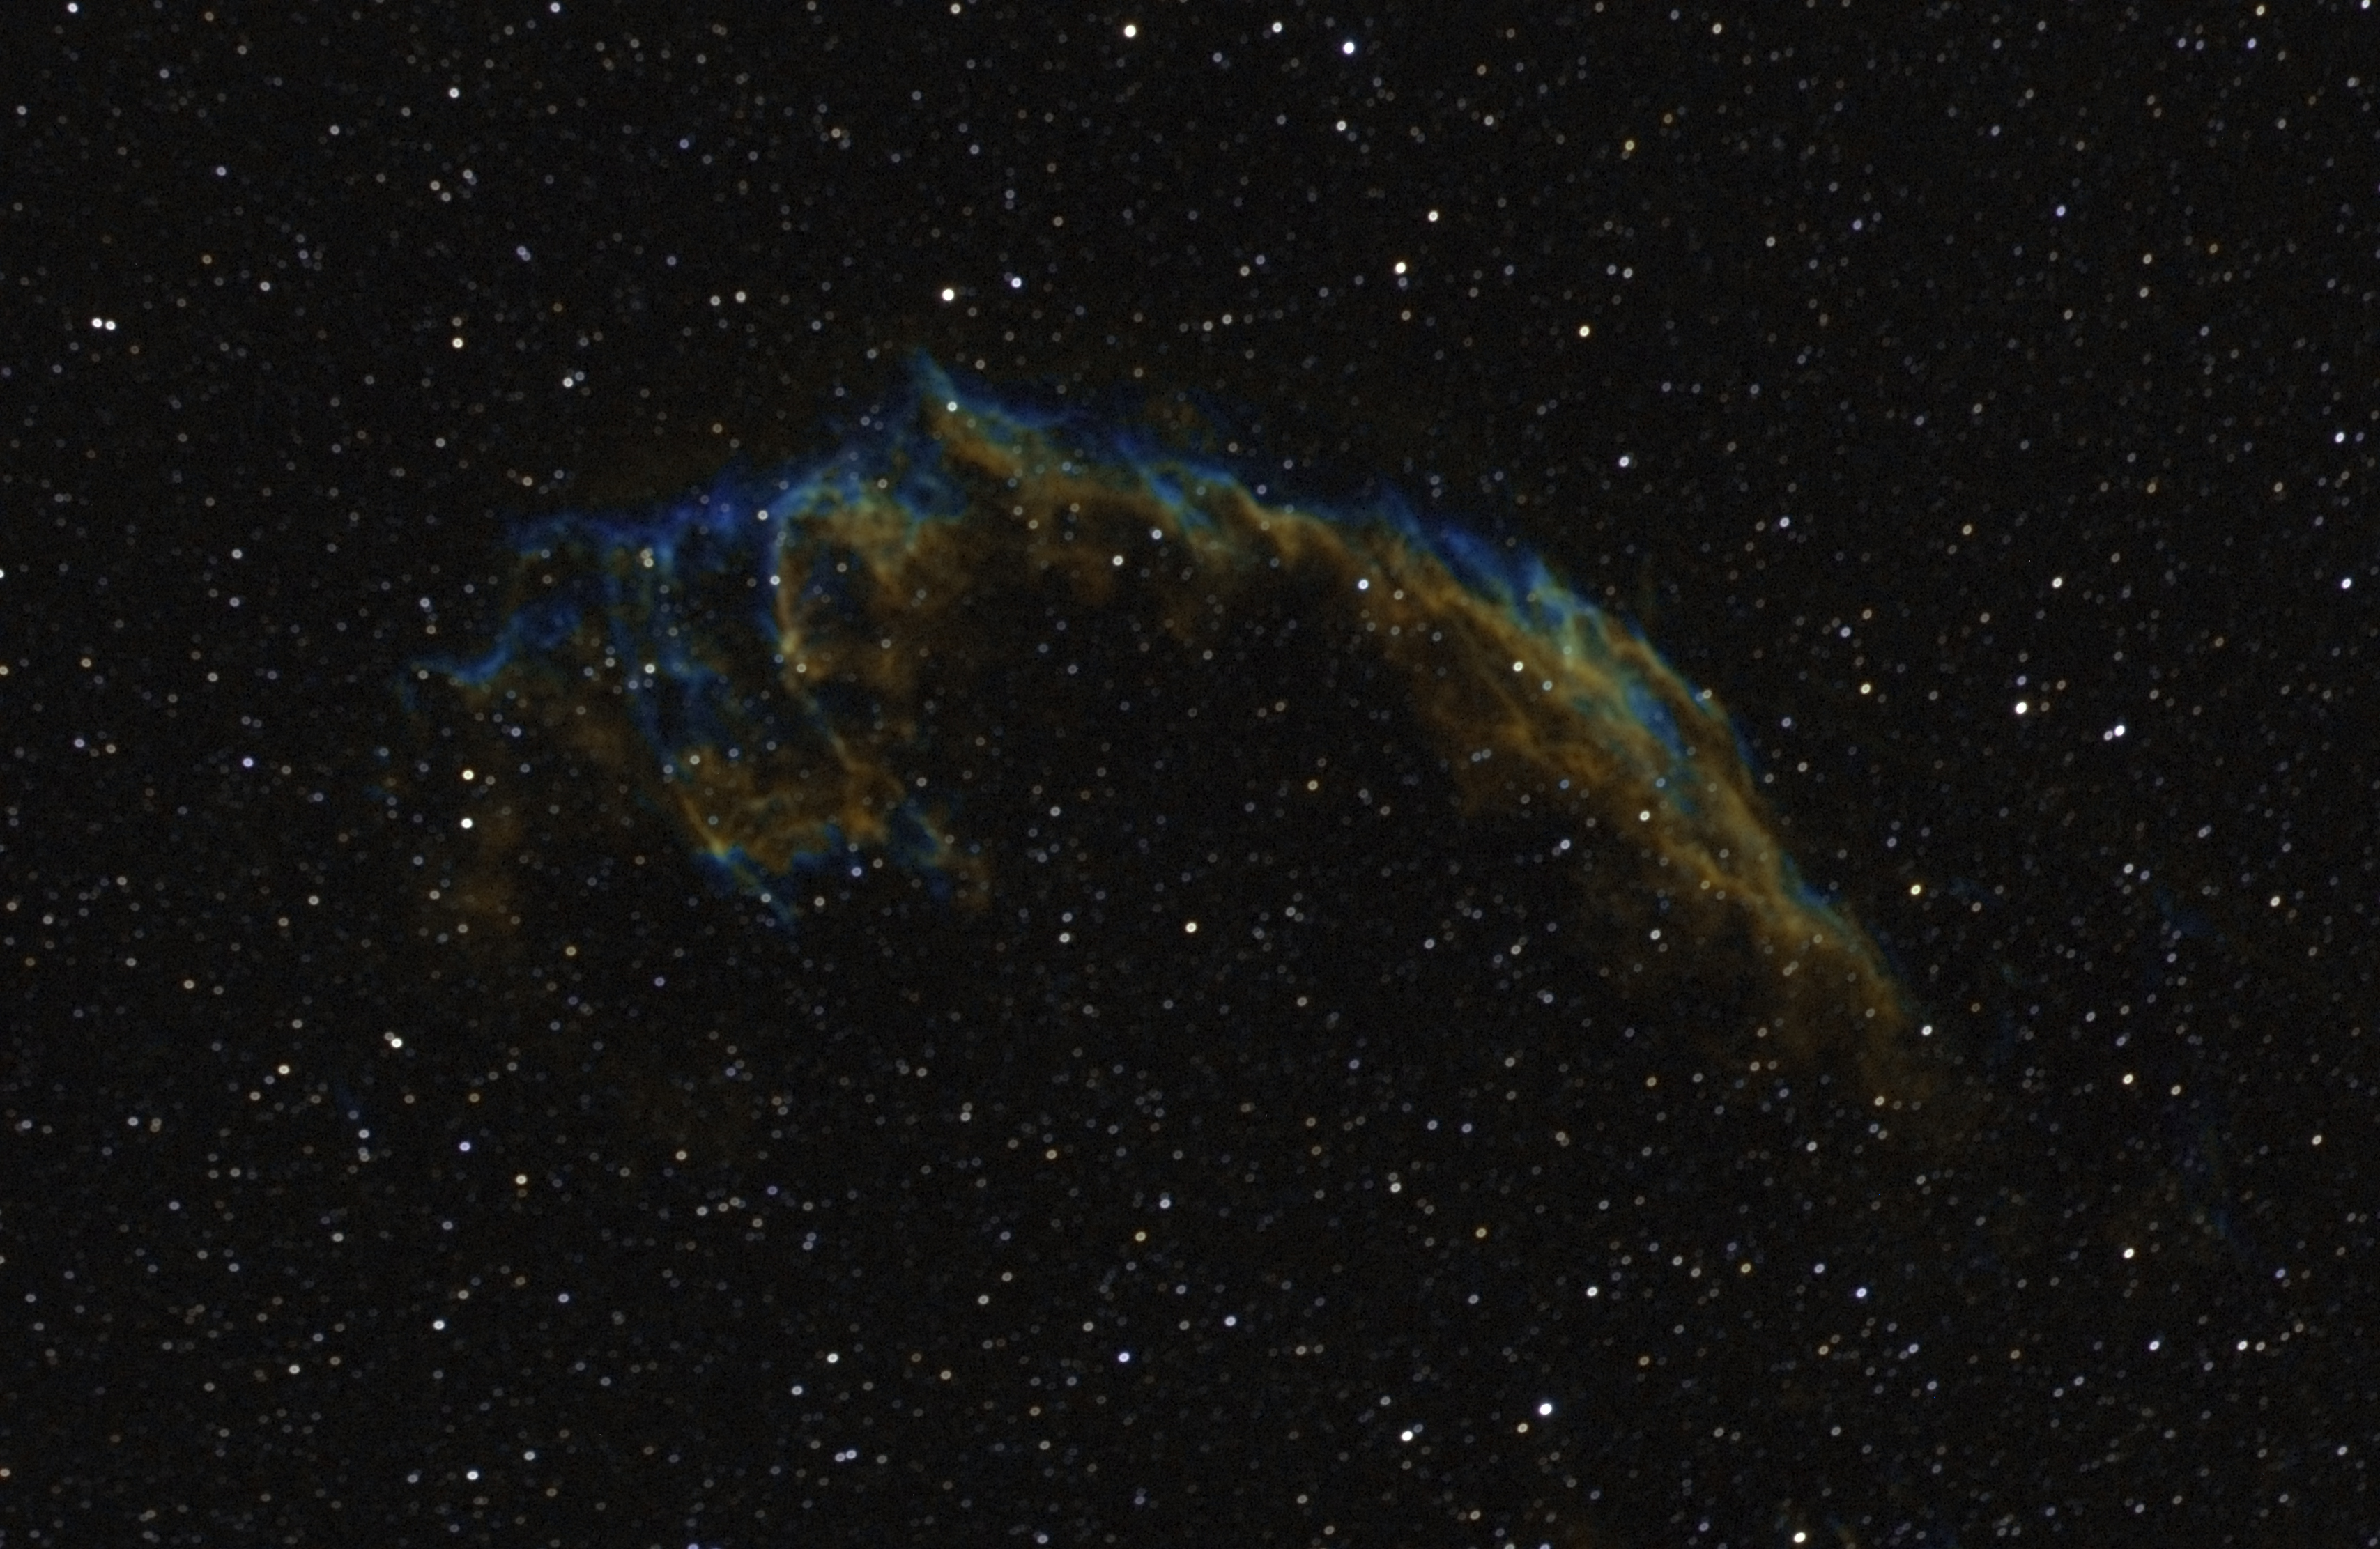
Eastern Veil Nebula in SHO – for Will| 21st June 2017

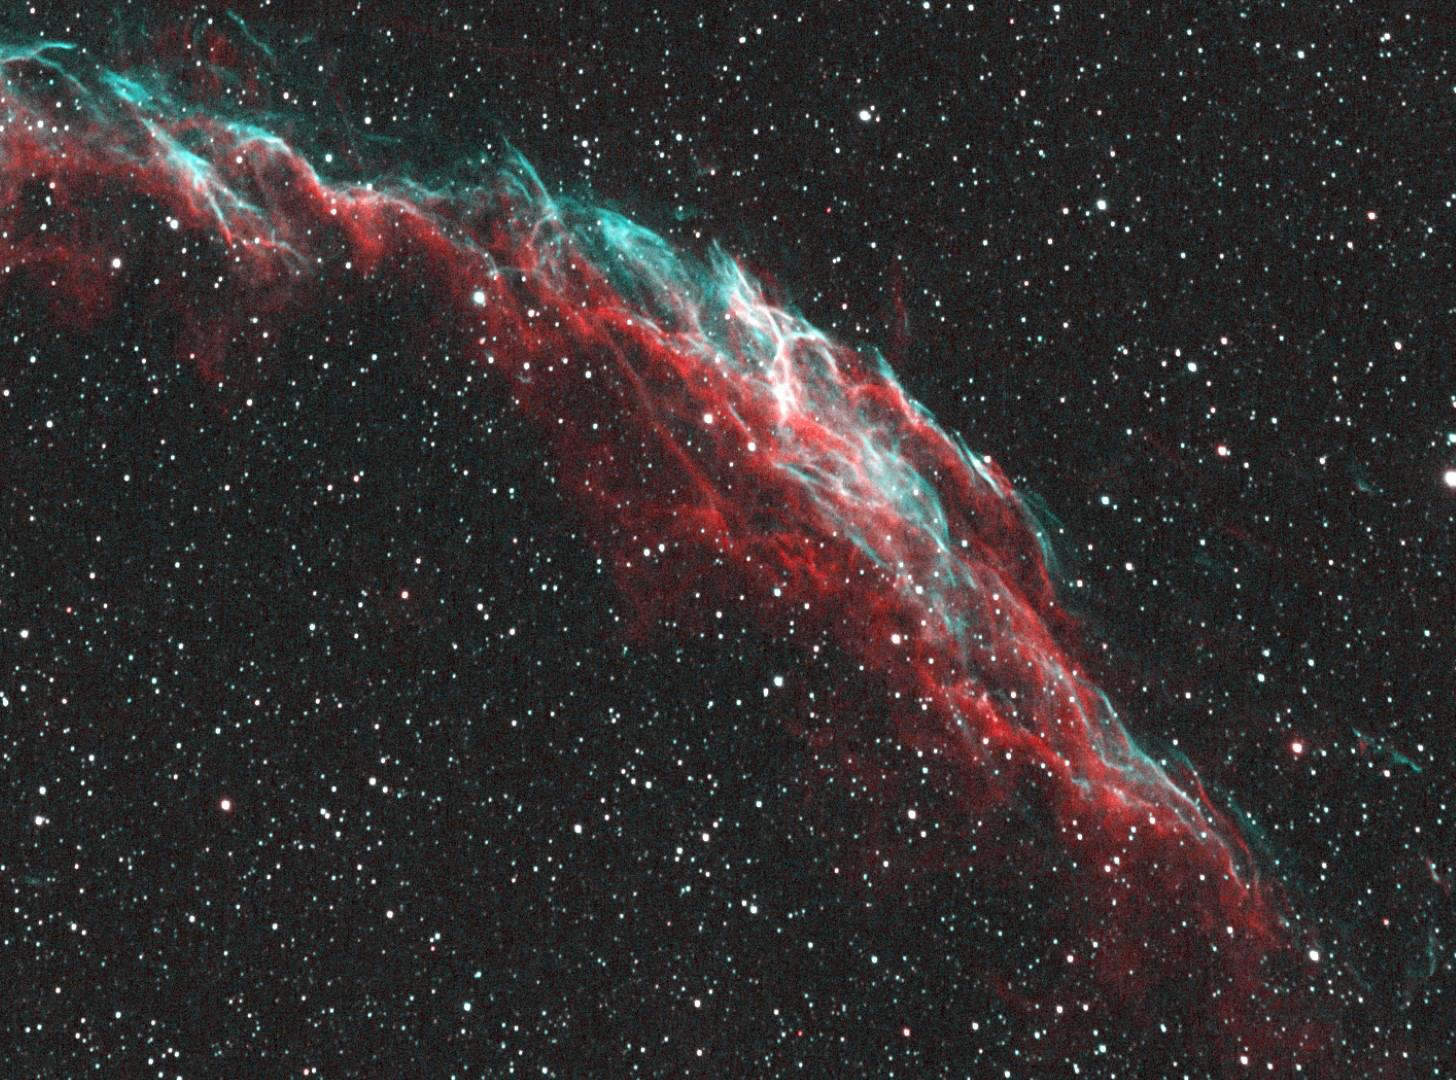
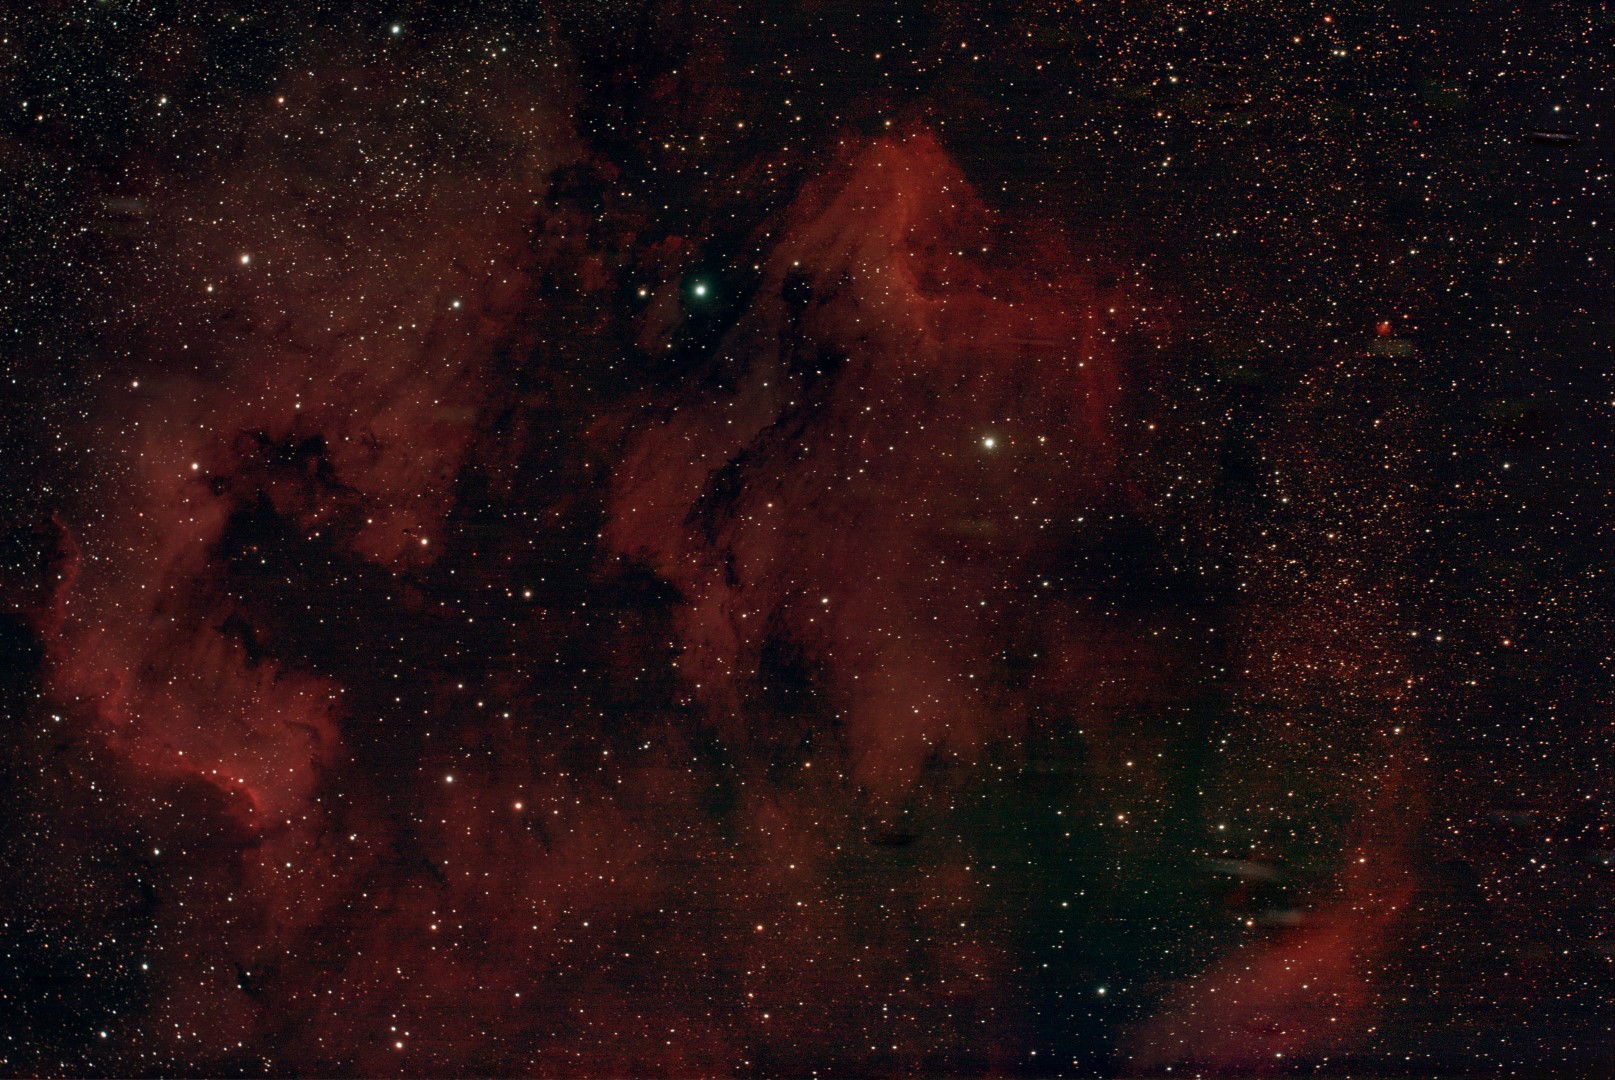
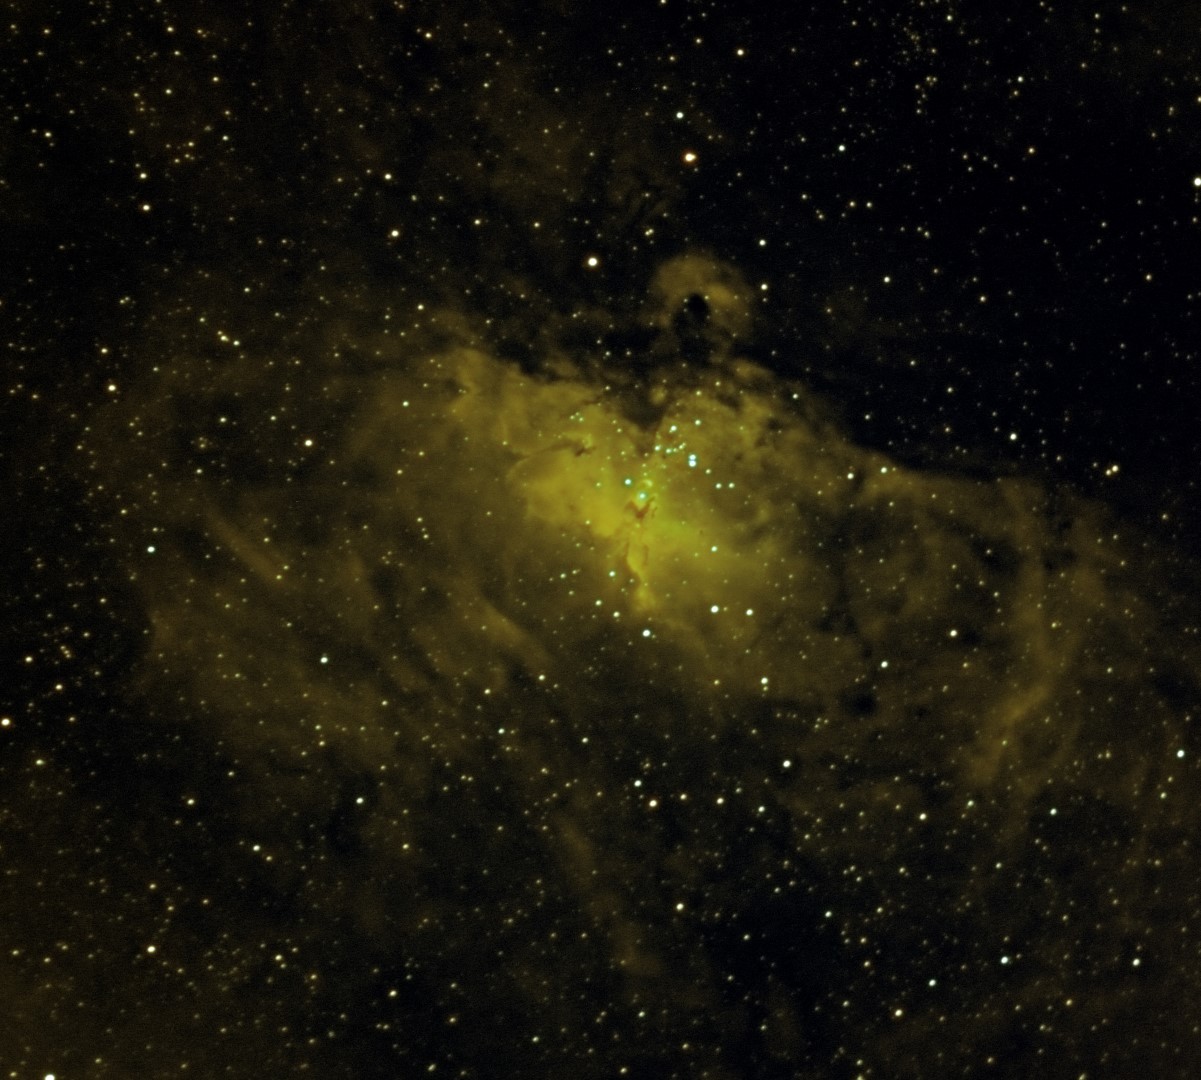
Notwithstanding these virtues, by June I was eager to start imaging again with the ZWO1600MM-Cool and with good weather and some very late nights I was able to obtain a few narrowband subs of the Eagle and North America nebulae.  To my surprise on the morning of 21st June I even briefly managed to image the Eastern Veil Nebula in narrowband; who would have thought imaging the Veil on the Summer Solstice?  Once again the results of just a few subs from the new camera continued to show great promise.

No Date Type* Object Name / Type
10 02/04/17 B NGC 2903 Galaxy
11 02/04/17 B M61 Galaxy
12 18/04/17 B NGC 4438 Markarian’s Chain
13 14/0517 V Jupiter Video Sequence
14 25/05/17 V Jupiter Video Sequence
15 26/05/17 DSLR Comet C/2015 V2
16 11/06/17 V Saturn Video Sequence
17 14/06/17 V Jupiter Video Sequence
18 19/06/16 N M20 Eagle Nebula
20 20/06/17 N NGC 7000 North America Nebula
21 21/06/17 N NGC 6992 Eastern Veil Nebula

JULY TO SEPTEMBER

After a taste of the ZWO1600MM-Cool at the start of the year and briefly around the Summer Solstice, the end of July finally brought the return of astronomical darkness, more suitable DSO targets and at last the opportunity to get serious with narrowband and broadband imaging.  Combined with some exceptionally good weather and clear skies this period was very productive and successful.  Without plate solving the maximum imaging time I can achieve at the moment is about two hours before or after the Meridian but using a high Gain of 300, 180 second exposures and autoguiding, for the first time I was able to get some very decent subs of various nebulae – now it was really getting exciting!

At the time of purchase I wavered between the ZWO EFW x5 filter or the soon to be released alternative x8 version and in the end waited for the larger version, together with the matched LRGB, Ha, OIII and SII filter bundle.  There were initial problems controlling the EFW and camera, inevitably resolved after some time with a new driver code but in the end the x8 EFW and camera have proved to be an excellent combination.  I have especially found narrowband imaging to be a revelation and when possible have so far mostly concentrated on this technique; its use when the Moon is about is an added and somewhat pleasing bonus.  The detail shown in Ha-subs can often be quite spectacular and for the best results I’ve discovered that more aggressive stretching is needed.
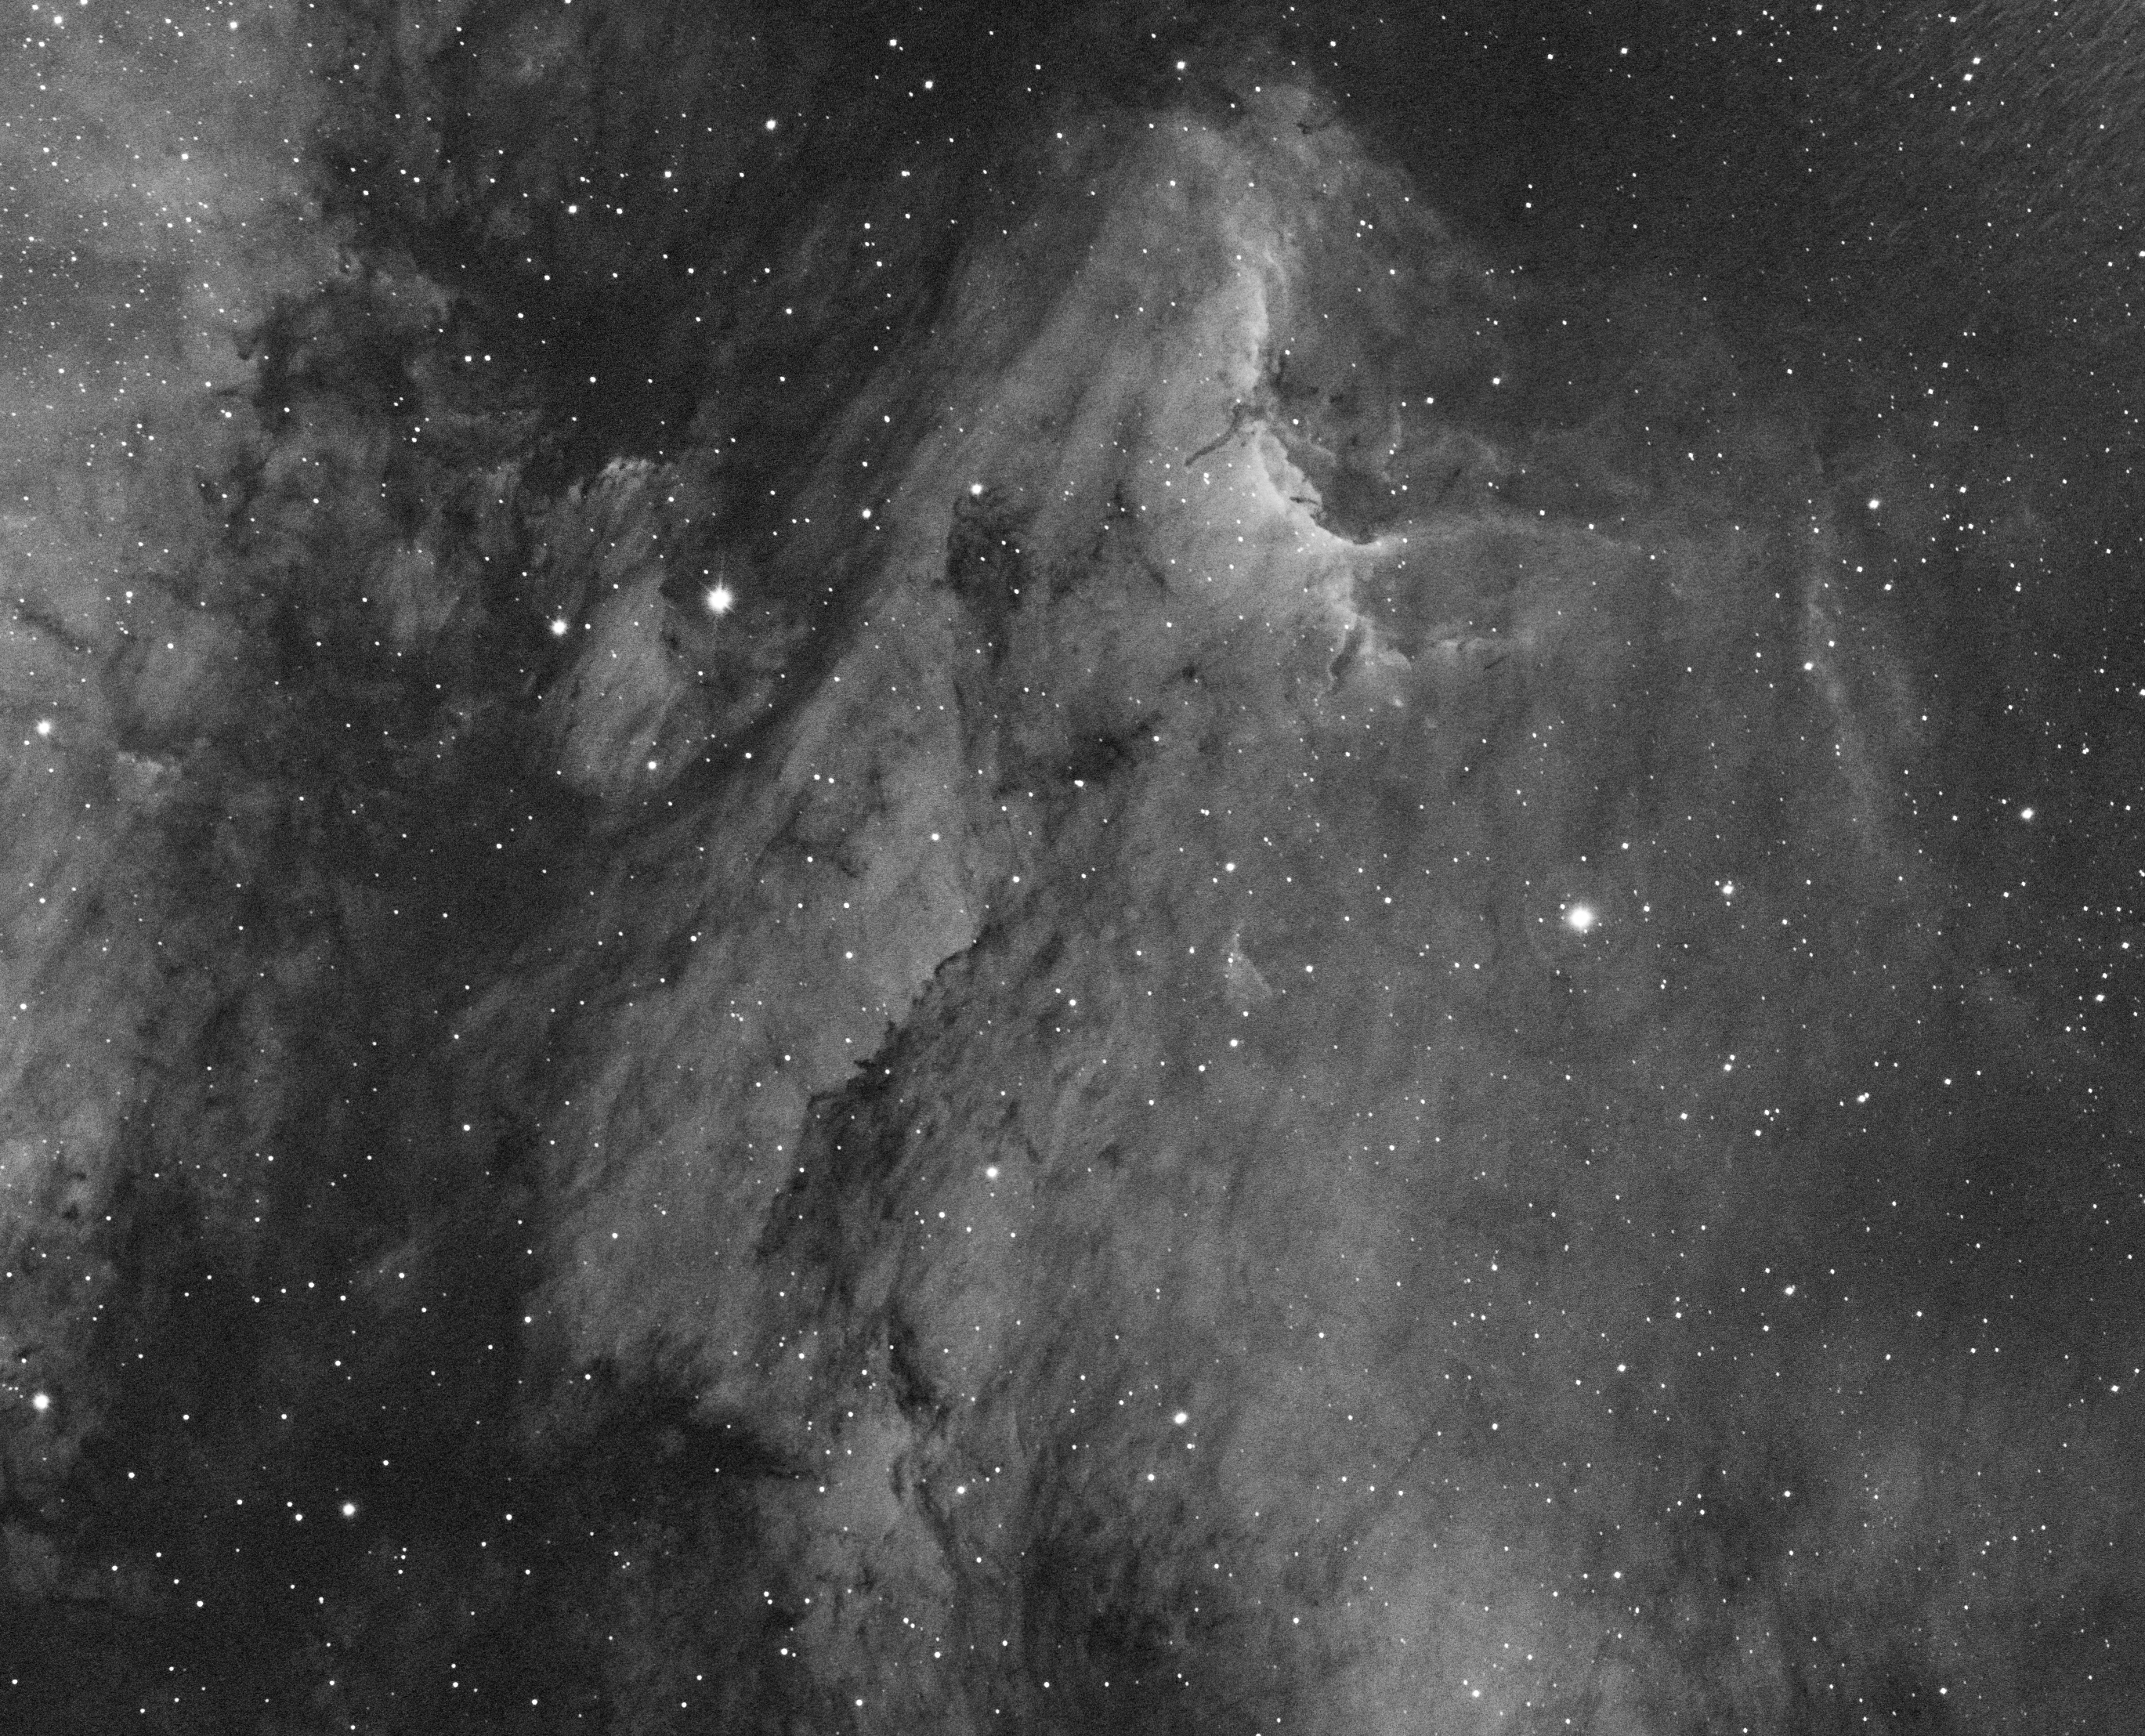
Picture saved with settings embedded.

To my surprise, I’ve so far found LRGB broadband imaging more difficult than expected, both to capture and in post-processing.  It’s apparent that Gain and Offset settings are more critical than narrowband, perhaps because such objects tend to be brighter, with more contrast and often greater complexity?  I had been looking forwards to imaging the Andromeda Galaxy in LRGB and as is often the case with M31, first thought that my subs were overblown.  However, after dialling down Gain, Offset and exposure time the alternative result was even more disappointing.  It was instructive that by returning to the original data and applying greater care during processing, I was able to tease a good image from the subs after all.

No Date Type* Object Name / Type
22 27/07/17 N M20 Trifid Nebula
23 31/07/17 N NGC 6960 Western Veil Nebula
        & Pickering’s Triangle
24 10/08/17 N IC 5070 Pelican Nebula
25 11/08/17 N IC 1318 SADR Region
26 11/08/17 N NGC 6888 Crescent Nebula
27 13/08/17 DSLR Perseids  
28 19/08/17 N NGC 6995/ NGC 6992 Eastern (Bat) Veil Nebula
29 20/08/17 B M15 Globular Cluster
30 27/08/17 N NGC 7000 North America Nebula
31 28/08/17 B M31 Andromeda Galaxy
32 28/08/17 B M33 Pinwheel Galaxy
33 15/09/17 DSLR Milky Way  

OCTOBER TO DECEMBER

From the experience of the new camera to-date I had arrived at two critical questions:

  • What are ‘right’ Gain and Offset settings?
  • What are the ‘best’ methods for LRGB imaging and post-processing?

Imaging during the final quarter then turned out to be something of a mixed bag trying to answer these questions.

I have a general feel about Gain, Offset and the related ADU values but if I’m honest despite reading around the subject I’m still mainly in the dark – no pun intended!  Such are the new challenges posed for all by the features of the ZWO1600MM-Cool it seems to me that even after 12 months the jury remains out over the answer to the first question – so it’s not just me!

The manufacturer provides value guidelines but based on experience, three schools of thought seem to have emerged from users:

  • Use Unity Gain 139 setting and vary exposure times – longer for nebulae, shorter for brighter objects such as M31;
  • Use low Gain for bright objects and higher Gain for faint objects + short and longer exposures, mindful of achieving a relevant ADU level across the resulting sub;
  • Use very high Gain and take lots and lots of short to moderate exposures.

I’m still experimenting with each of these techniques but increasingly lean towards higher Gain and varied exposure times of between 60” and 300”.  I have certainly found that lower Gain and short exposures didn’t work well for me when applied to the Andromeda Galaxy and California Nebula.

One issue when taking shorter exposures with the ZWO camera compared to a CCD is that many more subs are required, which inevitably needs very large storage and processing memory requirements – it’s a small price to pay for such quality and other advantages.  My laptop was already well specced for processing, with an Intel i7 64 bit chip 16GB RAM and to store the extra data I purchased a 4Tb external hard disc at a very reasonable cost = problem solved.
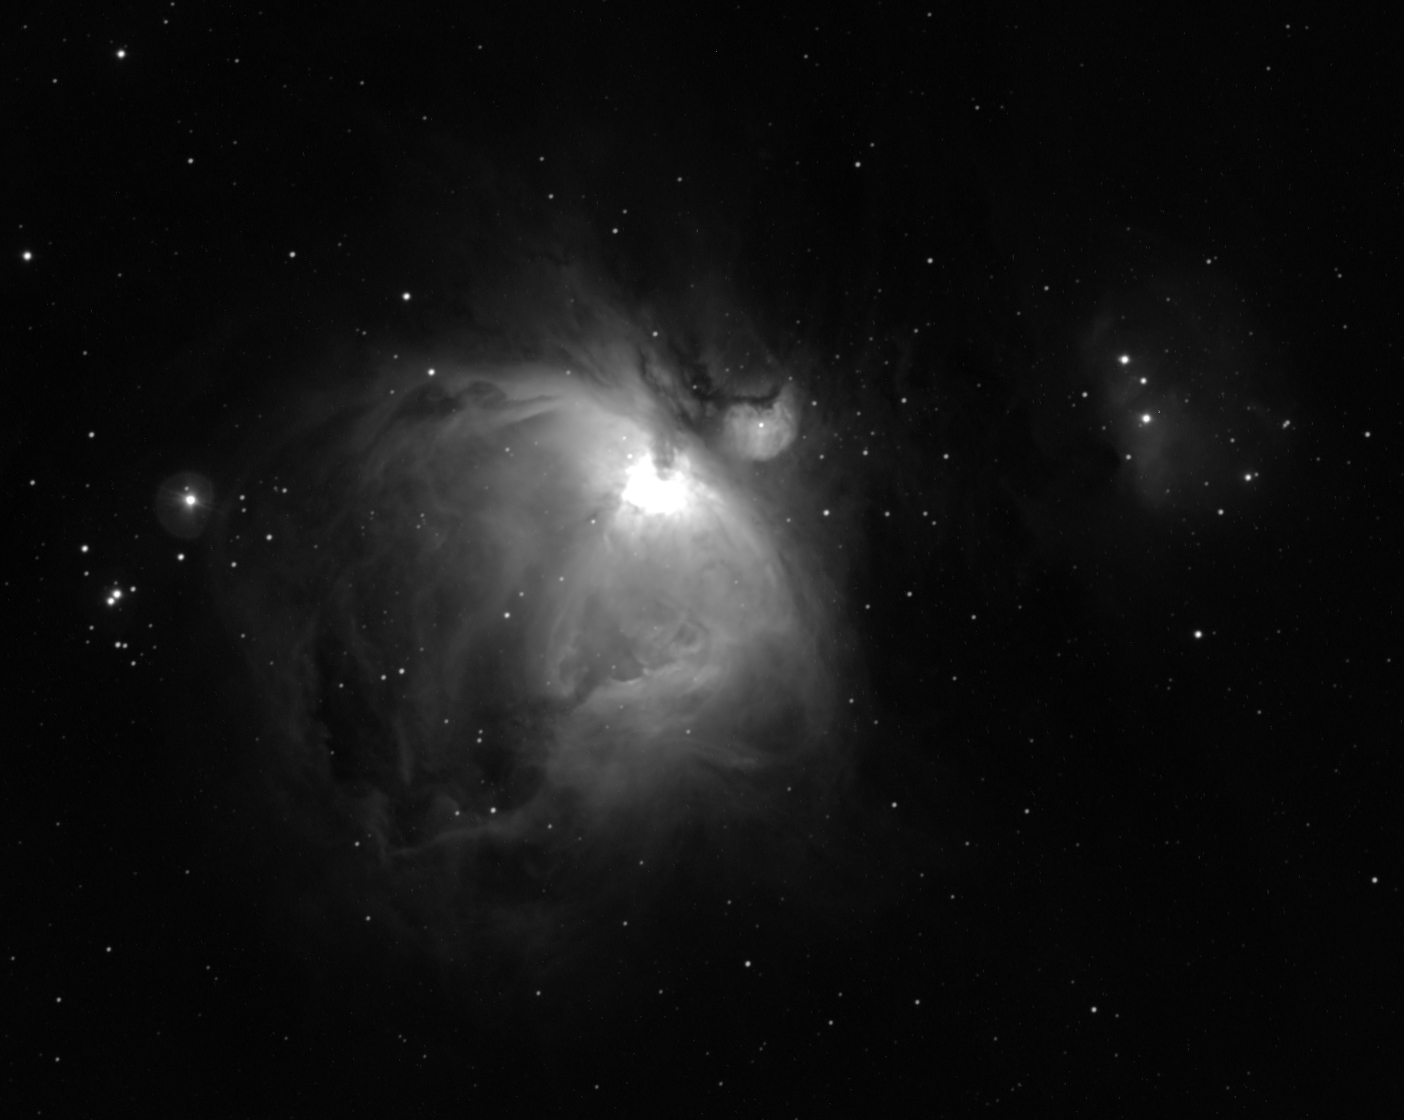
Picture saved with settings embedded.Like most people M42 has long been one of my favourites but like M31 I’m still struggling achieve a decent broadband image with the new camera and M45 is a similar problem; there’s nothing wrong with the camera, I just haven’t mastered the technique required yet.  However  narrowband images of M42, the Horsehead and Monkey Head nebulae all worked well at my standard default used of Gain 300 and Offset 10.

In preparation for further experimentation, at the beginning of  November I took time to compile a more comprehensive calibration library at various Gain, Offset and exposure settings.  Like most CCD cameras the new ZWO camera incorporates cooling to -45oC below ambient in order to reduce noise that is associated with all photoelectric sensors; I have been using the camera at a nominal temperature of -20oC.  By having such control it is therefore possible to obtain the aforementioned calibration frames irrespective of the ambient temperature and at any time.  Since June I’d already been successfully using another calibration set which has saved considerable time during each imaging session, unlike DSLR imaging which generally has to be undertaken at the same time + every time to ensure the same conditions.

Passing Shot: I’m posting Reflections later than usual this year having just returned from a protracted trip to New Zealand over the Christmas and New Year period.  The night sky down under was spectacular and I managed some good widefield imaging using a basic DSLR and tripod set-up; more on astronomy in New Zealand at a later date – Watch This Space Man! In the meantime below is a taster of the results taken whilst staying at my daughter and son-in-law’s house in Ohaupo, North Island.  Other than the beautiful Milky Way itself, note the Southern Cross just above the roof line and especially the large and Small Magellanic Clouds.
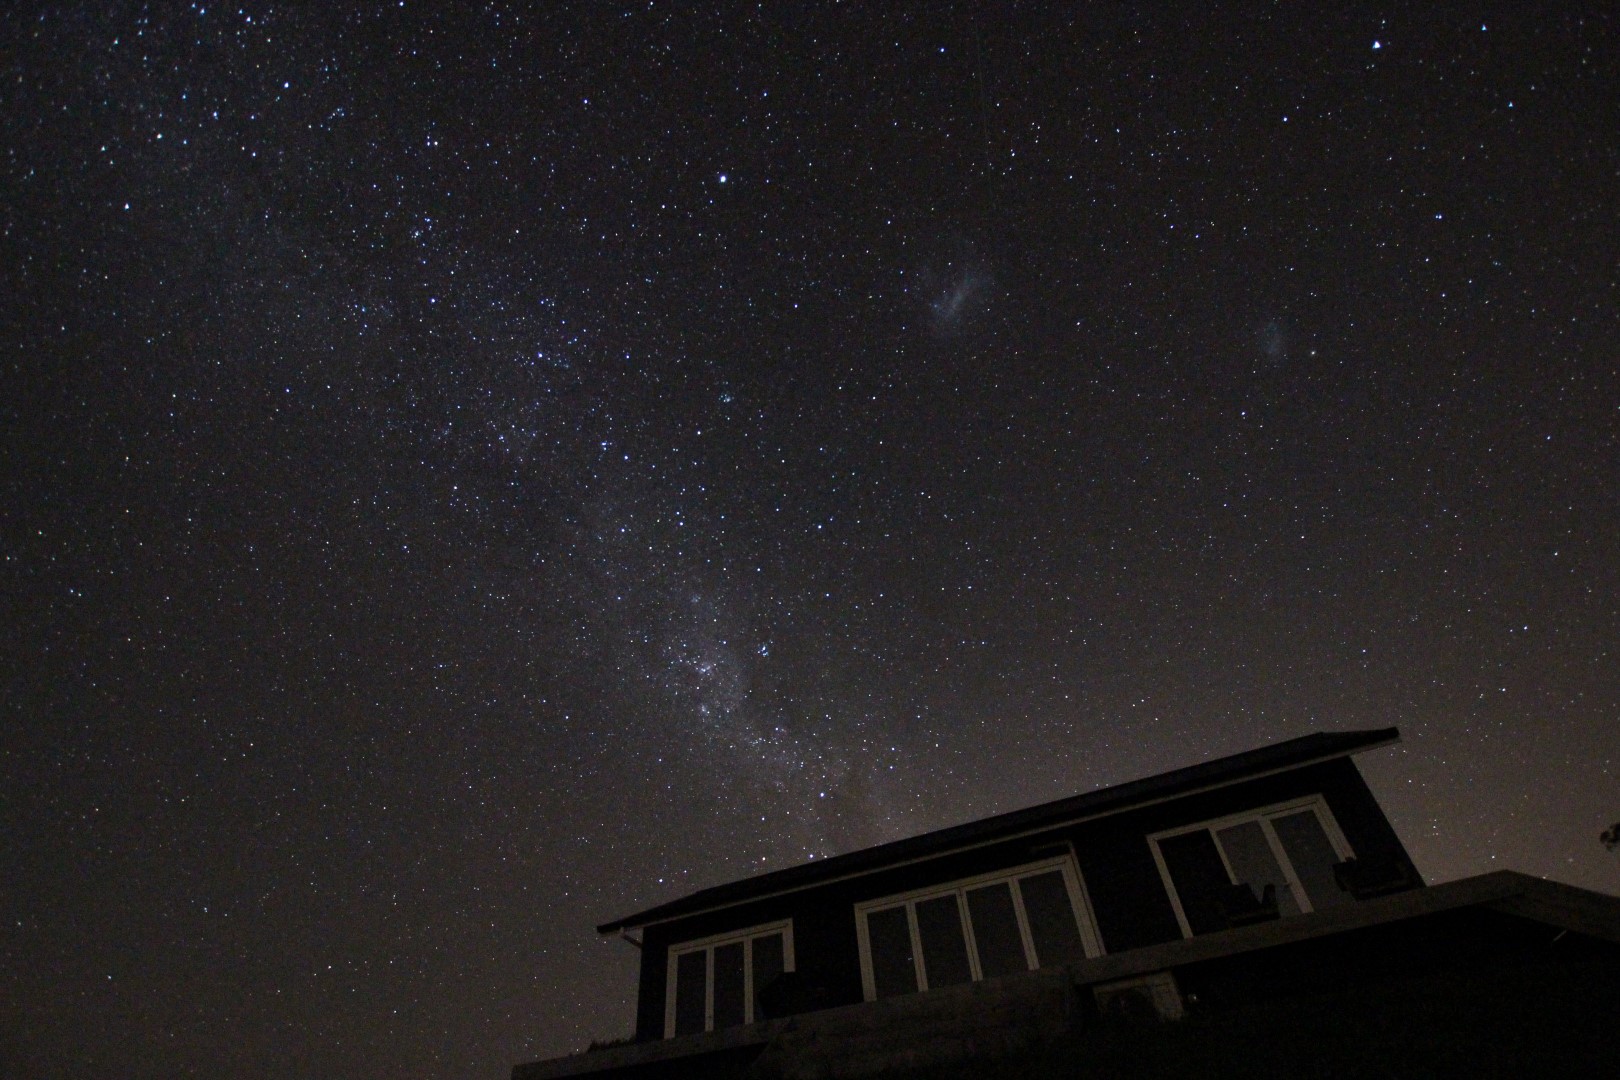
IMG_9984 (Large)

No Date Type Object Name / Type
34 12/10/17 B M31 Andromeda Galaxy
35 13/10/17 N NGC 1499 California Nebula
36 28/10/17 B NGC 2174 Monkey Head Nebula
37 28/10/17 B IC 434 Horsehead Nebula
38 30/10/17 B M45 Pleiades
39 30/10/17 B M42 Orion Nebula
40 01/11/17 N NGC 1499 California Nebula
41 13/11/17 DSLR Jupiter-Venus Conjunction
42 25/11/17 B NGC 1333 Reflection Nebula / Perseus
43 26/11/17 N NGC 2264 Cone Nebula

  ETCETERA

Once again my astronomy year was often shaped by other events and related matters.  Throughout the first quarter I completed an online MOOC course at Edinburgh University on the Higgs Boson and Particle Physics hosted by a wide variety of relevant experts, including no less than Peter Higgs himself.  It’s relevance to astronomy only came right at the end but was well worth waiting for.  Based on the theories of particle physics, the Higgs Boson, scalar fields and inflation, cosmologist Professor John Peacock ably demonstrated:

  • There was no Big Bang;
  • The existence of a multiverse – of which our Universe is but a part.

Intuitively I’ve long wondered about such possibilities and Professor Peacock’s lectures were by far the most convincing case I have seen for such a model.  Of course the implications of these conclusions are  profound and I’ve continued to think about this for the rest of the year.

As previously reviewed, for two weeks in February it was my good fortune to sail along the Norwegian coastline on the Richard With, flagship of the Hurtigruten ferry line.  At this time of the year it was very, very cold being mostly north of the Arctic Circle and the weather can be rough at times but overall the journey was outstanding.  Like most, my personal goal was to see and image the Aurora Borealis, which I was successful in doing on a number of evenings.  However, it’s got to be said that such imaging from a moving ship at -20C is both difficult and very uncomfortable.  Whilst I was pleased with the photographs, next time I’d prefer to be on land, where it should be so much easier.

Inspired both by the aforementioned trip and meeting a fellow geologist on board the Richard With who worked as a guest speaker on other cruises, I subsequently attended an audition to lecture myself on astrophotography.  Whilst my talk was successful and I was chosen to join the agency’s list of speakers, I have yet to be asked to join a cruise.

Favourite Images

With only a few exceptions, the outcome of my astrophotography in 2017 reflects the transition that took place from DSLR to the ZWO1600MM-Cool mono CMOS sensor camera.  The new camera has in every sense been a game changer and the resulting images have shown just how much colour and detail can be achieved in both broadband and especially narrowband.  Some of my personal favourites taken during the year are shown below, in no particular order:

Aurora Borealis-2 Northern Norway February 2017

LRGB1 GXCrop

NGC 2244 SHO Final1

Picture saved with settings embedded.

SHO Final

Eastern Veil Nebula detail in Bicolour 19th August 2017

Western Veil Nebula (Witch's Broom & Pickerings Triangle) in Ha-OIII Bicolour July 2017.jpg

MiIky Way Isle of Purbeck Dorset September 2017

M31 FINAL

CalCrop FINAL

SHO2 FINAL

Cygnus Wall BiCol FINAL

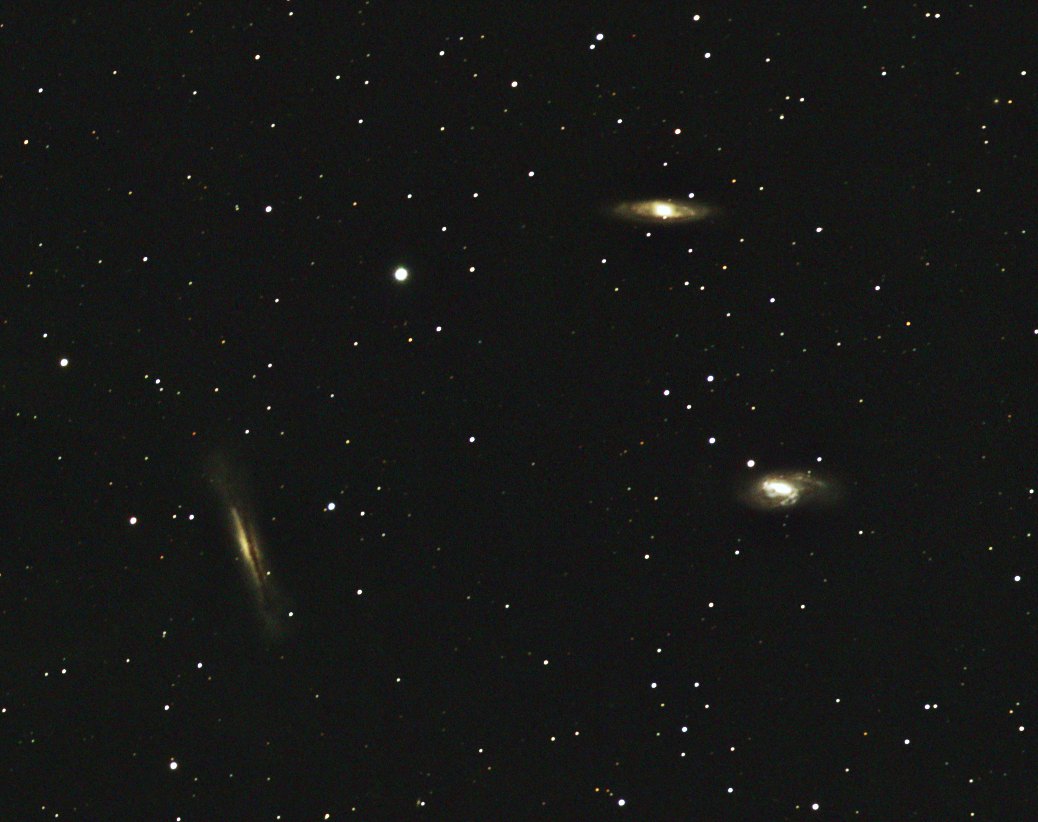
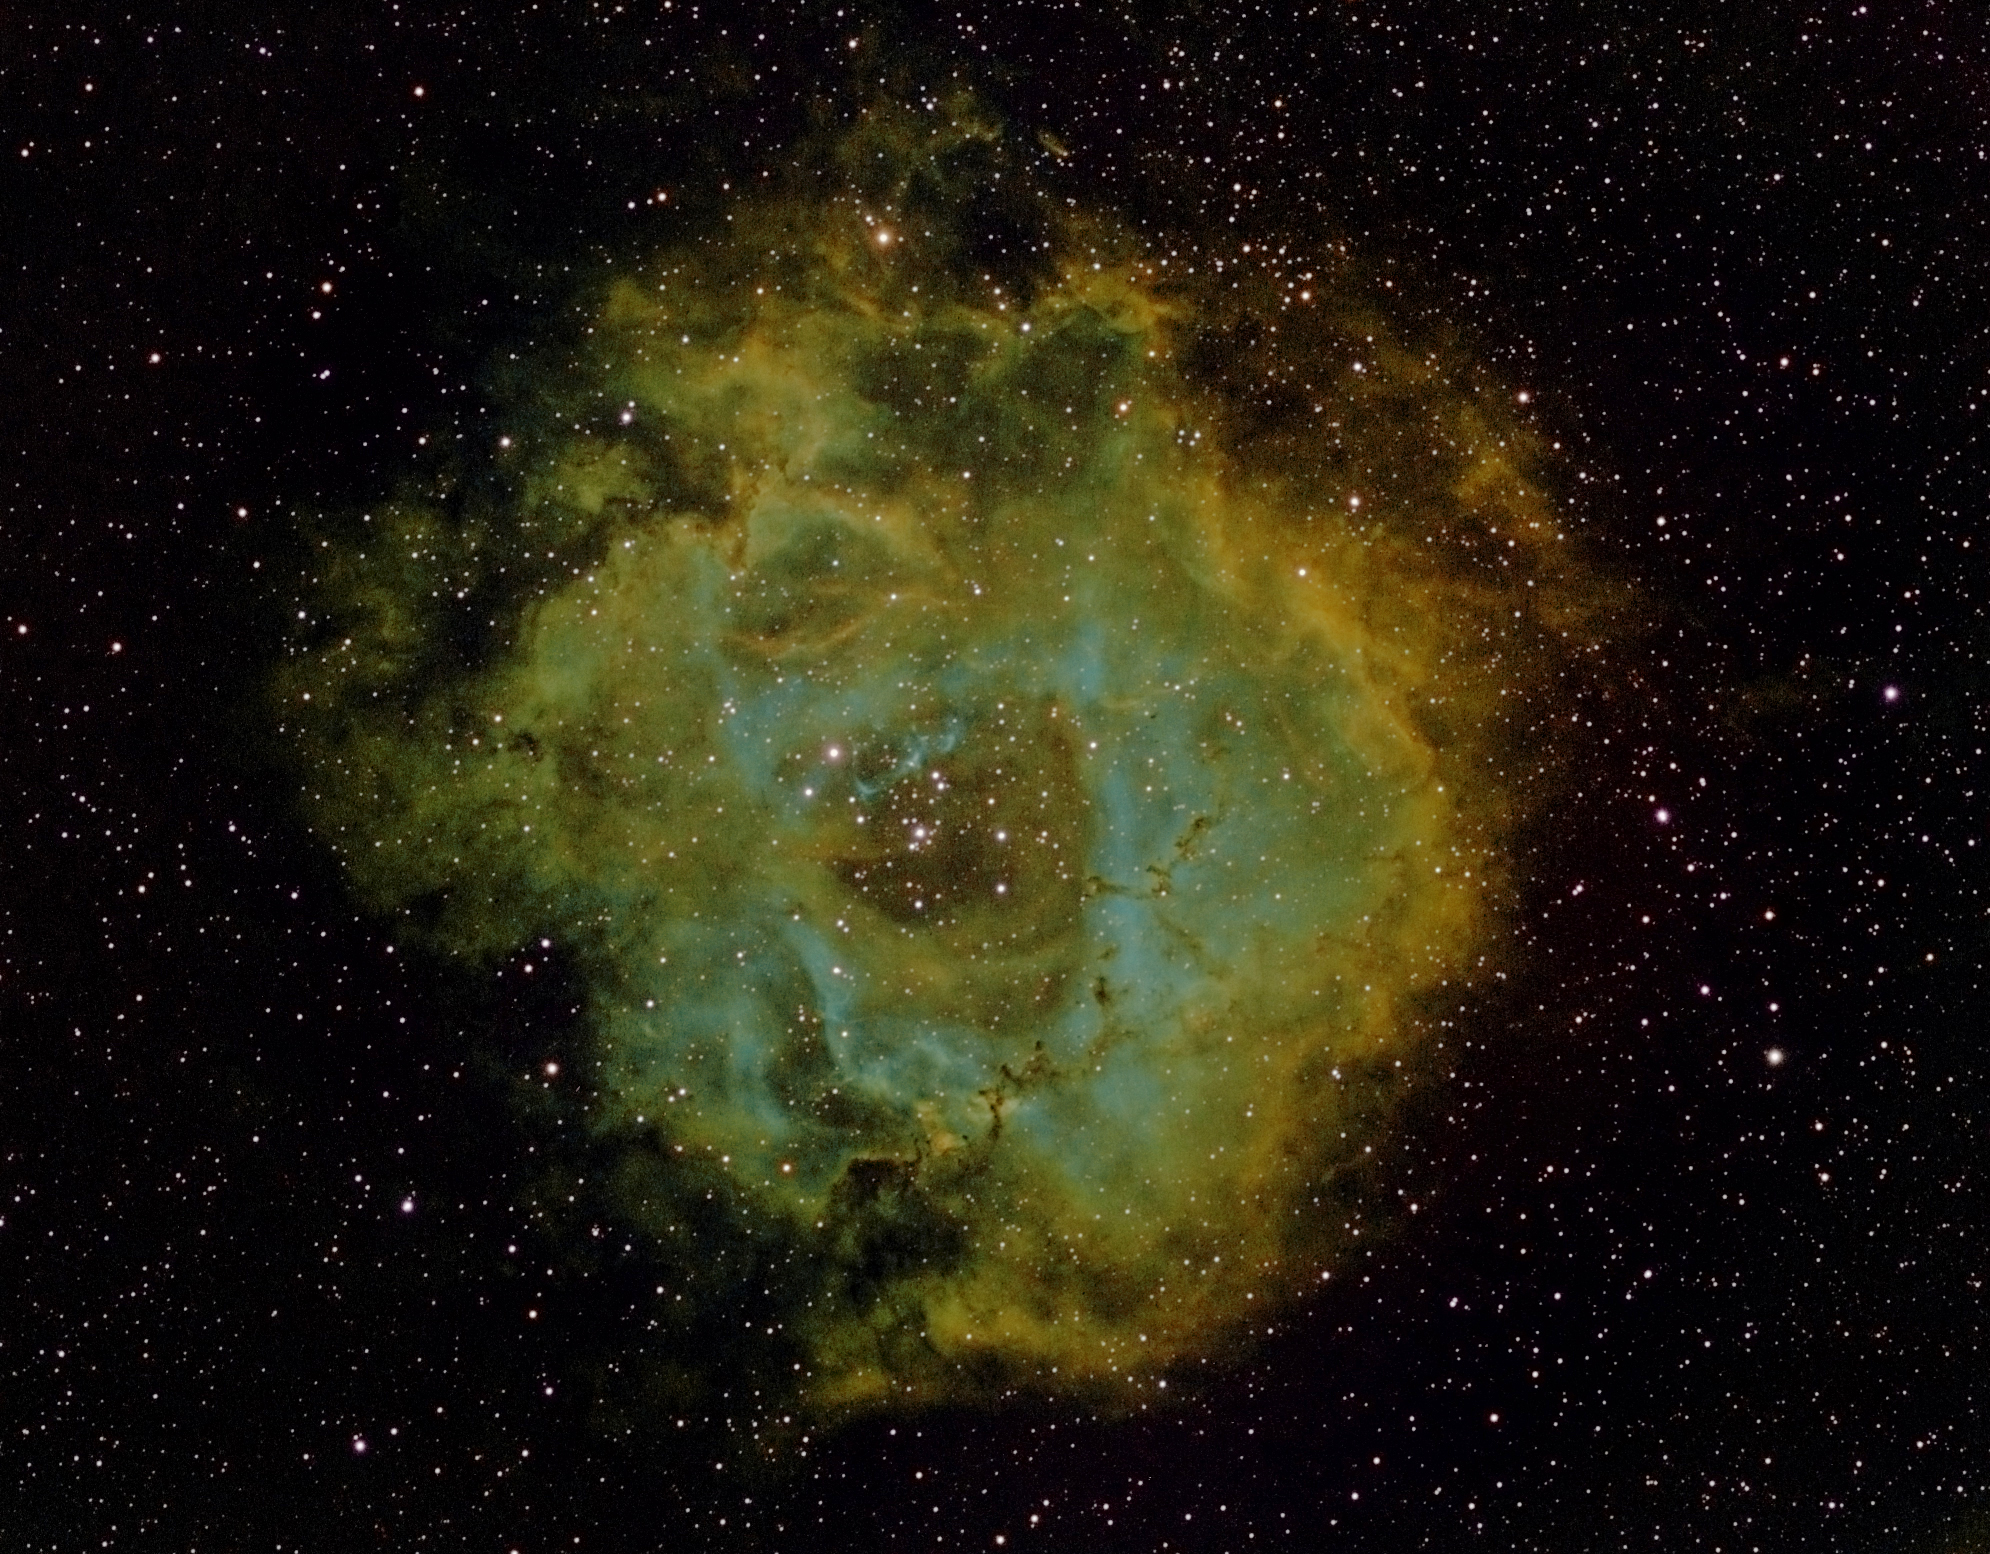
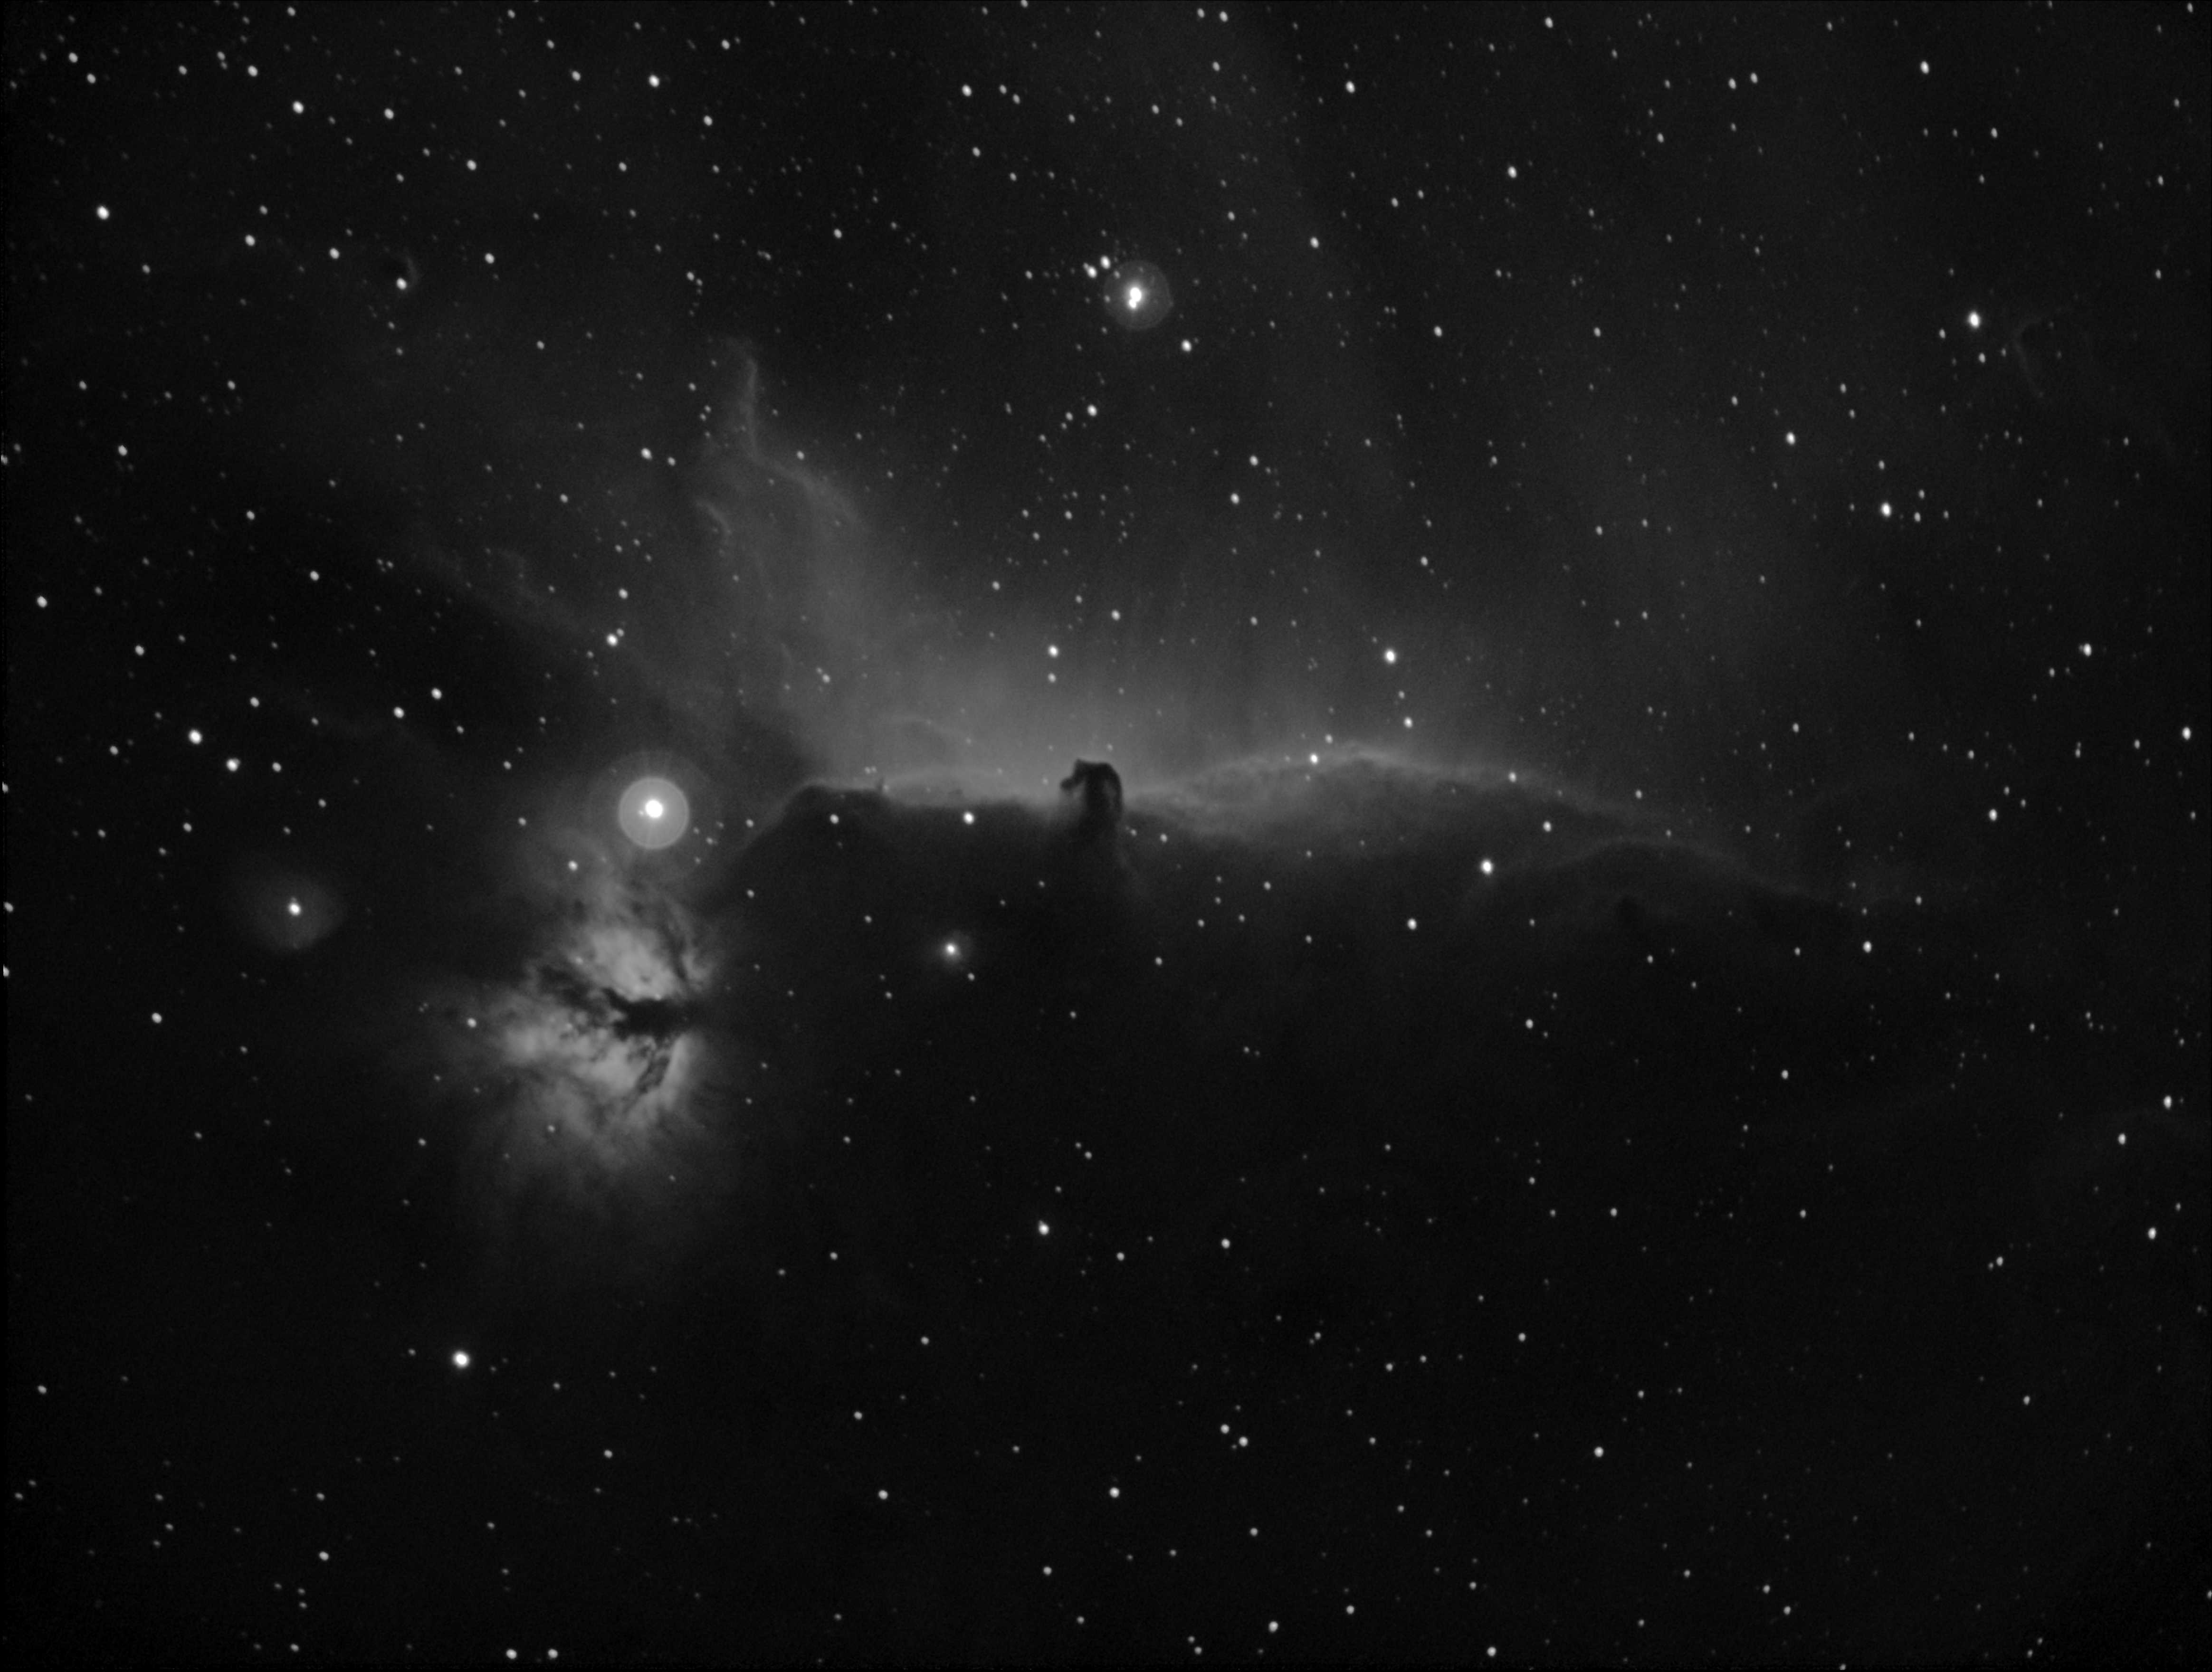
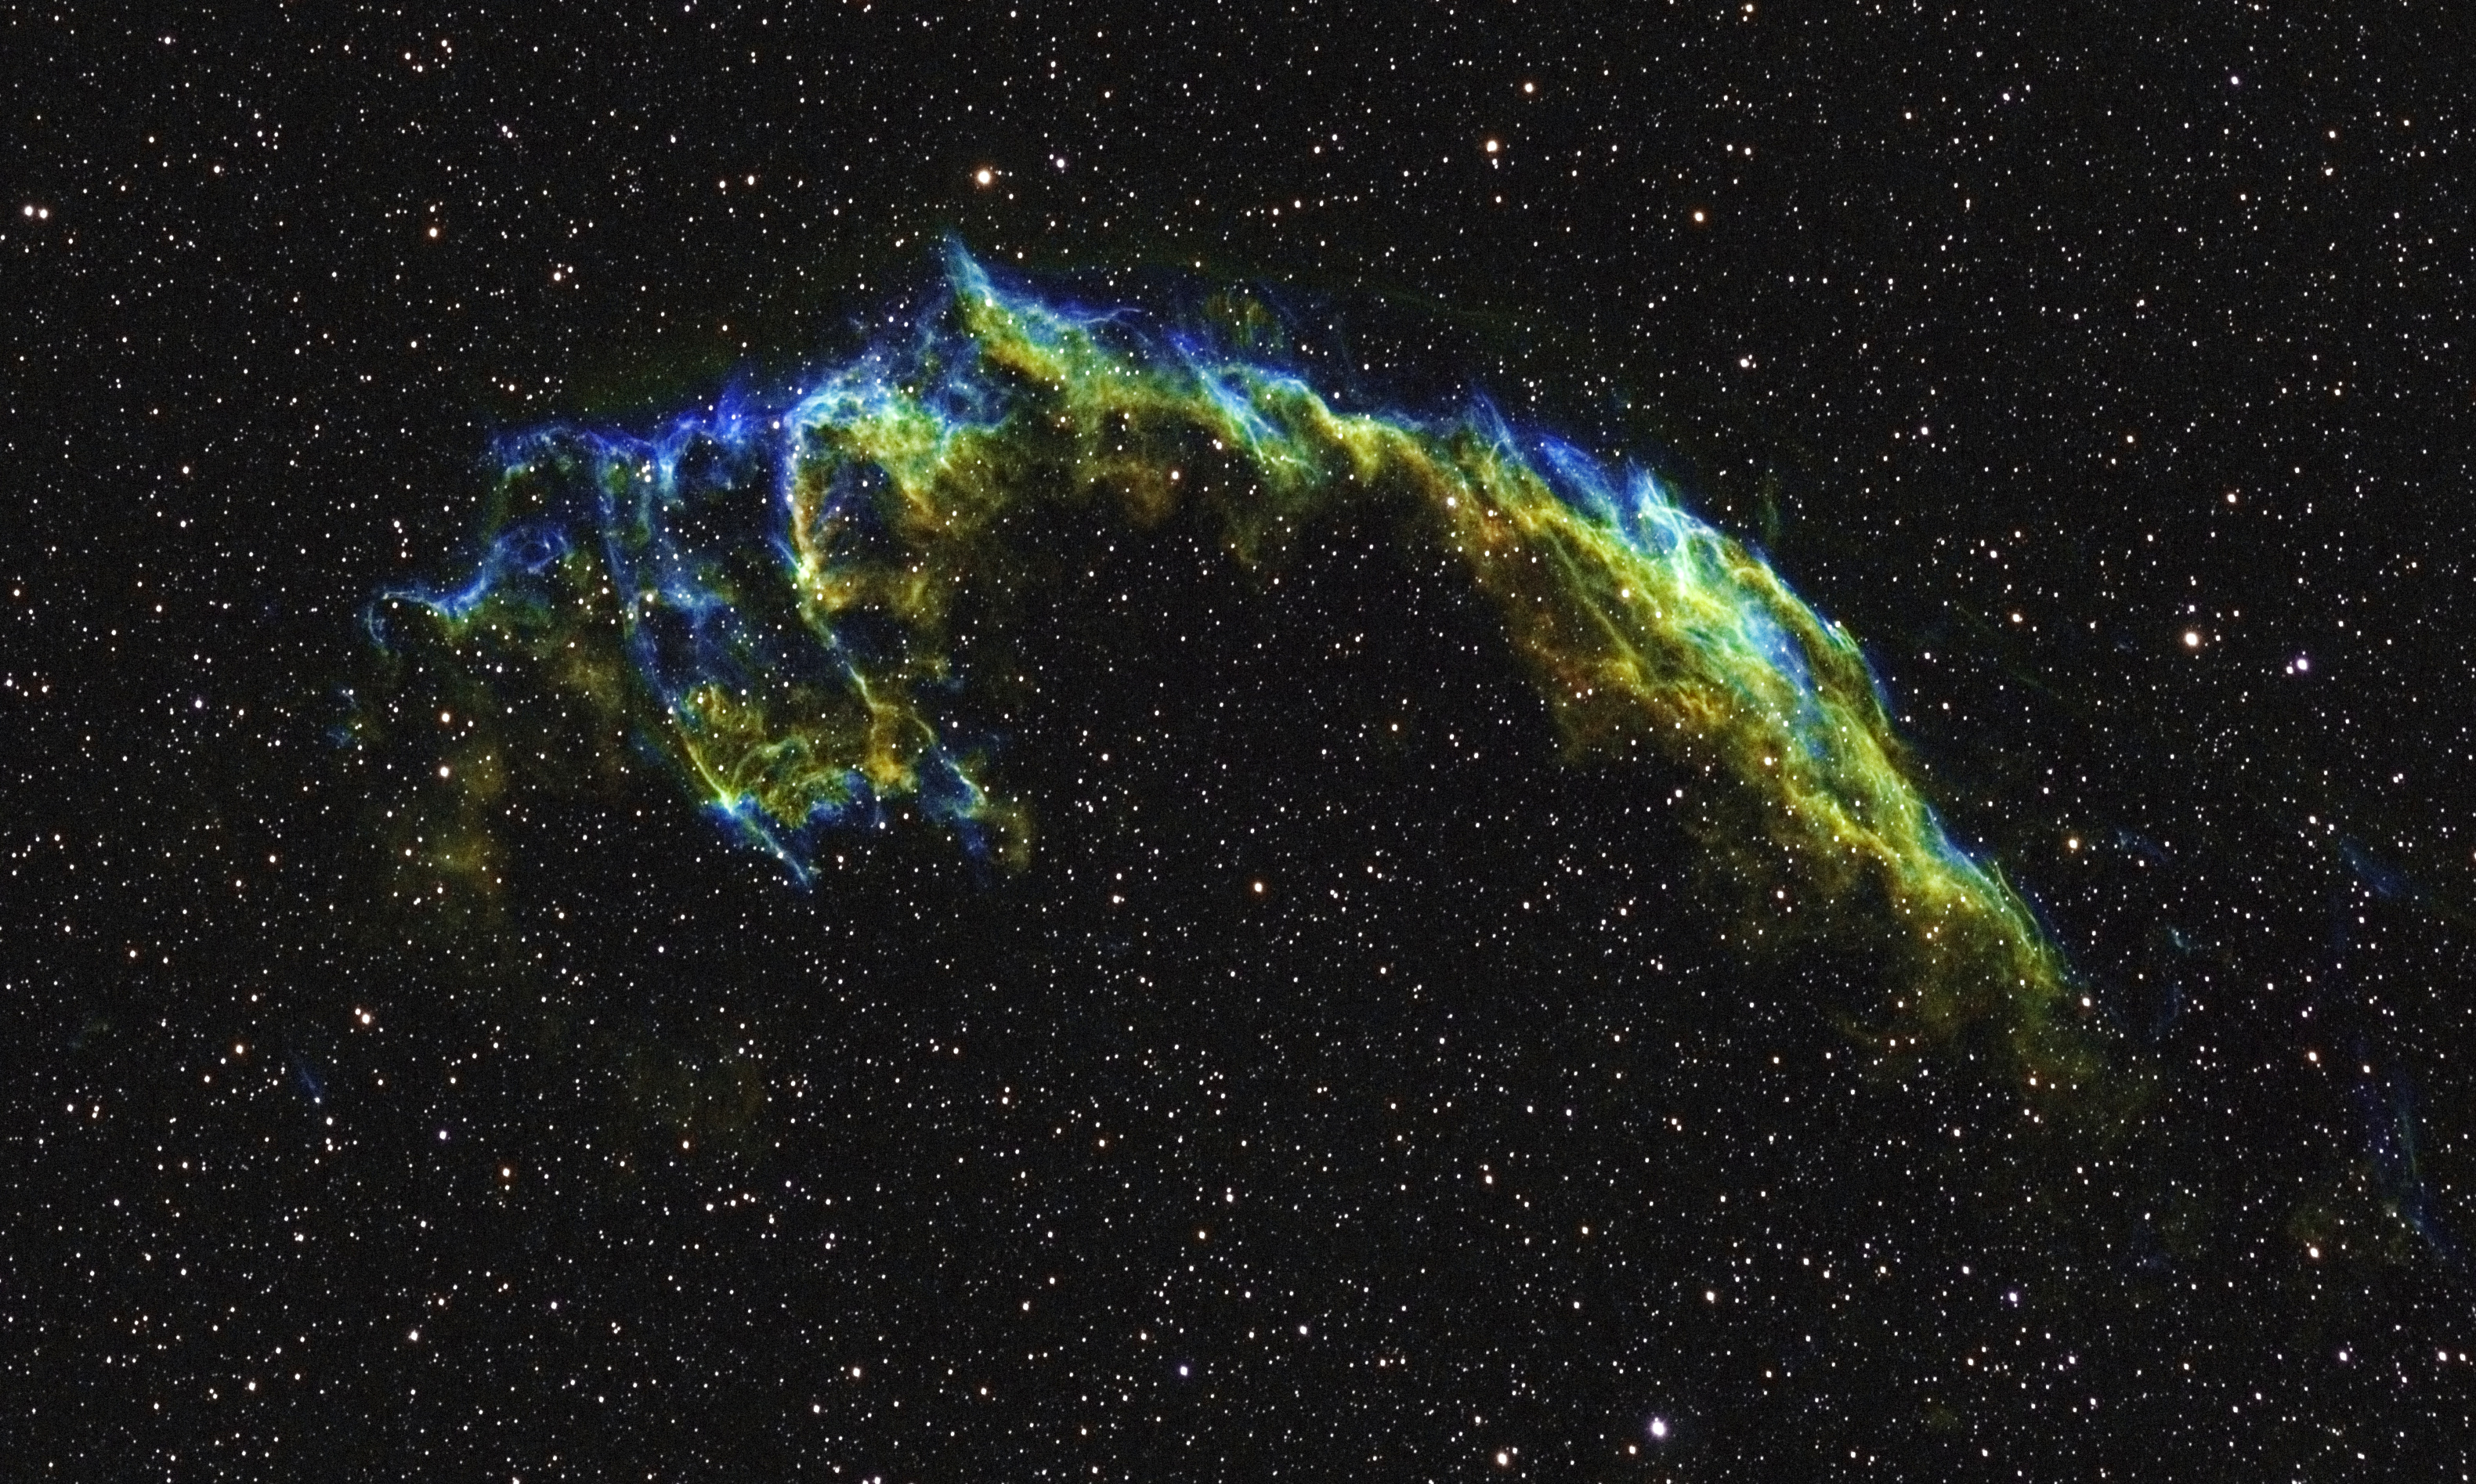
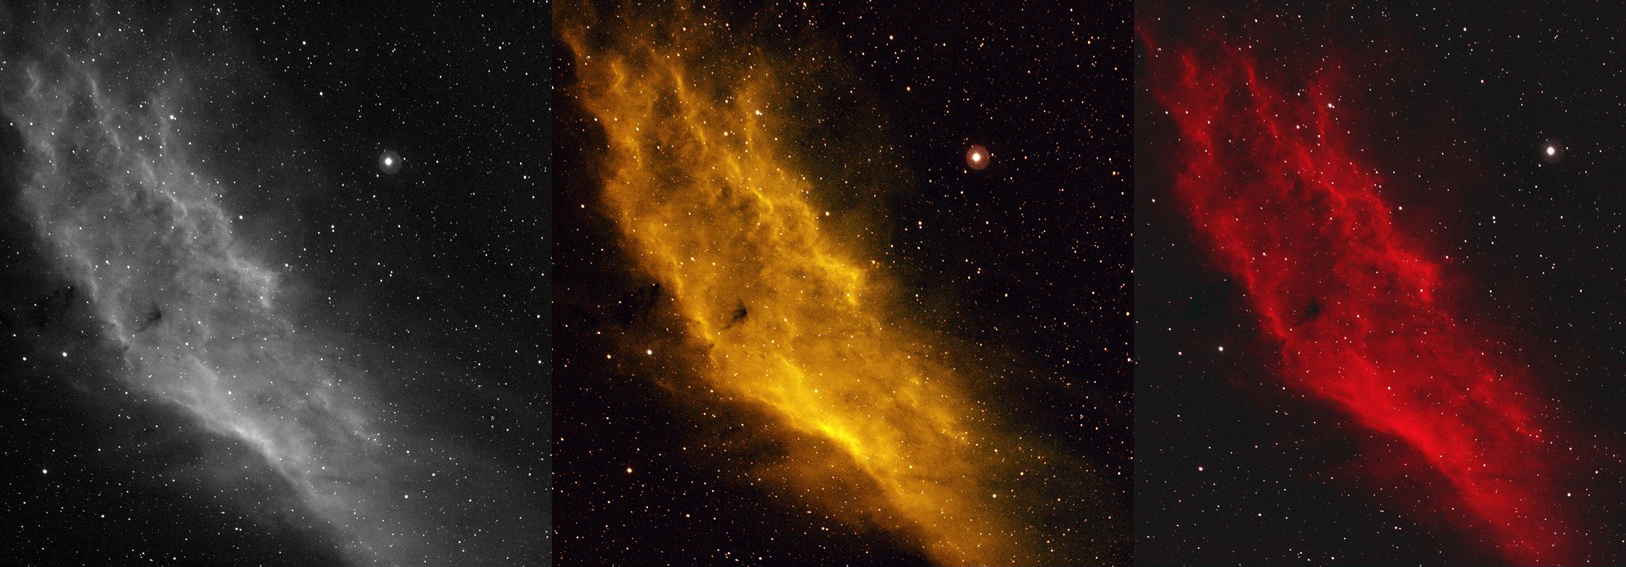
Above Images (from top-to-bottom): Aurora Borealis off Norwegian Coast – DSLR; Leo Triplet – LRGB; Rosette Nebula – SHO; Flame & Horsehead Nebulae – Ha; Eastern Veil Nebula – SHO; Eastern Veil Detail – Bi-Colour; Western Veil Nebula & Pickering Triangle – Bi-Colour; Milky Way from Isle of Purbeck, Dorset – DSLR; Andromeda Galaxy – LRGB; California Nebula – form left-to-right, Ha-SHO-Bi-Colour; North America Nebula – SHO; Cygnus Wall – Bi-Colour 

Round-up & goals for 2017

Since resolving a number of critical issues in 2016 and finally getting to grips with autoguiding, I’m pleased to say the basic processes worked very well in 2017.  In addition to improvements in the set-up, being able to operate from indoors has greatly improved both working conditions and the results.  Not surprisingly my astrophotography last year was dominated by learning and using the new camera.  Whilst the experience of DSLR imaging and related matters was helpful, I was surprised at just how different working with a mono camera, filters and especially processing has been by comparison and I’m still learning.  Some of the minutiae can be very important and are frustratingly easy to miss but, with the assistance of those ever helpful astronomers online and perseverance the results are really starting to show in my work.

RECORD CARD – 2017


Goal Specifics / Results Outcome
Improve processing After some set-backs now successfully processing FITS files in DSS and compiling broadband and narrowband images in Photoshop – all very different to DSLR RAW! Noticeable improvements using more complex techniques in PS.

  MUCH BETTER


Expand & Improve Widefield Imaging For the first time I obtained some decent images of the Milky Way but otherwise barely used the Vixen Polarie and did not make it to any other dark sky sites – disappointing.   FAILED


Start LRGB  imaging Now using the ZWO1600MM-Cool mono camera + EFW with LRGB & Ha- OIII- SII filters with good narrowband and varied broadband results.   GETTING           THERE


I think it helps to set some goals for the forthcoming year, so here goes:

  • Improve processing – more: Despite some noticeable improvements in 2017 there’s always more to learn whichever software is being used. I aspire to working with PixInsight or the newly acclaimed APP but will likely persevere with various more advanced Photoshop techniques.
  • Expand widefield imaging: First – use the Vixen Polarie as had been intended last year to obtain nightscape images at UK dark-site locations. Second – look at ways of using a widefield set-up with the mount.  Having previously failed I’m hoping to be more successful in 2018.
  • Improve broadband and narrowband imaging: In considering how to progress in 2016, I came to the conclusion that the next step should be a move to a mono camera rather than a larger telescope. This has turned out to be a great decision but it’s still early days.  There’s plenty more to learn and finesse but most of all after nearly a year’s learning and experimentation it’s clear that I need to improve one matter above all – increased integration time and this means learning plate solving.  I’ve been very happy using Astro Photography Tool (APT) for FITS image capture, scheduling and filter control (the APT Forum has been very helpful), but I also own the much praised Sequence Generator Pro (SGP) and might switch or at least give it a try in 2018.

I’m very pleased to say 2017 was a very good year for astrophotography, perhaps my best yet, which was especially defined by two positive developments:

  • In general the equipment set-up was much better after some long overdue changes and in particular operating from indoors, once all the basics are completed. With a good basic starting set-up and alignment of the guidescope-autoguiding camera with the main OTA, I’m often able to just quickly refresh EQASCOM alignment models directly from the computer = no more crawling around on the ground in the dark, or at least very little!
  • Although it’s still early days and despite my reservations over the complexity (which is true) of using a mono camera and filters, it’s revolutionised and revitalised my imaging and therefore proved very worthwhile. It is a lot of fun and the improvement of my images has been both exciting and very fulfilling.

You can’t ask for more than that and holds much promise for the coming year, which I hope to record in WTSM’s Reflections at the end of 2018.

Watch this space!

POSTSCRIPT

The ones that got away:  Imaged but not seen in WTSM this year (warts and all)

NGC 2174 281017

Pleiades 301017

Picture saved with settings embedded.
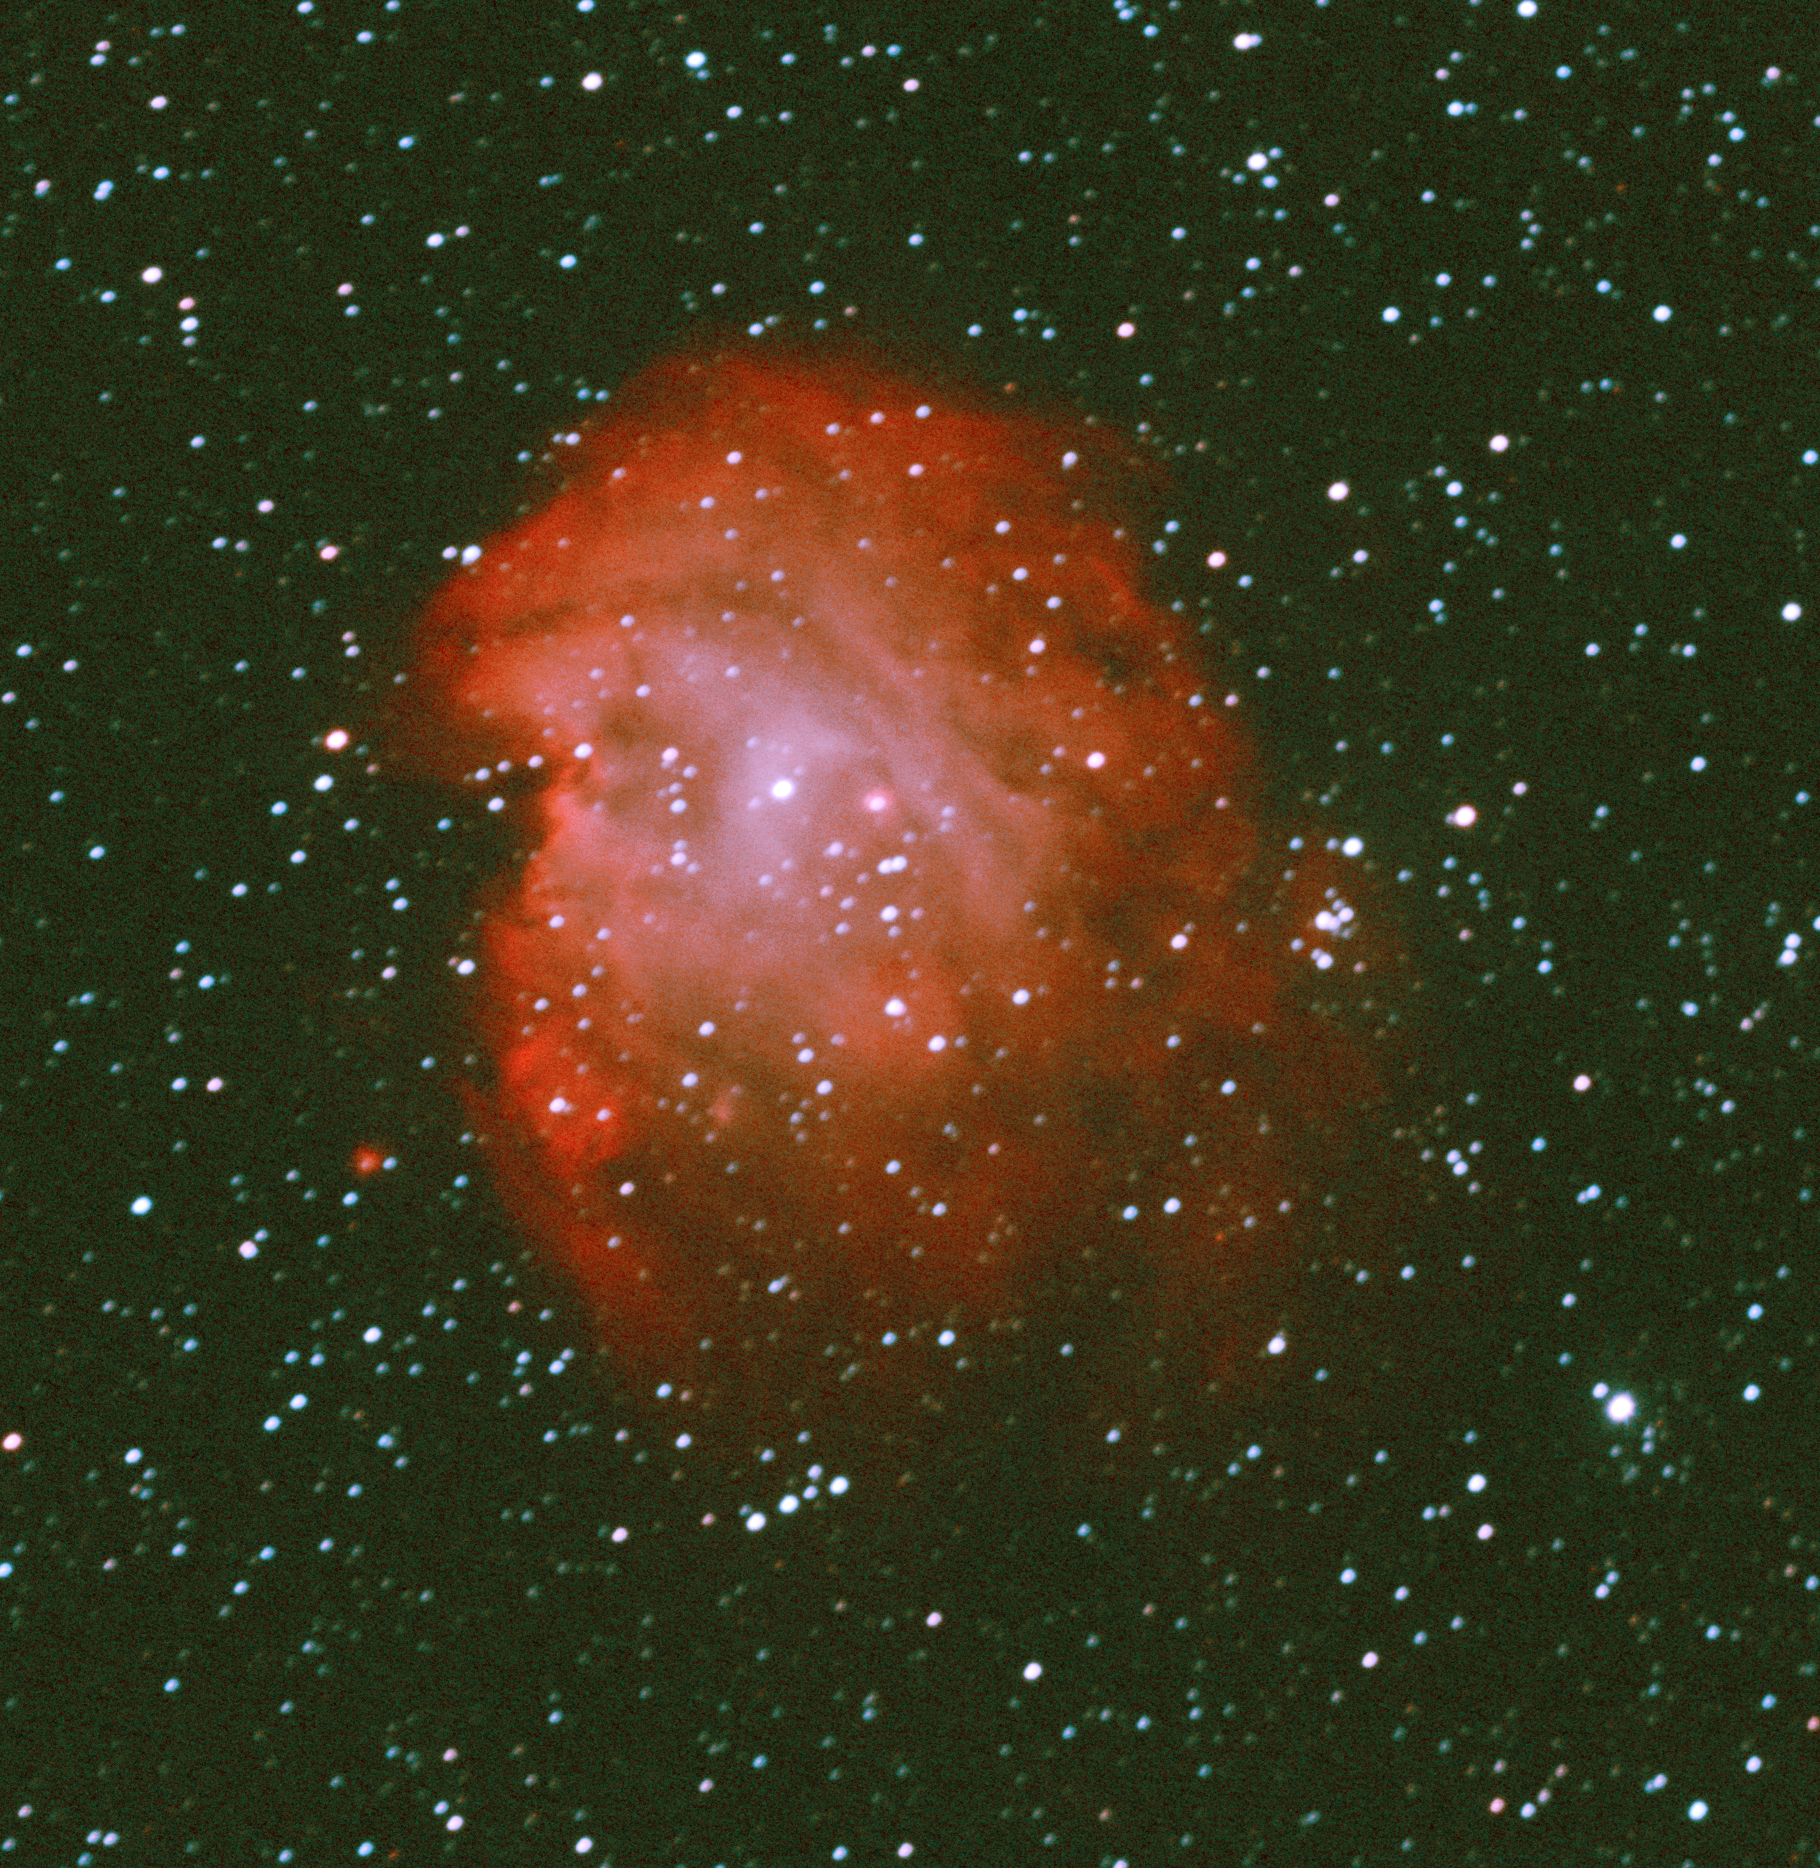
M15 Crop 200817

Above Images (from top-to-bottom): M42 Bi-Colour, Ha & SHO; Monkey Head Nebula Bi-Colour; Crescent Nebula SHO & Bi-Colour; Pleiades LRGB; Sadr Region Ha; M15 Globular Cluster LRGB    

AstroBites-3: Conjunction

IMG_8848 (Large)

I was up early this morning in order to view and image the rare visual conjunction of Jupiter and Venus.  Unfortunately I cannot see the eastern horizon from here but from the top of Redhill Common adjacent to Fairvale Observatory there is an excellent view and just before 6.30 a.m. I climbed to experience the spectacle.

Following a cold, clear night the early morning weather was excellent and I was able to obtain a number of images as well as a good view using binoculars.  It was a short but worthwhile event, as shortly after 6.50 a.m., with growing brightness from the impending sunrise due at 7.14 a.m., the view of the conjunction was soon lost.  The next Jupiter–Venus conjunction will be on 30th April 2022, so time to recover!

IMG_8853 (Large)

The Dutch Gadget

IMG_8370x (Large)

I have just finished reading J.L. Heilbron’s biographical tome on Galileo, which though very interesting I found a difficult book and somewhat academic in style.  In 1609 Galileo became aware of a Dutch spectacle maker’s device that made distant objects appear closer.  He subsequently became known for developing the so-called ‘Dutch Gadget’ into what we now know as the refracting telescope and moreover, applying its use to understanding the Solar System with the discovery of Jupiter’s four largest moons, confirmation of the phases of Venus and the observation and analysis of sunspots; the word telescope was subsequently coined in 1611 from the Greek tele “far” and skopein “to look or see” i.e. far-seeing.  In so doing he also helped to confirm the then controversial truth of the heliocentric astronomical model, whereby the Earth and planets orbit the Sun.  Against this background it is no surprise that Galileo is today much revered by mankind and has become known as the father of observational astronomy.

GalBook

Drawn into the complexity of obtaining images of the Solar System and beyond, it is the curse of astrophotography that we inevitably neglect observing the spectacle itself.  Notwithstanding, I am sure that Galileo would understand the power and beauty of today’s astrophotography, which in its own way is producing a quantum leap in our understanding of the Universe comparable to the impact of the original application of the telescope.

This summer the Solar System will hopefully provide both good observational and astrophotography opportunities here at Fairvale Observatory: Jupiter, Saturn, Comet C/2015 V2 (Johnson), the Perseids meteor shower and the Sun – sadly though I will not witness next month’s solar eclipse which takes place mainly over North America.  During recent summer months the lack of astronomical darkness, short nights and absence of DSOs has frustratingly continued to limit potential imaging targets for my new ZWO 1600MM-Cool camera but utilising a period of good weather there have recently been a few fleeting opportunities just before dawn related to the appearance of the summer arm of the Milky Way on the eastern horizon.

solstice sky

Picture saved with settings embedded.
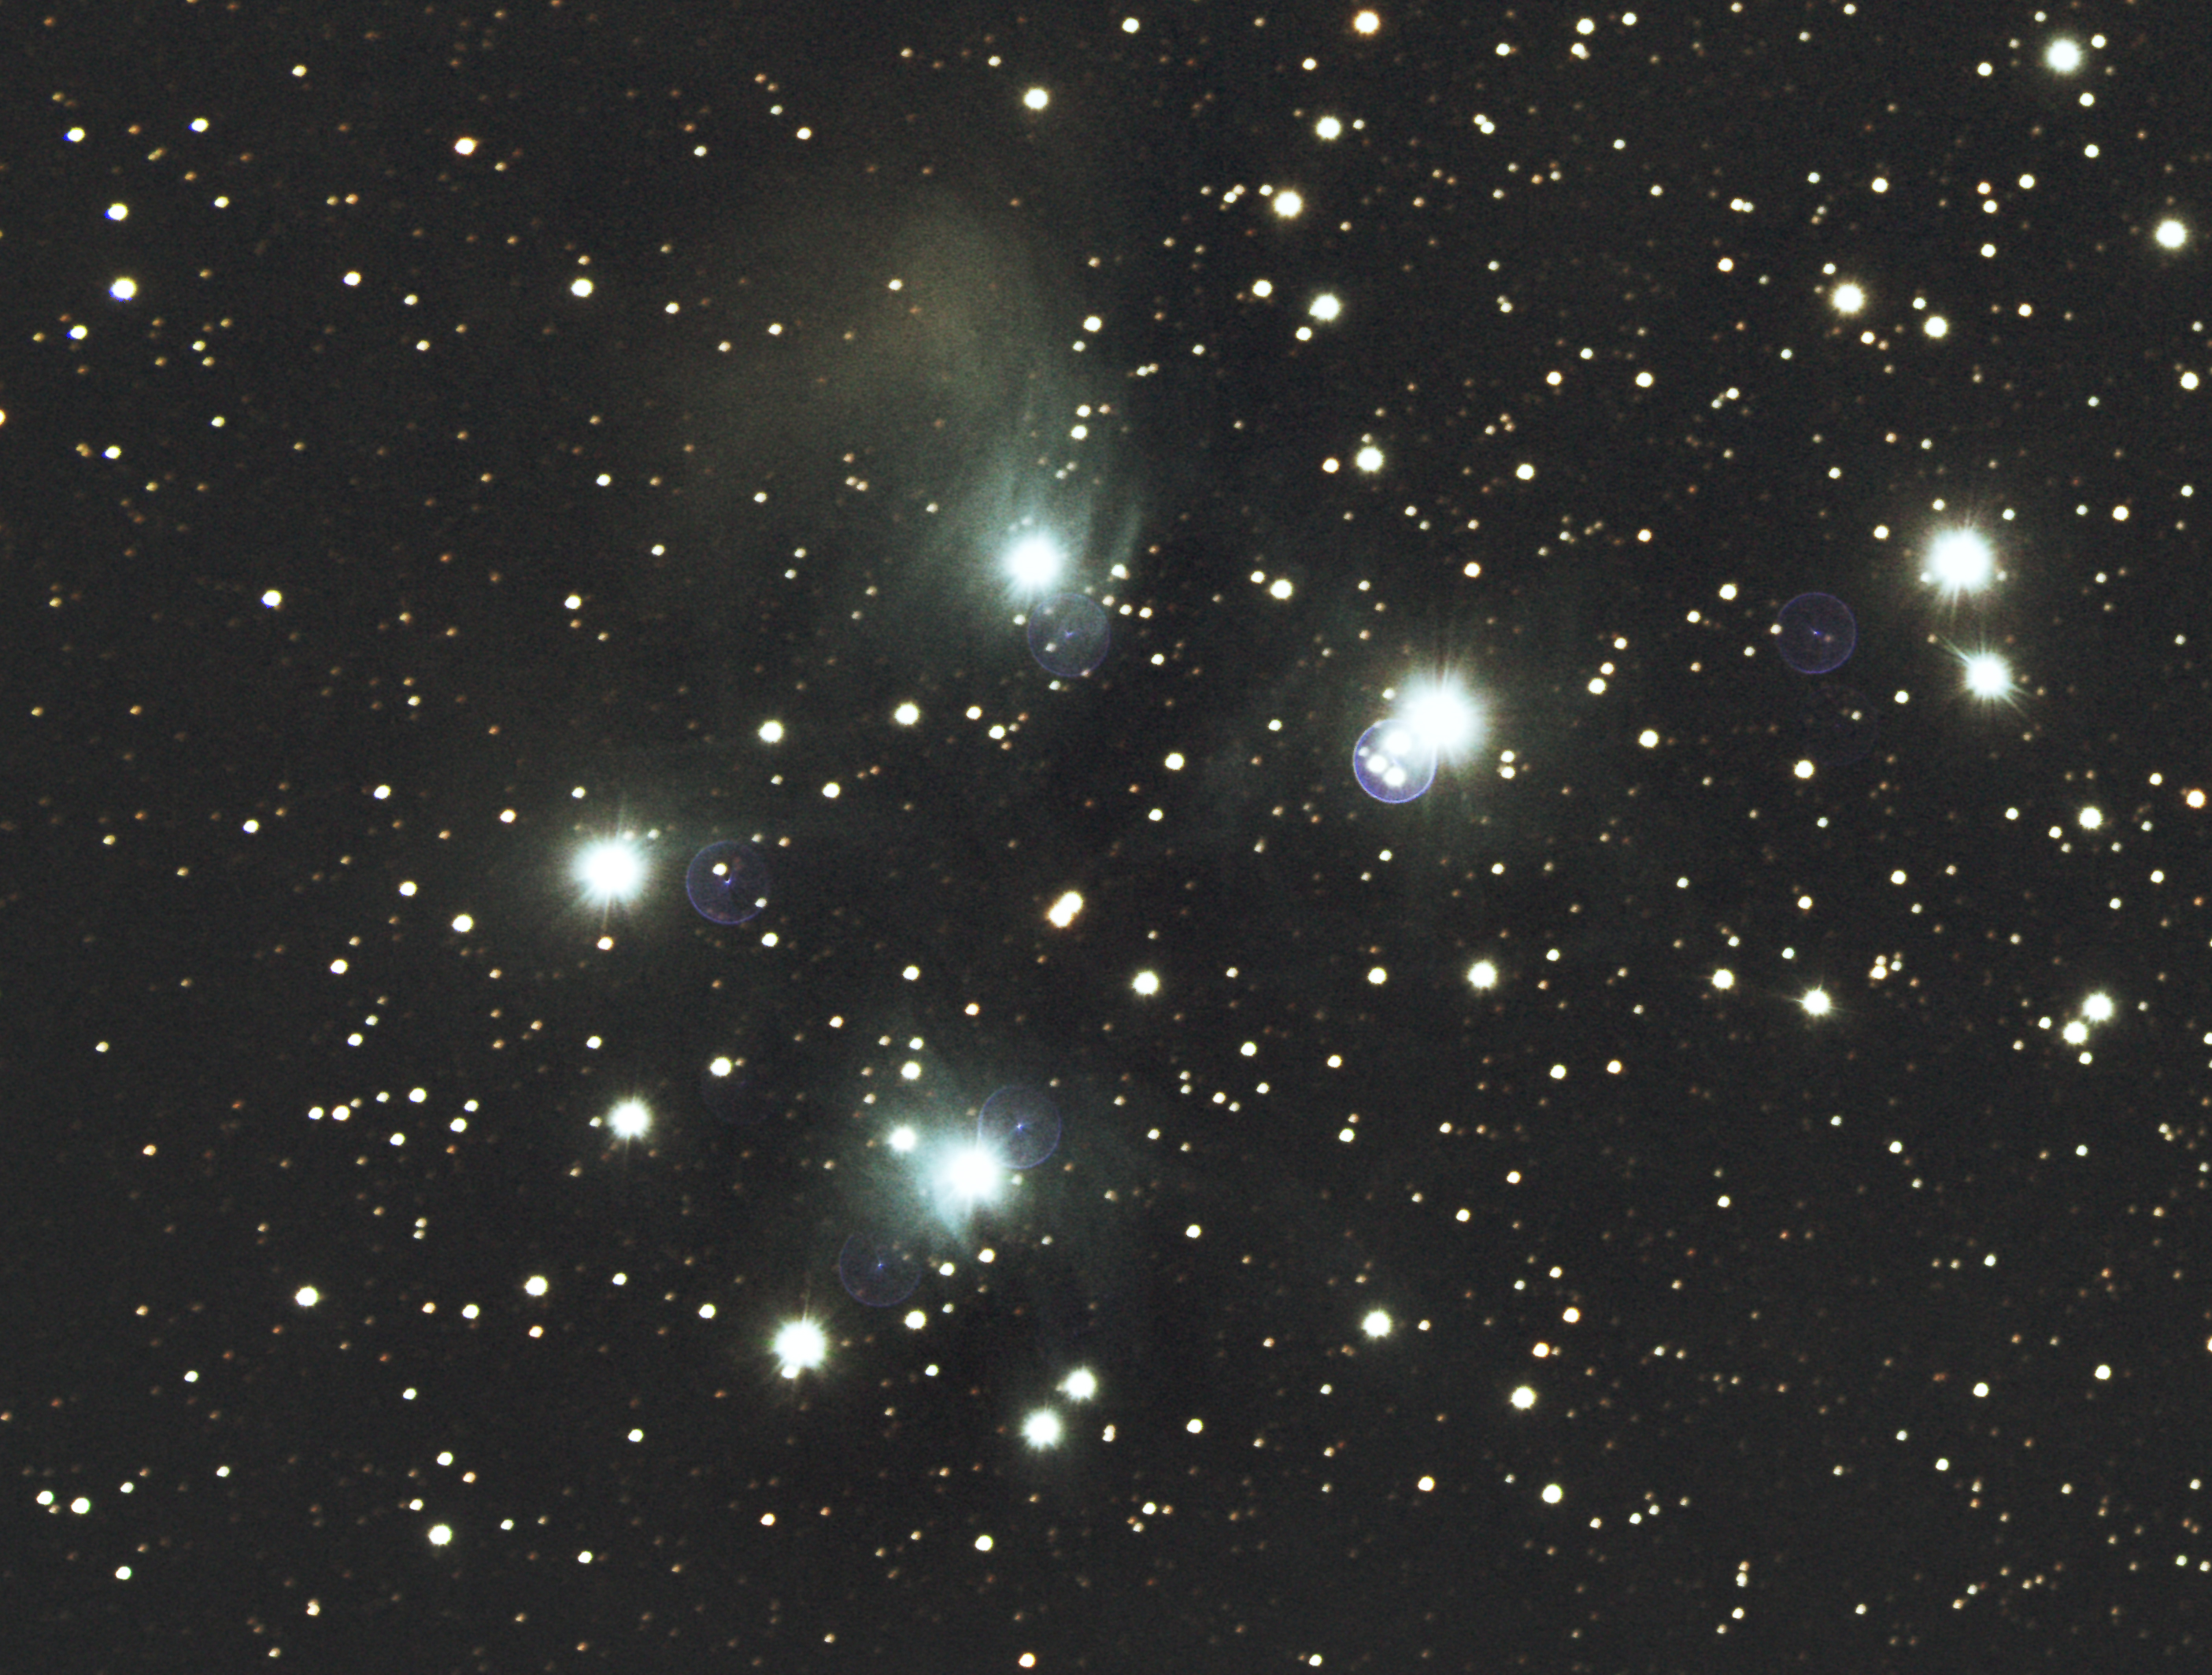
NGC 7000 The North America & Pelican Nebulae WO GT81 + modded Canon EOS 550D + FF | 30 x 120 secs @ ISO 1,600 + calibration | 19th September 2015

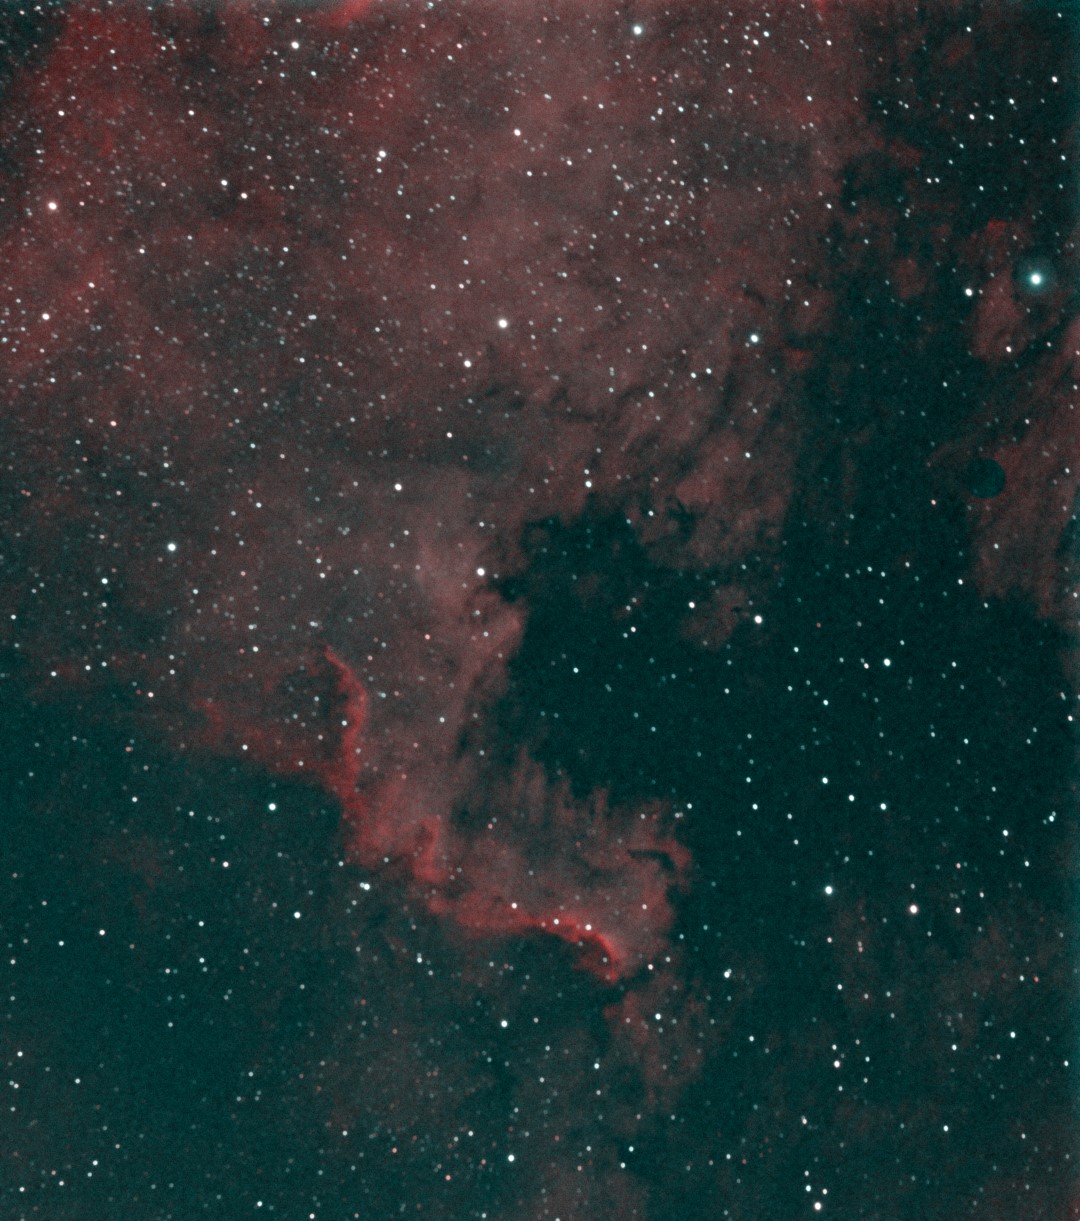
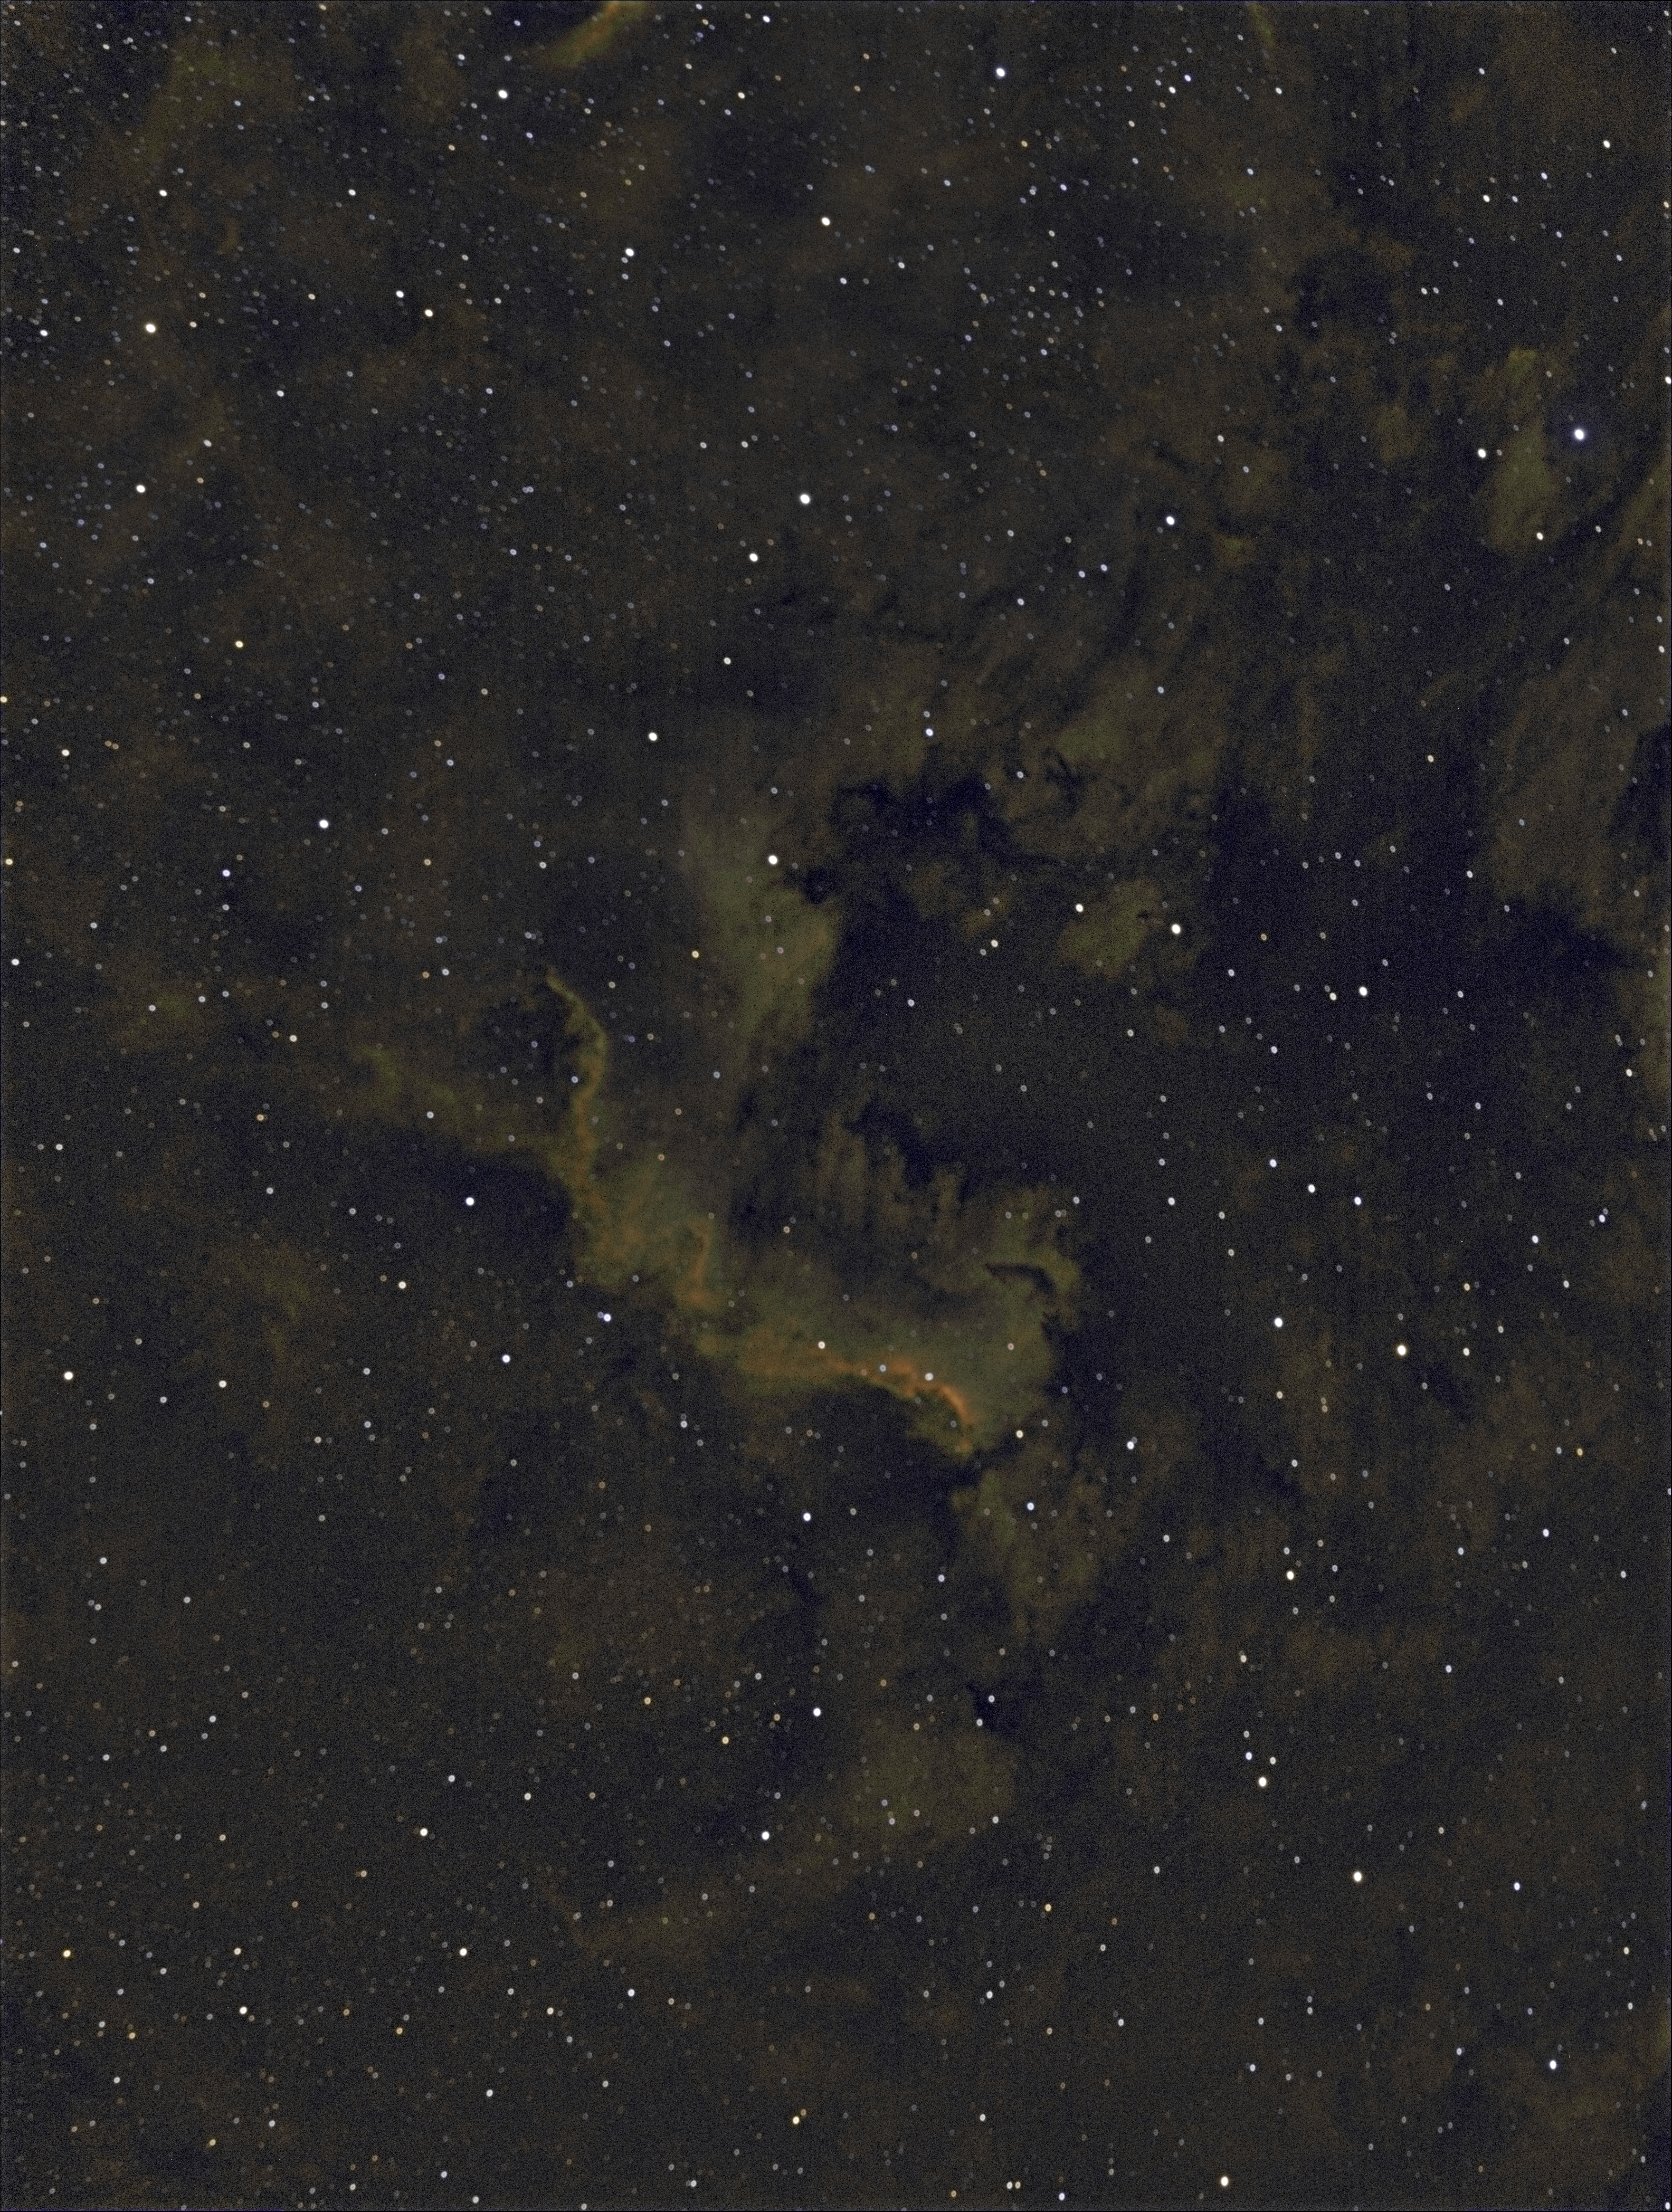
I first imaged the North America Nebula (NGC 7000) in 2014 and have since returned each year to image the nebula or its various parts using a DSLR camera.  Being a very large Ha-object the nebula is an ideal target for the ZWO1600MM-cool camera and I have been anxiously waiting its arrival again this year.  On this occasion, early on the morning of the summer solstice, high in the sky and 90o east the nebula was only just visible from my location, being very close to the roof-edge of my house!  Consisting of just six Ha-frames plus three OIII and SII taken just before dawn broke, the resulting image was never going to be my best but is nonetheless interesting in SHO format and quite different to previous DSLR images.

NGC 7000 BiCol (Large)

North America Nebula in Ha-OIII Bicolour

RGB L2C3 GxL3 Hub1 HPx

North America Nebula in SHO

At the other extreme, located low on the southern horizon and only briefly visible as it passed between the trees at the end of my garden is the Eagle Nebula AKA M16, home of the Pillars of Creation.  At 7-arcminutes in size and an apparent magnitude of +6.0, the nebula is at the lower end of possible for my set-up and at some 27o altitude with just 40-minutes imaging time between the trees it was a challenging target.  Notwithstanding, I’m pleased with the Ha and SHO narrowband images obtained, which quite clearly show the Pillars too.

M16 SHO1 (Large)

M16 Eagel Nebula in SHO: William Optics GT81 & ZWO1600MM- Cool & Field Flattener | 6 x 180sec Ha, x3 OIII, x3 SII Gain 300 Offset 10 + full calibration | 21st June 2017

As astronomical darkness is now slowly returning and with clear skies and weather permitting, I hope to attempt longer imaging sessions of both these and other targets during the rest if the summer and into autumn – I might even get to see M16 again as it eventually emerges from the other side of the trees!  Thanks to the development of the Dutch Gadget and modern cameras it is now possible for amateur astronomers to image such spectacular objects – I’m sure Galileo would be impressed and highly approve.

Planetary Playtime

SKY Live

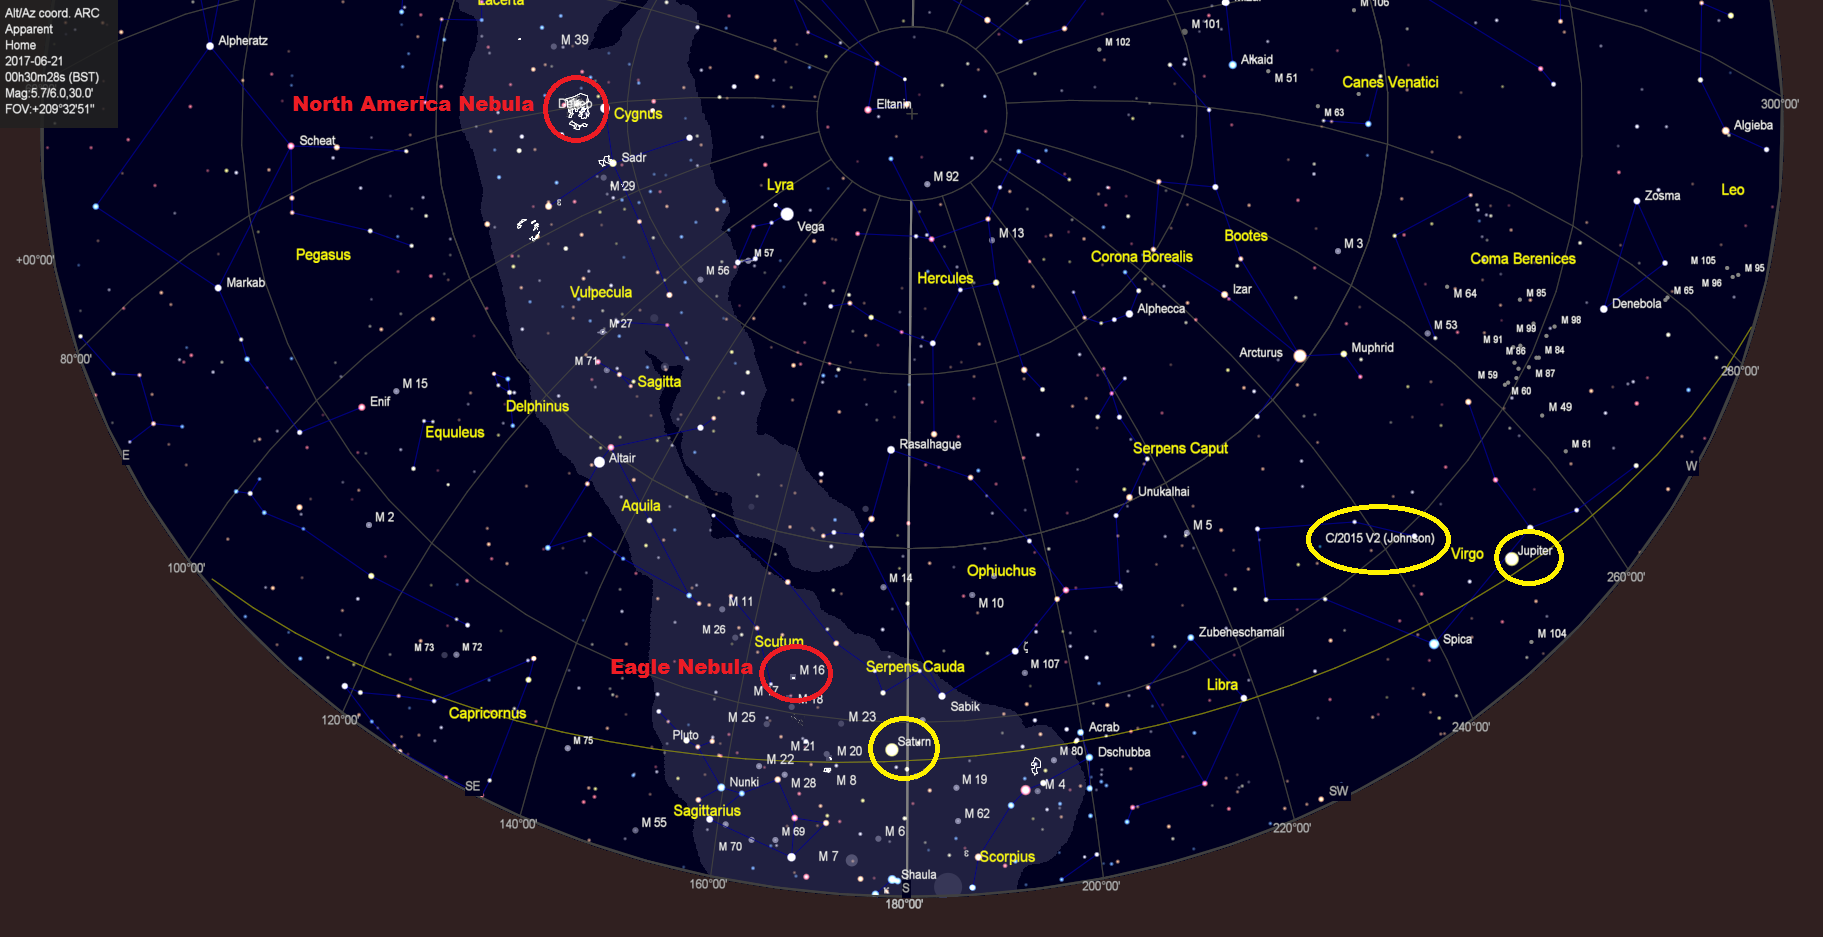
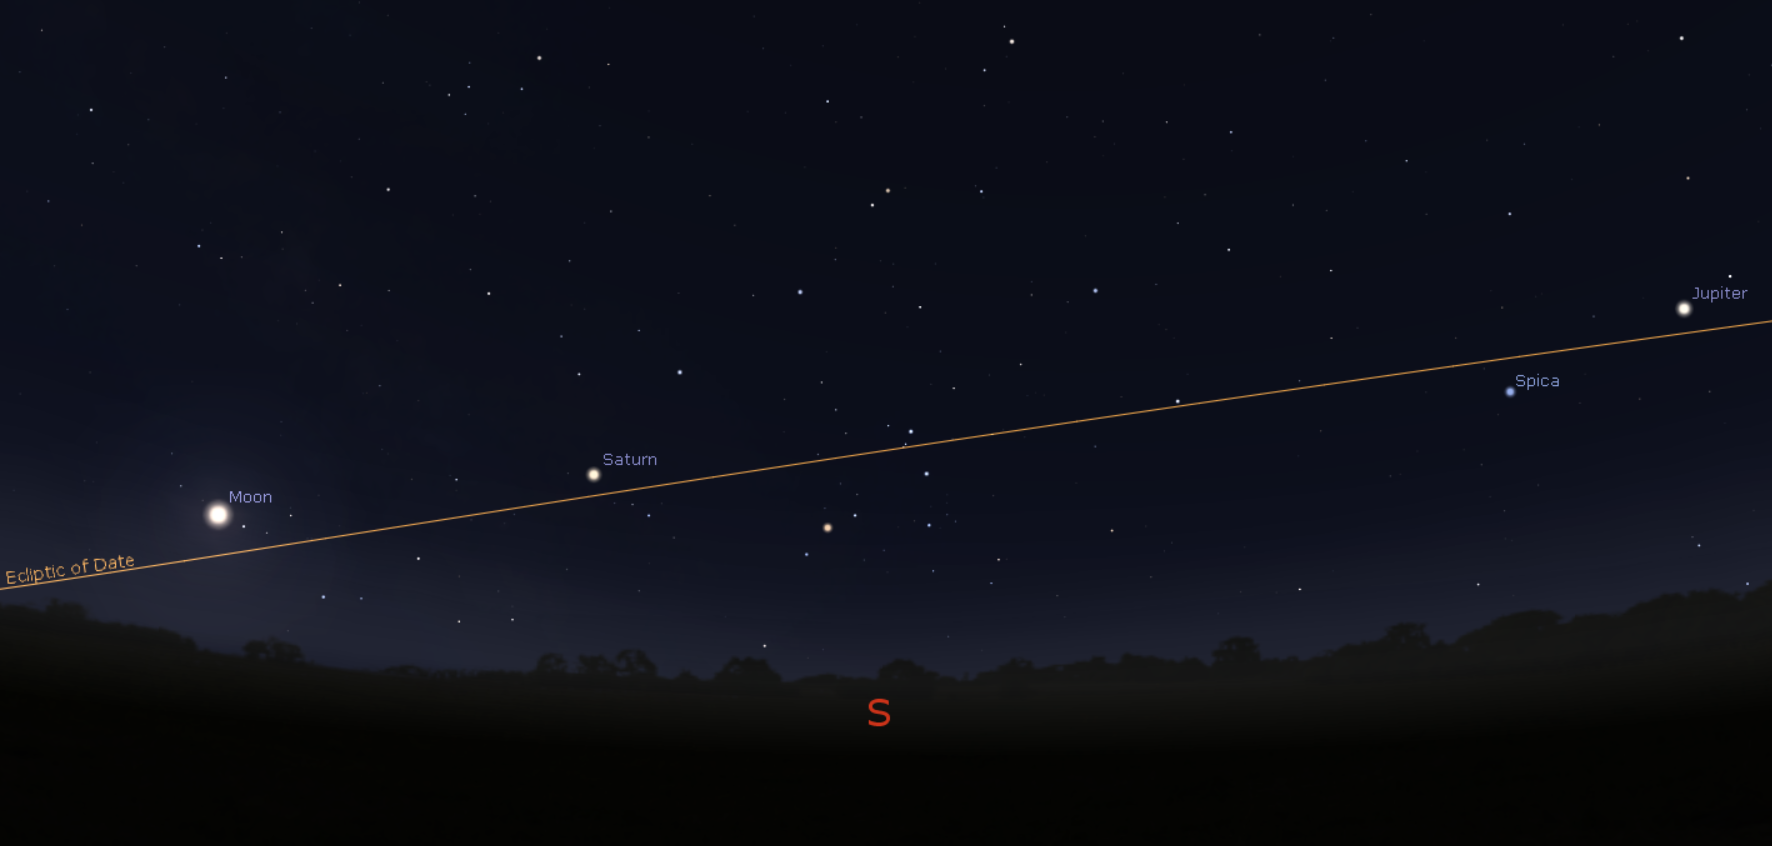
Starting out three years ago I inevitably began my astrophotography with the Solar System, the planets and other related bodies are after all closest to Earth but, as it turns out, are far from easy to image.  At the time using a Skywatcher 150PLS and ZWO120MC webcam, I achieved some reasonable images of Saturn, Jupiter, Mars, the Moon and later the Sun but with plenty of upside potential for improvement! Shortly thereafter having acquired my current set-up, I realised that my interest lay in DSO targets and, except for the lunar eclipse in 2015 and the odd white-light image of the Sun, have mostly ignored the Solar System, until now.  Currently no less than 7 planets are present throughout the night at the moment, the largest of which provide good viewing and imaging opportunities – planetary sky above for 11th June 2017 at 11 p.m. taken from TheSkyLive.com

From April to July there are limited DSO opportunities for my scope and camera and the only choice is to look elsewhere; the absence of astronomical darkness also doesn’t help.  This year the problem has been particularly frustrating as I’m itching to get to grips with my new ZWO 1600MM-Cool camera, which after a few hurried shots early in the year proved very exciting.  And so I’ve recently been playing around, returning to old subjects and unfamiliar equipment – first imaging the comet C/2015 V2 (Johnson) and again trying my hand again at some of the planets.

Unlike the DSLR and ZWO 1600MM-Cool CMOS camera, I the ZWO 120MC video based webcam is more suitable for the planets, which poses a whole new set of issues and the use of completely different capture and process software, in my case Firecapture for imaging and Registax for processing. Both are excellent free programmes but after three years required some re-learning.

Firecapture helps a lot when experimenting to find the best gain, gamma and exposure settings for each planet but there are still other difficult tasks to overcome, in particular planetary rotation, size, seeing conditions and my personal nemesis – focus – which after numerous attempts I have still failed to master. The truth is that even with the gas giant Jupiter, the planet appears quite small with the 81mm aperture of my Williams Optics refractor and detail is difficult to make out in order to focus when also blurred by atmospheric turbulence.  Notwithstanding, the belts and even the Great Red Spot are evident in the resulting images taken between 14th and 25th June, albeit a little fuzzy!

Webcam image data capture even over a couple of minutes is prodigious and requires significant processing capacity to handle.  I have found the aptly named Castrator software useful in this regard to cut the final AVI image down to the actual size of the planetary object, thus removing substantial areas of superfluous black sky.  Registax is equally powerful for video processing and stacking, in particular the intriguingly named Wavelets, which magically help restore detail and sharpness.

Saturn

In the case of Saturn, which at the moment is quite bright and well orientated, the problem is also size and especially seeing, in my case not helped by a 35 minute imaging window as the planet transits between two trees at the end of my garden; at least the large copper beech on the left blocked out the Moon at the same time! At this location Saturn is less than 15o above the southerly horizon and as a result seeing conditions are at best poor and usually bad.  However, I manged some blurred images that clearly show Saturn’s rings and even a little colour.  I’m now looking forwards to seeing more of the final Cassini mission images before the satellite crashes into the plant in September.

These are obviously not my best images and I already feel the need try again next year, hopefully with a more appropriate telescope (Santa has already been informed). Notwithstanding, my return to the Solar System has been fun and, in between imaging I’ve also taken time to carry out observational astronomy – something I rarely do nowadays being otherwise consumed by astroimaging paraphernalia.  DSO astrophotography is likely to remain my main interest in the future and I can’t wait to revisit old favourites later in the year with the new ZWO 1600MM-Cool camera.  In the meantime, I have renewed respect for the planetary astrophotographer’s, I’ll be back another time.


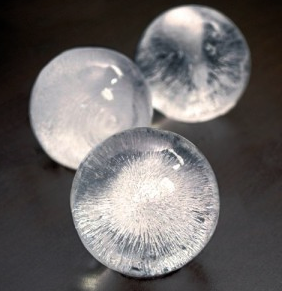
Great Balls Of Ice

iceball

The next couple of months can be frustrating for astronomers in the Northern Hemisphere.  We have just entered the period of summer during which there is no astronomical darkness and for those of us who enjoy the spectacle of a DSO there are also few around to image, especially of the larger Ha-type that my equipment is currently best suited to.  However, there are compensations and with some imagination and a change of tack, it can be a useful time in which to do some housekeeping and return to objects not usually viewed.

I recently noticed that dust and the odd stray fingerprint had appeared on the object lens of my William Optics GT81! Opinion on how to clean this critical element is varied but all advice says: (i) be very careful, and (ii) do nothing unless you absolutely have to; in particular opinion is divided on whether to use alcohol-free cleaner.  I therefore purchased some Baader Optical Wonder Fluid which comes recommended by many but for now confined cleaning to the use of a brush and compressed air to remove the dust and a Lenspen to gently polish the glass surface – the Wonder Fluid will have to wait until another day.

Warm temperatures that accompany summer are also a more comfortable time in which to undertake important tasks outside, such as re-setting equipment alignment, balancing, cable routing etc.  I am therefore also replacing the mount power cable and EQDIRECT adapter cable, both of which look the worse for wear.  Truth is the original cables were poor quality and, mindful of my disastrous camera cable problems this time last year, if possible I now intend to upgrade both these critical items.  The experience of last year’s meltdown showed how prone cables are to low winter temperatures and I now see there are alternative silicon cables on the market – obviously I’m not the only one who’s suffered!

Of course we all want to be outside imaging and observing and a recent spell of very fine, clear, warm nights provided just such an opportunity – but what to do?  There are some popular objects within the Solar System that are worthy of attention at this time of year, which for a change I therefore once again tried my hand at imaging, on this occasion a comet.

There have recently been no less than three notable comets in the night sky:

  • 41P/Tuttle–GiacobiniKresák:  first discovered in 1858, the comet orbits the Sun every 5.4 years and this year was seen from Ursa Minor – Draco – Lyra between March and May.
  • C/2017 E4 (Lovejoy):  only discovered earlier this year by the inimitable Australian comet hunter Terry Lovejoy, the comet rises in the east-northeast above the star Enif in the early morning sky.
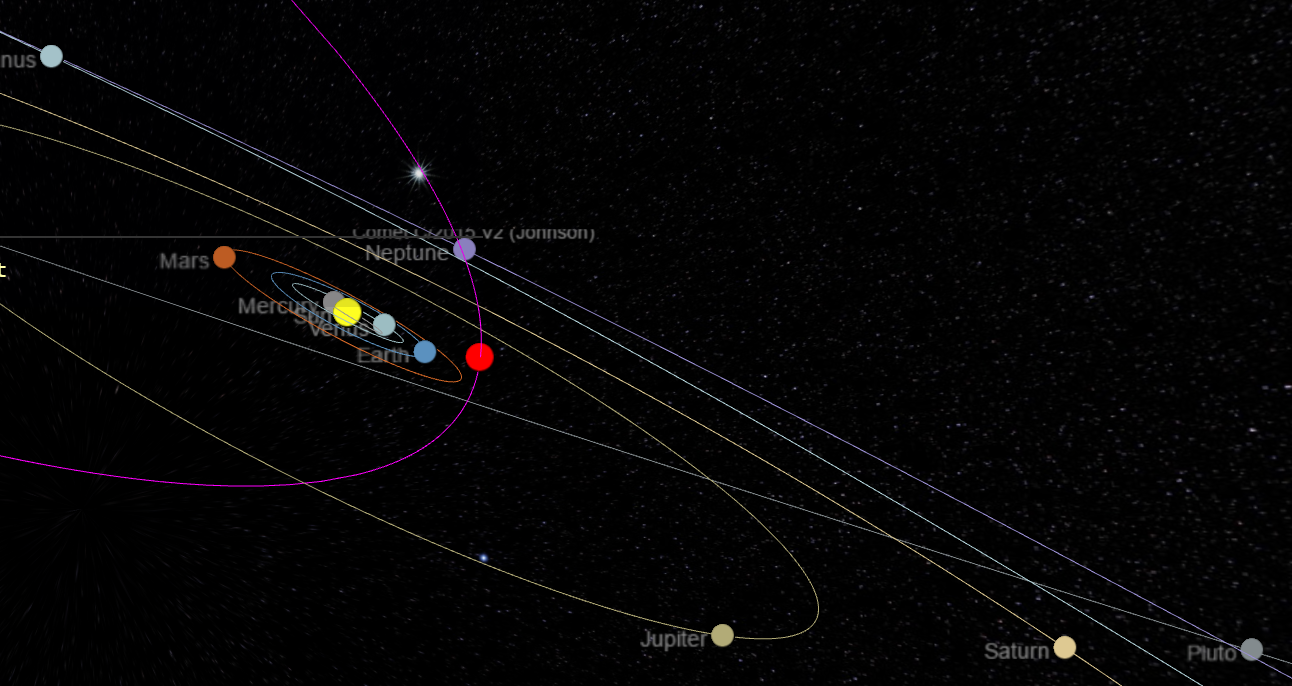
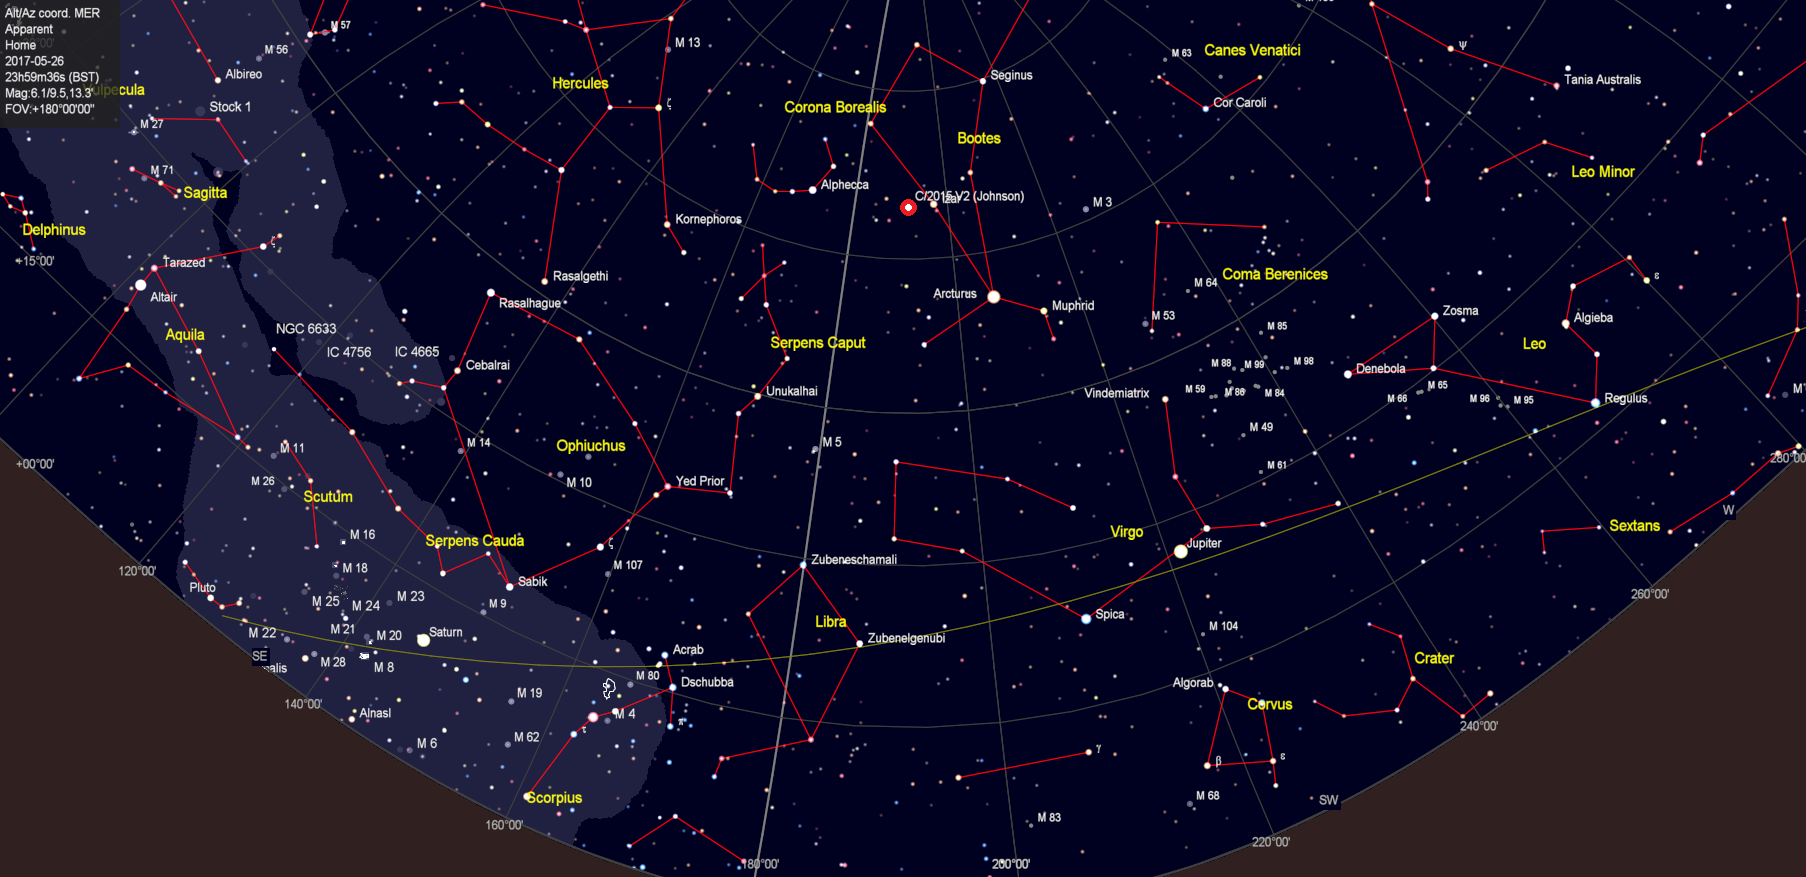
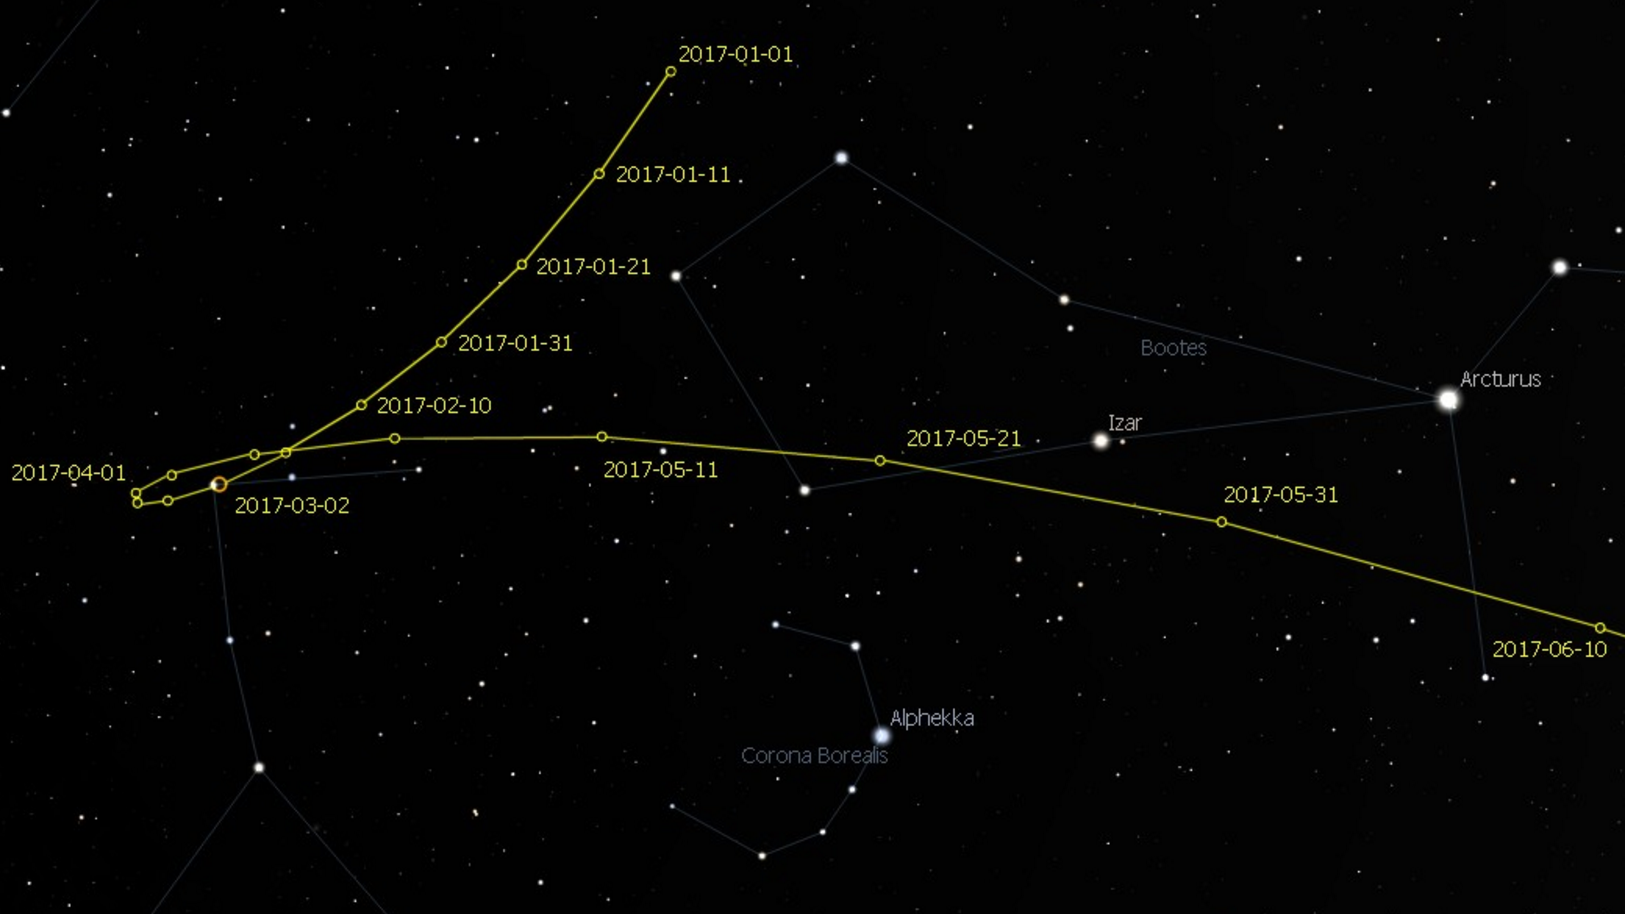
  • C/2015 V2 (Johnson): probably this year’s most popular comet, was at full magnitude in Hercules during April but is still clearly evident to the east of Bootes from about 11pm – see below.

V2 CdC

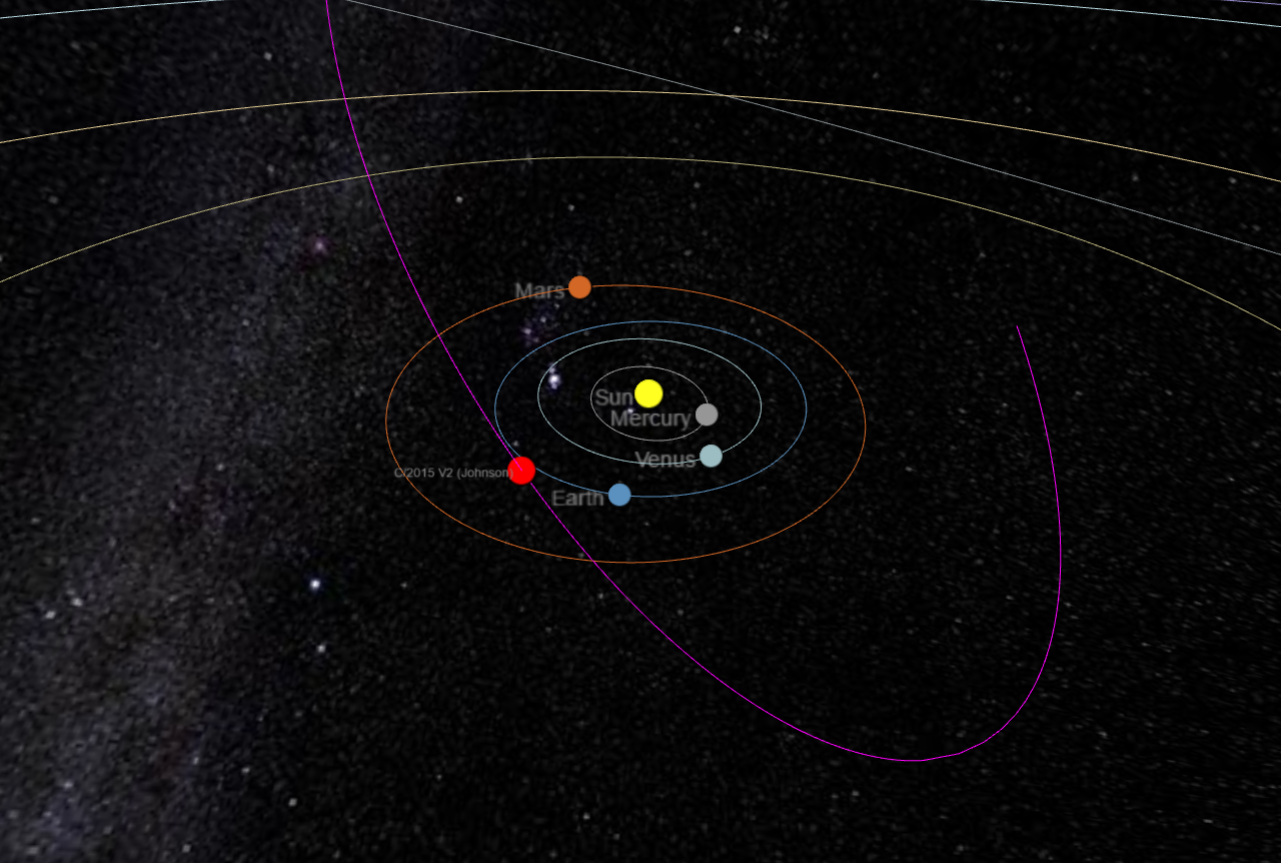
I have only once before imaged a comet, that being C 2014 Q2 Comet Lovejoy (him again) in January 2015, on this occasion I set out to image the aforementioned C/2015 V2 (Johnson).  The comet will soon reach perihelion on 12th June and thereafter leave the Solar System.  Travelling at a speed of 74,000 mph, imaging this small body of ice as it passes Earth is difficult and required going back to basics.  It was also the first time since January that I had used the DSLR camera, which despite longstanding experience required some brushing up.  At first I intended to follow the comet using the Custom Tracker facility in EQMOD but in the end this seemed unnecessary once I had the object centred in the camera and instead I resorted to a number short exposures at high ISO.

v2 orbit

V2 Track I am pleased with the results, though they are a little noisy due to some stupid mishaps on my part along the way which left less imaging time than I would have wished.  Though each comet is different, experimentation suggests that with good framing and guiding, exposures of about 2 minutes and ISO 3,200 produced the best results.  Given this exciting experience, which was also good fun,  I will hopefully not leave my return to comets so long as last time.