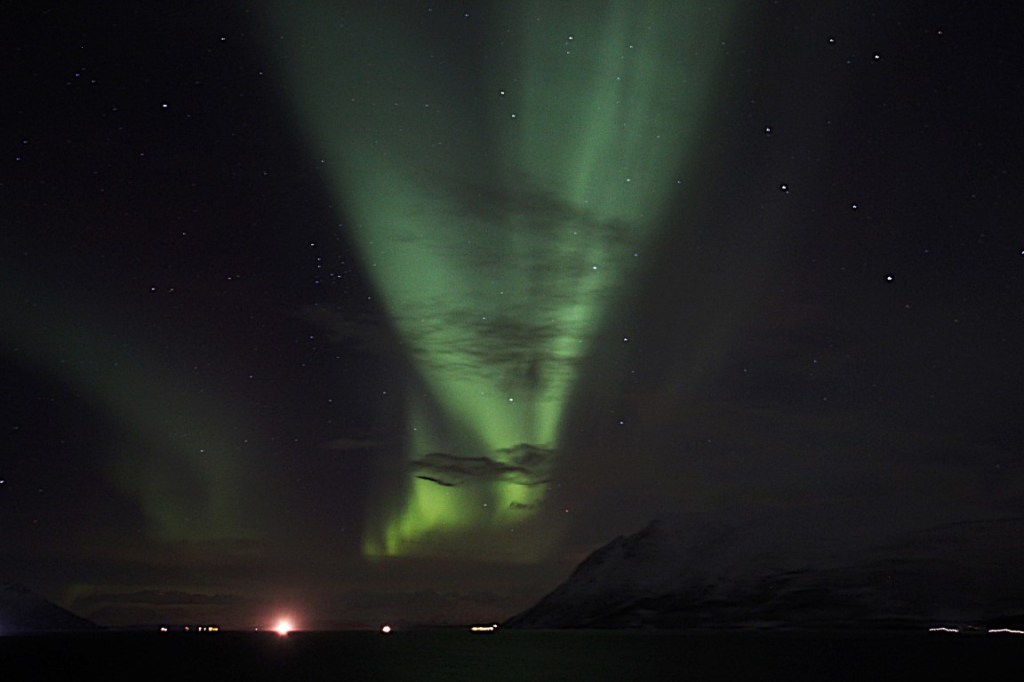
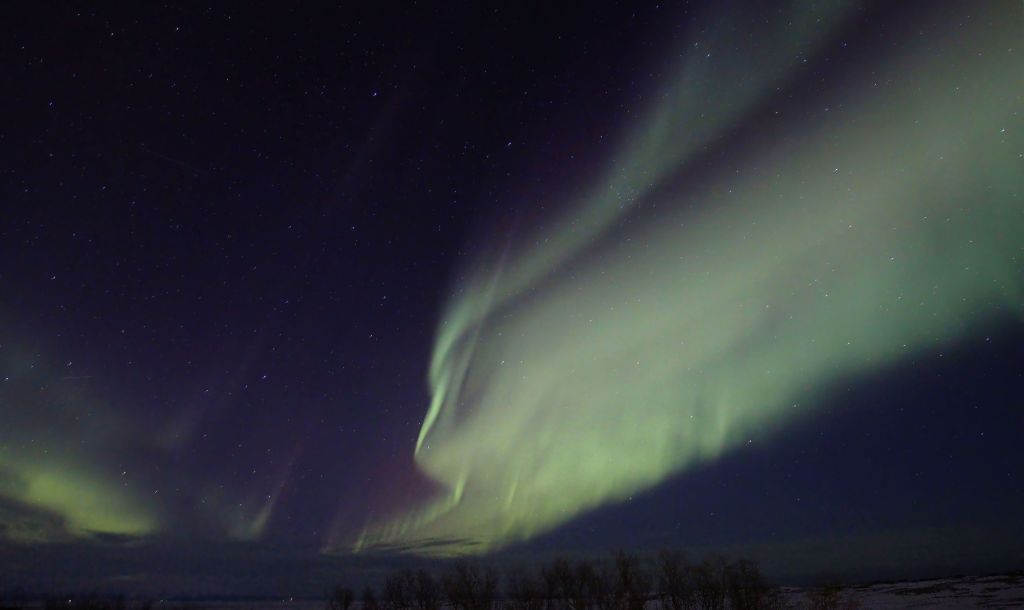
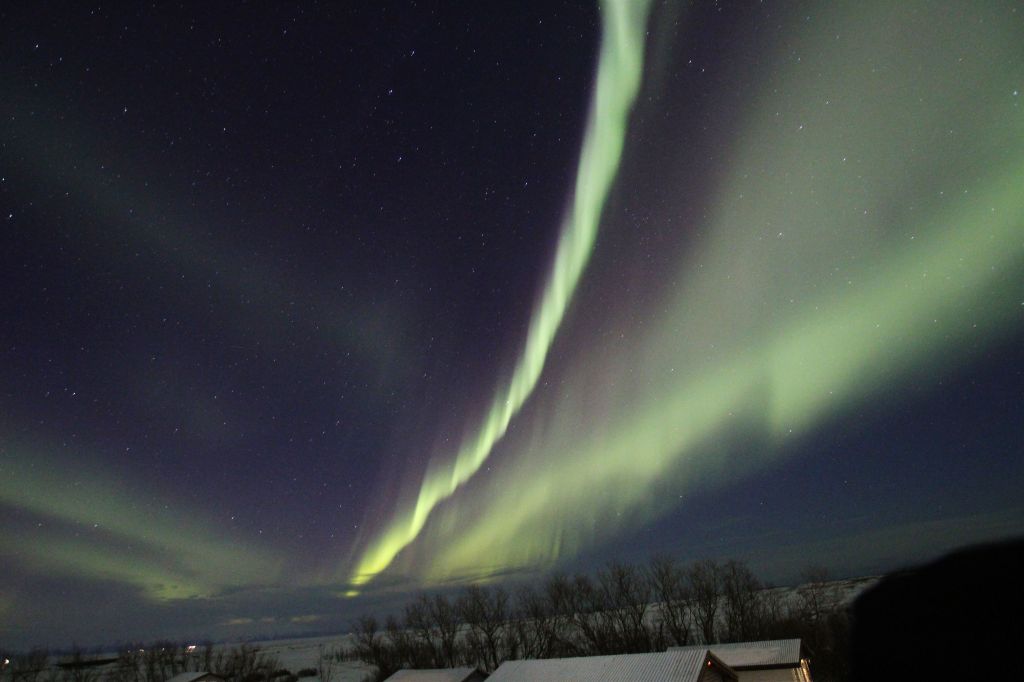
Icelandic Aurora

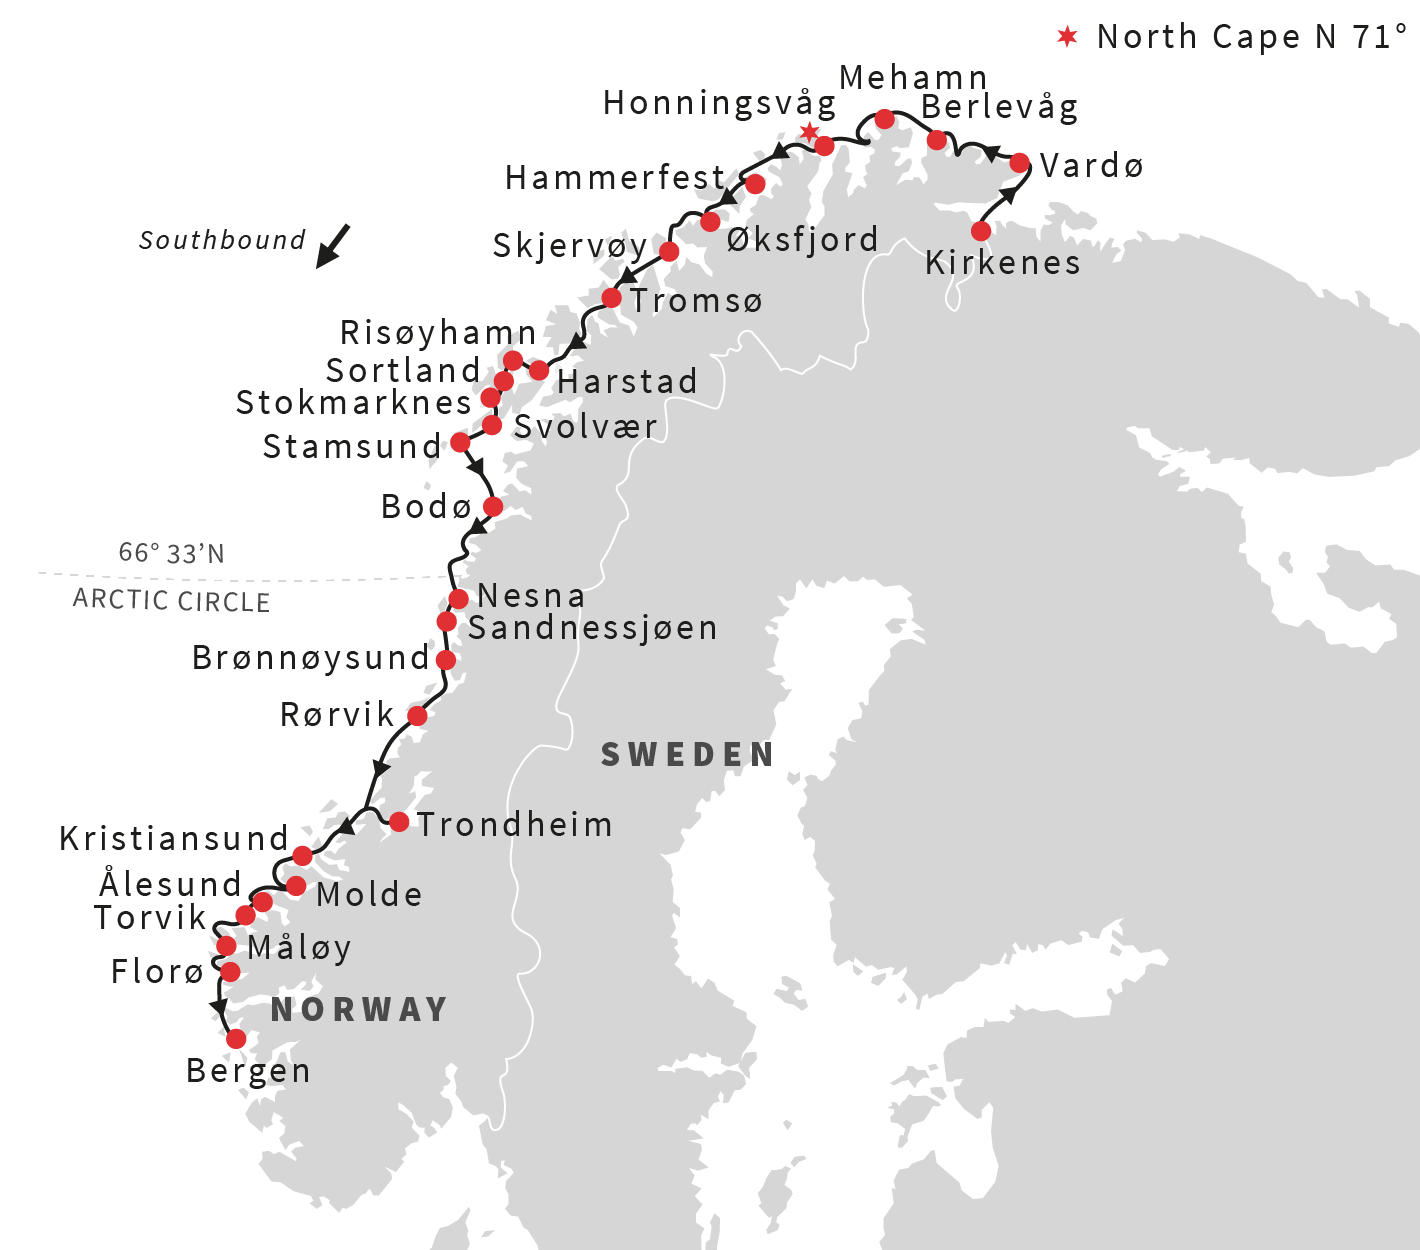
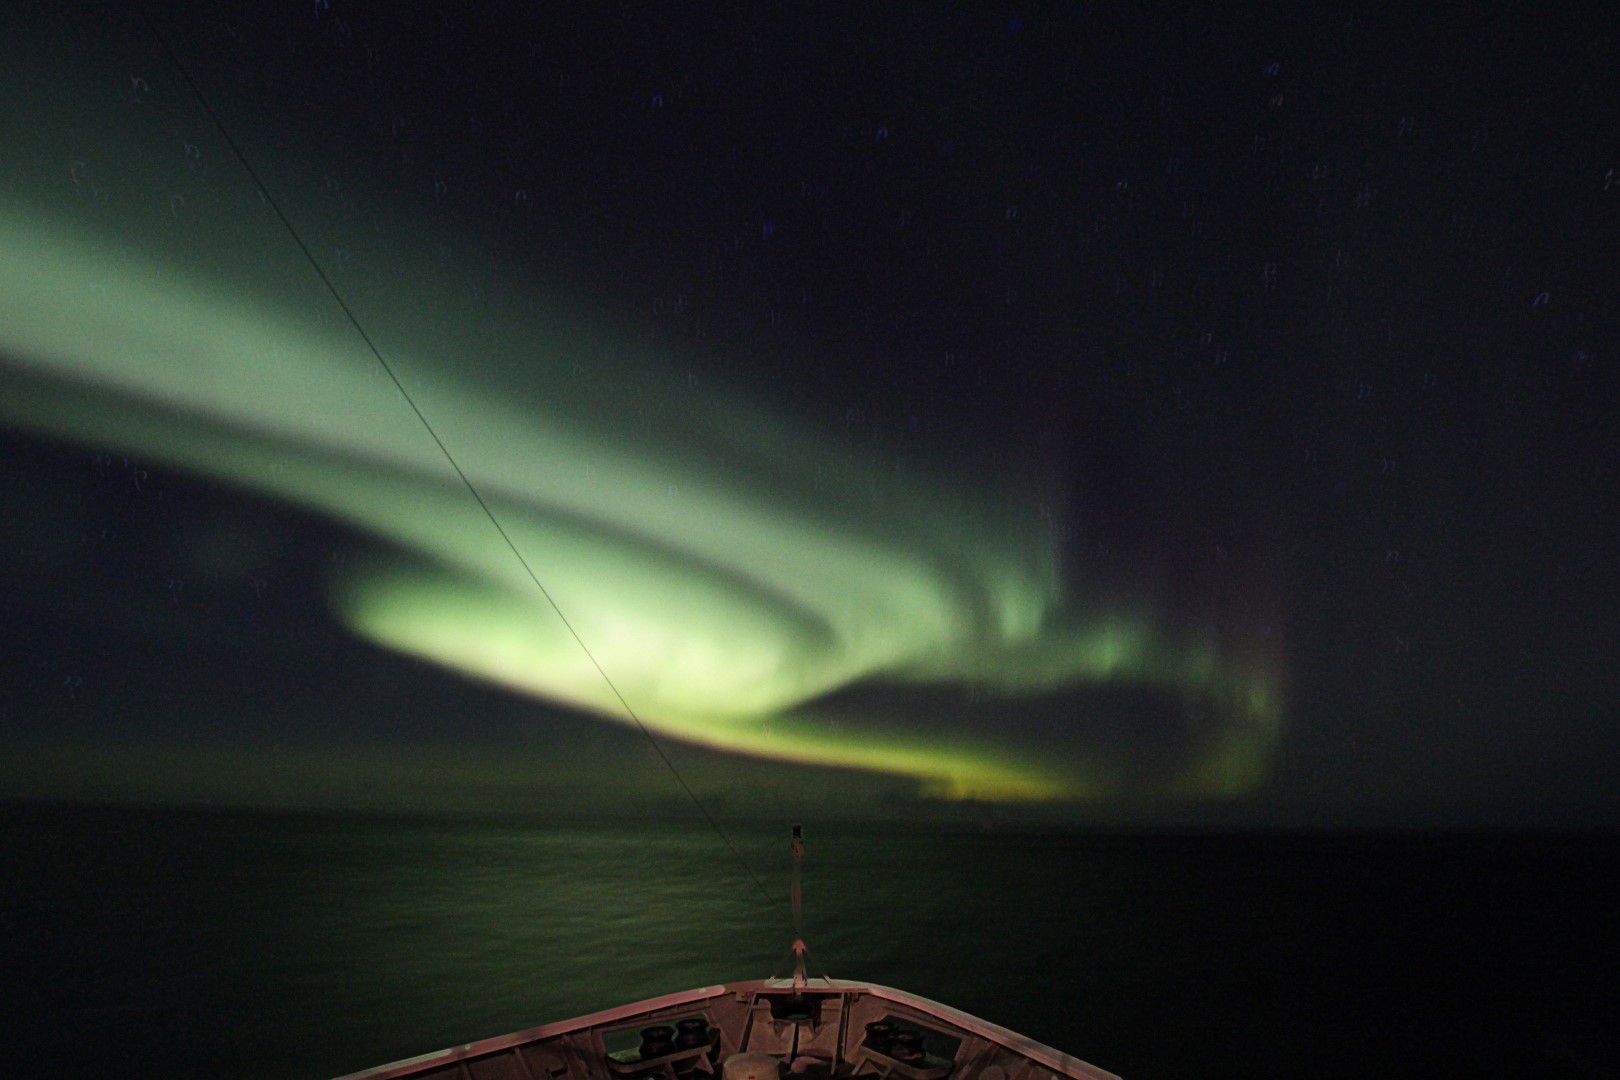
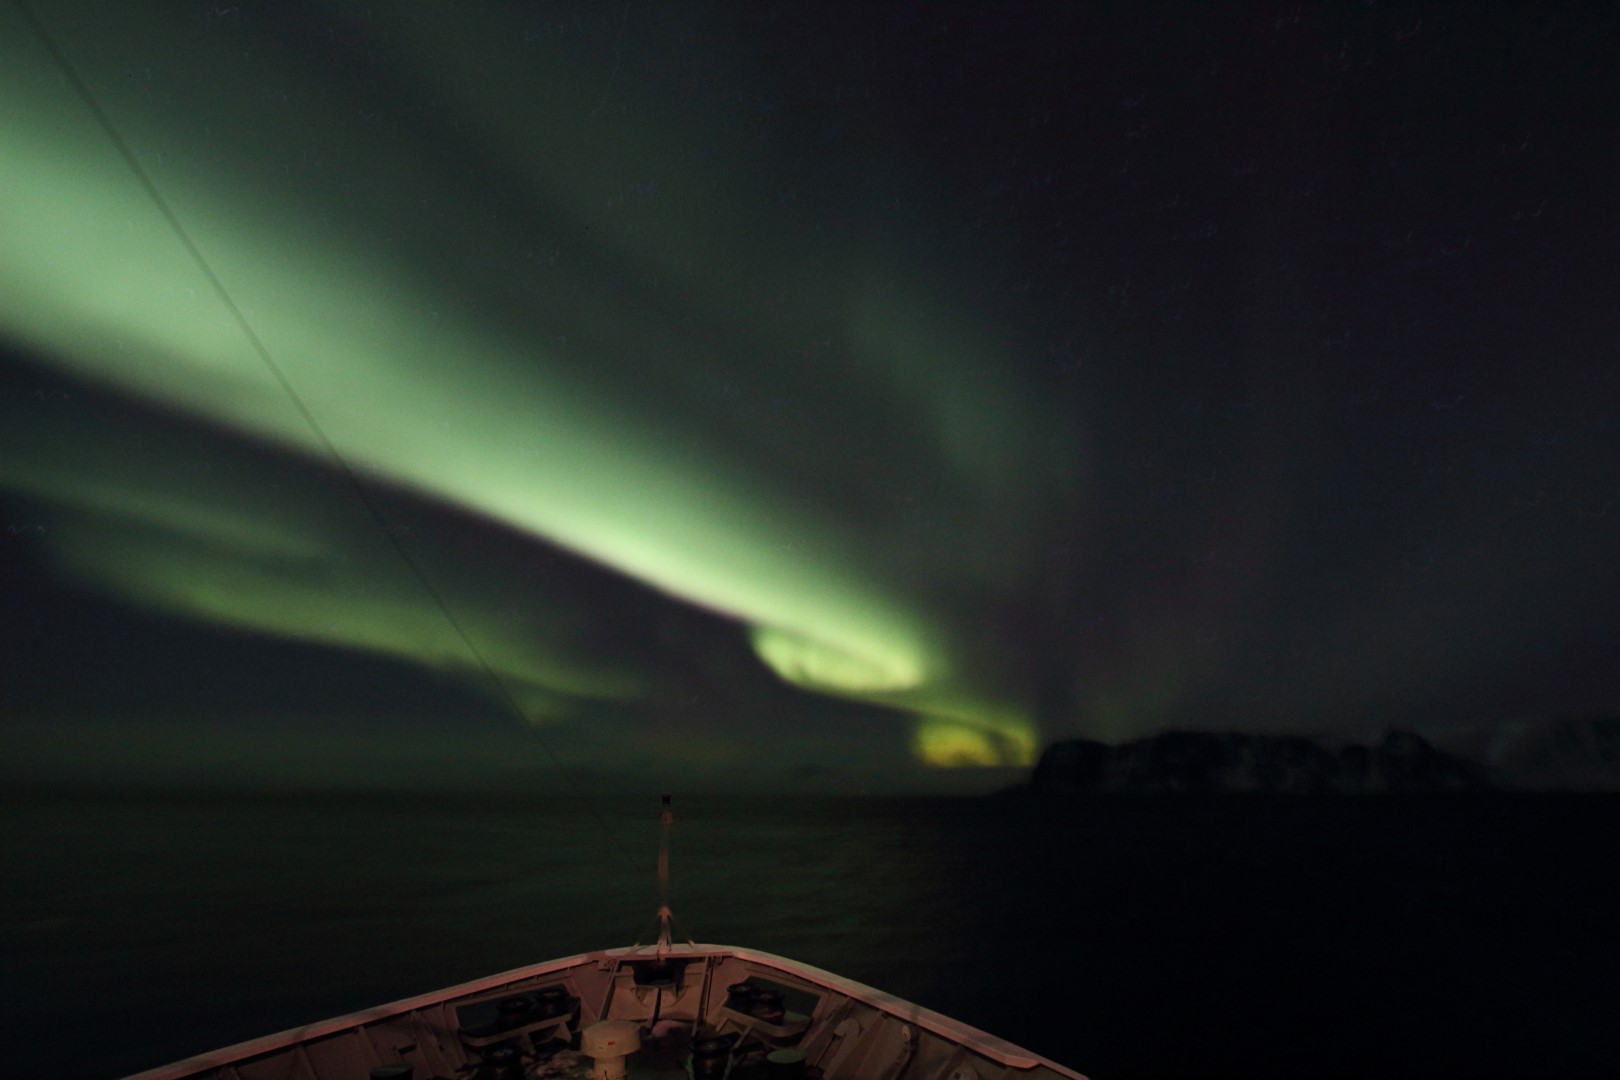
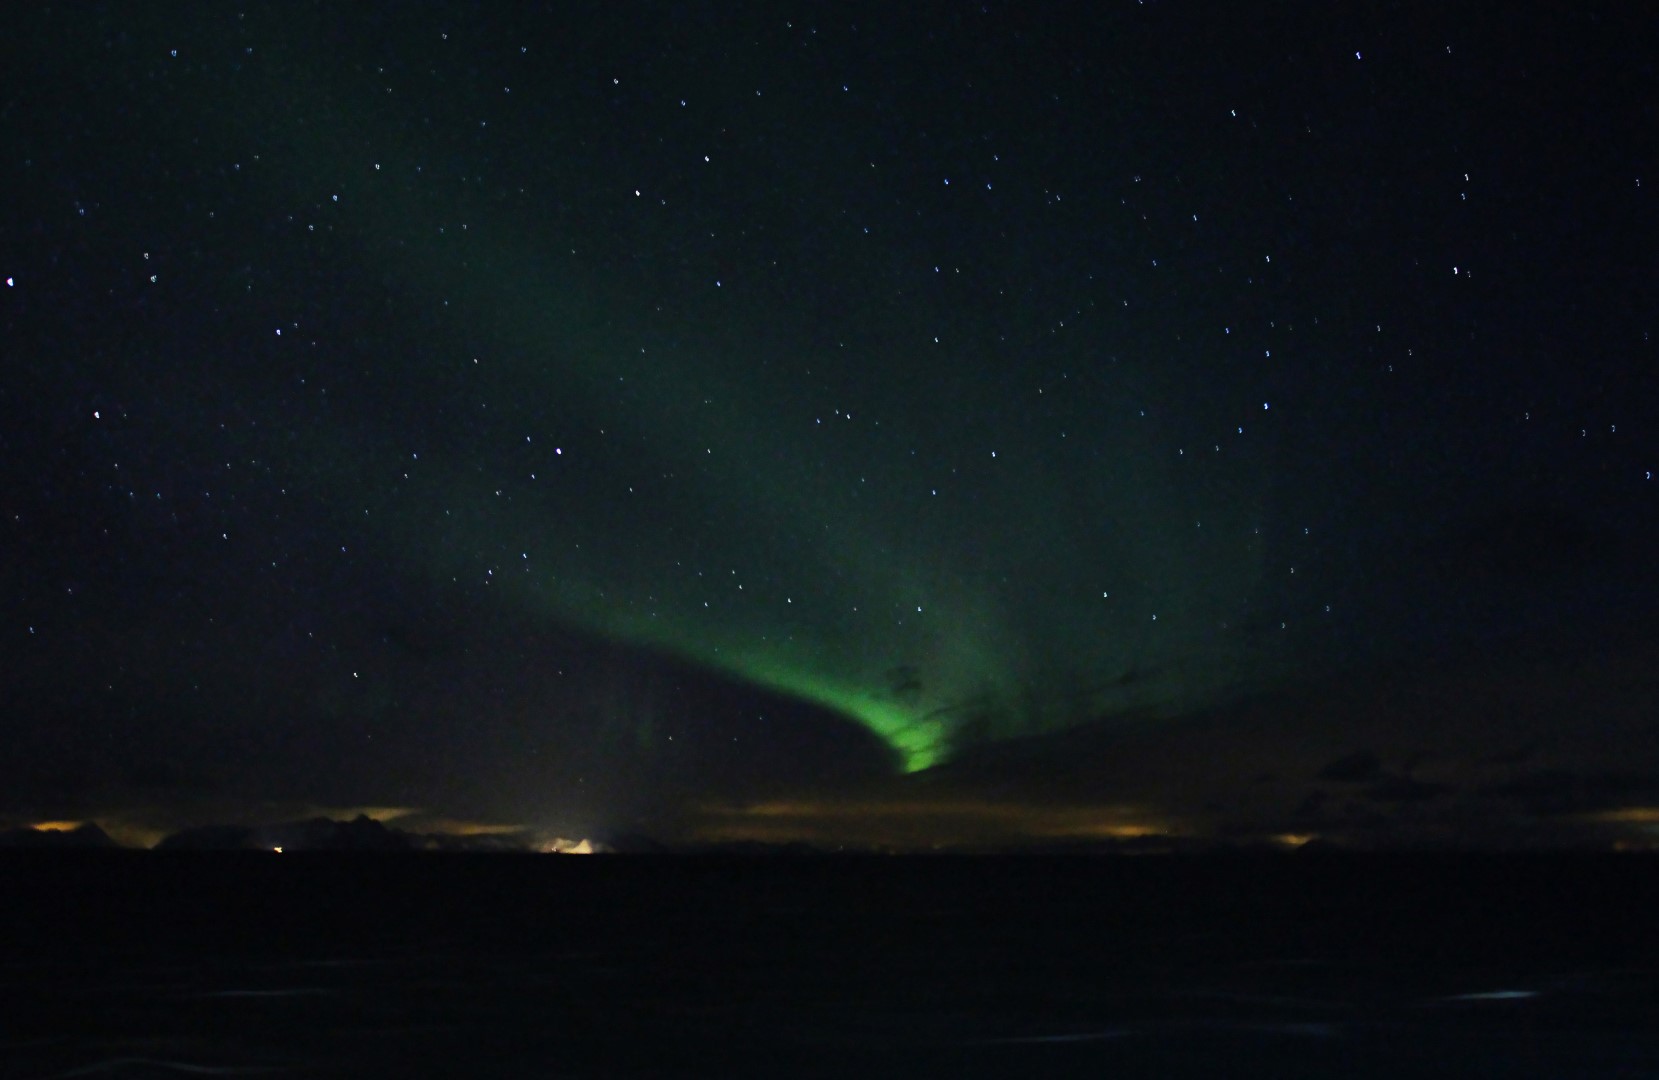
It’s just over 6-years since my last arctic adventure, which was a trip along the Norwegian coast by ship from Bergen to Kirkenes and back, stopping along the way for deliveries and pick-ups at 30-ports.  On that occasion we had good views of the Aurora Borealis whilst at sea somewhere north of the Arctic Circle and with some difficulty, I was eventually able to obtain some images (see below). Standing outside on ther deck at +70o North latitude in February was incredibly cold, making camera operation difficult, whilst the ship’s movement from side-to-side and up-and-down was hardly conducive to photography of the night sky!

This time, I’m just back from circumnavigating the island of Iceland by car from mid to late-March, which is described more fully on my other website Round The Bend here.  It was timed to avoid the worst of winter conditions and, with darkness quickly disappearing as Spring / Summer beckoned, maybe still get a chance to see and image the Northern Lights again – this time on terra firma.  Despite such planning, severe snow, ice and very strong winds were common for much of the time but, when it was clear the scenery was spectacular and, on a couple of evenings later in the trip, the Aurora Borealis put on a great show.

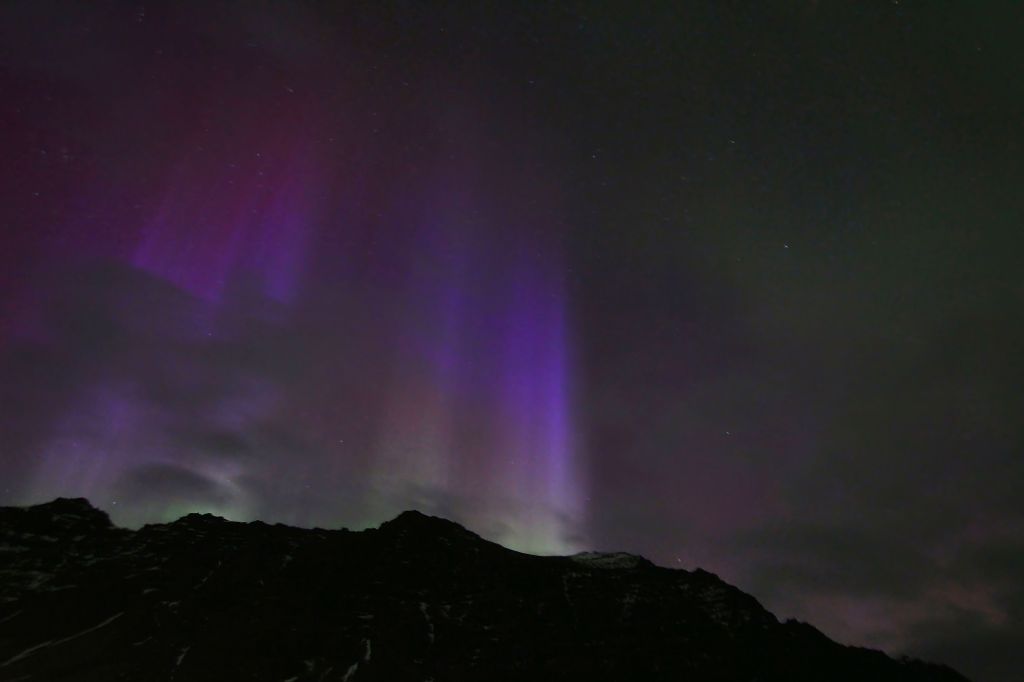
Situated just below the Arctic Circle, mostly between 64o and 66o latitude, Iceland is well known both for its geology and sightings of the Aurora Borealis or Northern Lights.  As a geologist, I travelled to Iceland primarily to view the rocks and though it was getting late in the season, I was also keen to see the Aurora again if possible.  Given the days of bad weather it was therefore fortunate to have clear skies and good views of the Northern Lights on two separate evenings whilst on the south coast, first at Gerdi near Jökulsárlόn and later just south of Kirkjubaejarkklaustur.

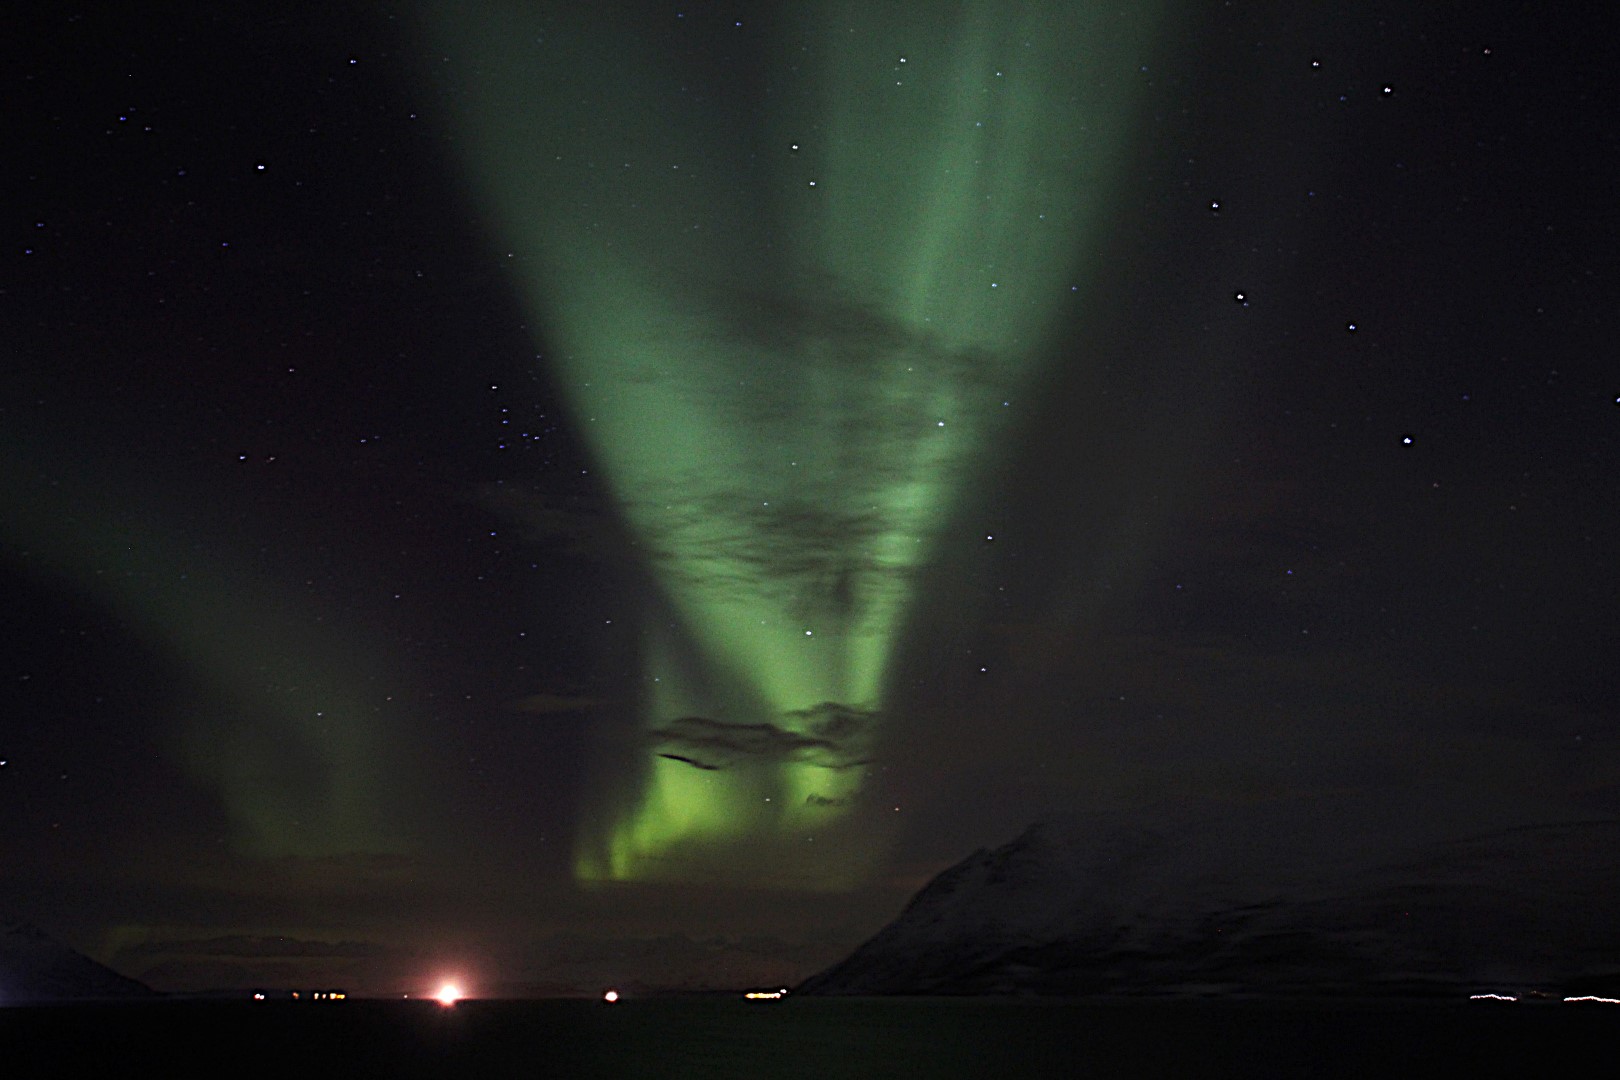
Despite my previous experience, each aurora is different and on this occasion I found using a Canon 700D DSLR mounted on a Gorilla Pod, using a Sigma wide-angle lens set at a focal length of 10mm f3.5 + ISO 3,200 and 10 second exposures generally produced a good image.  It seemed that we were on the southern edge of the aurora on the first night at Gerdi (see top of the page), which was therefore weaker but exhibited a striking purple colour (helium).  The following night the aurora was much stronger, this time mostly green (oxygen) with red and purple fringing (nitrogen & helium) and generally much more active, resulting in some great views with the naked eye and even better images (see below).

Reflections 2018

Reflections is a summary of my astronomy and astrophotography during the past year, plus some thoughts about what might happen in going forwards.  In some ways it’s a bit of a chore to compile but as it provides me with some perspective on what I’ve achieved year-to-year, I do find it to be a worthwhile exercise.

Watch This Space (Man) started in 2015 as a personal record of my astronomy journey. Notwithstanding, the blog has so far attracted 15,000 views from all over the world, including various locations in 64 countries over the past year (see map below for visitors in 2018).   I do like to hear from anybody out there – comments, questions, help or just to say hello  – and can be contacted via details in the ABOUT menu section or alternatively  just leave a comment on any item if you prefer.
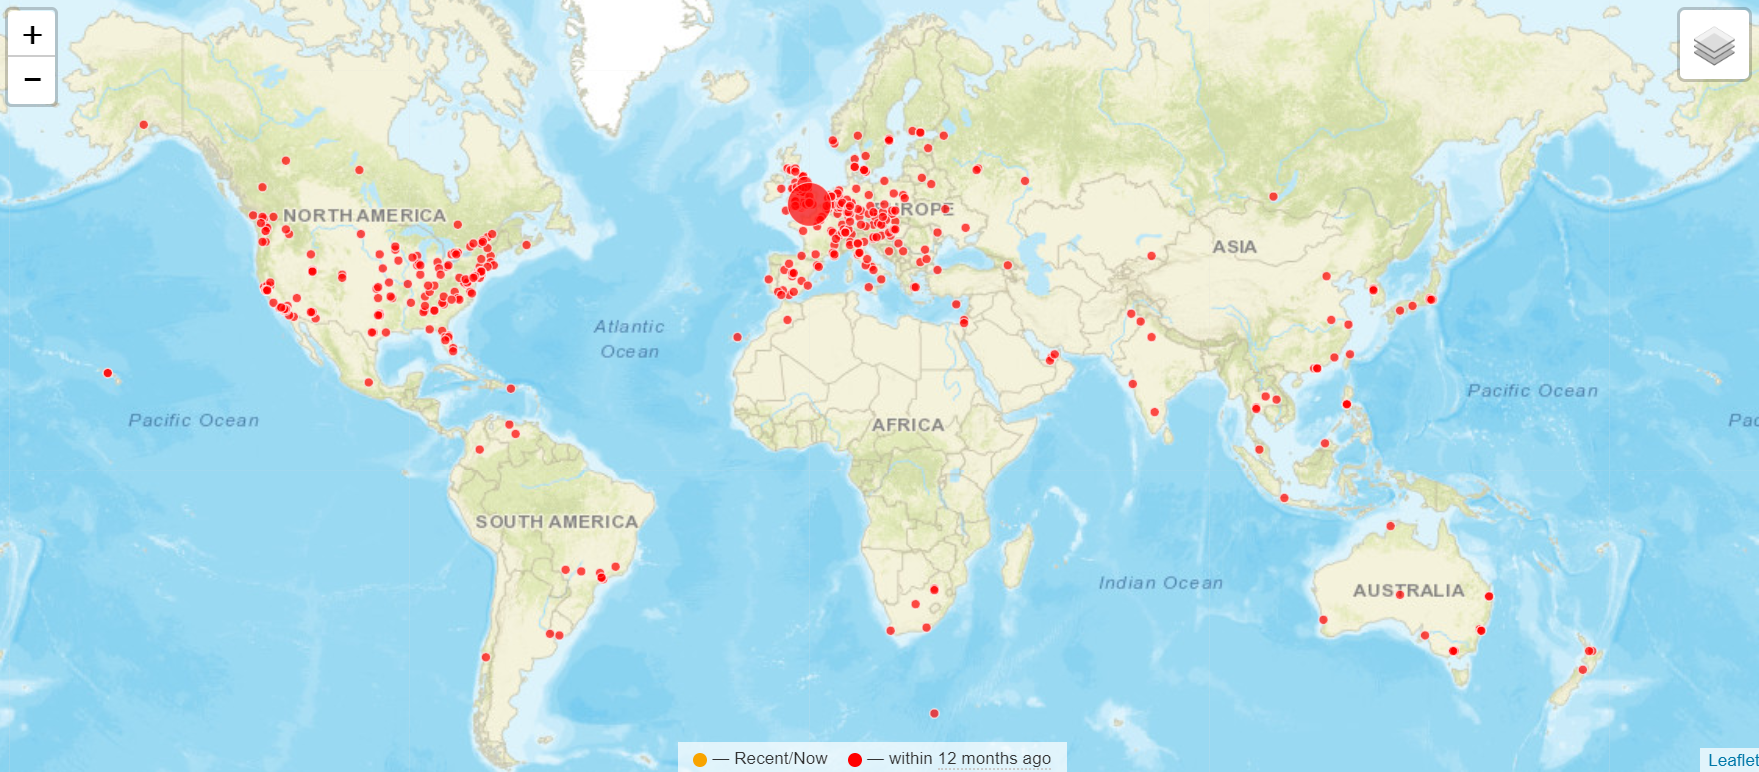
 

WTSM Map 2018


I’m always tinkering with the website where apart from the main blog, there are also links to other astrophotographers, astronomy tools, astronomy weather, scientific papers etc.,  so even if you’re a regular visitor please take a look around from time-to-time.  Looking back I see I did not file any reports this year  under the new Astrobites section, on the other hand look out for more notable occasional image that now appears in the right-hand column under the heading Screenshot, which this year included: the Eskimo Nebula, Jupiter, the Moon & Jupiter in conjunction and Venus etc.         

Whilst there is a photo gallery of my work, for a more summary view of some of my better images there’s a FLICKR album link which is accessible from the GALLERY menu.  Following the change to mono imaging techniques in 2017, for reference each image is now accompanied by a detailed tabulation of the technical information; personally I find this information invaluable when looking at other astrophotographer’s images as a guide to settings and issues when imaging the same object myself for the first time.

Reflections Banner

Overview, Images & Goals for 2019

Since getting to grips with autoguiding in 2017, I’m pleased to say all the basic processes worked well throughout 2018, resulting in a marked improvement of individual image subs.  Long imaging times are difficult to achieve in the UK with poor skies being the norm but the successful adoption of Plate Solving this year marked a very significant breakthrough and holds great promise for ever longer integration times in the future.  Re-configuring the equipment and operating set-up in 2017 now enables operating from indoors most of the time, which apart from improving working conditions, has also made operating itself much more efficient.

I’m especially pleased that after more than 4-years astrophotography I finally manged to establish a new imaging location at the bottom of the garden this year, thereby for the first time enabling imaging of the north sky, literally opening up a new world!  For another perspective I was also fortunate to experience some excellent night skies in New Zealand, France and Cornwall during the year, which was great fun and led to some excellent images too (see 2018 CHRONICLE later in this blog).

Favourite Images

Apart from the odd DSLR shot of the night sky, my astrophotography at Fairvale Observatory in 2018 was entirely carried out with the ZWO1600MM-Cool mono CMOS sensor camera & EFW, combined with the William Optics GT81 scope, in both narrowband and broadband wavelengths.  The new camera has in every sense been a game changer and a lot more work but, in my opinion, the images this year show substantial improvement.  I also made progress using more complex processing techniques in Photoshop and improved colour and detail by combining Ha with LRGB or adding RGB and narrowband wavelengths.  With these advances I submitted a number of images to the British Astronomical Association which, I’m pleased to say, were chosen for publication on their website at various times throughout the year (see Astroimaging Record 2018 at end of blog for details).

A few of my personal favourites are shown below, in no particular order:
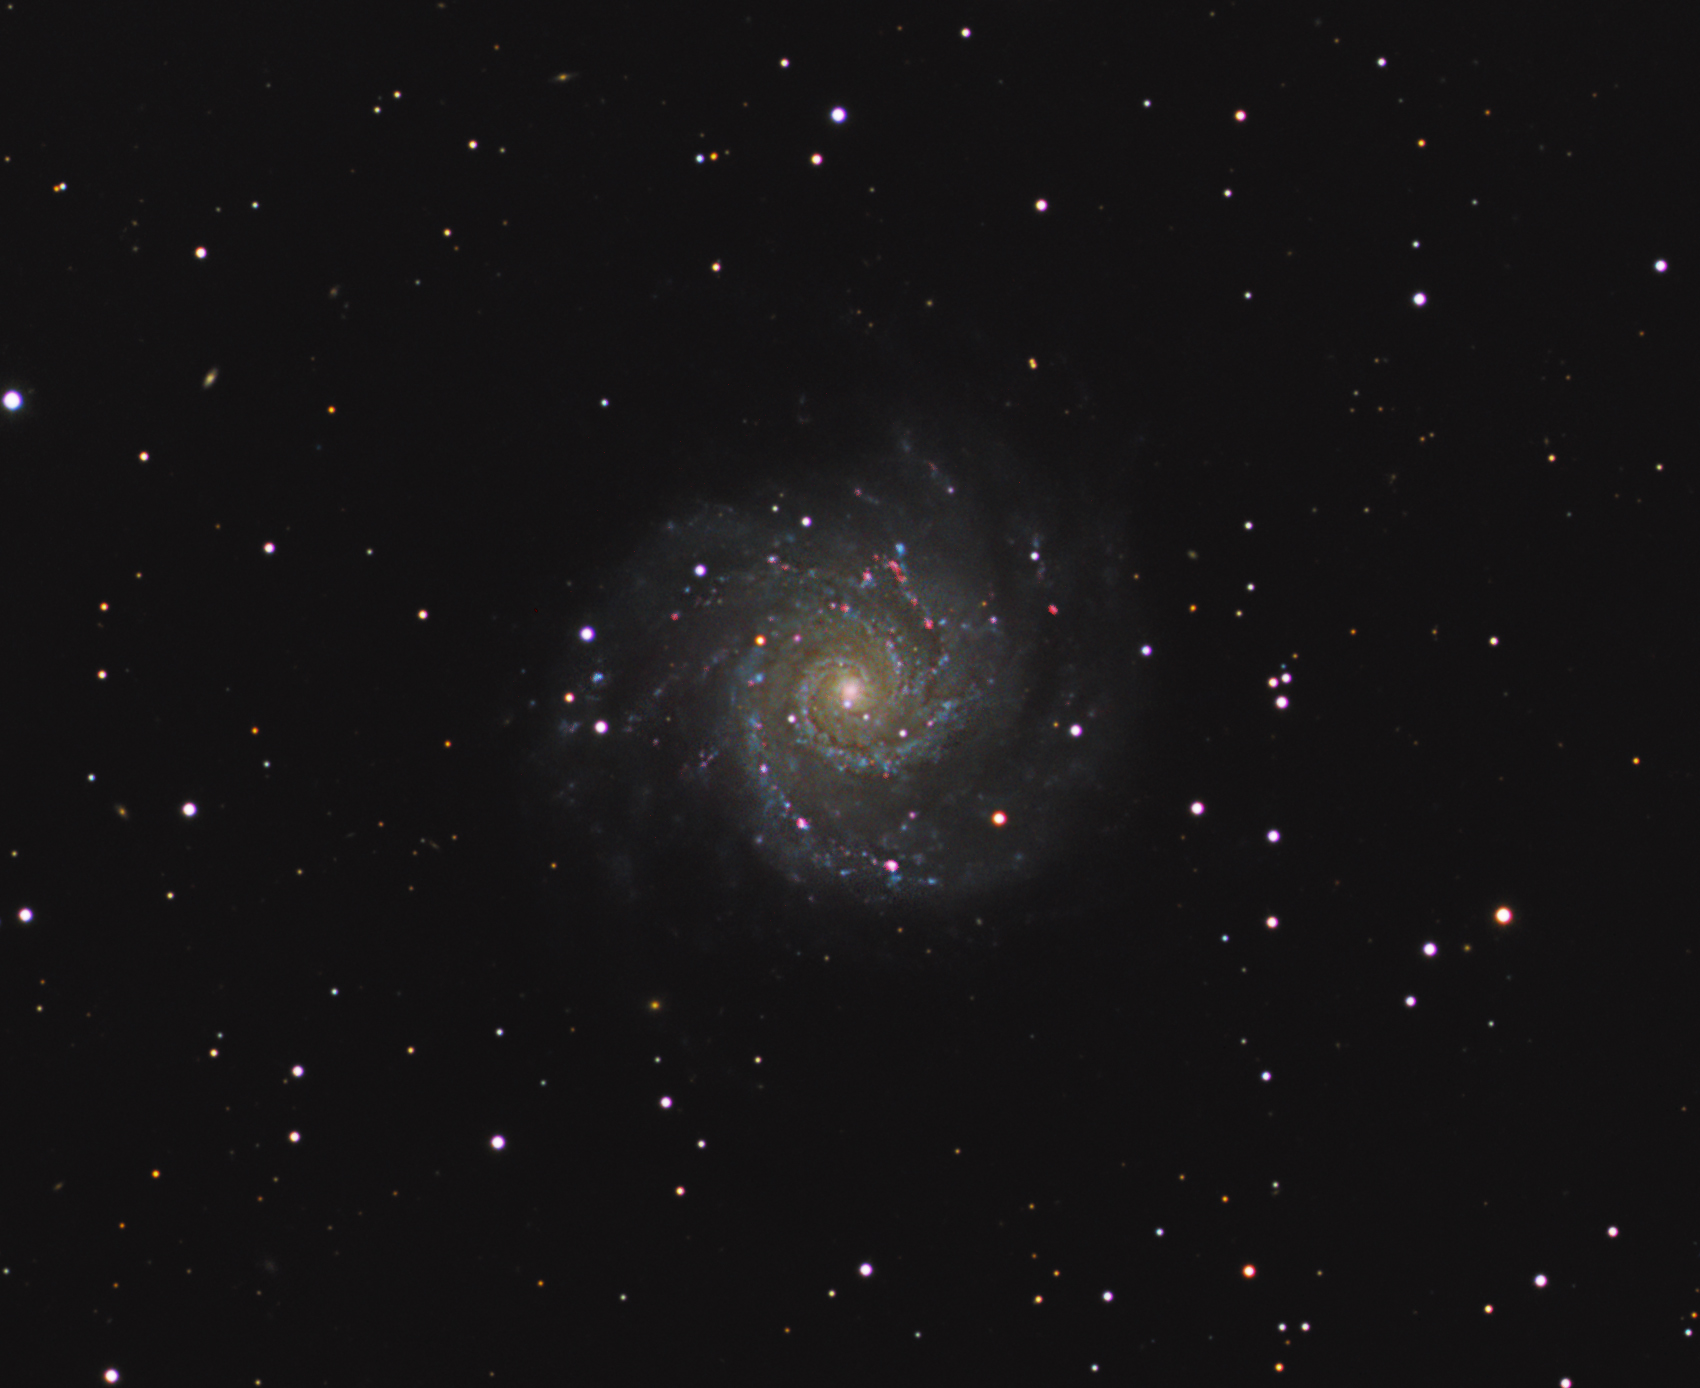
GR Final HaLRGB

M74 Phantom Galaxy (HaLRGB)

RGB HaOO XXX2

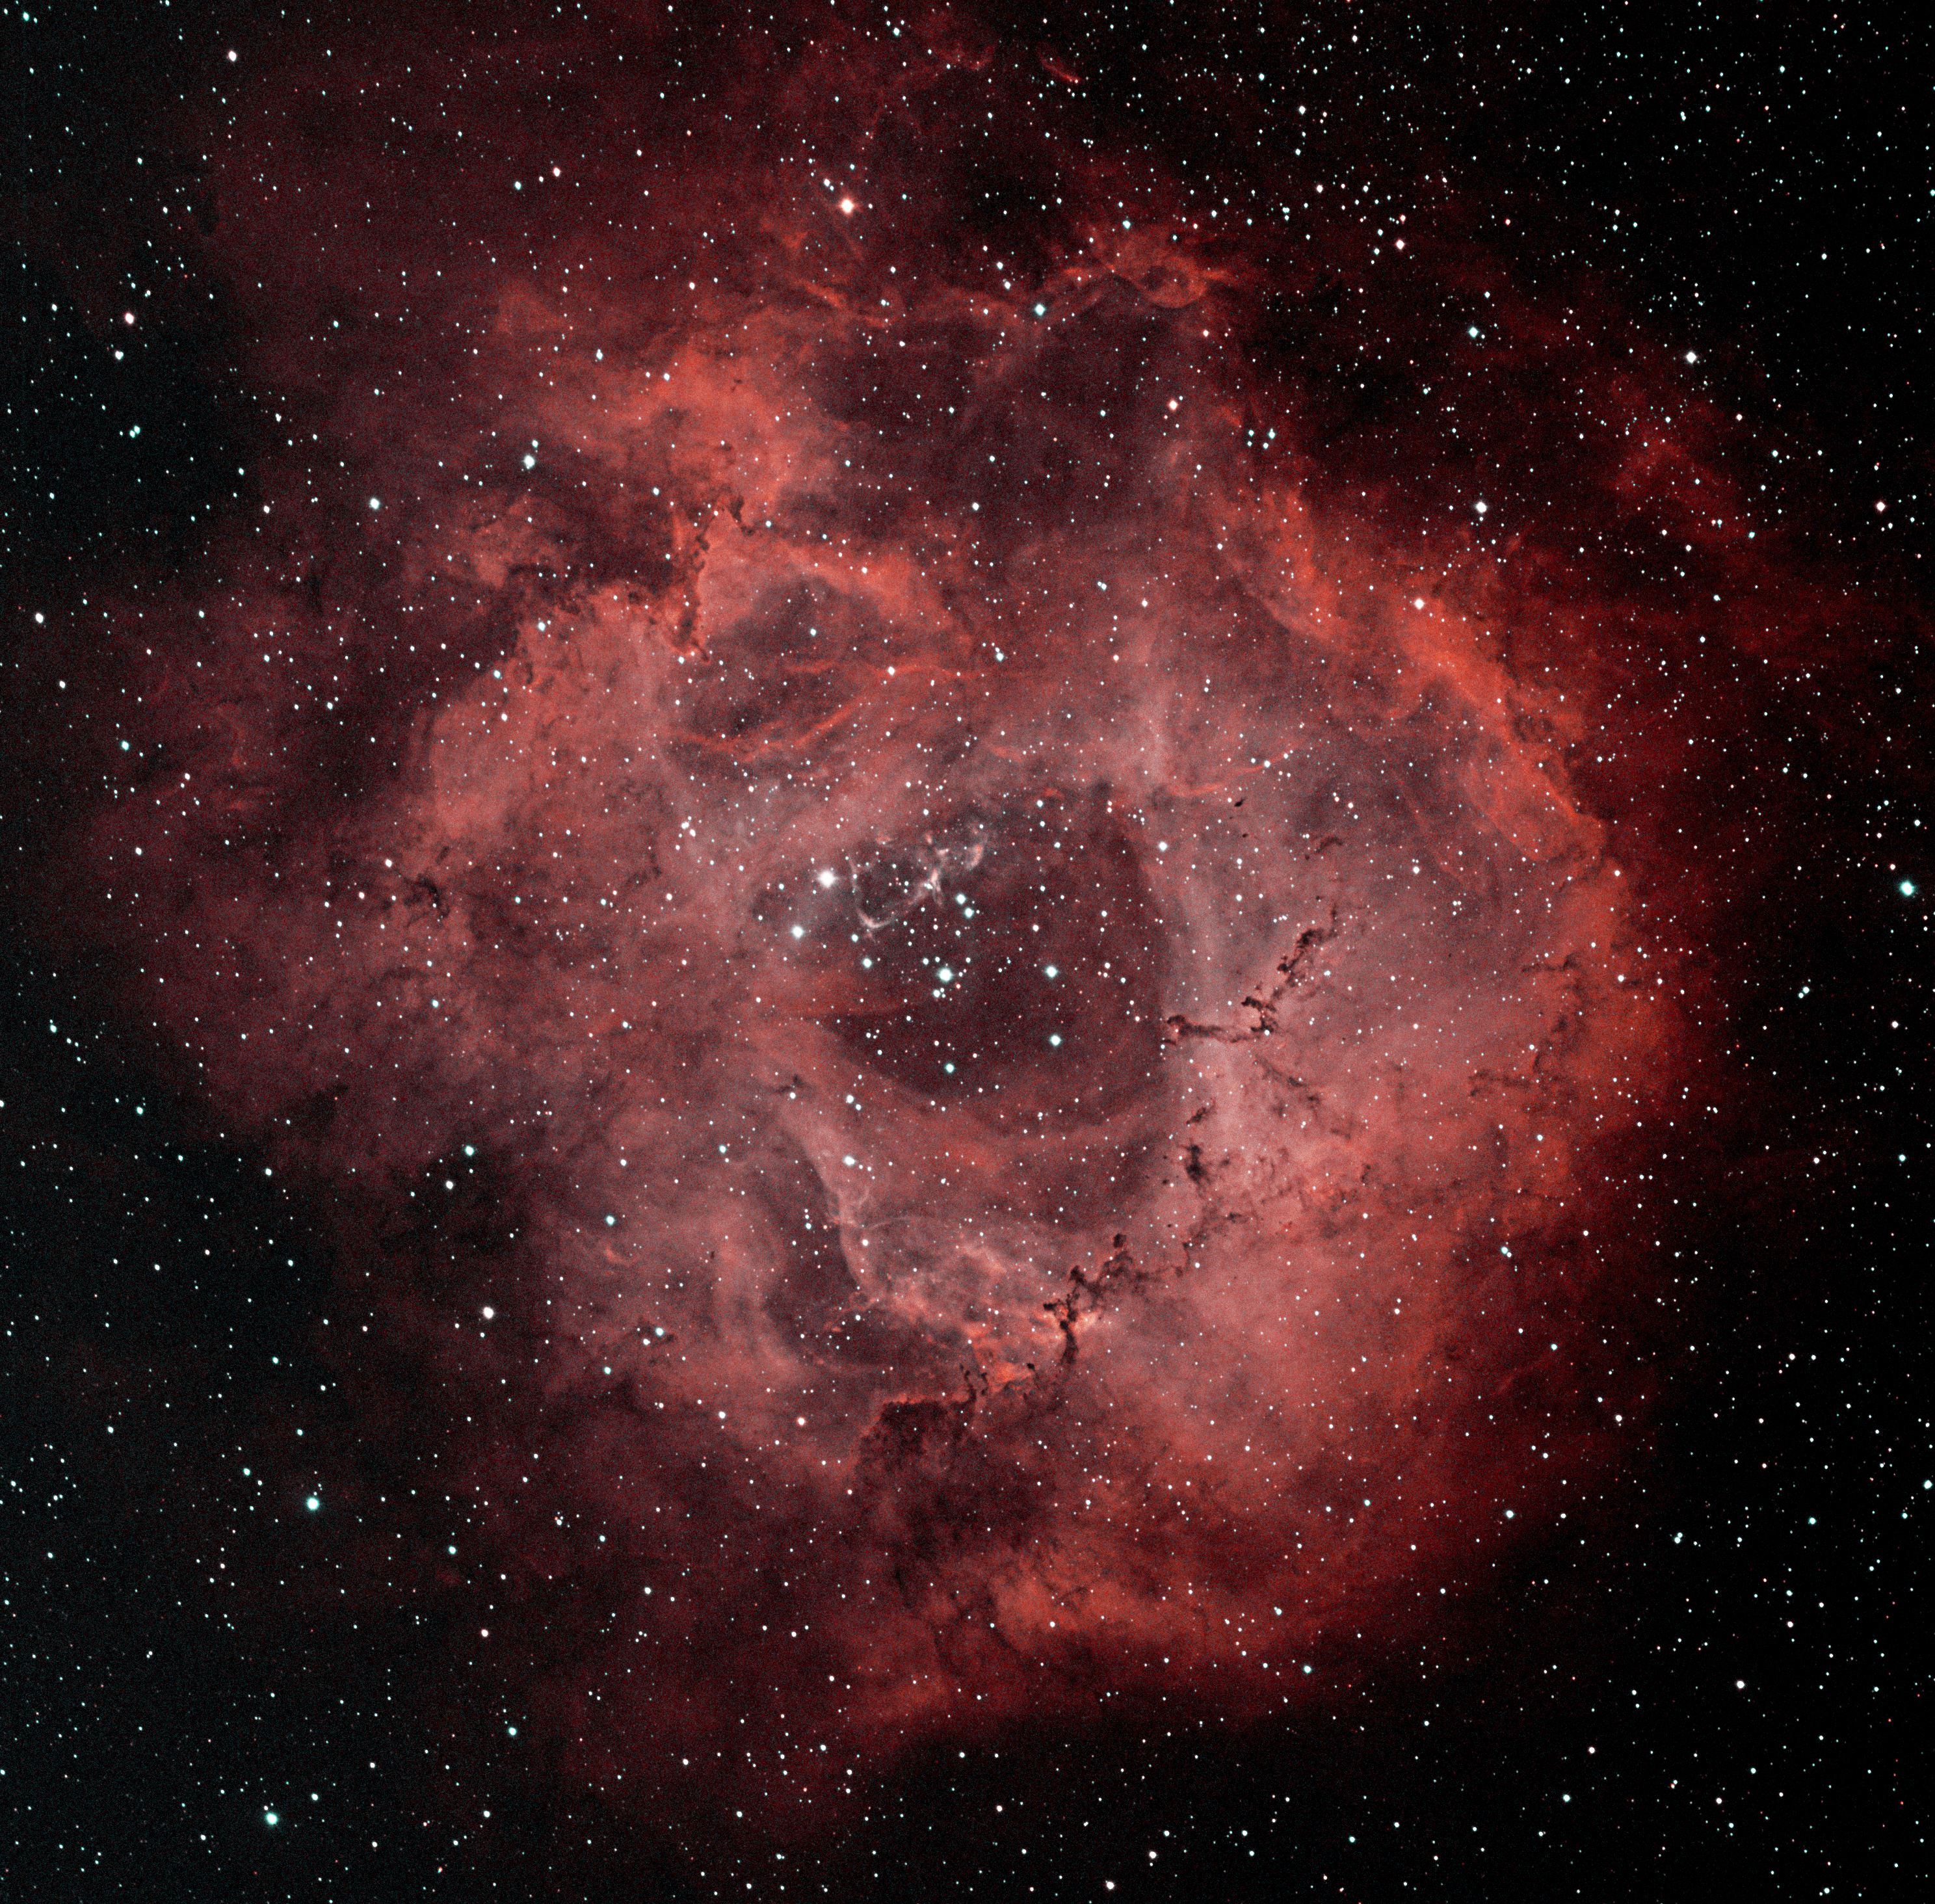
Rosette Nebula (HaOO) 

M13 LRGB Close-up

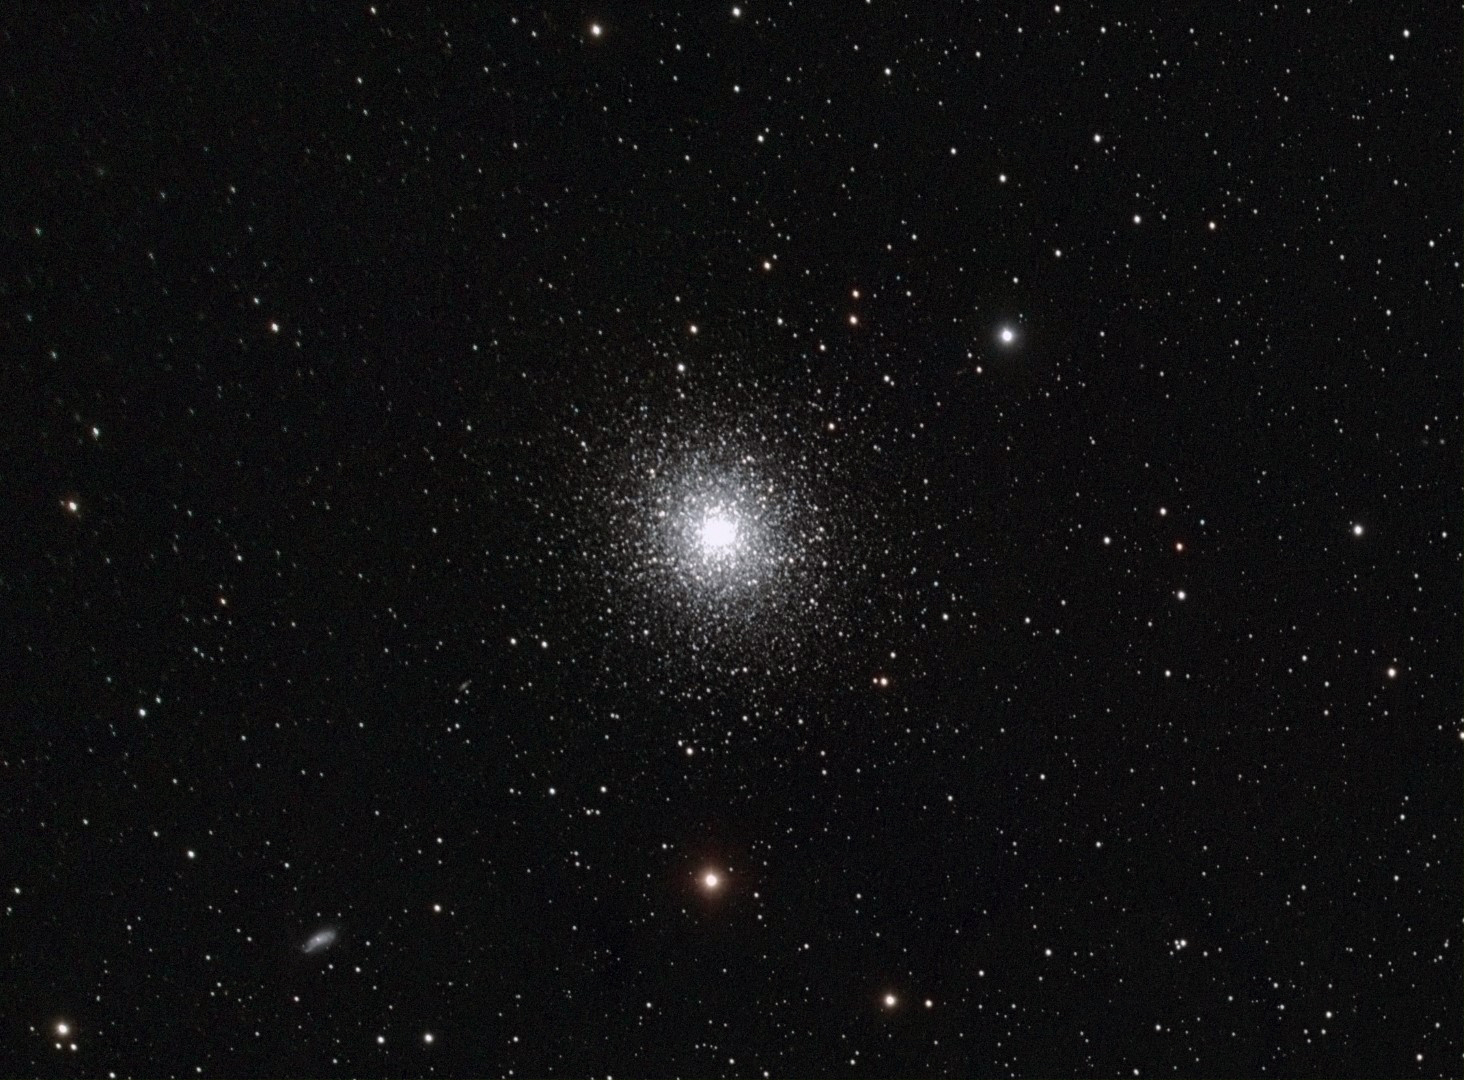
M13 Great Globular Cluster of Hercules (LRGB) 
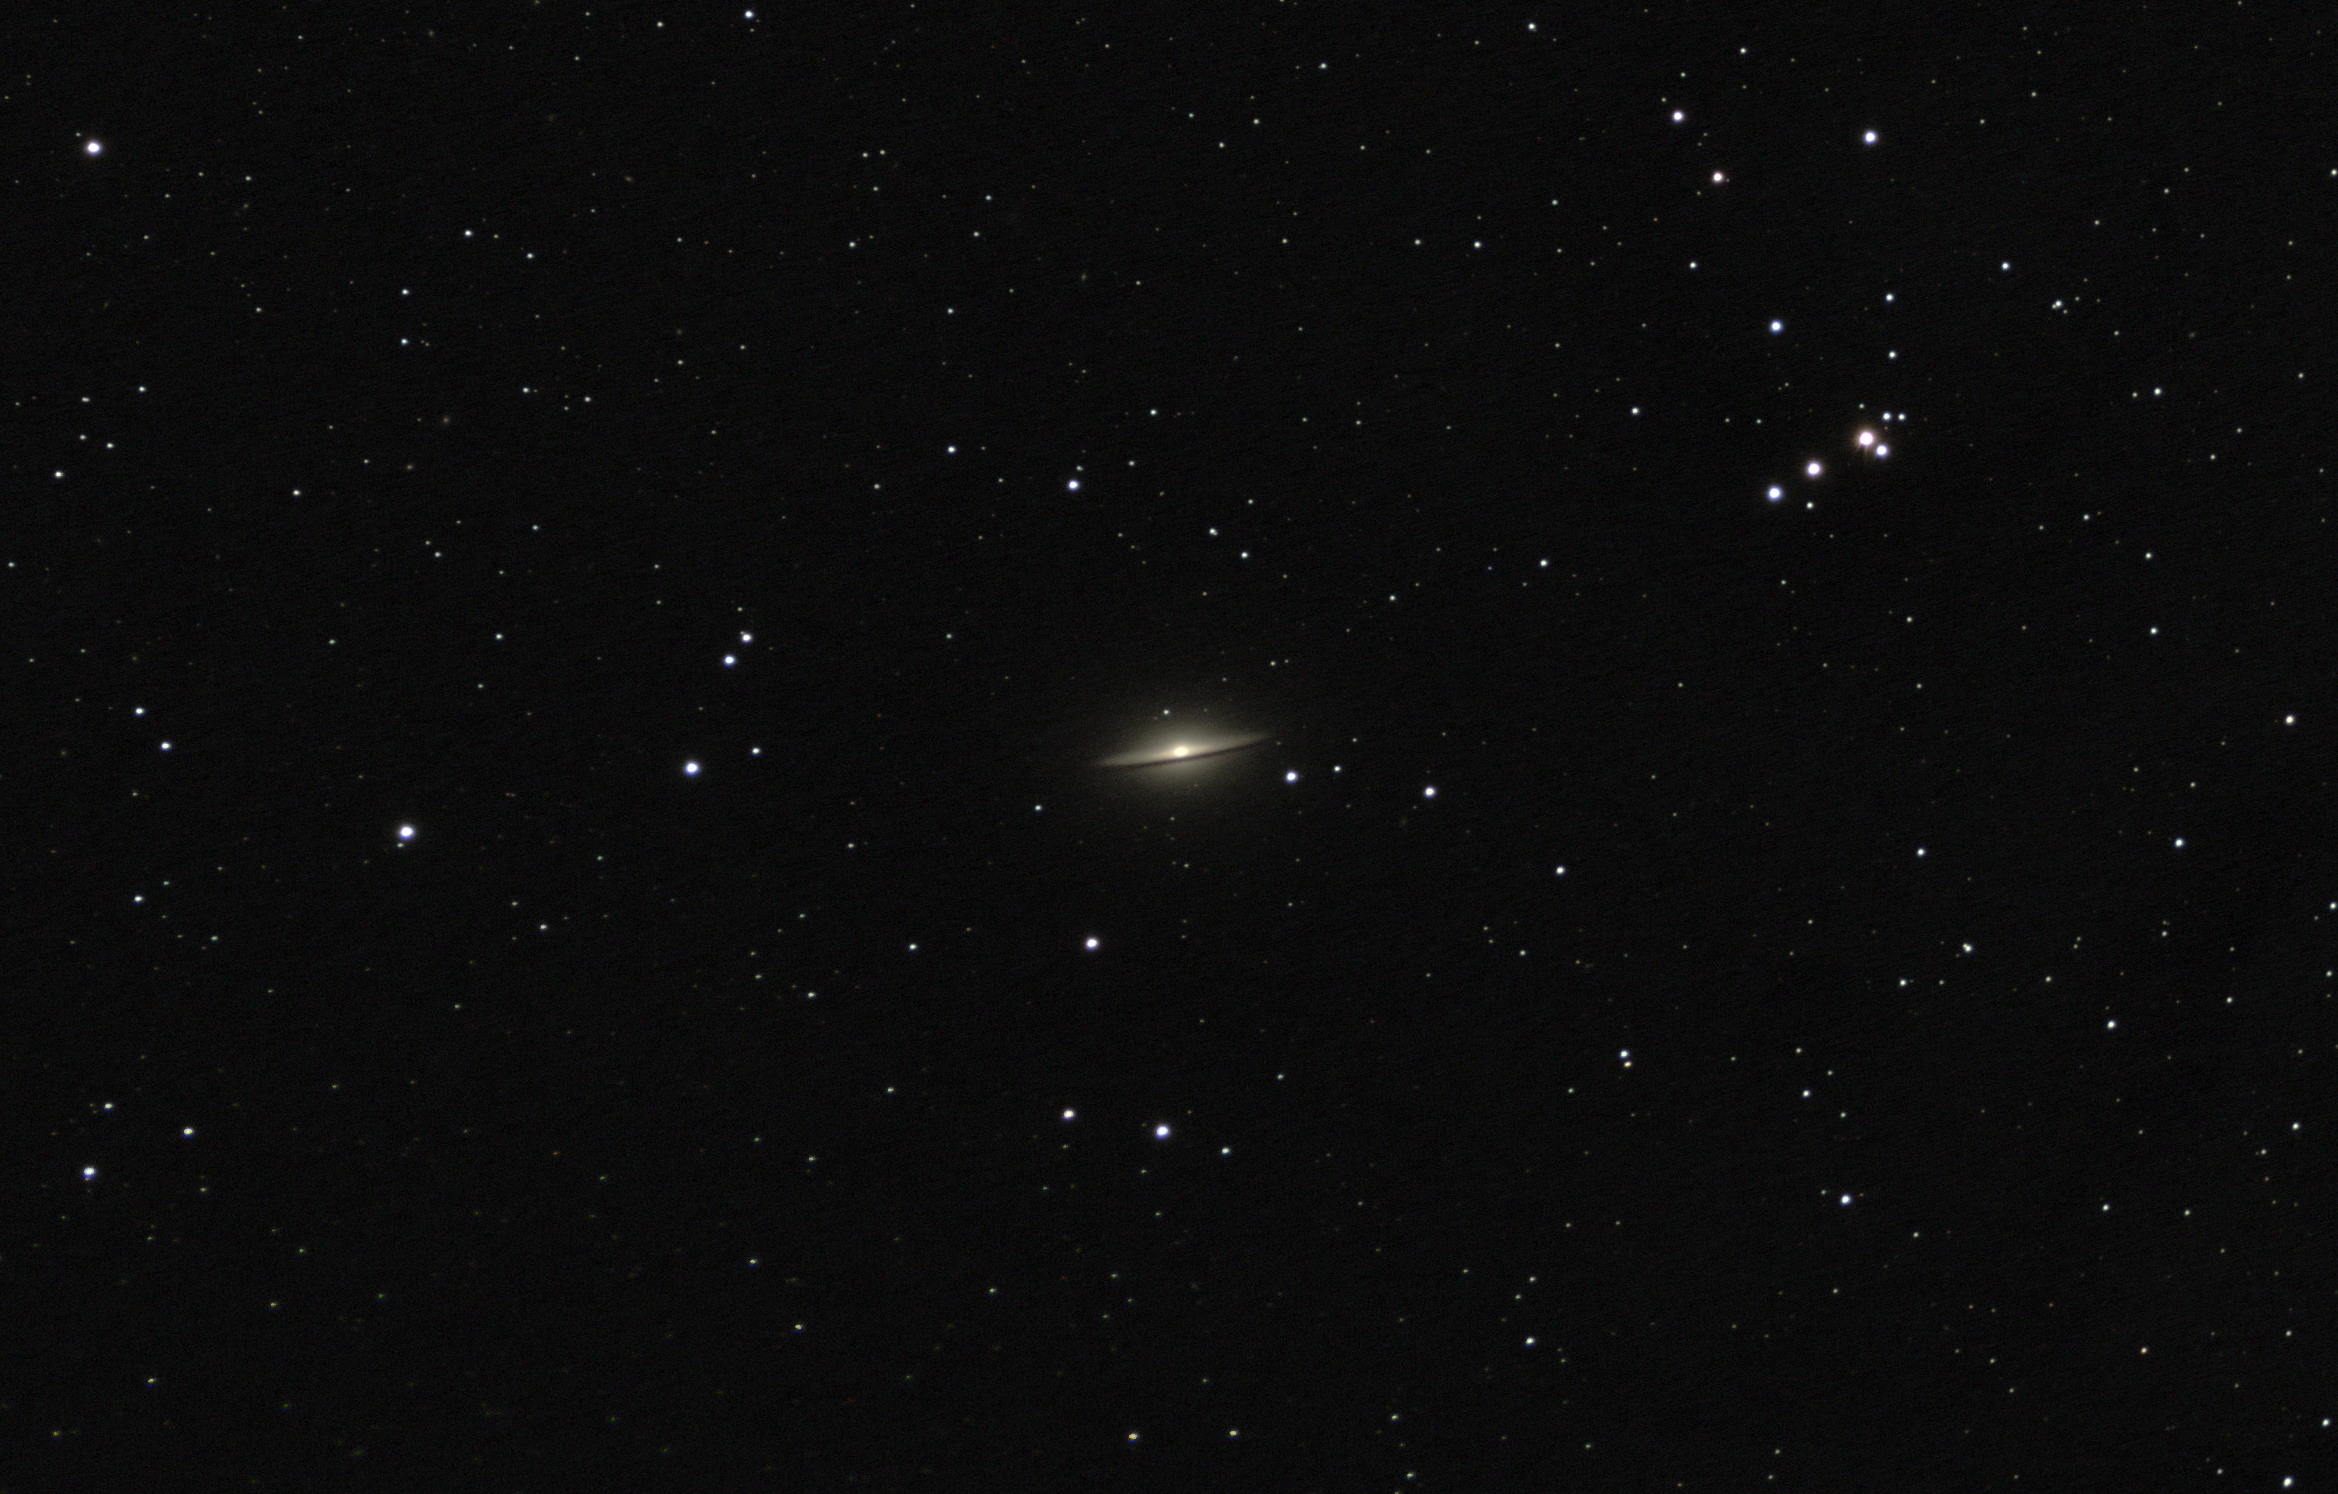
Sombrero Galaxy

M104 Sombrero Galaxy (LRGB)

HHOO hlvg (Large)

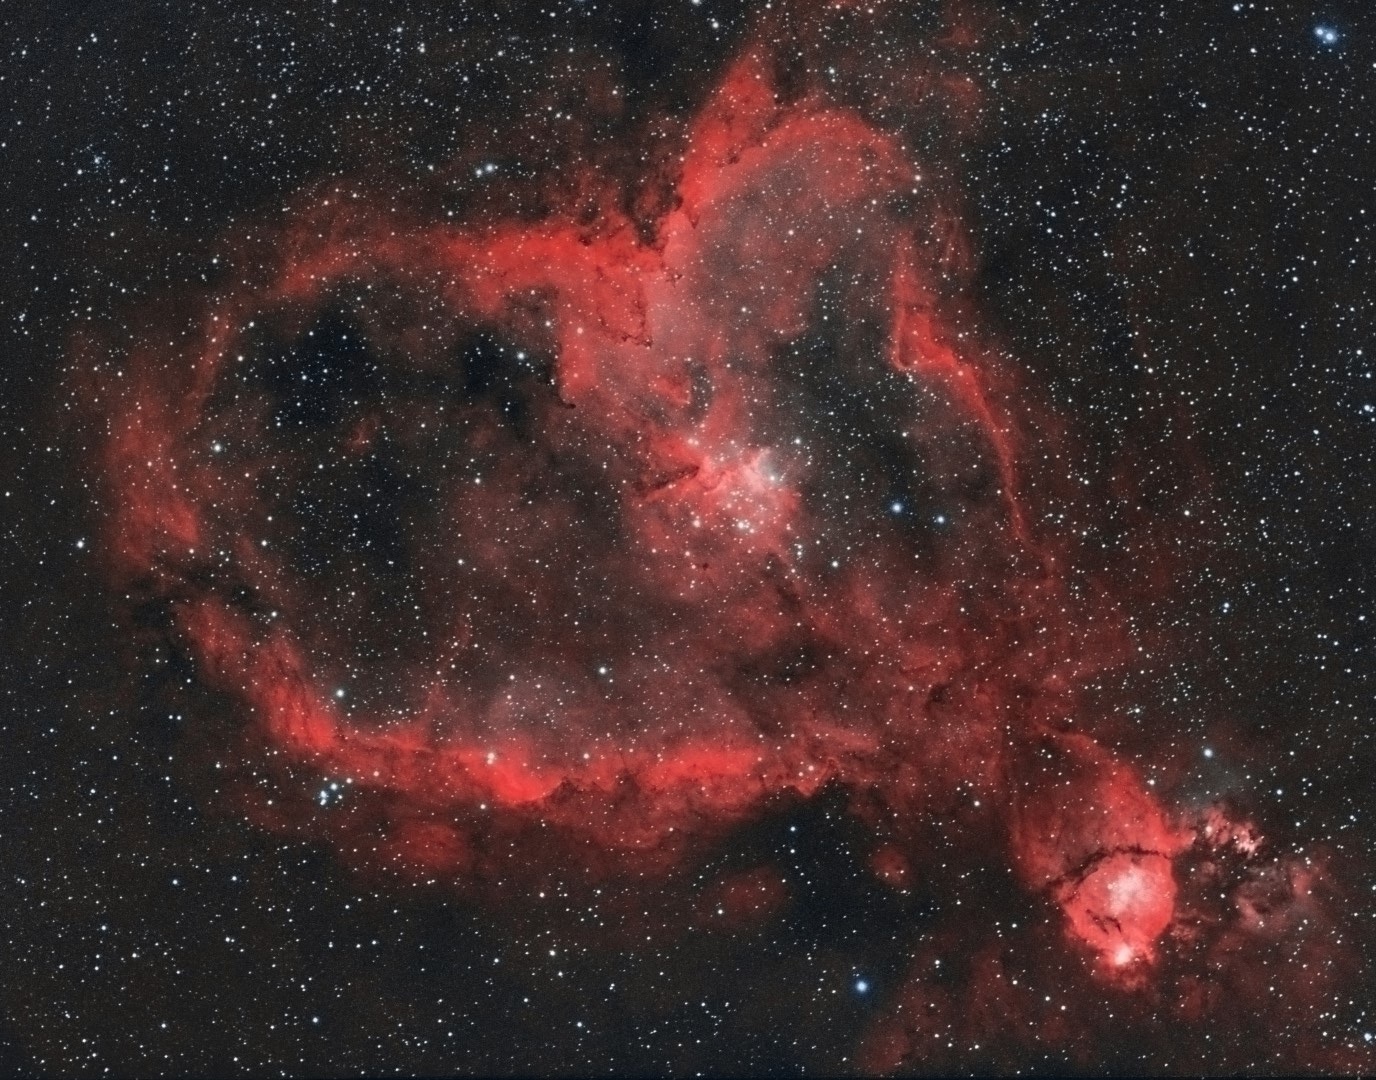
Heart Nebula (HaOO)

RGB2 GxFinalX (Large)

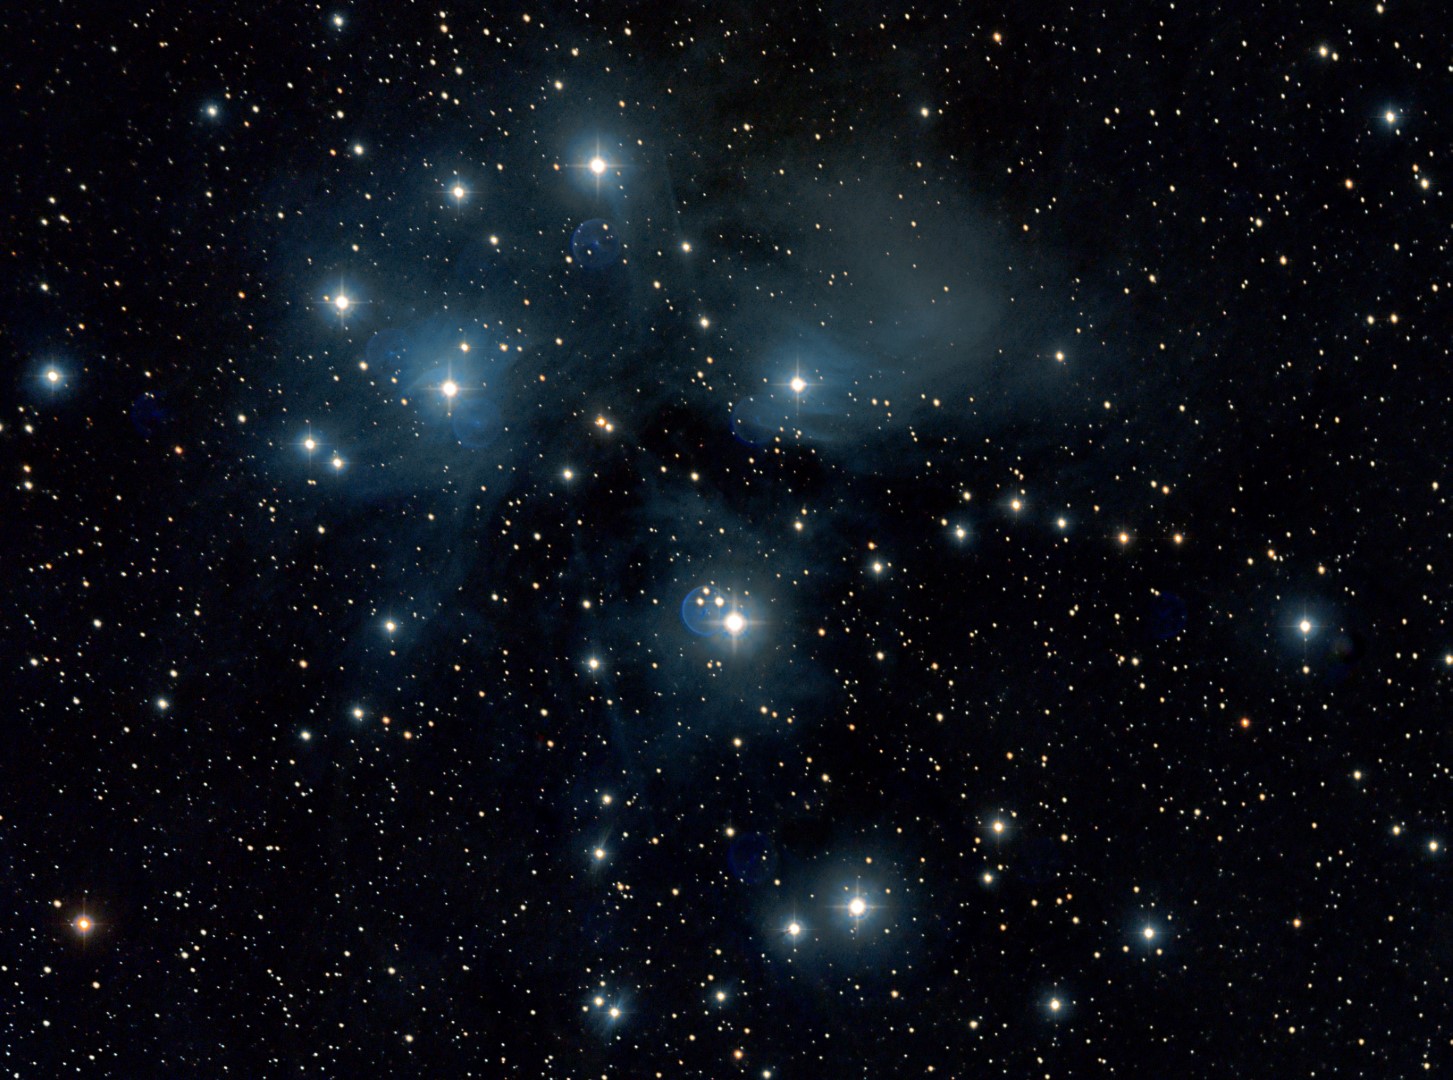
M45 Pleiades (LRGB)


RECORD CARD – 2018
Goal Specifics / Results Outcome
Improve broadband and narrowband imaging


Improved understanding and use of the ZWO1600MM-Cool mono camera leading to better subs.  Major breakthrough with Plate Solving enabling a significant increase in image integration times and overall quality. MUCH BETTER


Improve processing Continuing to make improvements and achieving noticeably better narrowband images but with more work to do in broadband. Much greater use of various Photoshop techniques is improving detail, colours and final quality. BETTER


Expand & Improve Widefield Imaging Despite some good images of the Milky Way in the UK and NZ I barely used the Vixen Polarie tracking mount and did not make it to any dark sky sites in the UK. FAILED


I think it helps to set new goals each year, so here goes for 2019:

  • Imaging: (i) There’s lots of scope to improve imaging techniques but probably most of all I now need to improve guiding quality and then increase exposure and image integration times further. (ii) Start mosaic imaging using Plate Solving.
  • Improve processing: Despite progress, I expect this will continue to be a major challenge for some time to come. Working with Olly Penrice in France and using Steve Richards’ new book Dark Art or Magic Bullet provided lots of opportunities to learn more but I’m still considering a move to new software for pre- and post-processing – we shall see.
  • Other: (i) Widefield imaging – Since acquiring the Vixen Polarie two years ago I’ve done little more than dabble in the occasional night sky shot. Maybe just set my sights lower this year and just see what happens! (ii) Do more observing – I had been thinking of getting something bigger like a Dob for observing whilst imaging is underway but frankly now thinking just do a bit more when I can with what I’ve got.  (iii) Notwithstanding weather issues at Les Granges observatory in France, get back to at least one good dark sky site next year.

I’m very pleased to say 2018 was again very good year for astrophotography, almost certainly my best yet, which was especially defined by two positive developments that are already transforming my astrophotography and hold further promise in 2019 (I said the same last year but it’s true):

  • Starting to Plate Solve has opened up whole new possibilities, in particular: Meridian flips and multiple imaging over different nights; Mosaic imaging.
  • Fairvale Observatory South – The ability to see and image the north sky from the new location expands imaging possibilities very significantly – should have done it sooner.

You can’t ask for more than that and hope that WTSM’s Reflections 2019 will record further such success.

Watch this space!
wtsm logo

2018 CHRONICLE

Below is a quarter by quarter summary of my astronomy and astrophotography for the year 2018, followed by an imaging record.  It’s interesting but not surprising that I recorded about 50% less objects than in the previous year but, as explained, integration times have increased markedly – “never mind the width, feel the quality”!

JANUARY TO MARCH

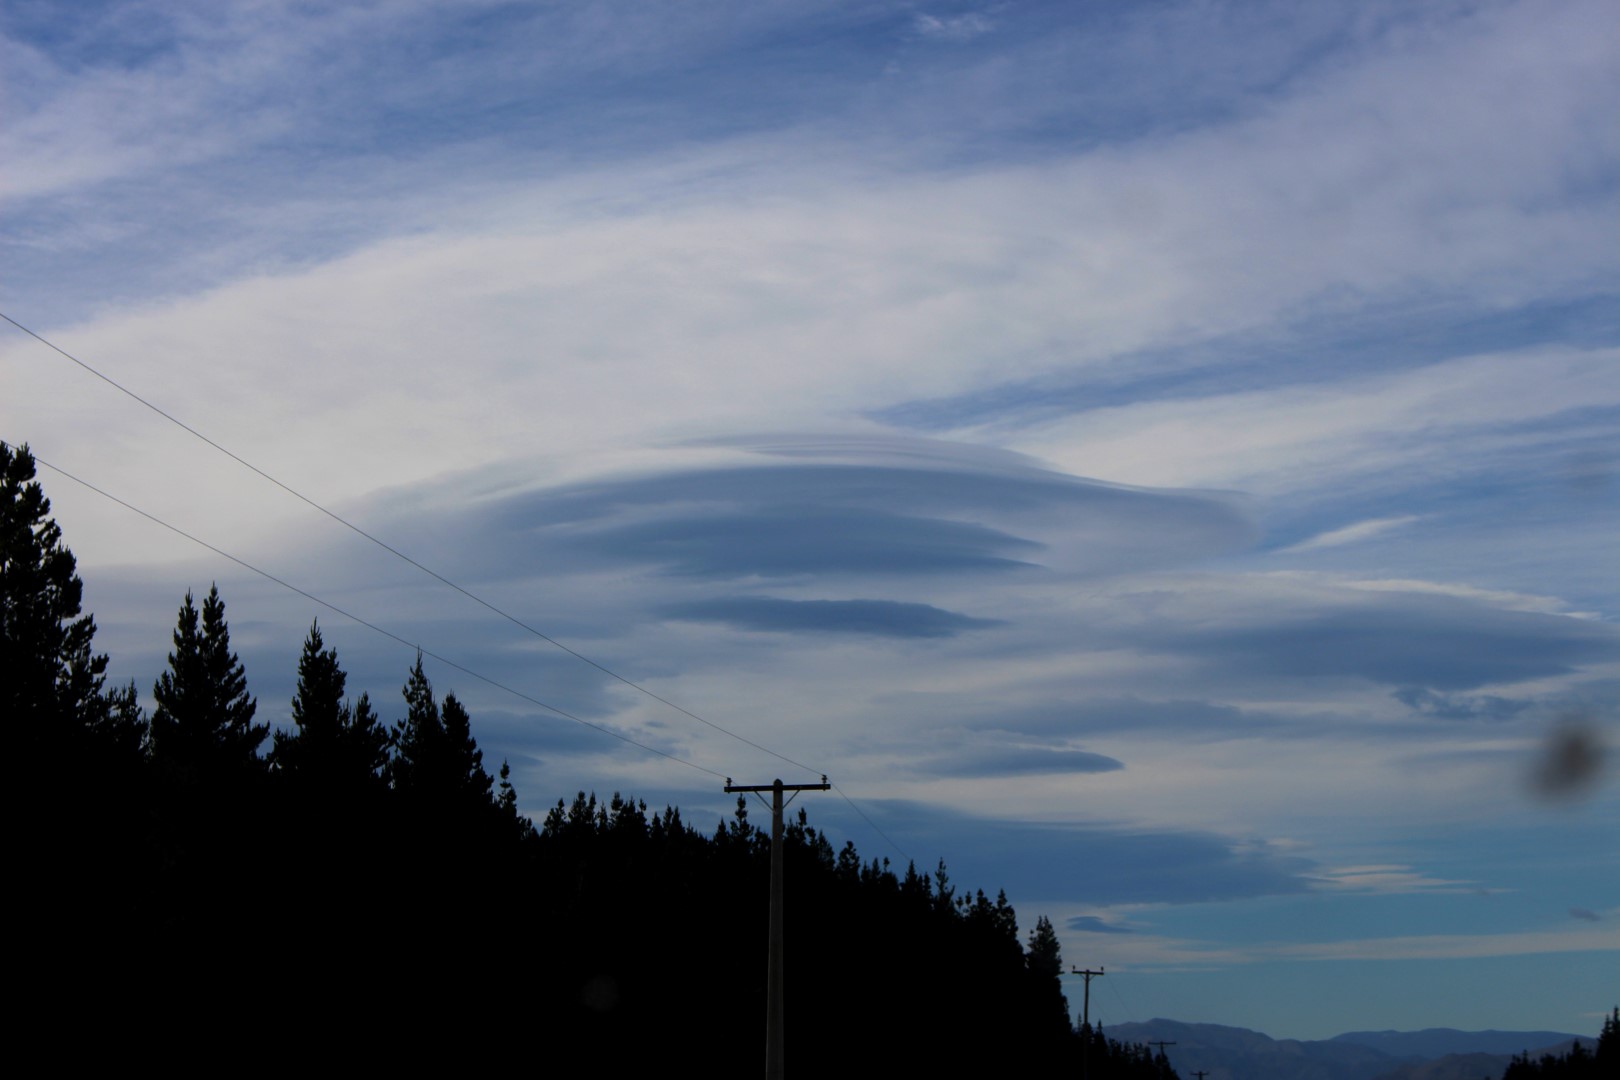
The year started with a new perspective on astronomy – upside down!  A six week trip to New Zealand over the Christmas period produced some wonderful views of the night sky in the Southern Hemisphere. Using my basic DSLR and a GorillaPod, I was able to obtain some good images of the Milky Way, accompanied by the Large and Small Magellanic Clouds, which are unseen in the Northern Hemisphere.  New Zealand’s weather conditions and terrain also produced opportunities to see various noctilucent cloud formations, particularly on South Island (below).
IMG_9102 (Large)

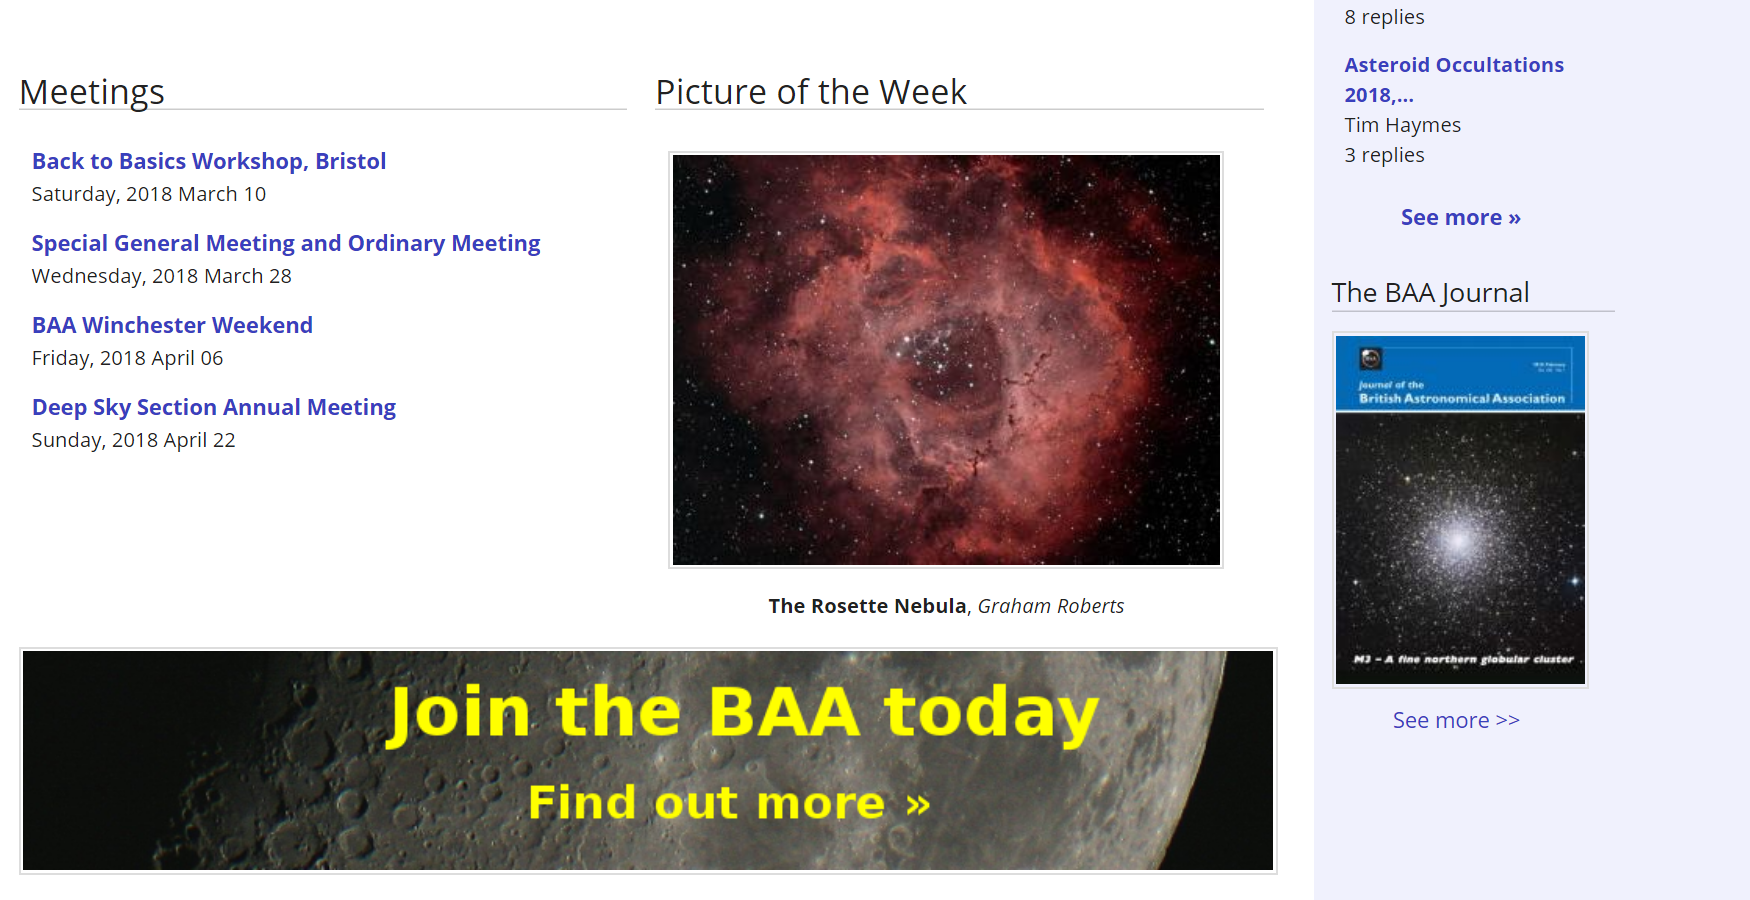
Being Down Under for much of January I was unable to start astroimaging until February but it was worth the wait, which resulted in an excellent narrowband image of the Rosette Nebula with which to start the year .  From the experience and advice gained in 2017, in narrowband I now tend to stretch each Ha-OII-SII wavelength more aggressively prior to post-processing and, as a result, obtain better detail and contrast.  In this case the resulting HaOO version of the Rosette (see Favourite Images section above) was particularly good and for the first time was included on the British Astronomy Association’s website 🙂
BAA PotW

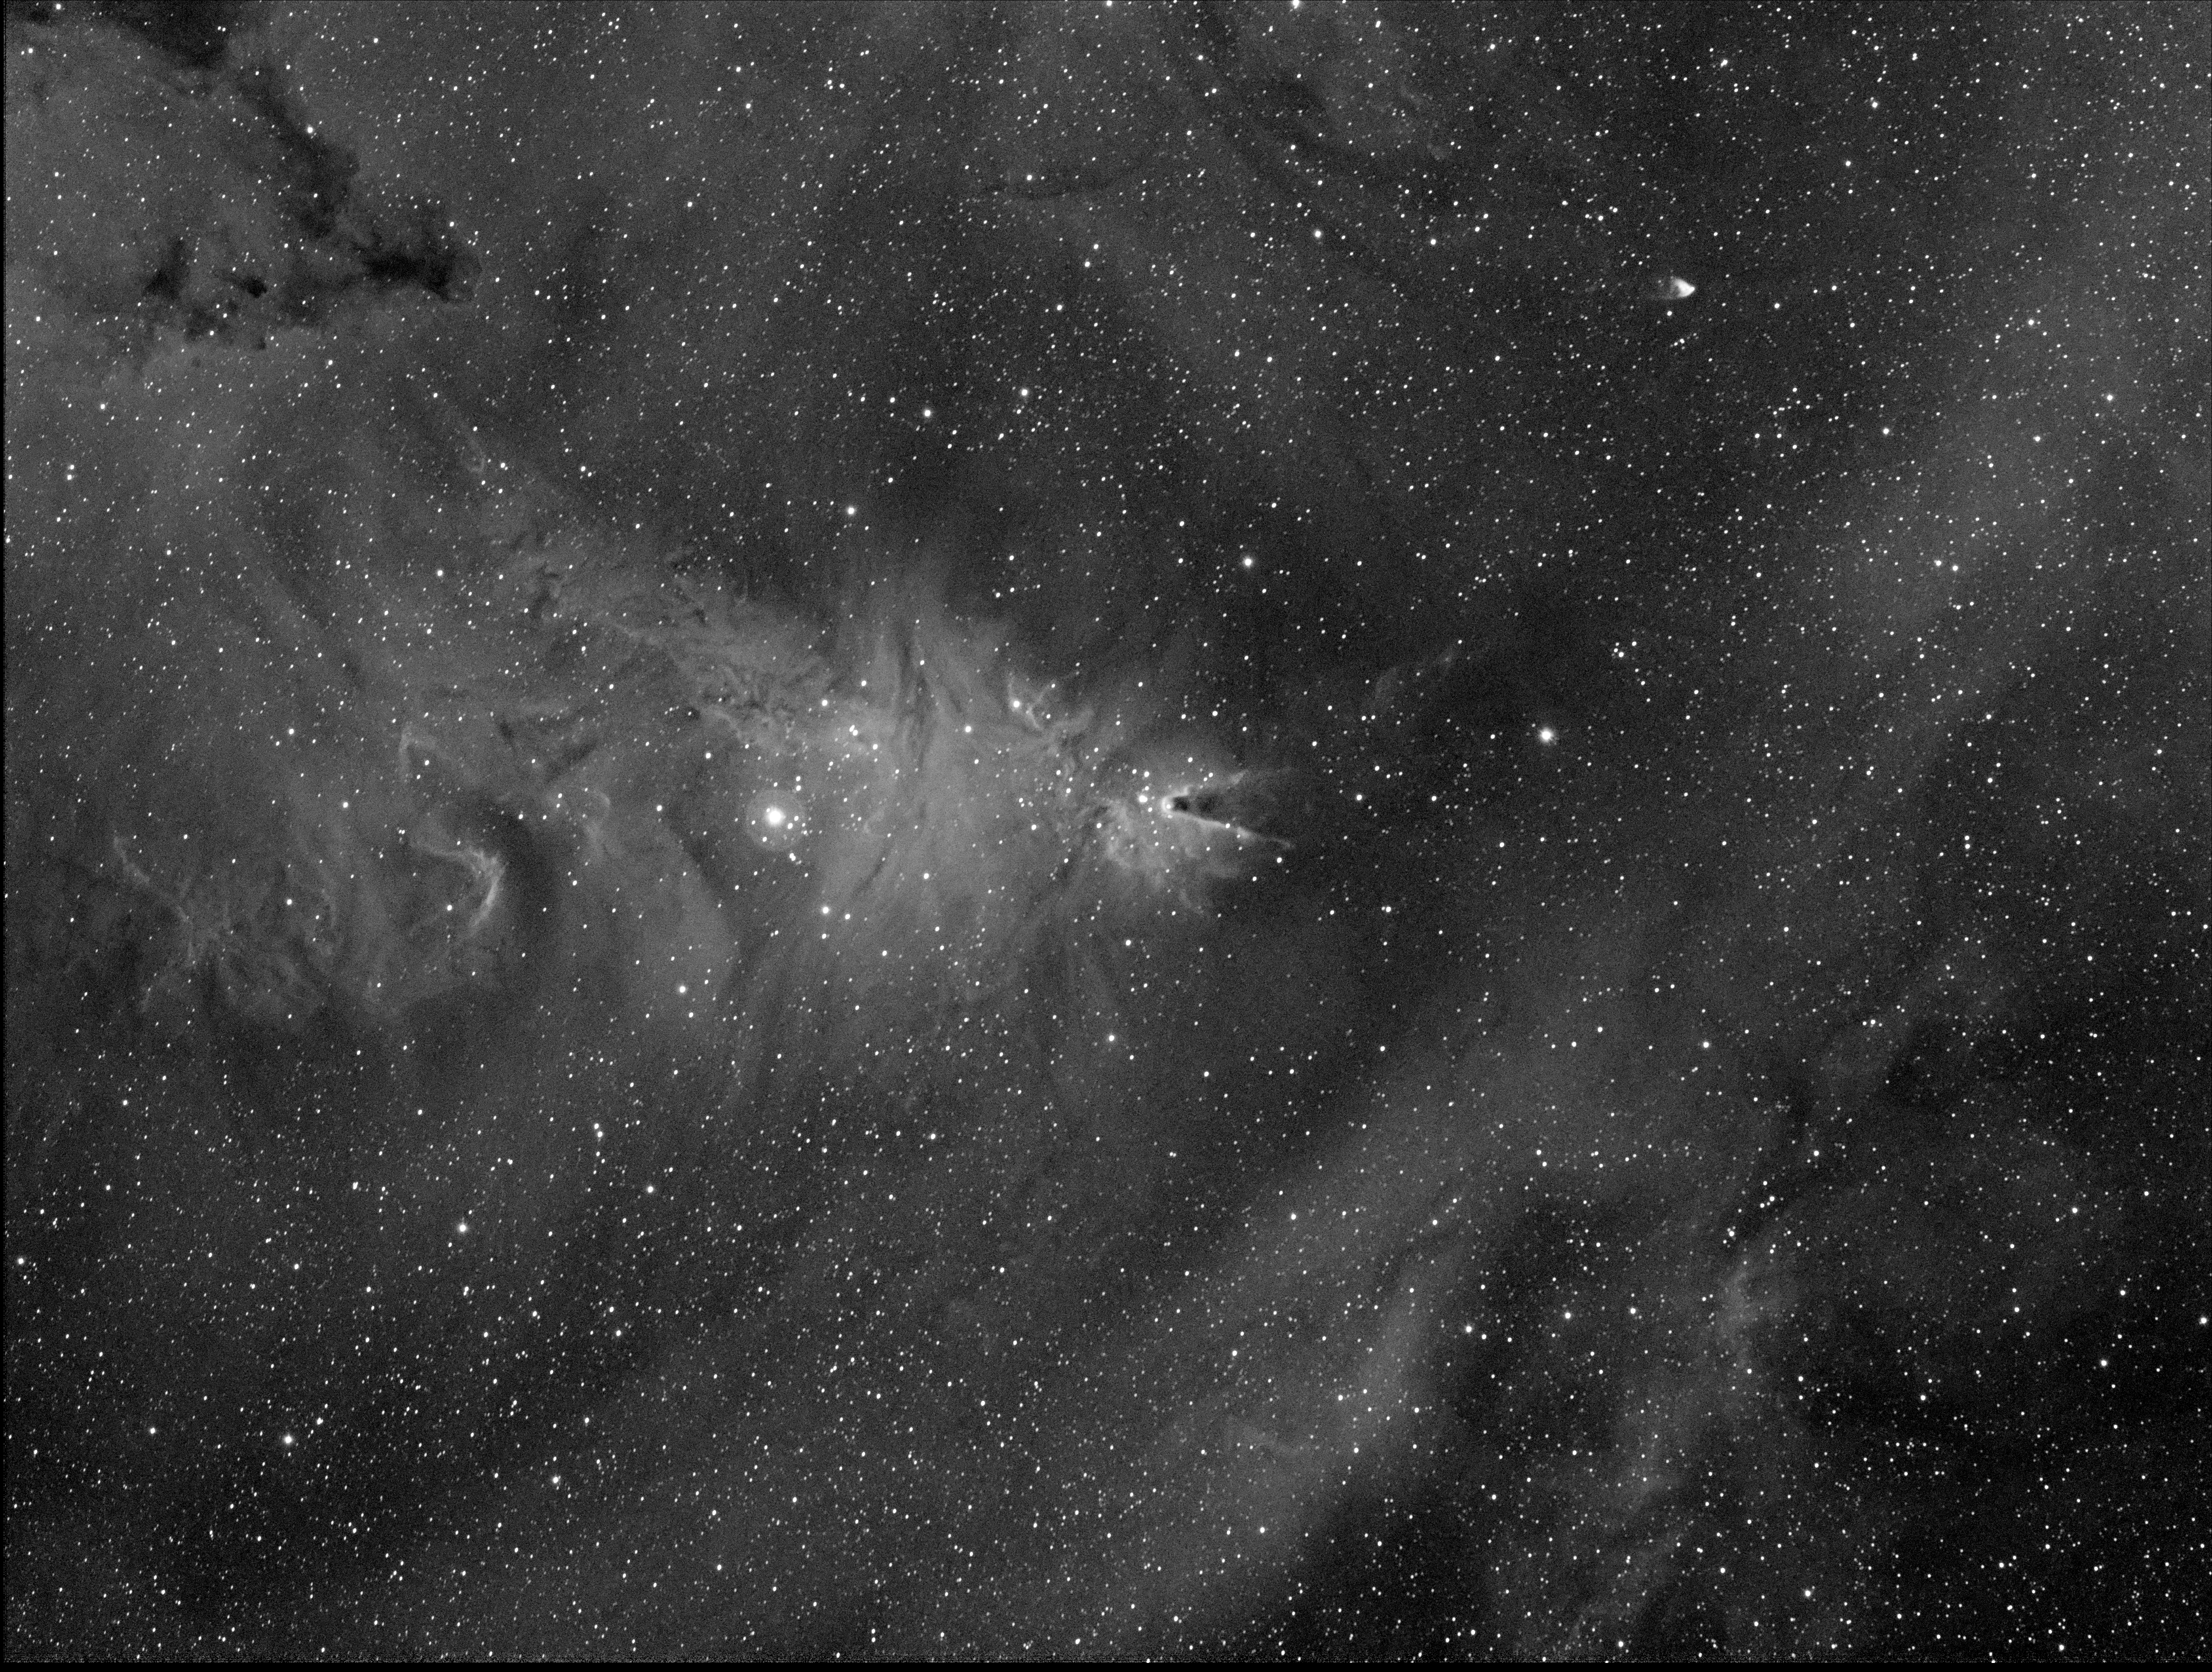
Since obtaining the ZWO1600MM-Cool mono camera narrowband imaging has been nothing less than a revelation to me.  Whilst tone mapping using the Hubble Palette produces quite spectacular and colourful results, applying the aforementioned stretching to the just the stacked Ha-wavelength subs can often result in equally exciting black and white (grey) images which show exquisite detail.  One such image taken in March was the Cone Nebula, which showed the more extensive nature of the HII-region as well as the Cone and Fox Fur Nebulae (below).
Picture saved with settings embedded.

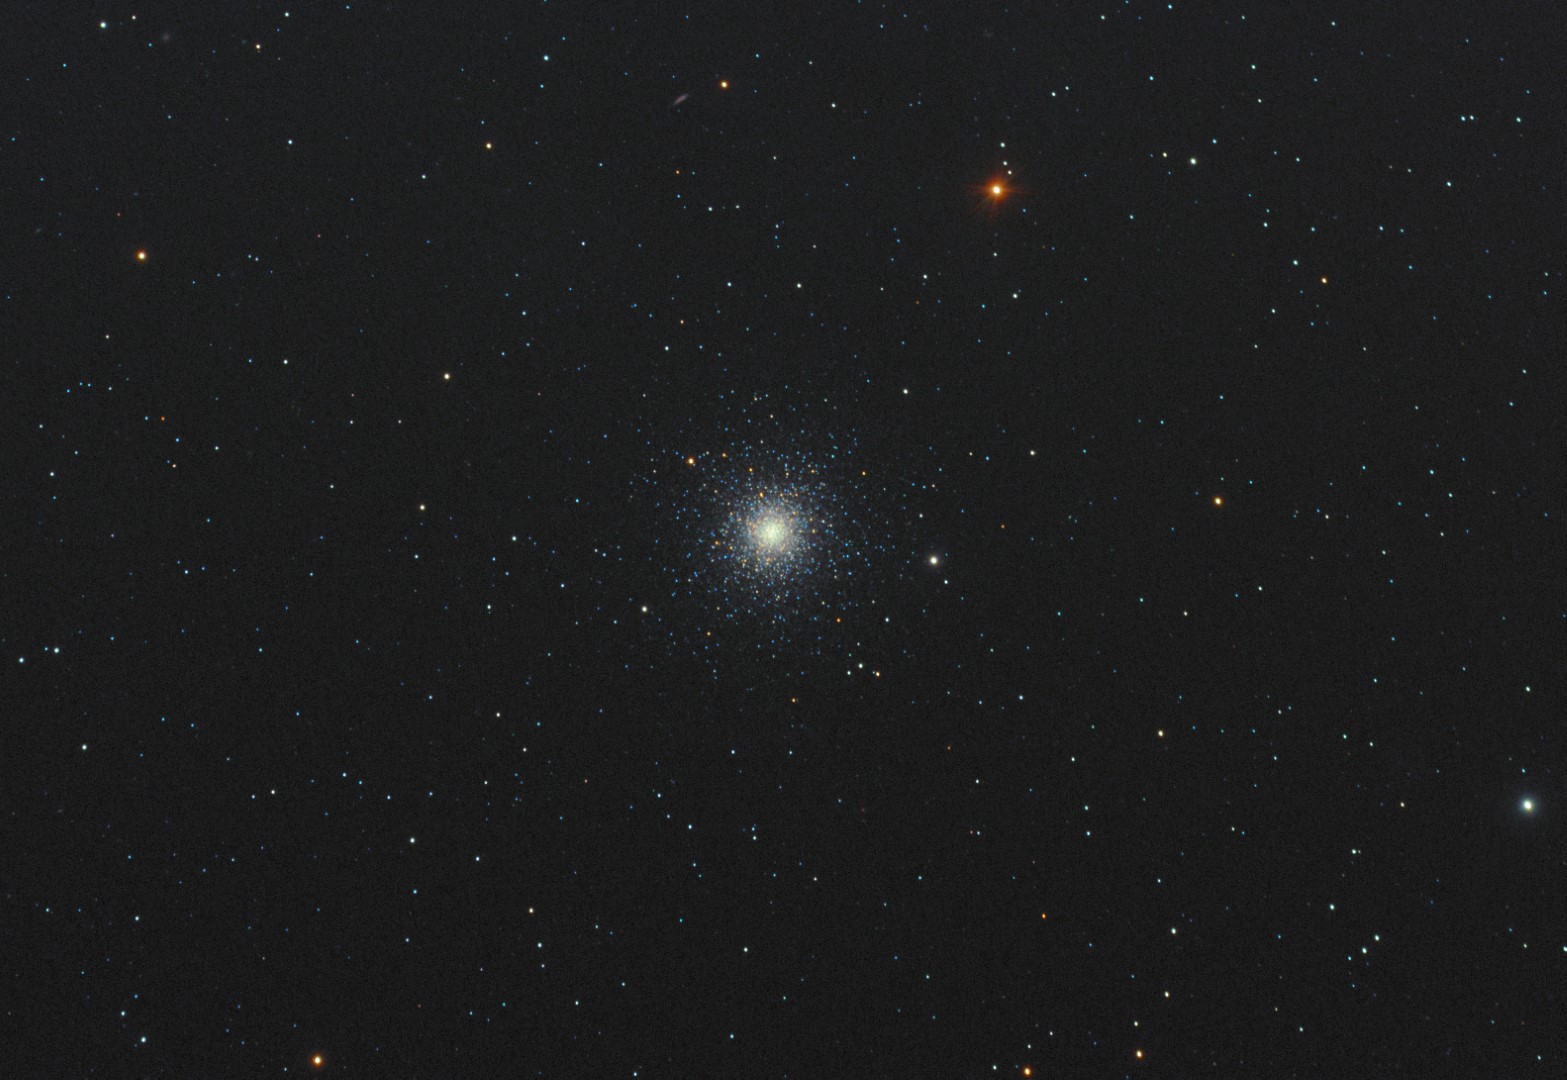
With the passing of winter’s narrowband targets by the end of February, I moved on to broadband imaging in March.  Of all the DSO features, I am perhaps most fascinated by globular clusters but had previously obtained mixed results with a DSLR camera.  Using the CMOS based ZWO1600 mono camera, I was now able to obtain much noticeably better colour and detail of these exciting but enigmatic objects (see Favourite Images section for M13 & below for M3).
M3 LRGB Crop (Large)

I can be put-off by some of the more technical requirements associated with astrophotography and, I‘m ashamed to say, that my approach is first to – ignore it, then maybe undertake some research but do nothing, then consciously put it off again and then, when there’s absolutely no alternative – give it a try.  I am not a technophobe, quite the opposite, but often find technology and the people who design and write about it unclear to the point of making no sense sometimes or at least misleading; it seems  somewhat paradoxical that I even got onto astrophotography given these issues! Notwithstanding, when I eventually summon the courage to tackle such problems, almost always I get it to work, eventually.  Such has been the case with Plate Solving this year.

With sight lines limited by houses, hedges and tall trees to the east, south and west, I’ve hitherto had to make do with average imaging windows of up to 2-hours, either to the east or west of the Meridian and depending on the object’s declination – a lower levels  the Meridian view is itself hidden by two tall trees, obscuring up to 30o vertically and 10o either side.  Naturally these constraints limit the image integration times severely, with an inevitable impact on the quality of images, notably with higher noise, less colour and detail.  The answer of course is plate solving and during February this year I finally bit the proverbial bullet.

Since changing to the ZWO 1600MM-Cool camera I have used Astro Photography Tool (APT) for image capture and camera control, with great success.  The software is quite comprehensive and it is excellent to use, though like most software can be a little idiosyncratic in places.  This is the point where I either give-up, try other software or, as is the case with APT, turn to their excellent product Forum.  Armed with the APT manual and answers from the Forum, I soon managed to plate solve and obtain images of the Leo Triplet over two consecutive nights, which subsequently aligned and stacked well – at last!

APRIL TO JUNE

For the past year or more I’d been thinking about the possibility of moving the observatory to the end of the back garden during the spring and summer period, so as to provide a platform from which to view the northern sky, which as previously mentioned is otherwise completely obscured by my house.  The principal issue was how to operate the equipment some 30-metres away?  From the experience of others it seemed that both WiFi and Bluetooth can have big reliability issues and I am always keen to keep it simple, so for now I chose to try and use a long ethernet cable to link the operating / capture computer with a control computer indoors.

I had intended to set-up on the lawn but after I had recently extended the paving around a nearby shed in the corner of the garden, cut back some of the bushes and cleared out the shed it, was obvious that this was a preferable location; the paved base was more stable and provided a dry foundation on which to work but, furthermore, the adjacent shed could house the operating computer.  Despite successful tests indoors using an ethernet cable between the two computers and Teamviewer software, only when the equipment was set-up in position outside did I finally discover it no longer worked; I still don’t know why and the problem remains work in progress (when I can be bothered to look at it again).

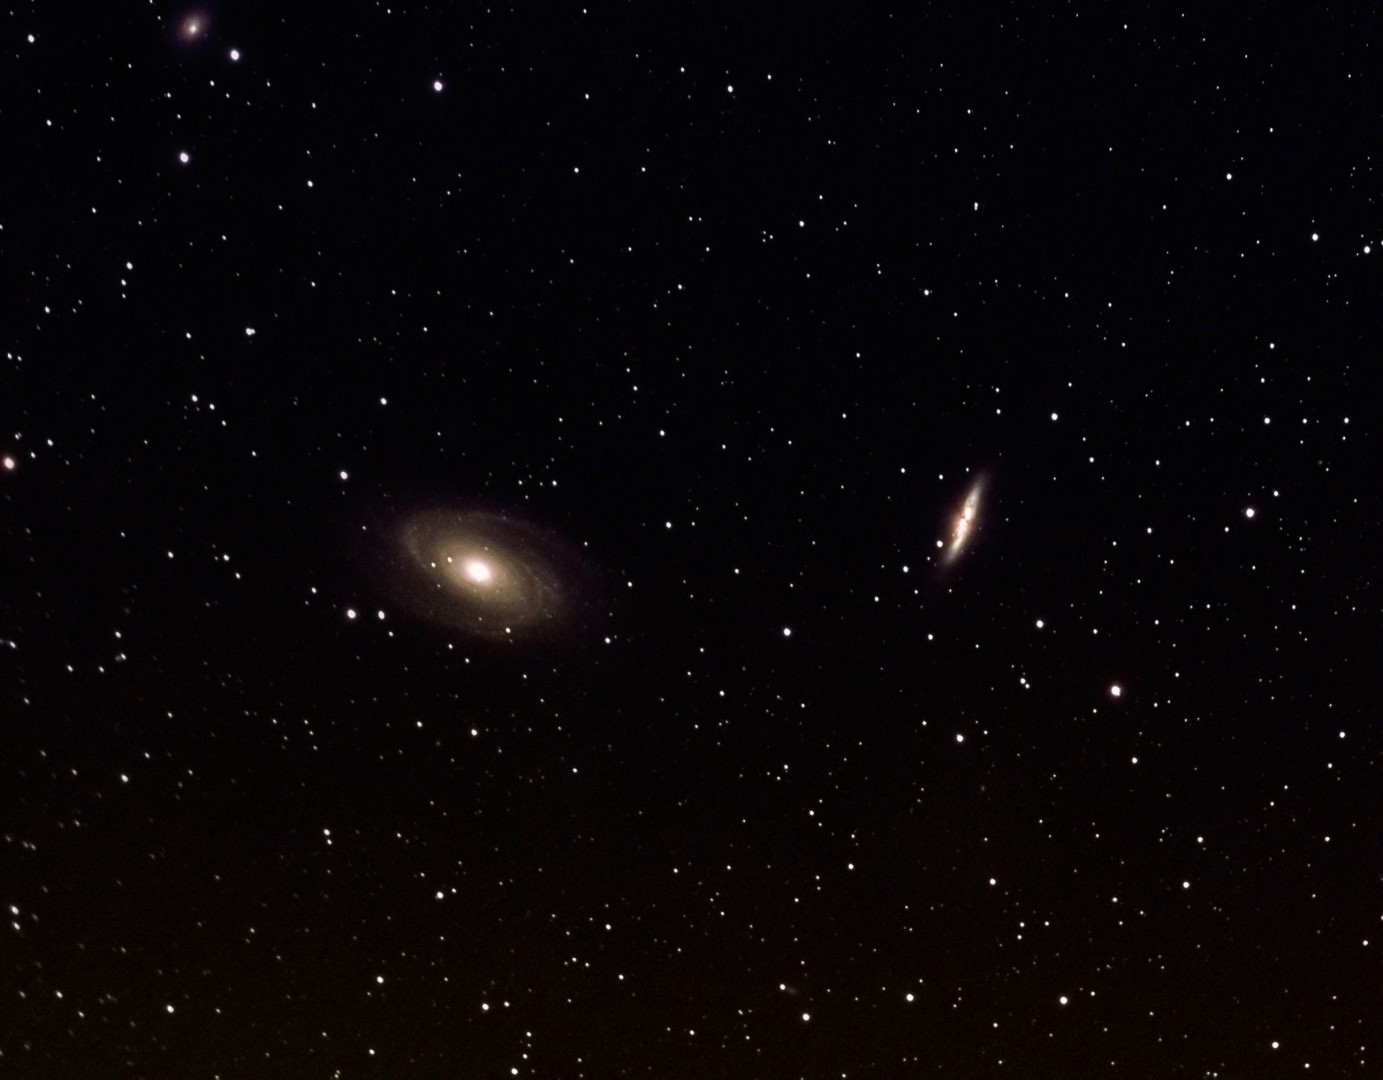
Notwithstanding, it was obvious that I could instead comfortably operate the mount and camera myself from the shed and duly set about establishing what has now become Fairvale Observatory South or the Shed Observatory (see photos above); the principal observatory location by the house now becomes Fairvale Observatory North or Patio Observatory. Having established myself at the end of the garden with a not unreasonable view of the north sky over the roof of my house, I eagerly set about imaging some northern classics over the next few months.  Imaging in both narrowband and broadband I was pleased to obtain decent pictures of the Bode & Cigar galaxies and the Elephant’s Trunk Nebula before taking a break in June and July when there’s no astronomical darkness; I have imaged at this time of the year before but it’s sometimes good to take a break.
M81 B (Large)

My very first image of the northern sky M81 Bode & M82 Cigar Galaxies (LRGB)

Now I know the observatory works from this location, I plan to move there sooner in 2019 in order to spend more time with new set-up, hopefully improving on the aforementioned objects as well as trying new ones.  All-in-all the new location was a big success as well as being great fun.  Strangely I was surprised to find that the experience of guiding could be more demanding in the north sky but of course thinking about it more, as the views essentially centre on Polaris on which RA lines converge the tracking needs to be more extreme in order to move the same angular distance when compared to a southward view.  However, anxious not to upset the established settings too much, my set-up was shoddy and, as a result, guiding error was generally poor from this locality.  Next time I’ll pay more attention to this and hopefully achieve better guiding and subs.

JULY TO SEPTEMBER

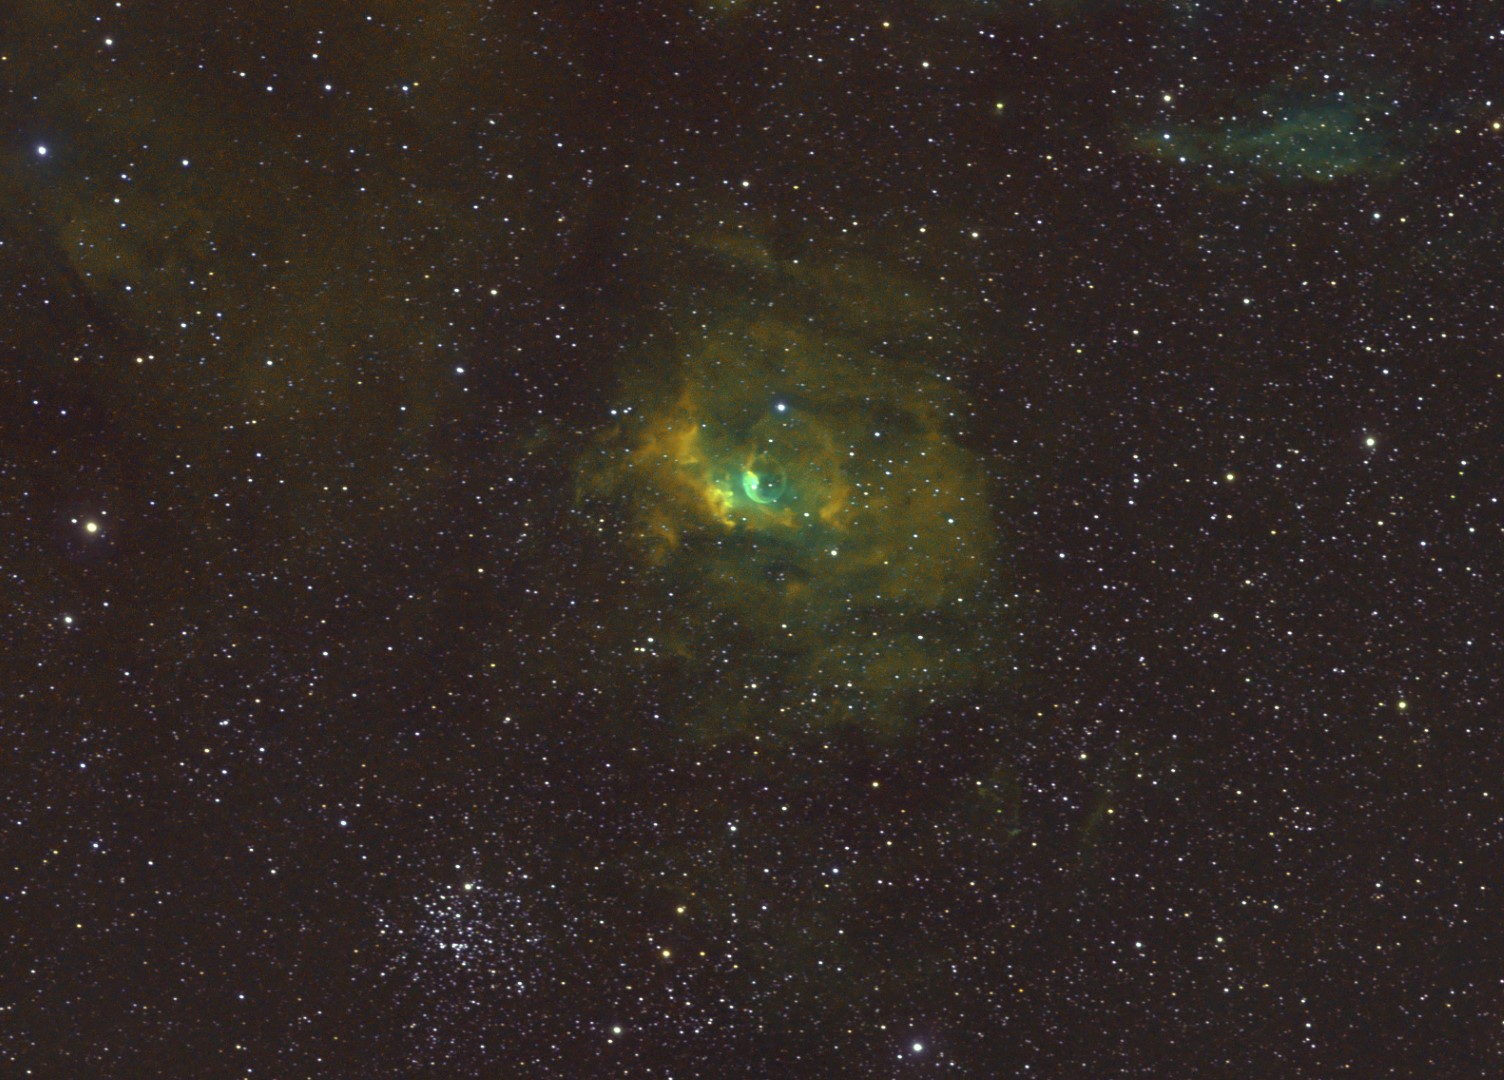
After a break of nearly 8-weeks I was eager to get back to the ‘new’ observatory at the bottom of the garden.  Furthermore, much of the summer through into September was dominated by a heatwave which was accompanied by clear skies, night after night!  As a result I was able to get some very encouraging results of the Heart (see Favourite Images section above) and Soul Nebulae and finally, to my surprise, the unusual Bubble Nebula (see image below).
SHO2int3 (Large)

OCTOBER TO DECEMBER

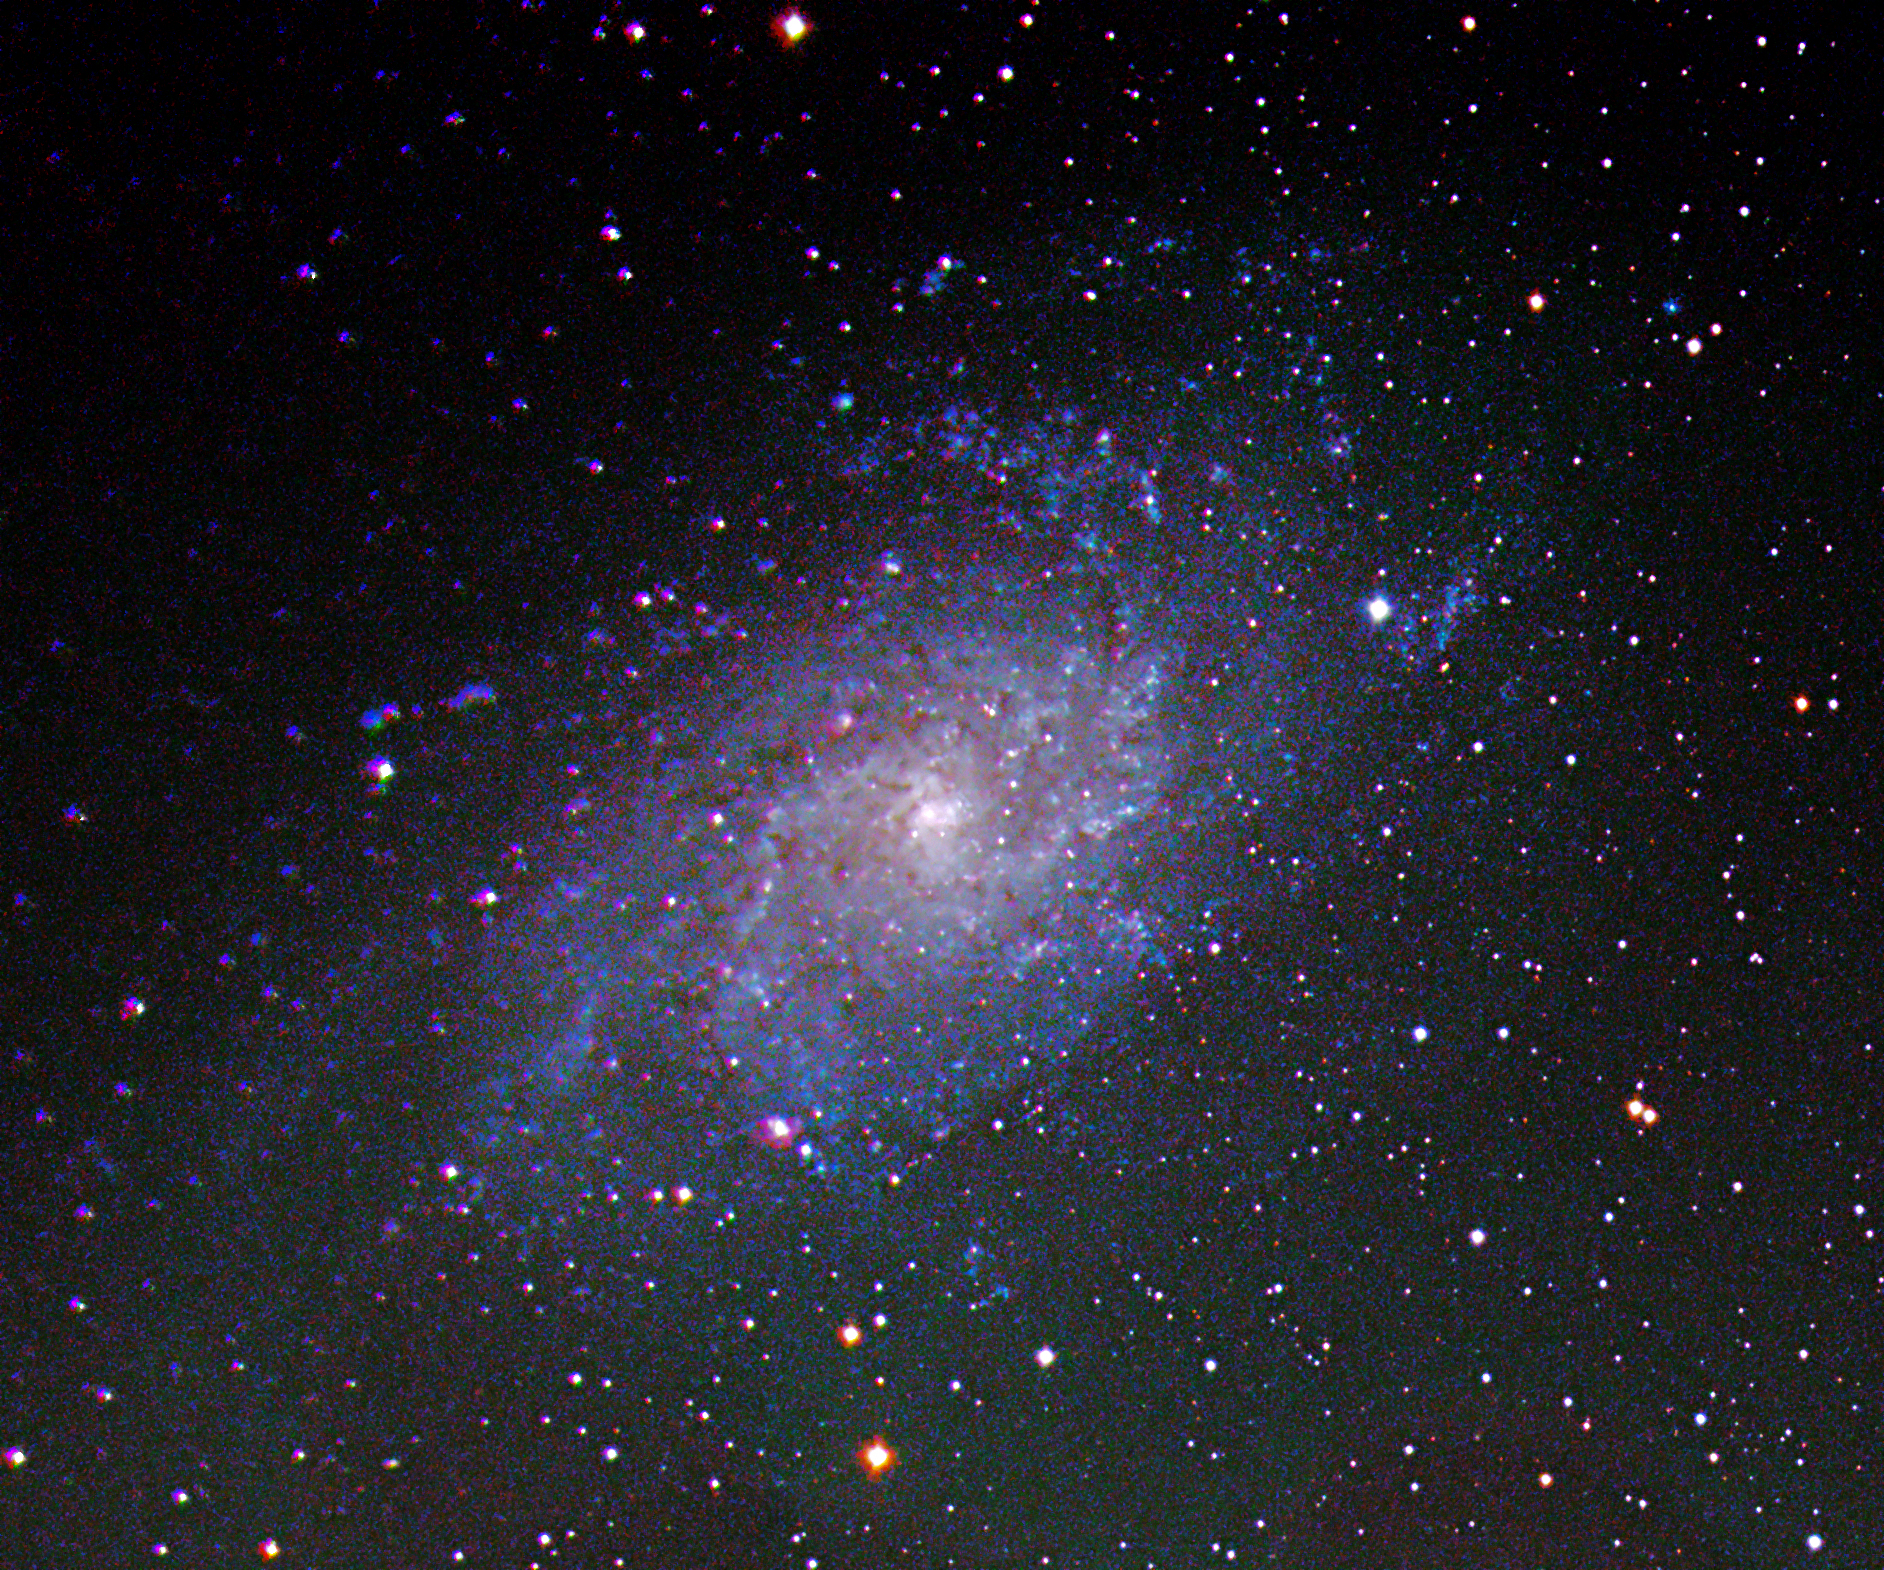
Needless to say, once back at Fairvale Observatory North the clouds rolled in and, furthermore, suitable objects for my equipment are initially sparse at this time of the year.  Since obtaining the ZWO1600MM-Cool camera I’ve concentrated on nebulae and narrowband imaging.  Though I’ve managed a few decent LRGB images, it’s fair to say that there’s room for improvement here and therefore finished the year on M33 the Triangulum Galaxy (see below) and subsequently M45 the Pleiades.  Despite being a good size for my scope it’s become clear to me that M33 is actually a tricky object and I was not satisfied with the final image – again better guiding and longer integration next time will almost certainly help.  However, Pleiades subsequently came out well (see Favourite Images section above) but the delicate interplay of the blue star light and interstellar dust does require careful post-processing.
LRGB P2 CropXX

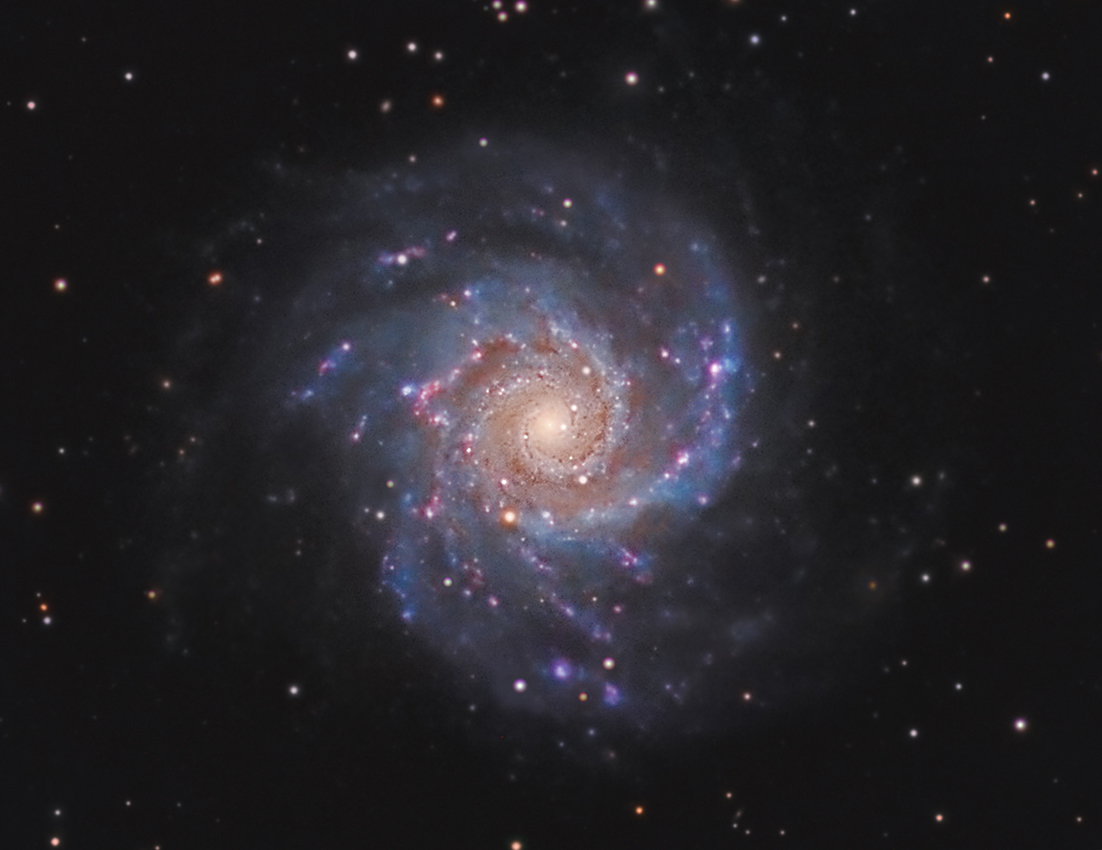
As it was my birthday and it’s been something of an overdue trip since first conceived in 2015, I travelled to Olly Penrice’s Les Granges Observatory at the beginning of November.  It’s a great set-up and Olly was a real pleasure to work and learn from.  As a somewhat remote location in the Hautes-Alpes region of Provence, when it’s clear the SQM values at Les Granges can exceed 22 and for the first two nights we were able to image M74 the Phantom galaxy in HaLRGB under such conditions using his TEC 140, though following some rain during the day seeing conditions were mixed on the first night.
HaLRGB mosaic (Large)

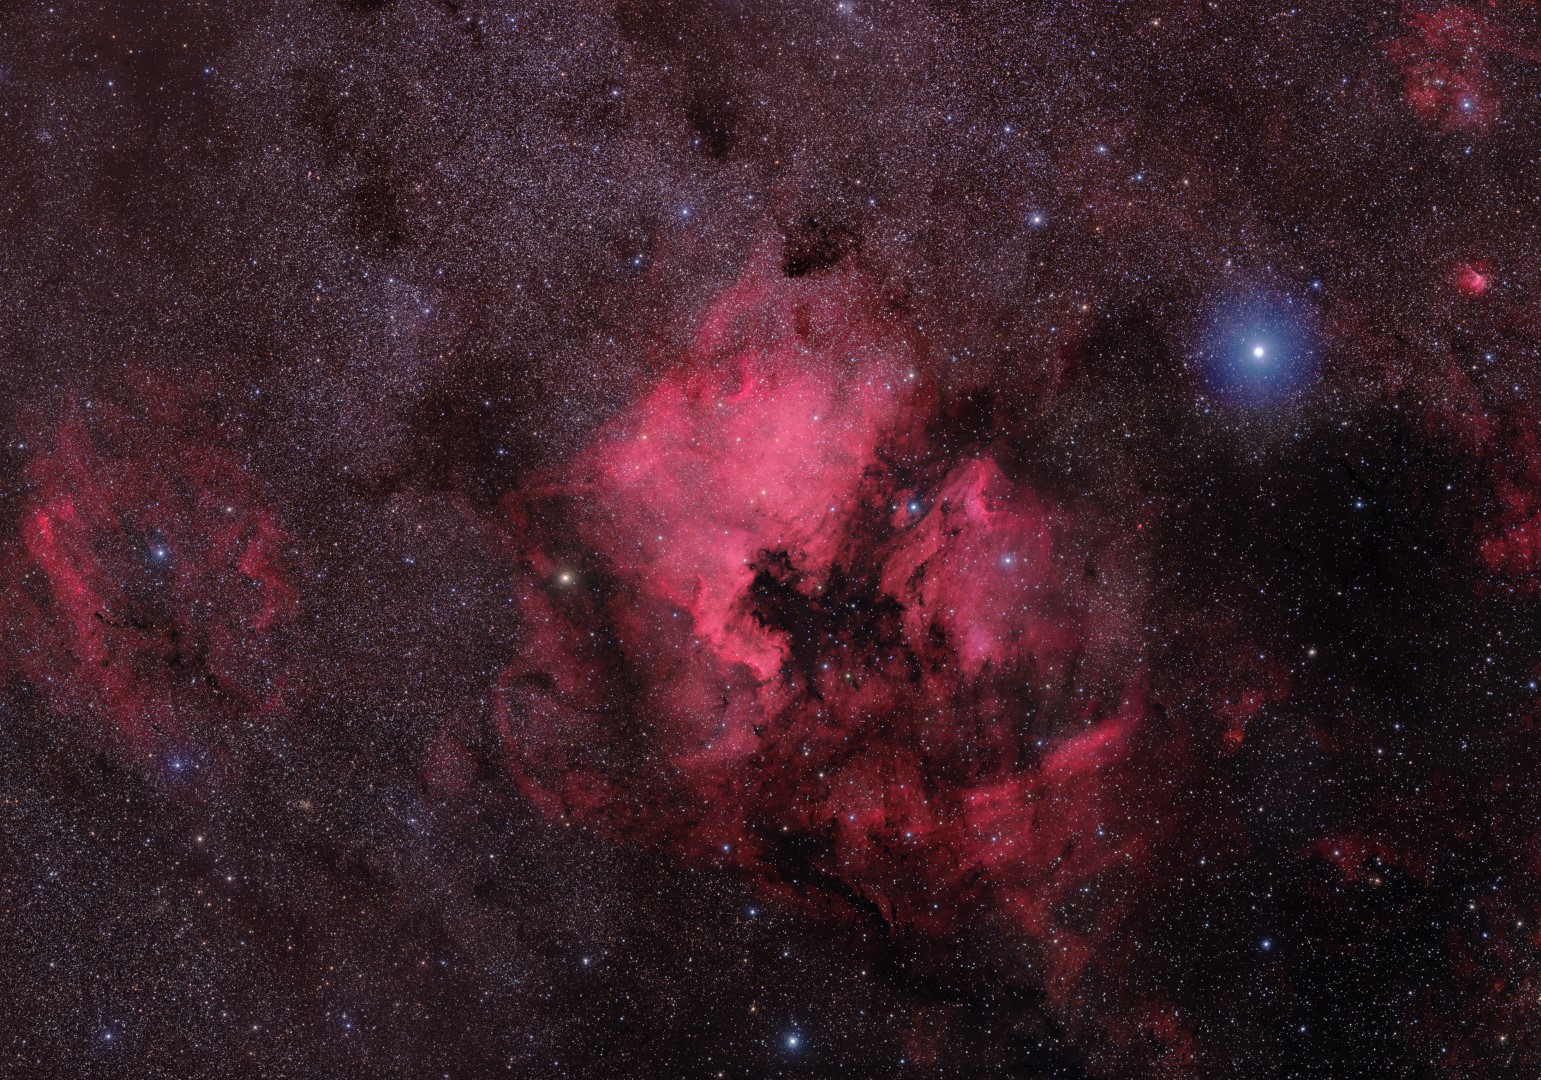
Unfortunately the clouds had followed me from the UK and for the rest of the time there we were unable to image, though it did allow me to spend some useful and enjoyable time processing with Olly.  Other than processing the M74 image and learning some new techniques, using data previously acquired by Olly and with his help, I was able to compile a wonderful 9-panel HaLRGB widefield mosaic image of the North America Nebula and surrounding region (see above).


Notwithstanding the mixed weather conditions, I was able to obtain my first good, face-on image of a spiral galaxy (see Favourite Images section above), which with some additional subs from Olly’s previous sessions using an 14″ ODK scope turned into a truly spectacular image (see below) of this less than popular object.
M74 ODK with TEC STARS HaLRGB Crop


ASTROIMAGING RECORD 2018

No Date Type Object Name
1 Jan 2018 DSLR New Zealand


Milky Way, Lenticular Clouds etc. 
2 09/02/18 NB NGC 2244 Rosette Nebula
       
3 11/02/18 NB NGC 2264 Cone Nebula
       
4 11/02/18 BB M44 Beehive Cluster
       
5 11/02/18 NB Abell 21 Medusa Nebula
       
6 11/02/18 BB NGC 2392 Eskimo Nebula
       
7 24/02/18 NB IC 405 Flaming Star Nebula
       
8 24/02/18 BB Moon  
       
9 19/04/18 BB M65 + M66 Leo Triplet
       
10 05/05/18 BB M3 Globular Cluster
       
11 06/05/18 BB M104 Sombrero Galaxy
       
12 06/05/18 BB M13 Globular Cluster
       
13 18/05/18 * BB M81 & M82 Bodes & Cigar Galaxies
       
14 20/05/18 NB NGC 7822 Nebula
       
15 22/05/18 NB IC 1396 Elephant’s Trunk Nebula
       
17 16/08/18 * NB IC 1805 Heart Nebula
       
18 02/09/18 NB IC 1848 Soul Nebula
       
19 03/09/18 NB NGC 7635 Bubble Nebula
       
20 09/10/18 BB M33 Triangulum Galaxy
       
21 28/10/18 BB M33 Triangulum Galaxy
       
22 2/11/18 BB M74 Phantom Galaxy
       
23 17/11/18 BB M45 Pleiades
       
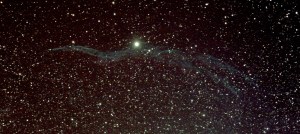
24 18/11/18 BB IC 2118 Witch’s Head Nebula
       

*multiple evenings                                            Underlined = BAA published
 

Antipodean Astronomy Adventures

IMG_9050 (Large)

I’ve recently returned from visiting family on an extended trip to Aotearoa – Maori for New Zealand – and whilst travelling around used the opportunity to learn something about astronomy in that part of the world (NZ Astro Directory).  Of course, the main difference Down Under is that it’s currently summer, plus everything in the night sky is upside down.

IMG_0003crop anotate

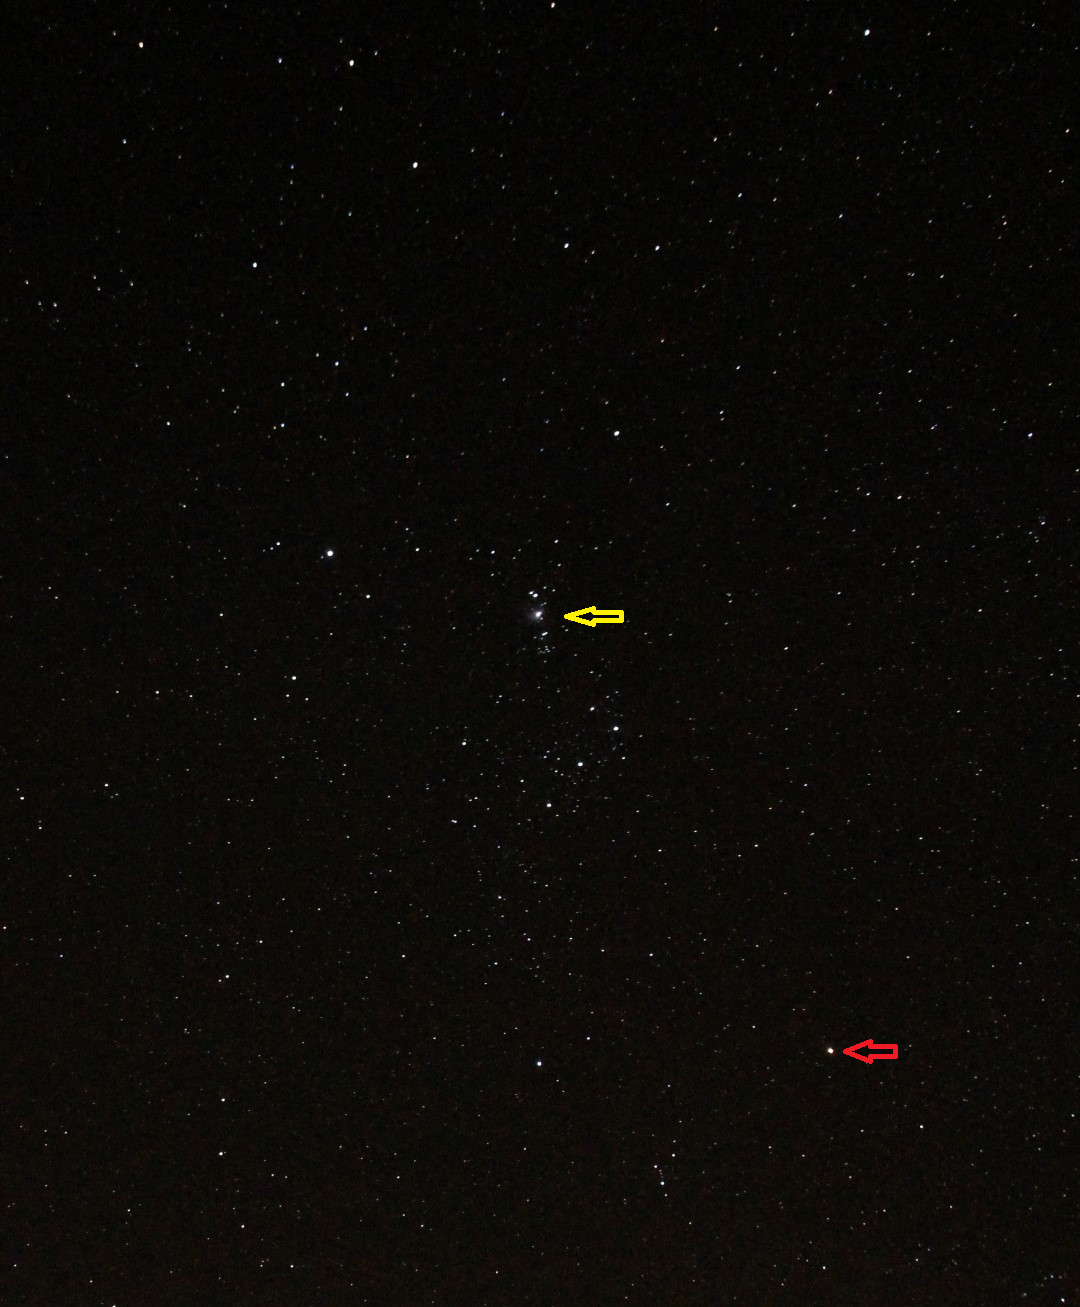
Topsy Turvy – everything’s in the wrong place ! Red arrow = Betelgeuse, Yellow arrow = Orion Nebula

It’s obvious really but relatively speaking the sky has not changed, you’re just  personally inverted compared to the Northern Hemisphere – which from the point of view of astronomy takes some getting used to when looking at otherwise familiar objects such as the Moon or Orion Constellation.  Although being their summer, at our principal location of latitude of 38o on North Island there was more than four hours of astronomical darkness even on the December solstice; viewed from the perspective of the Northern hemisphere, it is interesting to note that this is about the same latitude as Athens or the Korean DMZ!

Moon Man

It’s all about perspective – obvious really!

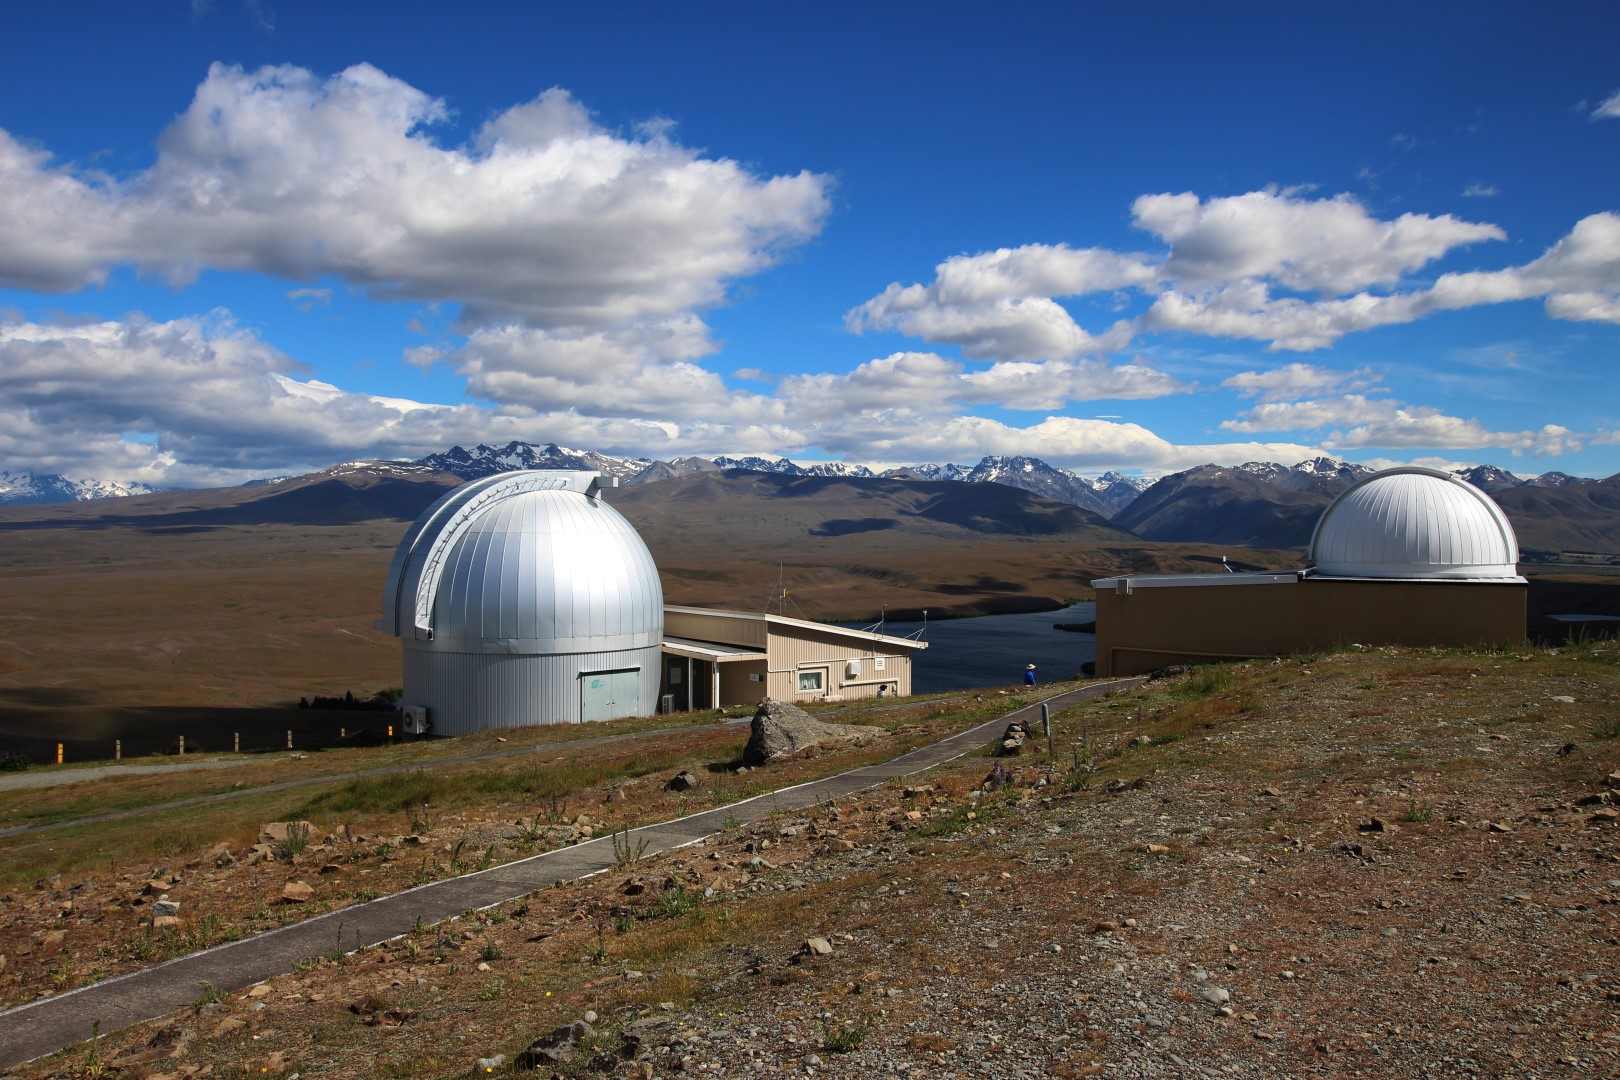
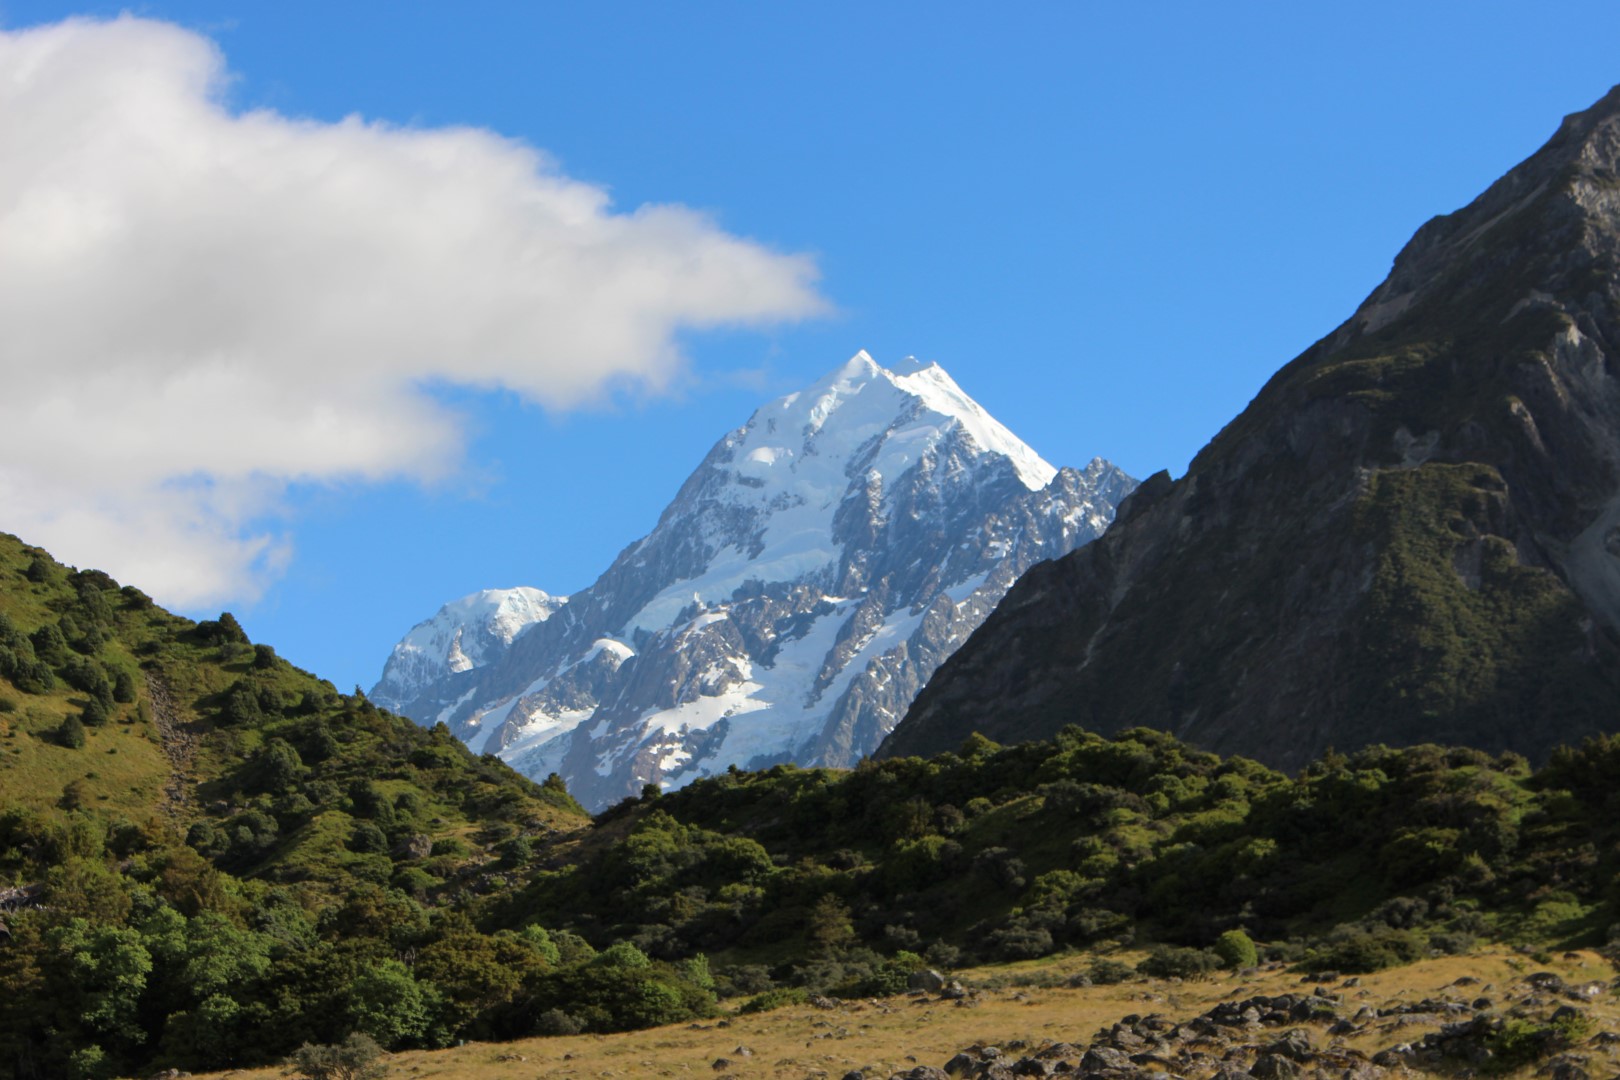
Although the weather was mostly very good, I was struck by how frequently the sky at night was cloudy – just like good old Blighty – it is after all also known as The Land of the Long White Cloud by the Maori.  Notwithstanding, as a country with only 4.85 million people most of the country is rural or even desolate, so that when the skies are clear the darkness and seeing conditions can be quite spectacular.  Viewing conditions are particularly good on South Island around the Lake Tekapo and Mt Cook district where a number of astronomy ventures are based, including the University of Canterbury’s Mt John Observatory – shown at the beginning of this blog.  For practical reasons I was restricted to taking only limited equipment – DSLR & lenses + Gorilla Pod & ball head + Vixen Polarie tracker + 10×50 binoculars – but was still able to obtain some pleasing images during the trip.

IMG_9081 (Large)

Mt Cook from near our campsite – the night sky here was fantastic

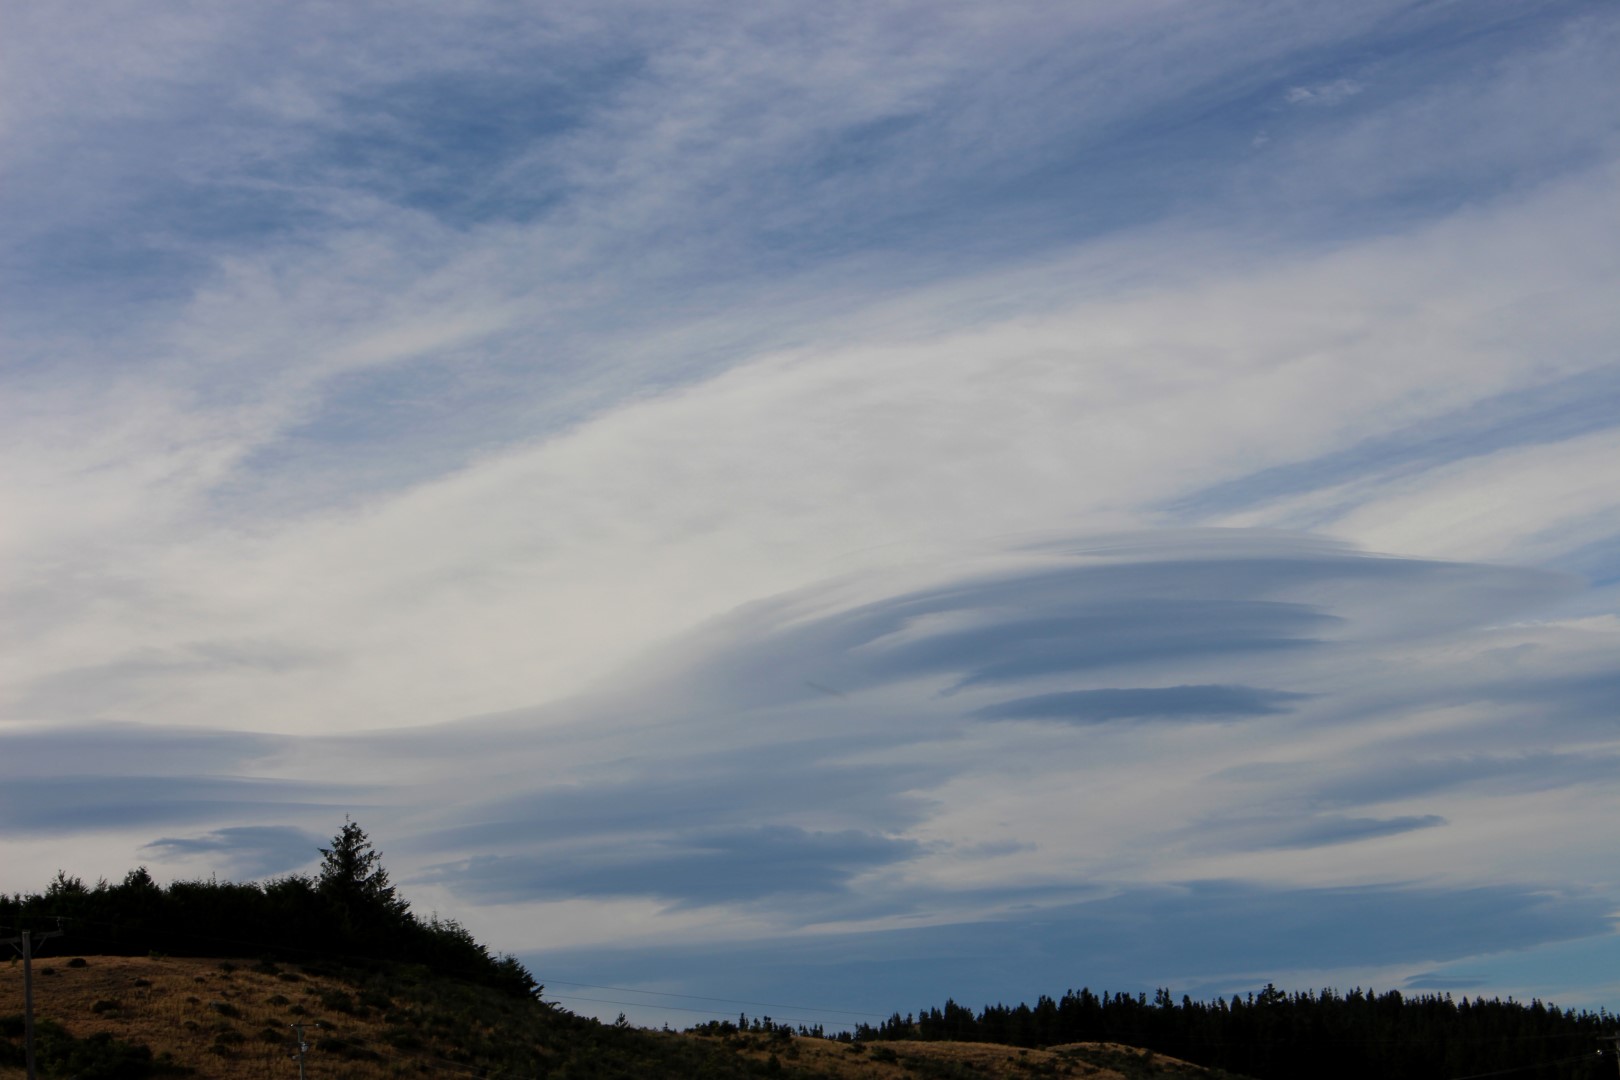
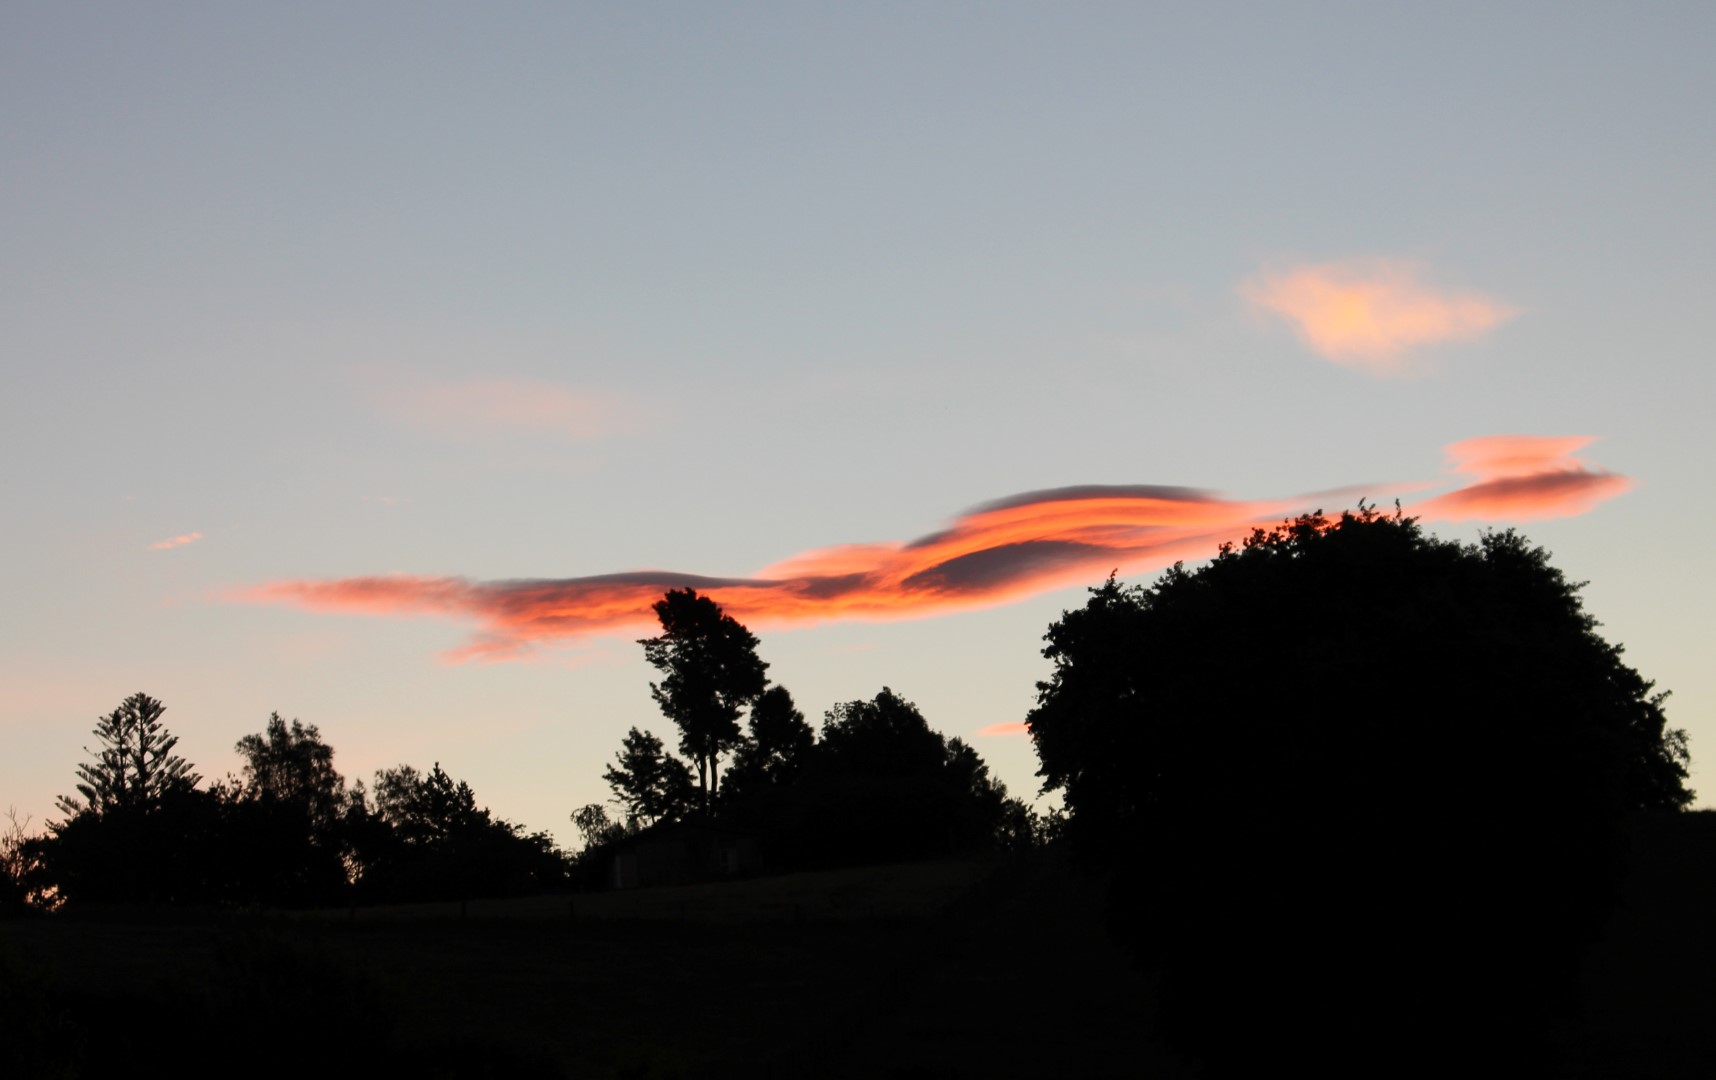
Early on it became evident that New Zealand seems to have all the right conditions required for the formation of lenticular clouds (altocumulus lenticularis).  I’m presuming this is related to its somewhat exposed position between the South Pacific Ocean and Tasman Sea, thus providing favourable wind and moisture conditions which are then influenced by the mountainous tectonic terrain that runs along the spine of South Island and the volcanic topography of North Island.  Whatever it is it works, providing really beautiful and often spectacular sights of these elusive and somewhat rare high altitude cloud phenomena.

IMG_9097 (Large)

Lenticular clouds south of Mt Cook – South Island 

IMG_9457 (Large)

Lenticular clouds near Te Awamutu – North Island 

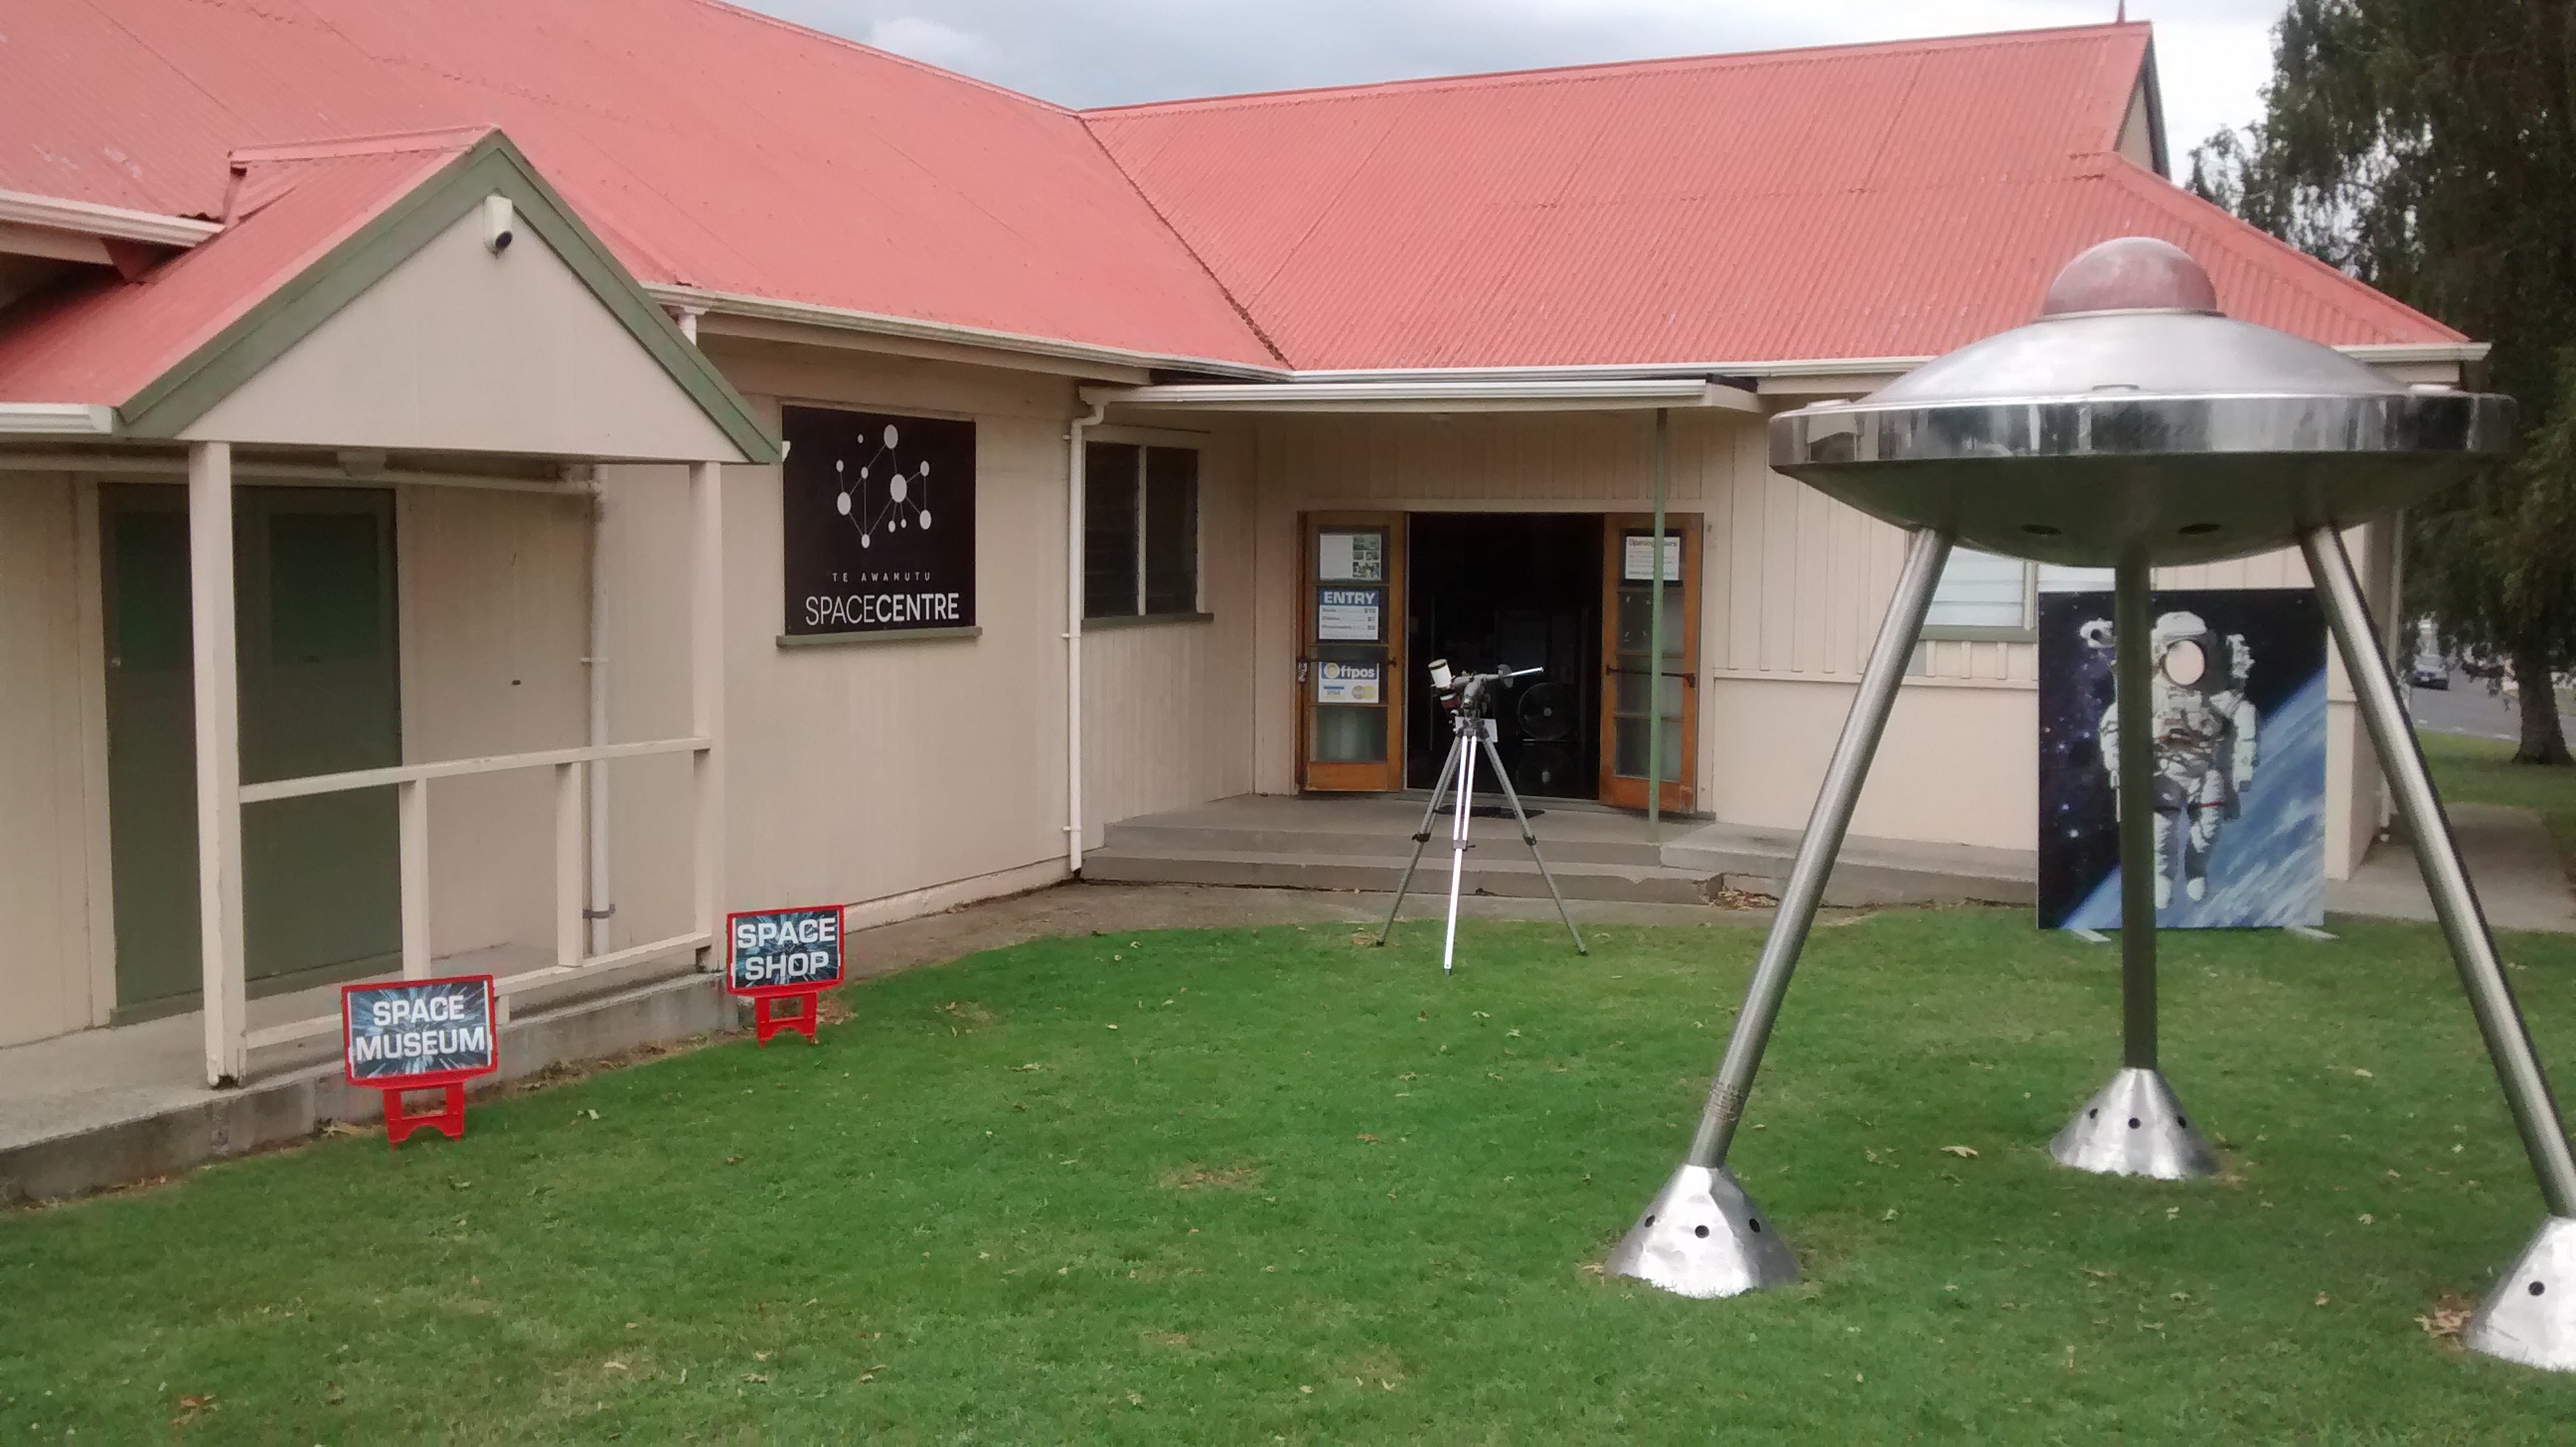
Prior to arriving in New Zealand I tried unsuccessfully to link up with some local astronomy clubs.  However, close to our base near Te Awamutu on North Island I was able to visit the Te Awamutu Space Centre at nearby Kihikihi.

IMG_20180115_130500614

The Te Awamutu Space Centre – Kihikihi

Conceived and run by the enthusiastic Brit Dave Owen (well he wasn’t going to be a Kiwi was he?), the Centre is an eclectic and interesting collection of space, space programme, astronomy and related educational items (see below).

Essentially the Centre is an outreach programme, which would be of interest to anyone in general, young and old, as well as the seasoned astronomer.  I particularly found the area on New Zealand astronomy & astronomers, astronauts and the historical role of Maoris in astronomy very  interesting.

Pliades

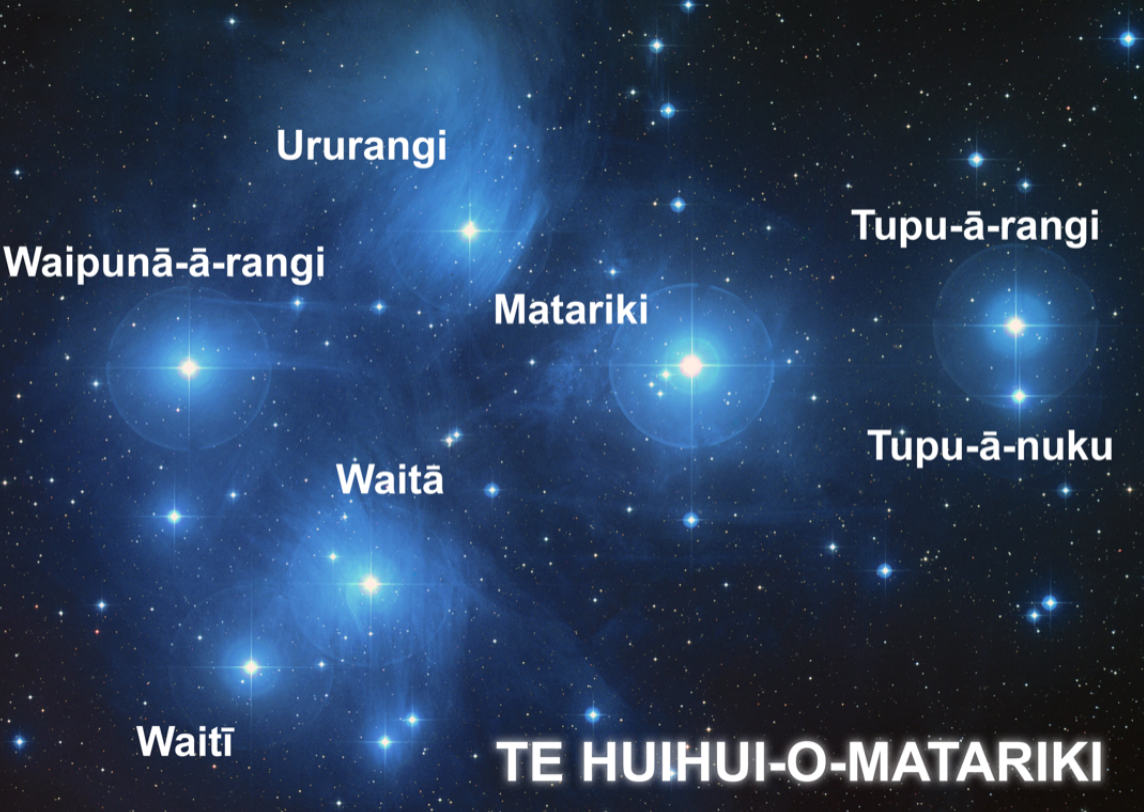
Maori star names of Mataraki (Pleiades)

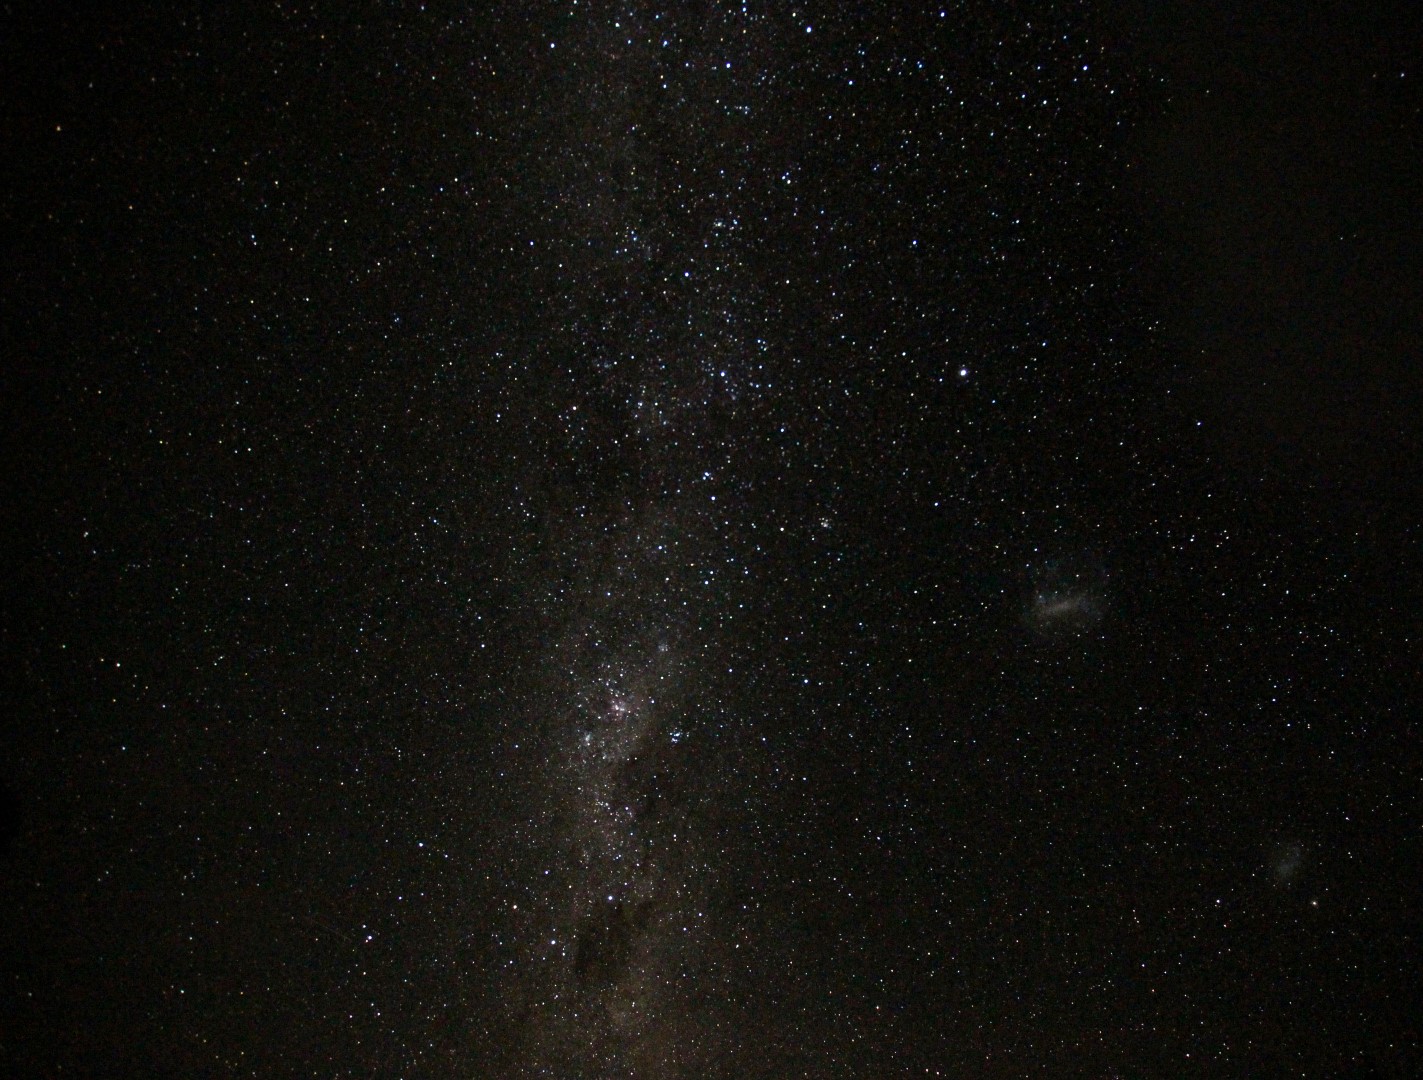
As we travelled the length and breadth of the country with the tantalising promise of some very dark skies, I was keen to view and image the Milky Way and particularly the Large and Small Magellanic Clouds, which are only visible from the Southern Hemisphere. Thwarted for a while by cloud cover I eventually got my first look at all these features whilst camping near the base of the 3,724 metre Mt Cook on South Island.  The sight did not disappoint but I was unfortunately unable to obtain any images on this occasion.

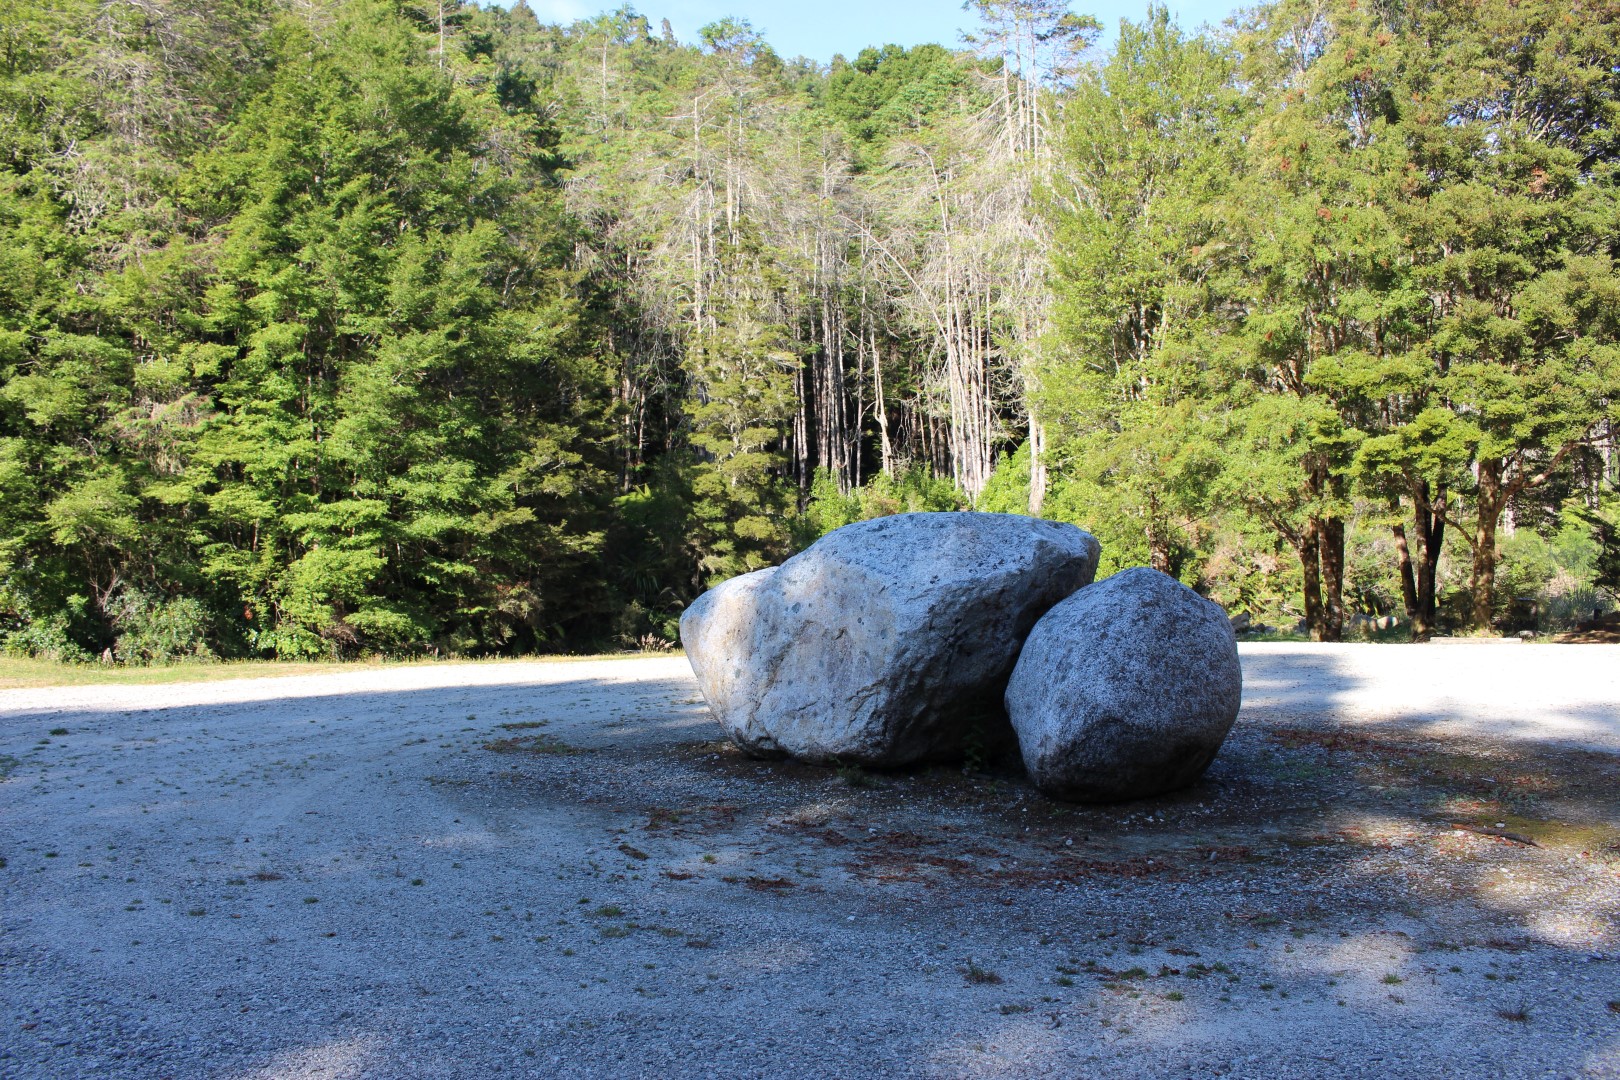
No worries (as they say in New Zealand – frequently!), a few nights later whilst camping at the improbably named Slab Hut Creek (site of old alluvial gold workings) west of the historic mining town of Reefton, I was at last able to image all these features.  Remotely situated in the middle of woods adjacent to the aforesaid gold creek, the night sky was inky black, albeit with some passing cloud from time-to-time.  Furthermore, located in the centre of the opening were two very large quartz boulders, which provided an ideal platform on which to set up the camera and Gorilla Pod.

IMG_9280 (Large)

A few tons of conveniently placed quartz helped imaging later in the night!

I didn’t get much sleep that night but it was a magical experience and I was thrilled to image both the Milky Way and Magellanic Clouds not individually but together.  As an added bonus we were also able to successfully undertake some gold panning during the day in the creek!

IMG_9244 (Large)

The Milky Way at Slab Hut Creek with the Large & Small Magellanic Clouds

IMG_9265 (Large)

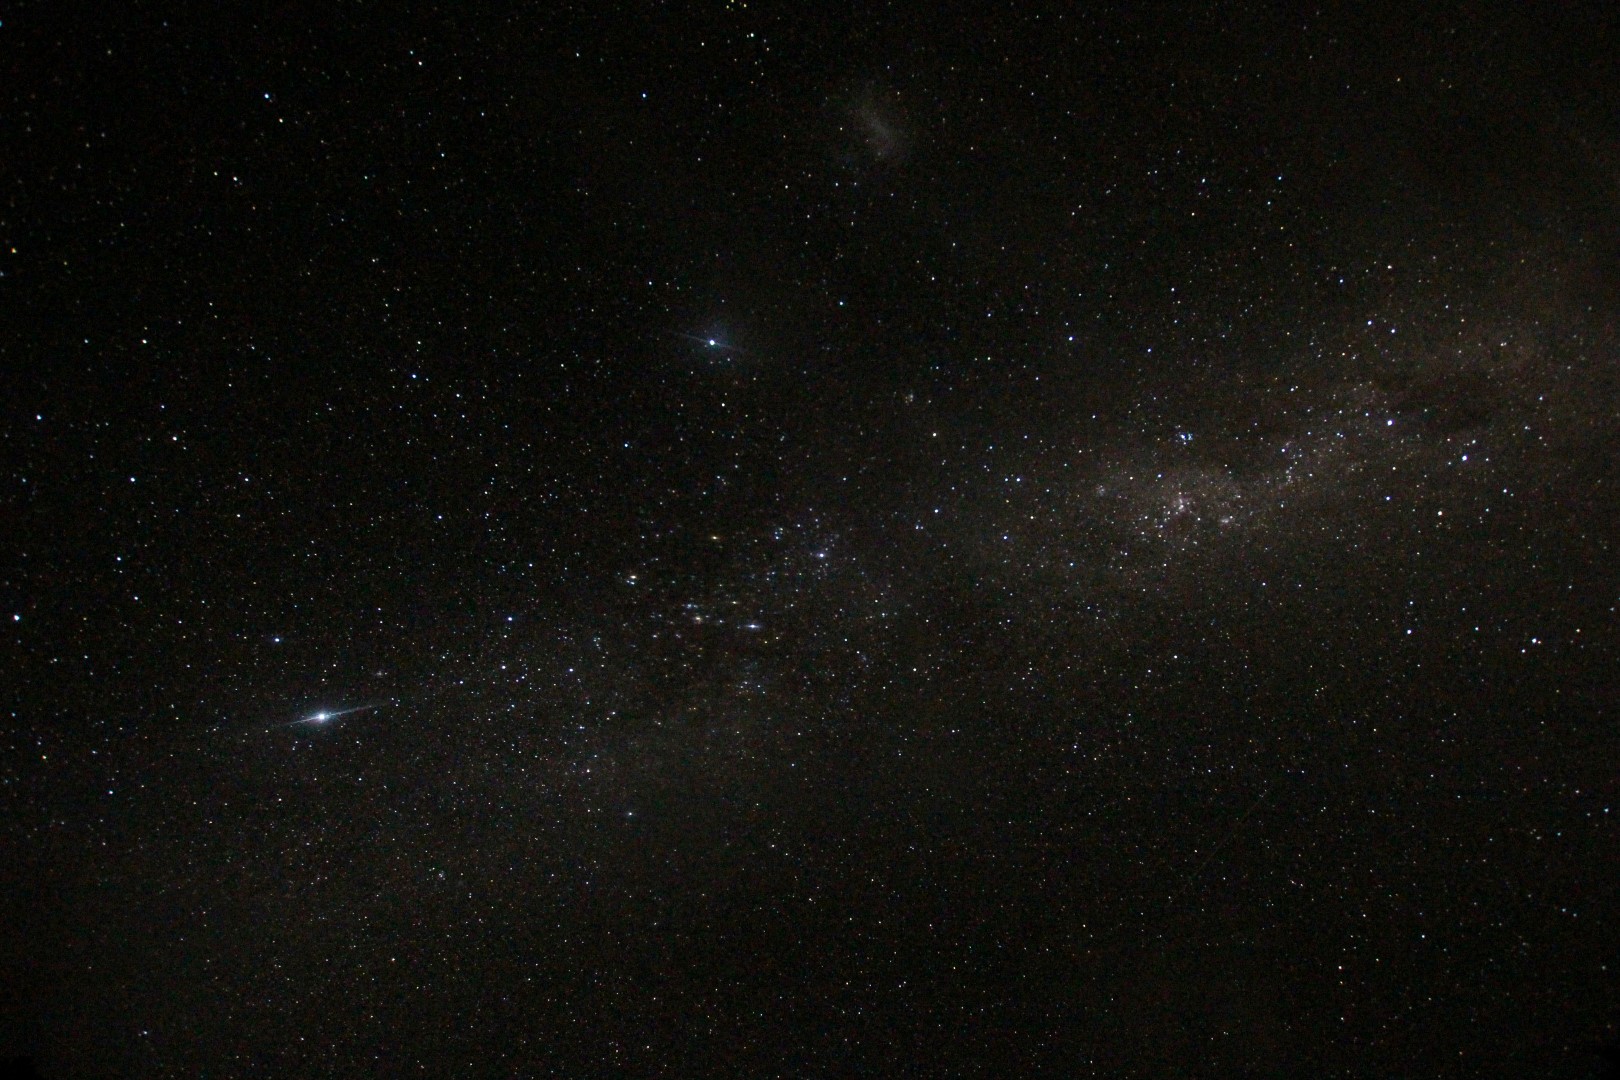
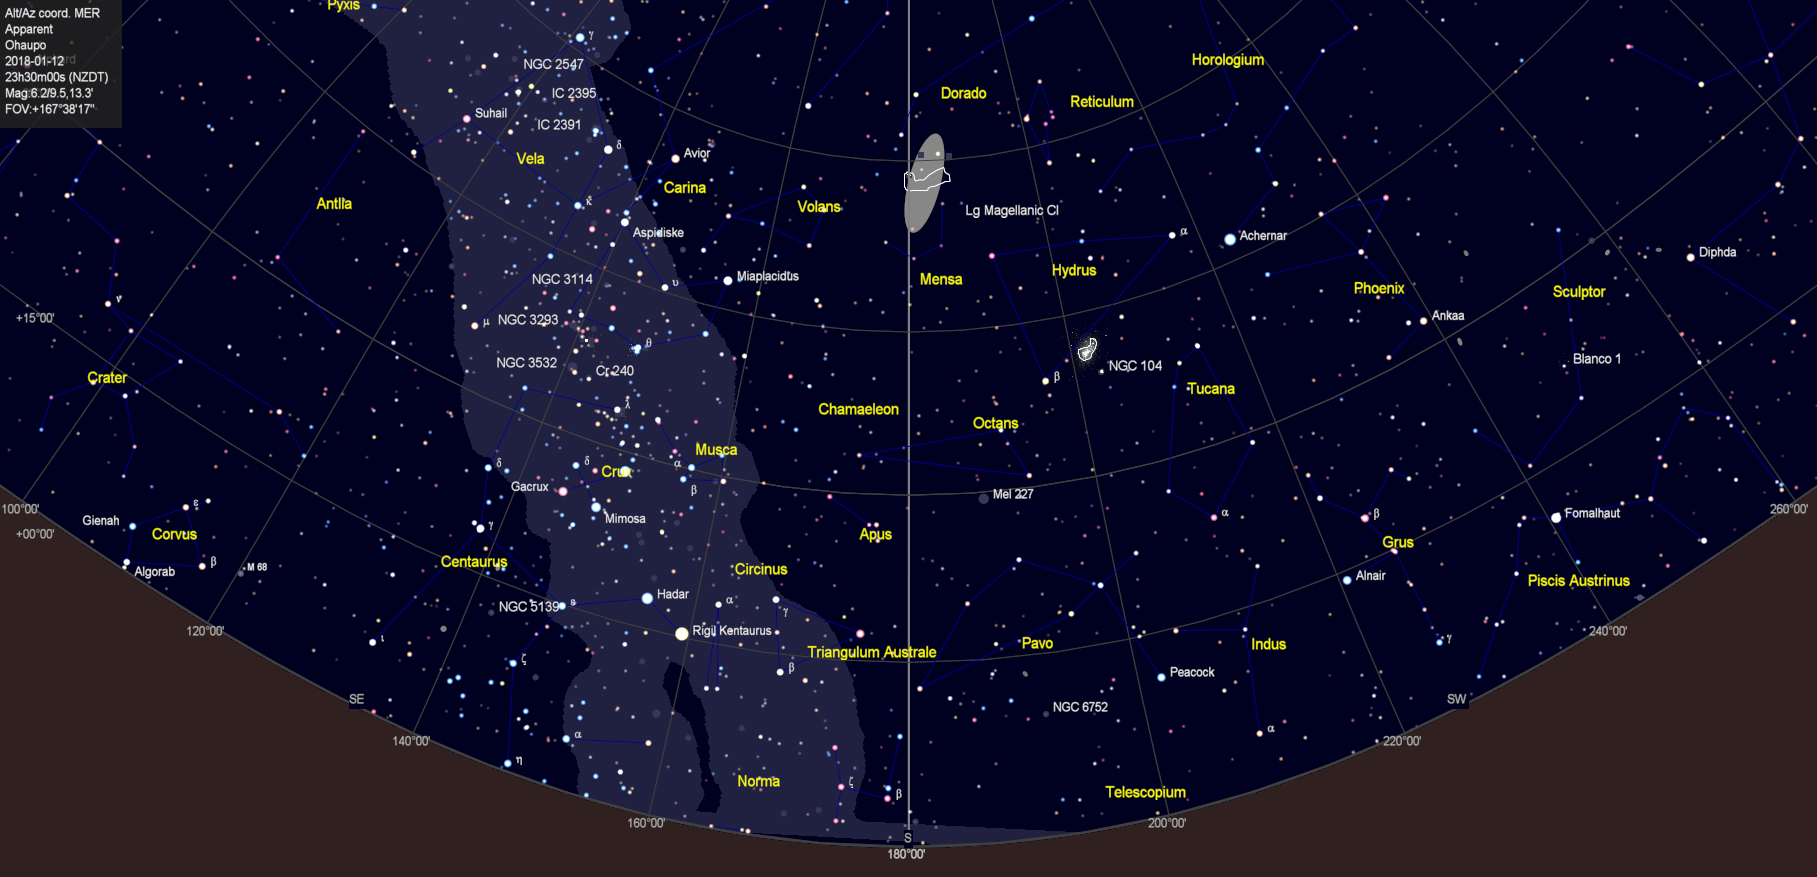
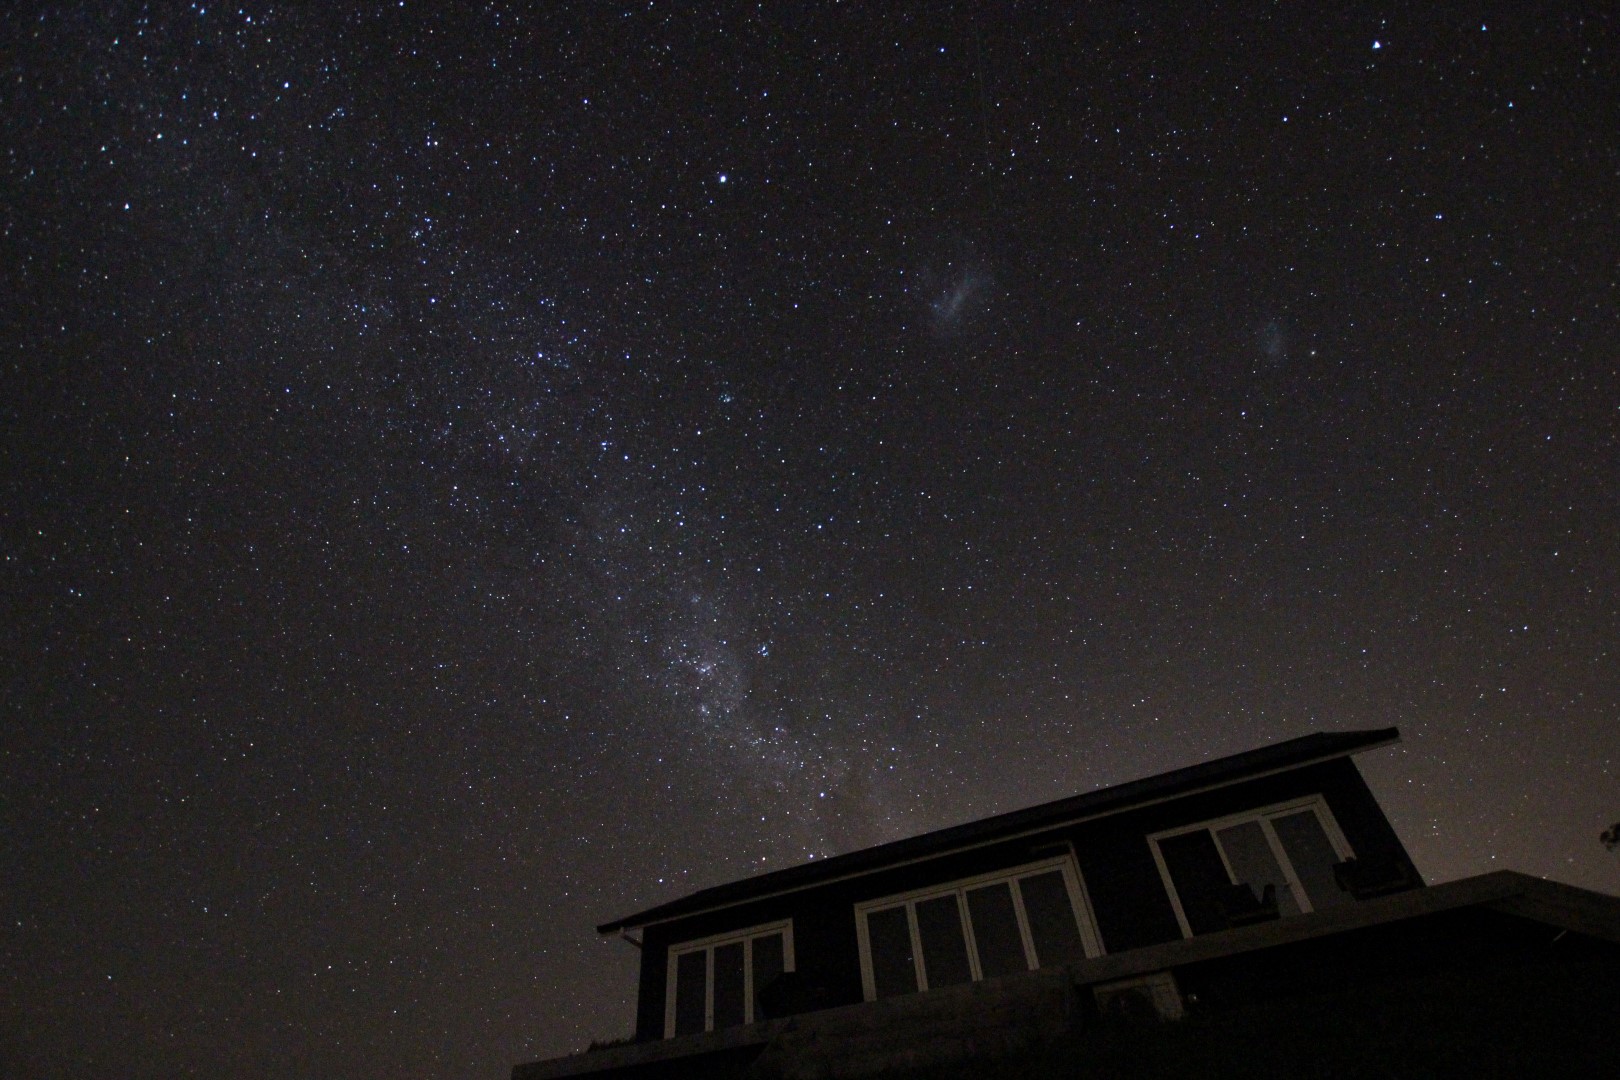
Thereafter I was hindered for the next few weeks by Christmas events and the inevitable full moon at the start of January, though the ISS did pass directly overhead on one evening (New Zealand from the ISS).  However, 10-days later back on North Island at our cottage in the Waipa district, I was eventually able to view and image once again the wonderful sight of the Milky Way + Magellanic Clouds + Southern Cross at the same time – sky chart and image below.

Ohaupo Sky

IMG_9984 (Large)

From our base on North Island: The Milky Way & Magellanic Clouds (right) + Southern Cross just above the left-hand side of the roof line 

When the conditions are right the night sky in New Zealand is truly outstanding. I would have liked to spend time there with the full astronomy set-up and camera that I use in the UK but for now I was very pleased to experience and enjoy Antipodean astronomy, it really is worth the long journey.

Arctic Antics

img_8084-large

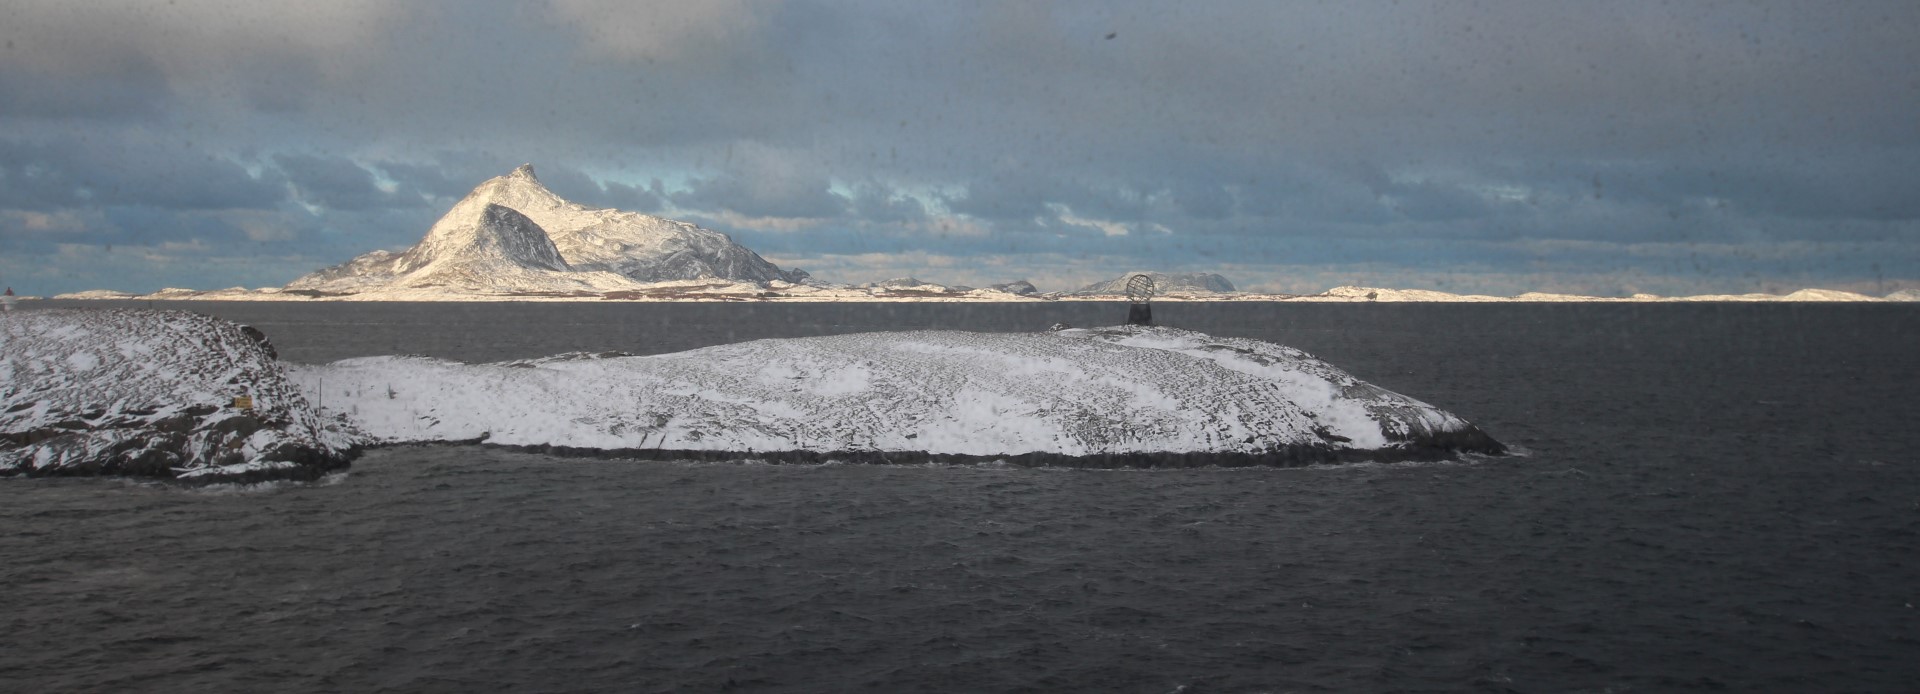
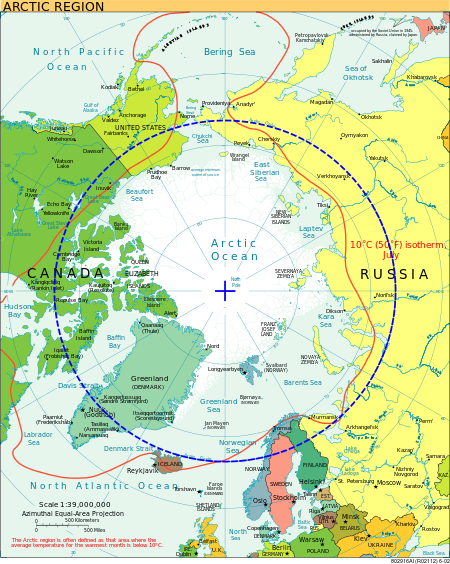
The globe pictured above on the island of Vikingen marks the location of the Arctic Circle off the western Norwegian coast.  However, surprisingly the position of the Arctic Circle is not fixed – as of 28 February 2017 it was 66°33′46.6″ north of the Equator but changes depending on the Earth’s axial tilt, which itself varies within 2° over a 40,000-year period due to differing tidal forces that occur as the Moon’s  orbit changes around Earth.  The region north of the Arctic Circle is famous for the midnight sun in the summer and its corresponding 24-hour darkness during the winter months, with major implications for life itself, as well as contrasting scenery and photographic conditions unique to this hostile region.

450px-arctic_circle-svg

During the last two weeks of February, when the return of limited daylight has just begun to mark the end of winter, I travelled by ship along the entire western and northern coast of Norway close to the Russian border, spending much of the time within the Arctic Circle.  The area is famous for its beautiful scenery, in particular the fjords which typify the coastline and for time immemorial have posed a significant challenge to all seafarers passing this way.

Our ship, the Richard With, was named after the Norwegian captain who in 1893 pioneered this difficult sea passage which we took from Bergen to Kirkenes and back.  Today a fleet of 12 ships are operated by the original Norwegian company Hurtigruten on a daily basis providing ferry transport for goods, vehicles and personnel, as well as a base for tourists seeking a view of the Northern Lights – in all the ship stops at over 30 ports in each direction.

kb_l4_map_desktop_us

Apart from the scenery, during the winter months the area north of the Arctic Circle is probably best known for the occurrence of the Aurora Borealis or Northern Lights (Norwegian – Nord Lys).  A view of this feature is treasured by all who see them but for astrophotographers it will be one of their ‘must do’ images to acquire.  The Aurora is caused by a solar wind originating from the Sun that consists of charged particles, which when drawn downwards at the Earth’s poles by the planet’s magnetosphere ‘excites’ atmospheric atoms which produce different coloured lights depending on the type of gas which is excited by the charged particles; a similar feature occurs around the South Pole called the Aurora Australis and is also now known to occur on Saturn and Jupiter.  The lights are mostly green in colour (ʎ 557.7 nm), sometimes red (ʎ 630 nm) or blue (428 ʎ nm) and less commonly pink, ultraviolet or yellow, depending on the altitude and type of excited gas – which is mostly either oxygen or nitrogen.  The resulting aurora takes the form of rapidly moving clouds or often curtains of light that dart across the night sky, constantly changing shape under the influence of the Earth’s magnetic field and does not disappoint when seen.

The Northern Lights are best imaged with a standard DSLR camera on a sturdy tripod, using a wide angle lens at full aperture, set at between ISO 800 to 1,600 and exposures of about 8 secs to 25 secs, depending on the brightness and quality of the light and the speed of movement of the aurora; focus and all other control needs to be operated manually for best results.  On land a tracking mount, such as a Vixen Polarie, could be used to improve sharpness but on a moving ship set-up and technique is a more difficult.

In this case exposure needs to be carefully balanced in order to account for the ships movement – forwards + up-and-down on the water – and the quality of the aurora light.  As exposures will always need to be greater than a few seconds, star trails are unavoidable and have to be dealt with in post processing as best as possible. I found imaging directly forwards or to the rear of the ship helped minimise this effect but still trails were still inevitable. Experimenting with various settings I found about 12 to 15 seconds exposure and ISO 1,600 generally worked quite well but varied depending on the sea conditions and nature of the aurora at any time.

At such high latitudes it is still very cold in February and warm head-to-feet-to-hands clothing is absolutely essential.  On this occasion, together with wind chill the temperature at the ships bow ranged from between -20oC to -30oC (that’s a minus sign!), making camera control very difficult and uncomfortable!  I tried using an intervalometer for remote shooting but as settings have to be changed frequently by hand it was not very practical; I’m sure on land it would prove much more helpful.  Furthermore, much of the time I had to hold the tripod down with some force as the wind was very severe.

Notwithstanding, I’m very pleased with the results shown below and would love to return again one day, perhaps in the summer – it is a truly different and very special part of the world – hat’s off to Richard With and all those who still sail these waters.

img_7634hpass-largeimg_7768x-large

img_7754star-crop-largeimg_8063x-large


The Sky’s The Limit

IMG_6235 (Large)

Imaging the Milky Way is a popular objective that has so far eluded me, mainly as I suffer from bad light pollution here at Fairvale Observatory.  Embarking on a trip to the Southwestern USA recently where dark skies abound, I therefore had high hopes of at last achieving this goal but alas it was not to be and will have to wait for another day.

The Grand Circle p76 1280302

The trip of a lifetime

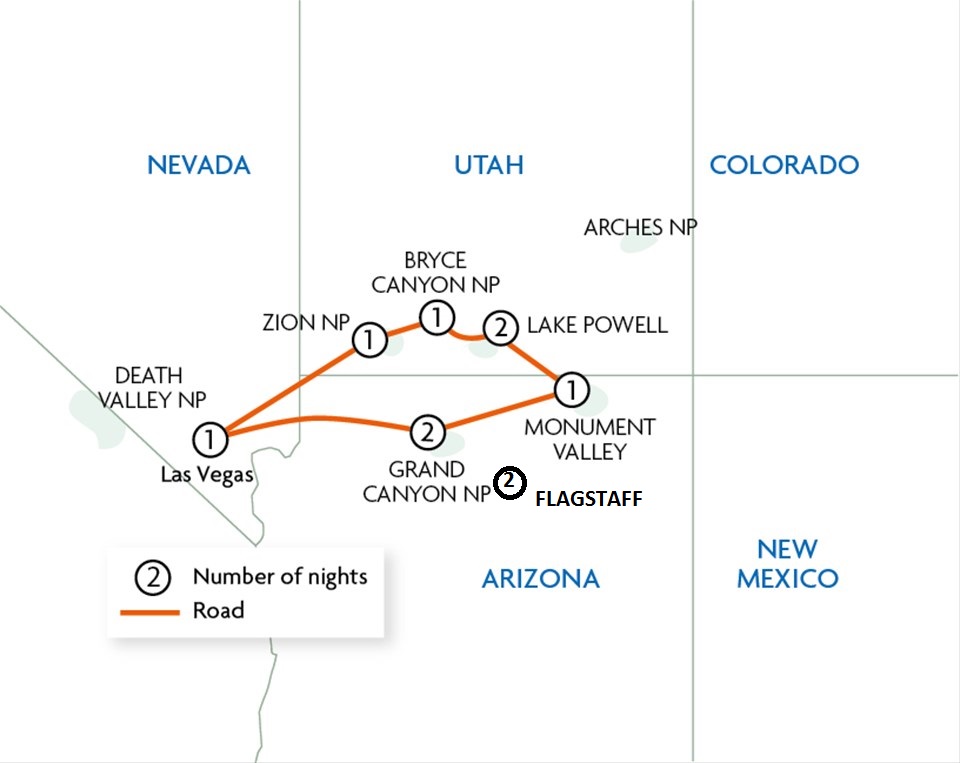
As a geologist I have often visited parts of Nevada, Colorado, Utah and California but never the famous sites of the Grand Canyon, Monument Valley, Glen Canyon (Lake Powell), Bryce Canyon and Zion National Park, which this time formed the trip of a lifetime.

IMG_20160407_152942 (Large)

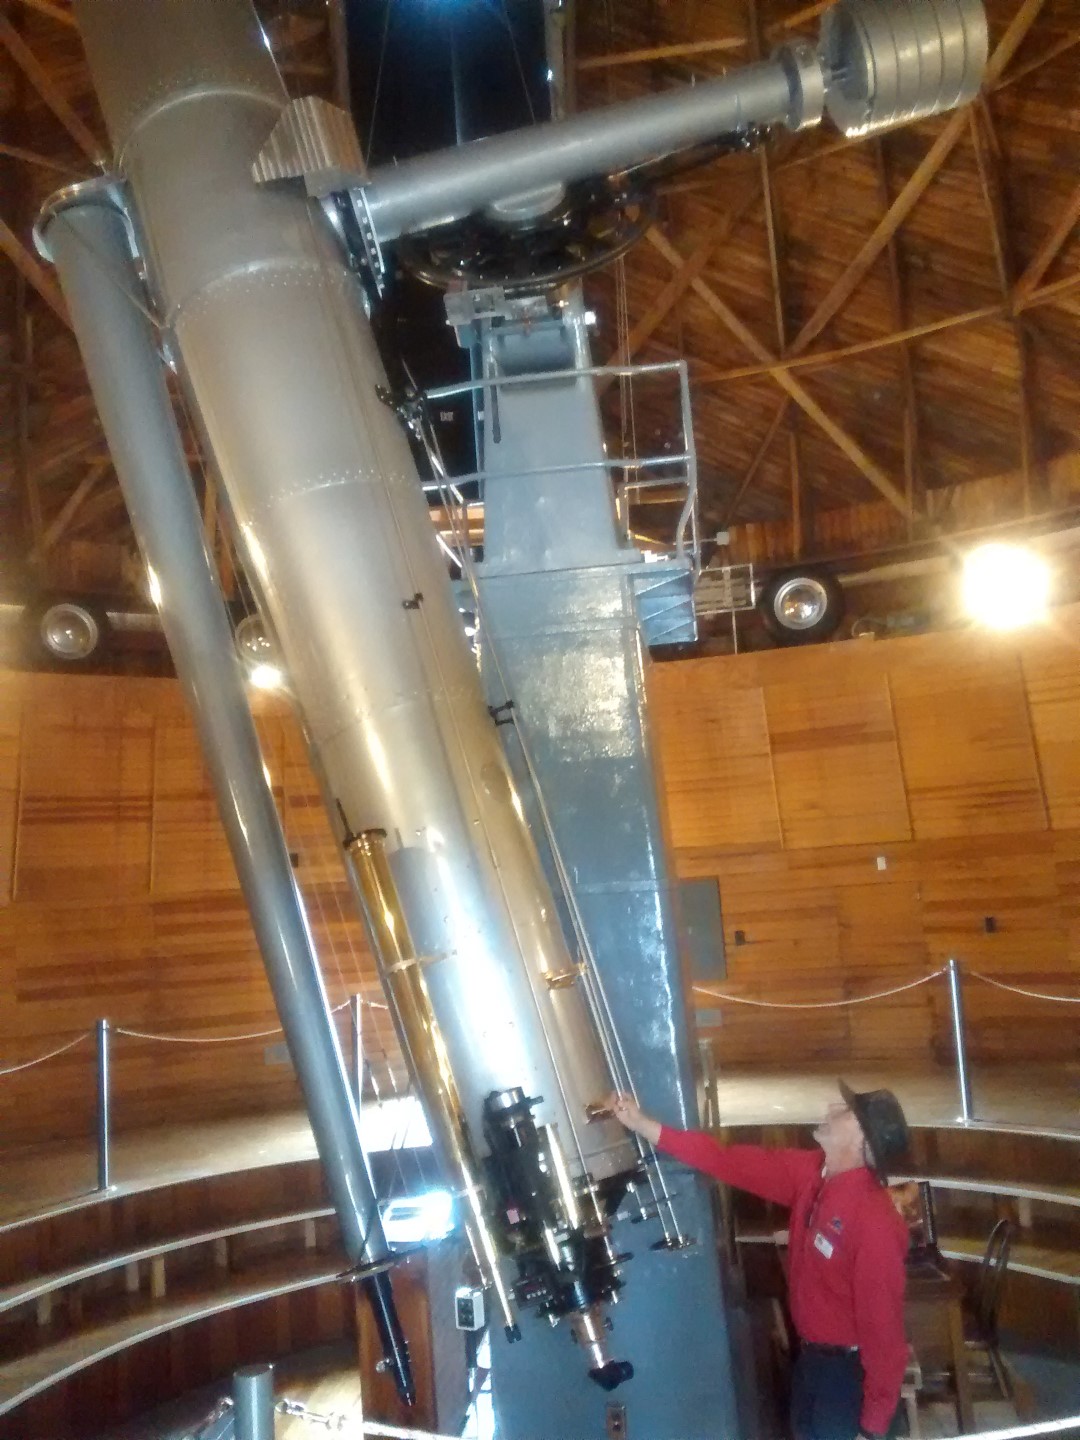
Alvan Clark & Sons 24″ refractor telescope at Lowell Observatory, Flagstaff, Arizona

First stop was after flying into Las Vegas was Flagstaff, home of the Lowell Observatory, where Pluto was first discovered and amongst others houses a magnificent 24-inch Alvan Clark & Sons refractor telescope built in 1895, which I hoped to use for viewing at the observatory’s nightly public sessions.  Unfortunately this was not to be as the sky remained resolutely overcast throughout the evening, despite good conditions earlier in the day.  Notwithstanding, the observatory is a fascinating place and still remains an important centre of modern astronomy studies; the adjacent town of Flagstaff is also home to the Department of Physics and Astronomy at the Northern Arizona University.

IMG_20160407_161022 (Large)

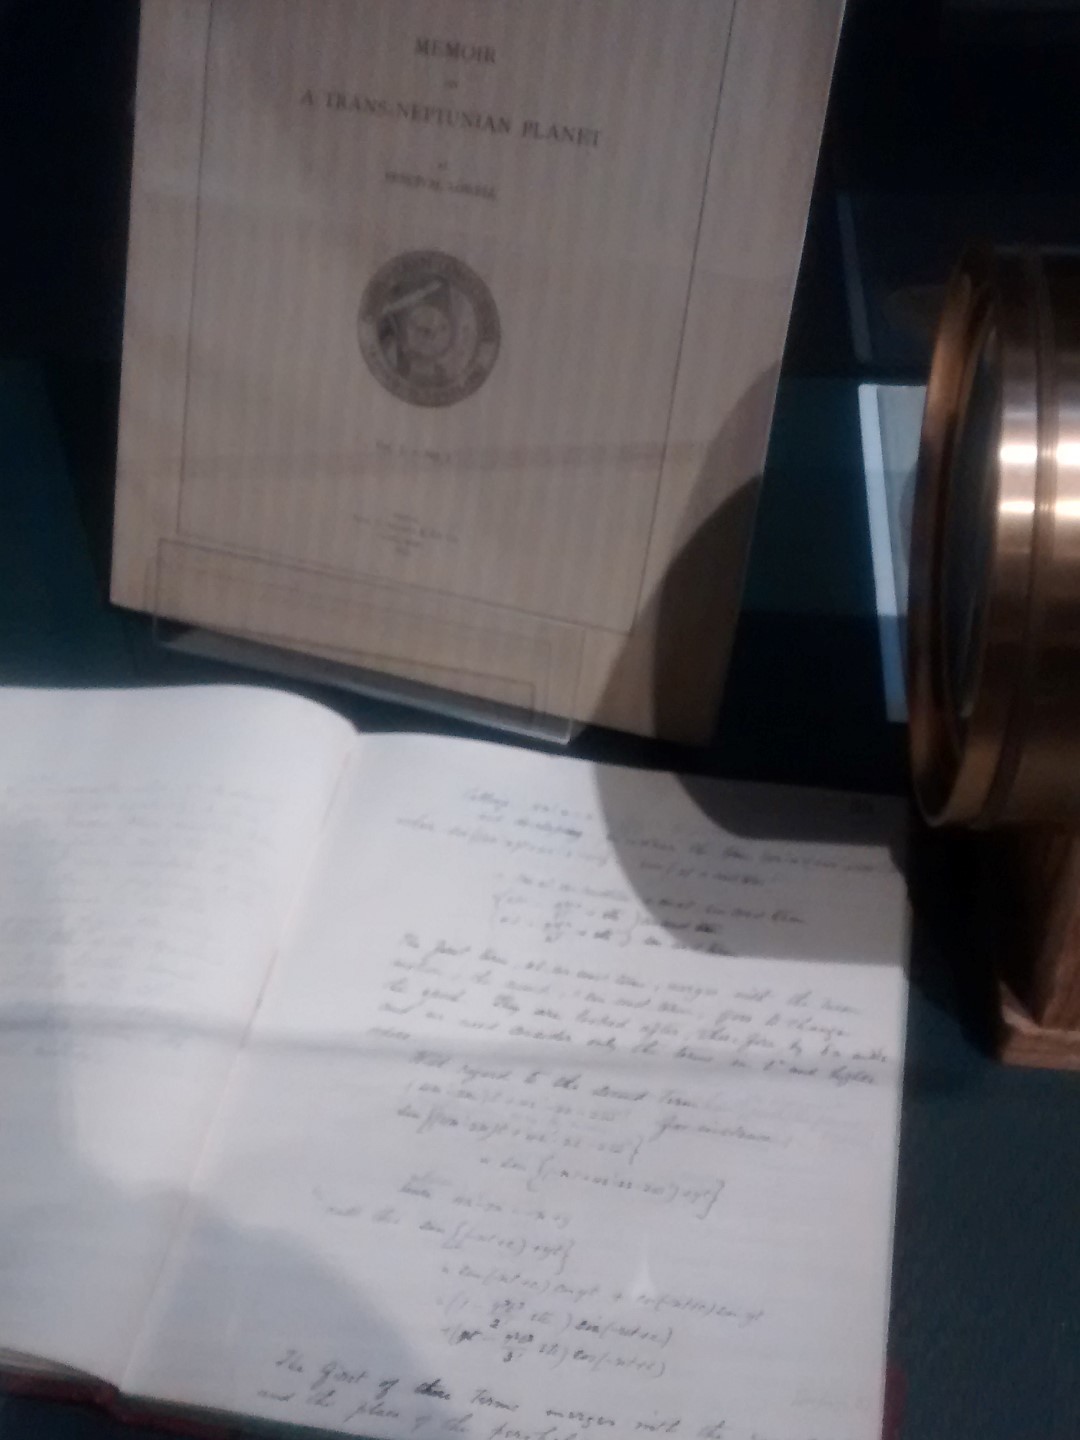
Final notes and paper published by Percival Lowell postulating the existence of a Planet X beyond Neptune, later confirmed by Clyde Tombaugh at Lowell Observatory in 1930 and named Pluto
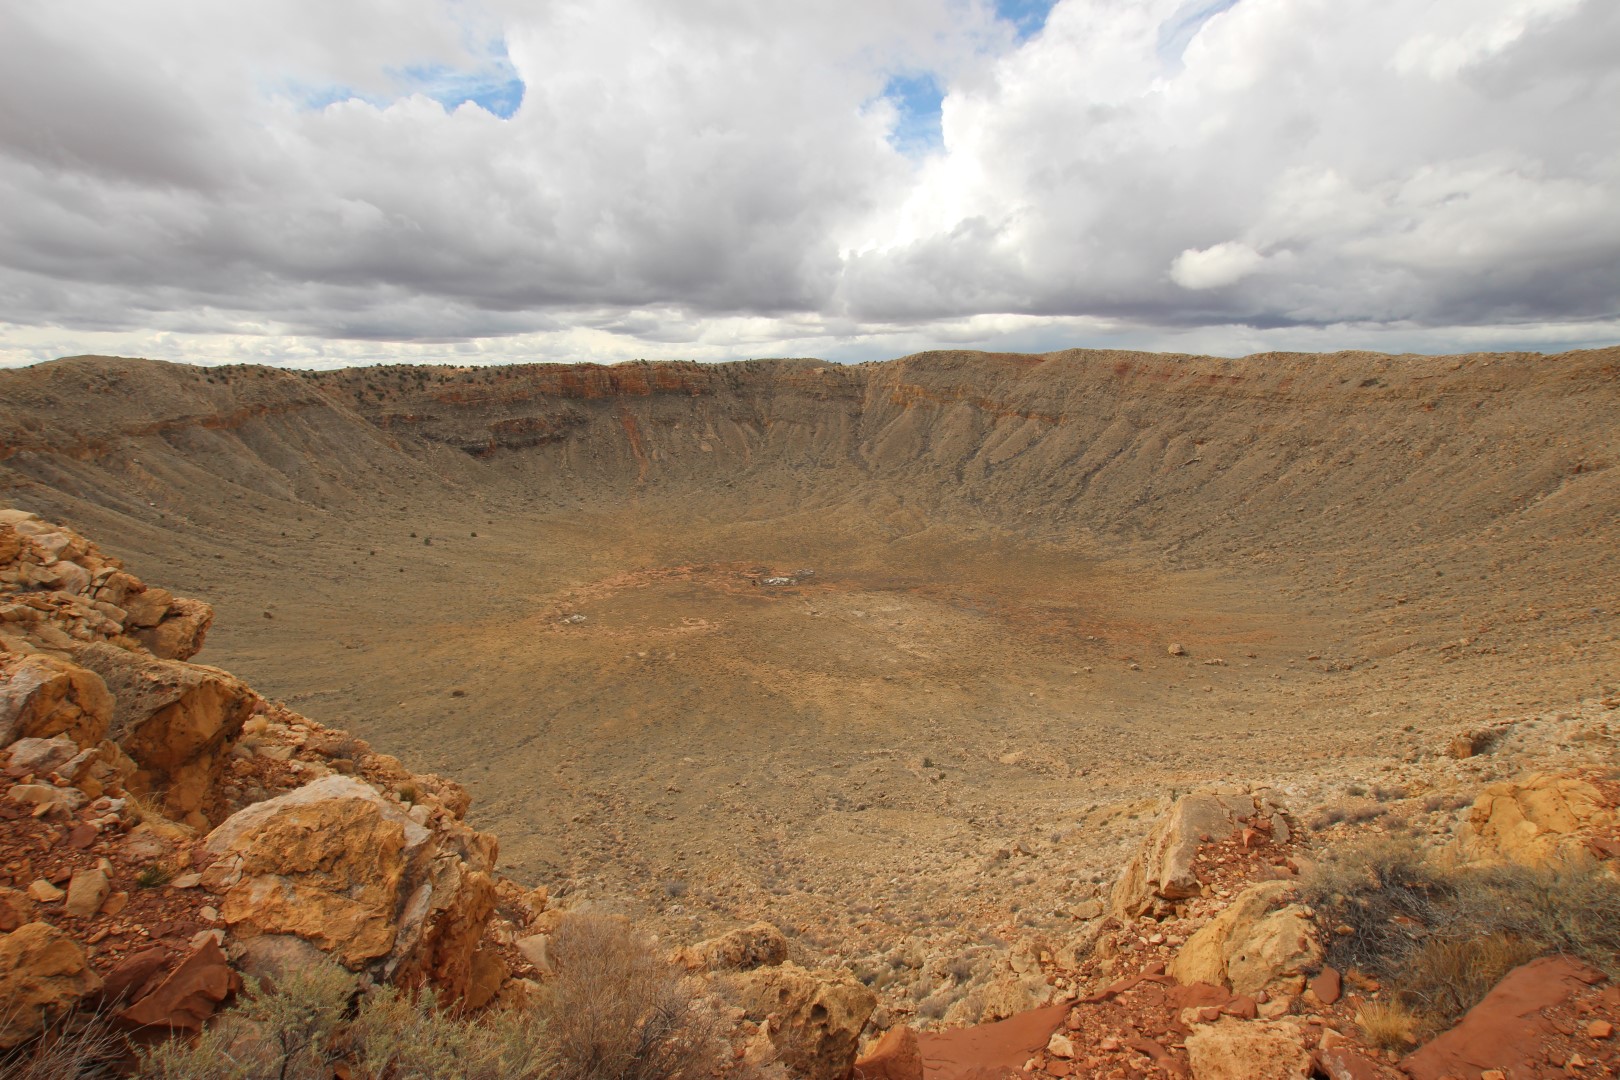
About 40-miles east of Flagstaff is the site of Meteor Crater, the best preserved meteorite impact crater on Earth.  Nearly one mile in diameter and over 500 feet deep, the 50,000 year old crater is very big and very impressive. There’s a lot to like about Flagstaff if you’re into astronomy!

IMG_5940 (Large)

Meteor Crater, Arizona, USA

IMG_5930 (Large)

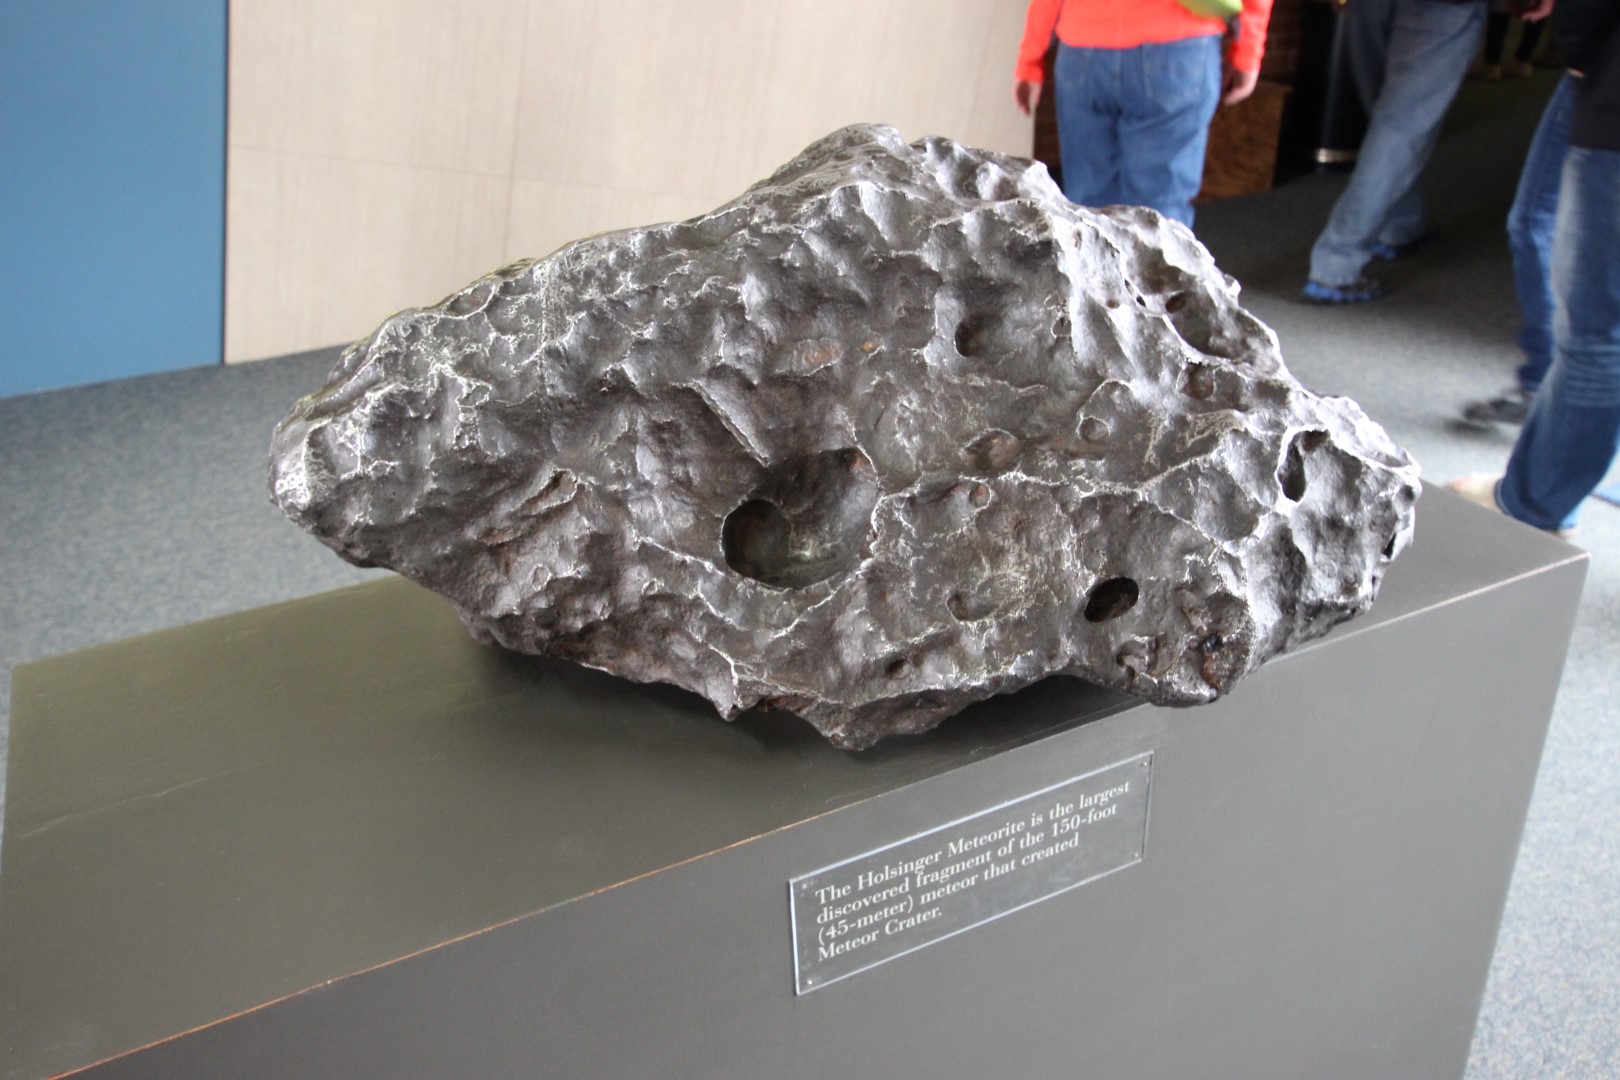
The Holsinger Meteorite: the largest remaining fragment of the 45 metre meteorite that created Meteor Crater

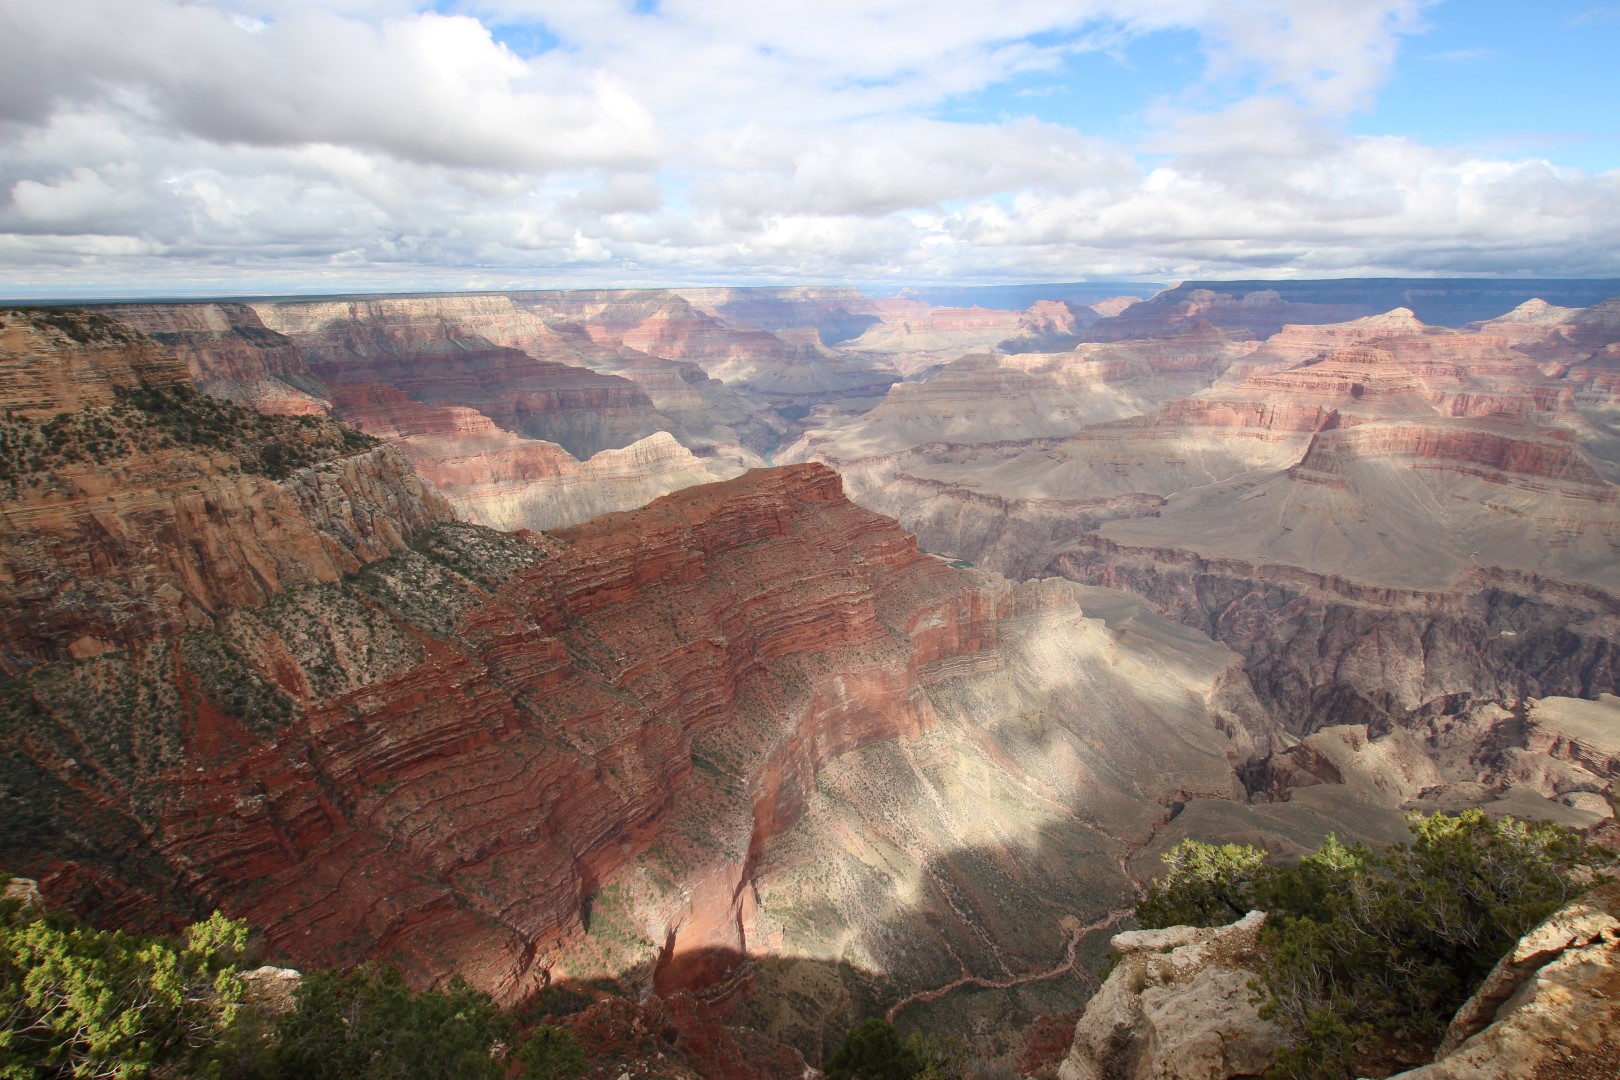
Moving on to the next stop at the Grand Canyon did not disappoint but staying just outside the park the location suffered some light pollution, compounded by cloud during the evening, thus prohibiting any imaging.

IMG_5974 (Large)

The incomparable Grand Canyon by day. Whilst we stayed around for sunset, unfortunately light pollution and cloud later prevented further nightscape imaging.

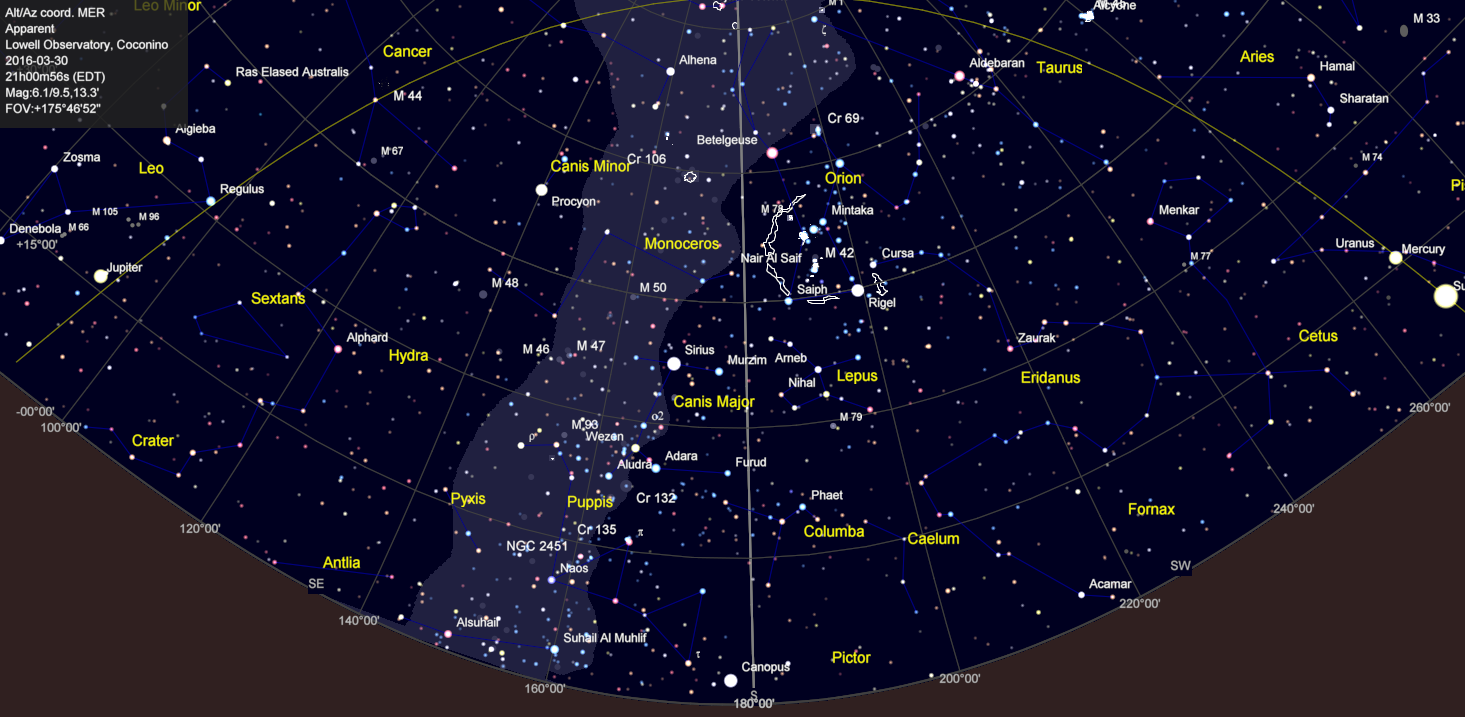
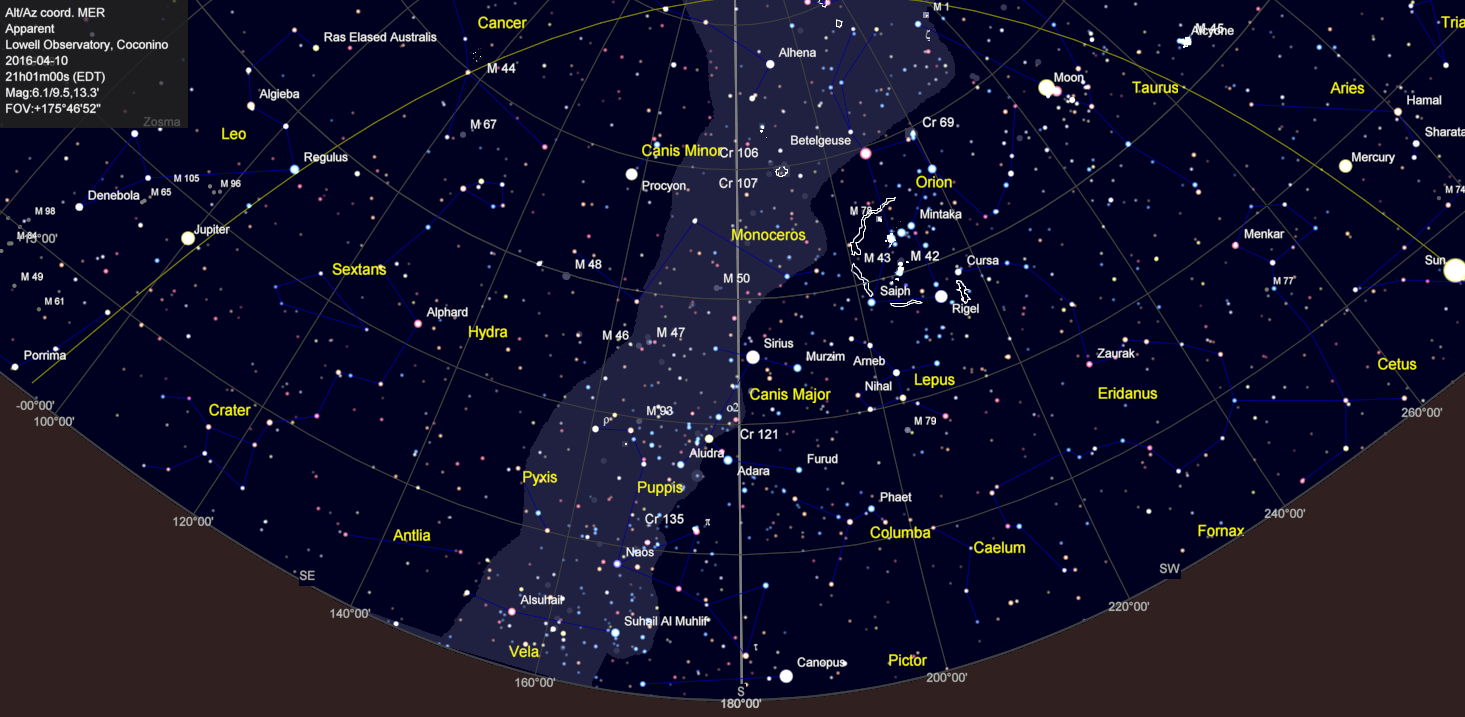
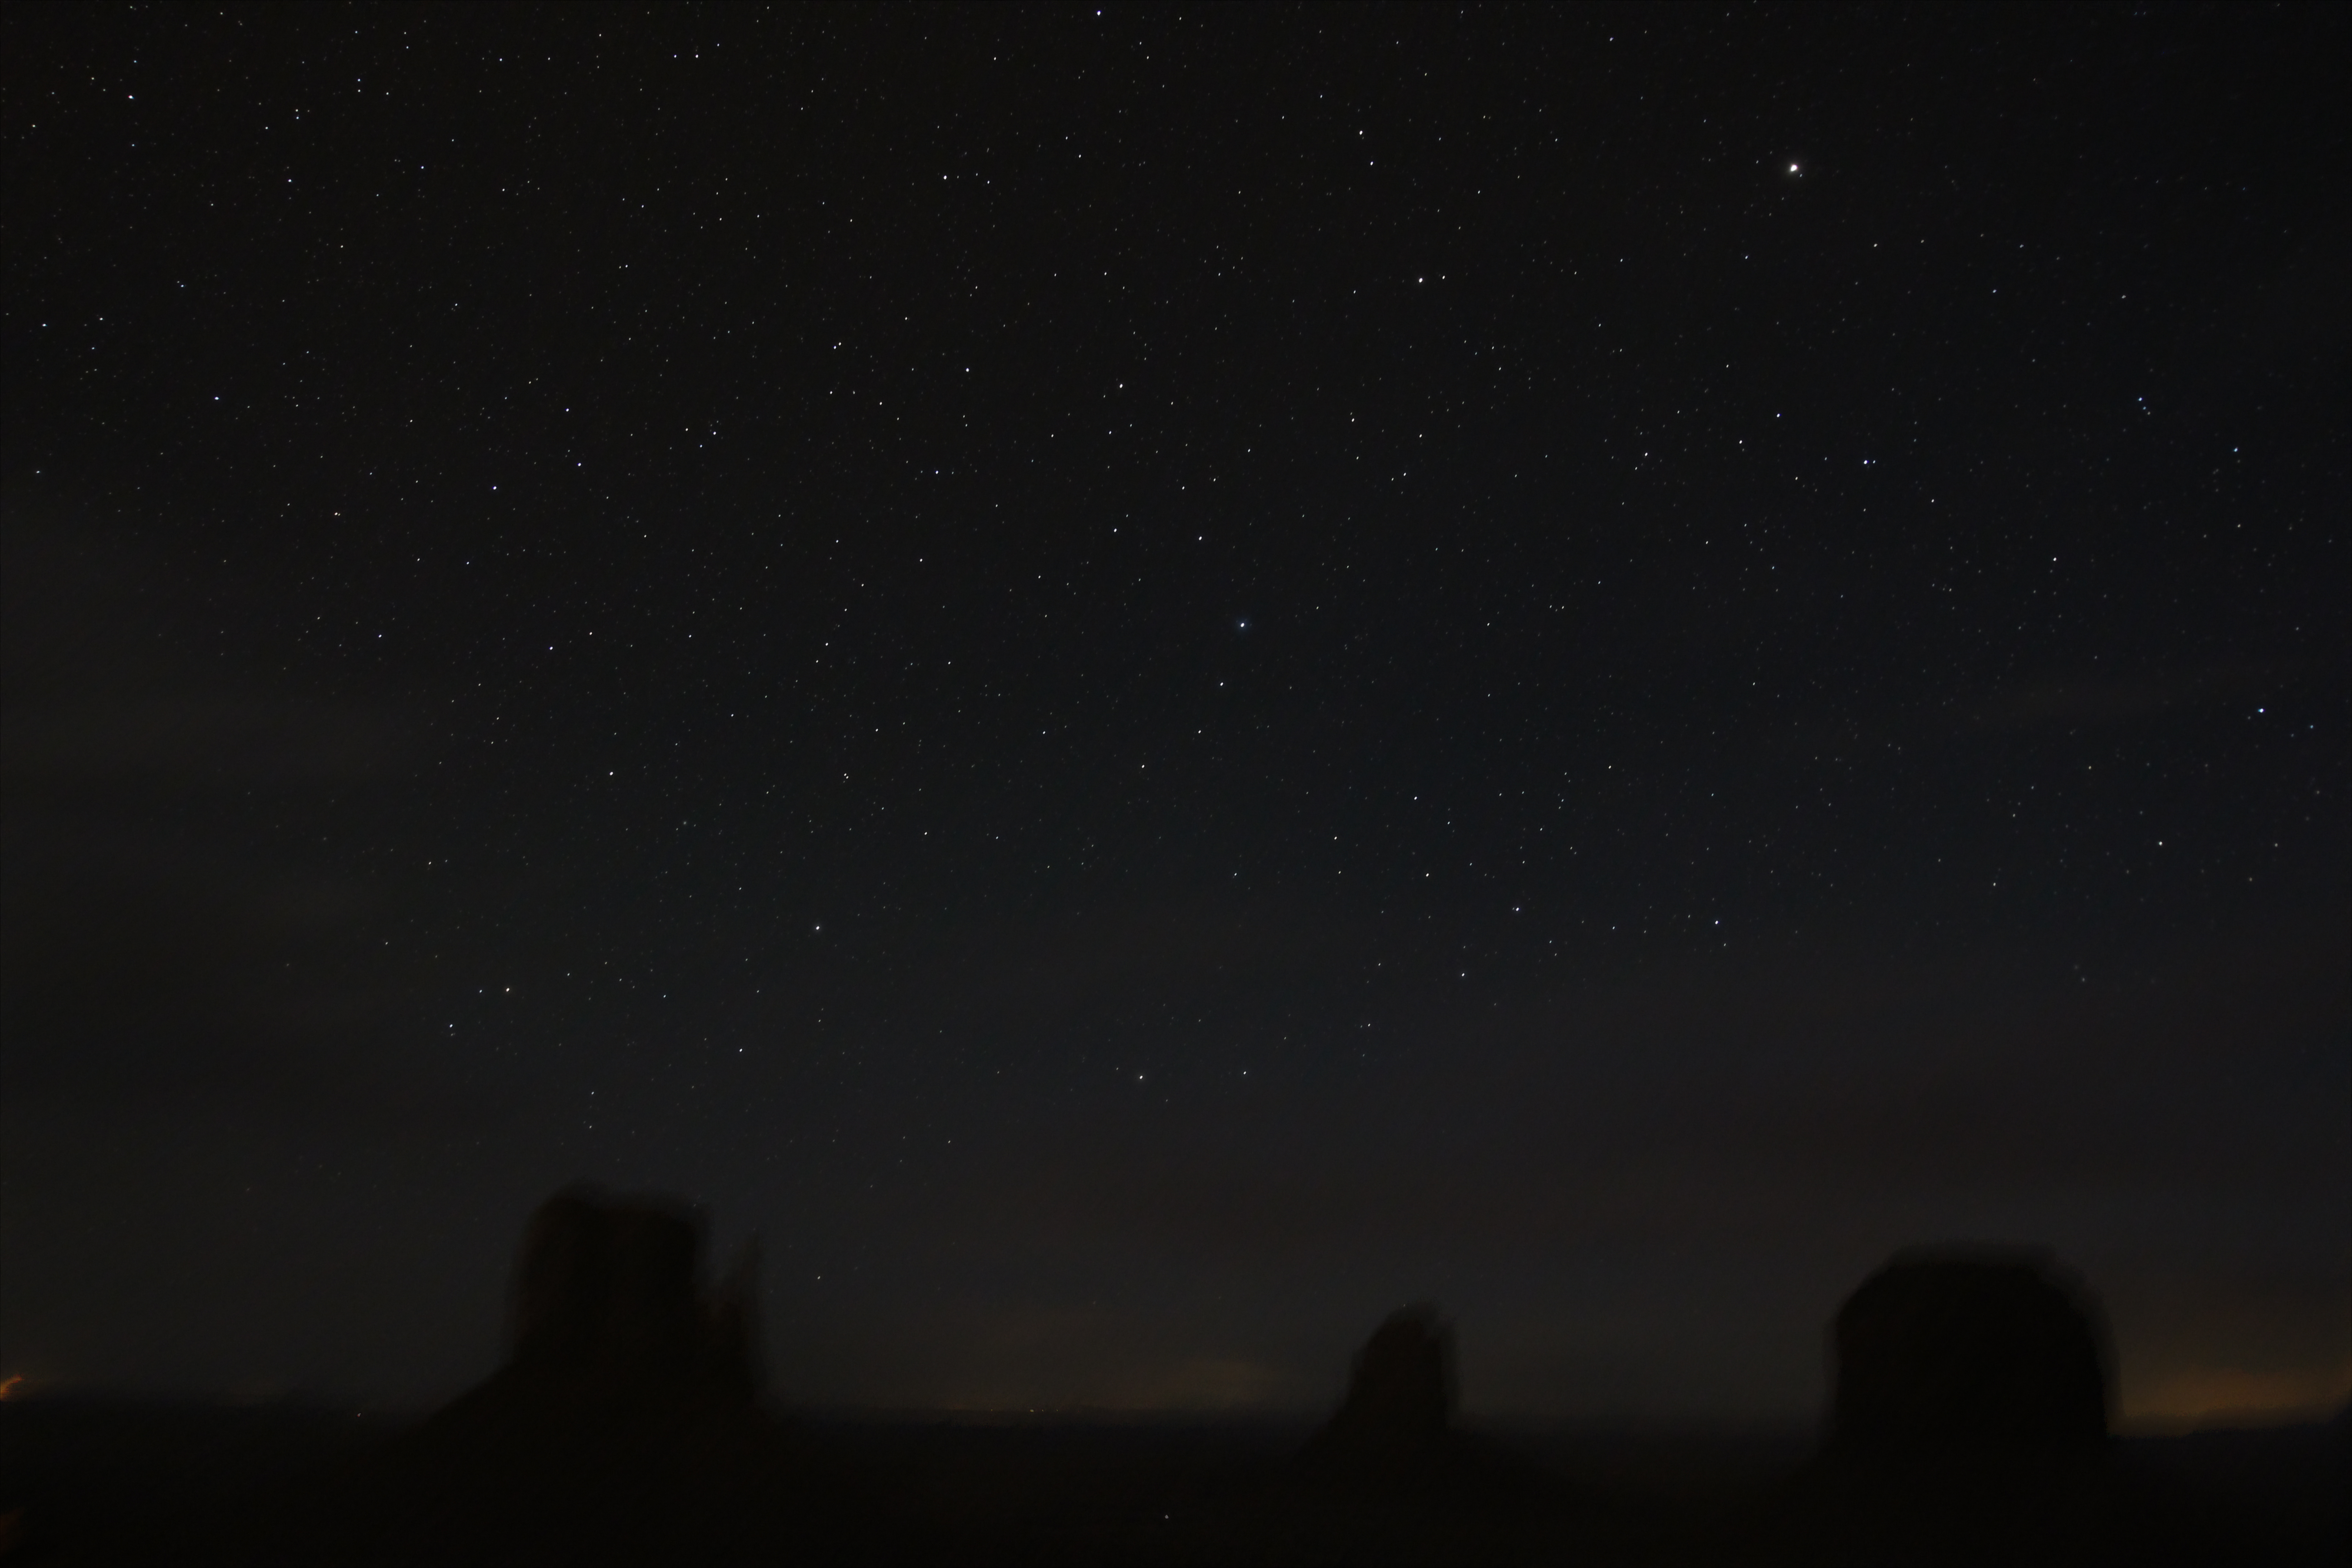
As a more remote location I had always envisaged that next stop at Monument Valley would be my first real opportunity to undertake some night imaging, for which purpose I had taken along the Vixen Polarie and a tripod.  In preparation I had previously studied the sky in this part of the world using Cartes du Ciel, which indicated that the Milky Way would be well positioned during my visit; being 35o latitude and 5,000 miles west of Fairvale Observatory meant that the sky was similar to that viewed in the UK three months ago and therefore included my favourite constellation Orion.  Unfortunately I had overlooked one problem and my long-time nemesis, the moon.

lowell south 9pm

The night sky from Lowell Observatory on 30th March 2016 – no Moon.

Lowell Obsy 100416

10-days later: night sky from Lowell Observatory on 10th April 2016, now with the Moon!

I was in the USA from 5th to 17th April but for some reason had modelled the sky in Flagstaff on 30th March.  It turned out that between then and 10th April, when I was in Monument Valley, the by now half-moon had moved into the night sky and ruled out any chance of seeing or imaging the Milky Way.  Of course, even if I had correctly identified the problem beforehand there was nothing I could do about it but it was still frustrating.  Notwithstanding, it was a clear sky and not to be defeated turned to Plan-B, which instead took advantage of the moon’s position and in my opinion turned out quite well.

IMG_6242 (Large)

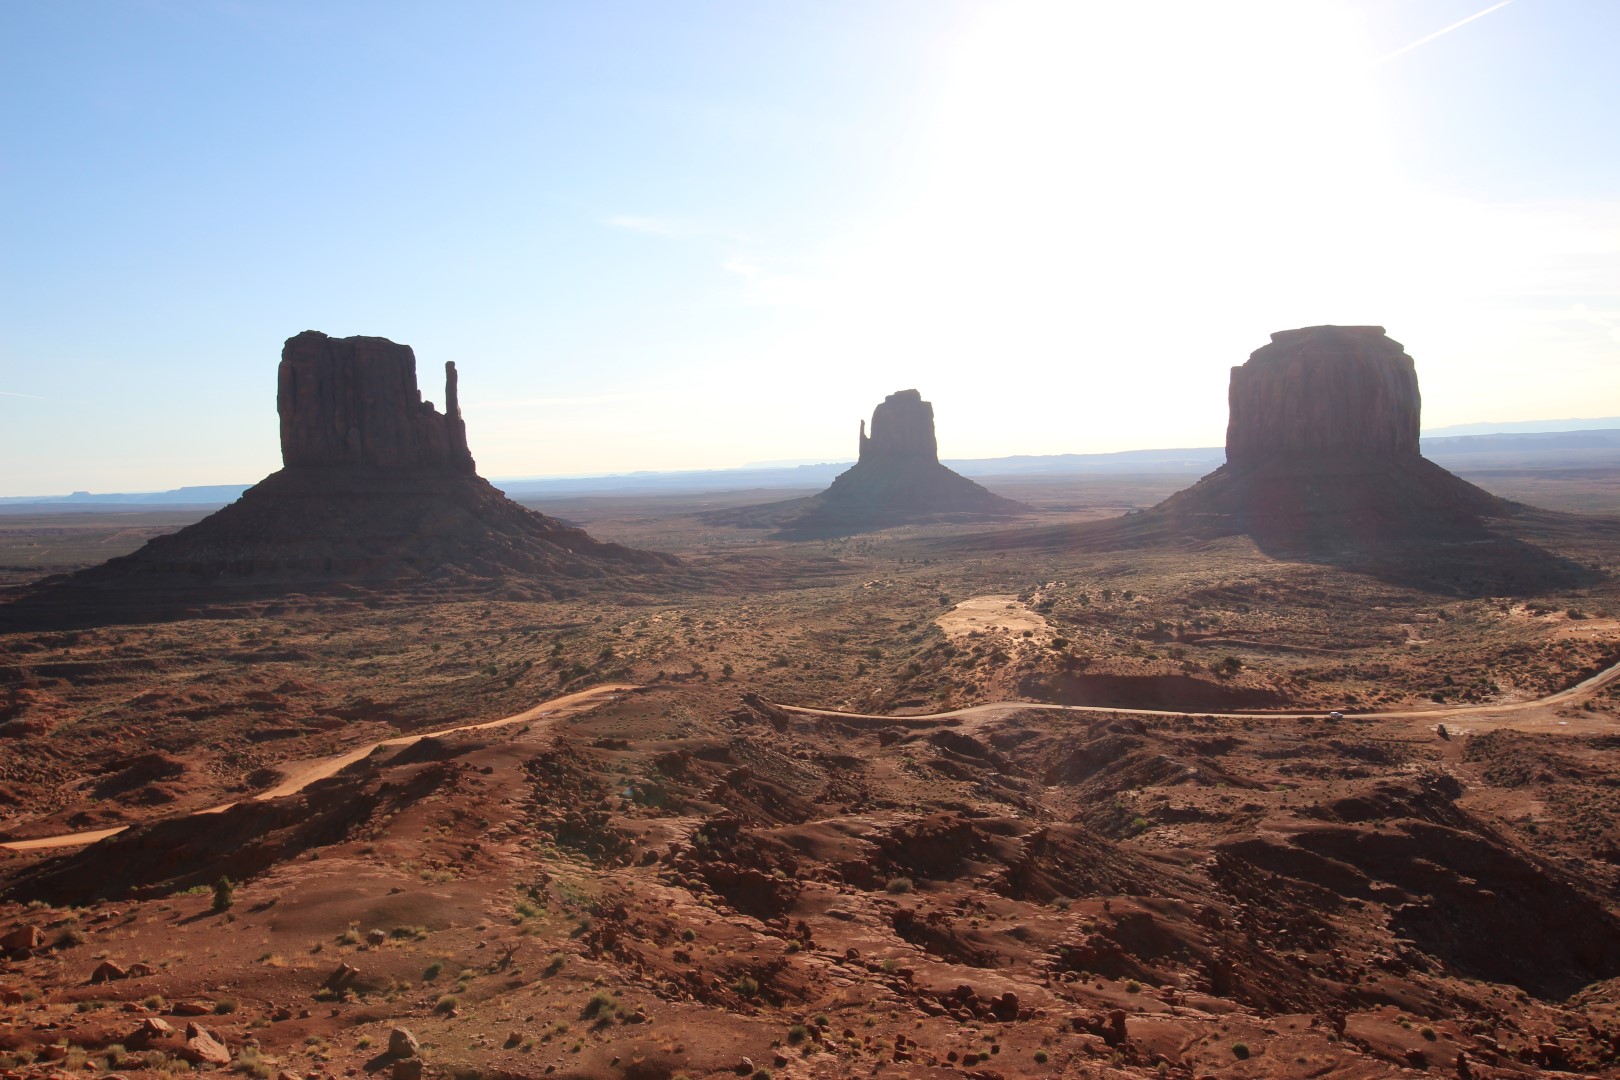
Monument Valley by Day: left to right – West Mitten, East Mitten & Merrick Buttes

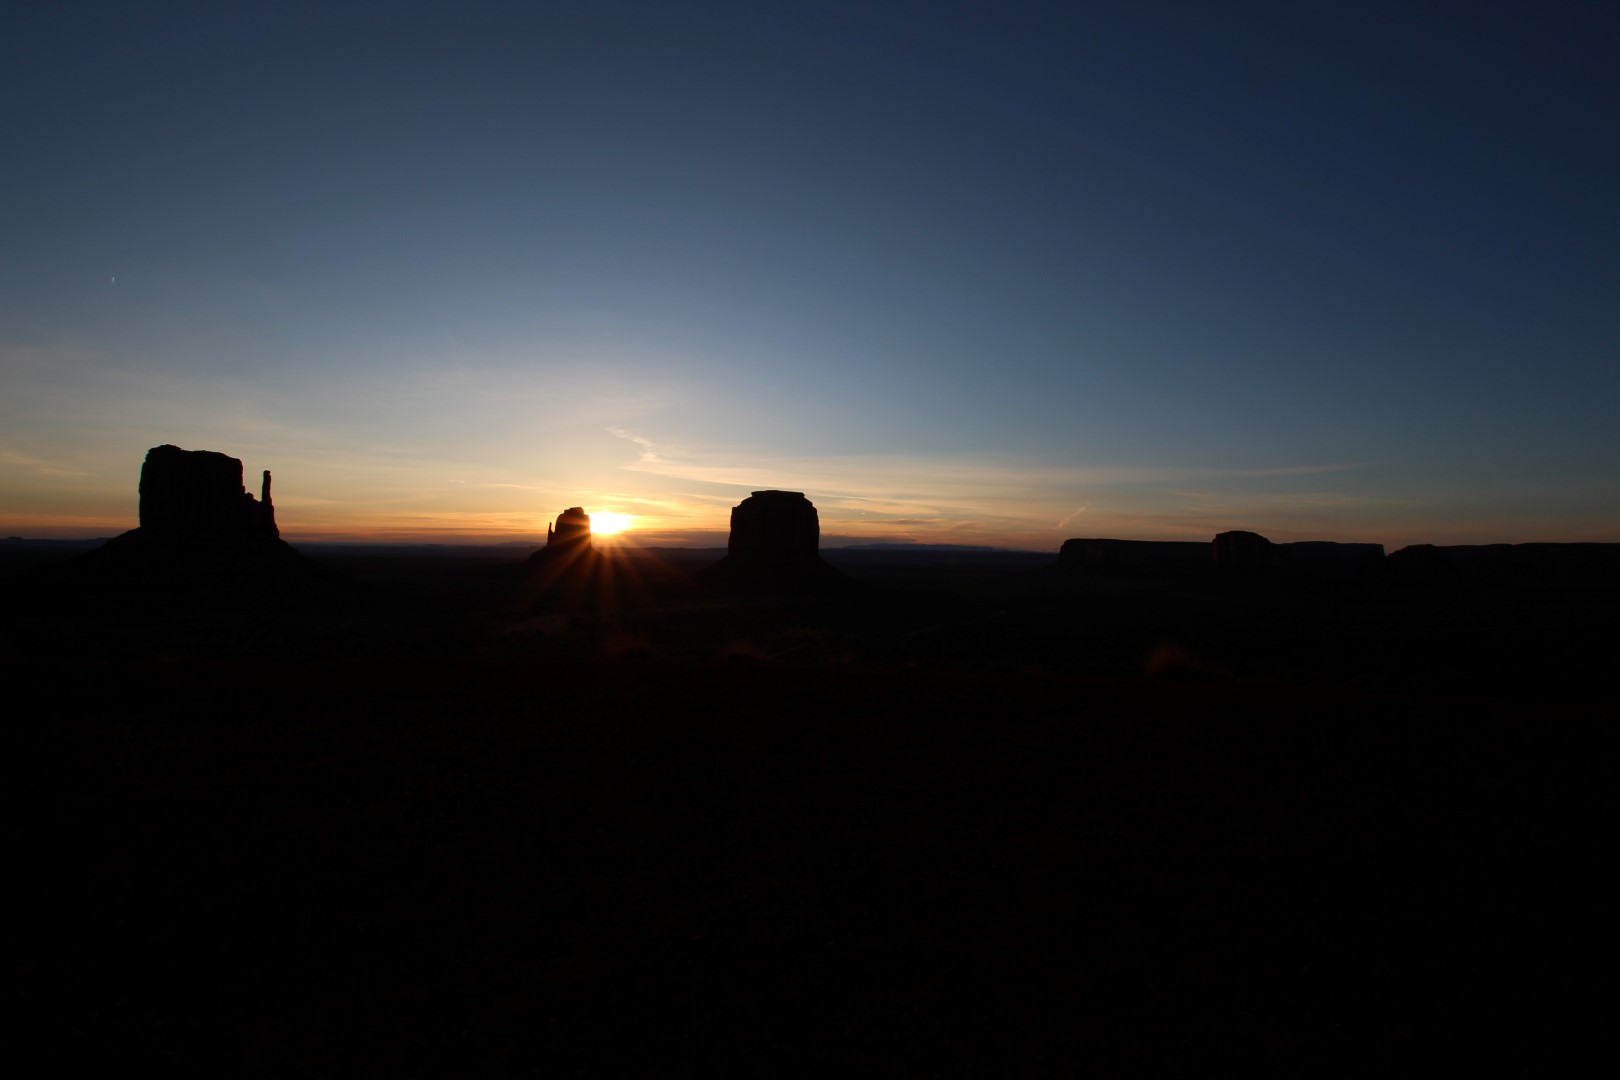
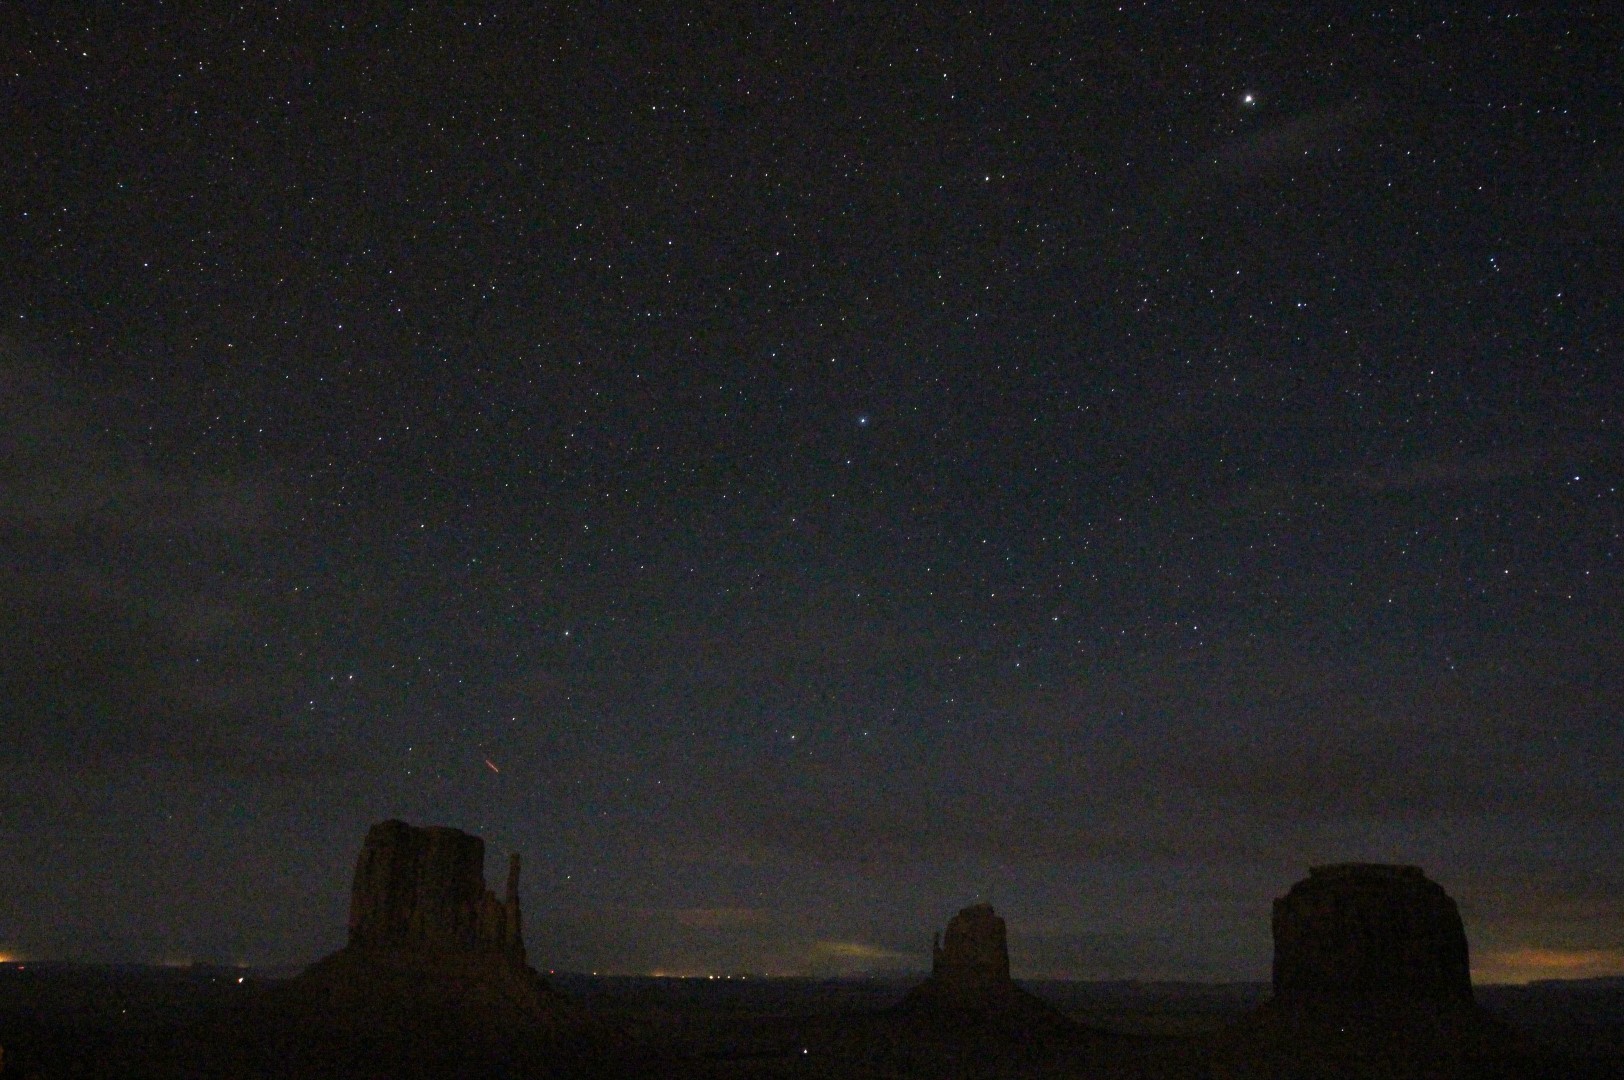
Despite the remote location at Monument Valley there was noticeable light pollution from the hotel and ancillary facilities.  However, being on the ground floor it was possible to set-up adjacent to the room’s balcony looking east, which was fortunately in the building’s own shadow, thus enabling a sequence of images to be taken of the night sky set against the buttes that typify this region.  UnfortunateIy I overlooked setting the Vixen Polarie to half-sidereal tracking speed, which subsequently resulted in a blurred landscape when stacked but the original subs capture the buttes in some detail, themselves illuminated by the moon’s light = result!

IMG_6219L1C1 (Large)

Monument Valley by Night; order of buttes same as above.  Canon 700D + Sigma 10mm wide-angle lens | 15secs @ ISO 6,400 | 10th April 2016

Picture saved with settings embedded.

Monument Valley at Night – mulitple stacked shots:  Sidereal tracking results in better sky but blurred landscape. Canon 700D & 10mm Sigma wide-angle lens | 20 x 15 secs @ ISO 6,400

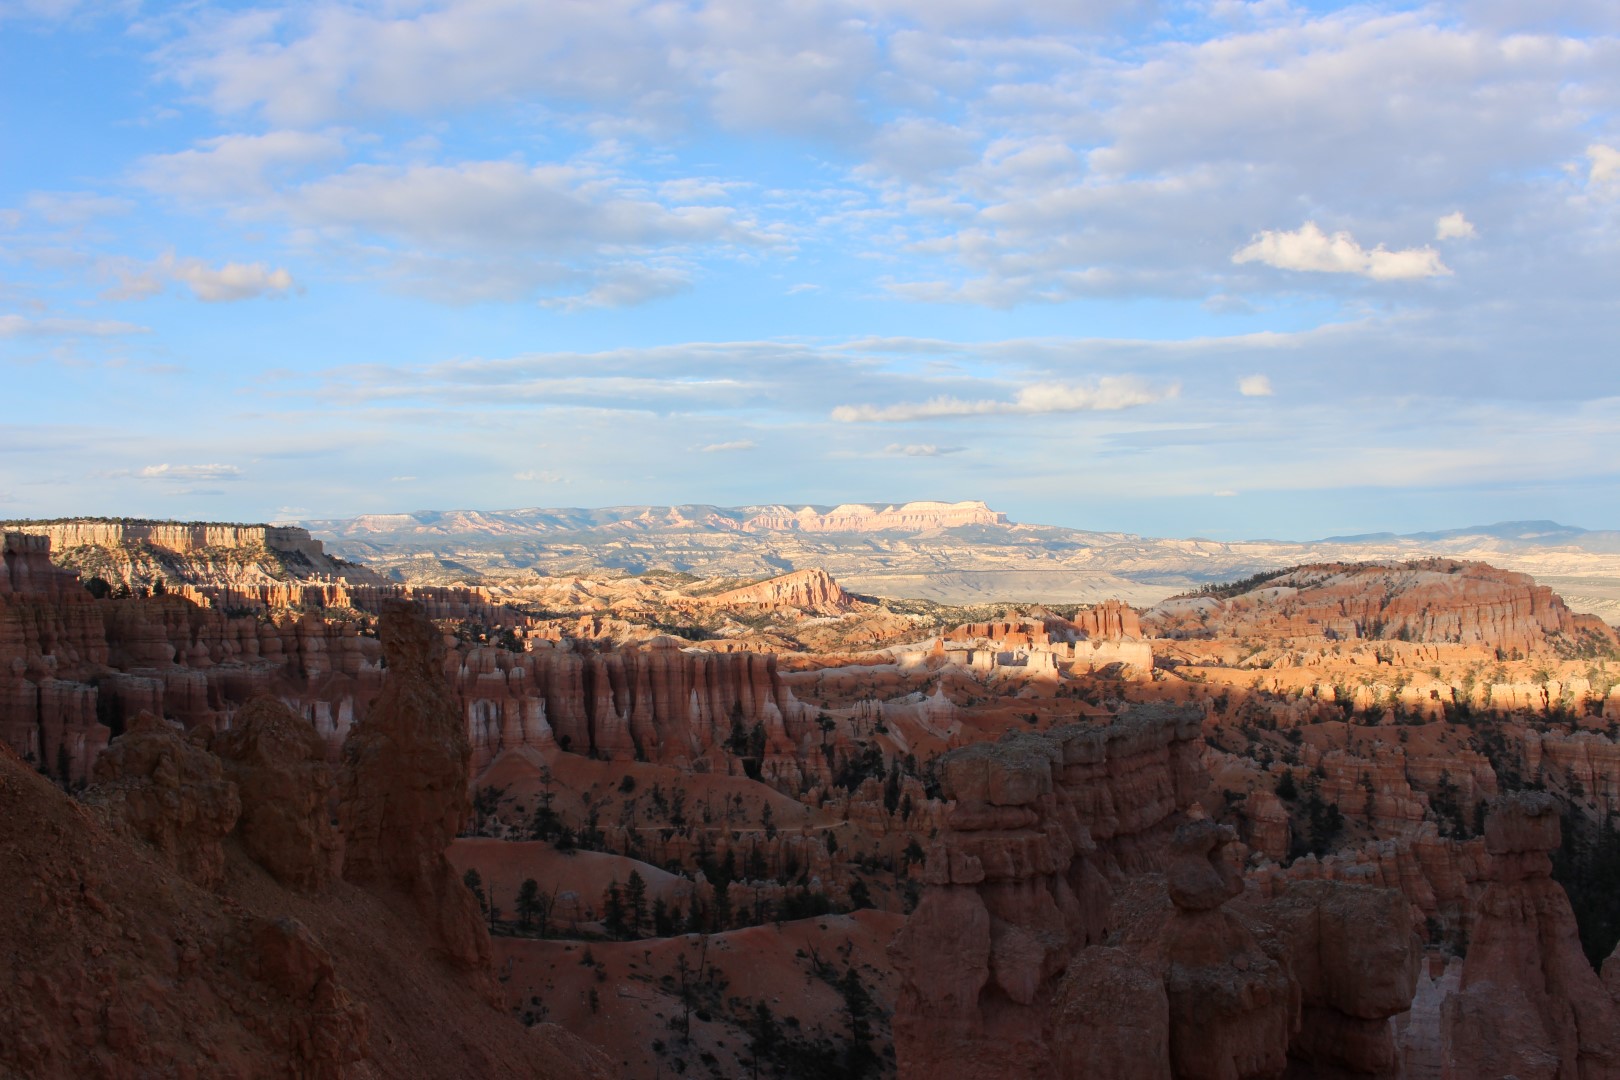
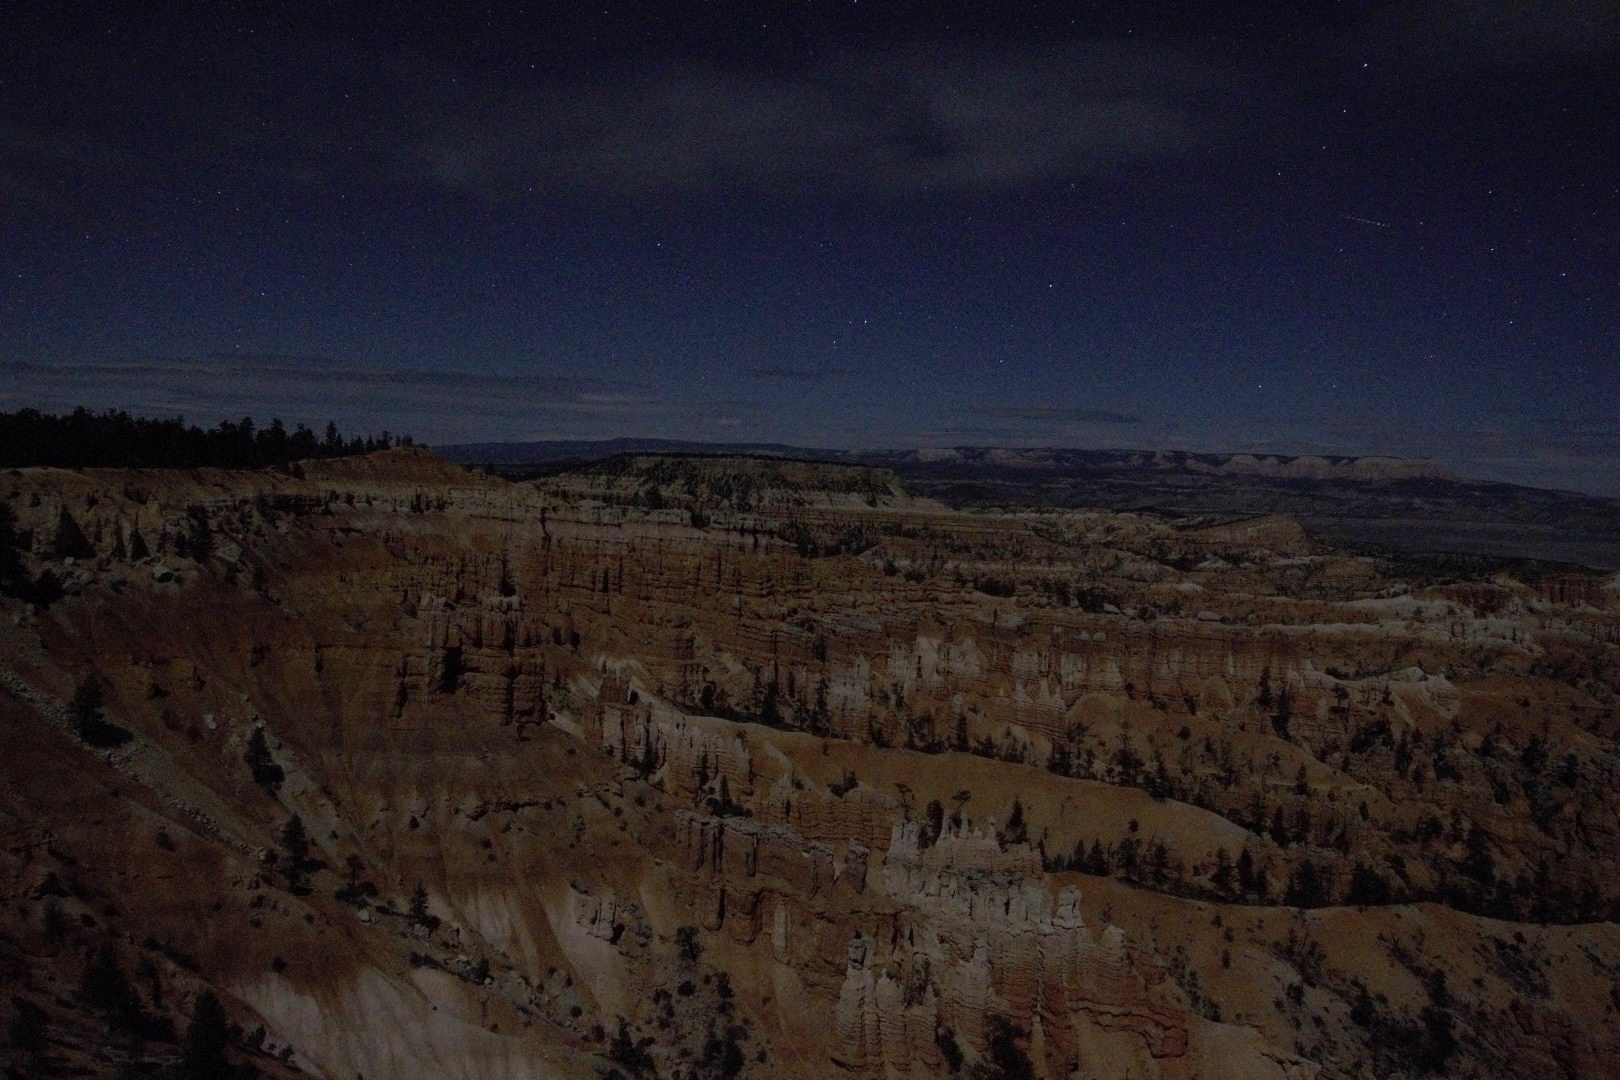
Three days later I was in Bryce Canyon, the location of extraordinary geological features called hoodoos, which are the result of unusual and extreme weathering of the limestone cliffs found there.  The land forms consist of thousands of various sized pillars of white and red limestone, seemingly lined up like soldiers along miles of the east facing limestone cliff face.   Once again I used the moon to illuminate and capture the scene, this time using half-sidereal tracking.  The result is somewhat haunting in nature but shows almost as much detail into the far distance as during daytime; I still find it incredible how sensitive the camera’s sensor is in gathering available light at night when extending exposure times and / or turning up the ISO setting.

IMG_6452 (Large)

Bryce Canyon at Sunset Point by Day

IMG_6525 (Large)

Bryce Canyon at Sunset Point by Night: Canon 700D + Sigma 10mm Wide-angle lens | 15 secs @ ISO 3,200 | 13th April 2016

It is clear I have much to learn about the deceptively simple nightscape photography using the Vixen Polarie but it is equally clear that the equipment provides significant potential and I look forwards to catching the Milky Way one day when the sky is clear and the moon absent.  Notwithstanding the disappointment of missing out on the Milky Way this time, in the spectacular big country of Southwestern USA the sky’s the limit and I hope to go back again one day.

DSC03151 (Large)

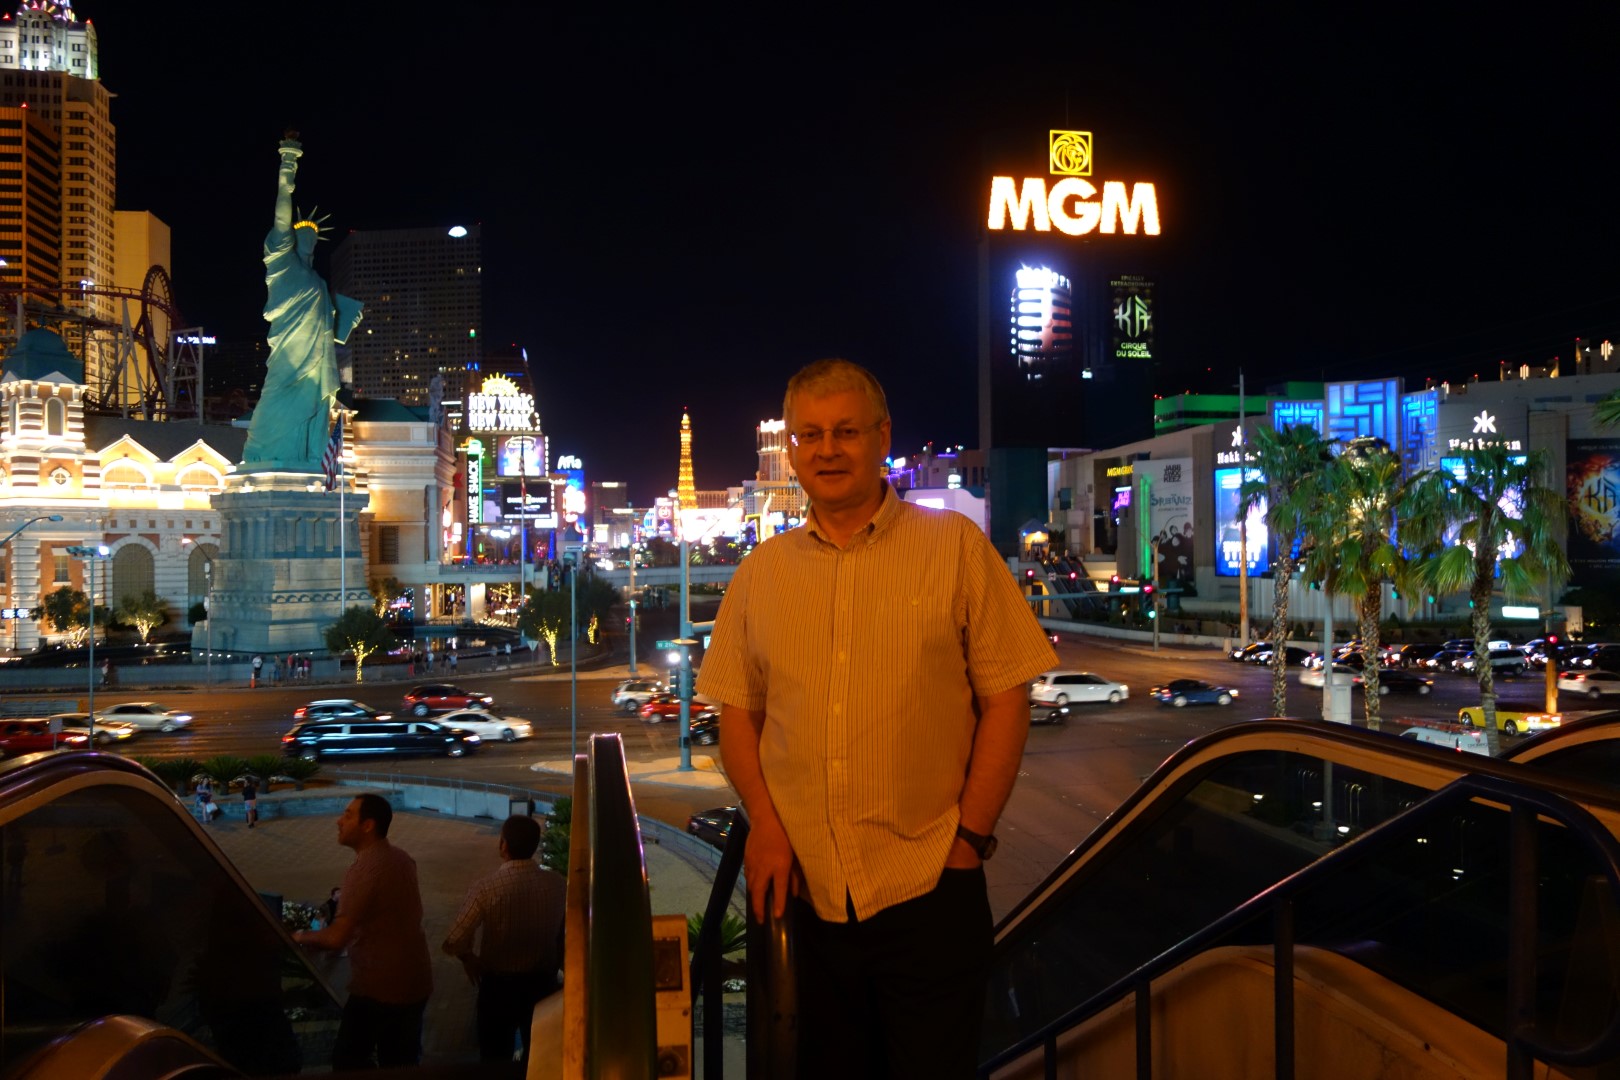
Too much light pollution perhaps? Even in the Big Country of the Southwestern USA getting the right conditions for astrophotography remains a gamble!

Reflections – 2014

2014 has been my first full year of astronomy and I thought it would be useful (for me) to recap, thereby hopefully providing some encouragement and momentum for 2015. It’s been a good year which I have enjoyed but it only gets a little easier, slowly, and I can see many challenges ahead.

reflect2

JANUARY TO MARCH

IMG_2431 Stitch (Medium)

At the start of the year I was still getting to grips with my original basic equipment, purchased in 2013 as an introduction to astronomy to see if I liked it: EQ3-2 mount, Skywatcher 150PL telescope and two basic Plössl eyepieces and Barlow.  Though good, the shortcomings of the equipment quickly became apparent even for modest viewing tasks, so I soon made some important additions.  In no particular order these were: RA and DEC motor drives, a Telrad finder and two better quality, wide-angle eyepieces.  All of these items made a noticeable improvement to my astronomy and eventually my growing interest in astrophotography.

As a result, at the start of the New Year I decided to purchase a Canon 700D DSLR camera, which has since opened up a whole new world, literally.  I have considerable SLR experience and had been using a compact digital camera for some years but the need to understand and use the technology embodied in a DSLR for astrophotography is, as they say, a whole new ball game.

At this stage, my approach to astronomy was to try and learn the basics first by using basic equipment, thereby understanding the nuts and bolts of astronomy before moving on to more technical processes and software driven equipment. Moreover, I hoped such an approach would provide a good, long-term foundation of knowledge to undertake more ambitious tasks one day; walk before you run.

Although a member of the Flamsteed Society, its location at Greenwich does not lend itself to regular, on-the-ground astronomy from which I might otherwise learn first-hand from other members. Unfortunately more local clubs are also absent, so the learning curve has been steep and mostly personal and hands-on, though I must recognise the extensive and generally excellent help gleaned from the internet and various astronomy blogs, noteworthy of which has been Stargazers Lounge.  I have often been disappointed by some of the retailers who, in my experience don’t relate well to customers and / or provide clear, helpful guidance or adequate aftersales support.  My interpretation is that they consist of persons who have probably started astronomy shops as an extension of what was previously a hobby and often lack the commercial and personal skills required for such a business. Thankfully there are exceptions and it is they who I shall return to with my business in the future, whenever possible.

  Date Object* Feature  / Name
Feb Jupiter Afocal Images
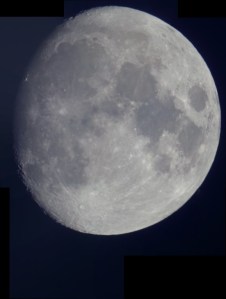
Moon DSLR mosaic
Greta Orion Nebula Afocal Images

*Record of photographic images taken in 2014

APRIL TO JUNE

By now I knew I wanted to pursue astronomy as a hobby and, in order to fast track my learning process and experience the subject at a higher level, I undertook a one week astronomy course at the private Tacande observatory in La Palma. The equipment there was outstanding and so was the night sky and guidance provided by the owner, Joan Genebriera.  Afterwards I was hooked and my aspirations were sky high, literally.

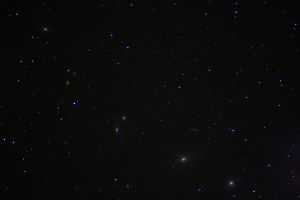
Virgo Group

Virgo Group – Galaxy Supercluster| Canon 350D from Tacande Observatory, La Palma

Returning from La Palma brought me back down to Earth, however, undeterred I felt it was time to try my hand at webcam planetary imaging. On the face of it easy but, as usual, looks can be deceiving. Online advice indicated that it was possible to adapt and rig-up an old webcam for such purposes but my attempts to do so using a spare Logitech webcam only ended in misery.  I therefore decided to bite-the-bullet and purchase a more suitable, off-the shelf one. The Holy Grail for entering webcam imaging is apparently the Philips Toucam but alas it is no longer made and finding one second-hand is very difficult.  I therefore soon realised that it would be necessary to purchase a new webcam and, furthermore, it made sense to get one which was specifically made for astrophotography, the theory being it would work out-the-box.  As a result I purchased the ZWO ASI 034 MC colour webcam but, despite my best efforts was unable to get a picture and decided to visit the retailer in person, determined to find out if it was me or the camera; as it turned out it was neither.

The first problem turned out to be the camera software SharpCap, which despite assurances, would not work with the camera.  Next, for reasons I still don’t understand, the alternative FireCapture software would also not work until a more up-to-date version was downloaded.  Notwithstanding, it also became evident that the camera would not work through a USB 3.0 port – though at the time this was not specified anywhere in the accompanying literature.  Finally, with the camera plugged in to the USB 2.0 port and the up-to-date version of FireCapture, it worked!  Getting to this point took me countless hours at home, a long trip to the retailer (who was very helpful) and then still some 2-hours to get it working.  So much for working out-the box!  This again seems to be a feature of astronomy.

From this and other experiences with equipment, software and manufacturers I have concluded that the world of astronomy is fraught with unnecessary problems often arising from just inadequate advice (see previous comment). It is assumed, by others: manufacturers, retailers or more technically minded astronomers, that the user will possess similar skills to make things work but, as many /most of us are newcomers this is, to say the least, an unhelpful assumption.  I have therefore learned that the internet is your friend.  Through the use of various online sites and blogs, other astronomers have given their very helpful and often not inconsiderable time and advice, for which I am eternally grateful.

Whilst this was all happening at the retailer, I took the time to review the camera I had purchased more closely and at the last moment decided to exchange it for the inevitably more expensive ZWO ASI 120 MC version, which unlike the 034 MC version can be used for autoguiding – I hoped futureproofing the purchase, time will tell.  It is interesting to note that the current version of this camera (a) comes with different software and (b) has been upgraded to work with USB 3.0 – well why wouldn’t it in the first place, as most computers now use this specification?  This suggests to me: did they really think about the camera’s design and operation properly at the beginning?  However, following this breakthrough using the webcam for imaging was still to provide its own problems, which I am still grappling with.

SW 150PL x2 Barlow & ZWO ASI 120 MC

SW 150PL x2 Barlow & ZWO ASI 120 MC

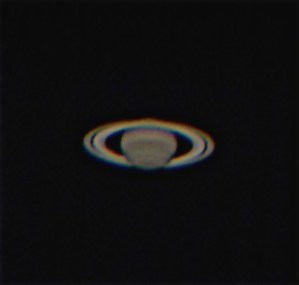
Using the ZWO ASI 120 MC I first started imaging Saturn, with some success. However, using the EQ3-2 mount to find, focus and image was very difficult, especially when I tackled Mars. In this case the size of the planet makes all the aforementioned issues even more difficult but, after lots of attempts I managed to get an image – altogether with plenty of room for improvement but satisfying nonetheless. I subsequently discarded the webcam in favour of the DSLR, with which I am more comfortable and due to the lack of suitable, mostly planetary objects through the summer period.  With the return of Jupiter in recent weeks and the prospect of using the ZWO webcam for autoguiding, I have returned to using it again but given the time that has since elapsed, I need to relearn its use all over again!

At this point I had concluded that I wanted to pursue astronomy and astrophotography.  I was also drawn inexorably towards astroimaging DSO objects; they provide numerous, albeit more difficult targets at all times of the year and I have found their combination of otherworldly beauty and science fascinating – I am now on a slippery slope that I feel will last for years!  The implications of this conclusion and based on what I had learned over the preceding year about my basic equipment had only one consequence, I needed better equipment.  There are astronomers who will say this hobby can be done cheaply, frankly I don’t believe it.  Even buying second hand and generally making-do, the need for another piece of equipment never seems to stop – ask my wife.

Resigned to this course of action and the inevitable extensive analysis of what equipment was best suited, I reached a conclusion of what equipment I needed surprisingly quickly, though still prevaricating over innumerable makes and models available.  In the end I purchased an AZ-EQ6 GT mount and William Optics GT81 FPL3 triplet achromatic refractor.  I could have shaved £400 to £500 off the cost by purchasing other very good but cheaper makes and models but the WO is a beautifully tactile piece of obviously very well made equipment, which is a pleasure to own and use.  I had originally intended to purchase an HEQ5 mount but on taking the long view (no pun intended) and considering the superior and critical payload capacity decided to move up to the EQ6, which then became the AZ-EQ6 GT for its superior belt driven mechanism and even better payload.
Date Object* Feature / Name
April M104 Sombrero Galaxy
M1 Crab Nebula
M3 Globular Cluster
M84 Lenticular Galaxy
M95 & M96 Group Spiral Galaxy
Virgo Group Supercluster of Galaxies
NGC 4435/38 The Eyes (Nonet) Galaxies
May The Moon
Mars
Saturn

JULY TO DECEMBER

The absence of good astronomical darkness approaching the Summer Solstice at the end of June and onwards until later in August, makes imaging difficult at this time of the year.  Furthermore, the summer skies are generally less interesting and altogether provide limited opportunities.  As a result the one object remaining, that hopefully dominates the sky at this time of the year, is the Sun.  It was therefore time to start solar astronomy.

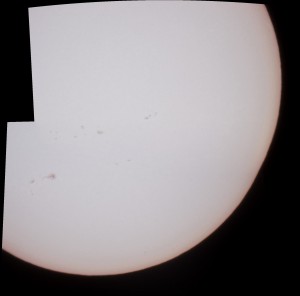
Given the obvious dangers I approached the task carefully, getting a made-to-measure Baader Astro Solar filter for use with the Skywatcher 150PL.  Rightly or wrongly, at this initial stage I decided to use the 150PL as I figured the larger, open design of the Newtonian reflector would help cooling.  The result was fascinating, with sun spots and general surface granulation clearly visible. However, the set-up has two drawbacks: (i) the resulting FOV is small and requires six or more images to cover the whole of the Sun, and (ii) such a filter only produces a view of white light, not allowing the more spectacular features evident at a other wavelengths, such as prominences, to be viewed.  For this a considerably more expensive solar telescope or highly specialized filters are required – such is the fascination of our local star I can see the time I will want to pursue this branch of astronomy further.
Sun Mosaic SW 150PL + Baader Astro Solar Filter + Barlow x2 | Canon 700D DSLR

Sun Mosaic
SW 150PL + Baader Astro Solar Filter + Barlow x2 | Canon 700D DSLR

Having since used the new equipment for nearly six months now I have no regrets – you get what you pay for.  However, as usual there have been problems to overcome.  The mount is very solid and was a real pleasure to use but from the outset I have faced one big problem – polar alignment.  With no view of Polaris or any of the northern sky, as my house is in the way, combined with restricted views to the south, east and west due to adjacent housing and trees, the only options were drift alignment or the polar alignment routine that I latterly discovered in the SynScan handset. For the moment the SynScan method has become my preferred technique but it can still be problematical, as it is quite fiddly and often the stars chosen by SynScan are not always visible e.g. it is not uncommon that at times all the alignment stars provided by Synscan are located in the northern sky and cannot be seen because of the aforementioned problems.  However, I am getting better and with diligence and patience can now get to within 30” or less of true polar alignment, which has allowed exposures of up to 180 seconds.  I have tried drift alignment a few times but have difficulty finding suitable stars on the horizon, as I basically don’t have an horizon! Going forwards I am considering the use of Alignmaster software, which looks very useful for this purpose, though the lack of a northerly view might still be a problem.  In addition, I hope the ultimate goal of autoguiding should further enhance tracking accuracy even without perfect polar alignment – we shall see.

The second problem initially encountered was achieving an image when using the William Optics field flattener / focal reducer.  Try as I may, I could not get an image with the William Optics GT81 + field flattener + camera combination and after a few evenings trying became desperate.  How could it be so difficult?  All this money for top-end equipment and not even a lousy image, let alone a good picture. With the help and encouragement from members of Stargazers Lounge, I had another go.  This time I was more diligent with the set-up and at first using a very bright, easy to see star, was at last able to achieve a camera image and good focus using a Bahtinov mask.  In a nutshell, the problem was that the point of focus is very, very critical, just a fraction of a millimetre out and the image disappears.  Now I know this it’s quite easy but nobody points this out, least of all the manufacturer or retailer, who provided little to no instructions – I am learning this is also something common in the world of astronomy, which I find quite unacceptable.

So, after some weeks of trials and tribulations, the new equipment is mostly working very well and I have been able to successfully image a wide variety of objects.  There’s plenty of room for improvement but I have obtained some enjoyable and often quite exciting photographs.  Now for the next challenge, which has just started: computer control and autoguiding.

NGC 6960 AKA The Witch's Broom Canon 700D | 20x90 sec + darks.bias/ flats @ ISO 800

NGC 6960 AKA The Witch’s Broom
Canon 700D | 20×90 sec + darks.bias/ flats @ ISO 800

With DSLR or CCD / webcam imaging, processing is at least equally important as the original image capture.  In the later part of the year I have therefore also started to tackle this dark art.  Whilst compilation software such as Deep Sky Stacker and Registax requires some understanding to set-up, it is with post-processing that the final image can be made or lost.  As a result I am using the extra time indoors to try and master the various techniques, with mixed success.

I should also note that during this period my elder daughter, Alison, persuaded and then helped me set-up this website.  It has proved a useful discipline for organising my thoughts and images.  I am very grateful for her help and have surprisingly enjoyed recording my astronomy endeavours. Although intended as a personal record, I note from the underlying website provider that it has been read far-and-wide across the world – 36 countries this year – which is also gratifying.  I would love to hear from anybody via the WTSM site: questions, what are you doing, comments & feedback etc?

Date Object* Feature / Name
July M57 Ring Nebula
M13 Globular Cluster
M15 Globular Cluster
Aug M27 Dumbbell Nebula
M31 Andromeda Galaxy
M11 Wild Duck Cluster
ISS International Space Station
NGC 6888 Crescent Nebula
The Sun
Sept NGC 7000 North America Nebula
NGC 6960 Western Veil Nebula & Witch’s Broom
NGC 7380 Wizzard Nebula
M31 Andromenda Galaxy
IC 1396 Elephant’s Trunk Nebula
M2 Globular Cluster
Oct M45 Pleiades Open Star Cluster
Uranus
M33 The Pinwheel Galaxy
NGC 6992 Eastern Veil Nebula
NGC 6995 Bat Nebula
M42 & M43 Great Orion Nebula
NGC 7320 Stephen’s Quintet (Galaxies)
NGC 7331 Deer Lick Group (Galaxies)
NGC 7814 Spiral Galaxy
Nov NGC 1909 Witch Head Nebula
IC 434 Horsehead Nebula
NGC 2024 Flame Nebula
NGC 1973/75/77 Running Man Nebula
Dec M1 Crab Nebula
ISS International Space Station
NGC 2264 Christmas Tree Cluster & Cone Nebula etc.
NGC 2261 Hubble’s Variable Nebula
NGC 19818 Open Star Cluster
NGC 2244 Rosette Nebula
M35 Open Star Cluster
M78 Reflection Nebula

??????????????

Goals for 2015 are:

  • Transfer the mount to EQMOD computer control – I have already linked the equipment indoors, together with Cartes du Ciel, but have yet to use it outside live.
  • Upgrade camera control software – again I am already trialling Astrophotography Tool (APT) indoors, which looks good and provides lots of flexibility, though in some ways I still like the EOS Utility software, which uses more simple and therefore reliable control choices.
  • For astrophotography this is the Holy Grail and, if successful, should enable significantly longer exposures and thus better detail and sharper images to be achieved.  At the time of upgrading my equipment in the summer I also purchased a William Optics 50 mm guidescope – all I need to do is get it working! This will require two further pieces of software: (i) Push Here Dummy or PHD, which is responsible for controlling the interaction between the guidecope and the mount, and (ii) Astro Tortilla, which undertakes a process called ‘plate solving’, whereby using actual pictures taken at the time of set-up, it then recognises the section of the sky it (the telescope) is looking at, identifies the object in the field of view and using this information ensures that the telescope (and thus camera) are pointing exactly towards the chosen object by iteratively interacting with the other guiding software.  As a fan of the KISS principle, I must admit to being somewhat intimidated by all this but am assured by others that it is not so bad to use  (famous last words) and once up and running, will have a major impact.  We shall see!

Even at this stage, I can already see the need for additional equipment.  With numerous Ha-emitting nebulae a modified DSLR camera is beginning to seem essential and probably a more powerful computer for image processing.  I am sure this list will grow as the year progresses.

All-in-all, I am pleased with my progress during the past year, with a noticeable improvement since acquiring the new equipment.  There have been more highs than lows and, I suppose, that’s a result in itself.  It is very exciting when you first see Saturn, Jupiter or Mars and then image them but I have discovered that my metier and main enjoyment comes from DSOs, in particular nebulae.  I find their very nature beguiling; beautiful to view, challenging but very rewarding to image and scientifically fascinating.  I am therefore sure that in 2015 they will remain my main targets but, notwithstanding, there are many other objects worthy of attention, including in the UK a partial eclipse of the Sun in March.

Watch this space! 

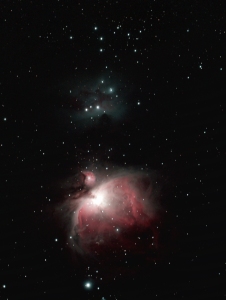
Orions Sword. Top to bottom: NGC 1981 Open Star Cluster, NGC 1973/75/77 Nebulae, M42 & M43 Great Orion Nebula & the binary star Hatsya. WO GT81, Canon 700D + FF | 30 x 120 secs + darks/bias/flats @ ISO 800

My picture of the year: Orions Sword. Top to bottom: NGC 1981 Open Star Cluster, NGC 1973/75/77 Nebulae, M42 & M43 Great Orion Nebula & the binary star Hatsya.
WO GT81, Canon 700D + FF | 30 x 120 secs + darks/bias/flats @ ISO 800


Fool’s paradise

Off today to discover what the skies of France are like – cycling to the Loire.  The Loire is littered with château the building of which, despite their undeniable beauty, reflected the detached world of the French aristocracy that ultimately ended in the French Revolution between 1787 and 1799; nice for some but ultimately unsustainable and dangerous for all.

We are faced today by a dichotomy that is equally dangerous, society’s dependence on the benefits of a science without (broadly speaking) an understanding of science.  A recipe for catastrophe that is playing out through day-to-day life, education, religion, the media, politics and policies – a fool’s paradise – neatly summarised by astronomer Carl Sagan:

“We live in a society absolutely dependent on science and technology and yet have cleverly arranged things so that almost no one understands science and technology.  That’s a clear prescription for disaster.”

http://www.csicop.org/si/show/why_we_need_to_understand_science

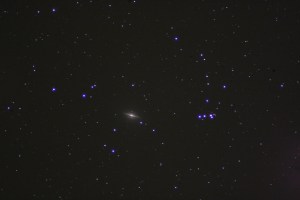
Gratuitous picture of M104, the Sombero Galaxy taken in La Palma this year, to brighten things up!

Gratuitous picture of M104, the Sombero Galaxy taken in La Palma this year, to lighten things up!

La Palma: Nice one Joan

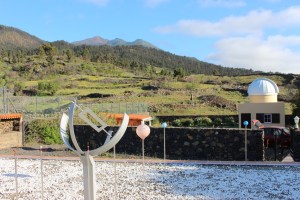
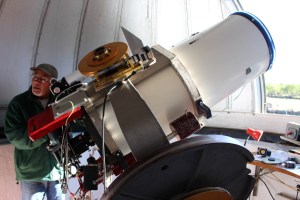
At the end of March this year we went to La Palma to spend a week at the Tacande Observatory, built and owned by Joan Genebriera http://www.astropalma.com/ .  The purpose of the trip was to experience astronomy at its best and, perhaps, fast track my knowledge of astrophotography. Joan has not only built the observatory himself but almost every scope, mount and nut and bolt therein, for which he also has a superb workshop.  The result is a first class astronomy set-up, with a 14″ hand made Mak as its centrepiece – what a beauty.

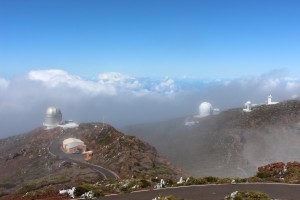
Joan has pursued astronomy since a boy, going on to work in the construction and maintenance of telescopes and observatories, which brought him to La Palma from Catalan 17-years ago, to help build the professional observatories at Roque de los Muchachos:

IMG_3449 (Medium)

Later, as he approached retirement, he purchased a property just outside El Paso on the south side of the Caldera de Taburiente and went on to build the Tacande Observatory there:

IMG_3336 (Medium)

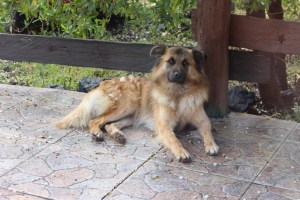
In addition to the observatory there is a separate block containing a studio, a workshop and a very comfortable x2 bed apartment – perfectly located to crash out after a long night in the observatory – which is where we stayed. For company, day and night, Joan’s dog ‘Tuk’ is also there to keep guard:

IMG_3410 (Medium)

During the week Joan provided a comprehensive course on astronomy and astrophotography, in particular, patiently dealing with our numerous questions.  The views and initial photos were spectacular but then for four nights the clouds rolled in.  Whilst this has to be seen as part of astronomy, we had hoped for better at La Palma,  However, our faith was restored during the last two nights, when we worked long into the night with perfectly clear, dark skies, collecting photo data of various galaxies and nebula –  mostly using his SBIG CCD cooled camera with stunning results.  On the final morning we were then treated to great views of the Sun using the heliograph and subsequently the 15″ Mak, wow!

Such is the quality of the Tacande Observatory and Joan’s knowledge and skills, that a French university has previously set-up a remote observatory next to the main dome, with more on their way.

Unfortunately the best pictures that were taken on the SBIG are all FITS format which, as yet, I have been unable to open – when I do they will go straight on this site.  However, working in parallel with the SBIG we also set-up a Canon 350D DSLR on the attached refractor, which was also successful in producing very good but wider angle photographs.  One such picture, showing the Sombrero Galaxy currently forms the main header for this site. Nice one Joan!

IMG_3521 (Medium)