Reflections 2020

After starting astronomy in 2014, Watch This Space (Man) was launched shortly thereafter as a personal record of my then nascent astronomy journey.  Apart from the main blog about my progress or otherwise, links to other astrophotographers, astronomy tools, astronomy weather, scientific papers etc. can also be found on this website; I was suprised to see that to-date 152 items have been published on this site.

I always like to hear from others – comments, questions, help or just to say hello – and can be contacted via: graham.s.roberts@gmail.com  or just leave a comment at the end of any item if you prefer.

Vistor map 2020: In this most difficult of years for everyone, it’s especially heartening to see so much interest from all corner’s of the world and hope to see you and others again in 2021 – Clear Skies!

REFLECTIONS is a review of my astronomy and astrophotography during the past year, together with some thoughts on possible future developments.  

2020 Overview, Images & Goals for 2021

For the world 2020 was a year like no other.  Notwithstanding the obvious problems and dire consequences of Covid-19 for everyone, there have been surprising benefits for astronomy.  Although I am retired, under lockdown there was even more time available for hobbies.  Furthermore, as I live close to Gatwick and Heathrow airports + underneath numerous high altitude long-haul overflight paths, a massive reduction in air travel resulted in a very obvious improvement in seeing conditions, which was confirmed by guiding results.  Located in a Bortle 5 to 6 area I ordinarily achieve at best average RMS error guiding of 0.90” to 1.50”/pixel, guiding improved markedly during lockdown to between 0.50” to 0.75”/ pixel.  Of course such seeing conditions also resulted in better quality imaging itself and on a number of occasions I was able to achieve integration times of 10-hours or much more over a number of nights.  The result was better images but less of them and inevitably, a lot more cloud throughout the rest of the year!

Having previously got to grips with plate solving, using the new CdC planning function I intended to develop the use of mosaics this year.  However, such is the weather in the UK (see above) that it’s obvious to me that creating mosaics is probably not the best use of what imaging time we get.  Undeterred, during January I planned and shot a 15x panel mosaic of Barnard’s Loop in Ha-wavelength.  Unfortunately the unpredictable occurrence of patchy cloud invalidated some of the panels, though I was finally able to compile a 7x panel mosaic of the upper easterly section of Barnard’s Loop – see below.  Notwithstanding, there were lessons learned: (i) restrict mosaics to one or two panels and / or (ii) where wider view images are required use a wide FOV set-up rather than a large mosaic.

Most of my other objectives for 2020 turned out to be pipedreams e.g. a new observatory or perhaps a larger telescope or dual rig.  Despite this there were important developments on other fronts.

After eventually coming to the conclusion that mosaics were probably an unwise way to go considering UK conditions, it became clear that a suitable high-quality camera lens might produce similar coverage with less imaging time and hassle.  Thus also inspired by the images of others on the SGL Forum using such equipment, I set out to build a new rig based around the excellent Samyang 135 f2 lens.  This project remains work-in-progress but so far using the lens with a bespoke 3D printed rig and micro focuser made by Astrokraken and a modded DSLR, it’s apparent that this lens produces excellent widefield images in a relatively short time.

Initial Samyang 135 f2 set-up with modded DSLR

With the time and ‘opportunity’ afforded by lockdown throughout most of the year, I finally decided to do something about improving my processing, namely learning PixInsight.  Unfortunately the rumours were correct – it is a steep learning curve and altogether a less than user friendly software.  However, after many weeks of toil and expletives I’m pleased to say I can now process an entire image with PixInsight, the impact of which has been nothing less than profound.  However, whilst PixInsight is an excellent processing facility, I’ve come to the conclusion that it is often best used together with other process software where appropriate for specific tasks:

  • Deep Sky Stacker for calibration, alignment and stacking; the equivalent PixInsight process is just too complicated and time consuming;
  • Photoshop can be very helpful finessing colours and stretching (Levels & Curves);
  • Starnet++ is useful for creating starless images, which then help to get the best from processing nebula separately before re-combining with the stars;    
  • Topaz AI Denoise has been very effective and easy to use for noise reduction and sharpening at any point during the workflow.                      

This combination for processing has turned out to be something of a game changer and almost certainly was the most important astrophotography development of the year for me, which augurs well for 2021 and beyond. 

Favourite Images

Continuing with the theme of less is more, I imaged just 13 objects this year – of which three were experimental & three with a DSLR – but still with a total integration time of 80 hours (2019 17 objects & 65 hours, 2018: 25 objects & 43 hours).  Having worked through many of the astronomer’s favourites by now, images in 2020 consisted of: a new approach to old favourites, difficult / small objects for my equipment e.g. galaxies or less popular and widefield targets. 

I’m pleased to say that most of these images turned out well and it’s difficult to choose a favourite.  The so-called ‘favourites’ below therefore represent those images from this year that portray an important development in my astrophotography journey. More detailed reviews of these and all other images from 2020 can be found in specific articles that can be accessed using the links found below or via the Blog Index, located under the dropdown menu ABOUT.  

Heart Nebula: Although imaged in 2018, this version has been re-processed using mainly PixInsight, thus transforming the original SHO Hubble Palette image from something rather dull to one with warm, vibrant colours, as well as much great detail – demonstrating the significant impact of my new PixInsight based processing abilities.   

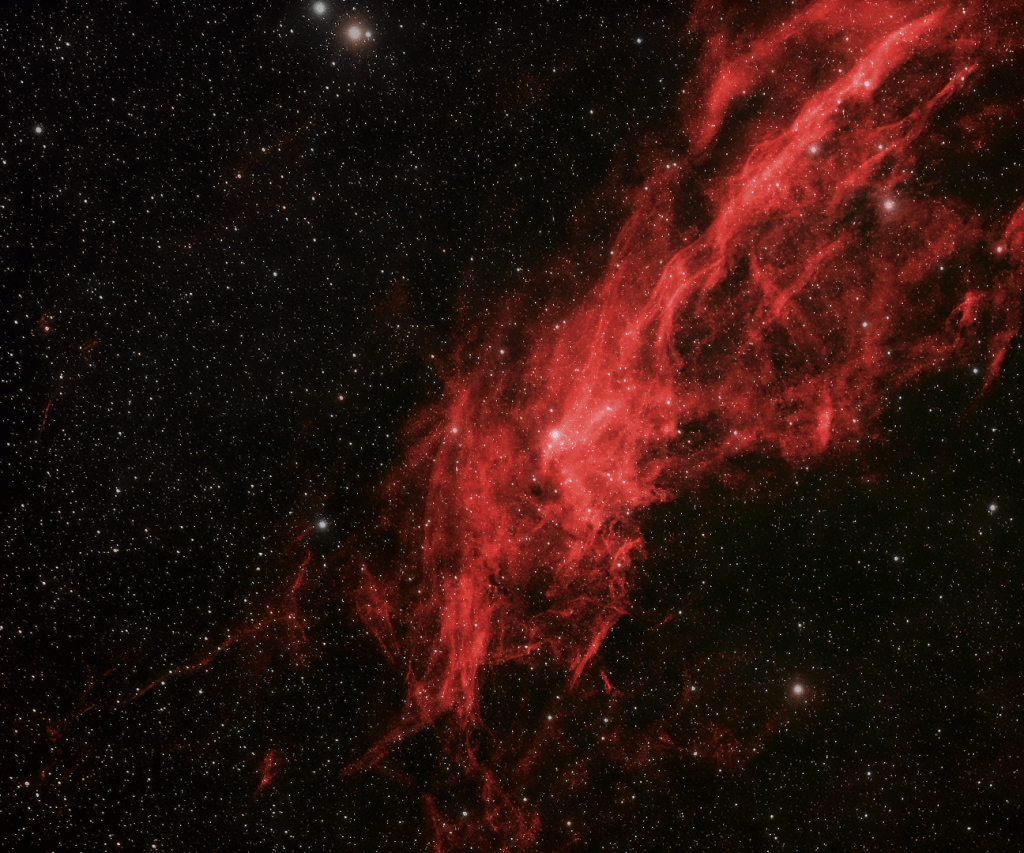
LBN 325: Numerous emission nebulae populate this small part of a very extensiveHII-Region, which forms an exciting LRGB image.  Processing was complex and difficult, in order to bring out exciting features that abound in this spectacular but less popular area of the Cygnus constellation. Integration time of 10-hours was obtained over three nights and is my first LRGB image processed using PixInsight.       

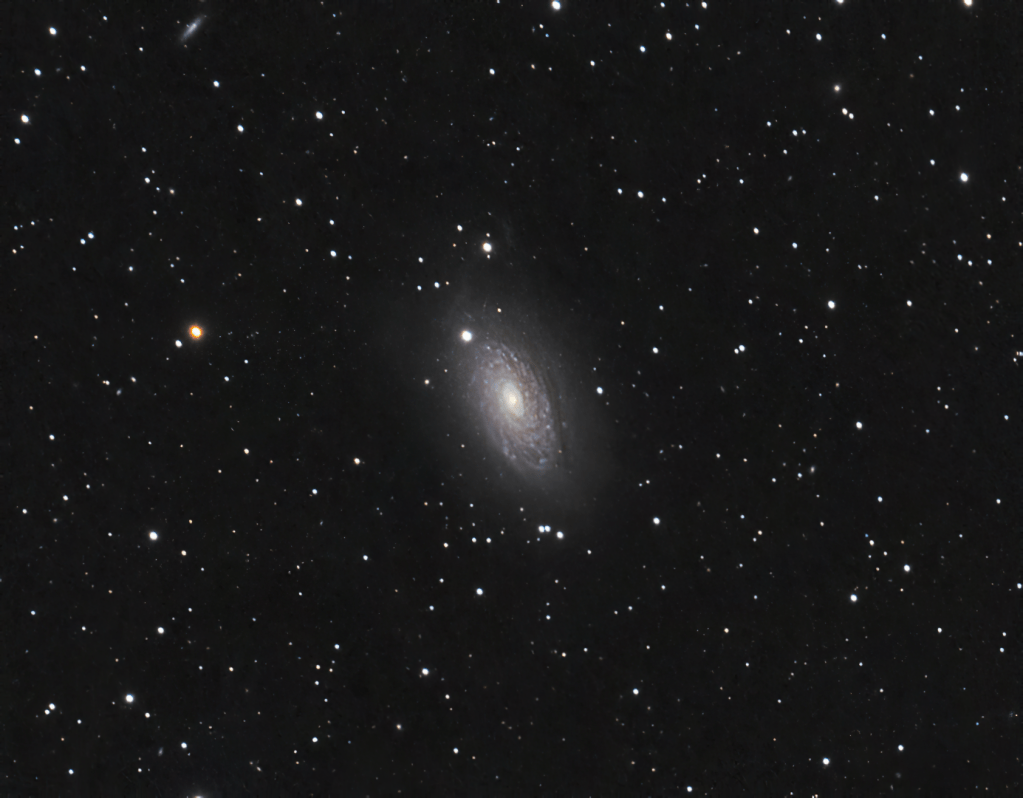
M63 Sunflower Galaxy:  At 12.6’ x 7.2’and apparent magnitude of +9.3,this small flocculent galaxy in the Canes Venatici constellation is a challenge for my equipment. However, with 8 hours 20 minutes exposure over three nights in April and careful processing, the all-important detail within the galactic disc is clear.  Topaz Denoise AI and Gigapixel software played an important role in maintaining the colour and delicate detail in this +50% cropped image.     

Taken from last year’s REFLECTIONS 2019:

“Although you never know, I don’t see any major breakthroughs in the coming year”.  Just goes to show what I know, fewer but better images were obtained in 2020:

RECORD CARD 2020

GoalSpecifics / ResultsOutcome
Improve image captureFurther Improvements in overall quality + much longer integration times + better guiding accuracy = less but better images.MUCH BETTER    
Better processingUsing PixInsight software combined with Photoshop, Starnet++ and Topaz Denoise AI has led to major processing improvements and much better final images.      MUCH MUCH BETTER  
Widefield ImagingInitial results from new imaging rig based around Samyang 135 f2 lens were very promising but there’s more to do.BETTER    

My main objectives for 2020 were largely fulfilled (see above), so what about 2021?

  • Imaging:  Other than maintaining the aforesaid improvements achieved over the past two years – guiding & longer integration times – two items that still need to be addressed are: (i) upgrade filters to remove star bloating and all round better images, (ii) improved focussing.   
  • Widefield: Complete Samyang-rig build and switch from DSLR to CMOS mono camera.  
  • Consolidate processing improvements: Whilst the move to PixInsight and other software was very successful in 2020, I’m still only scratching the surface of what’s possible.
  • Upgrade mono camera – there’s a new generation of colour CMOS cameras starting to appear, hopefully soon to be followed by their mono equivalents !

Hardly a year I and the rest of the world will want to remember, though more than ever astrophotography played a big role in providing relief from the trauma going on around us all. 

The major increase of integration times achieved and the use of PixInsight has proved transformative for my astrophotography and will justify returning to reimage some old favourites in future years.  I had often thought about upgrading my OTA to something bigger but given the lack of a permanent observatory here at Fairvale Observatory, combined with long periods of bad / cloudy weather, the penny finally dropped and I now have high hopes for the little wonder that is the Samyang 135 f2 lens when I complete its set-up in 2021.                

Looking back I have to be happy with my astrophotography in 2020 but more importantly, look forwards to an even better year which holds great promise building on the positive developments of the past 24-months.  Moreover, I hope for the sake of everyone that we will be able to deal with Covid-19 soon and return to something of a normal life once again.  These are big ambitions and I hope that WTSM’s Reflections 2021 will record such success.

Watch this space!


ASTROPHOTOGRAPHY INDEX OF 2020

To access each blog, click on the title required below highlighted in RED:

JANUARY & FEBRUARY – Jinxed: Barnard’s Loop Mosaic (+ NGC 1333 reflection nebula & LDN 1622 Bogeyman Nebula)

MARCH – Nice but Dim: Medusa planetary nebula / Abell 21

MARCH & APRIL – Return of the Lion: Leo Triplet M65, M66 & NGC 3628

MAY – Galactic Bloom: M63 Sunflower Galaxy

JUNE – Canine Capers: M51 Whirlpool Galaxy

AUGUST & SEPTEMBER – The Big Picture: First Light Samyang 135 f/2 NAN, Cygnus & Veil Nebula 

OCTOBER – Reach For The Sky: LBN 325 emission nebula

NOVEMBER – Swan Adventures: NGC 6914 reflection nebula

DECEMBER – Image Redux: HST re-processing – Pacman, Heart, Rosette, NAN & California Nebula

Canine Capers

Following a very poor winter period, spring has been nothing less than spectacular and provided many clear nights for astronomy, ironically made all the better by the covid-19 lockdown.  With the near absence of road traffic and especially aircraft – Fairvale Observatory is badly affected by flights from nearby Gatwick, Heathrow and Redhill aerodrome – it has resulted in noticeably better seeing, as well as a quieter and more enjoyable environment overall; it’s worth noting that after experimenting with Deep Sky Stacker (DSS), increasing the Kappa-Sigma clipping parameter from 2.0 to 2.50 for the light subs, in all but the worst cases eliminated aircraft tracks in the final stacked image.  Resulting from these favourable conditions, I’ve recently been able to image four otherwise difficult targets, amounting to some 40-hours total integration time, literally unprecedented conditions in the +30 years I’ve lived here.

CanVen Map

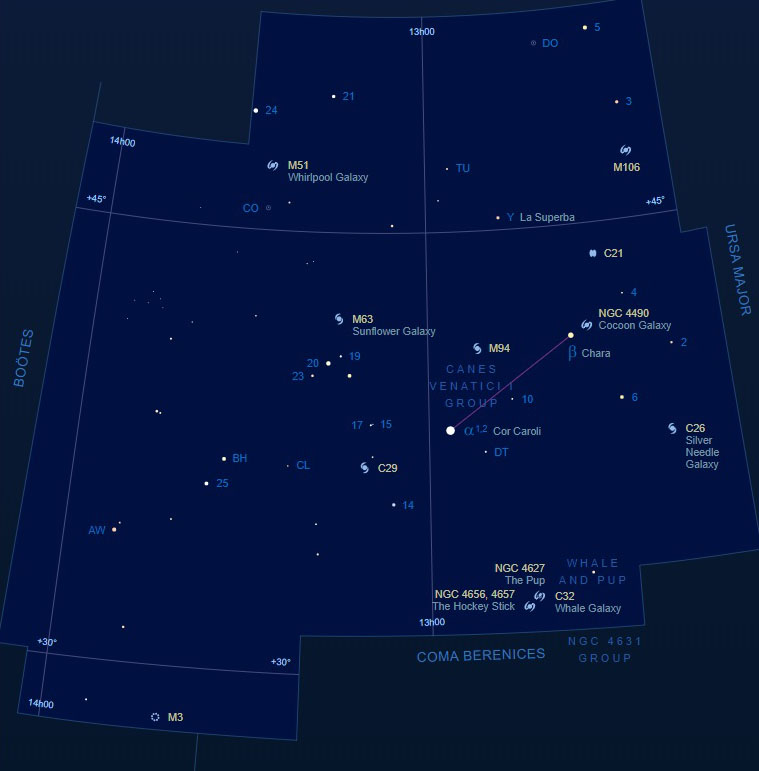
Apart from a brief diversion imaging the Leo Triplet, my attention has otherwise been centered on the constellation of Canes Venatici, AKA the Hunting Dogs.  At this time of the year the constellation starts to come into view high overhead from the east at about 10 p.m. and crosses the meridian about three hours later.  Located below Ursa Major and above Bootes, the relatively small Canes Venatici hosts five Messier objects, four of which are galaxies and it is these I’ve been drawn to.  From earlier test shots I determined that the M94 galaxy was unlikely to be suitable for my equipment but I did obtain and have already described images of first M106 and then M63.  Notwithstanding, I had unfinished business with the last of the four galaxies, which I therefore now turned to.

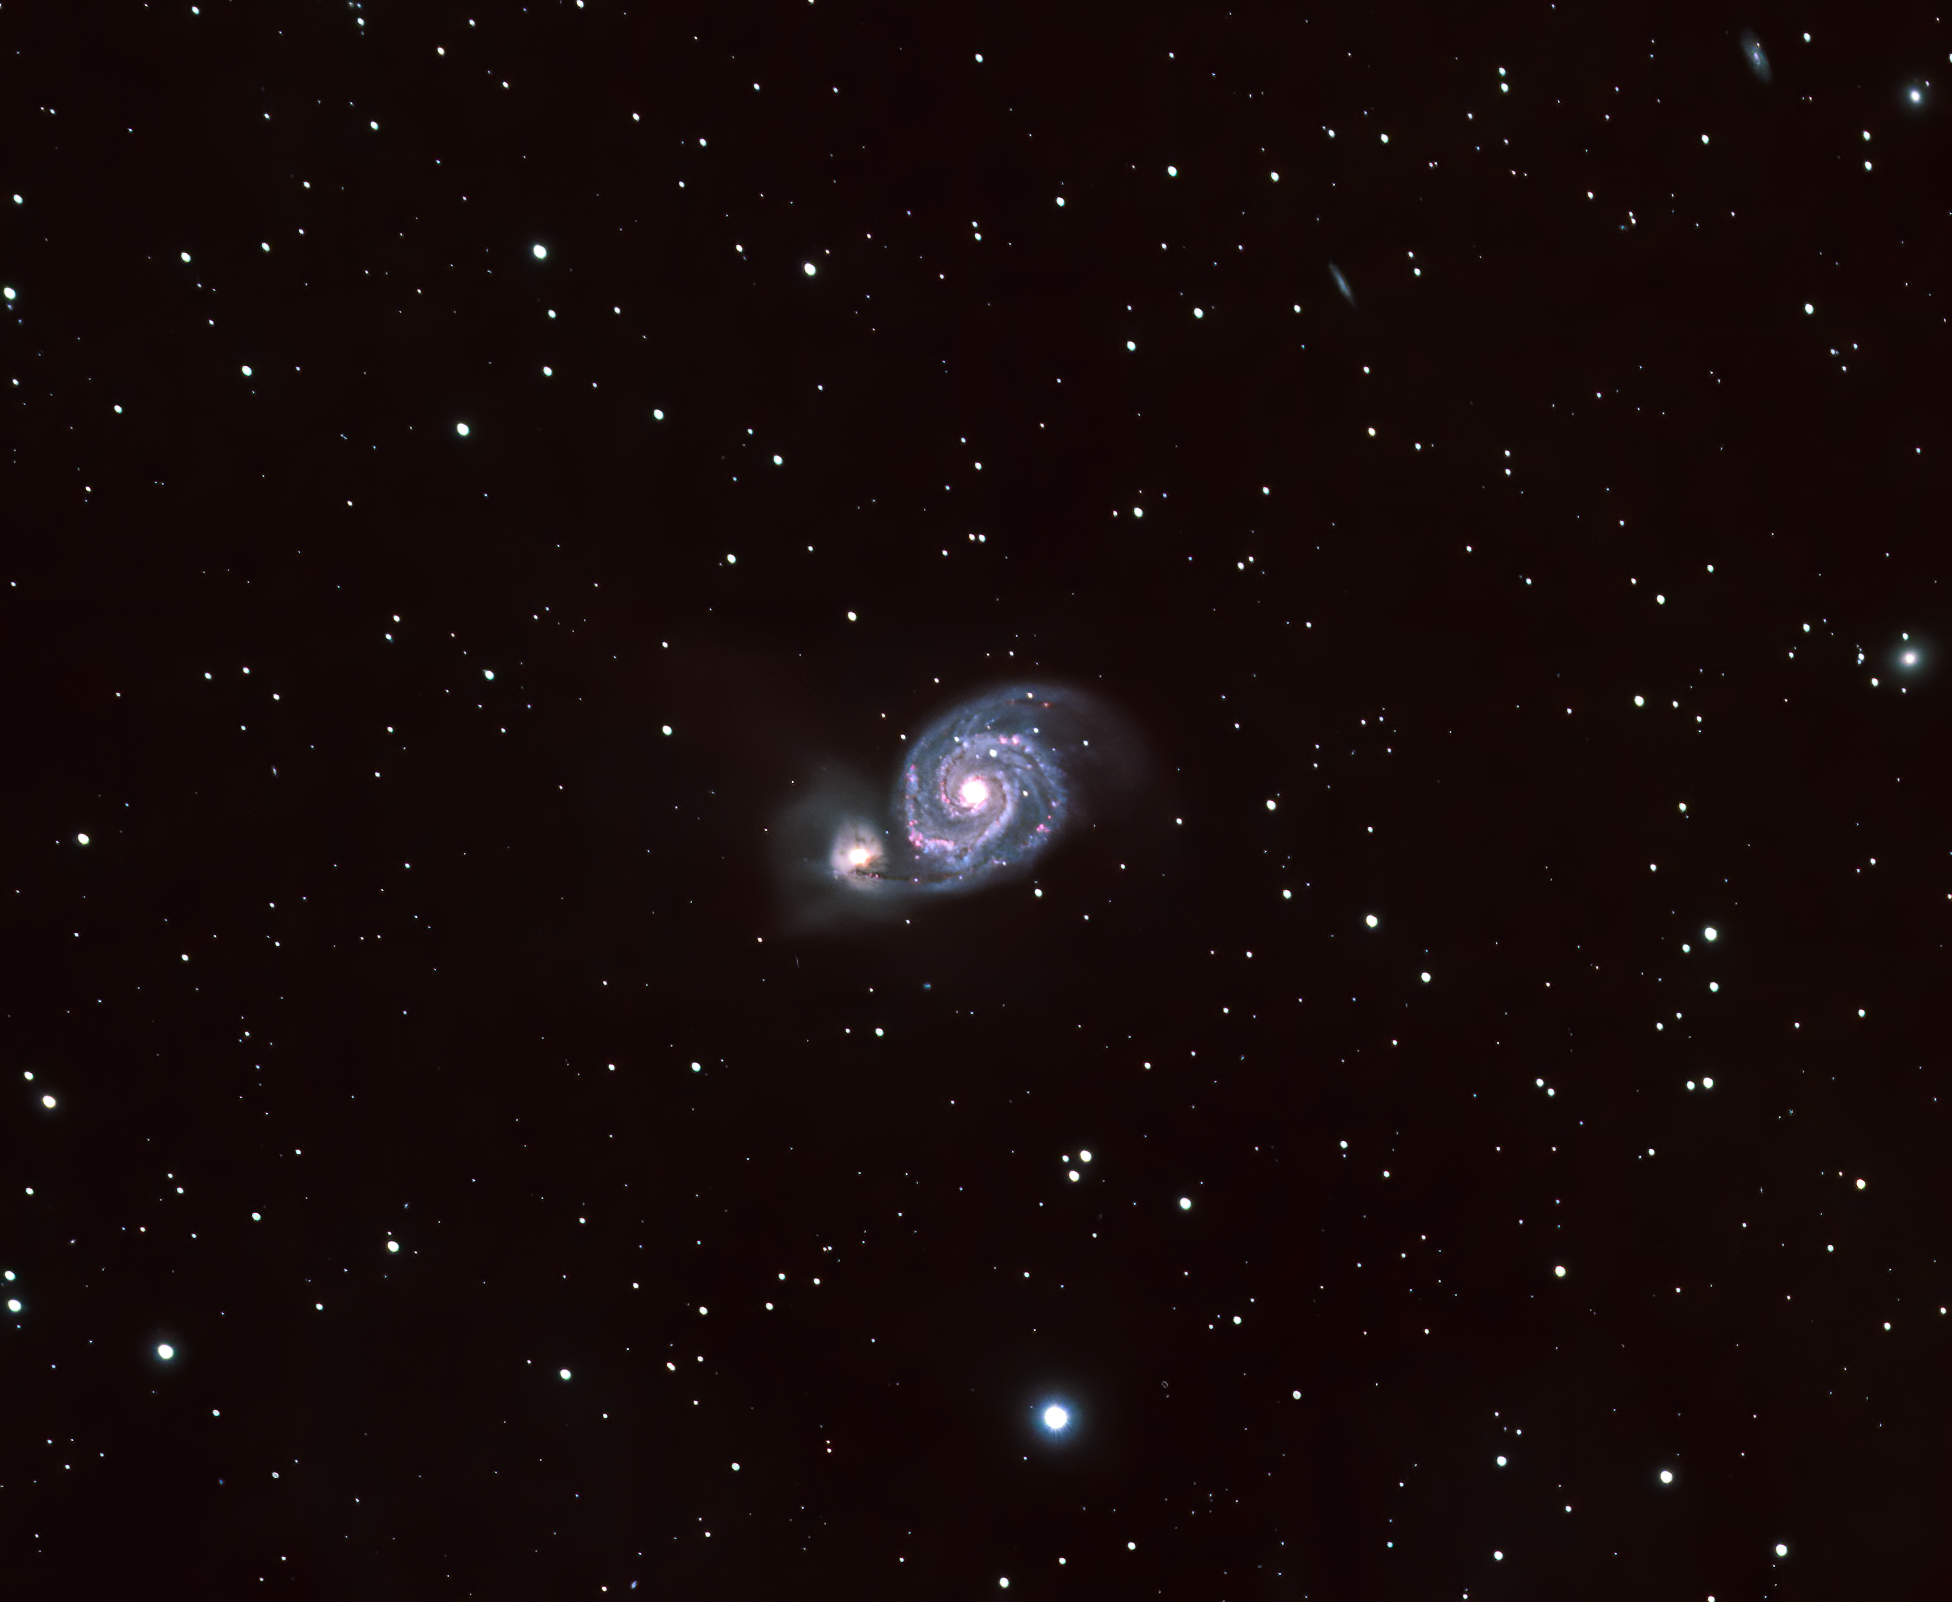
In 2019 I was pleased to acquire my first ever image of the wonderful M51Whirlpool Galaxy and its smaller companion, NGC 5195.  However, I noted then that the final LRGB image still needed much more integration time than just 2hr 18min. achieved, plus the addition of Ha-subs and that I hoped to return to the Whirlpool and its neighbour as soon as possible for this purpose.

M51 HaLRGBFinal-denoise-denoise

It was therefore a great pleasure to image M51 over no less than seven nights in March and April this spring, which combined with last year’s data resulted in over 16 hours integration time, substantially longer than any previous image I’ve compiled before.  Moreover, the quality of seeing also benefitted SNR and guiding quality, thus achieving RMS errors of at least 0.80 arc seconds or better.  I did encounter some plate solving issues and had to resort to manual framing on a few nights but fortunately DSS software dealt with alignment OK and the final image is all I could have hoped for (see above + top-of-the-page cropped).  Naturally the interaction of the two galaxies is the signature feature of this image but it is the improvement in general colour, detail and addition of Ha-subs highlighting regions of new star formation, that have been most transformative in portraying these objects in all their glory.

Using my current set-up it seems unlikely that the image would benefit significantly from any further data acquisition but I’d like to think I’ll return another day using a larger telescope and higher resolution with which to capture and enjoy even more detail of all these exciting objects of Canes Venatici.  It is said that “it’s an ill wind that blows no good” and I am doubtful we’ll ever have such good conditions here again but for now I was delighted to be able to positively exploit this otherwise difficult time in lockdown.

  IMAGING DETAILS
Object M51 The Whirlpool Galaxy & NGC 5951
Constellation Canes Venatici
Distance 23 million light-years
Size 11.2’ x 6.9’   77,000 light-years (M51 only)
Apparent Magnitude +8.4
   
Scope  William Optics GT81 + Focal Reducer FL 382mm  f4.72
Mount SW AZ-EQ6 GT + EQASCOM computer control & Cartes du Ciel
Guiding William Optics 50mm guide scope
  + Starlight Xpress Lodestar X2 camera & PHD2 guiding
Camera ZWO1600MM-Cool mono  CMOS sensor
  FOV 2.65o x 2.0o Resolution 2.05”/pix  Max. image size 4,656 x 3,520 pix   
EFW ZWO x8 ZWO LRGB & Ha OIII SII 7nm filters 
Capture & Processing Astro Photography Tool + PHD2 +  Deep Sky Stacker & Photoshop CS3
Image Location              & Orientation Centre  RA 13:30:03      DEC 47:11:43  (approx.)                   Top  = South  Bottom = North 
Exposures L x 95   R x 62   G x58   B x 66   Ha x 46 = 327 x 180 sec                                                         Total Integration Time: 16hr 21 minutes   
  @ 139 Gain   21  Offset @ -20oC    
Calibration 10 x 180 sec  Darks  20 x 1/4000 sec Bias  10 x  HaLRGB Flats                             @ ADU 25,000
Location & Darkness Fairvale Observatory – Redhill – Surrey – UK        Typically Bortle 5-6
Date & Time 10th April 2019 +23rd 24th 25th 27th March & 20th 21st 22nd April 2020@ +22.00h
Weather Approx. 6oC   RH <=60%                  🌙 New Moon approx.

Boreal Breakthrough


M81 LRGB Final HLVG

I have often written about imaging difficulties here at Fairvale Observatory, which apart from overflying aircraft from Gatwick and Heathrow airports, 24/7 helicopters from Redhill aerodrome and general light pollution, also consists of numerous sightline obstructions in the form of large trees to the east and south, high garden hedges and the complete obstruction of the north sky by my house!  I have toyed with the idea of moving onto the lawn so as to look back northwards over the house but was concerned by all the faffing about to get the equipment down and back up a flight of steps, as well as added complications with equipment control and dew problems; I concede that many do operate successfully in this way but with plenty of other problems to cope with, I like my hobby to be as easy and convenient as possible.

Last year I enjoyed working outside during the summer months – notwithstanding the lack of darkness during much of this period – and therefore over the past winter finally considered how such a garden-based set-up could be achieved, primarily for use between May and September.  The resulting Plan-A was to place three paving stones within the lawn to support the tripod and run a USB-cable back to the house for control.  However, after recently expanding a small paved area outside the shed at the end of the garden and looking at the potential sightlines from this location, it was obvious that a Plan-B set-up here could also work.  Whilst not quite as good viewing angles as the original location, there are a number of other worthwhile benefits:

  • Being off the lawn on paving it seemed likely that dew could be less of a problem;
  • Working on the paving around the mount would be more convenient and dry;
  • By clearing out the adjacent shed it could be used as a dry location from which to control the equipment.

And so early in May I set about establishing Plan-B and soon afterwards putting it to work.

Pan1 Comp (Medium)

The view from the shed looking northwards is surprisingly quite good (see above) and I don’t know why I hadn’t considered this before. There are a few large trees to the north east, a high hedge along the western boundary and of course my house is still somewhat in the way but altogether it’s not too bad and for the first time I have a clear view of Polaris, as well as a whole new plethora of imaging targets!  Whilst this direction looks directly towards south London, being on the southern slope of the Greensand Ridge the worst of the city’s glow is fortunately obscured by the hill.  Furthermore, it is ironic that my house and the hedges also provide considerable protection from the local street lights, which I’m pleased to say are now turned off after midnight anyway.

Set-up

Local equipment layout the same as previously

I cut-back some of the adjacent vegetation to improve sightlines and ran a power cable from the house to the shed otherwise it’s exactly the same set-up which was being used at the main, south looking location on the patio by the house.  I looked into WiFi-control of the equipment but from the experience of others concluded it could be unreliable and instead considered using Teamviewer software via a USB Cat-5 repeater cable from the mount / shed computer to a second computer in the house.  However, given the distance of some 30 metres I finally decided to adopt a more robust LAN Cat-6 ethernet cable for this purpose. Unfortunately whilst this had worked successfully during testing in the house, I have so far been unable to get it to work outside and for now have had to operate the equipment from inside the shed, which has nonetheless proved to be a comfortable and effective alternative.

Being lazy and cautious about changing too much about the set-up, I levelled, aligned and reset the new location data of the tripod but kept all other settings the same for now.  I realise this is not ideal but initially just wanted to experience the new location and north sky to understand what was possible within the given field-of-view and identify any obvious problems.  Fortunately a settled period of good weather allowed me to try out the new location soon thereafter.

North Sky ViewX

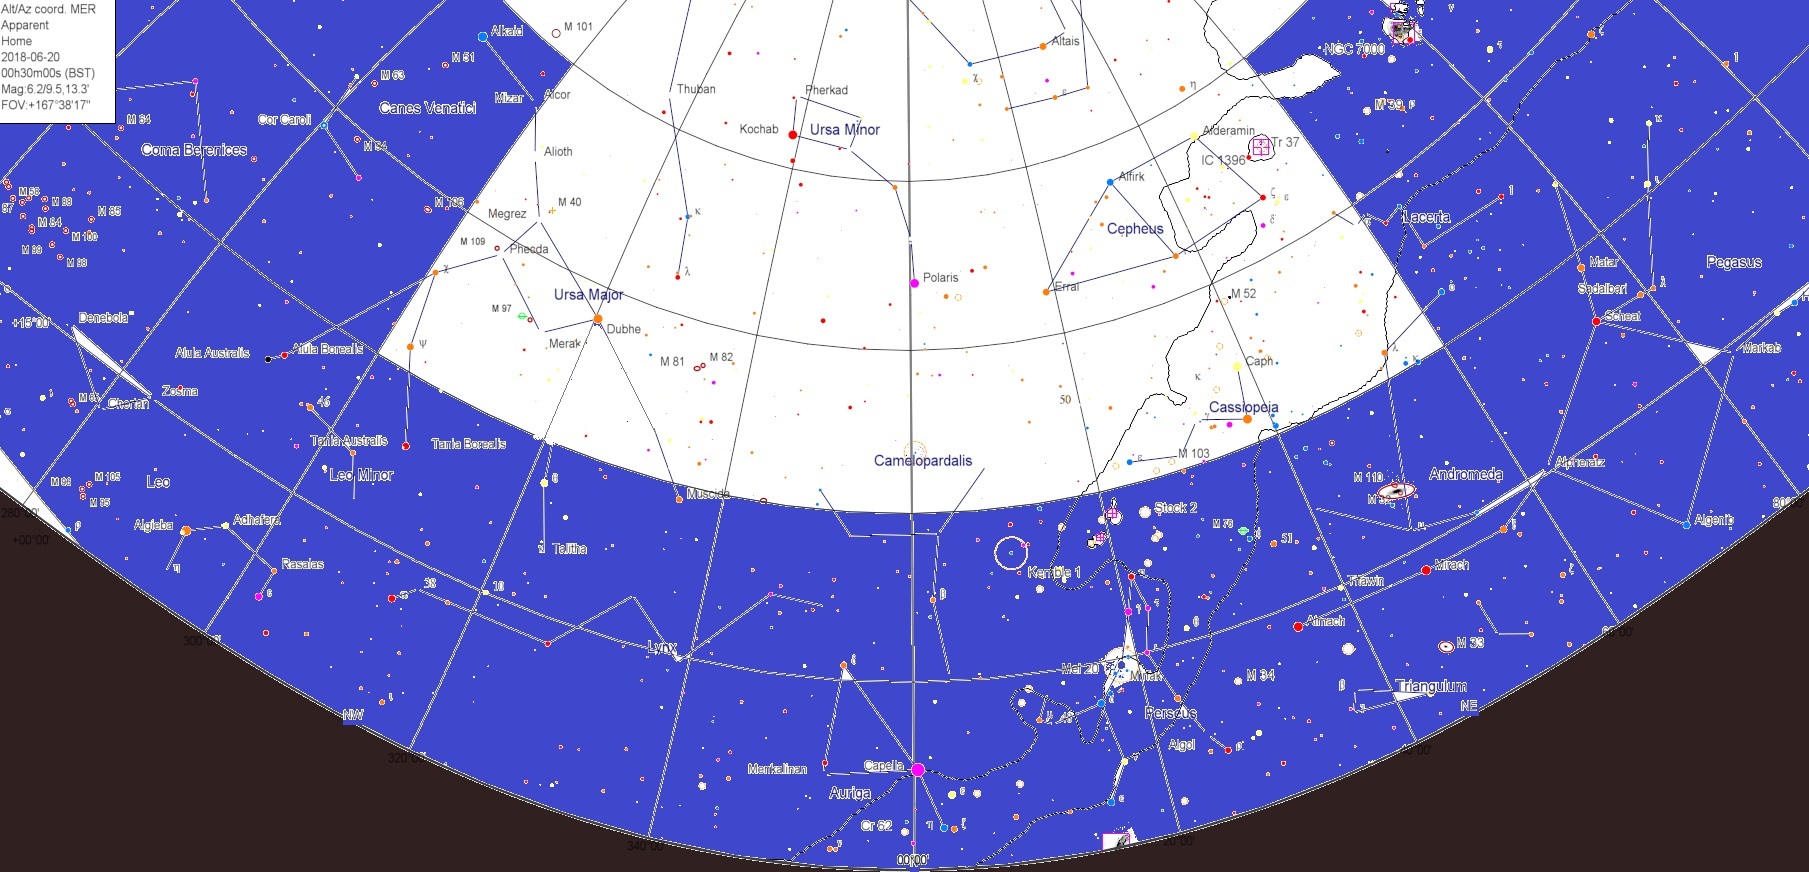
White area shows optimum imaging area from Fairvale Observatory South – AKA ‘The Shed’

What I hadn’t expected on first use was that slewing and tracking would become more difficult and takes noticeably longer at higher latitudes, especially approaching Polaris.  Following subsequent enquiries and with some further thought it now makes sense.  At higher latitudes near and above about 70 degrees as the lines of Longitude are closer together, it makes the RA slew rate bigger and bigger the closer you get to the North Celestial Pole.  Of course the celestial pole is not coincident with the terrestrial pole, which means that those objects within the latitude of 90o minus the observer’s latitude – in my case this equals 39o – means that all those objects above 39o will be circumpolar from my point-of-view i.e. will rotate over the year around North Celestial Pole.  This is basic astronomy but hitherto I had not considered the implications for tracking and guiding before and will need to bear it in mind when selecting targets in the future.

M81 B (Large)

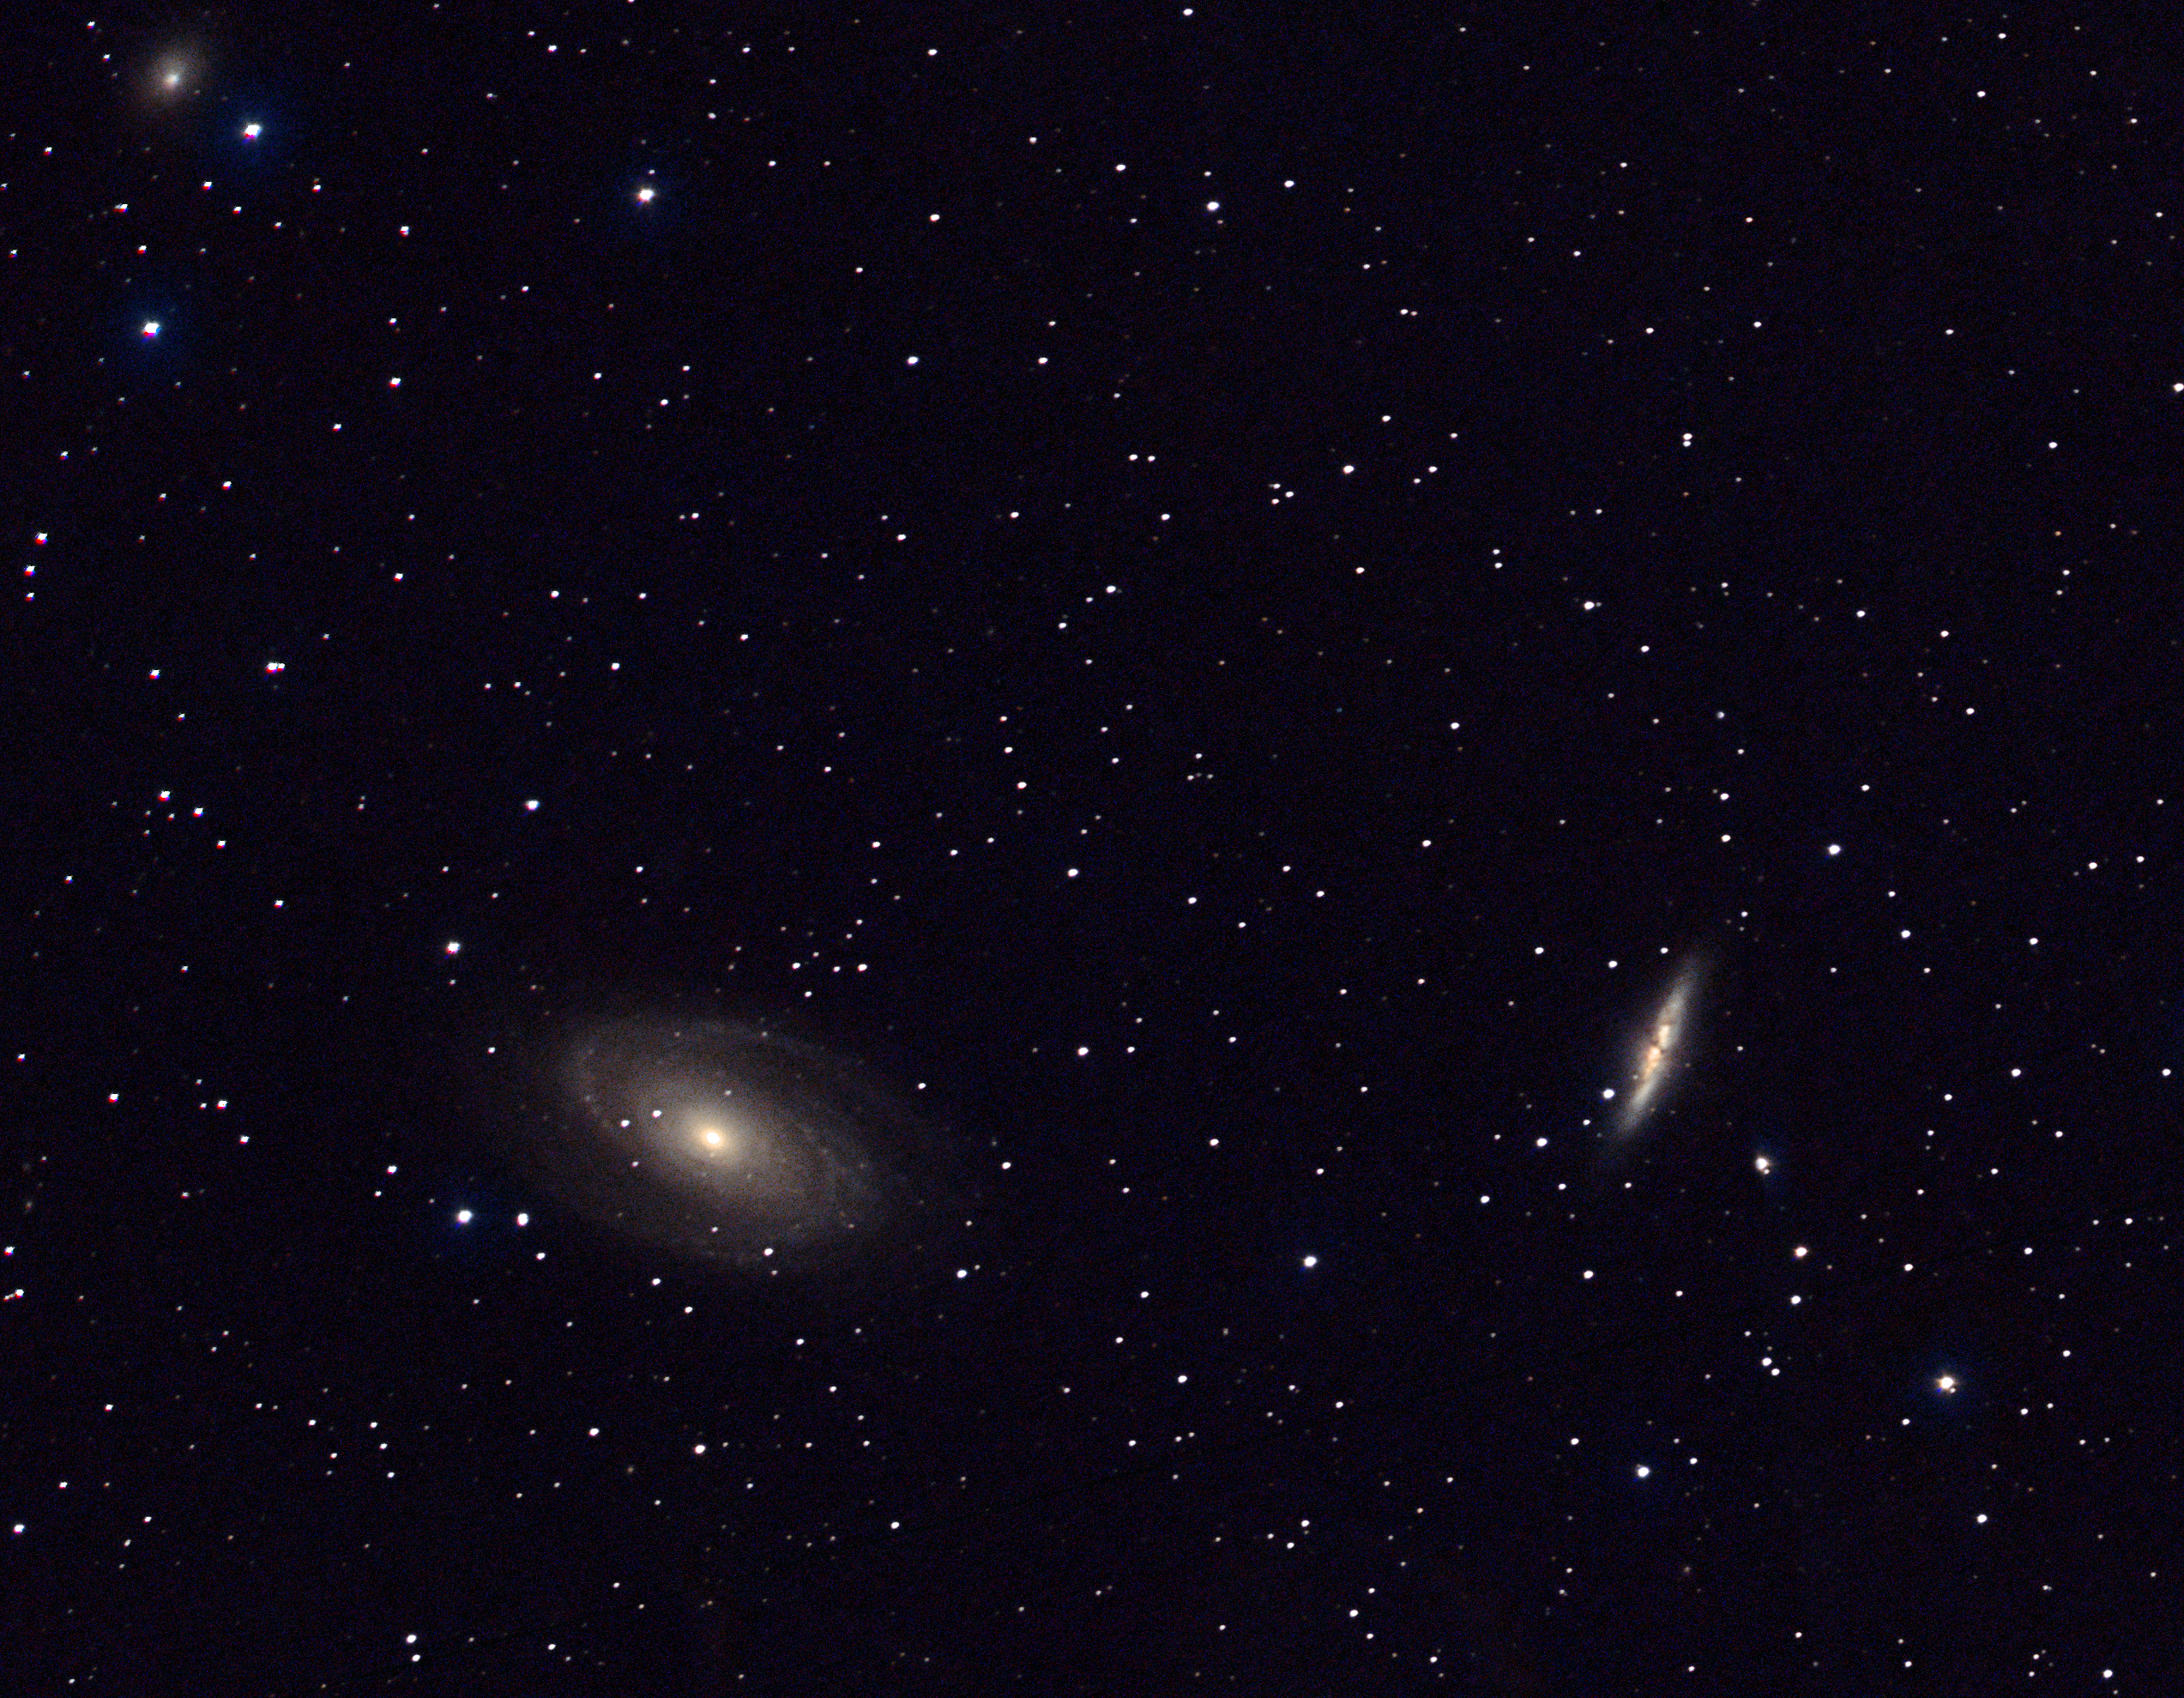
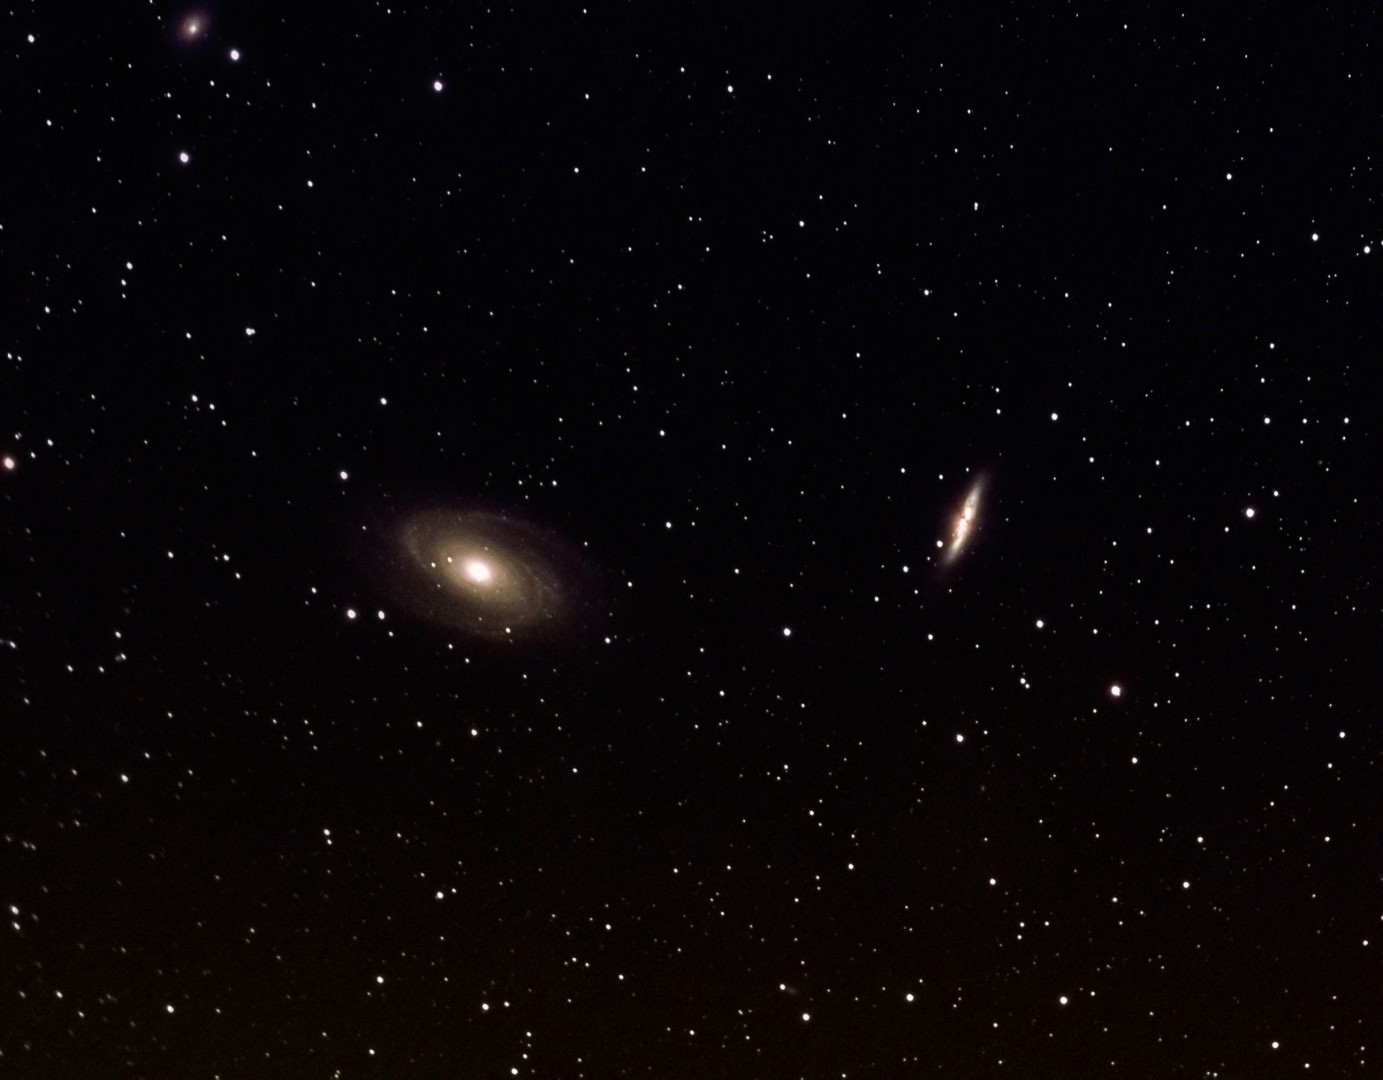
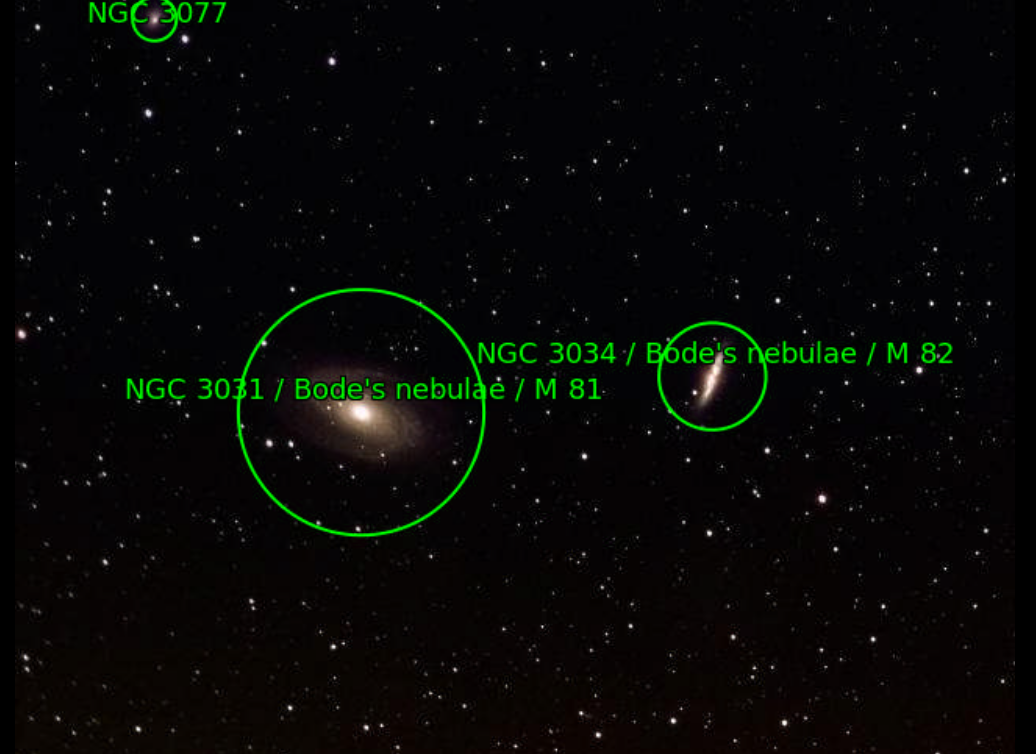
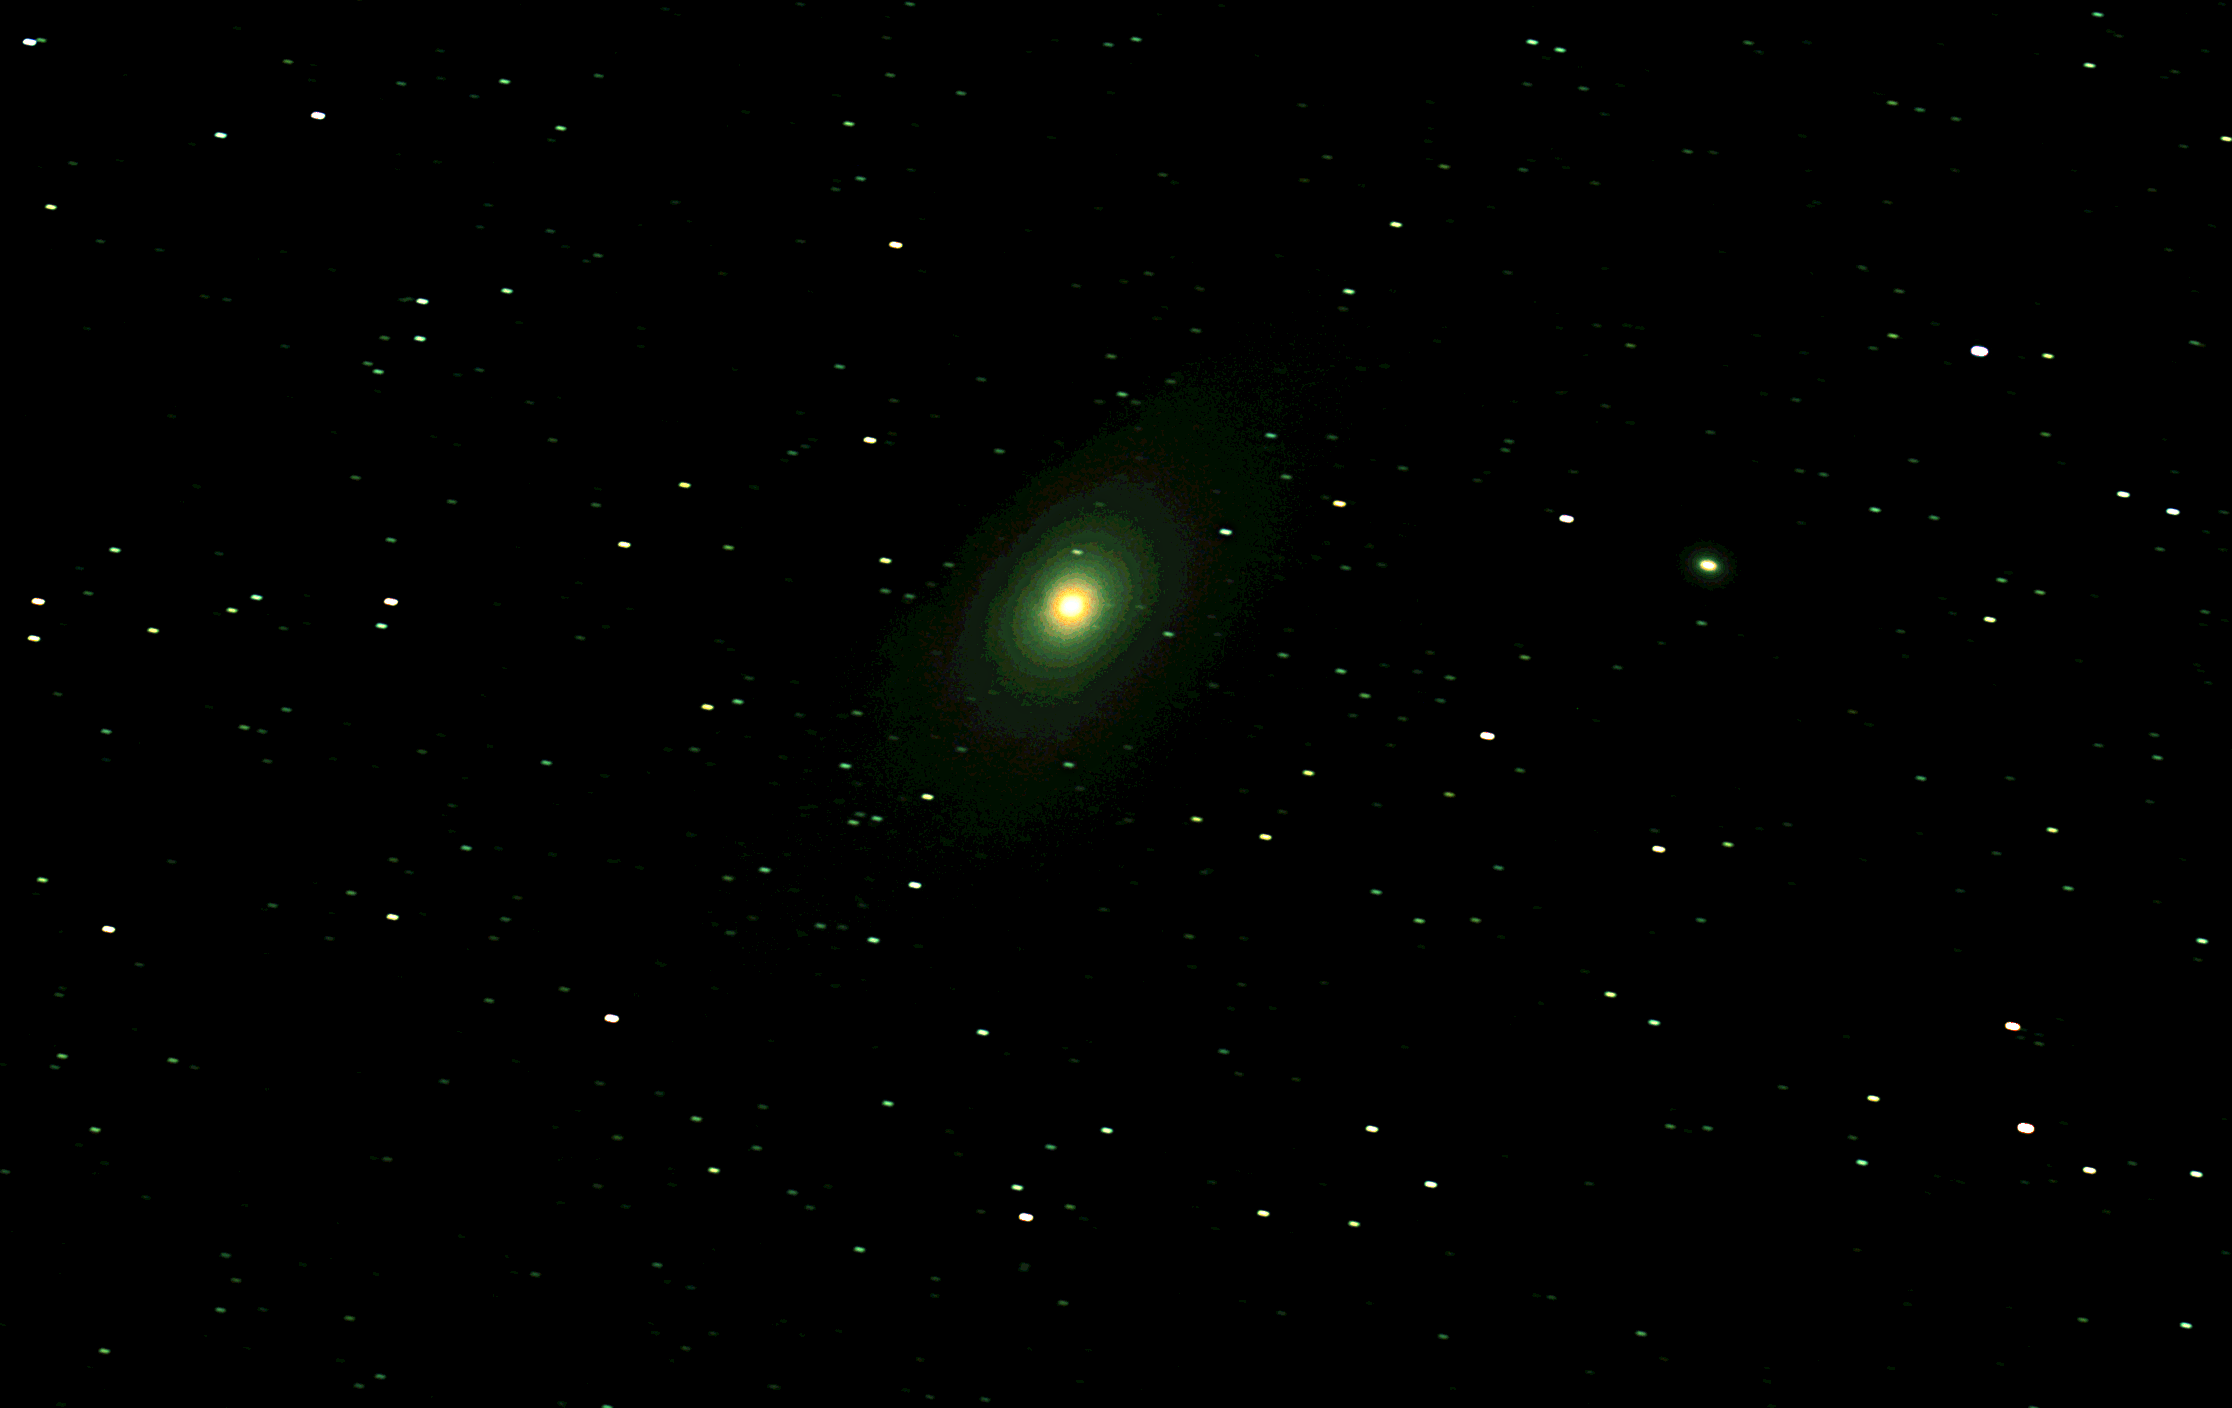
I had one particular target in mind but as it was only viable much later in the night, on this occasion I chose to start imaging the north sky for the first time with Bode’s Galaxy AKA M81 and the nearby Cigar Galaxy AKA M82; for comparison using low gain, long exposure on the first night (top of the page) and high gain, short exposure (below) on the following night.  Given the target’s DEC position of 70o I soon discovered the aforesaid tracking difficulties, which resulted in the RMS guiding error varying from 3’ to 20’ and deleterious consequences for the images!


Whilst I’m pleased with my very first north sky images, it is obvious I’ll need to return again with better guiding and much longer integration time.  On a positive note the general set-up worked very well and the shed provided an excellent place from which to operate the control and image capture equipment.  Furthermore, despite a few restrictions the overall view of the northern night sky is good and holds much promise for future, hitherto inaccessible imaging objects.  As a result of establishing this new site I intend to name the new north looking location Fairvale Observatory South or ‘The Shed Observatory’ (see mosaic above) and the principal, south looking location by the house Fairvale Observatory North or ‘The Patio Observatory’.  Altogether this marks a major breakthrough for my astronomy and I eagerly await the return of astronomical darkness on 20th July onward.

AstroNet ResultX

IMAGING DETAILS
Objects Bode’s Galaxy M81  &  Cigar Galaxy M82     
Constellation Ursa Major
Distance M81  11.8  &  M82  11.4 -12.4 million light-years
Size M81 26.9’ x 14.1’   &    M82 11.2’ x  4.3’
Apparent Magnitude M81 +8.0  &  M82 +8.4
 
Scope  William Optics GT81 + Focal Reducer FL 382mm  f4.72
Mount SW AZ-EQ6 GT + EQASCOM computer control
Guiding William Optics 50mm guide scope
  + Starlight Xpress Lodestar X2 guide camera & PHD2 control
Camera ZWO1600MM-Cool (mono)   CMOS sensor
  FOV 2.65o x 2.0o Resolution 2.05”/pix  Max. image size 4,656 x 3,520 pix   
EFW ZWOx8 + ZWO LRGB & Ha OIII SII 7nm filters 
Capture & Processing Astro Photography Tool + PS2,  Deep Sky Stacker & Photoshop CS2
Image Location Centre Image-B    RA 09:55:13.46    DEC 69:21:08.36  (19/0518) 
Exposures                       


A 18/05/18   10 x 180 sec L  + 5×180 sec RGB  (Total time: 75 minutes)    @ 139 Gain   21  Offset @ -20oC

B 19/05/18   45 x 60 sec L    + 15 x 60 sec RGB  (Total time: 90 minutes)    @ 300 Gain   50  Ofsett @ -20oC    

Calibration                    


A 15 x 180sec Darks  20 x 1/4000 sec Bias  10 x Flats LRGB  @ ADU 25,000  

B 15 x 60sec Darks     20 x 1/4000 sec Bias  10 x Flats LRGB  @ ADU 25,000  

Location & Darkness Fairvale Observatory South – Redhill – Surrey – UK       Typically Bortle 5
Date & Time (A)    18th  &   (B) 19th May 2018 @ +23.45h approx.


Reflections – 2016

2016 was the second full year of Watch This Space Man (WTSM) and once again it’s been something of a mixed period.  Faced with a major, apparently insoluble problem, by mid-year I actually thought of giving up but by year-end it’s all come good again, in fact very good.   Reflections is a look back at the ups-and-downs of the past year, astronomically speaking and a peek into the next twelve months, which one way or another could determine the future of my astrophotography.
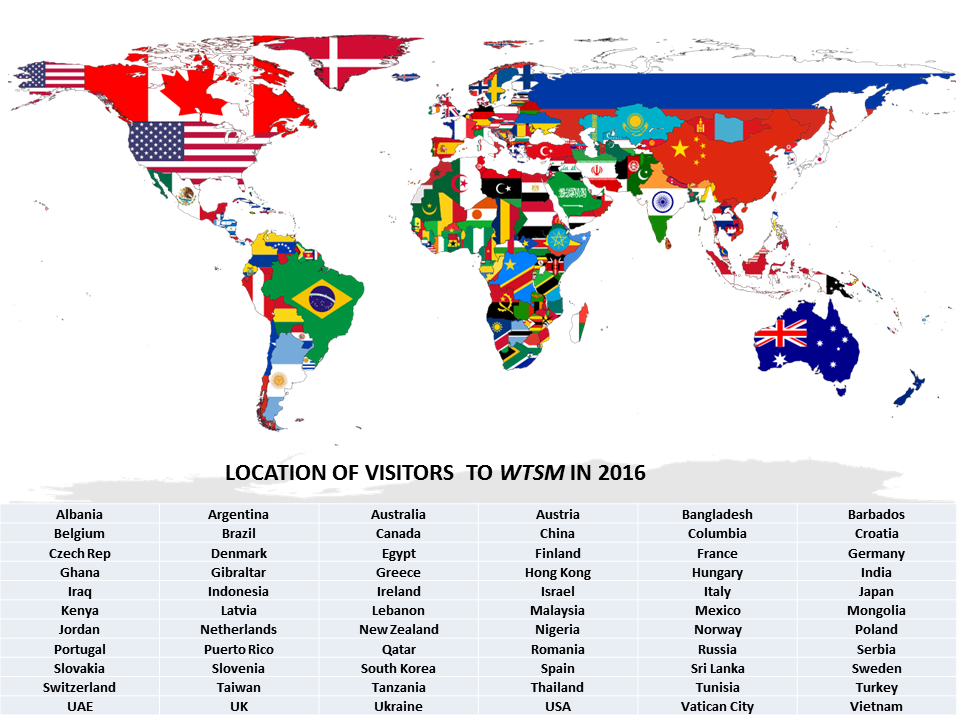
wtsm-visitor-map

I have been astonished by the interest in this website, with some 7,000 visits and 14,000 page views from more than 65 different countries during the year, the list is quite amazing.  Though I write this blog for myself, I am increasingly aware of this unsolicited readership – you are all most welcome and I would be very pleased to hear from anyone who would like to get in touch with queries, comments or just to say hello – contact details are in the Contact drop-down section of the About main menu.

reflections-2016

JANUARY TO MARCH

The year started poorly, got much worse, then finally improved. Using my recently acquired Vixen Polarie I was pleased to start the year with an image of Barnard’s Loop, something notoriously difficult to photograph and had previously eluded me.  Sadly I was not so successful with the Milky Way and have reluctantly come to the obvious conclusion that this can only be imaged in much darker skies than I’m ever likely to experience located just to the south of London and close to Gatwick airport!

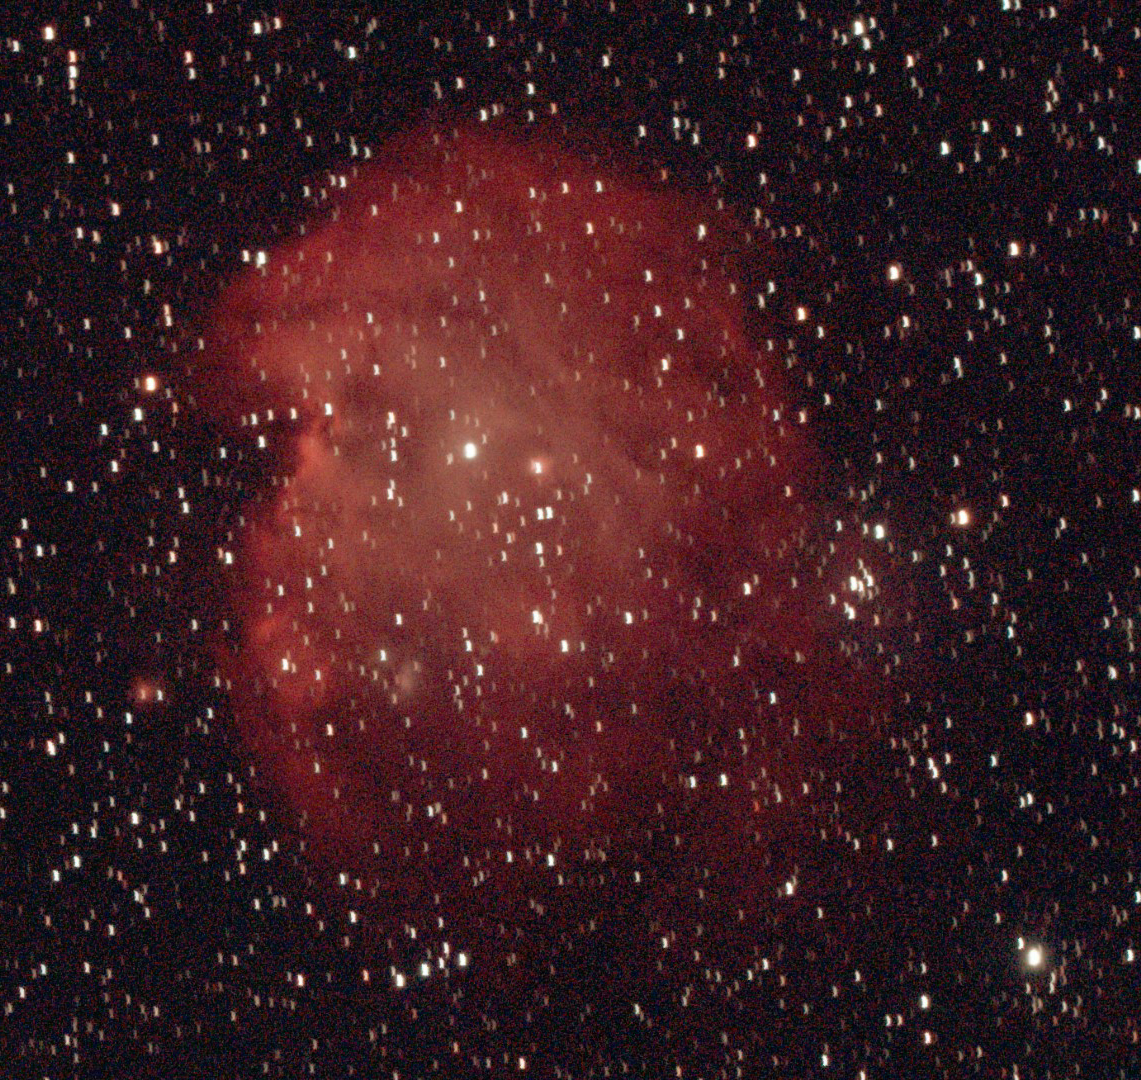
As Orion starts to move on after Christmas and especially from February, I struggle to find suitable imaging targets; Coma Berenices and other constellations at this time contain numerous galaxies but they’re mostly too small for my William Optics GT81 and otherwise what might be doable I have already done before.  Notwithstanding, after looking carefully I came across two HII nebulae still lurking in the early evening.  The size and Ha-light of NGC 2174 Monkey Head Nebula and IC 2177 Seagull Nebula, provided just what I was looking for.  Located close to Gemini and Monoceros constellations, both these DSOs are within the part of the Milky Way section of the sky, an area that thankfully produces many other similar opportunities at this time of the year for a modded DSLR camera.
Picture saved with settings embedded.

Monkey Head Nebula

It’s often the small things that either alone or cumulatively can help transform the outcome with astrophotography.  The quarterly period finished by acquiring two new pieces of equipment, one which could help improve the set-up and operation of the mount, the other which I hoped would help me move to the next level of imaging.

  • When working in the dark and worse still in the cold, the ergonomics and general convenience of operating the equipment becomes paramount.  Since starting to use EQMOD-ASCOM and Cartes du Ciel for mount control and tracking, I encountered the problem of having to be in two places at the same time; in this case co-ordinating adjustments at the mount and the computer, in particular when making and syncing star alignments.  The answer to this conundrum was a gamepad, which I purchased for a nominal sum on eBay and after watching the inimitable Chris Shillito’s video on setting up and using a gamepad with EQMOD-ASCOM, have never looked back.  By using the gamepad the telescope can now be manually slewed, centred and synced on any object whilst remaining at the scope, thereby making the process of alignment much quicker and convenient.

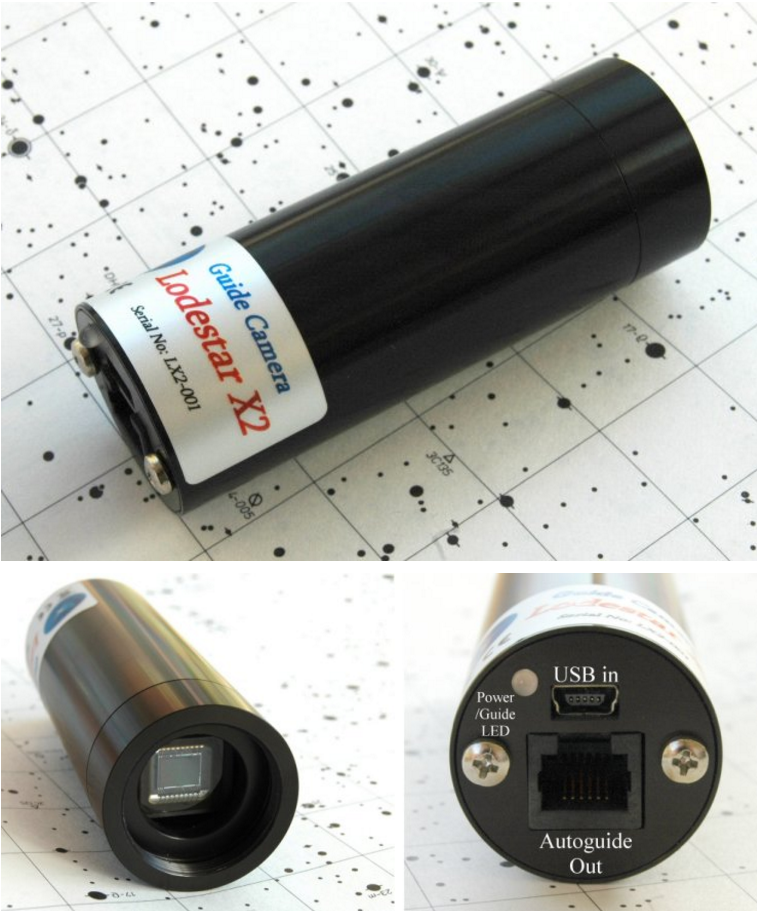
  • At the end of 2015 it was my intention to start guiding in the coming year, a prerequisite for the long exposures necessary to increase data capture and thus hopefully improve image quality.  I had originally intended to use my ZWO ASI120 MC camera together with a William Optics 50mm guidescope for this purpose but there always seemed to be other problems to overcome first and to be honest, I was somewhat intimidated about tackling the black art of guiding.  I was finally prompted to do something about this when in March a second-hand Starlight Express Lodestar X2 autoguide camera came up on the UK Astronomy Buy & Sell.  From previous research I knew this was considered to be a very good and popular guiding camera, so as it had only just been posted on the website, I immediately went for it and was successful – timing is everything.  Inevitably I had problems setting-up and in particular getting the camera to focus – which was my own fault – but by the end of March I was guiding!  Truth is my guiding at this stage was not very good and I needed to look further into using the PHD2 guiding software but nonetheless, the equipment was at least now working together!

No

Date Object*

Name

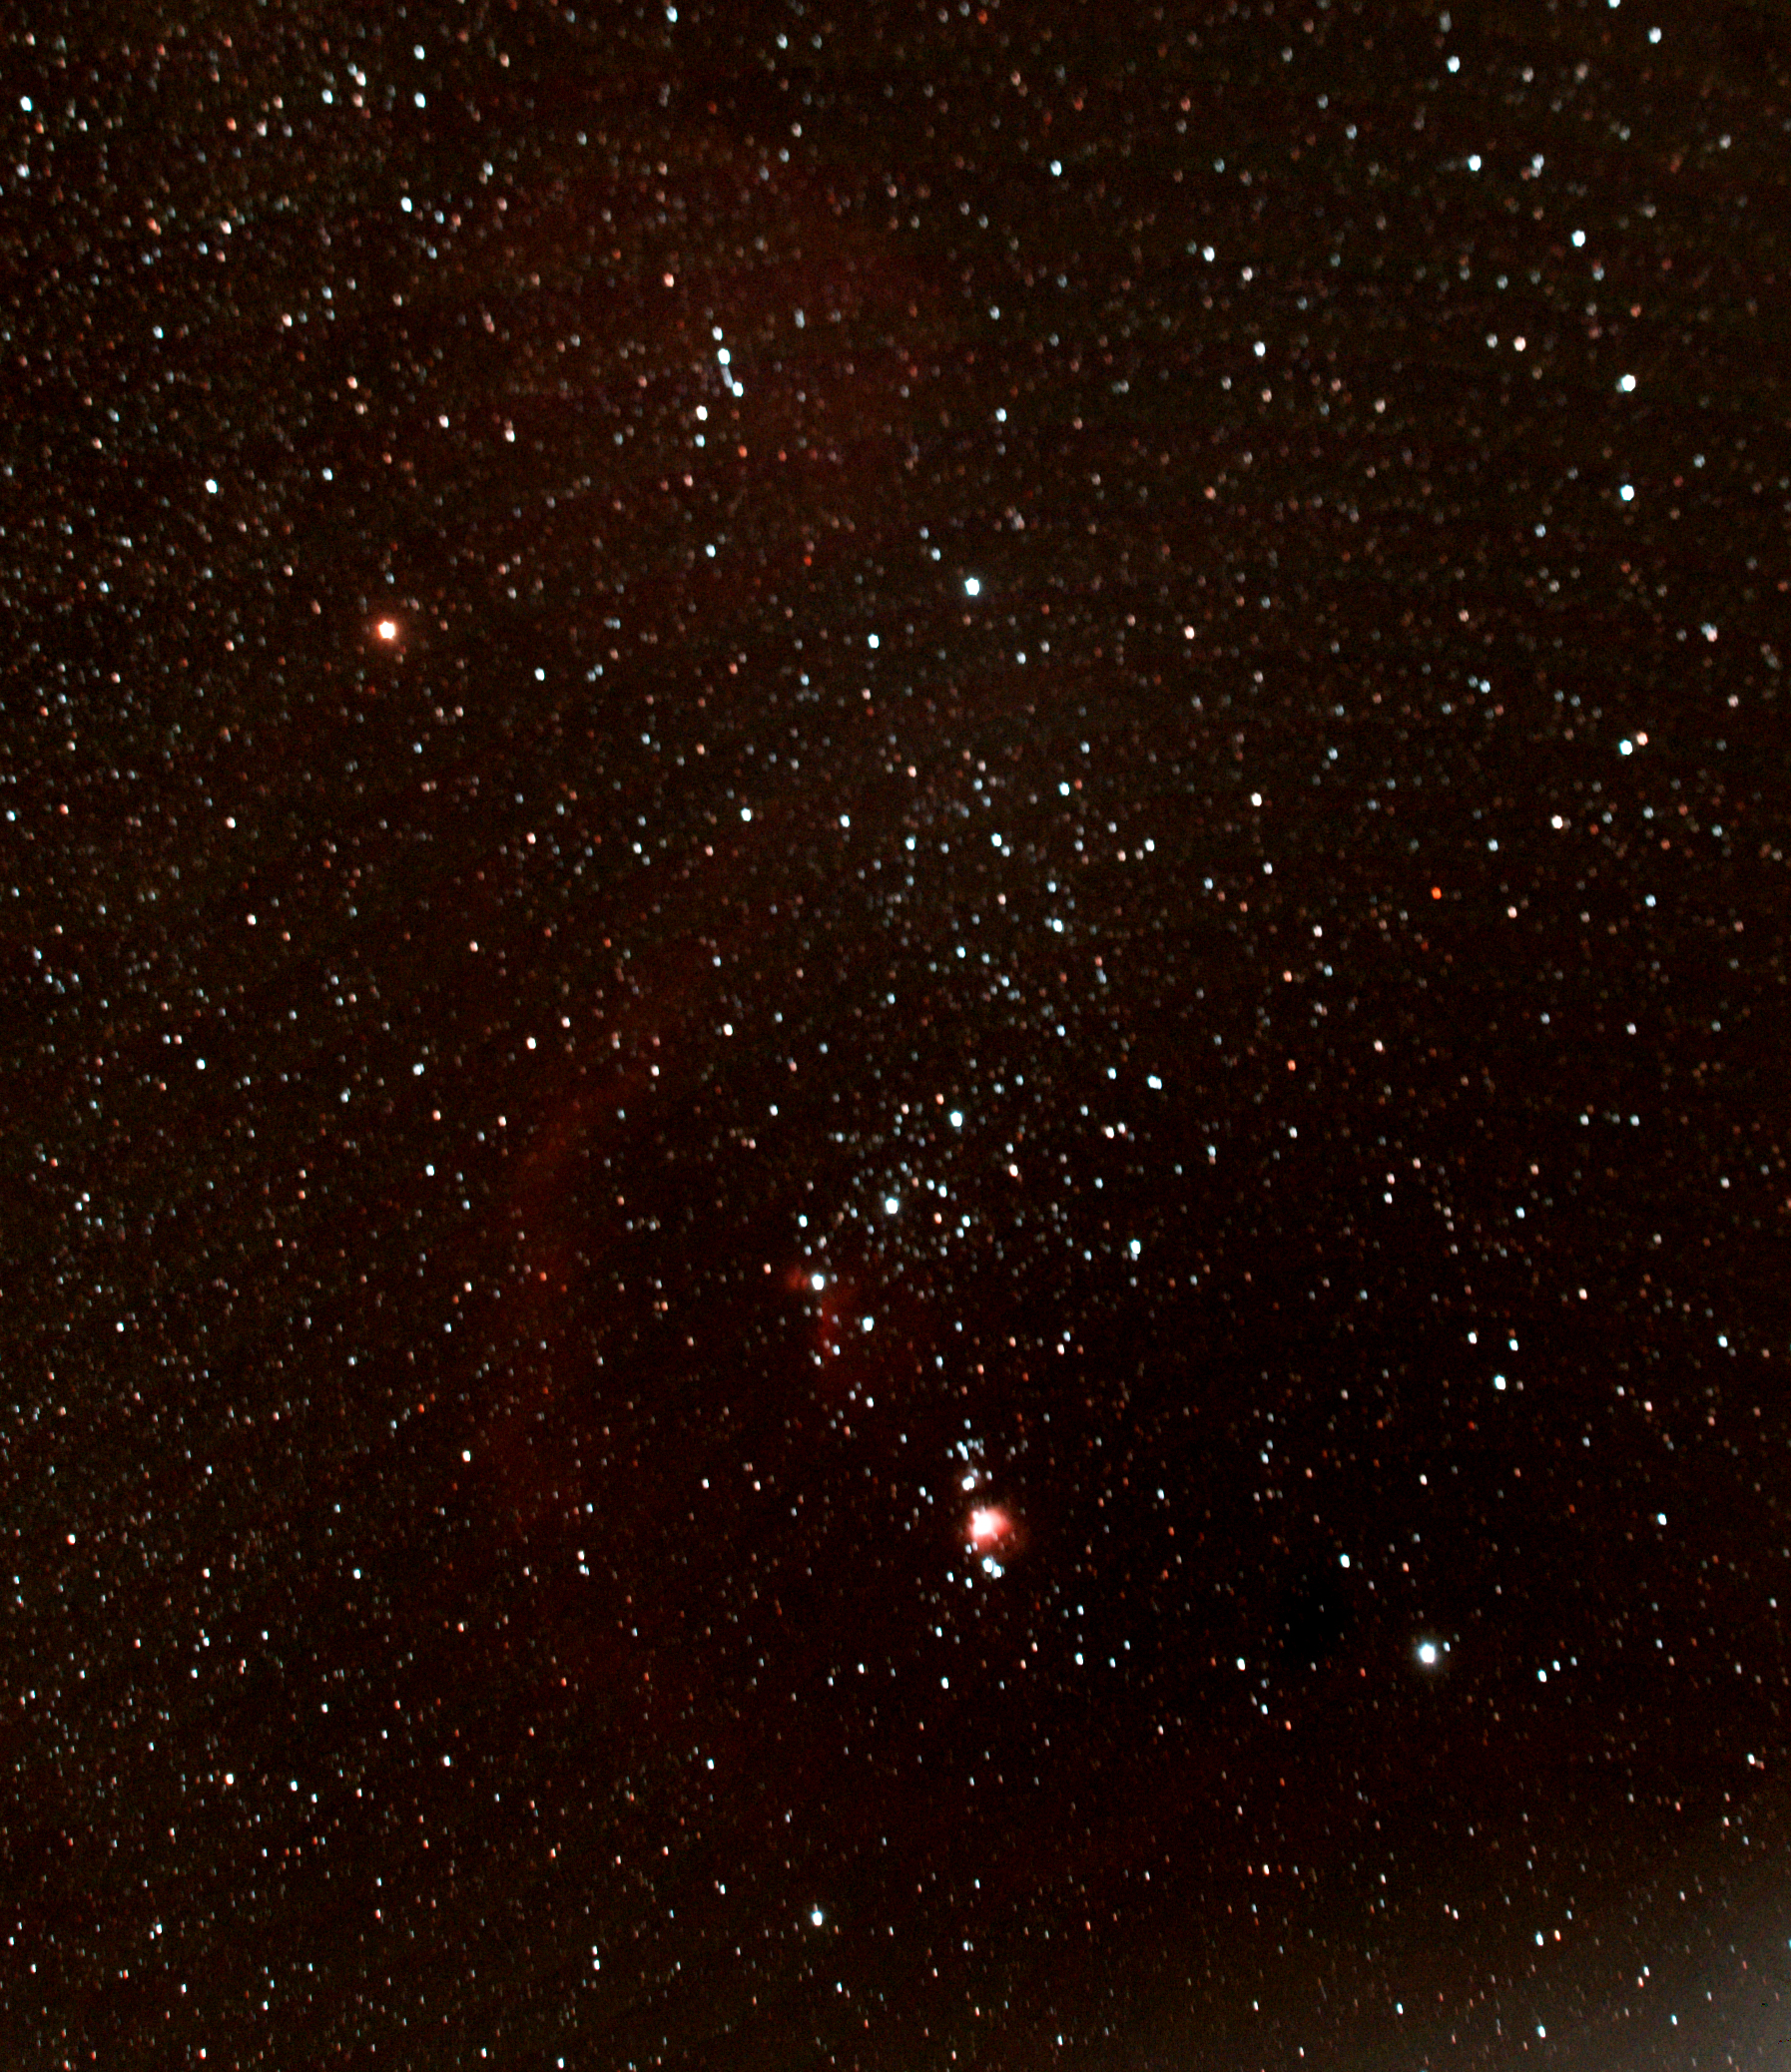
1 07/01/16 Orion Barnard’s Loop
2 14/01/16 Orion Barnard’s Loop
3 02/02/16 Catalina Comet
4 02/02/16 Milky Way  
5 10/02/16 IC 2087 Dark nebula
6 NGC 2174 Monkey Head Nebula
7 IC 2177 Seagull Nebula

*Record of quarterly photographic images taken in 2016

APRIL TO JUNE

After finishing the previous quarter on something of a high note by getting PHD2 working for the first time, I was now hopeful that from herein my exposures and thus images would show improvement – unfortunately I was soon to be very disappointed.

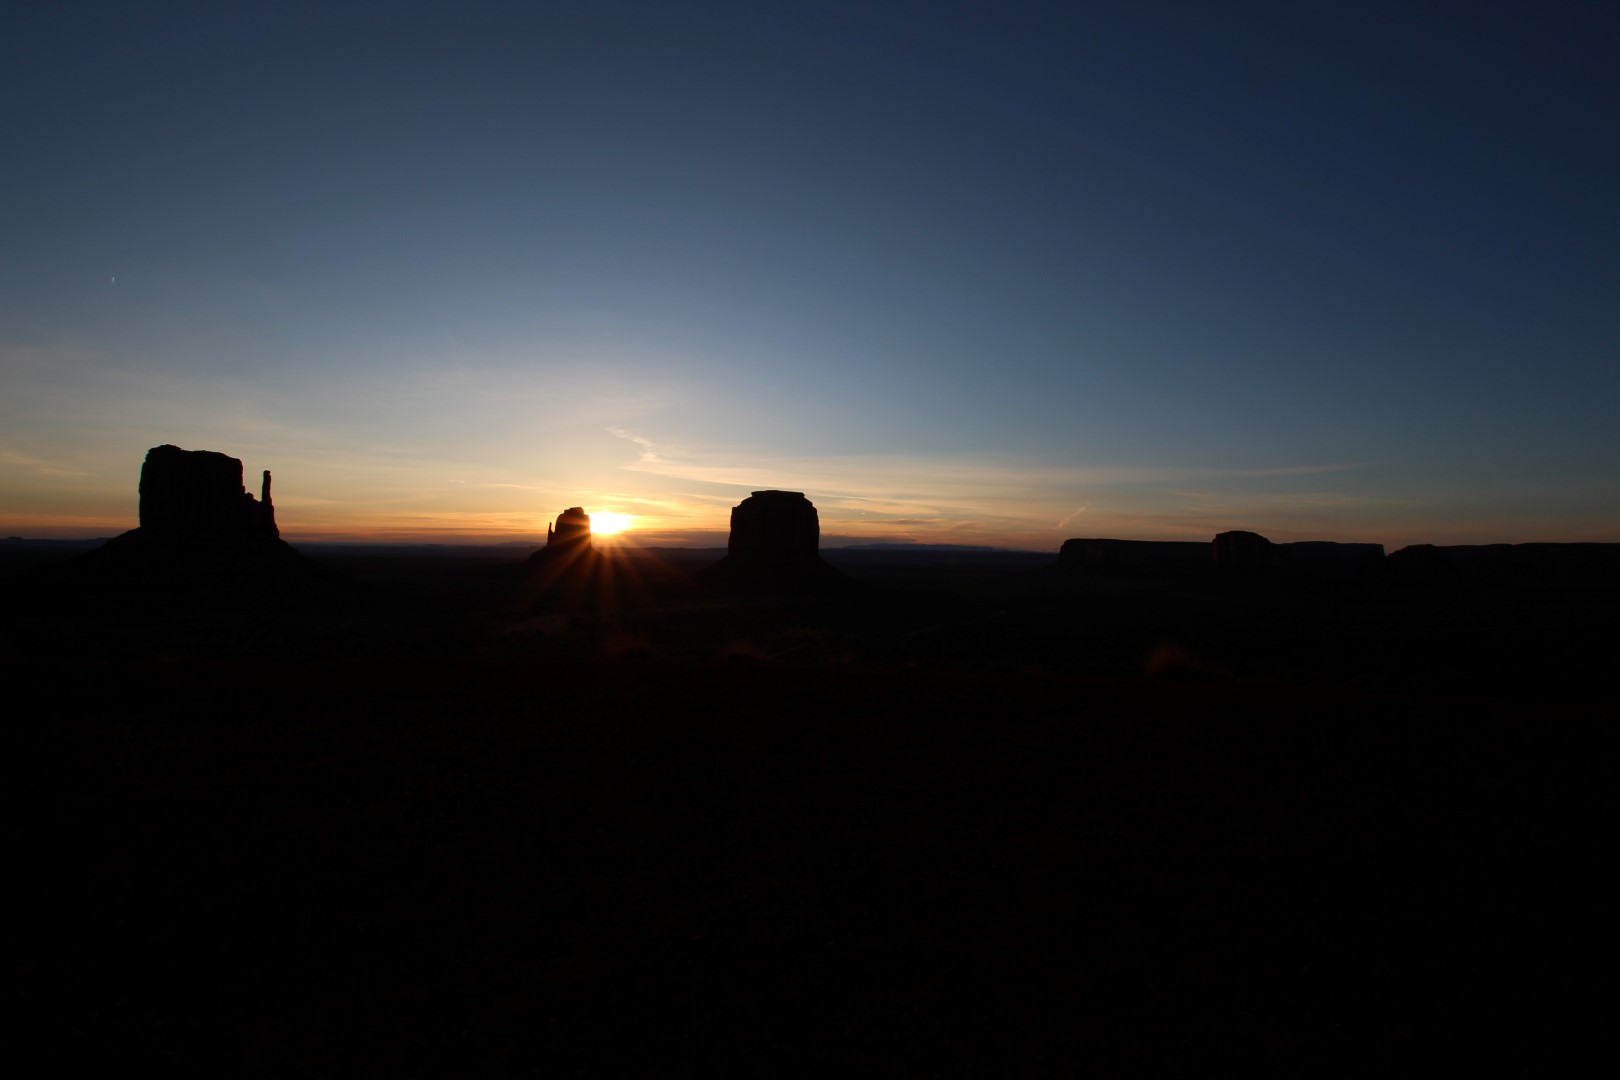
In April we went on a trip to the Southwestern USA – something of a geological pilgrimage for my wife and I (we are both geologists) – to see the Grand Canyon, Monument Valley, Bryce Canyon and Zion National Park as well as many other similar areas.  Prior to going I had purchased a Sigma 10mm-20mm wide-angle lens in anticipation of all the big views that are characteristic of the region and was not disappointed by the lens or the scenery.

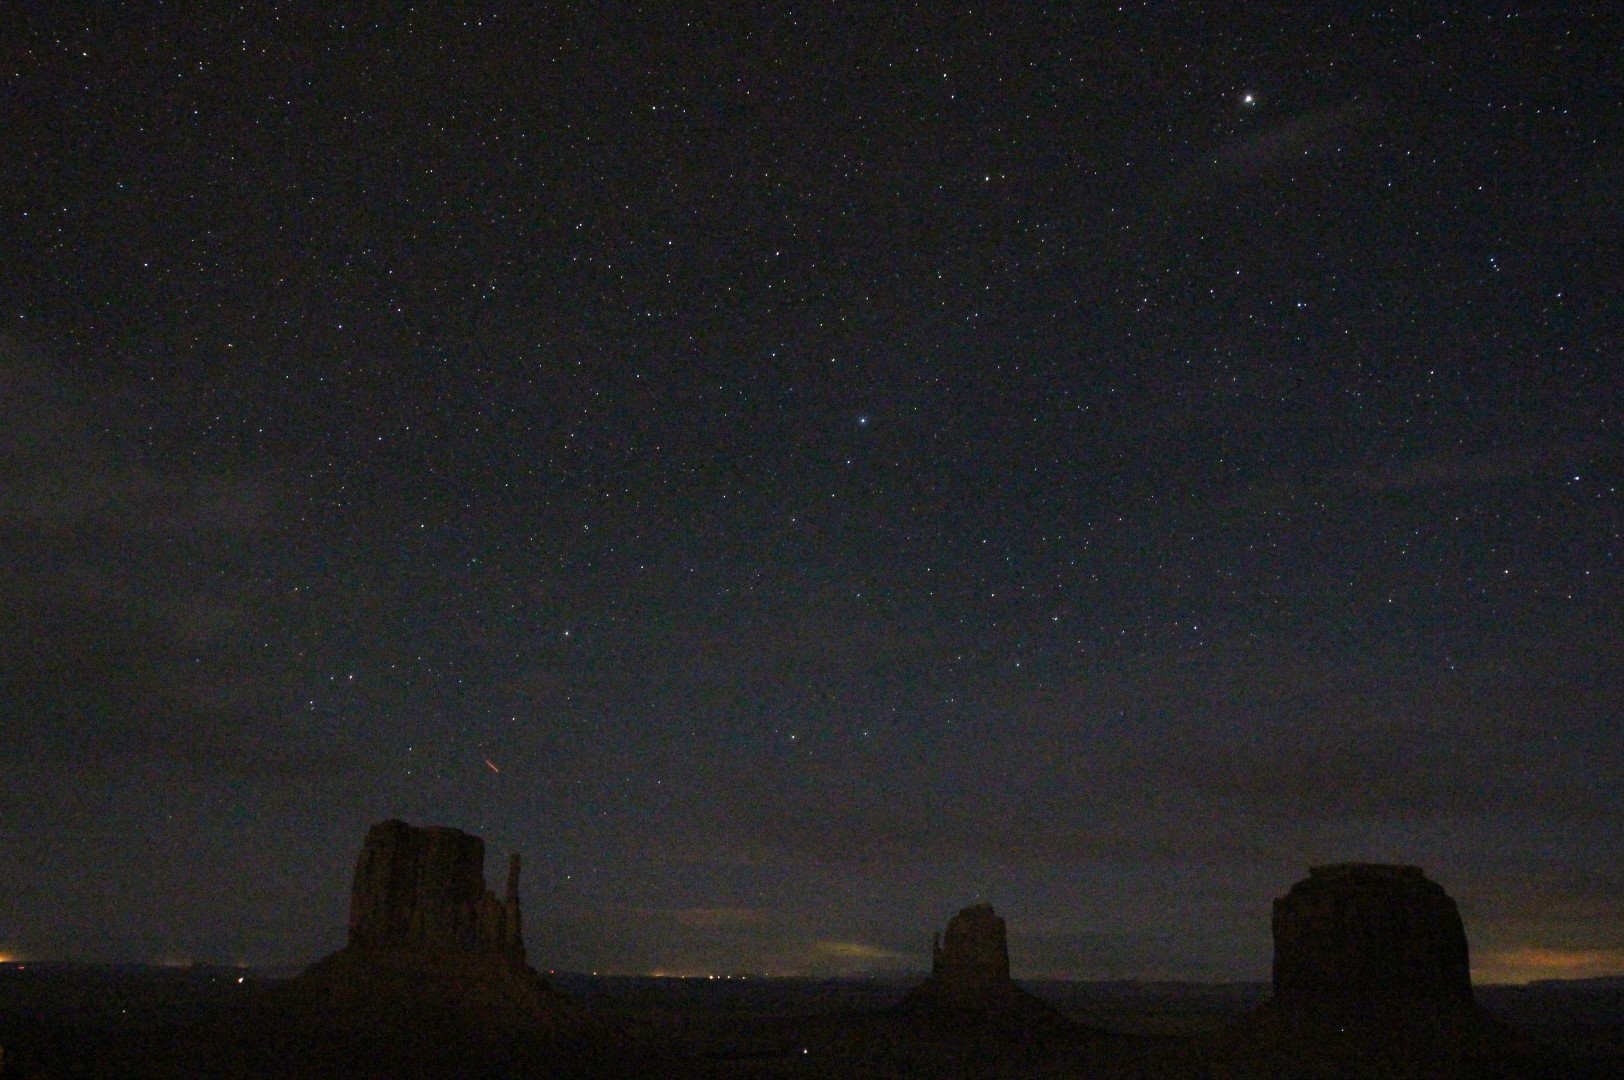
Being largely an uninhabited wilderness area, I also took the Vixen Polarie with a plan to at last capture images of the Milky Way.  Unfortunately, whilst I had checked the sky beforehand on Cartes du Ciel, I think I must have made an error with the dates.  We did get clear skies but unfortunately it turned out to be a full moon whilst there, which ruled out any hope of seeing, let alone imaging the Milky Way; oh well there’s always another day and it’s not going anywhere in the meantime.  Notwithstanding I did manage some pleasing nightscapes at Monument Valley and Bryce Canyon.

IMG_6235 (Large)

Given my initial guiding success prior to visiting the USA, I had been looking forwards to getting to grips with improving guiding and imaging on my return.  Furthermore, on 6th May there was a rare solar transit of Mercury and in preparation, the week before I set up and tested all the equipment and then successfully took some test images of the Sun using a Baader solar filter.  All was well on the appointed day which was also fortunately clear and sunny, so that shortly before contact I was all set and ready to try and capture the movement of a small black dot (Mercury) across the face of the Sun.  Unfortunately it was not to be and the weeks that followed almost marked the end of my still nascent hobby of astrophotography!

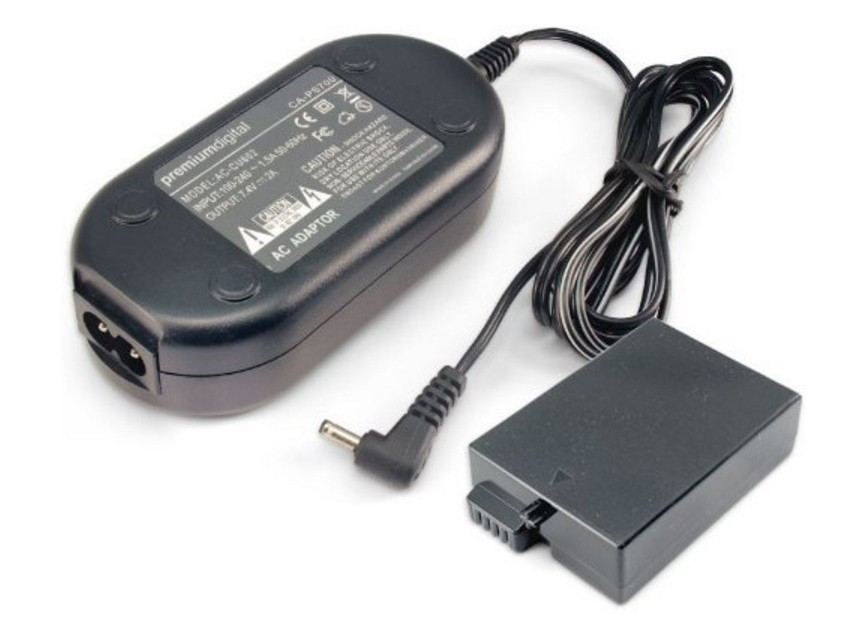
In short, EQMOD crashed when I turned on the DSLR camera to image the transit!  I tried re-booting and checked every other piece of equipment numerous times but to no avail.  I subsequently spent weeks trying to track down the problem, checking and re-checking every cable, piece of equipment and updating or reinstalling all the relevant software without success.  The nature of the problem strongly suggested there was a conflict between EQMOD-ASCOM and the camera and I therefore turned to the EQMOD forum for help, without success.  Somewhat late in the day and by now desperate, I posted the issue on SGL and quickly received a reply from someone who had had a very similar problem, which though also very difficult to identify, turned out to be a very small break in the outer cover of the DSLR AC/DC power adapter cable.  It’s not clear to me why this matters but I bought a new adapter and as they say, Bob’s your uncle, it worked!  I have looked very carefully at my adapter and cable and can see nothing wrong but am very thankful for the advice.

acdc

AC/DC Adapter: How can something as basic as this cause so much disruption?

It seems ridiculous that this very minor problem was nearly terminal but just in case it happens again I have since bought another spare power adapter.  Together with my daughter’s wedding in early June and the adapter meltdown, imaging for two of the three months during this period was almost non-existent.  Still by July I was ready to start again but by then there was no astronomical darkness!

No

Date Object

Name

8 April USA Monument Valley etc
9 06/06/16 M5 Globular cluster
10 M13 Globular cluster
11 M57 Ring Nebula

JULY TO SEPTEMBER

After the carnage of the last quarter, I was then unable to resume imaging in July due to travel commitments.  So I used what time was available to improve my knowledge of PHD2 and once again, check everything was now working ready for the return of astronomical darkness and better night skies from 20th July; I am of course now paranoid of another similar breakdown.  At the start of August I manged to obtain a just passable image of the Eagle Nebula for the first time.  Then shortly afterwards on the evening of 11th / 12th August, clear skies produced a decent night for viewing and imaging a few of this year’s Perseids meteor shower.  But it was at month-end and continuing into September that my imaging in 2016 finally took off.

m27-comps-paintfile

At that time the weather was consistently dry and warm, providing more than a week of clear skies and almost nightly imaging.  Dark nebulae are interesting features I’d hitherto not recognised as imaging opportunities and was therefore intrigued to successfully image the E-Nebula at this time.  Thereafter I used the opportunity of the weather window to experiment with PHD2 by using M27 the Dumbbell or Apple Core Nebula as a control imaging object.  Of course, each year is different but I’ll try to use any similar conditions in the future to sort out and develop old and new techniques, such unusual moments are precious for UK astronomers.  At the end of nearly two tiring weeks I had PHD2 working quite well and have not looked back since.  As a result of this work soon thereafter obtained good images of the Andromeda Galaxy, as well as the Veil, Crescent and Ring Nebulae.

No

Date Object

Name

12 07/08/16 M16 Eagle Nebula
13   M11 Globular
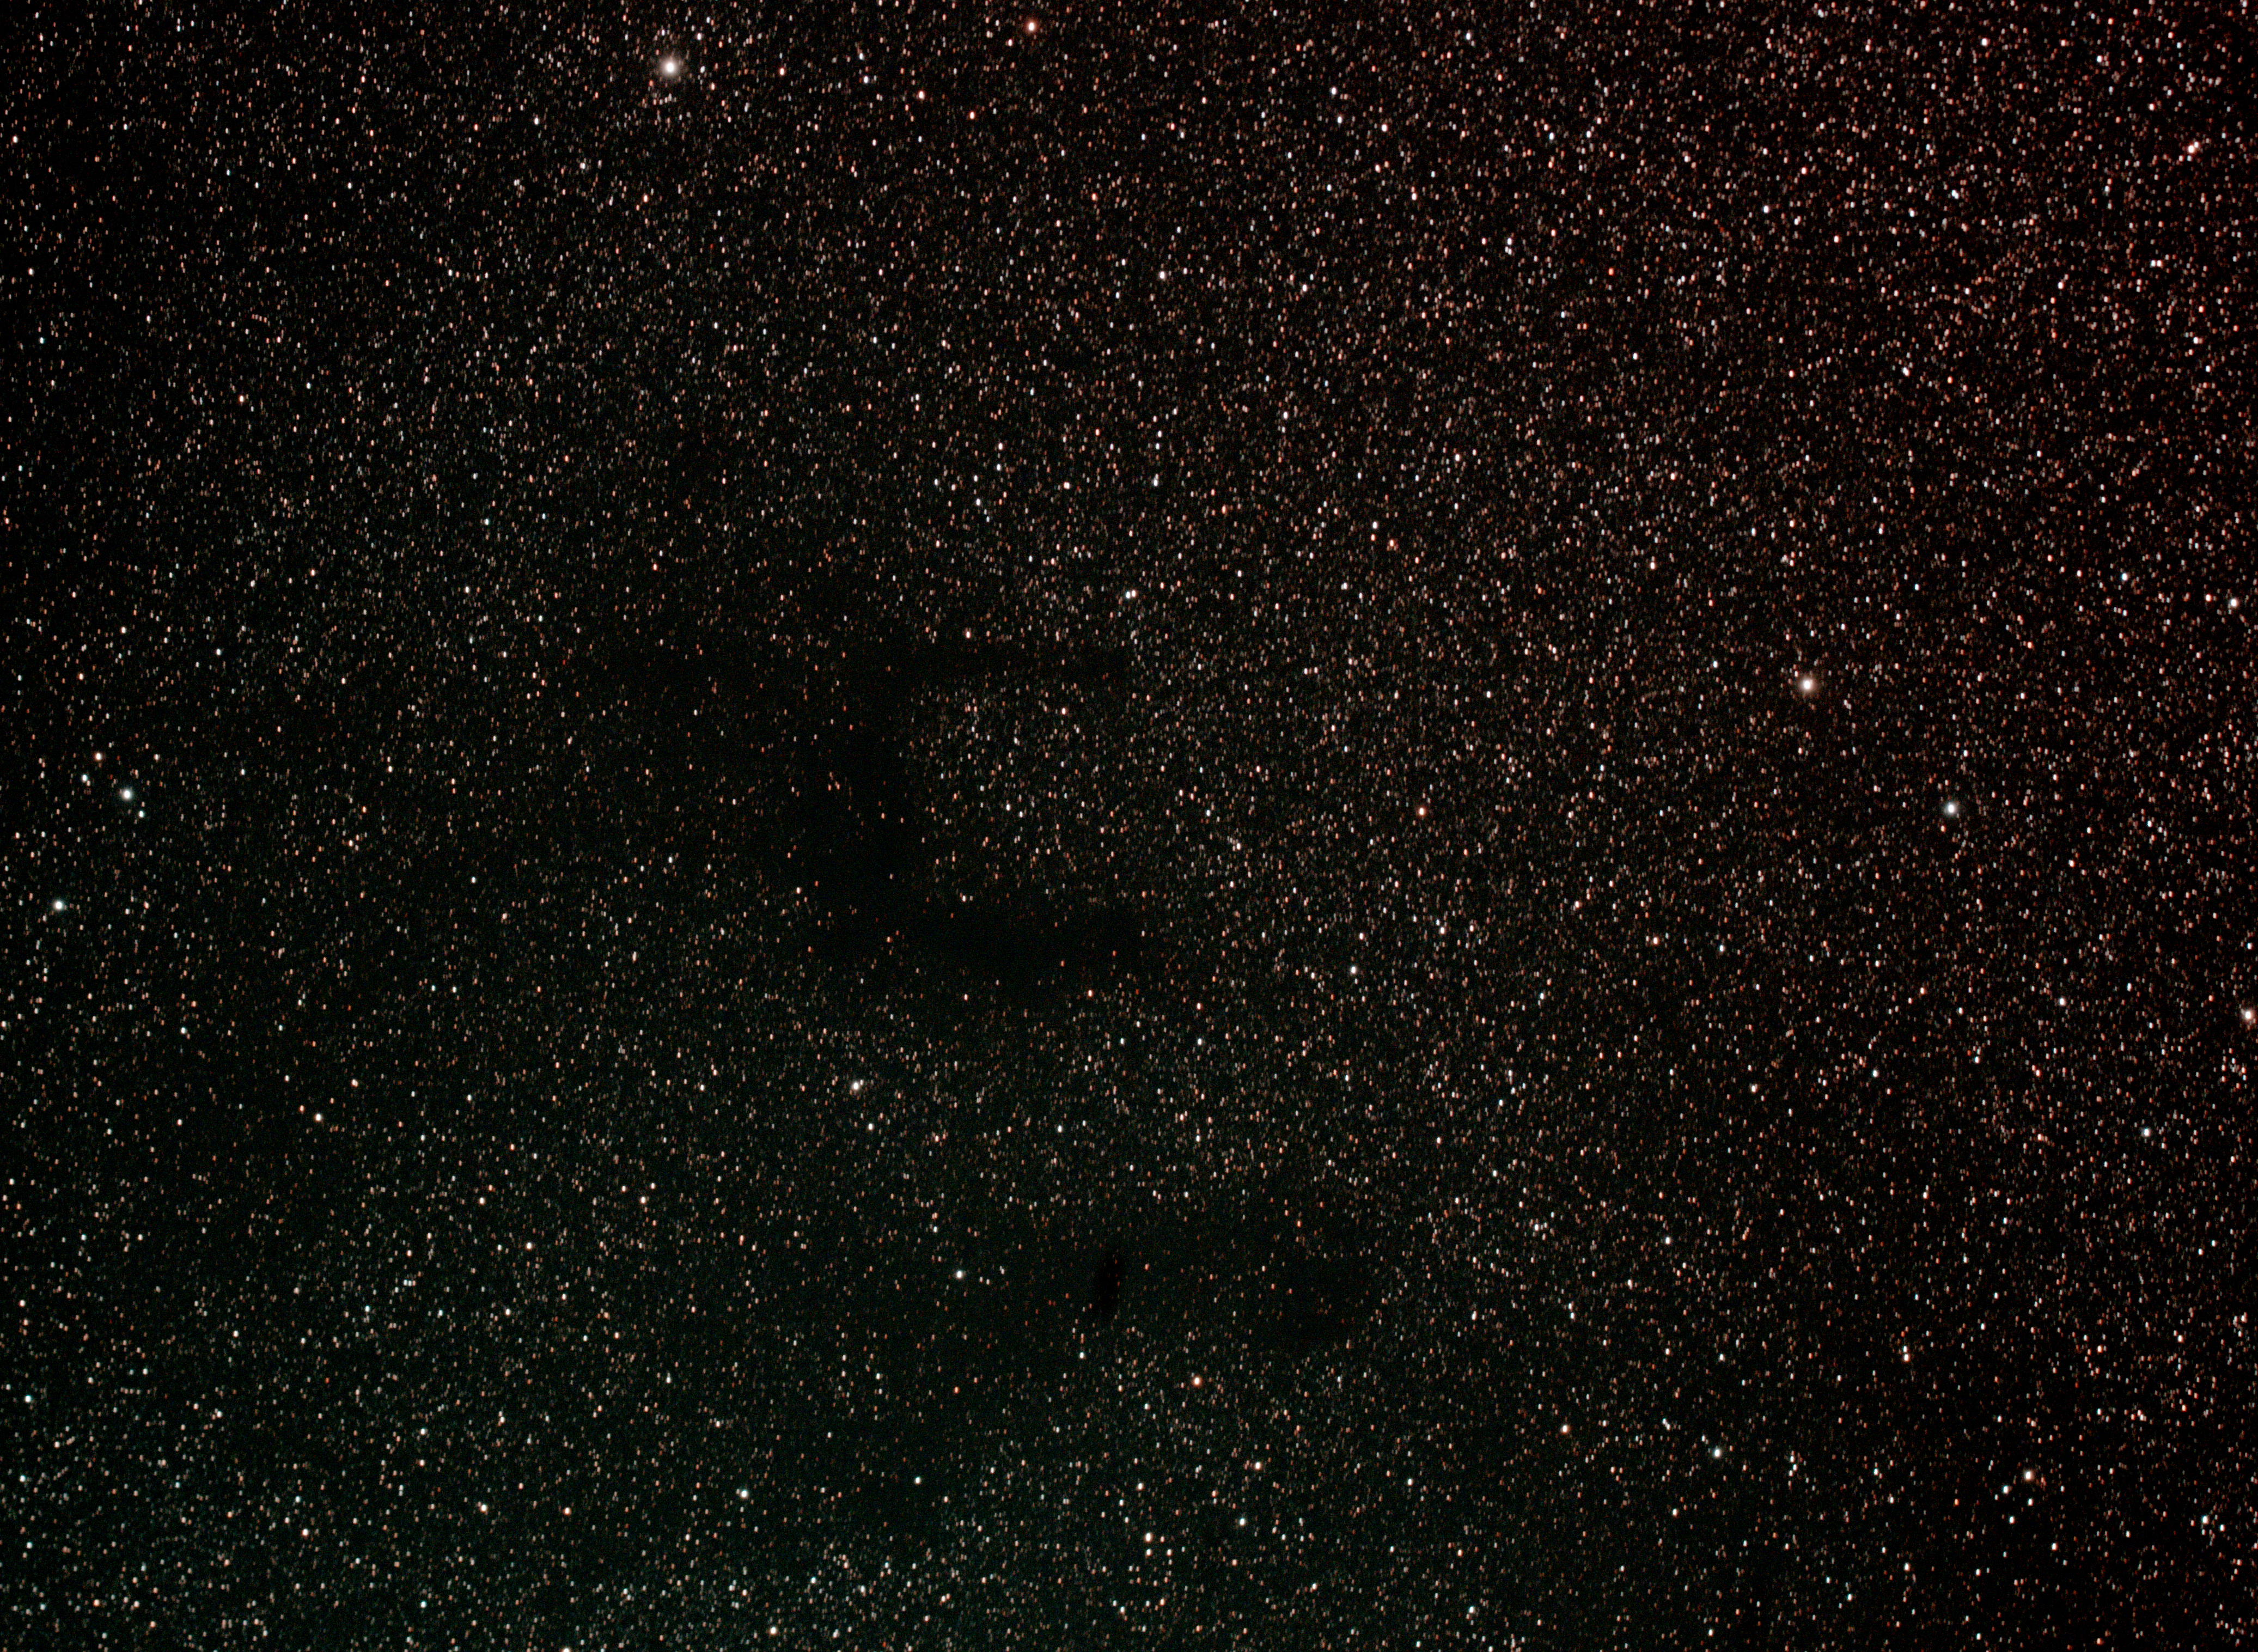
14   B142-3 Dark E-Nebula
15 11/08/16 Perseids  
16 23/08/16 LDN 673 Dark Nebula
17   NGC 6781 Planetary Nebula
18   M27 Dumbbell Nebula
19   Albireo Double star
20   Moon  
21 28/08/16 M11 Globular cluster
22   NGC 6905 Blue Flash Neb
23   Albireo Double star
24   15 Aquilea Double star
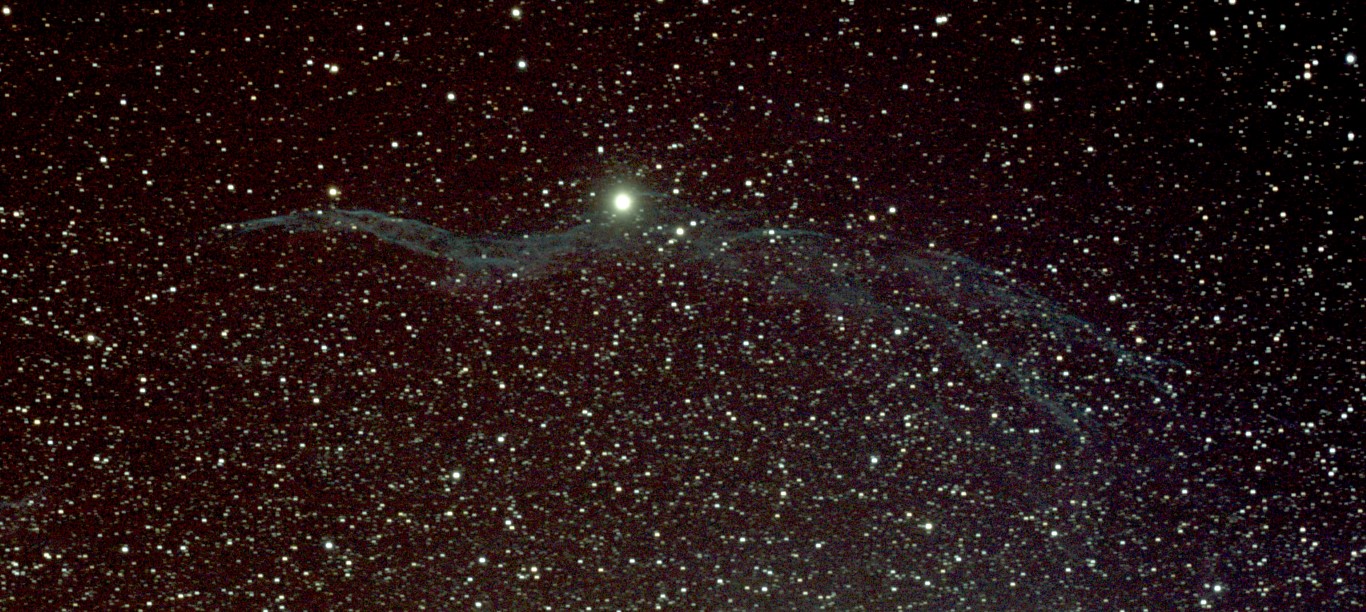
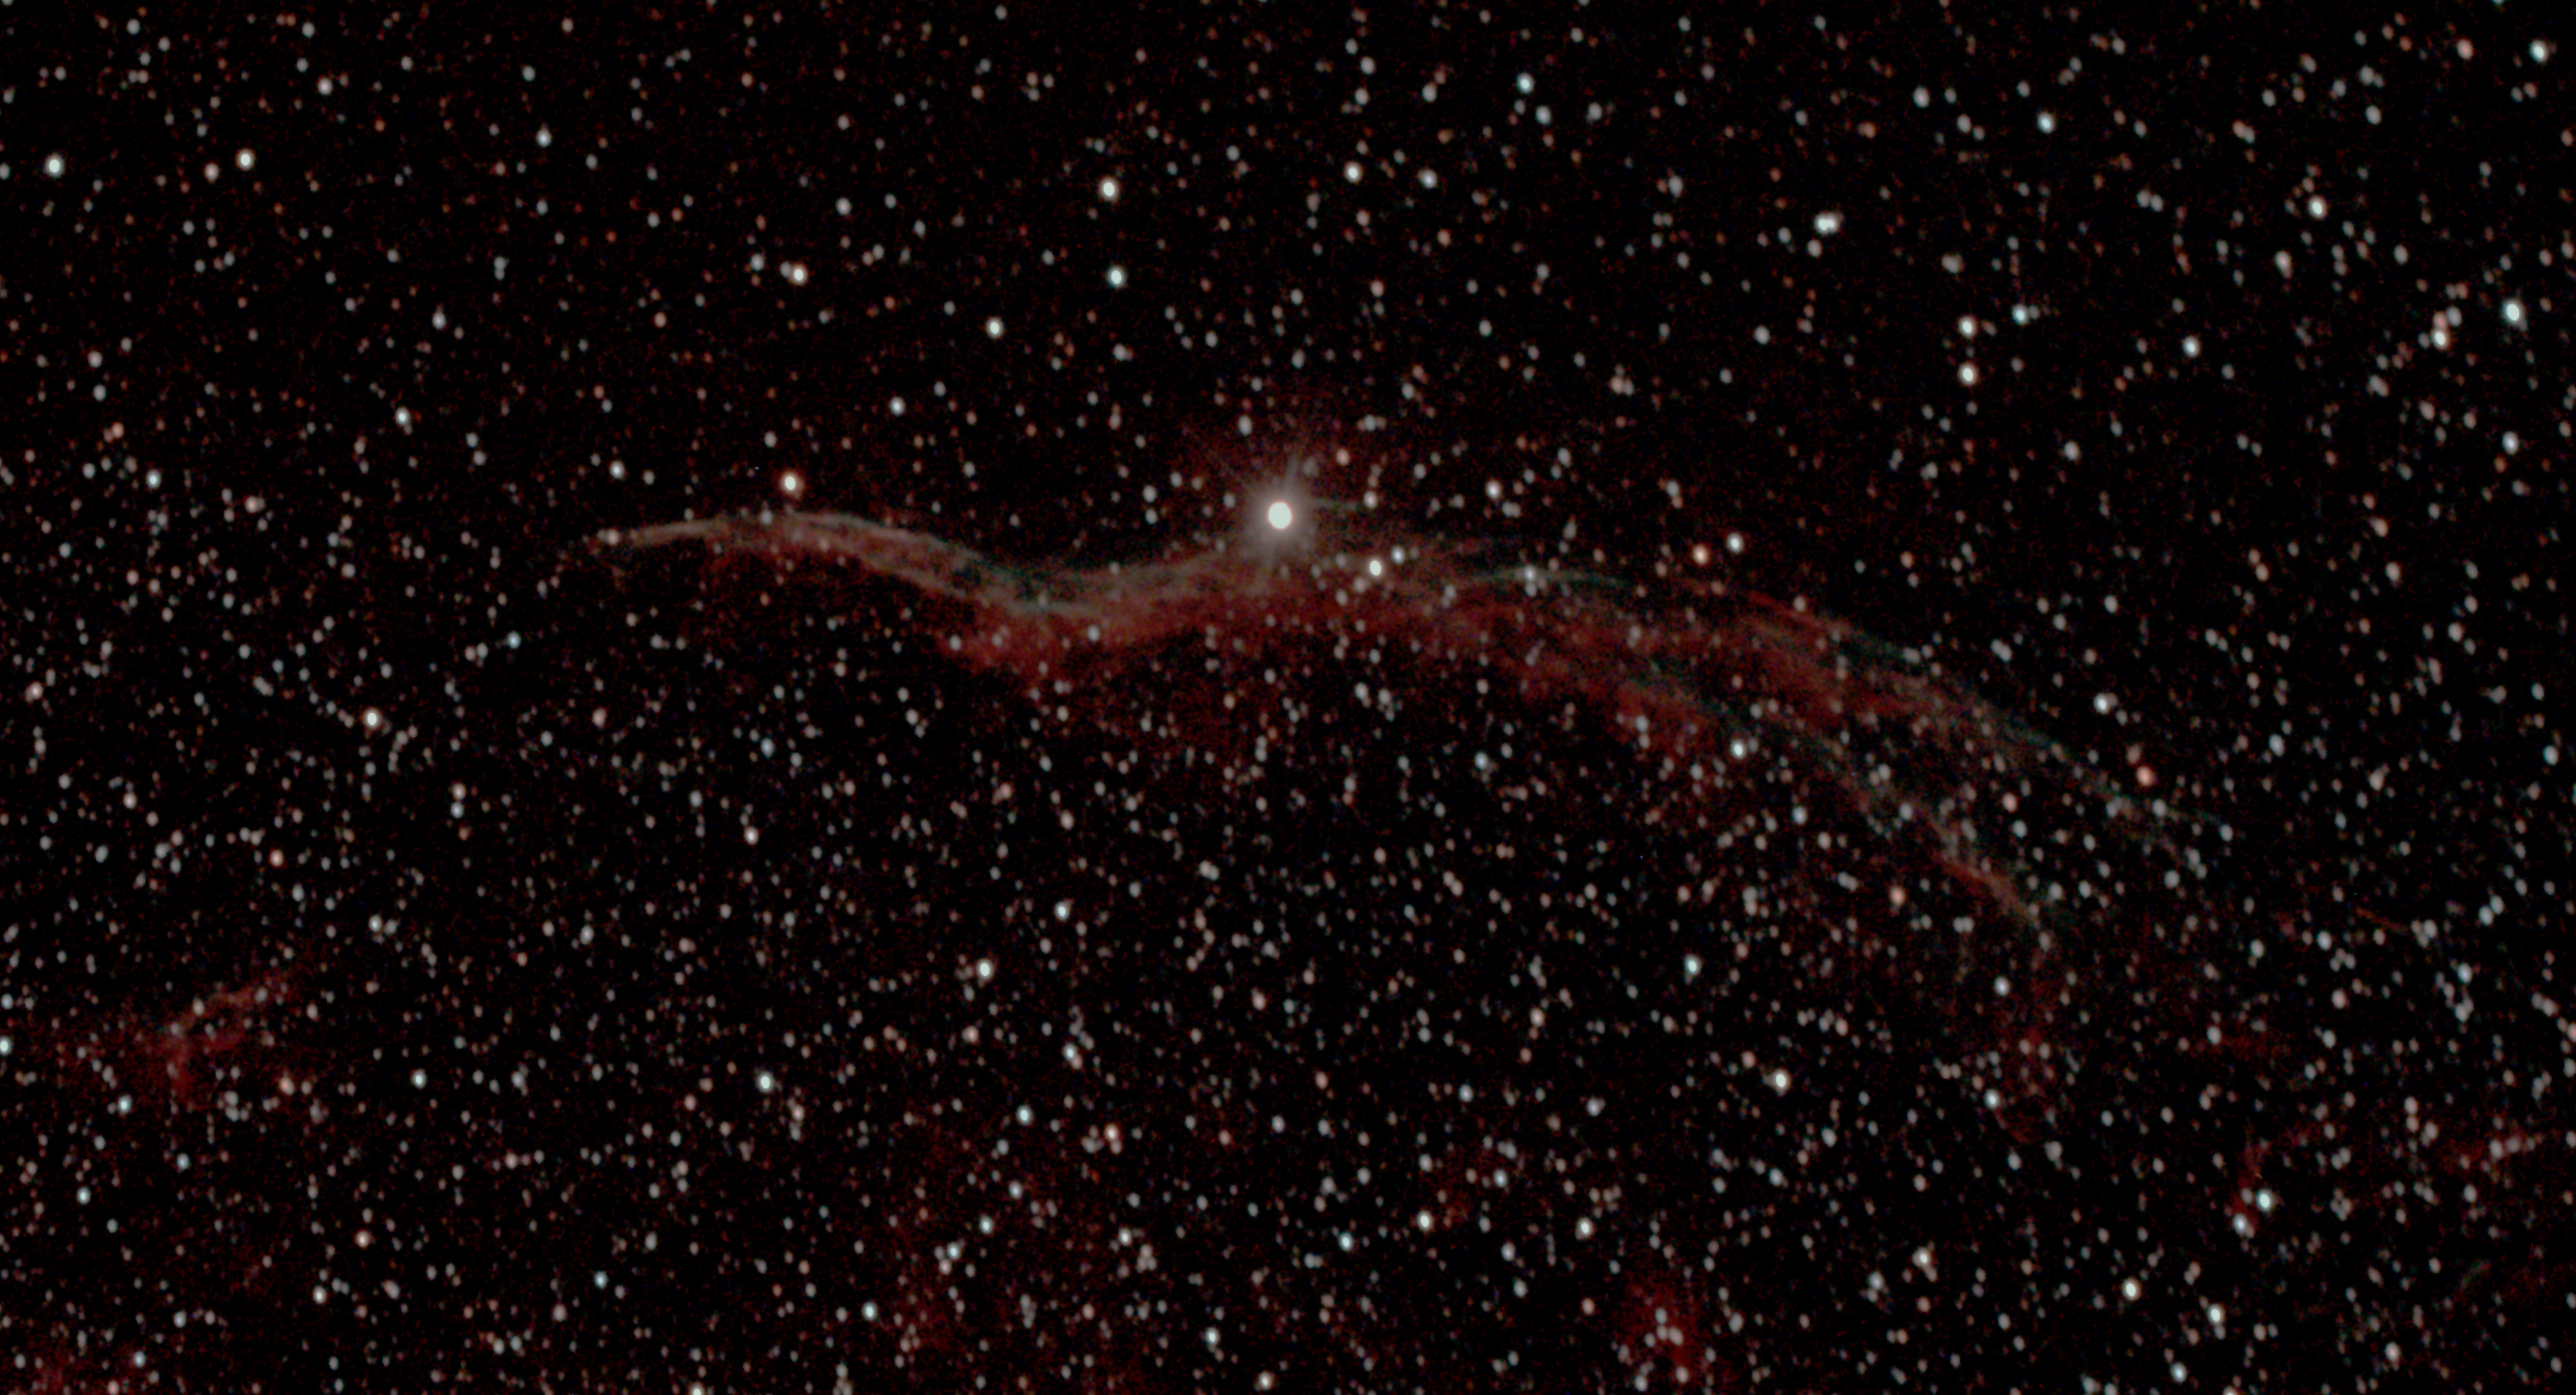
25   NGC 6960 W Veil / Witch’s Broom
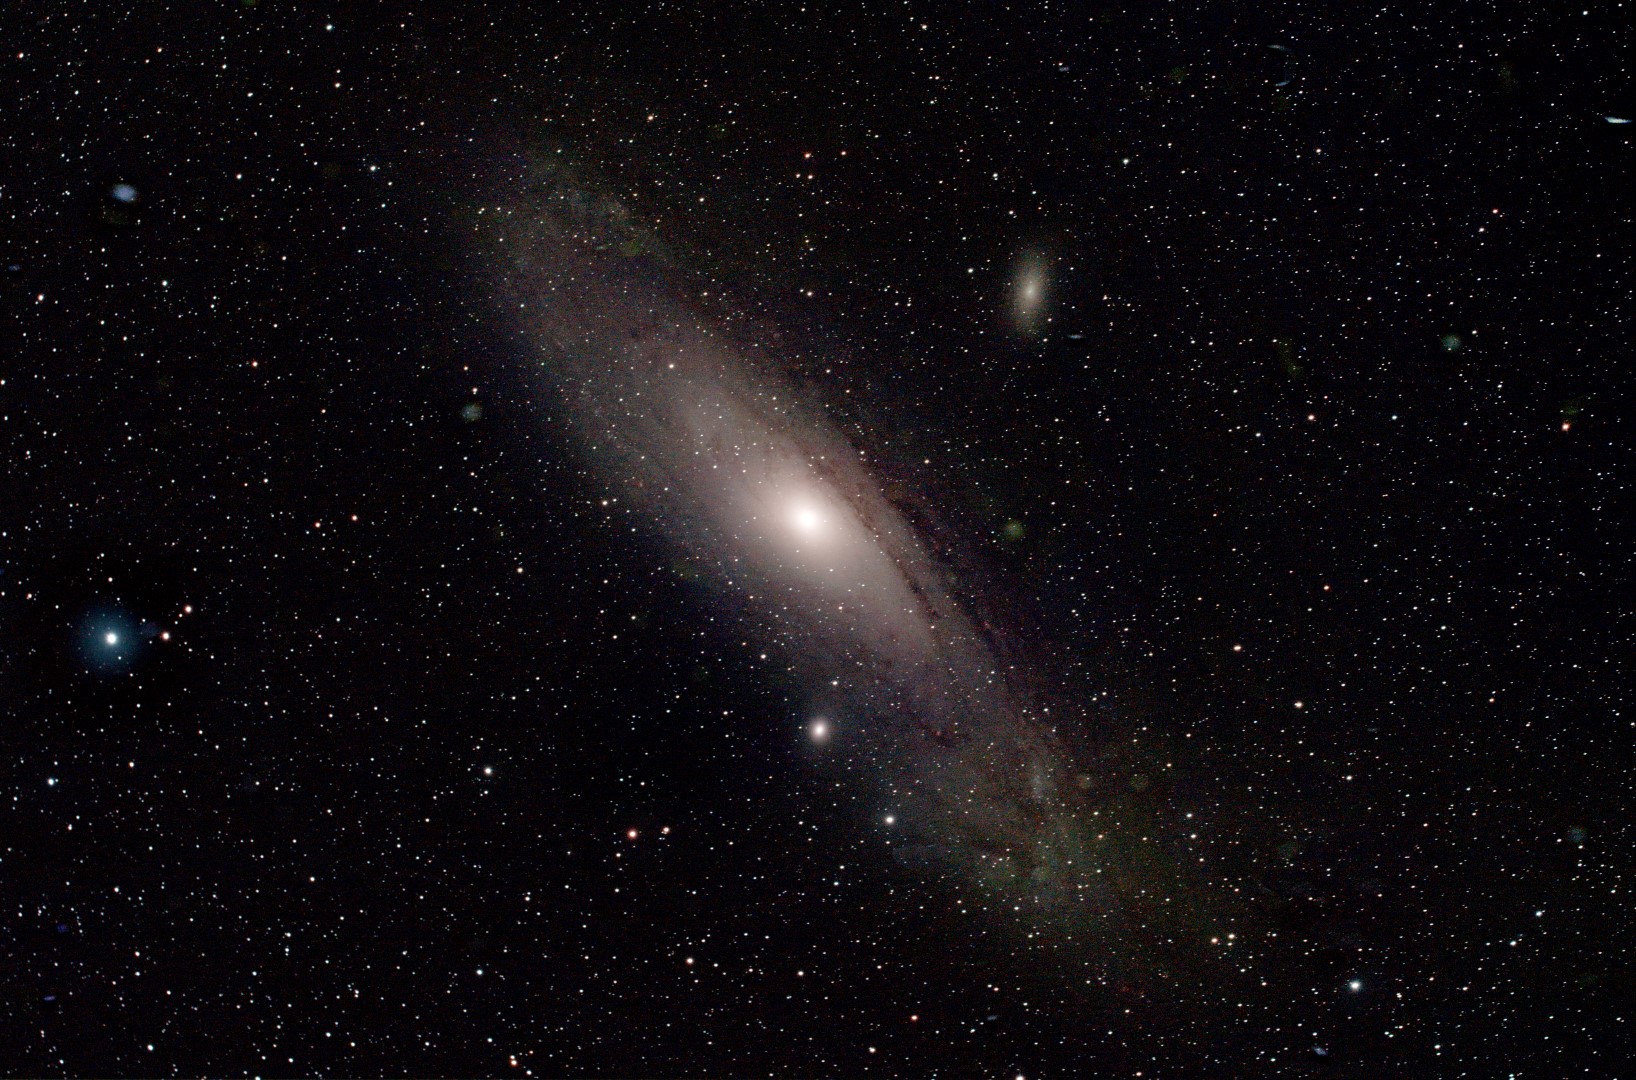
26   M32 Andromeda Galaxy
27 29/08/16 M27 Dumbbell Neb
28   NGC 6960 W Veil / Witch’s Broom
29   NGC 7814 Pegasus galaxy
30   M15 Globular
31   M27 Dumbbell Nebula
32   M27 Dumbbell Nebula
33 08/0916 M27 Dumbbell Nebula
34   M27 Dumbbell Nebula
35   NGC 6960 W Veil / Witch’s Broom
36   NGC 6960 W Veil / Witch’s Broom
37   M31 Andromeda Galaxy
38 11/09/16 NGC 6888 Crescent Nebula
39   NGC 6992 Eastern Veil  (NGC 6995)
40 13/09/16 M57 Ring Nebula

OCTOBER TO DECEMBER

Normal conditions resumed later in September and into the final quarter in the form of overcast skies.  A minor break in the weather allowed a crack at the M33 Triangulum Galaxy towards the end of October but only in late November did another clear period occur, by which time the winter sky had arrived and temperatures had fallen to nearly 0oC.

Picture saved with settings embedded.

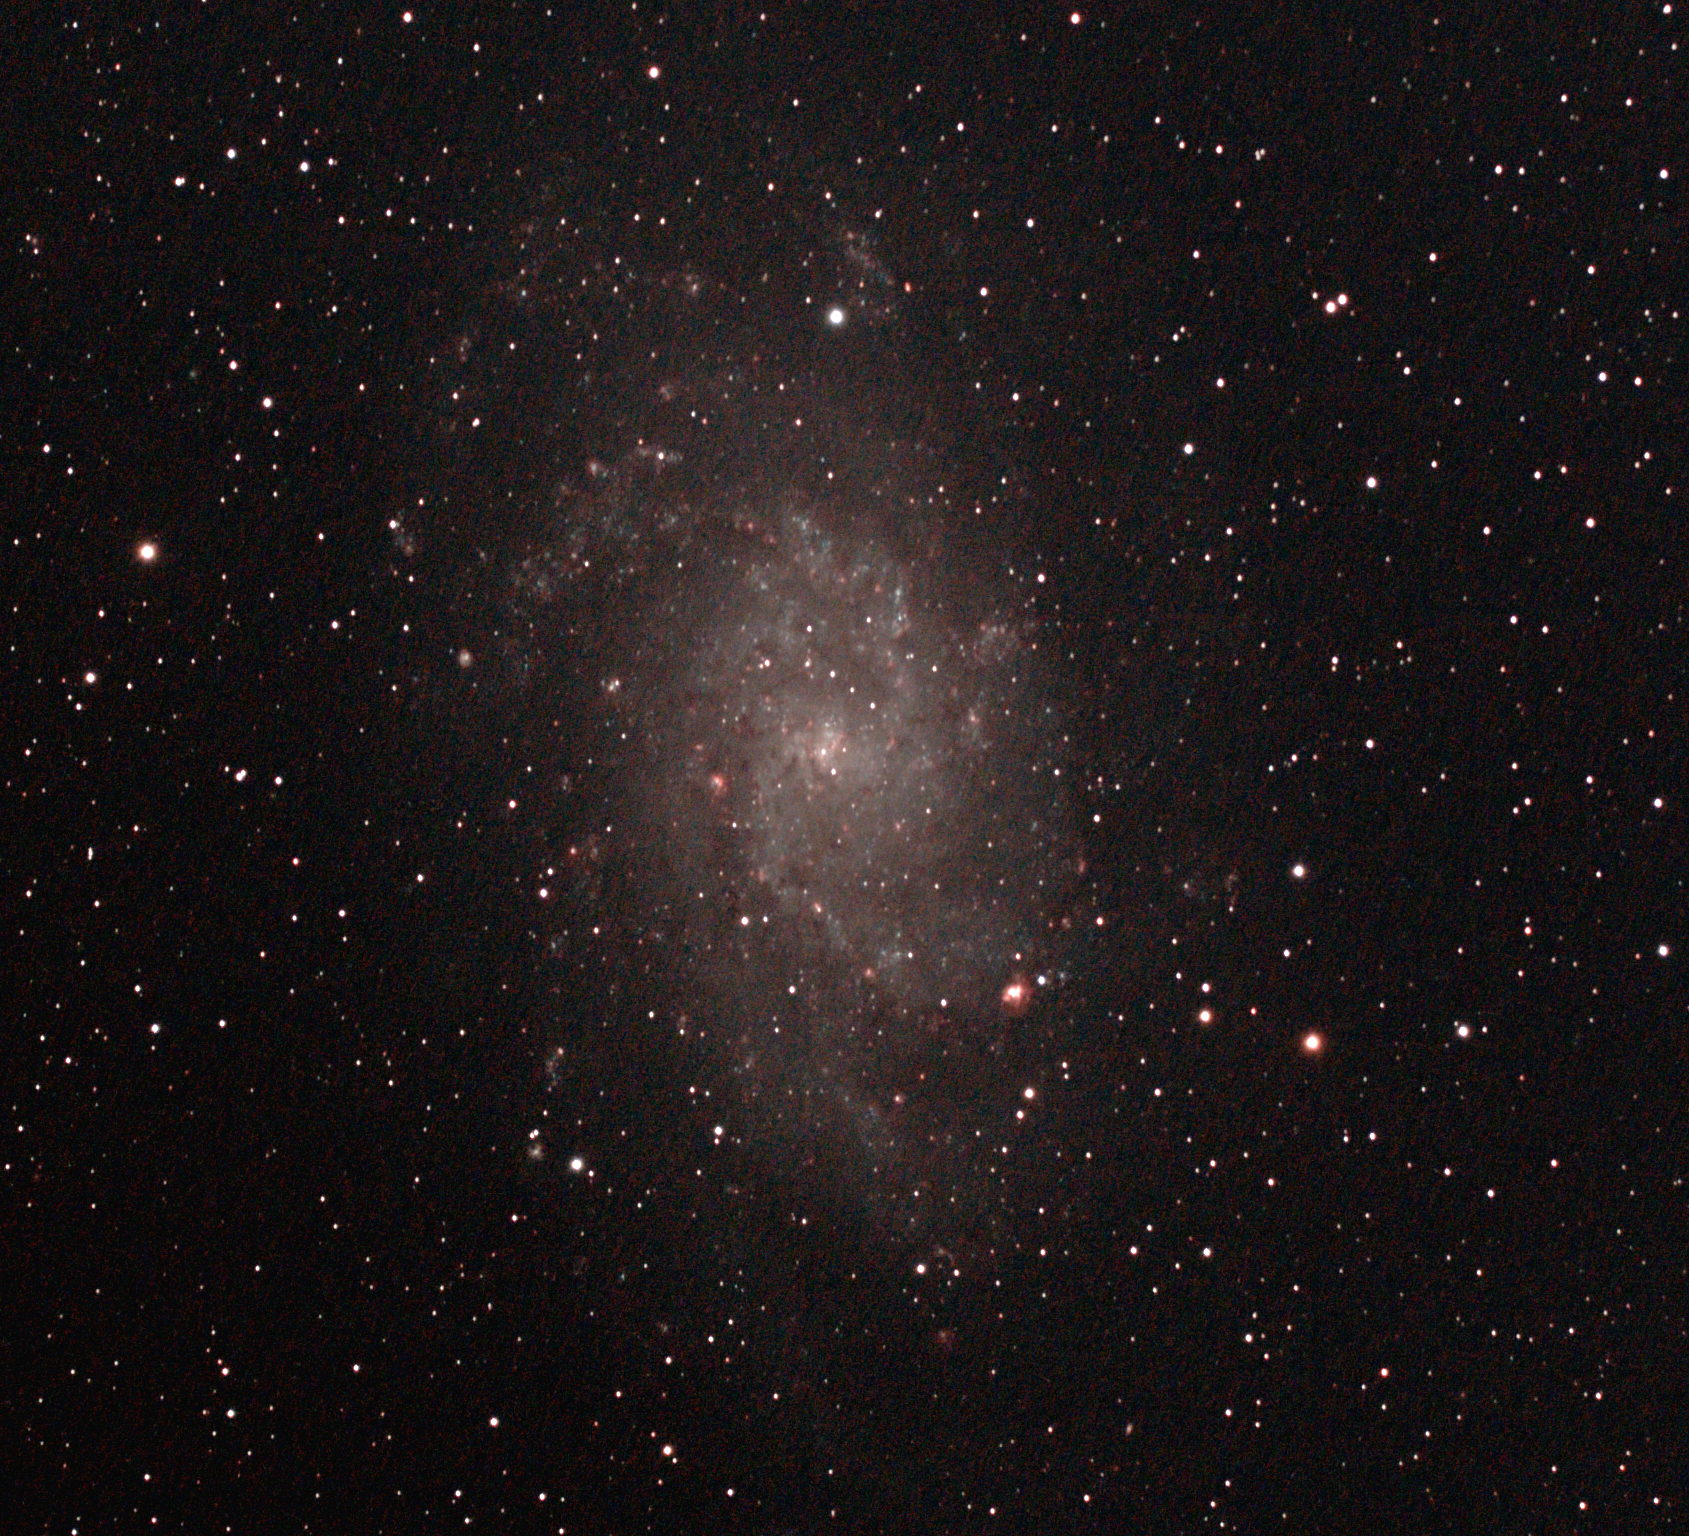
M33 Triangulum Galaxy – consisting of some 40-billion stars, the photons in this image have travelled 3-million light years in order to reach my camera sensor! | WO GT81 + modded Canon EOS 550D & FF guided | 18 x 300 secs @ ISO 800 & full calibration | 22nd October 2016

Unfortunately I am unable to establish a permanent observatory here at Fairvale and have to take-out the bring-in all the astronomy equipment each time.  Apart from being inconvenient this has two practical disadvantages: (i) it can be uncomfortable even unpleasant working outside in such temperatures, and (ii) it is necessary to polar and star align every time; on occasion when using SynScan and EQMOD-ASCOM it can take up to 2-hours before starting imaging.  Fortunately, I think I have now sorted out both these problems which should greatly help in the future.

By re-configuring the computer, mount and camera wiring, combined with establishing a wireless link between my tablet and the computer, once set-up I can now control most of the functions from indoors.  The comfort of being indoors benefits operating in general and especially thinking, which can be quite difficult when astroimaging and made even harder when it is cold.

With prolonged periods of clear weather in the second-half of the year, I was sometimes able to set-up and leave the equipment for a few days under a waterproof cover, which meant that from day-to-day I could be up-and-running each time in less than 30 minutes!  However, I expect this will only rarely be possible and nightly set-ups are likely to continue to be the norm.  Fortunately, I have also recently discovered two techniques that should help both streamline and improve star and polar alignment in the future.

In addition to guiding, PHD2 has a very good polar alignment facility that eliminates the use of the SynScan handset and enables the procedure to be carried out from the computer; it can also be undertaken without sight of the Polaris star, which is a major problem at Fairvale Observatory where it is totally obscured by my house.  At times when the mount can be left outside, I can also save and subsequently re-use the star-alignment model in EQMOD-ASCOM.  All-in-all these and other procedures have made a very positive impact on my astronomy and astroimaging.  The outcome of these changes led to a decent sequence of imaging with which to finish the year and, furthermore, hopefully provides a strong foundation for continuing improvements in 2017.

No

Date Object

Name

41 22/10/16 M15 Globula cluster
42   M33 Triangulum Spiral Galaxy
43 28/11/16 M45 Pleiades
44   NGC 2024 Horsehead Nebula
45   M42 Orion Nebula
46 29/11/16 Hyades Open star cluster
47   NGC 2244 Rosette Nebula
48 30/11/16 NGC 1499 California Nebula
49   IC 405 Flaming Star Nebula
50 03/12/16 M74 Spiral Galaxy
51   M77 Spiral Galaxy
52   M1 Crab Nebula
53   IC 2118 Witch’s Head
54   M78 Reflection Nebula
55 04/12/16 SH2-264 Lamda Orionis
56   SH2-261 Lower’s Nebula

ETCETERA

A few other astronomy and imaging related matters helped shape the past year for me. After  coming across WTSM, I was surprised to be contacted by the Purley Photography Camera Club to give a lecture on astrophotography in March.  I’m pleased to say the event went very well and, furthermore, the process of compiling the presentation beforehand helped expand my own knowledge of the subject too.

TTT Cover

In May I received a sun dial installed on a carved Purbeck Stone plinth as a retirement present.  As a time piece it’s accuracy is limited but it is a beautiful addition to my garden and solar astronomy for which I am very grateful.  By coincidence, later in the year I also came across a simple but charming sun dial set into the ground by the upper lake at Earlswood Common, a short walk from my home and  Fairvale Observatory.  Intriguingly it works by standing on a central stone, located depending on the season, and then uses your own shadow to read off the time – clever.

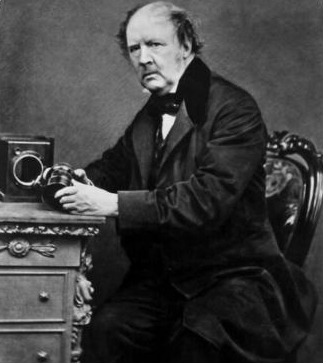
In September we visited Lacock Abbey in Wiltshire, home of William Fox Talbot in the 19th Century – photography pioneer and notable for developing photographic fixing and printing.  The photography museum there is very good and it was fascinating to see his place of work in the house, where the very first photographic print is also displayed.  His contribution to photography  is unique and today he is generally recognised as the father of modern photography.

william-henry-fox-talbot-with-camera-141697035181903901-141210123557

As  a Londoner born and bread, I like to think I know the city well and over my lifetime have visited most of its unique sites, old and new.  However, for some inexplicable reason I had never been to Westminster Abbey, so decided to put that right in November.  It is, of course, a building of unparalleled history, with numerous graves and memorials of centuries of kings & queens, as well as scientists, explorers, poets, actors etc.  Noteworthy amongst these for the astronomer is the physicist and mathematician Sir Isaac Newton and  Second Astronomer Royal, Edmond Halley.

I must next give mention to the man who throughout the year dominated my reading, learning and thinking – Albert Einstein.  His work during the early part 20th Century still dominates today’s physics and astronomy.  We continue to make ground breaking discoveries that substantiate and build on his ideas that were originally postulated over 100-years ago.  Pictures only recently obtained using the the Hubble telescope have spectacularly demonstrated the effect of gravitation lensing and in 2016 for the first time ever the existence of gravitational waves was confirmed.  This year I therefore decided to understand the man and his work better.  During the first half of the 2016 I read Walter Isaacson’s excellent biography of Einstein and have recently completed and 8-week Stanford University course on the Special Theory of Relativity.  They were both very enjoyable, immensely interesting and time well spent.

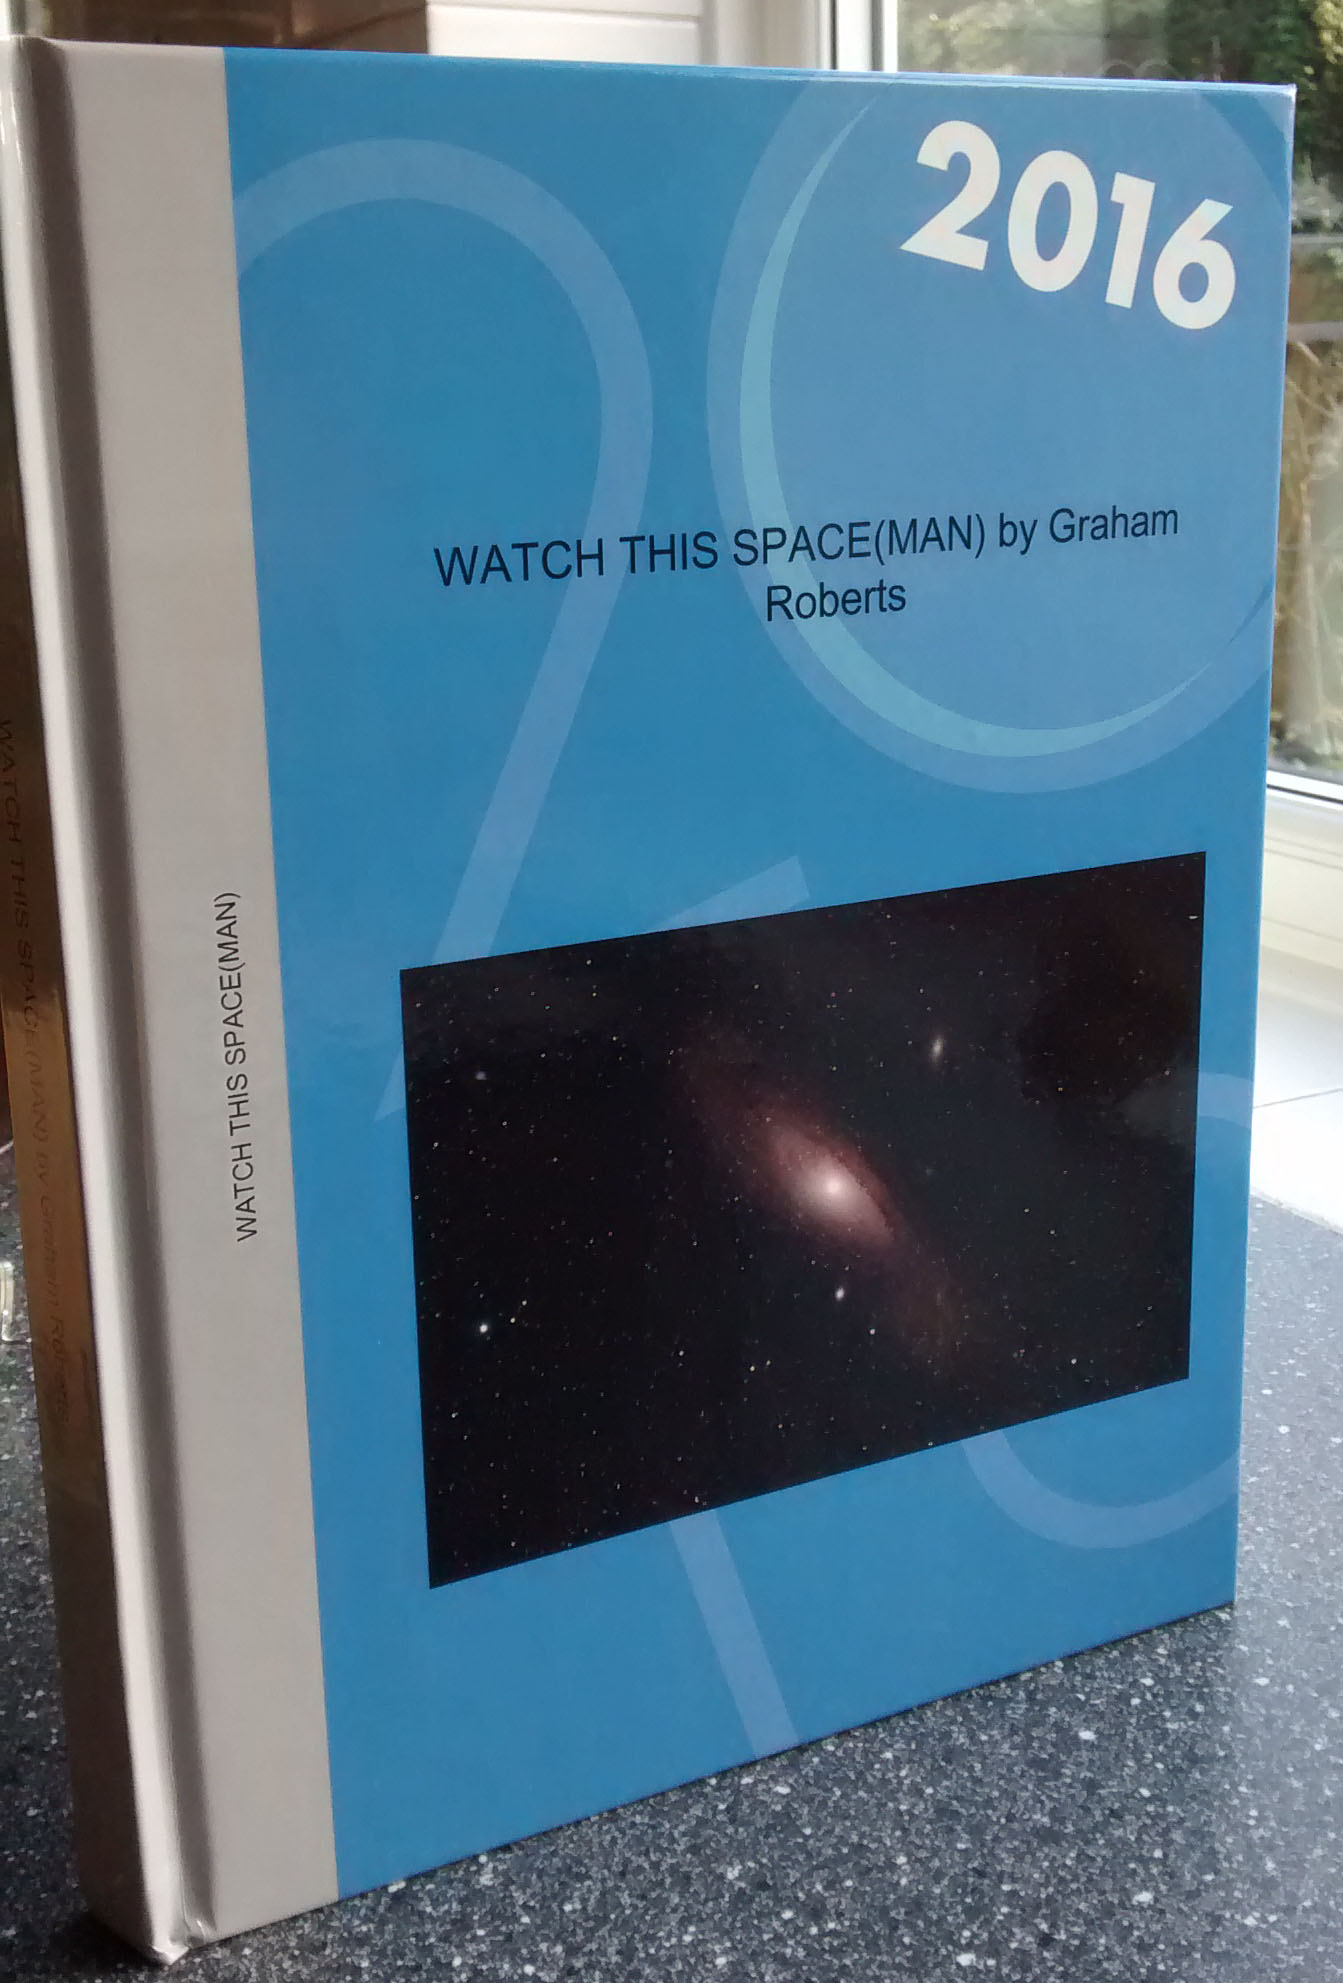
Finally, this Christmas I was surprised and very pleased to receive a printed, bound copy of the WTSM blog for the period since its inception on 5th August 2014 until 10th November 2016.  A lot of work has gone into producing this blog and I’ve always been concerned that somehow something might go wrong with the website or internet and it would all be lost. This book now safely preserves in print all the blogs and images posted during the aforementioned period.  The production is generally very good and I have already enjoyed re-reading some of my blogs once again.

img_20161227_122915516

WTSM: The Book!

Favourite Images

As a result of the aforementioned issues, 2016 has certainly been a year of two halves.  Having resolved the equipment problem and started to employ some very useful new techniques and software, I was eventually able to obtain some good images. My personal favourites in no particular order are shown here below:

Picture saved with settings embedded.

Barnard’s Loop & Lamda Orionis Nebula : Vixen Polarie & modded Canon 550D + Sigma UWA @ 20mm | 11 x 240 secs @ ISO 1,600 + darks | 7th January 2016

IMG_6219L1C1 (Large)

Monument Valley by Night: order of buttes same as daytime photo above. Canon 700D + 10mm Sigma wide-angle lens | 20 x 15 secs @ ISO 6,400 | 10th April 2016

Picture saved with settings embedded.

B142/3 Barnard Dark E-Nebula

Picture saved with settings embedded.

M27 Apple Core Nebula | William Optics GT81 + 50mm Guide Scope & 10-point EQMOD-ASCOM alignment model | modded Canon 550D + Field Flattener | 3 x 300 secs @ ISO 1,600 & full calibration, 90% cropped | 30th August 2016

Picture saved with settings embedded.

M31 | WO GT81 + modded Canon 550D & FF | 10 x 300 secs @ ISAO 1,600, darks + flats | 8th September 2016


Round-up & goals for 2017

Despite the frankly awful start to the year, astronomically speaking 2016 finished on something of a high.  Furthermore, contrary to initial indications I was in the end partially successful in achieving some of my objectives set out at the beginning of last year:

RECORD CARD – 2016
Goal Specifics / Results Outcome
Increase imaging exposure times Improved equipment set-up and alignment and successfully started autoguiding with exposure times of up to 8-minutes. DONE


Improve processing Started using newer version of Photoshop CS2 + other related software. Improvement with post-processing using online tutorials and Nik Syzmanek’s booklet Shooting Stars. GETTING THERE


Start widefield imaging Purchased Vixen Polarie, with portability put to use in the USA but did not make UK dark sky sites as planned. GETTING THERE


img_20161130_234303293

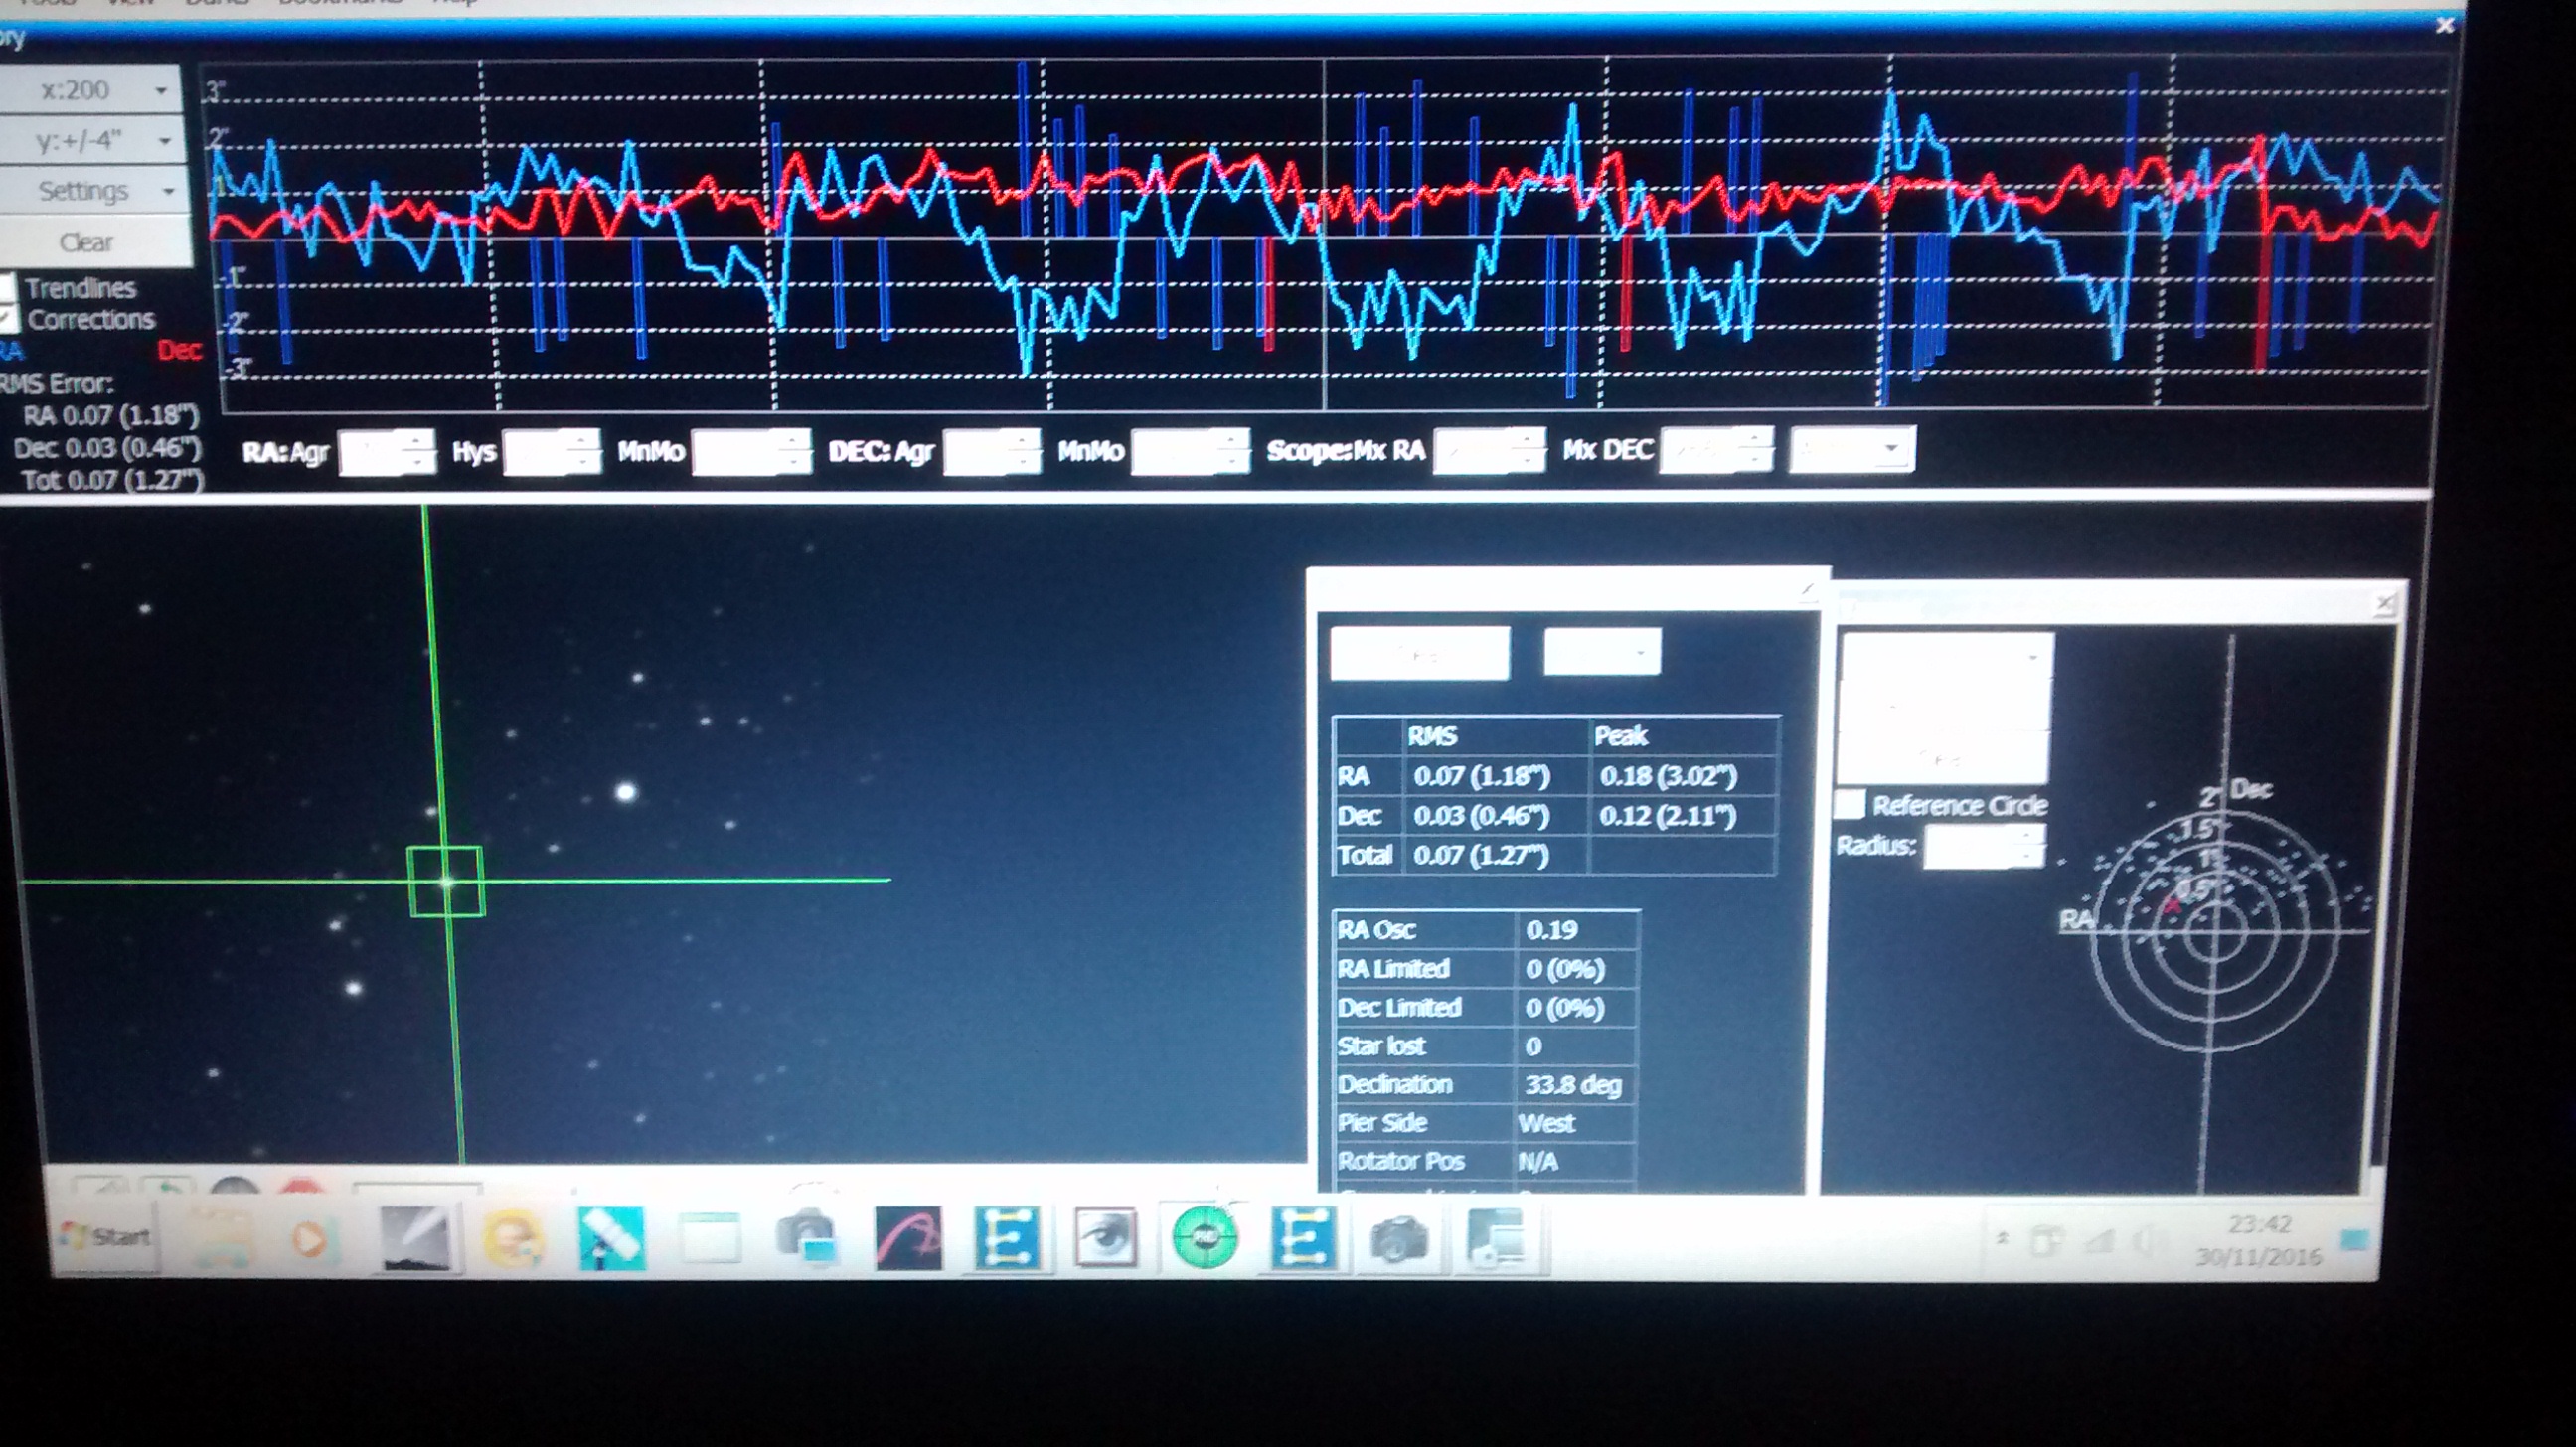
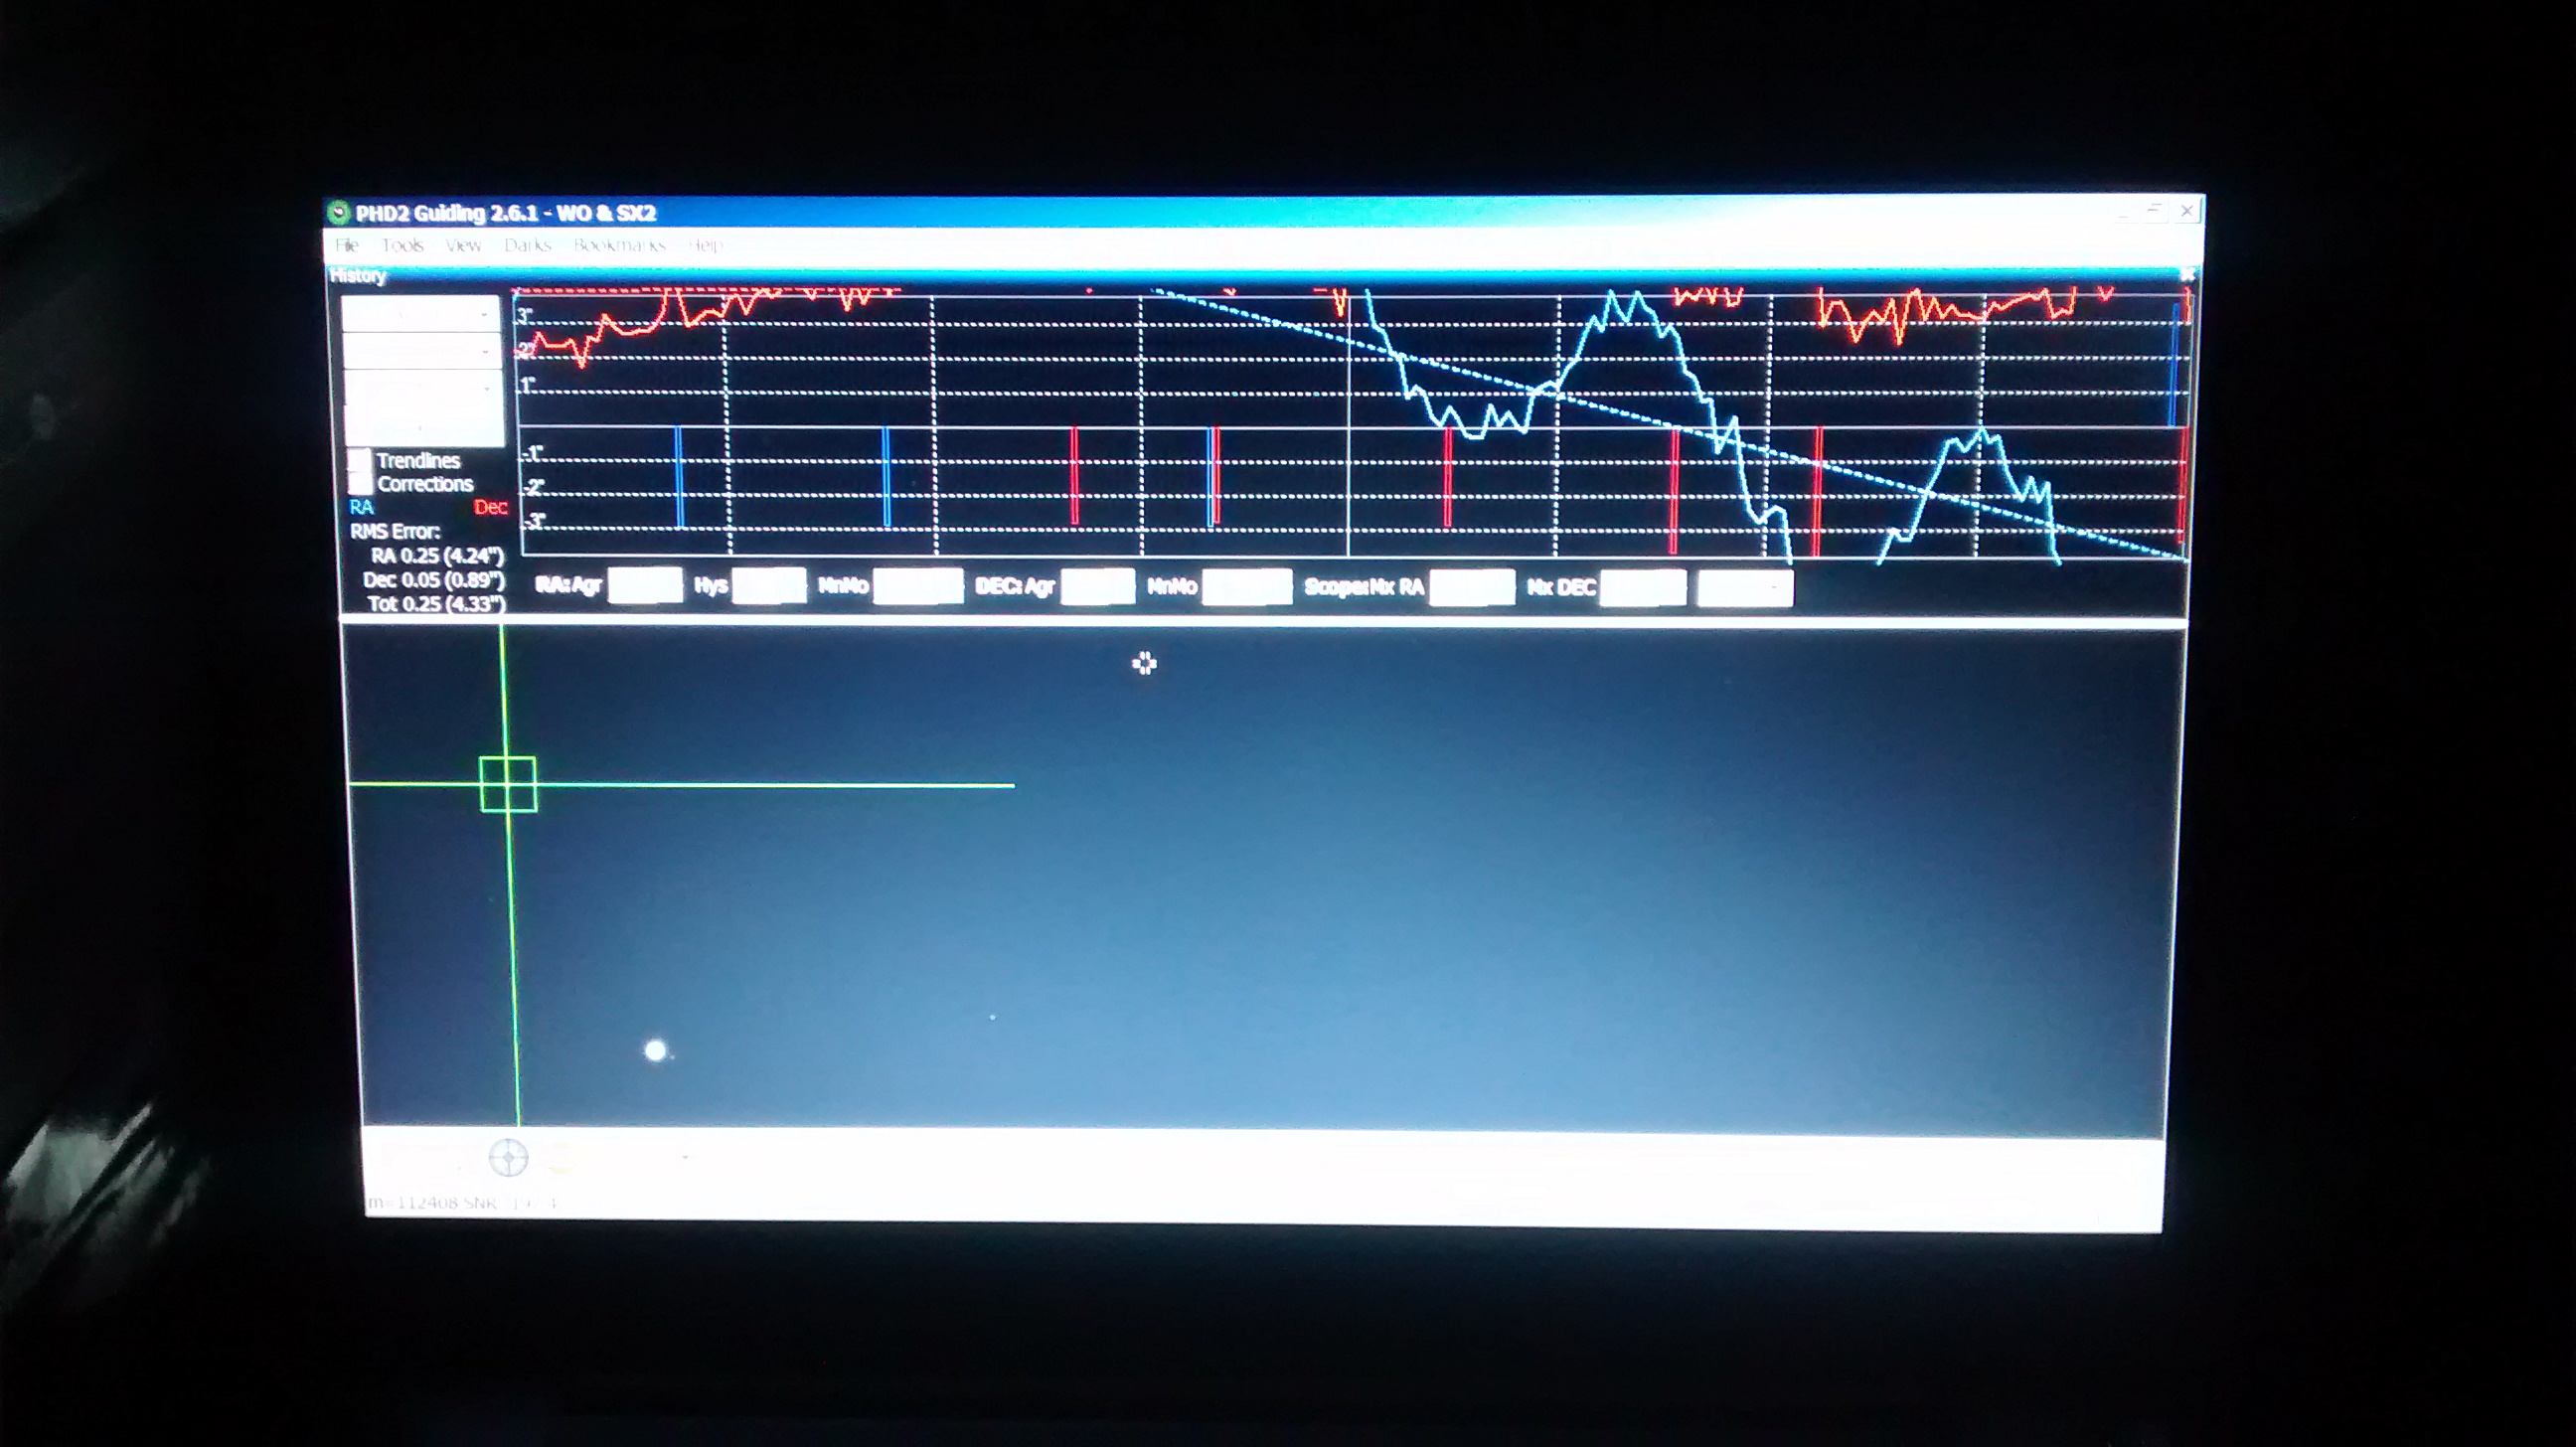
Getting better: PHD2 working screen 30th November 2016, DEC is good but room for improvement with the RA settings. Notwithstanding, the impact of tracking and image quality is noticeable.

download

I’m concerned about setting more goals or the forthcoming year but I think it helps, so here goes:

  • Improve processing: As the headmaster’s report would say “room for improvement” and I will try.  I have purchased Warren Keller’s book Inside PixInsight, considered by many to be the gold standard of post-processing software but is a nightmare to learn – this may be a step too far for now, we’ll have to see – maybe 2018?
  • Expand and improve widefield imaging: First – use the Vixen Polarie as had been intended last year to obtain nightscape images at UK dark-site locations.  Second – look at ways of using a widefield set-up with the mount more successfully.
  • Start LRGB imaging: I spent a lot of time in 2016 considering the question – what next? I am keen to image smaller DSO objects, in particular galaxies and was on the verge of purchasing a larger telescope – probably another refractor.  However, after attending a talk by Nik Syzmanek, one of Britain’s foremost astrophotographers, I have come to the conclusion that the next step should probably be a move to LRGB imaging, which if successful probably has the greatest potential to improve my pictures – let’s hope so.

Looking back 2016 was a funny old year, which for me was defined by three experiences:

Despite two wonderful periods at the end of August and November the weather for astronomy was mostly awful, with cloud cover for weeks on-end and when it was clear, it was a full moon – frustrating or what?

I had already learned that patience and perseverance are required in large quantities for astroimaging but the equipment break-down in May and June was so severe and apparently insoluble that, together with the aforementioned cloudy skies, I really thought of giving up.

However, this time there is a happy ending: after I finally solved the equipment problem and started autoguiding, I feel I have eventually made some great strides with my imaging in 2016 which, furthermore, holds much promise for the coming year and I hope can record in WTSM’s Reflections at the end of 2017.

Watch this space!


The future is not what it used to be


sftf

If I’m honest my astrophotography has so far often been – never mind the quality feel the width!  That is to say, I have tended to chase objects – nebulae, galaxies, planets, solar – in order to learn about my equipment and the night sky as well as just have fun recording images of these distant worlds.  Nothing wrong with that is there?  It’s not that I don’t aspire to obtaining the best image possible and I have made good progress since starting out but I’ve often felt constrained by circumstances.

Although I’ve generally been happy with my images, it’s a fact that there are a number of factors that altogether make astrophotography difficult, especially here at Fairvale Observatory:

  • Poor weather & persistent cloud cover
  • The Moon
  • Buildings & trees obscure sightlines
  • Light pollution from Gatwick airport
  • Numerous aircraft passing overhead
  • Equipment problems
  • Software problems
  • Equipment and software failures
  • Equipment limitations
  • Need to assemble equipment each time

sky-mosaic

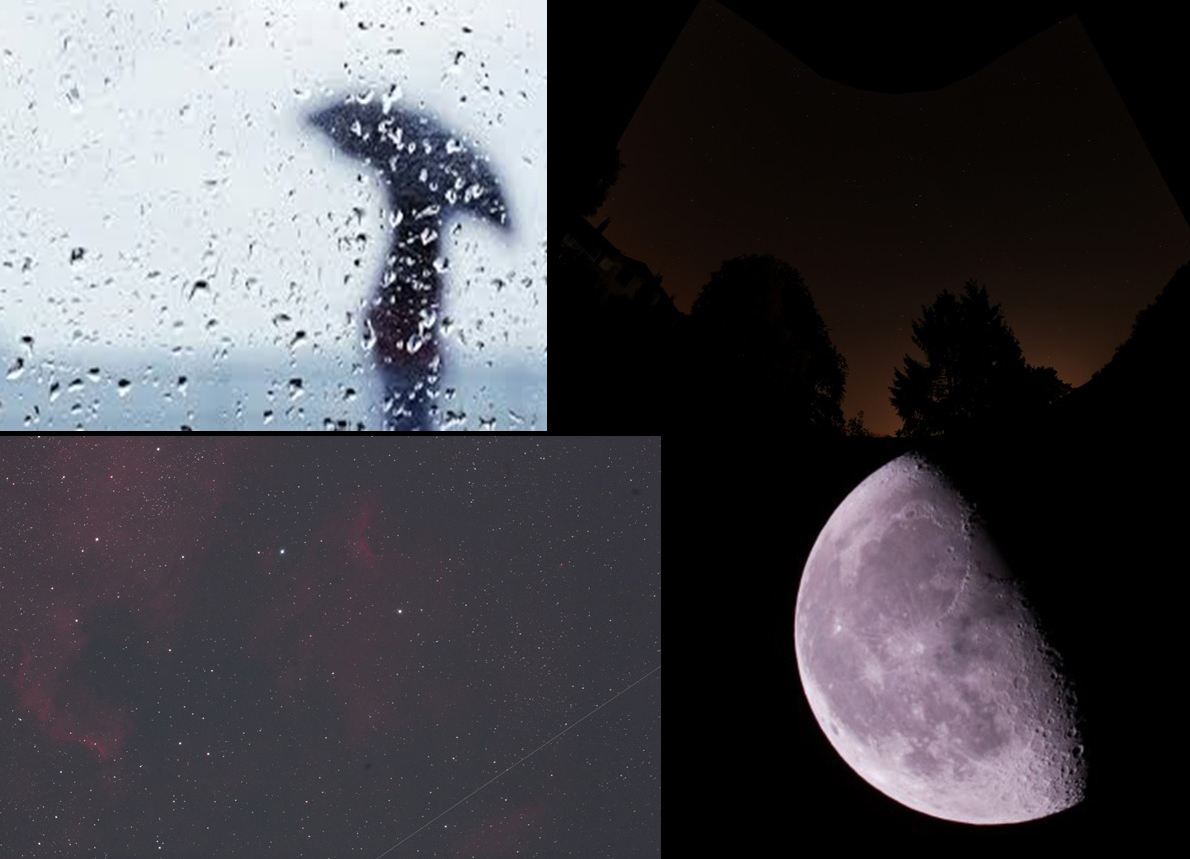
Bad weather, frequent cloud cover, limited sightlines, aircraft trails and the inevitable monthly occurrence of the Moon limit imaging opportunities here.

Under these circumstances I usually need to grab what I can, frankly it’s a miracle I’m able to achieve anything sometimes; Met office statistics for the six-months period from September 2105 showed cloud cover was a record 68% compared with an historical average of 32% for that time of year, as a result it was unusual to be able to undertake astrophotography more than once month, if that!  Wherever possible I therefore have to target those items that I can improve easily, quickly and cheaply dealt with, which is mostly equipment.  Buoyed by renewed enthusiasm from my recent autoguiding success, I now intend to concentrate on changing some key items that I hope will eventually bring about more noticeable improvements.

sign2For a while I have been thinking about getting a larger telescope, in order to get to those faint fuzzies that are beyond the capabilities of the otherwise excellent William Optics GT81.  As usual the choice is a minefield of possibilities, each with inevitable imaging pros and cons!  I started thinking about a Ritchey Chrétien or Schmidt Cassegrain but I have really appreciated the qualities of the aforementioned WO GT81 and am now erring towards a larger refractor.  However, after further consideration I am now considering a change of priorities.

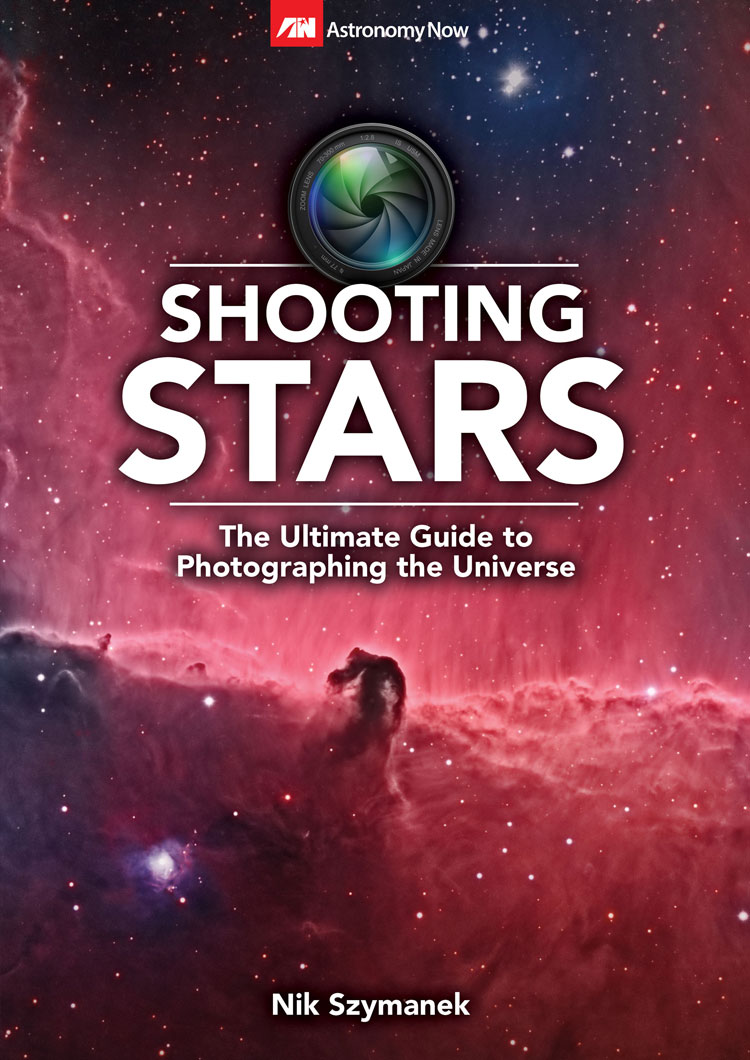
In September I was fortunate to attend a presentation on image processing by Nik Szymanek who, it has to be said, really knows his onions when it comes to astrophotography; I was intrigued and impressed to find out he also hails from my neck of the woods when I was a teenager in Essex and is an accomplished rock drummer – something I also used to meddle with in the past – what a geezer, as he would say.  The talk was very instructive and I am now ploughing my way through Nik’s fabulous book on the subject called Shooting Stars (published in magazine form by Astronomy Now).  Such personal, first-hand and relevant guidance is difficult to find in astroimaging and the book has a wealth of really practical information and useful advice that I wished I’d known sooner.  Good equipment is important but in the world of digital imaging the significance of processing cannot be overstated.  It’s a dark art alright (no pun intended) but Nik’s work has strengthened my resolve to improve my processing knowledge and I’m even more determined to raise the bar during the forthcoming winter.

20160708-shooting-stars-for-storeFollowing Nik’s talk and listening to others, the penny that has now dropped is that for the moment it’s not the telescope but the camera that needs changing.  After careful thought it’s apparent that I already have very good set-up, yes a bigger aperture would be good for those smaller fuzzies but the 81mm apochromatic refractor I already own is an outstanding telescope that still has much potential when combined with the AZ-EQ6 mount and now autoguiding.

99bc97fcafac09f14ac69801dab00398

The addition of a modded DSLR at the beginning of last year had a significant impact on my images, especially with Ha dominant DSOs which I literally saw in a new light using this camera.  I have continued with the DSLR for a number of reasons but mainly because I am familiar with such cameras which are relatively easy to use and produce reasonable results when starting out with astrophotography.  However, listening to Nik and reading the forums and elsewhere, I have come to accept that the best way forwards should now be a CCD-type camera.  As a result I am deep in my research of CCD issues and possible cameras – this could take some time and won’t be cheap!

The operation of CCDs is quite different to a DSLR and I’m sure will involve a whole new period of pain but it’s clear that this is the best route for now if I am to significantly improve my astrophotography.  Other than the technical challenges CCD imaging presents, I am however concerned about the greater number of frames needed for LRGB + calibration and how that’s going to work with the weather restrictions and other problems I have but it’s got to be worth a try.

However, before setting out on this daunting task I first slewed the camera towards a few familiar objects just to experiment with guiding and assess the benefits it might bring to my imaging in the interim.  A spell of unusually good weather in late August – early September was too good to miss and with guiding I was able to achieve exposures of up to 8 minutes.  However, for the moment I continued to limit the number of Subs and calibration frames just to ensure I could shoot more objects in the available time, plus you never know when the next bank of cloud will roll in – old habits die hard!

download

Looking at the results below demonstrates my progress when compared with earlier images but the limited number of frames and calibration has probably restricted the full benefit of what might be gained from guiding and some shots remains quite noisy. Nonetheless, I now have high hopes that the potential is within my grasp to make real progress in achieving better image quality.  I am not convinced I have yet reached a turning point but I am well positioned to navigate the tasks required to get there, which are now more clearly understood and in my sights or should that be RDF – watch this space!

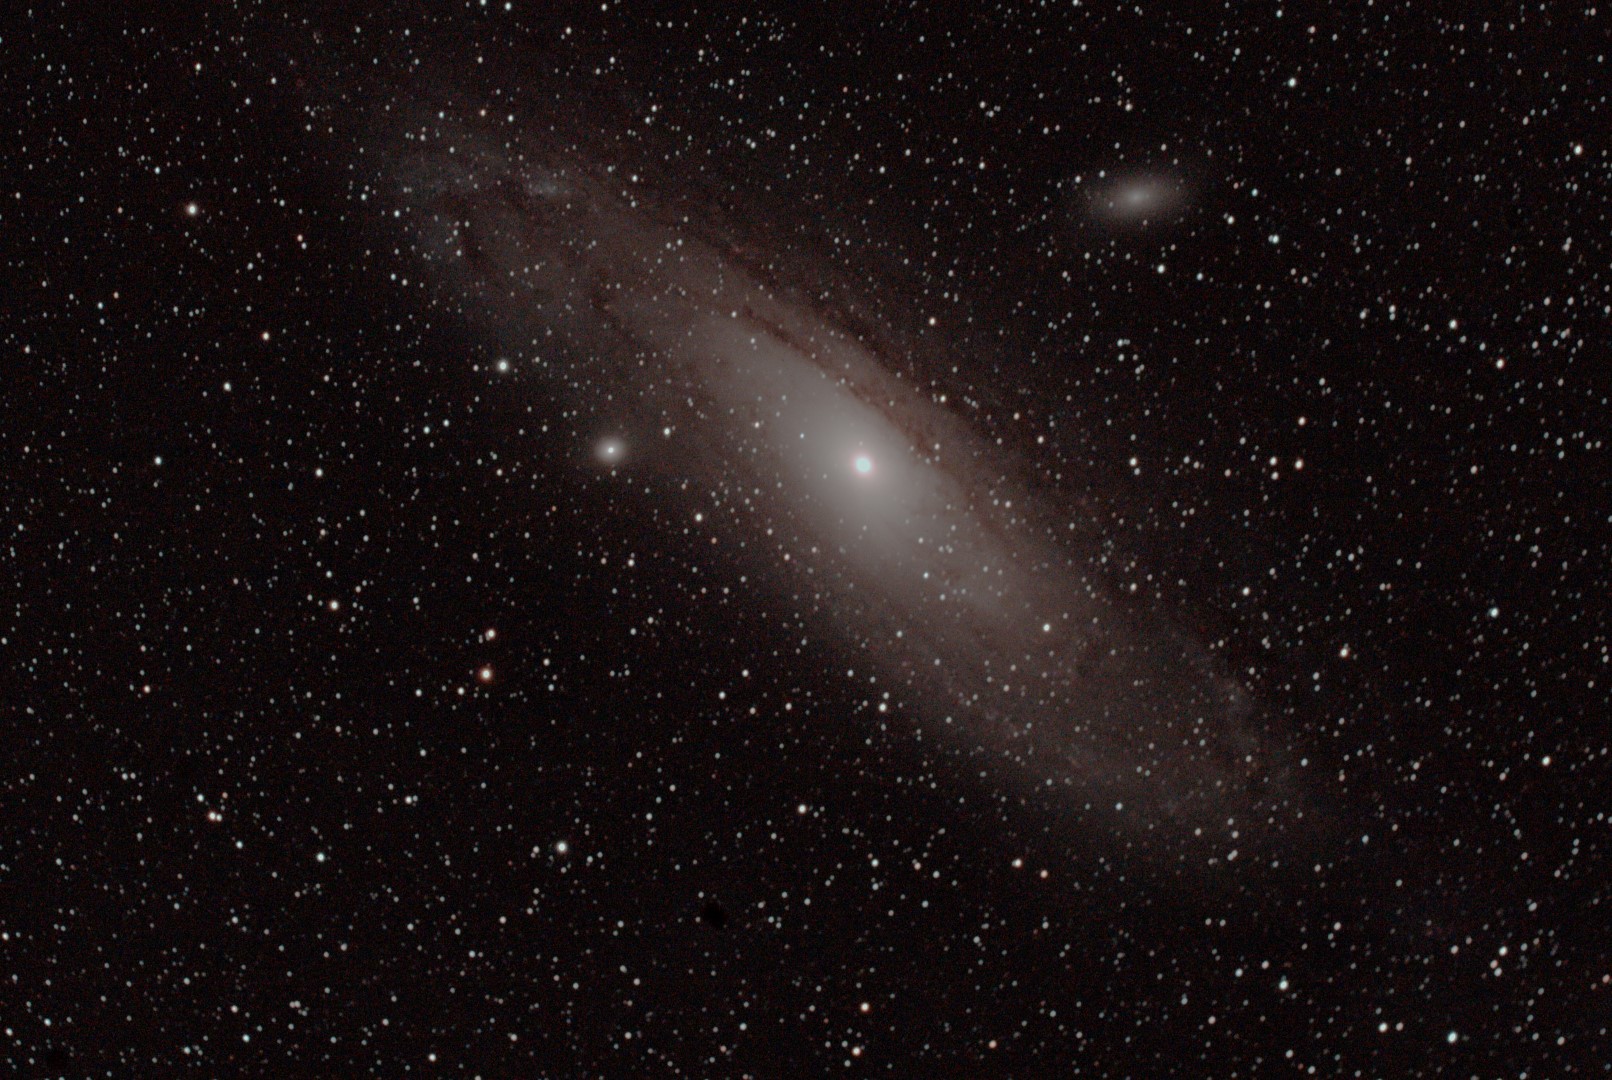
M31 Andromeda Galaxy

M31 DSS2 30 sec ISO800 170814crop

WO GT81 + unmodded Canon 700D & FF| 10 x 30 secs & ISO 800 | August 2014

Picture saved with settings embedded.

WO GT 81 + modded Canon 550D + FF | 9 x 120 secs @ ISO 1,600 | 19th September 2015

Picture saved with settings embedded.

WO GT81 + modded Canon 550D & FF & PHD guiding | 10 x 300 secs @ ISO 1,600 calibration | 8th September 2016

NGC 6905 Western Veil Nebula – The Witch’s Broom

NGC 6960multiplelevelsonecontrast FINAL(Medium)

Canon 700D | 20×90 sec + darks.bias/ flats @ ISO 800

Picture saved with settings embedded.

WO GT81 + modded Canon 550D + FF & PHD guiding | 5 x 300 secs @ ISO 1,600 & calibration | 8th September 2016

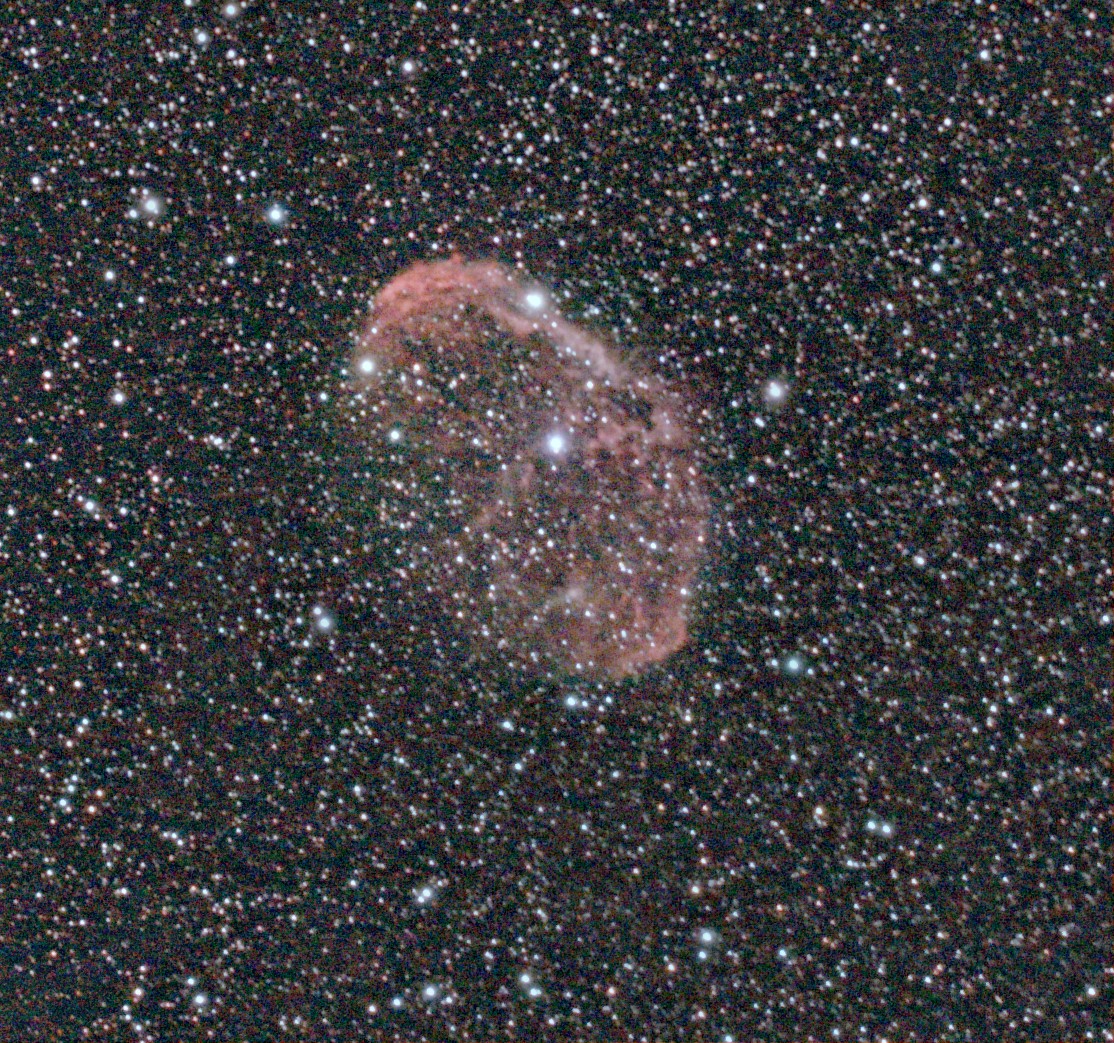
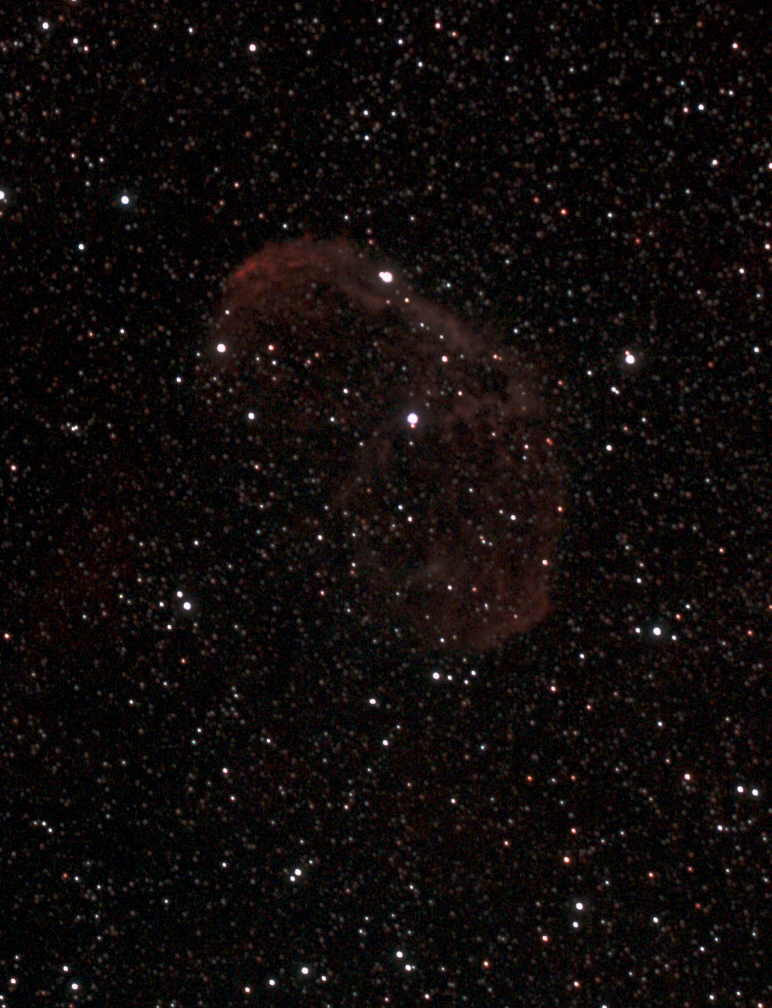
NGC 6888 Crescent Nebula

Picture saved with settings embedded.

WO GT81 + modded Canon 550D + FF | 19th October 2015

Picture saved with settings embedded.

WO GT81 modded Canon 550D + FF & guiding | 10 x 300 secs @ ISO 1,600 & calibration | 11th September 2016

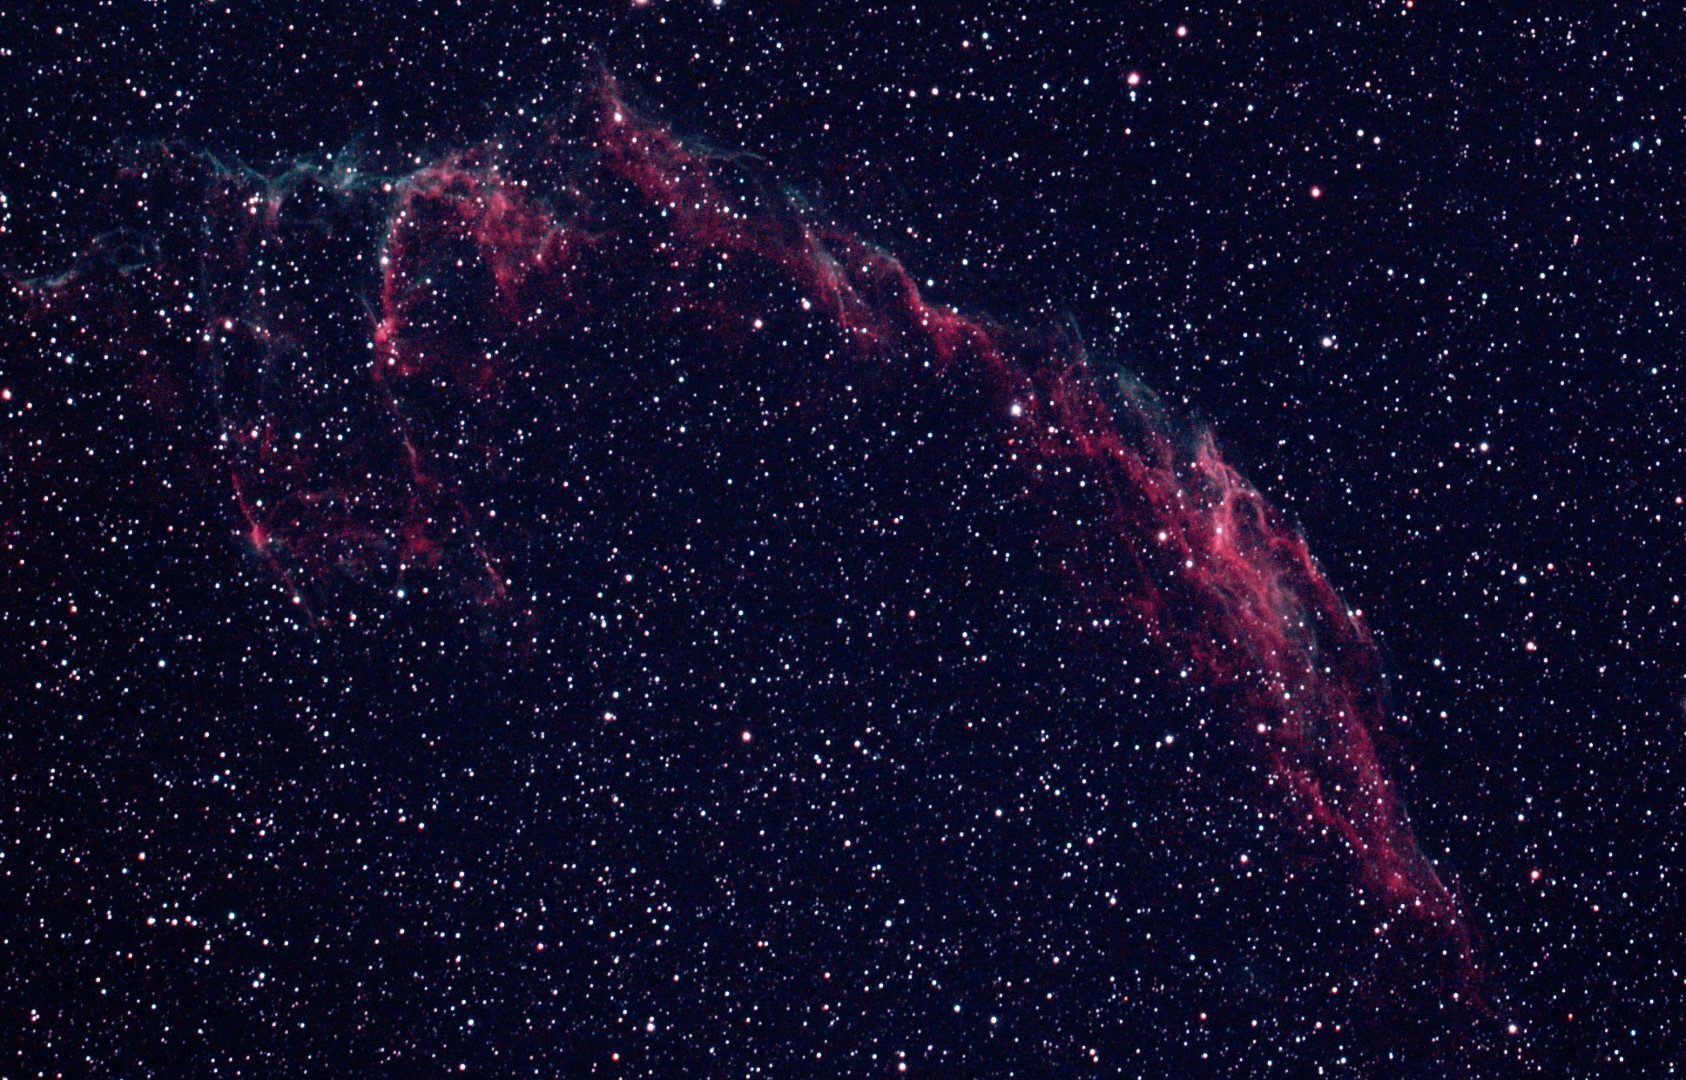
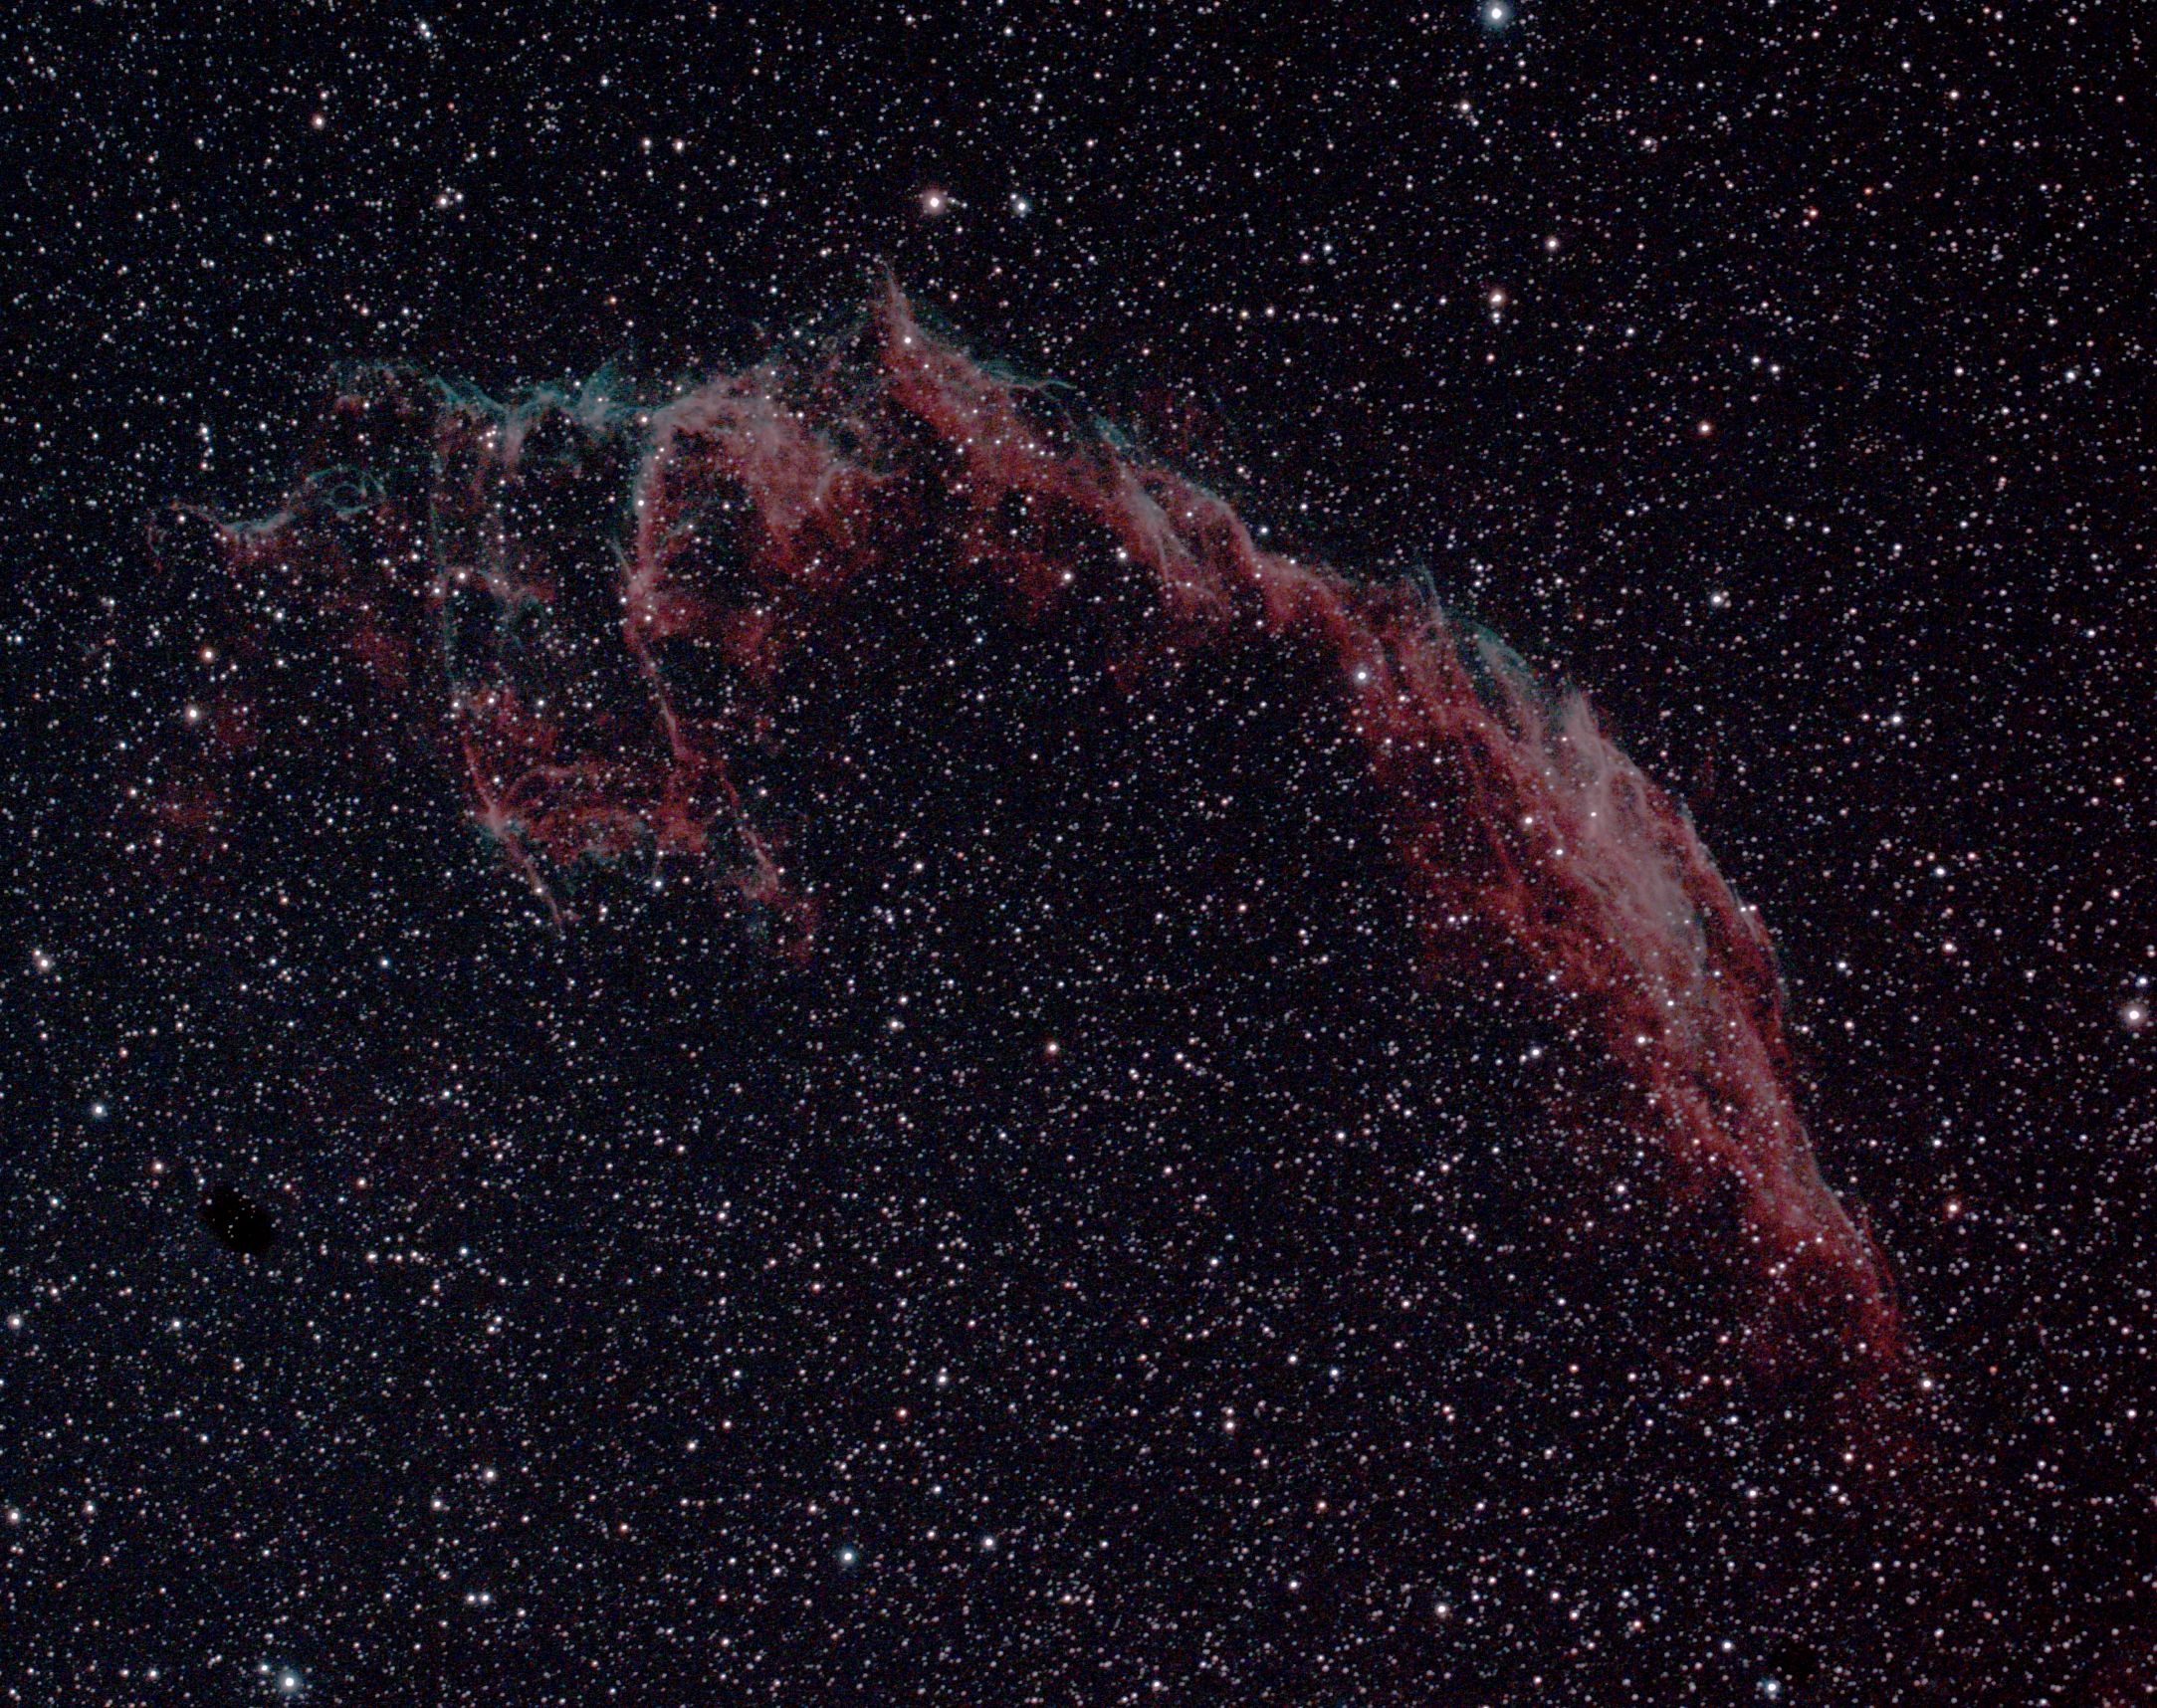
NGC 6992 Eastern Veil & Bat Nebula

NGC 6995 Stacked1-22 (Large)

Eastern Veil Nebula – NGC 6992 (right) & NGC 6995 (left). WO GT81 + Canon 700D & FF | 29 x 120 secs + darks/bias?flats @ ISO 1,600

Picture saved with settings embedded.

Eastern Veil Nebula (NGC 6922 & 6995): WO GT81 & modded Canon 550D + FF & guiding | 10 x 300 sec @ ISO 1,600 + darks | 11th September 2016


Forbidden Fruit

sonof

Soon after embarking on my astrophotography adventure just over two years ago it became apparent that after getting the basics right – polar & star alignment, focus, image capture etc. – the Holy Grail of imaging is increased exposures times, thereby collecting more of those elusive photons that have travelled across the Universe.  The first step to achieving this goal is tracking, which since purchasing my AZ-EQ6 mount in 2015 I have been successfully improving over time, on a good day achieving 180-second exposures and from time-to-time resulting in some decent images.  However, the light from DSOs is often very feint and can require much longer times, which is easier said than done.

At the same time as acquiring the aforesaid mount and a William Optics GT81 telescope I also purchased a William Optics 50mm guide scope, with which I intended to start guiding and thus push exposures above my 3-minute barrier.  Despite these aspirations, through a combination of events and my unease about the apparent difficulty of guiding, the guide scope has remained unused – until now.  Having recently purchased a dedicated Starlight Express Lodestar X2 guide camera, I have finally been emboldened enough to give it a try.

sx2

Starlight Express Lodestar x2 Guide Camera can be used either via the mount’s ST4 port or via ASCOM and the computer for pulse guiding.

I initially struggled to set up the guide scope and get the guide camera working together.  In particular obtaining focus proved very difficult; like the GT81 the guide scope focus turns out to be achieved within a very short distance that is measured in fractions of millimetres, which in this case required the insertion of an extension tube.

img_20160902_173811432

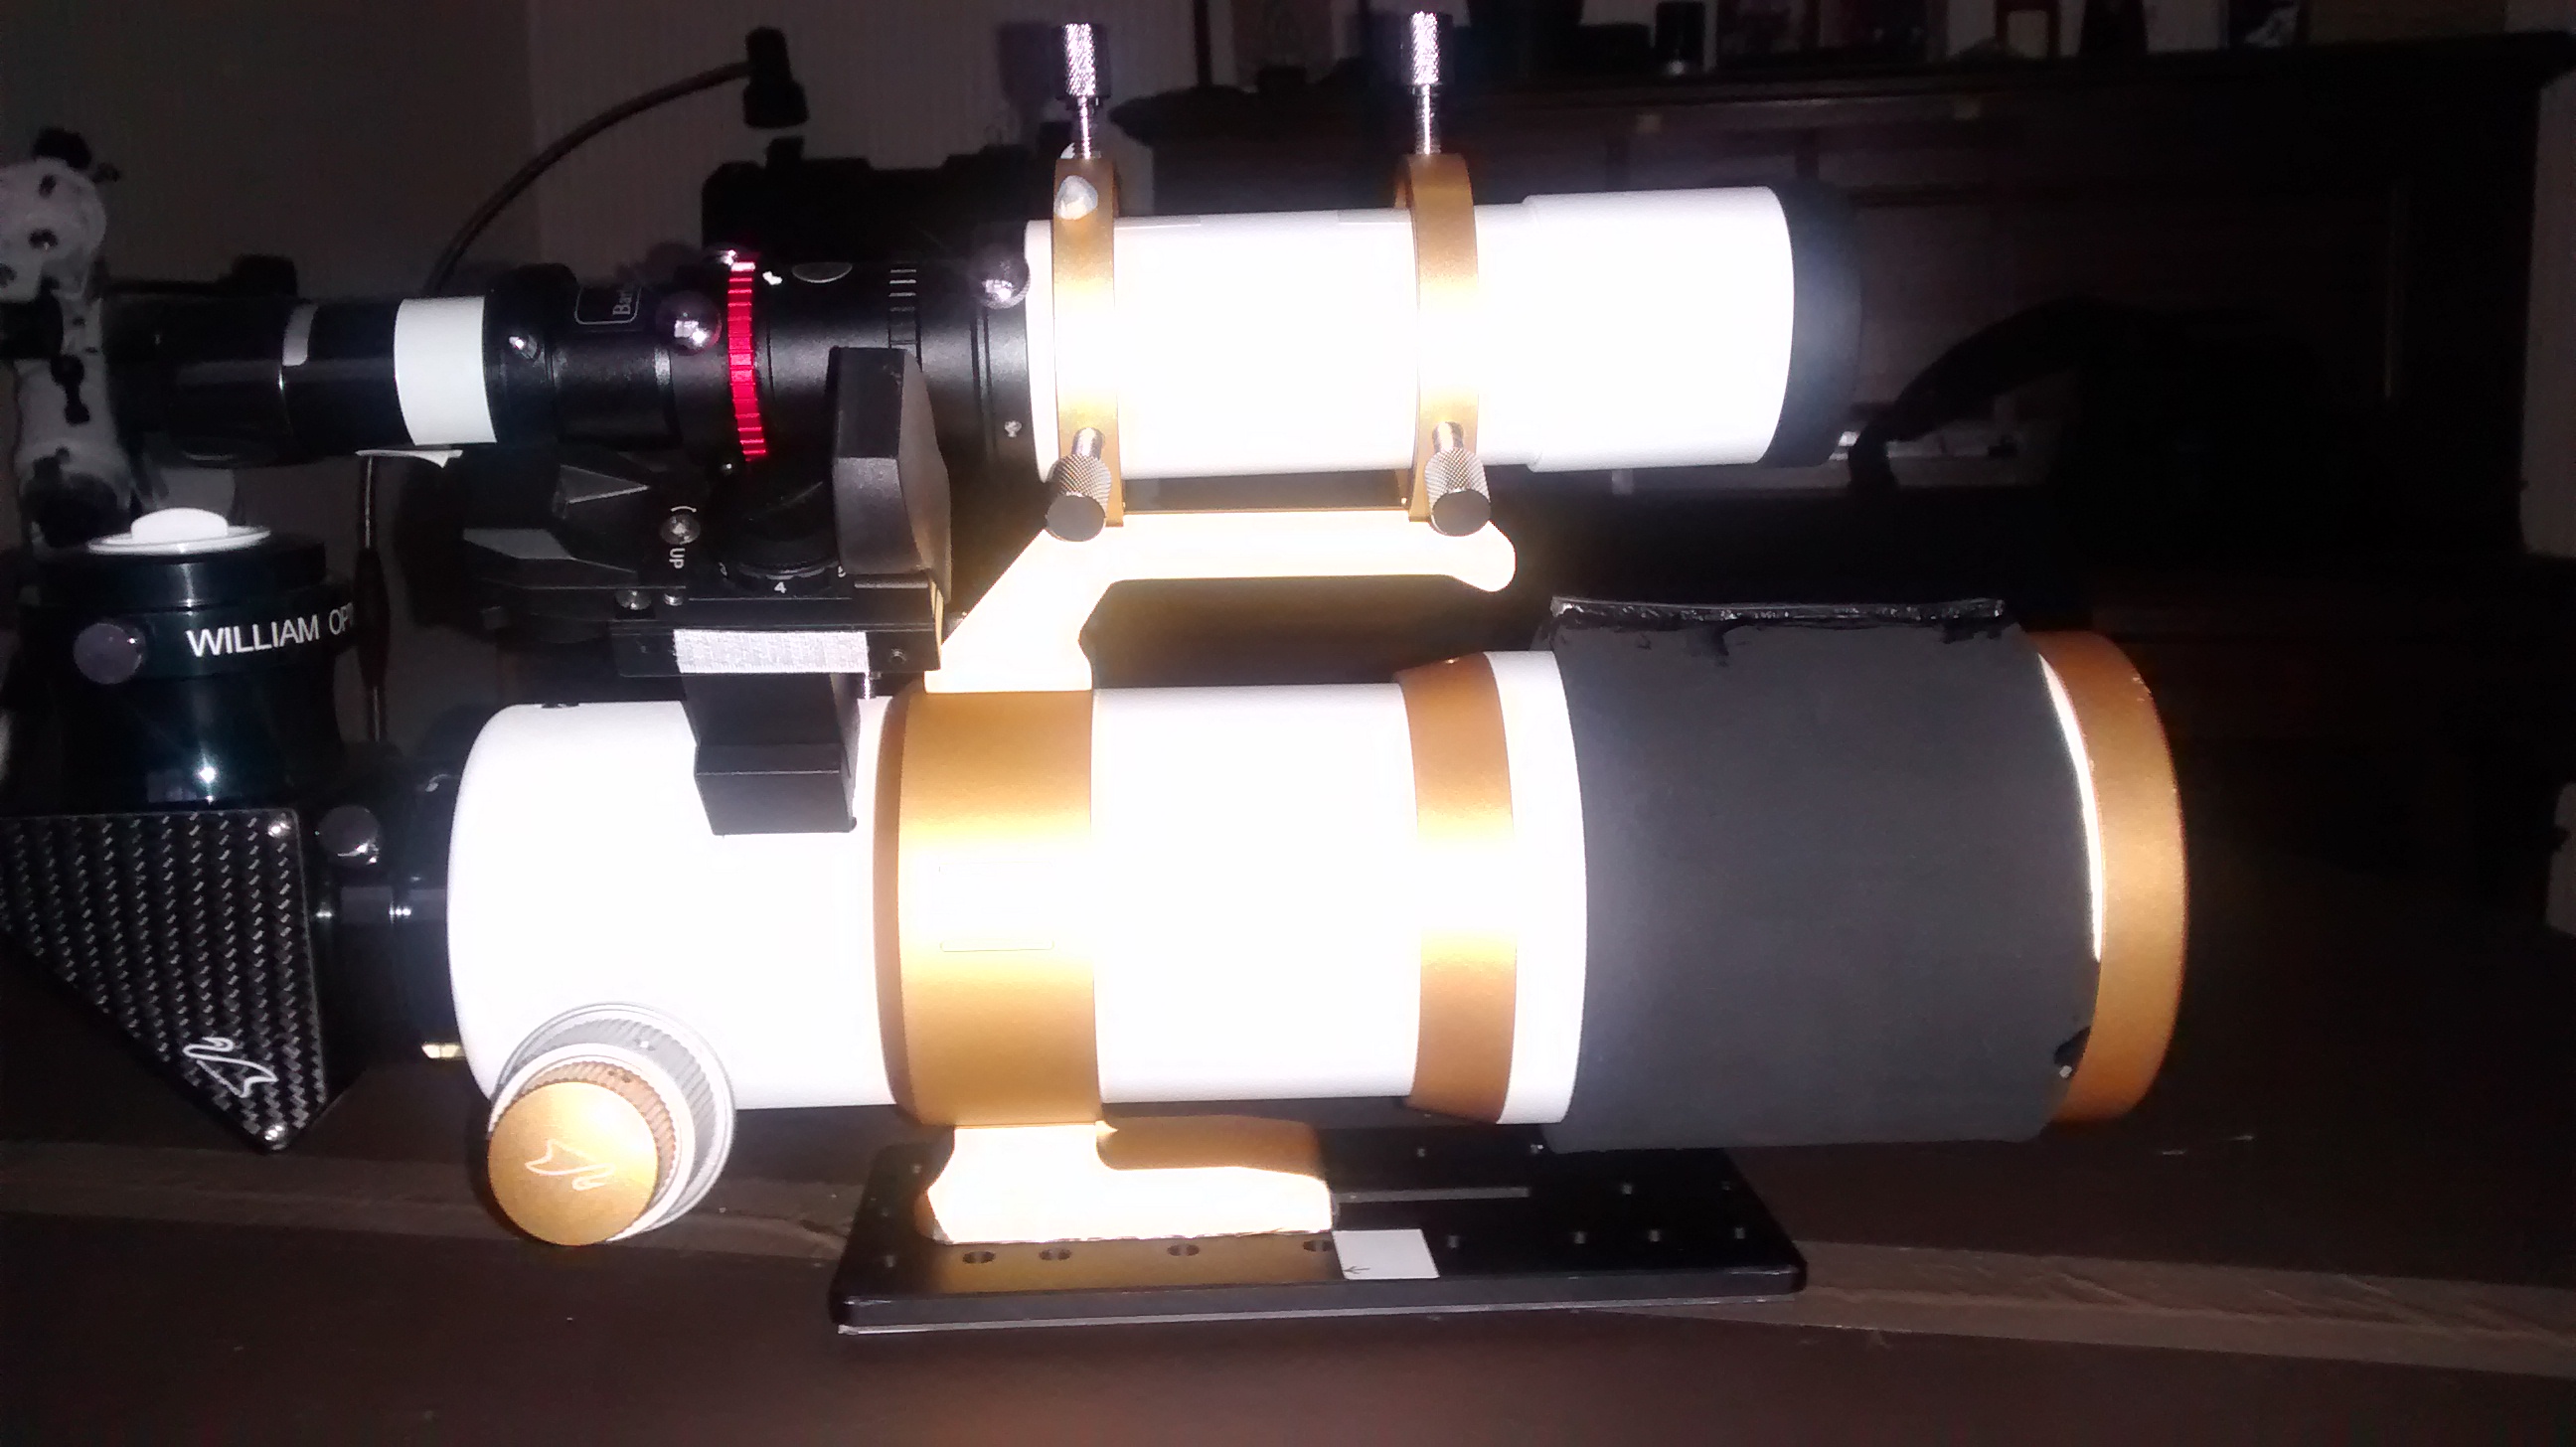
Reminiscent of the Space Shuttle on its Boeing 747 transport plane! The William Optics 50mm guide scope + Lodestar X2 guide camera neatly mounted atop the GT81 imaging scope using the integral rings.

Thereafter the big challenge, which I had previously avoided, was to start using the very popular PDH guiding software; Push Here Dummy (PHD) is named tongue-in-cheek by its original creator Craig Stark and is an amazing but somewhat intimidating piece of software.

option1


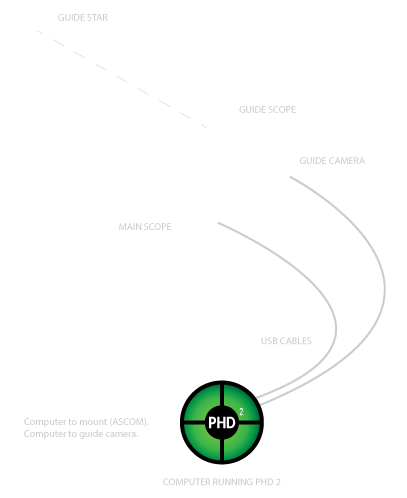
The principle is simple – find a star within the FOV and use it as a fixed reference point from which to assess and then correct small tracking errors in order to achieve better tracking, which thereby maintains pinpoint accuracy and enables longer exposure times, thus avoiding trailing of the sky and the objects being imaged.  Its use is regarded as something of a dark art but I have finally grasped the nettle with some success.  After months of clouded skies followed by an almost fatal equipment failure (see here for more), a period of exceptionally good weather and clear skies since late August provided the ideal opportunity to get to grips with this challenge that has so far eluded me.

At first I used a couple of sessions to overcome some past problems and ensure that everything was stable and worked well for basic tracking and imaging, in particular:

  • Repair and improve the imaging camera’s AC/DC adapter lead;
  • Where possible improve all other leads and connections – once bitten …..!  In this respect I have significantly re-arranged and tidied up the many power, control and camera leads, which has included the addition of right-angle USB / mini-USB camera connectors that now makes plugging-in easier and produces less strain on the connections i.e. more secure.  Simple, cheap and something I should have undertaken long ago;
  • Revisit EQMOD-ASCOM in order to achieve more robust tracking – especially reviewing the star alignment procedures;
  • Fit the guide scope using the rings incorporated onto the GT81 OTA, subsequently re-balancing the equipment and improve the mount’s feet positioning.

At this point I spent a couple of nights just playing with the equipment and in particular EQMOD-ASCOM, so as to obtain the best possible alignment; having suffered an enforced absence from imaging I just wanted to have some fun again too.  At the end of this process, first using SynScan for polar alignment before switching to EQMOD-ASCOM + Cartes du Ciel for star alignment, I successfully produced a good 10-star alignment model which was then saved for future use.  The resulting images already showed some improvement but I still had to tackle PHD.  With unusually good weather I decided to leave the final set-up outside under cover, thus preserving the settings for a shot at the aforementioned task of guiding next time.  In the interim I then needed to read the operating instructions and watch numerous videos on the use of PHD.

img_20160911_213525309

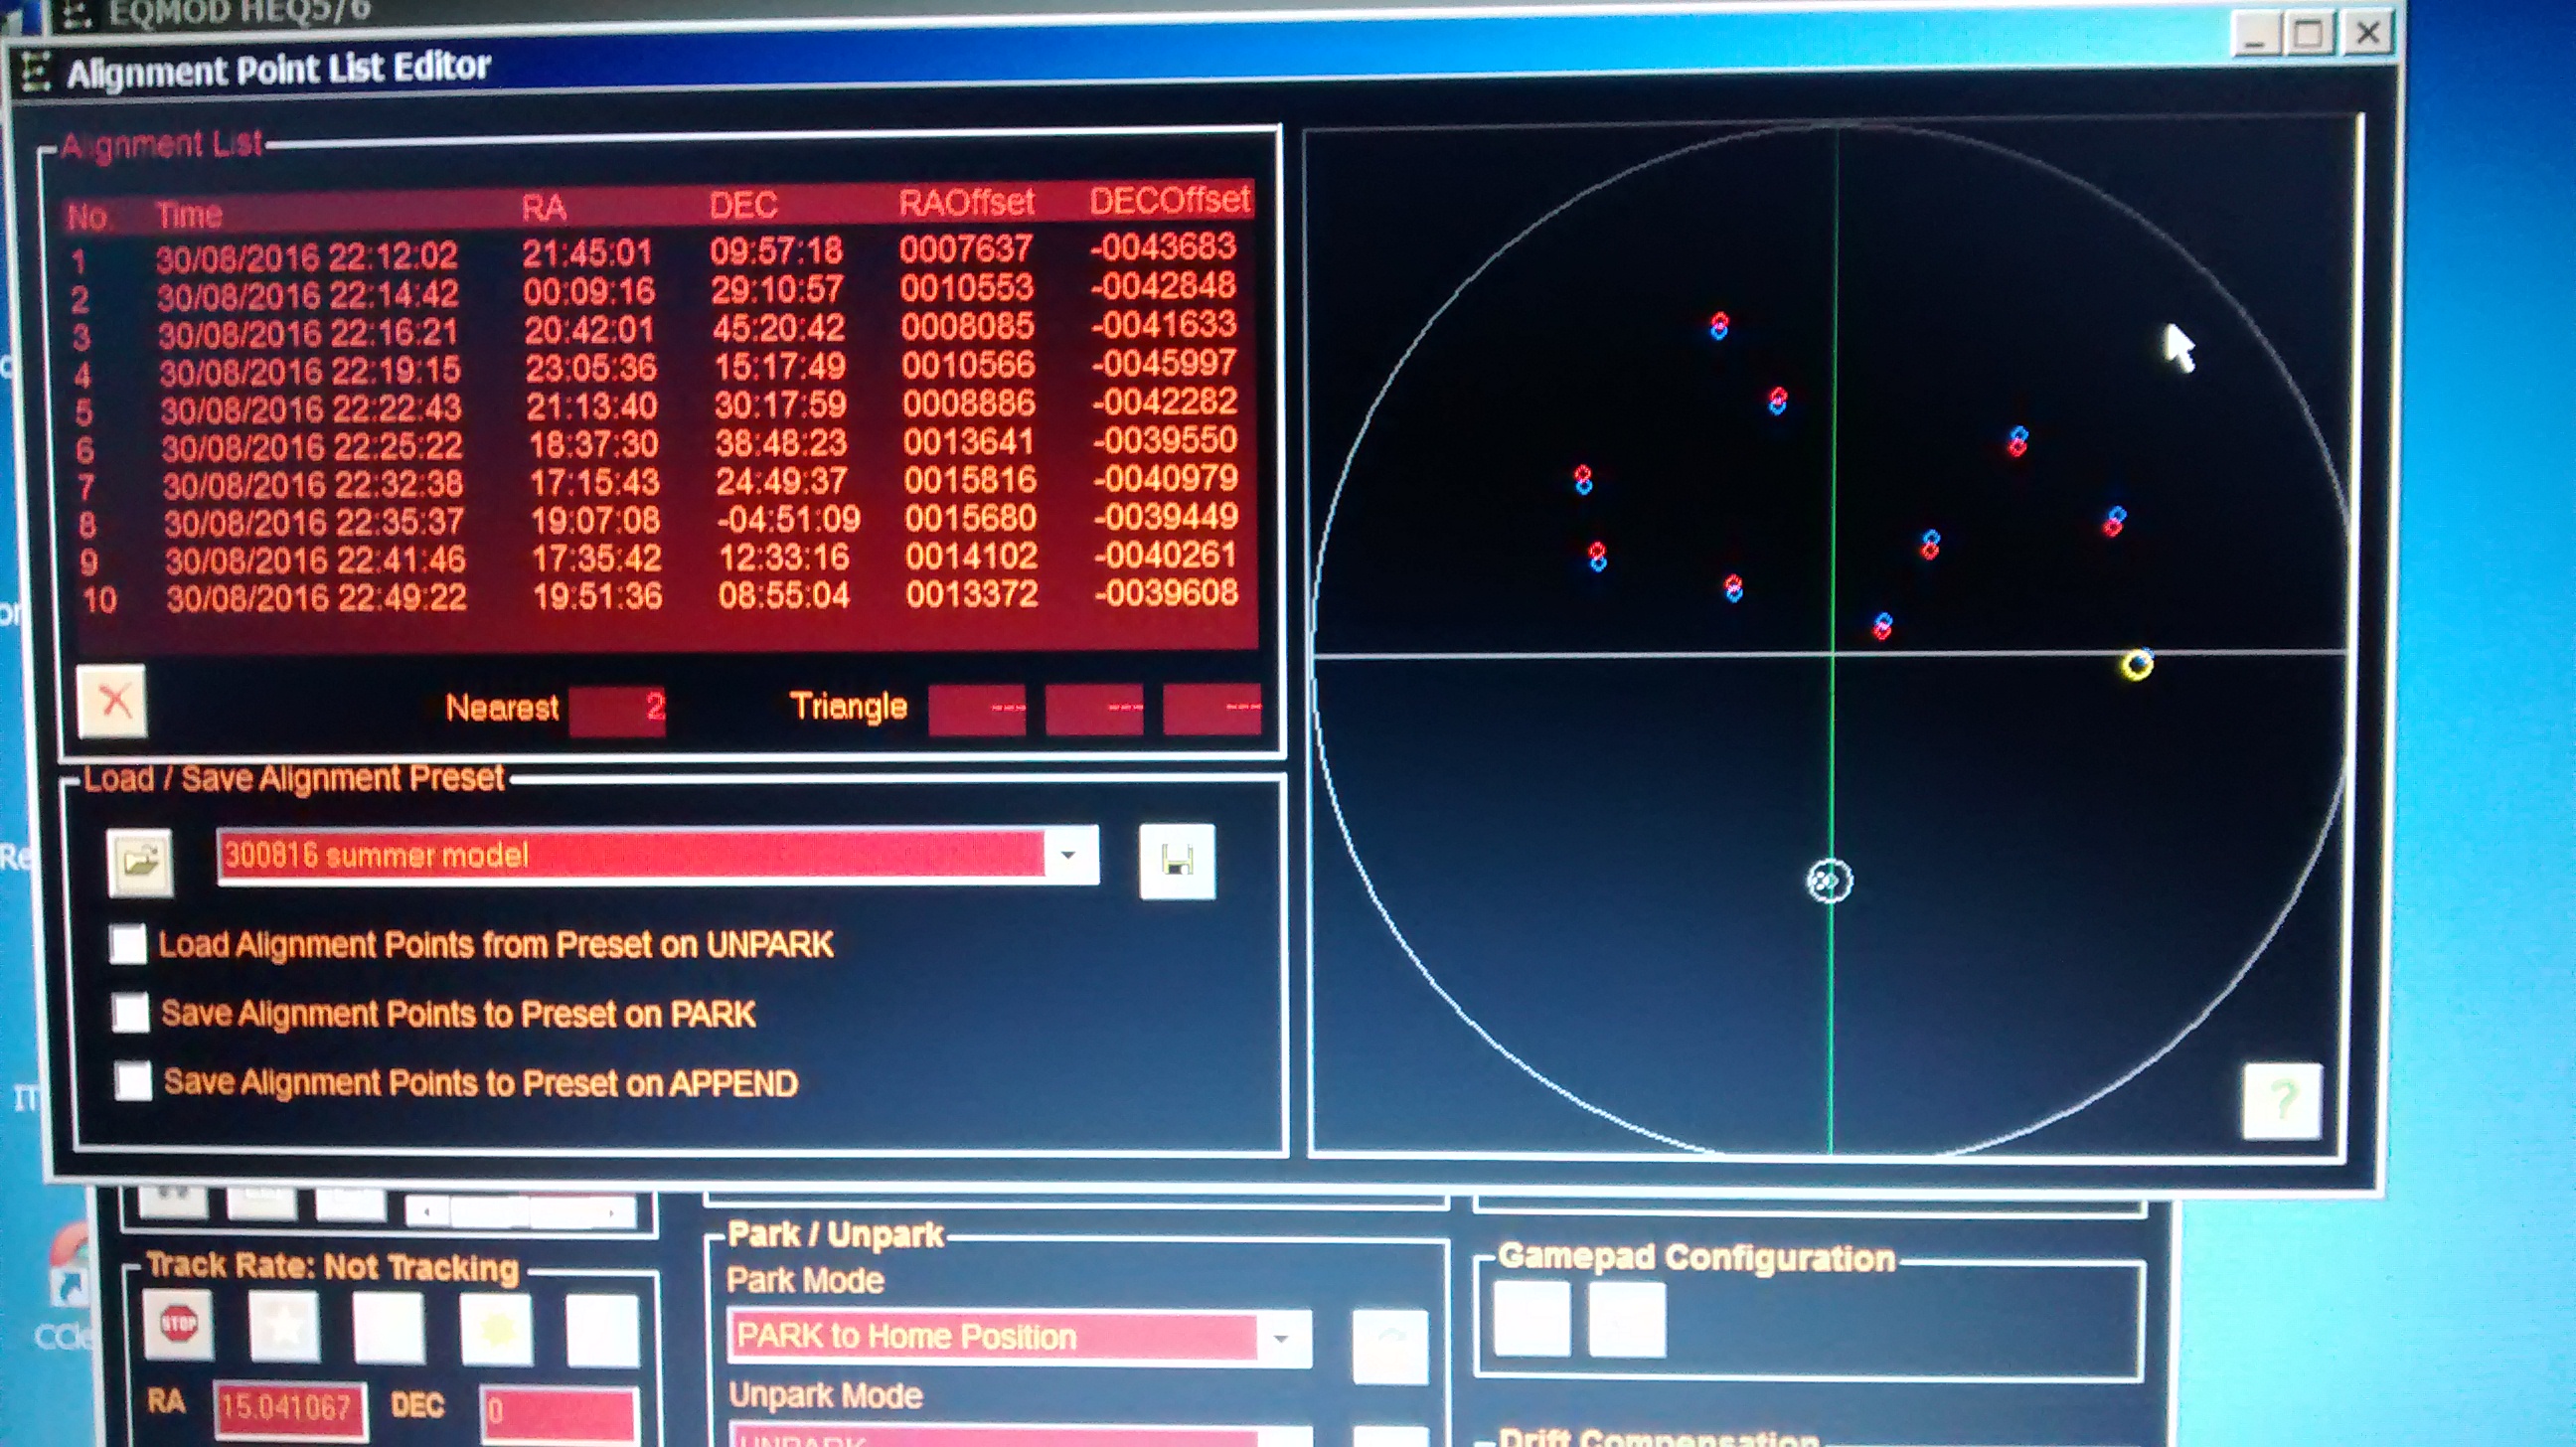
EQMOD-ASCOM 10-point alignment model. With an obstructed view of the northern sky by my house, all points are inevitably located in the southern quadrants.

Like so much of amateur astronomy, I will forever be grateful for the time and effort given by others to help those like me pursue our hobby.  The material, videos and responses to my forum queries on guiding have as usual been nothing short of outstanding and very, very helpful.  It’s still been difficult to get going but without the help and support of others it would be a complete non-starter.  In this respect I’d like to pay credit to SGL and the Open PHD Guiding forums.

Armed with this knowledge I have since undertaken a few sessions using PHD2 with reasonable success, achieving exposure times of 5-minutes and more.  Changing conditions and different objects make it necessary to continually finesse guide settings throughout the night and between nights and it’s already obvious that there’s much more to learn.  Such adjustments are not always linear or empirical in nature and will often only come from gut feel (experience).

I have chosen to use ASCOM pulse guiding, though my equipment also has ST4-ports which I had initially intended to use due to its apparent simplicity.  I am unable to argue the pros and cons of each method but there seems to be an overwhelming preference for pulse.  What I do understand (I think) are the greater subtleties that can be obtained with the pulse guiding technique and in particular, the co-ordination it provides with ASCOM, thereby ensuring PHD and the mount communicate with each other to provide essential directional information as well as guiding.  I am still investigating the impact of various BRAIN settings but through trial-and-error have progressed since my first guiding session.

img_20160831_000920crop2-large

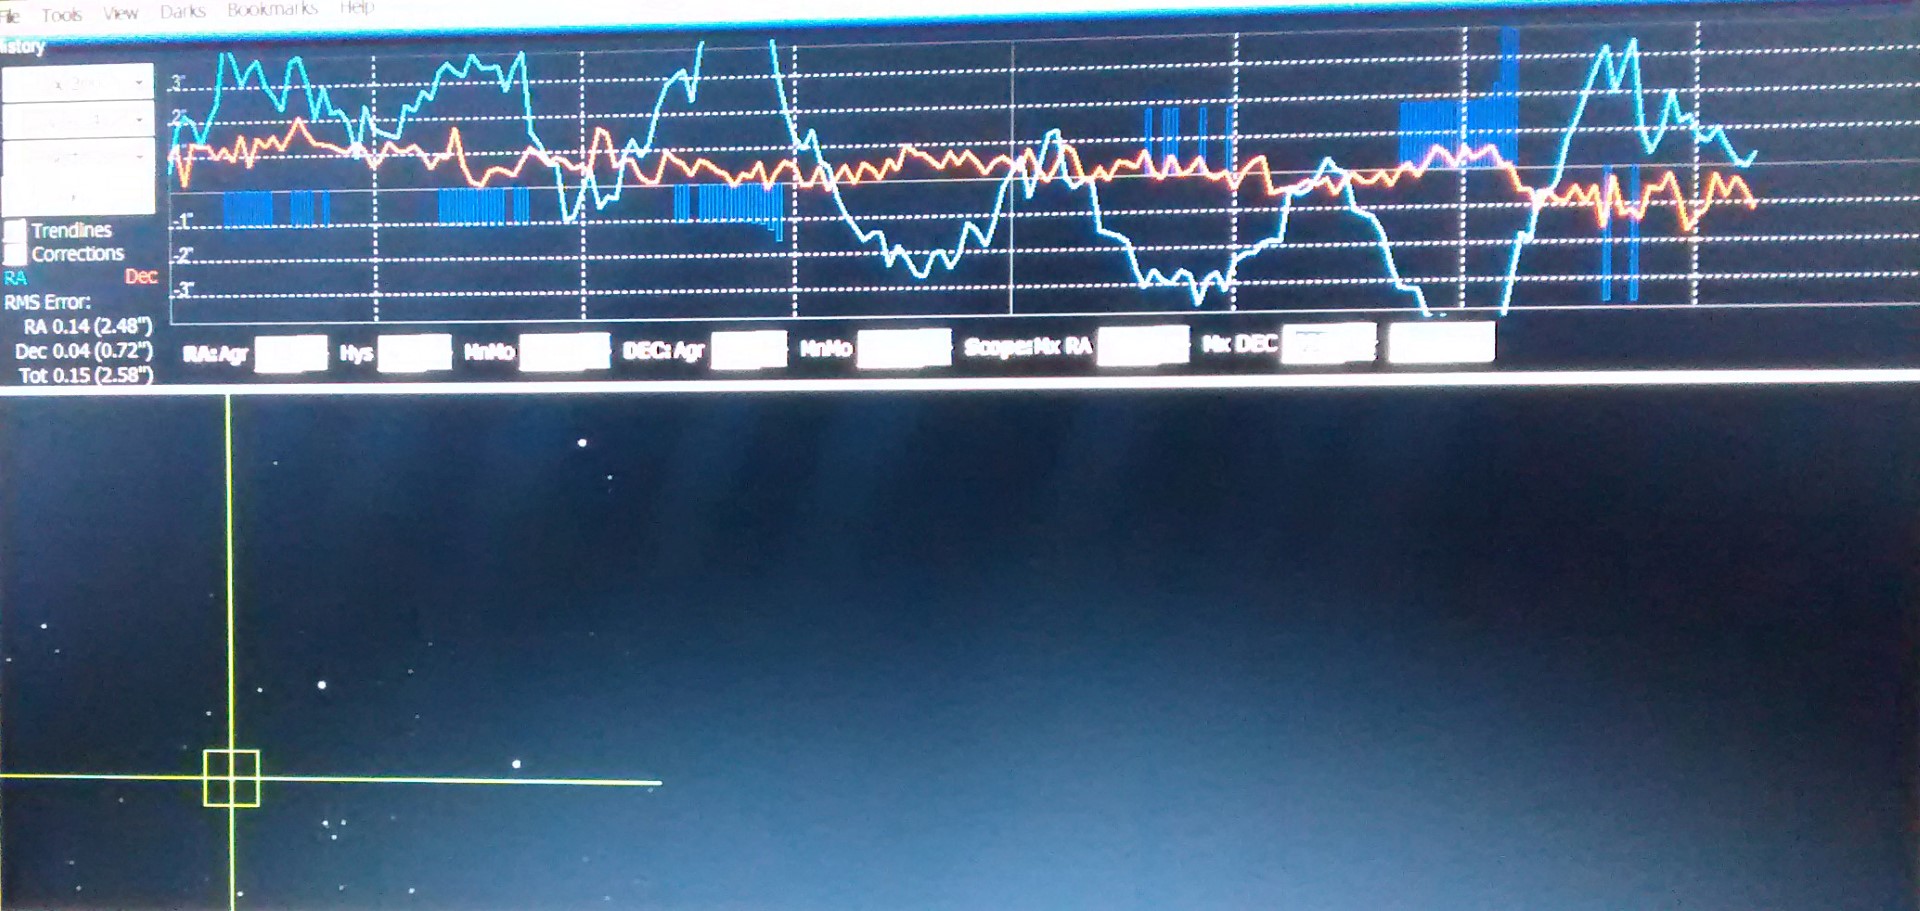
First Pass: early guiding results 30th August 2016

img_20160912_014945688crop-large

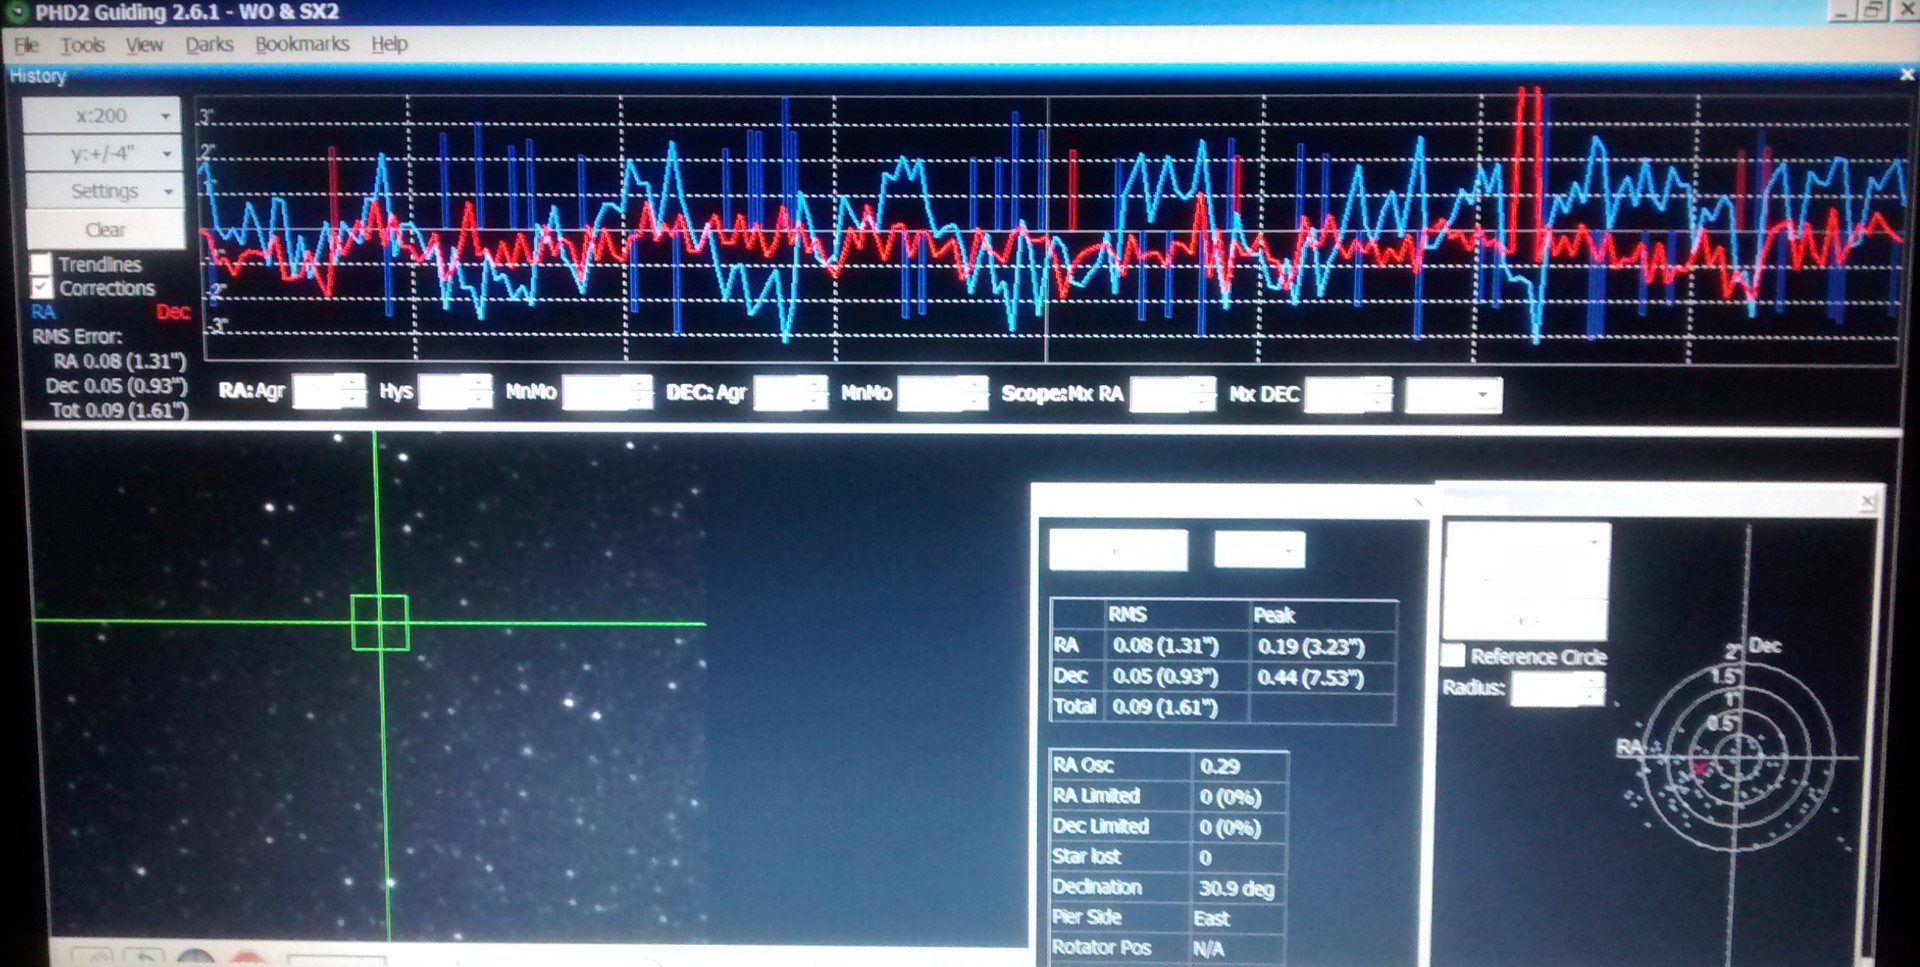
Getting better: most recent guiding results 12th September 2016

Calibration of PHD is frustratingly slow and it seems that even after successfully completing the RA-procedure can still fail during the subsequent DEC / backlash clearance.  After calibration use of the PHD Guide Assistant can then provide more help in achieving the best settings for the given set-up and conditions, though it is also very slow.  However, once completed PHD is fantastic and so far has run well during the night, even when changing objects.  Furthermore, I’ve also studied and experimented with the PHD Drift Align tool and am hopeful that by using this I may soon be able to both dispense with SynScan altogether and improve polar alignment, hitherto my imagining nemesis as I cannot see Polaris from my location – a very exciting prospect – what’s not to like?

Starting a sequence of experimentation I chose a familiar but hitherto difficult DSO object to image that should benefit from longer exposures.  Having by now reached late-summer / early autumn, there were a few old favourites around such as the Veil and North America nebulae but for these trials I decided to go for the low hanging fruit of M27 or Apple Core nebula AKA Dumbbell nebula.

m27-170814-dss

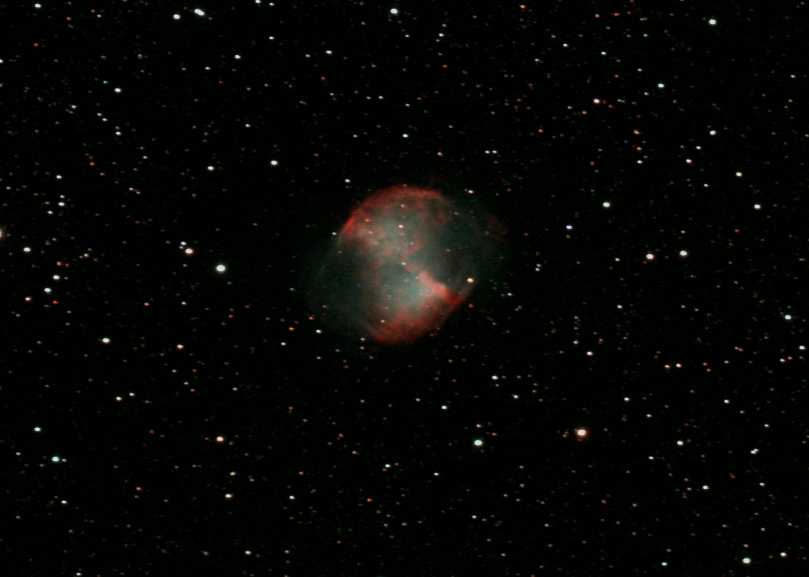
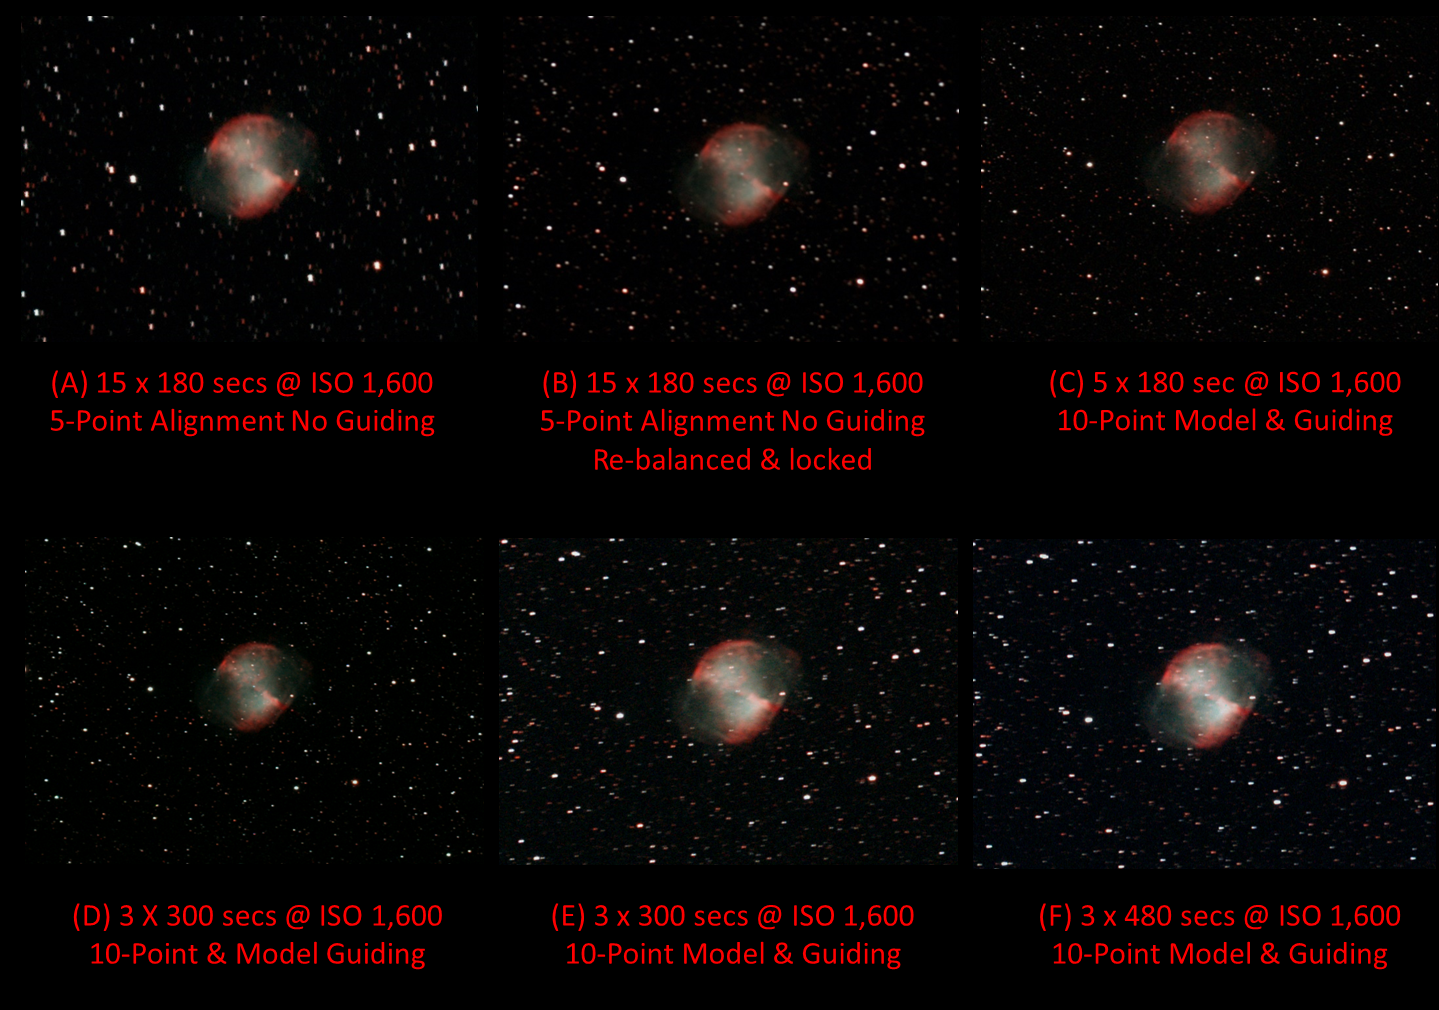
My previous image of M27 in August 2014!

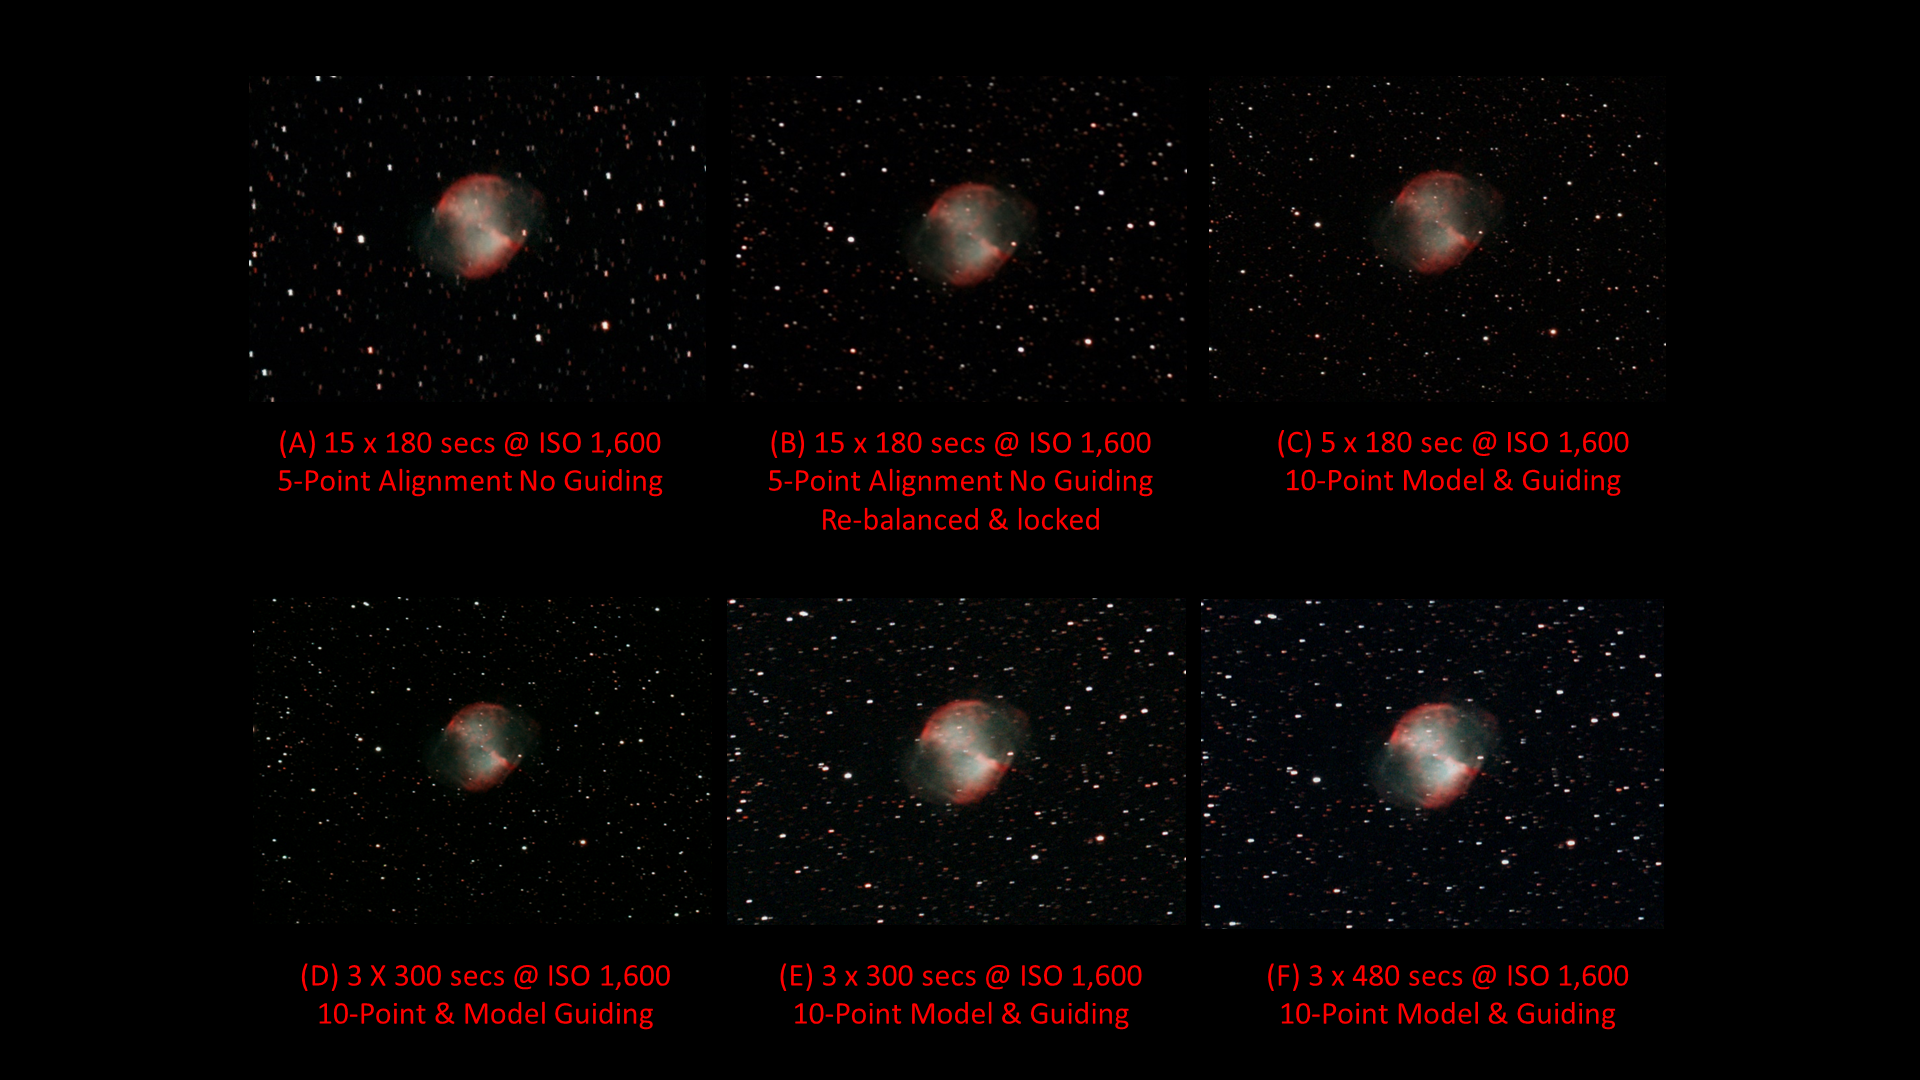
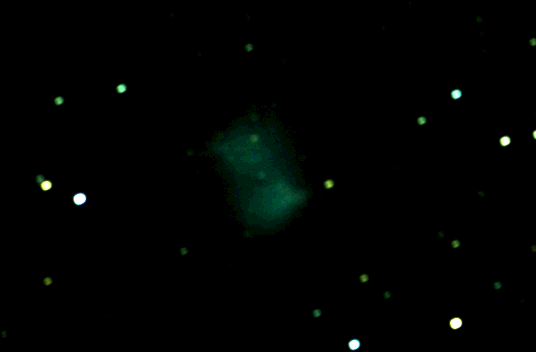
With limited success I imaged this planetary nebula in my early days of astrophotography but with its 8.0’ x 5.6’ size and apparent magnitude of +7.5, I found it difficult to obtain good detail and colour.  However, even without guiding the improved set-up and alignment produced better results at 3-minutes and with +5-minute guided exposures the images immediately showed very noticeable improvement.

The images were taken on four different nights starting on 23rd August and finished on 8th September, during which time the sky was clear and the weather warm with very low humidity, though by the end seeing conditions had started to deteriorate due to the impact of the emerging 1st quarter Moon.  All images have been cropped to the same size of 700 x 500 pixels or 2% of the original FOV i.e. an object size of about 0.20%!  Given this very small size M27 really is at the limit of the GT81 telescope.

m27-comps-paintfile-cropped

Strictly speaking the images are not fully comparable as the aggregate exposure times are not equal but nonetheless I think the results demonstrate the positive impact of guiding. The final two images are guided but do show greater star distortion, particularly at 8-minutes.  I suspect this may be due to the period over which the mount was left outside and would probably have benefited from some alignment tweaking before imaging re-commenced – lesson learned; the severe cropping ratio has also magnified any problems that would probably be less obvious in a larger widefield image.  There’s obviously room for improvement but I’m very happy with these early results which I can hopefully now build on.

Picture saved with settings embedded.

M27 Apple Core Nebula – my first and favourite guided image | William Optics GT81 + 50mm guide scope & 10-point EQMOD-ASCOM star alignment model | modded Canon 550D + field flattener & Starlight Express Lodestar X2 guide camera | 3 x 300 secs @ ISO 1,600 & full calibration, 3.3% cropped image| 30th August 2016

Unfortunately there is some downside to the longer exposures obtained from Fairvale Observatory: potentially more aircraft tracks and cloud plus more extended imaging time is unavoidable but overall it is, as expected, a major leap forwards for my astrophotography.  There’s still much to learn and improve with the technique but for now I am delighted to say that after nearly two years I am at last successfully guiding  – would you Adam & Eve it?

Fairvale Observatory Part-3, Progress: modded DSLR, computer control, autoguiding etc.

It’s been a while since I last took a look at developments here at Fairvale Observatory (Part-1 & Part-2) and looking back it’s pleasing to see that progress has continued with positive results.  After acquiring the William Optics GT81 refractor and AZ-EQ6 mount in 2014 I have been experimenting and enjoying the equipment’s significant abilities until recently but have now embarked on some new, potentially important improvements that hopefully will result in significant breakthroughs.

At the start perhaps the biggest problem for imaging was polar alignment, made very difficult here as my house almost completely obscures Polaris.  It took some time but I’ve now overcome this by using the Synscan handset polar alignment technique, which now enables me to achieve an accuracy of just a few arc-seconds and has led to a significant increase in imaging times of at least 180 seconds.

With the short focal length of the fast William Optics this level of alignment error works well and I’ve been pleased to obtain decent images of larger DSO features such as the Great Orion, Rosette and Veil nebulae i.e. near / middle distance objects, ideally at least 1o in size with an apparent magnitude of +7 or better.  Once I’ve exhausted all these targets, and I have fortunately been discovering more and more, it’ll be time for another telescope!

The small things matter too and in this regard I’ve added a number of useful items:

  • Made a solar filter and finder tube for the WO GT81;
  • At last, I recently collected the cables together into two looms;
  • Purchased a 12mm reticle to aid alignment;
  • Astronomik CLS light pollution clip filter;
  • Photoshop – an old version but I’ve been successfully using it for processing.

IMG_2292

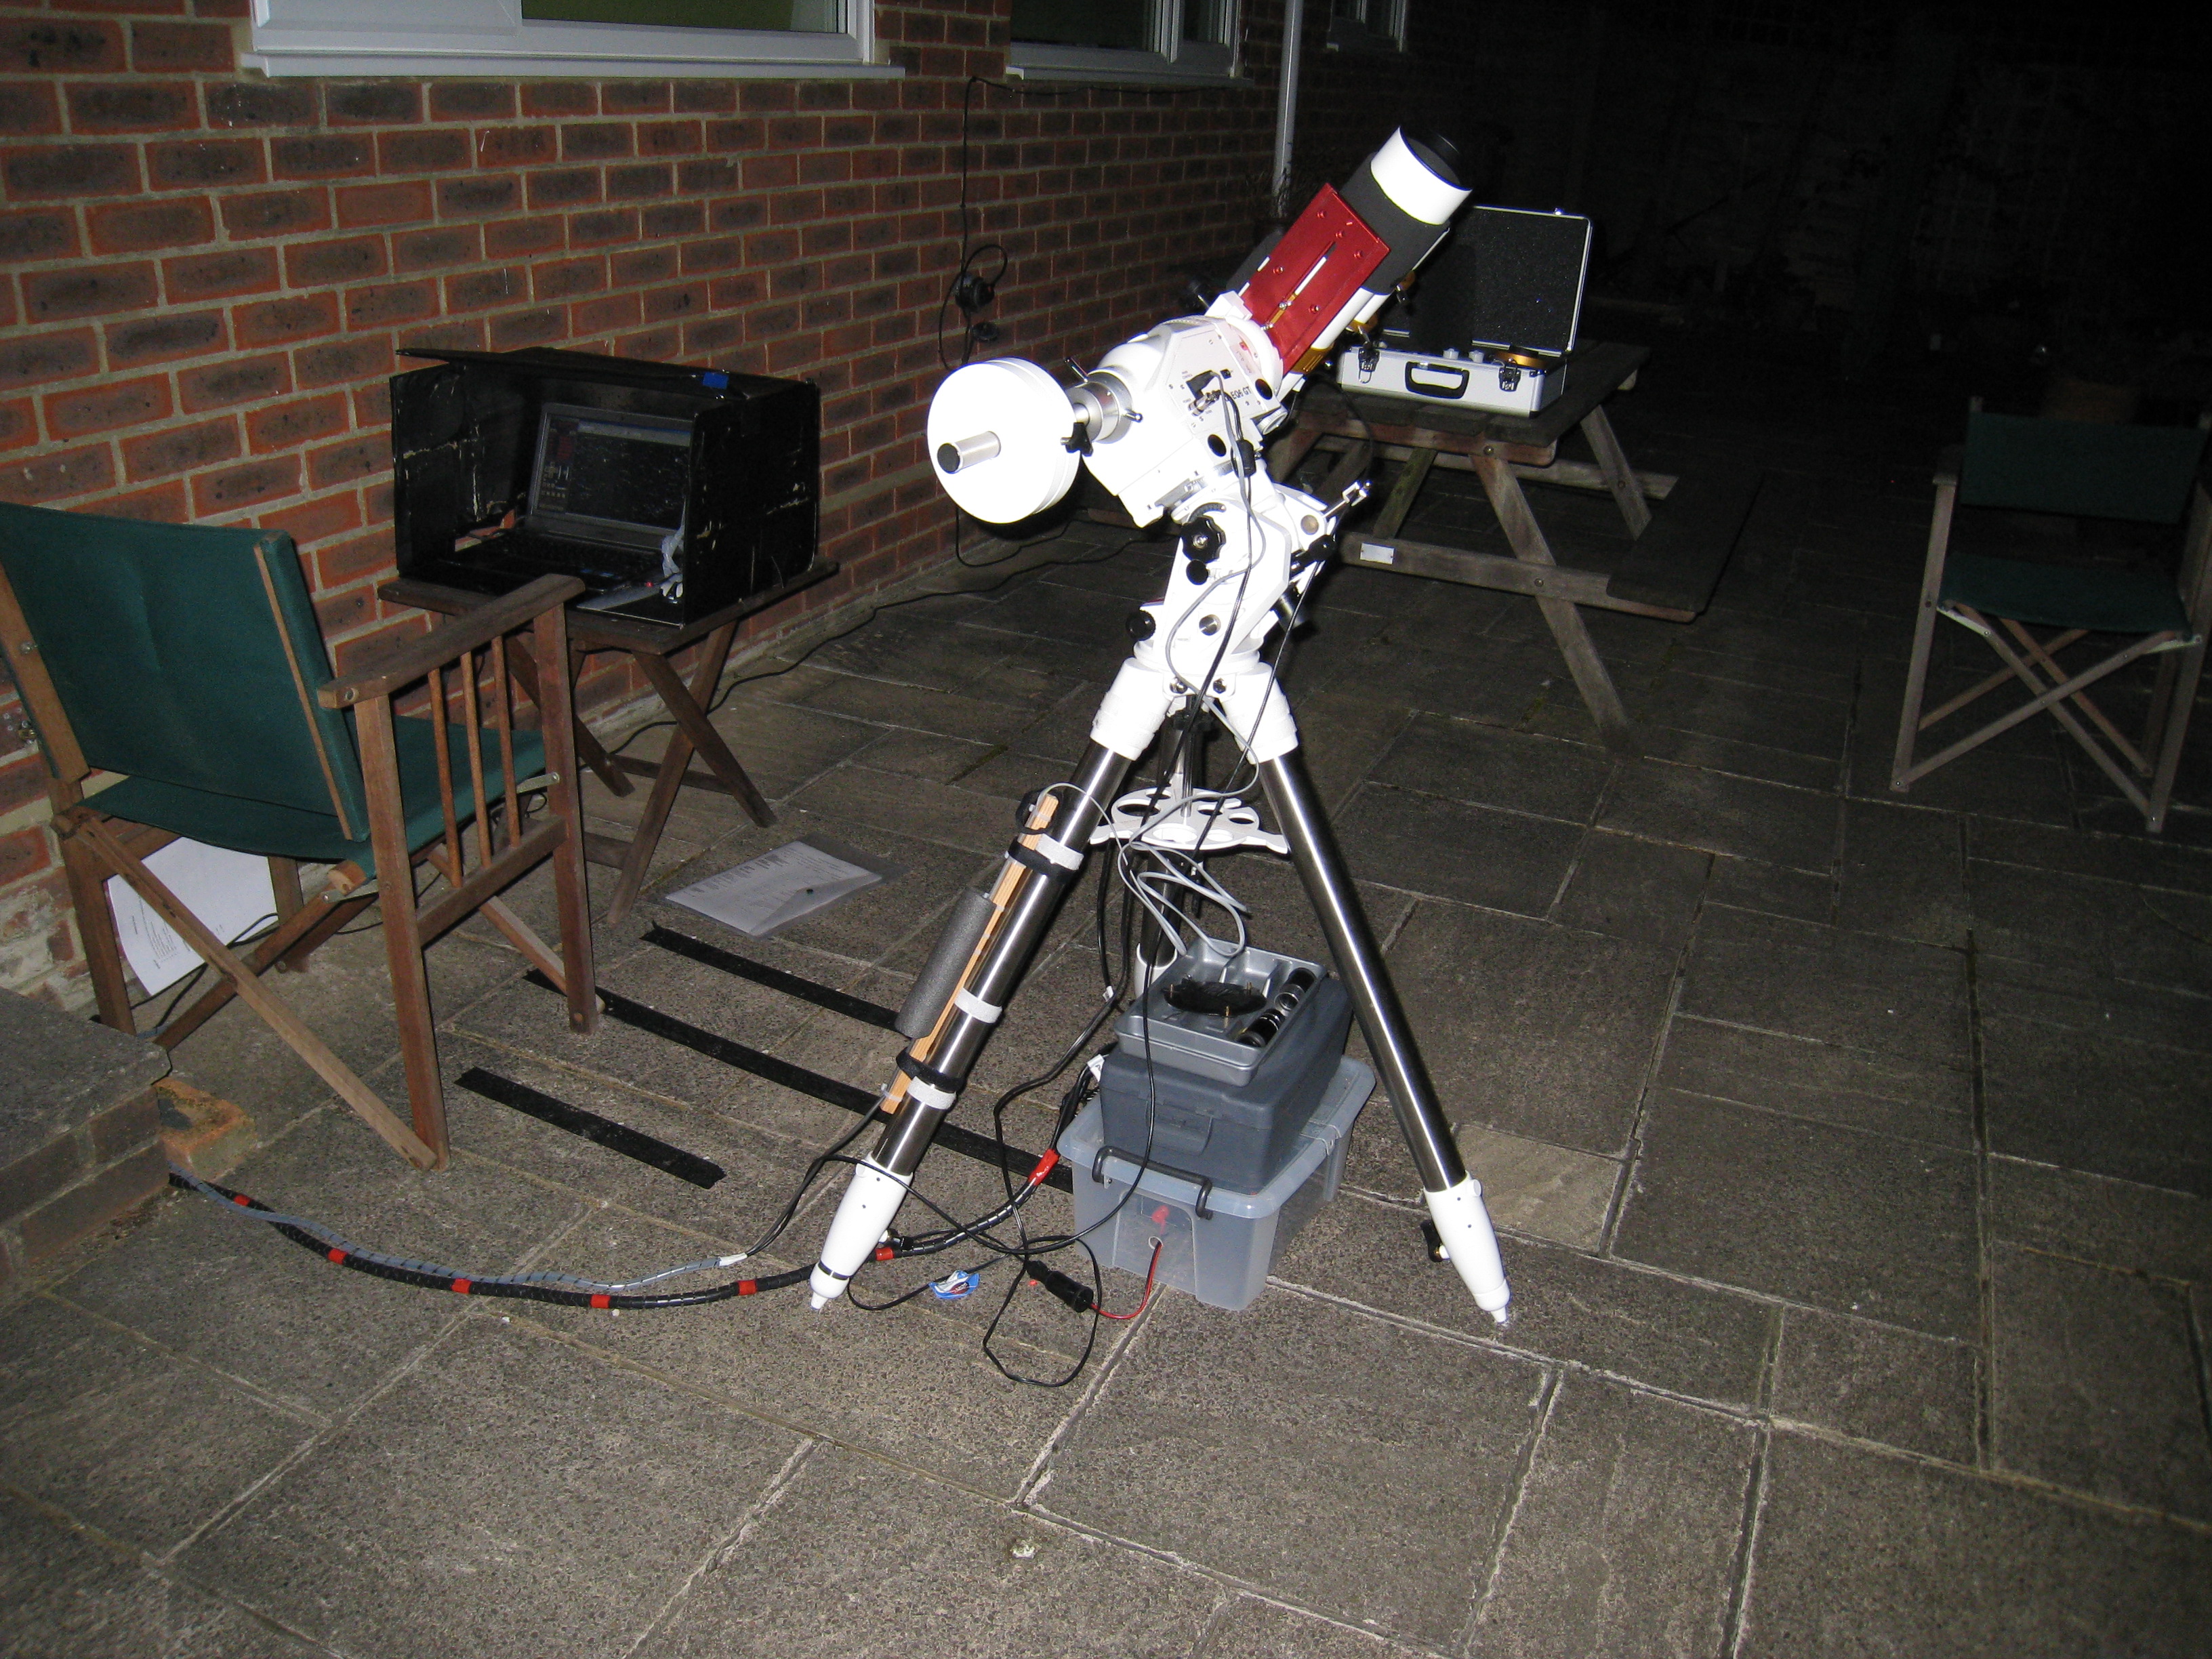
The set-up has become a lot tidier and logistics made easier by collecting the power and camera cables into two separate looms (camera loom not shown) and permanently attaching the HiTec Astro control cable to the mount – why didn’t I do this before?

More significant additions that I’ve already reviewed include a modded Canon 550D DSLR, which together with improved tracking has revolutionised imaging and a recently a Vixen Polarie, that has transformed widefield photography and added a new dimension – transportability.  It’s early days and I have not really got to grips with the Vixen Polarie yet but initial use suggests it’s going to be a very useful addition and potential game changer.

At the end of last year in Reflections I outlined my goals for 2016 and I am pleased to say that I have at last just started to establish the equipment and software to start autoguiding, the holy grail of astroimaging that when fully working should enable me to achieve exposure times significantly greater than present – which is likely to be at least another couple of months.  For a while I have been successfully using EQMOD /ASCOM combined with Cartes du Ciel for tracking.  There were some initial connection problems but now using a HiTec Astro EQDIR adapter and a better quality USB cable seems to have improved this matter; I’ve also recently secured it to the tripod making the set-up more stable and aiding logistics.  I still polar align with Synscan before switching to EQMOD-Cartes du Ciel for additional star alignment, slewing and tracking.

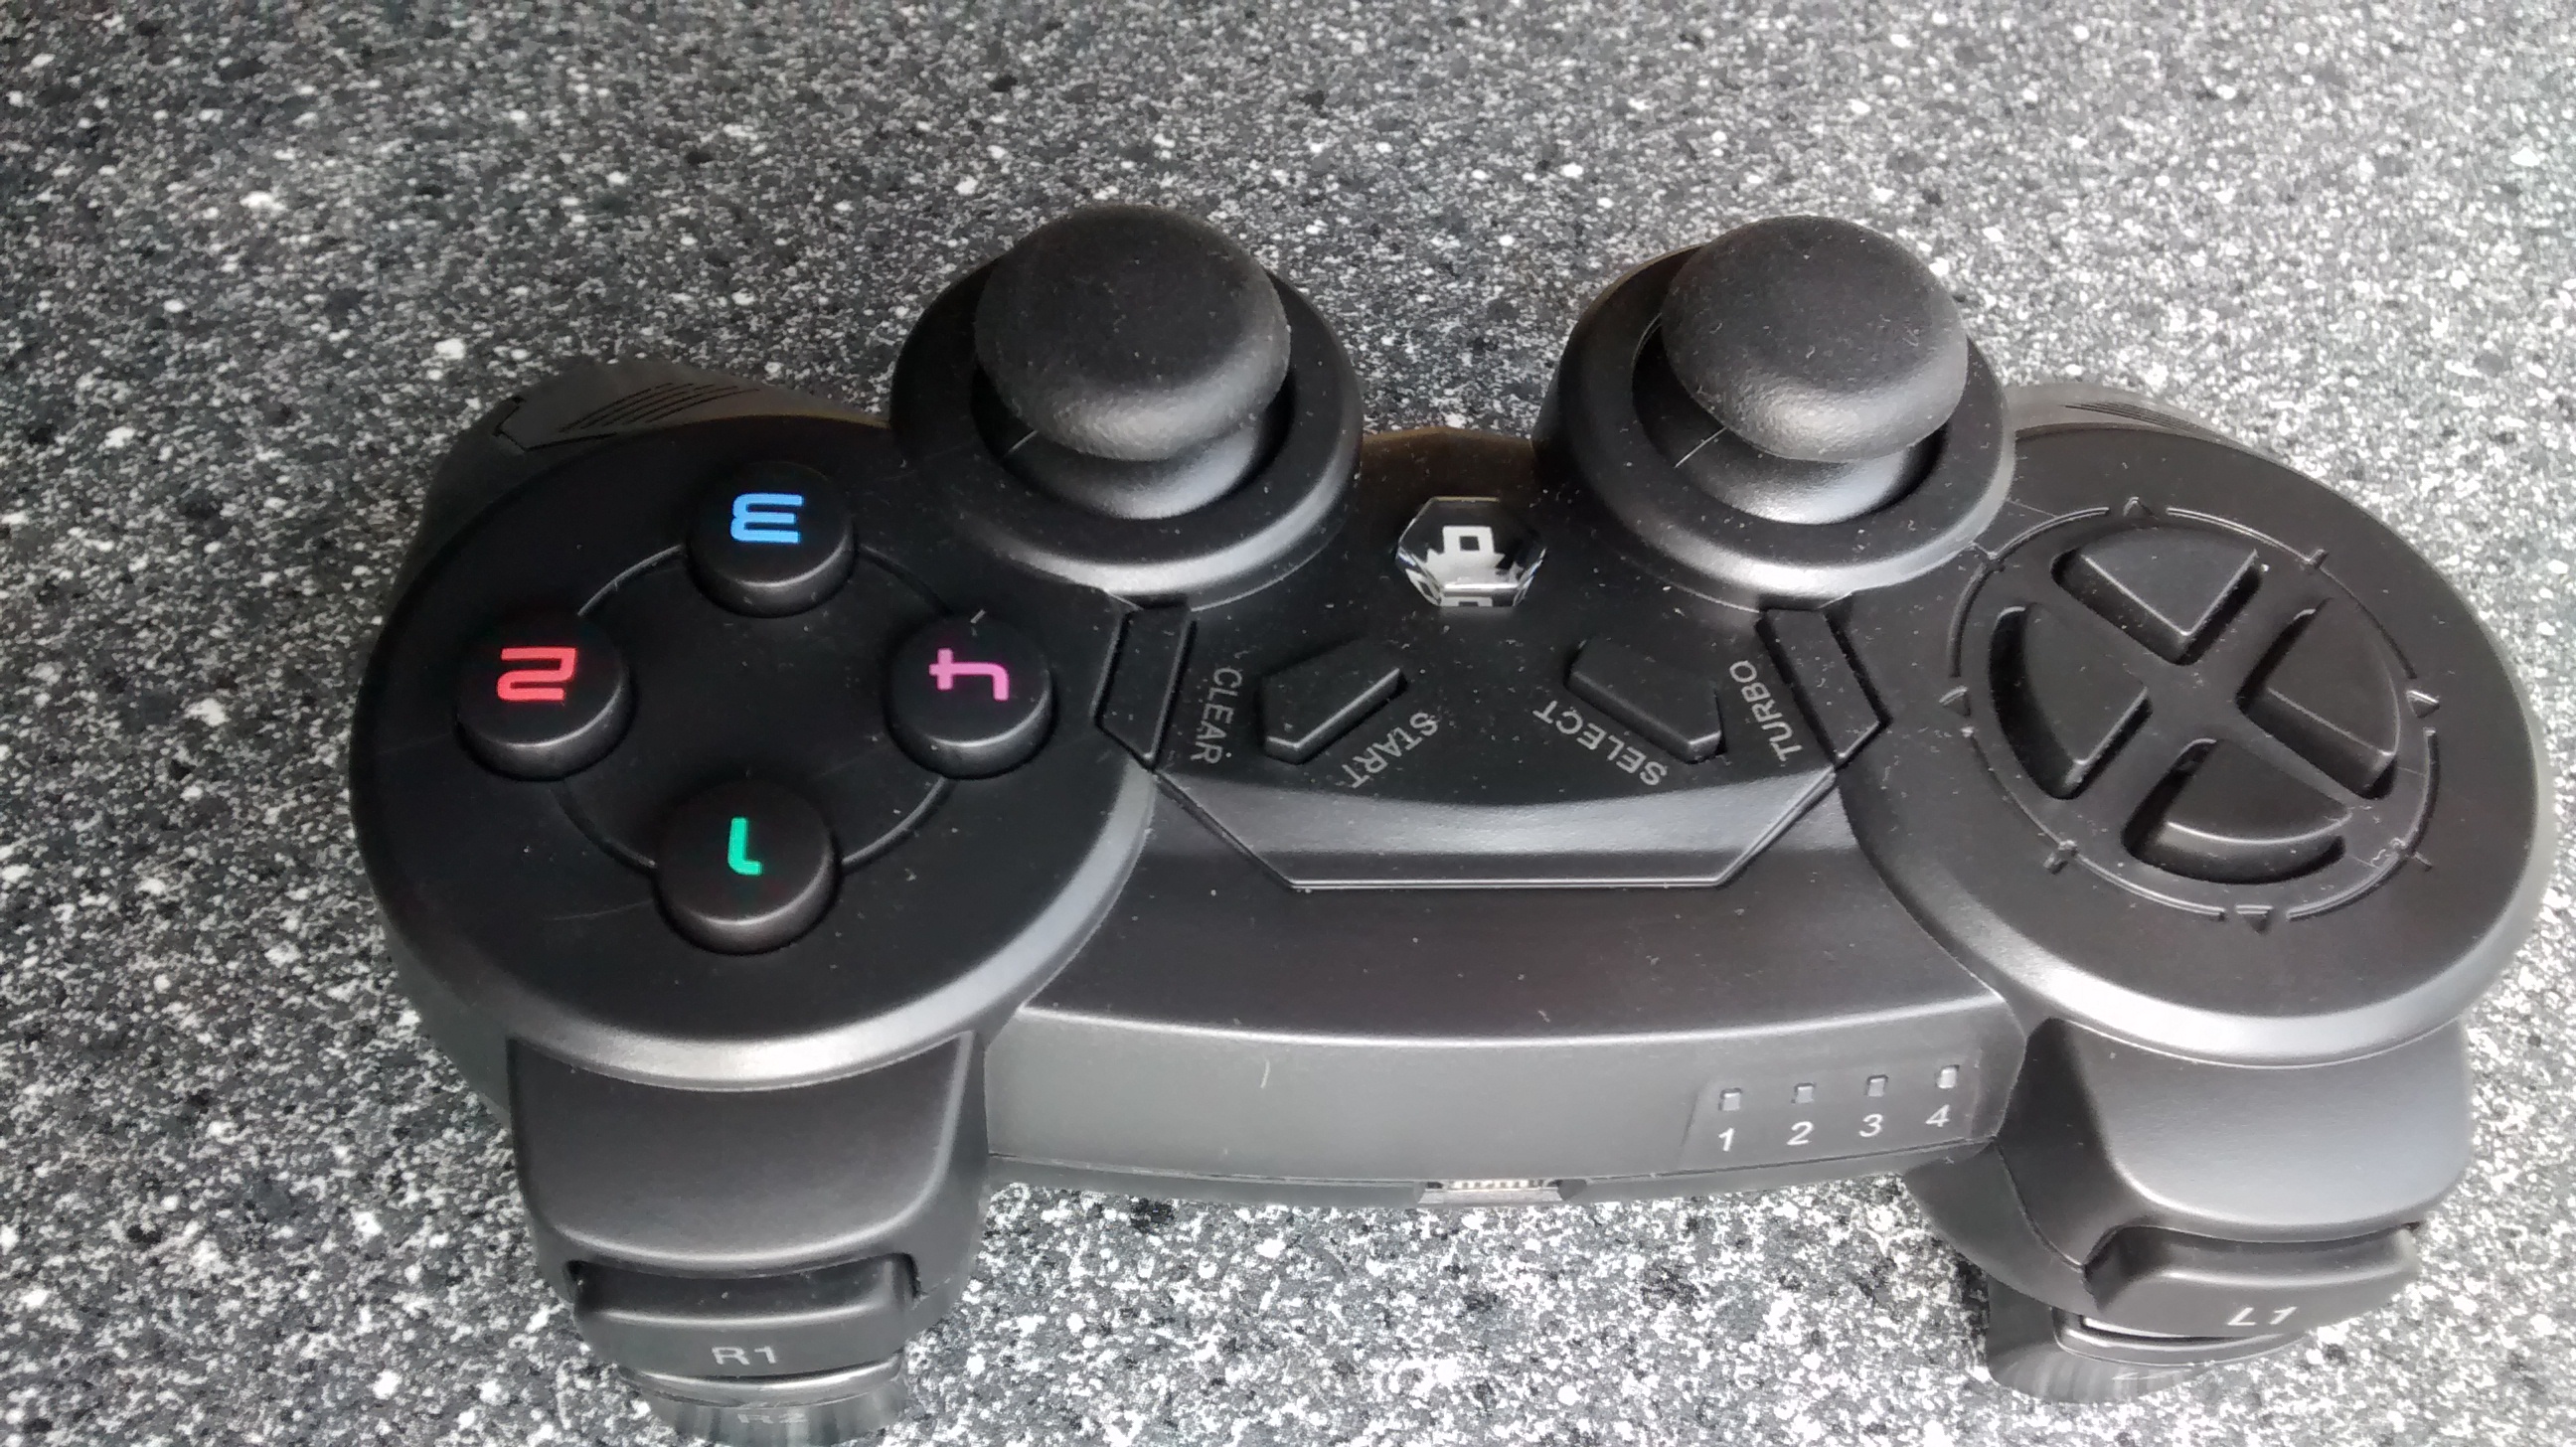
Using EQMOD-Cartes du Ciel makes slewing to any chosen object much easier than Synscan but its use has introduced another operating problem.  After slewing to a chosen object or star it is never exactly centred and some manual fine alignment is almost always necessary at this point.  The problem is that this requires being at the eyepiece, which of course is not located by the computer, which means frequent toing and froing between the two locations and a lot of guesswork when adjusting the mount from the computer.  In reality this is not very practical and I have therefore just purchased a gamepad that links wirelessly to the computer and allows mount adjustments to be made when at the eyepiece.  It’s not quite set up yet but nearly and I’m impressed; ASCOM even allows you to add WAV files that speak to you when making changes – sounds like a gimmick but when in the dark with lots of items to attend to it is actually very useful and will hopefully reduce the possibility of making mistakes.

IMG_20160401_144602833

Wireless gamepad provides extensive control of critical alignment functions without being at the computer: front x4 buttons are assinged to set various slew rates, the mount-telescope can be directed either via the rear (shown right) joystick or POV buttons on the right, button-1 parks and button-2 syncs. Other buttons have yet to be allocated.

It had been my intention to use the ZWO ASI 120MC webcam for guiding, in fact I upgraded to this at the time of purchasing in 2014 for this very purpose as it has a specific port for ST4 autoguiding directly with the mount.  However, very recently a Starlight Express Lodestar X2 guide camera came up second-hand and being widely acknowledged as one of the best guider cameras available I couldn’t resist!  Of course, despite its pedigree like most things with astroimaging it has not been that simple to get working.

sx2

Starlight Express Lodestar x2 Guide Camera can be used either via the mount’s ST4 port or via ASCOM and the computer for pulse guiding – I’m doing the latter.

Despite being a dedicated guide camera with high operating specifications, at first I could not obtain any sort of image to prove it was even working but by transferring the lens from the ZWO camera and fiddling with the software I eventually got an image, phew!  It’s important to say here that for guiding it is also necessary to use suitable guiding software and I‘m inevitably using PHD2, which itself is full of wonderful features and mischief that I am at the early stage of learning and trying out with the camera.

IMG_20160316_233736210

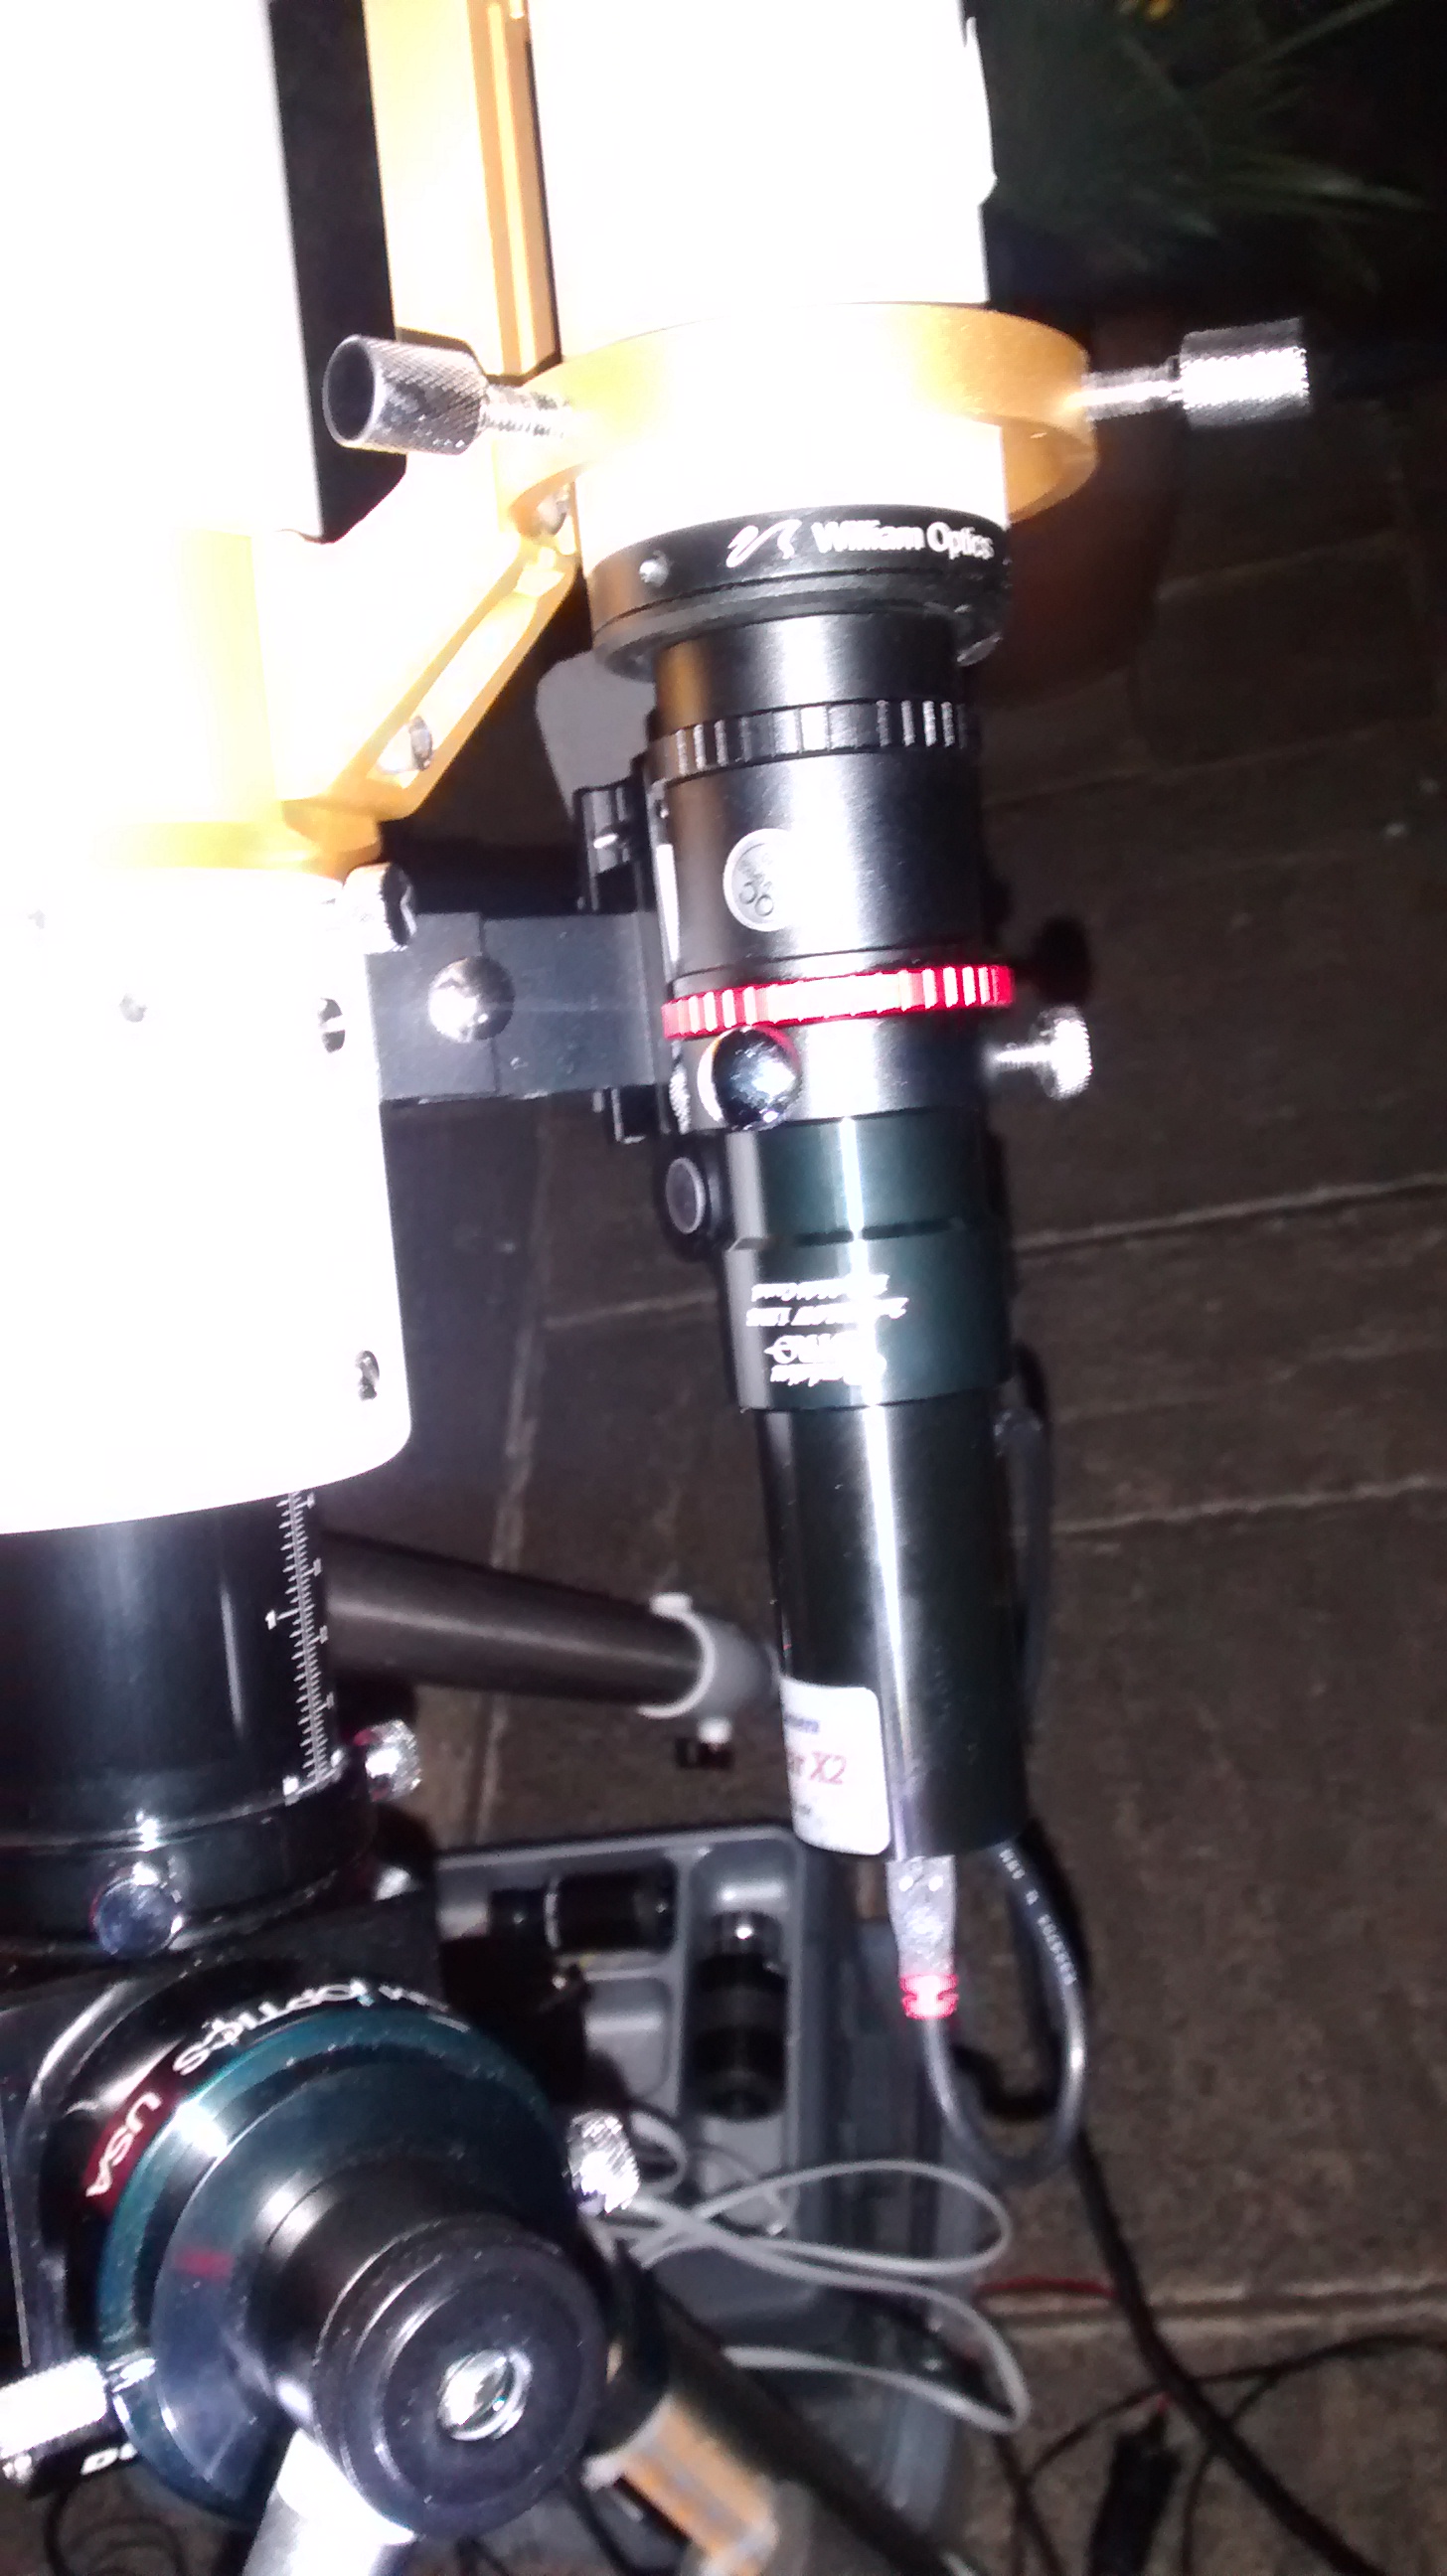
William Optics 50mm x 200mm with focus tube and Lodestar guide camera – after lengthy experimentation, insertion of a x2 Barlow barrel eventually achieved focus.

At this early stage the other inevitable obstacle has been achieving focus.  The William Optics GT81 telescope conveniently comes with its own guidescope rings that elegantly form an integral part of the OTA shoe attachment.  With guiding as a long term goal, I therefore obtained the matching 50mm William Optics guidescope at the time of purchasing the main telescope, which until now has been sitting in its box as I built up the courage to put it all together and attempt guiding.

IMG_20160331_225626313

The black art of autoguiding and infamous PHD2 screen; I have just for the first time got the camera and PHD2 working together: focussed, calibrated and guiding. The nature of the blue (RA) and red (DEC) traces indicates there’s still much to learn but at least it’s working and holds much promise for future imaging!

As a matching guidescope and a dedicated top-of-the-range guide camera I assumed it would all fit together and with a little adjustment focus could be obtained, right?  Wrong.  I played with the camera’s position but failed to get any idea where the point of focus was.  Next time I initially had the same result but by now knew that the camera was working so persevered and by using the barrel from a x2 Barlow with the lens removed eventually found focus, about 2cm back from the maximum position achieved using just the guidescope + focus tube and camera.  I know that there are many makes of equipment and permutations but surely a matched guidescope and standard, best-in-class guide camera should be designed to work together from the outset?

So what’s next? I am hoping that after a few more sessions with the guide scope and PHD2 I will able to start autoguiding properly.  However, two years of astronomy and an early look at PHD2 tells me it probably won’t be that easy.  Notwithstanding, two years of astronomy also tells me that perseverance is essential and usually pays off.  Watch this space!