Following some important developments, I think it’s fair to say that the past year has hopefully marked an appreciable turning point for my astrophotography. Reflections is a summary of my astronomy last year, in particular astrophotography, as well as some thoughts about how I hope to progress in the 2018.
I’m again pleased that there is continuing interest in Watch This space (Man) – A personal discovery of the Universe through astronomy and astrophotography. This is a personal journey and I’m glad to see there is also regular activity in many of the older blogs, which altogether illustrate what I expect many others have experienced during their own personal journeys? For those starting out or with related interests, I hope they will find these pieces interesting, instructive and perhaps even inspiring; it’s not an easy hobby but when it works – it usually does with patience, perseverance and help from the wider community – the experience is very rewarding, often exciting and mostly fun.
I’m aware that many of my blogs can sometimes be on the long side, that’s because I want to thoroughly document and discuss the matters rather than superficially comment on them. However, I am mindful that from time-to-time there are issues that can best be covered in a more concise manner or just events that speak for themselves and can therefore be brief, for which purpose I have now introduced the AstroBites section. Unfortunately, despite the best of intentions, I’ve so far only used this item occasionally but hopefully will rectify the situation next year.
I’m always tinkering with the website, so even if you’re a regular visitor take a look around from time-to-time. There is a photo gallery but for a simpler view of some of my better images I’ve recently added a FLICKR album, which is accessible from the Gallery menu. The sharp eyed may also note that in response to new imaging techniques, I have changed the image and technical details summary for each picture; I find this information invaluable when looking at other astrophotographer’s images, as it can be very helpful when starting out in general or when using similar equipment or imaging the same object for the first time.
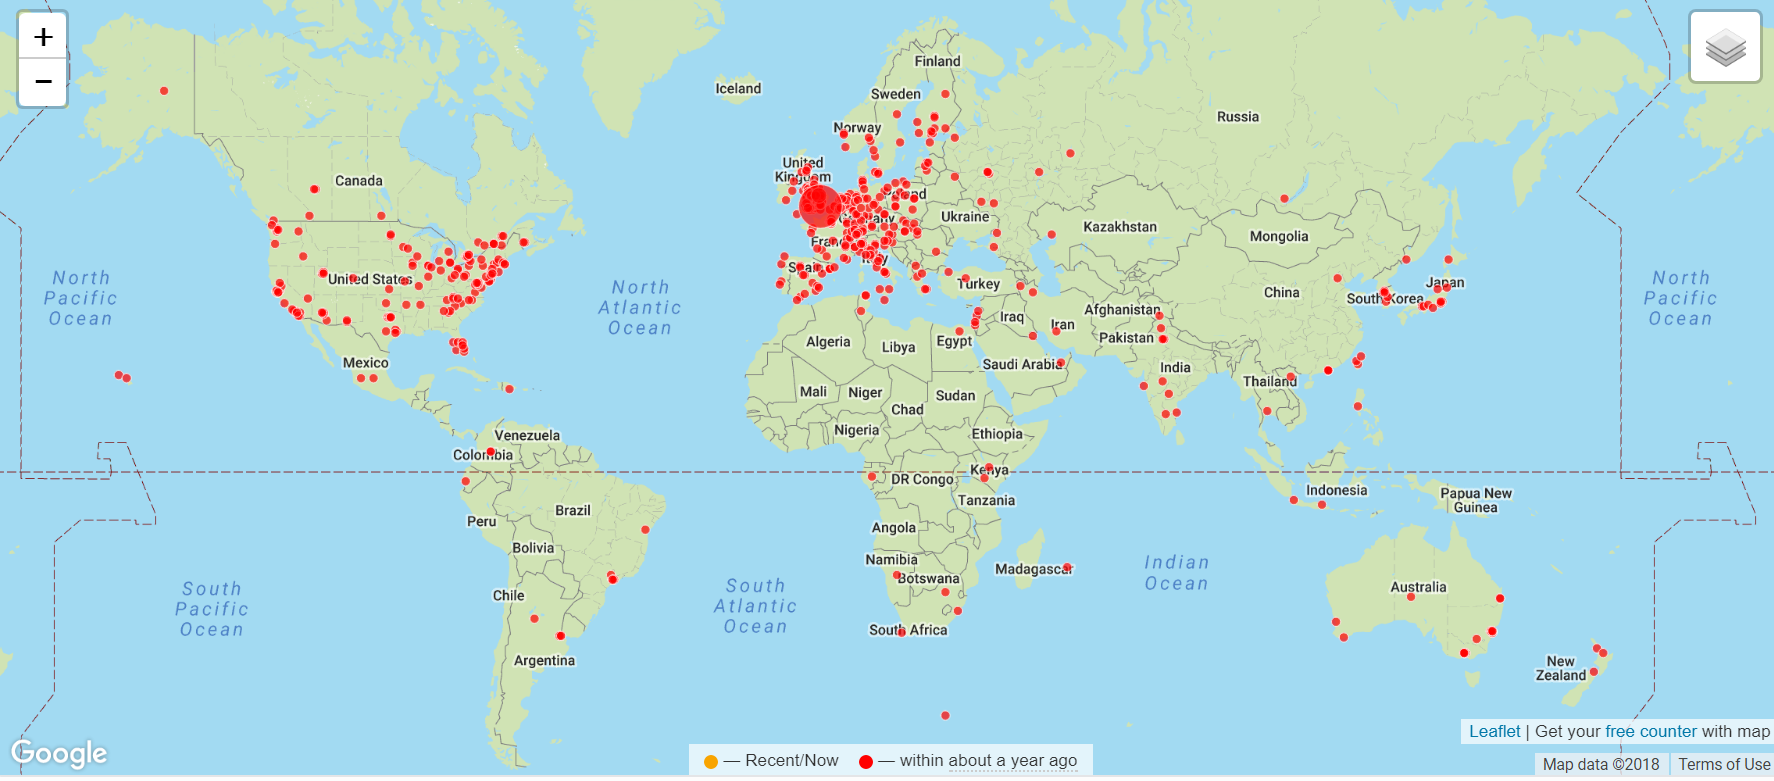
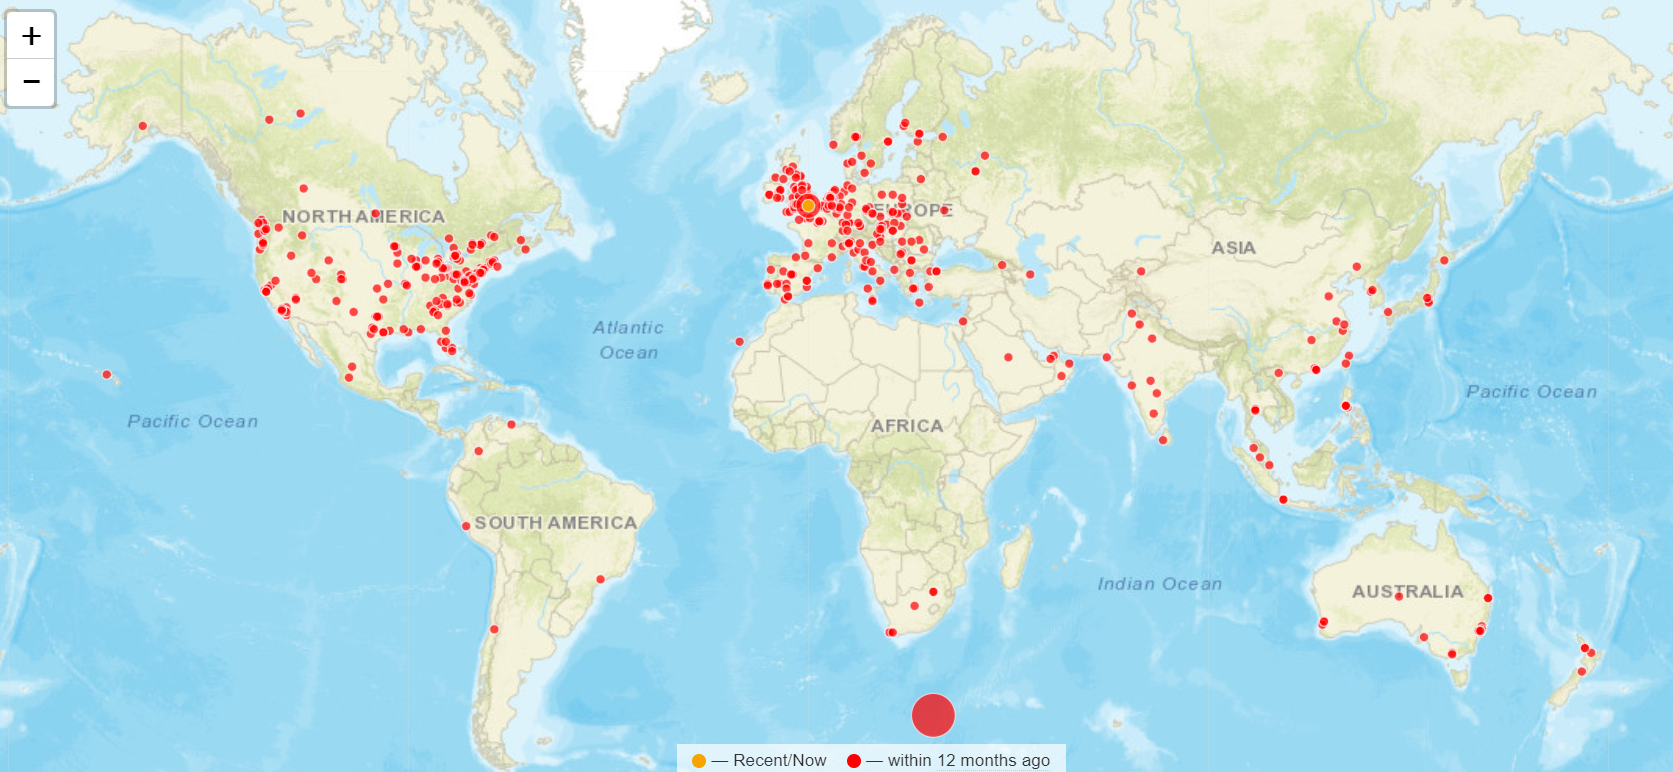
Once again the site attracted much interest from all corners of the world, which are summarised in the map below. Please do get in touch if you have and relevant thoughts, queries or just to say – hello – contact details are in the ABOUT section of the main menu.
JANUARY TO MARCH
After overcoming some major technical problems that almost brought my nascent hobby to a premature end in 2016, I felt I needed to consider what would be the best way forwards thereafter. My initial inclination was a larger telescope in order to get at those faint fuzzies but most of all I just wanted better quality images. In the past this would inevitably result in acquiring a CCD mono camera and all that means in terms of very exacting technical issues and very long exposures, neither of which I was prepared to take on, or at least only to a degree – life’s too short and the UK weather too cloudy!
However, during the latter part of 2016 something of a game changer was emerging in the world of astrophotography and after following developments online for a few months, I was persuaded that the new ZWO1600MM-Cool mono camera could also give me what I wanted, without many of the issues of a conventional CCD camera. As a result I purchased the aforesaid camera and matching x8 EFW just before Christmas in 2016 and eagerly awaited clear skies in the New Year. Unfortunately it wasn’t that simple – now there’s a surprise!
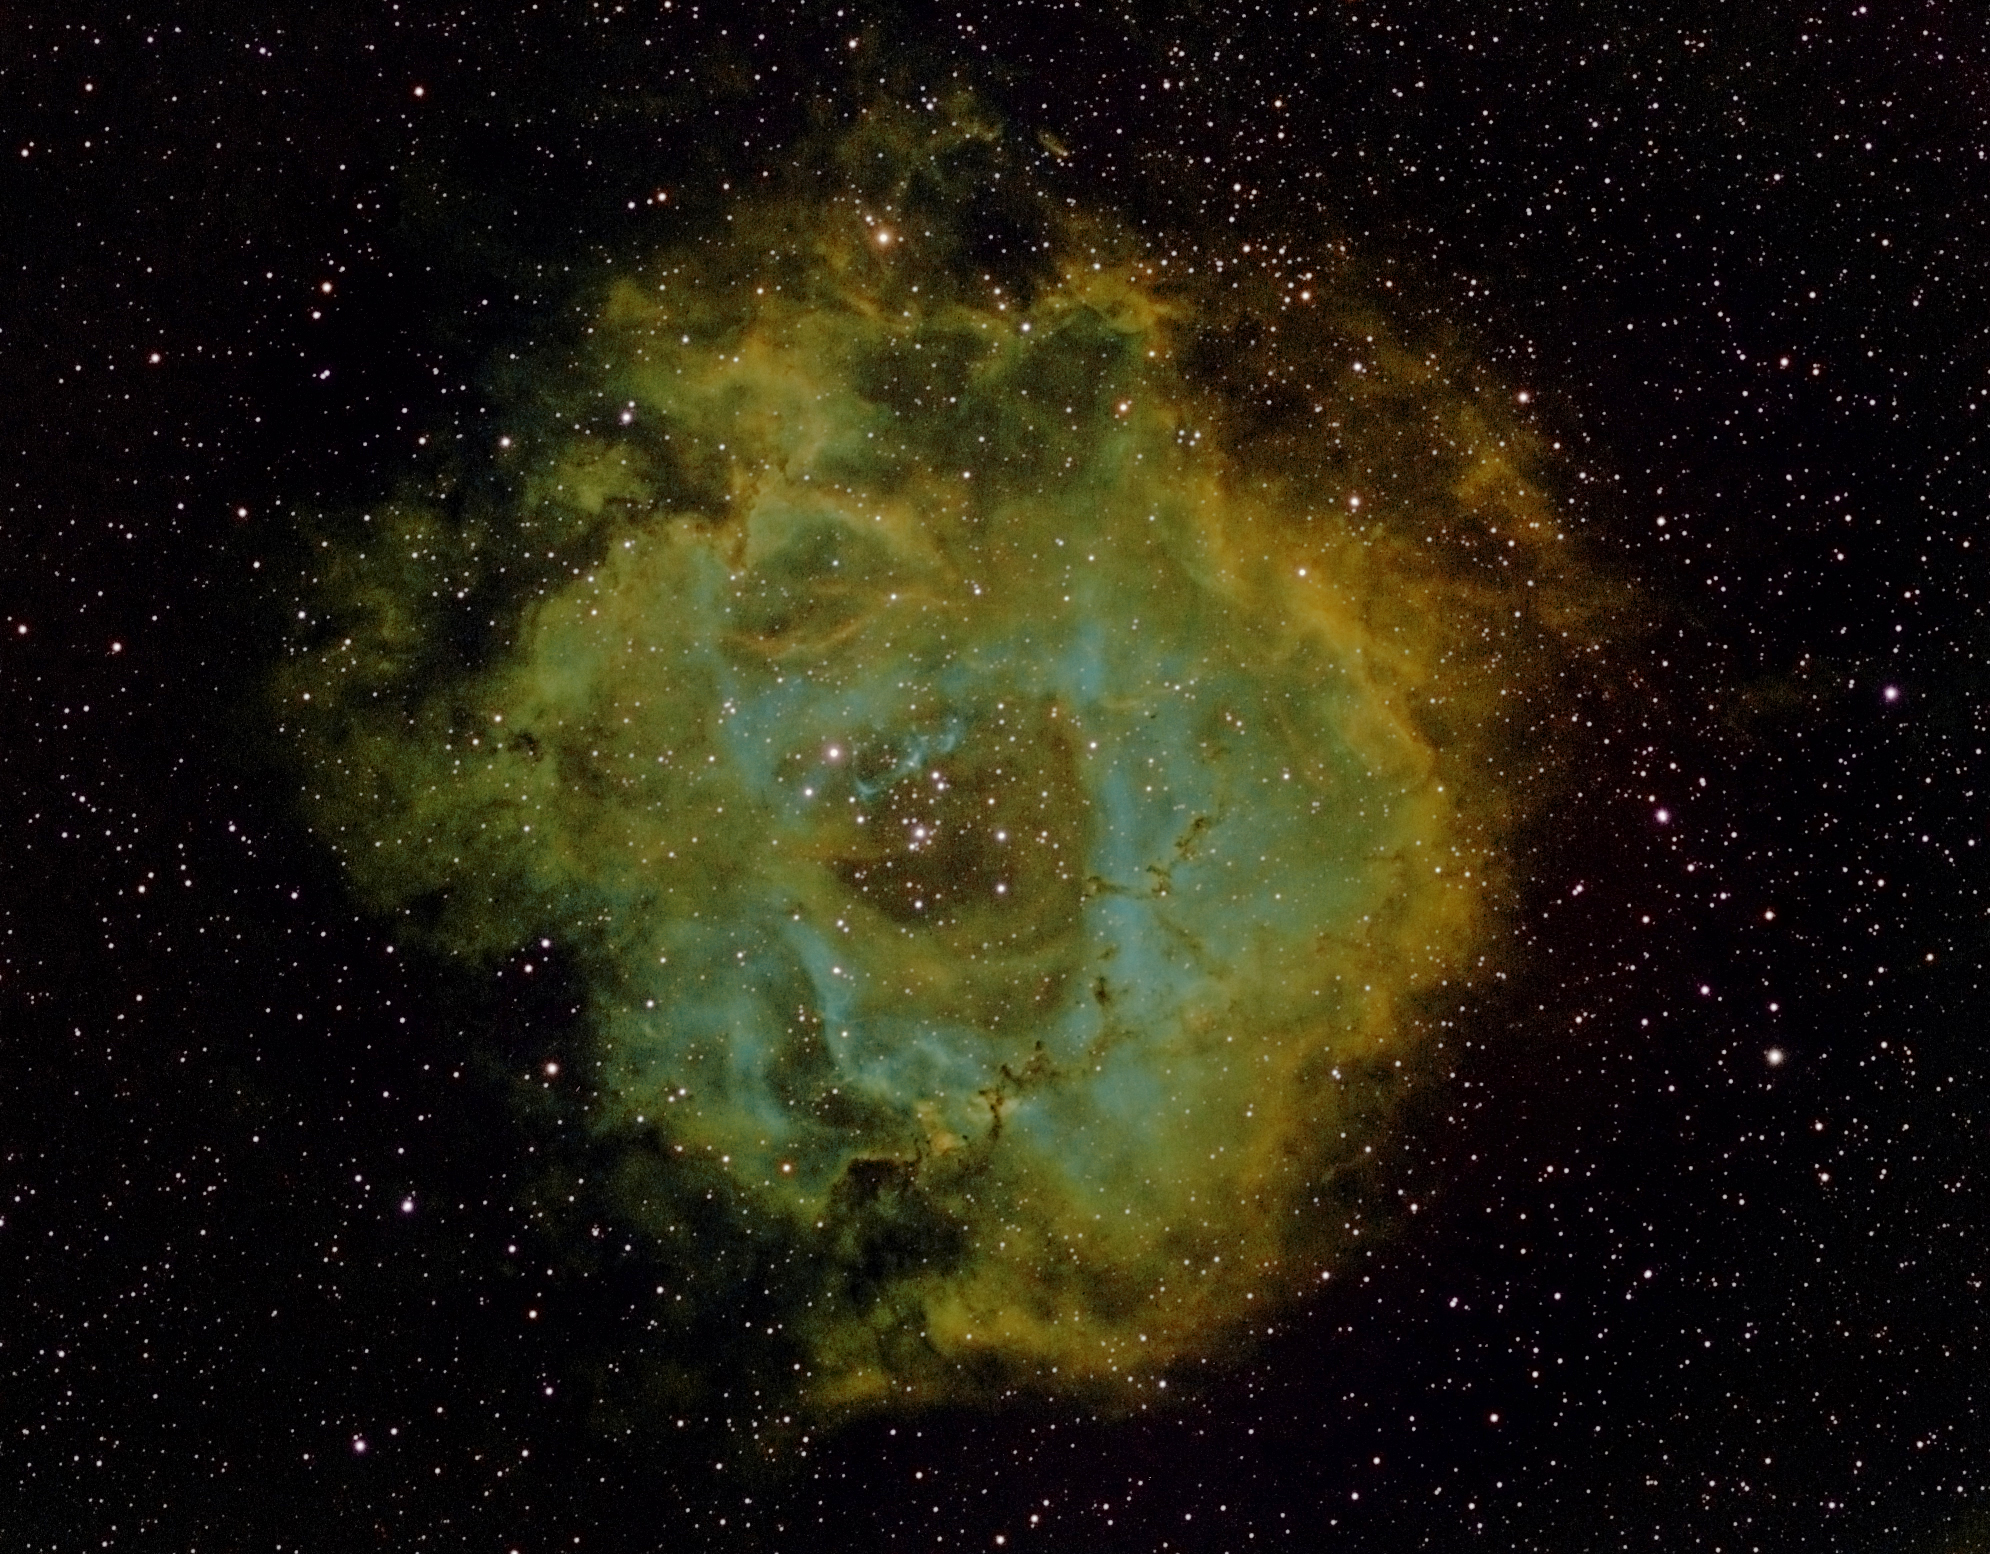
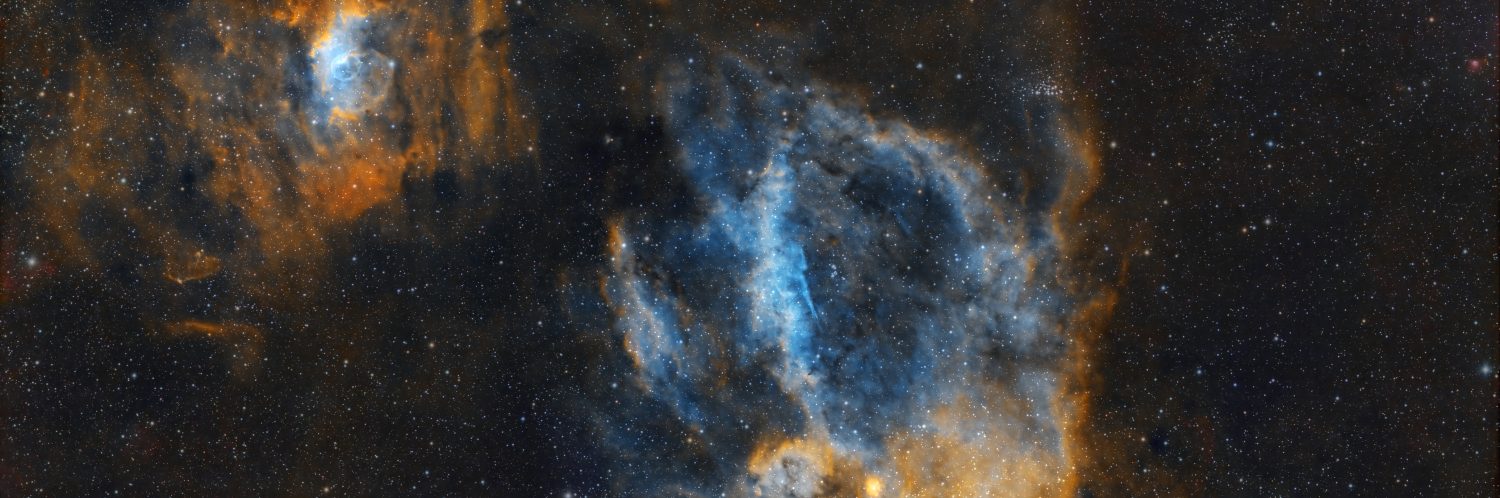
The crucial benefits of the new CMOS based ZWO camera are three-fold: (i) very low read noise and high sensitivity achieved with, (ii) relatively short exposures – sometimes as little as 30 to 60 seconds, (iii) larger field-of-view compared to a CCD. Wow! Unfortunately there was still much to sort out, notably the image train, image capture and processing, all of which differ considerably from a DSLR camera. Notwithstanding, eventually first light (see image below) was achieved in March and it was immediately obvious that this was going to fulfil my astrophotography dreams and more for now – hopefully!
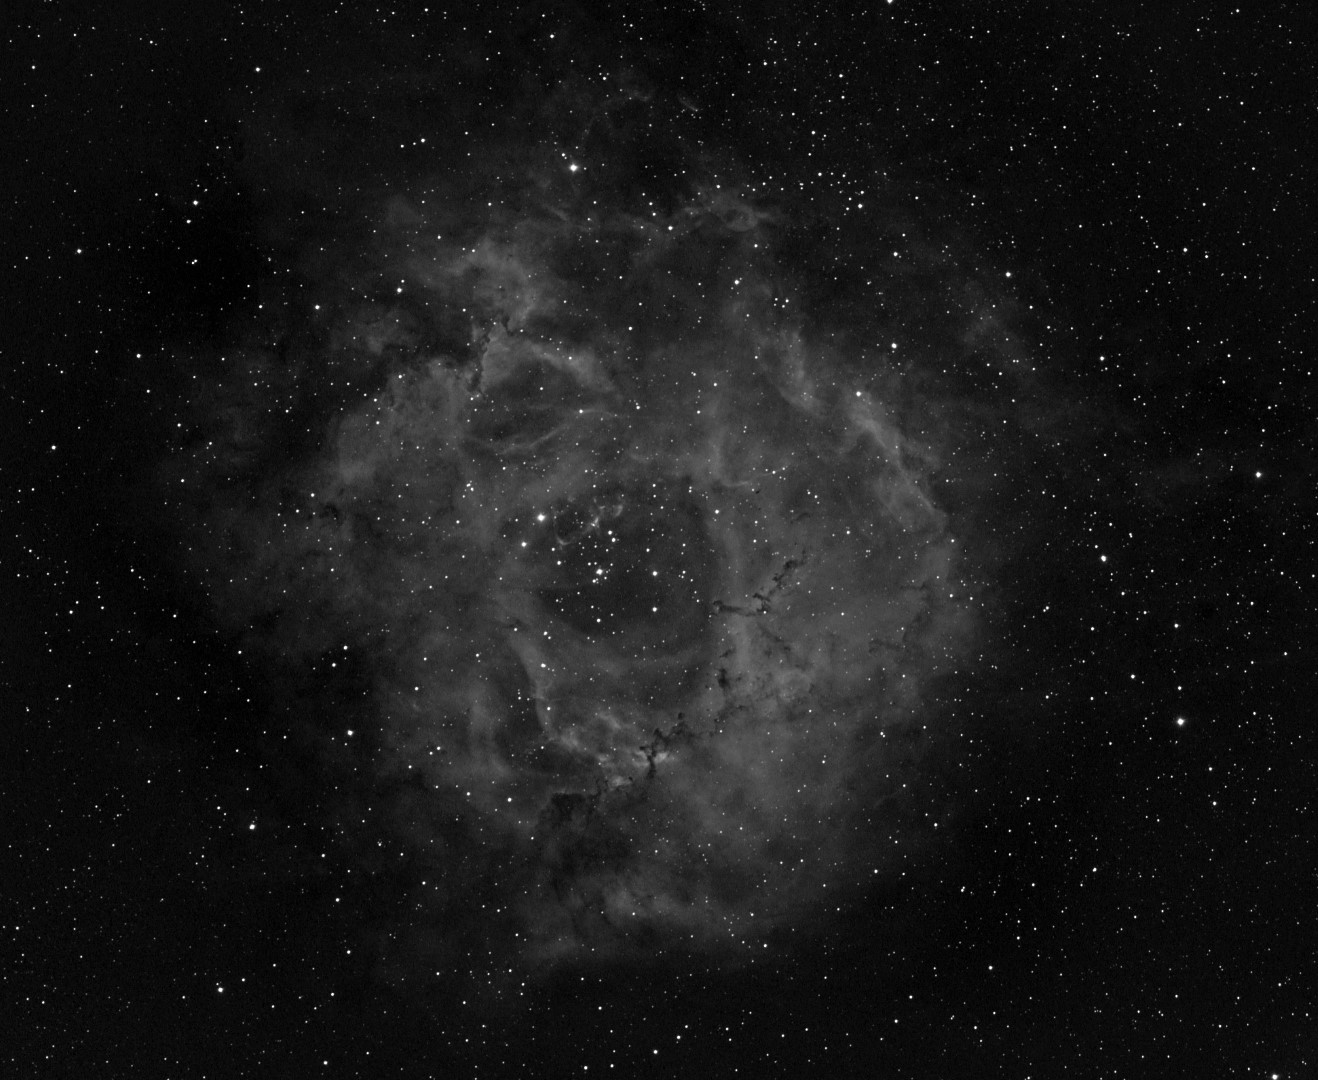
Rosette Nebula in Ha | William Optics GT81 + ZWO ASI 1600MM-Cool & 0.80 focal reducer guided | 15 x 180 secs + darks & bias calibration Gain 300, Offset 10 | 21st March 2017
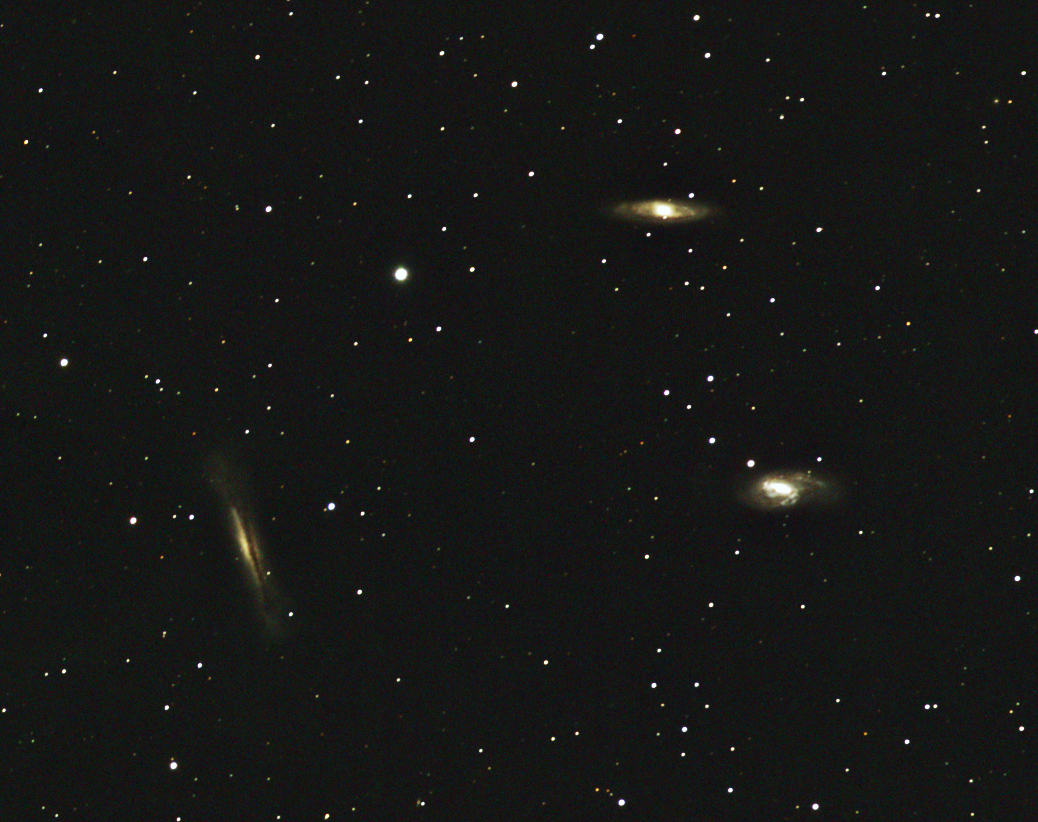
Using mostly narrowband filters – more on that later – I was initially able to obtain some exciting and very promising images of classic HII-region objects just before they disappeared over the western horizon; thereafter followed weeks of frustration whilst I waited for other suitable objects to appear – timing is everything. The ZWO1600 camera is very good for most deep sky objects, nebulae, galaxies and globular clusters but with the William Optics GT81 the combination is best suited to larger targets. As a result by late winter and early spring, when smaller objects such as galaxies dominate the night sky, it became necessary to find something else to do for the next few months.
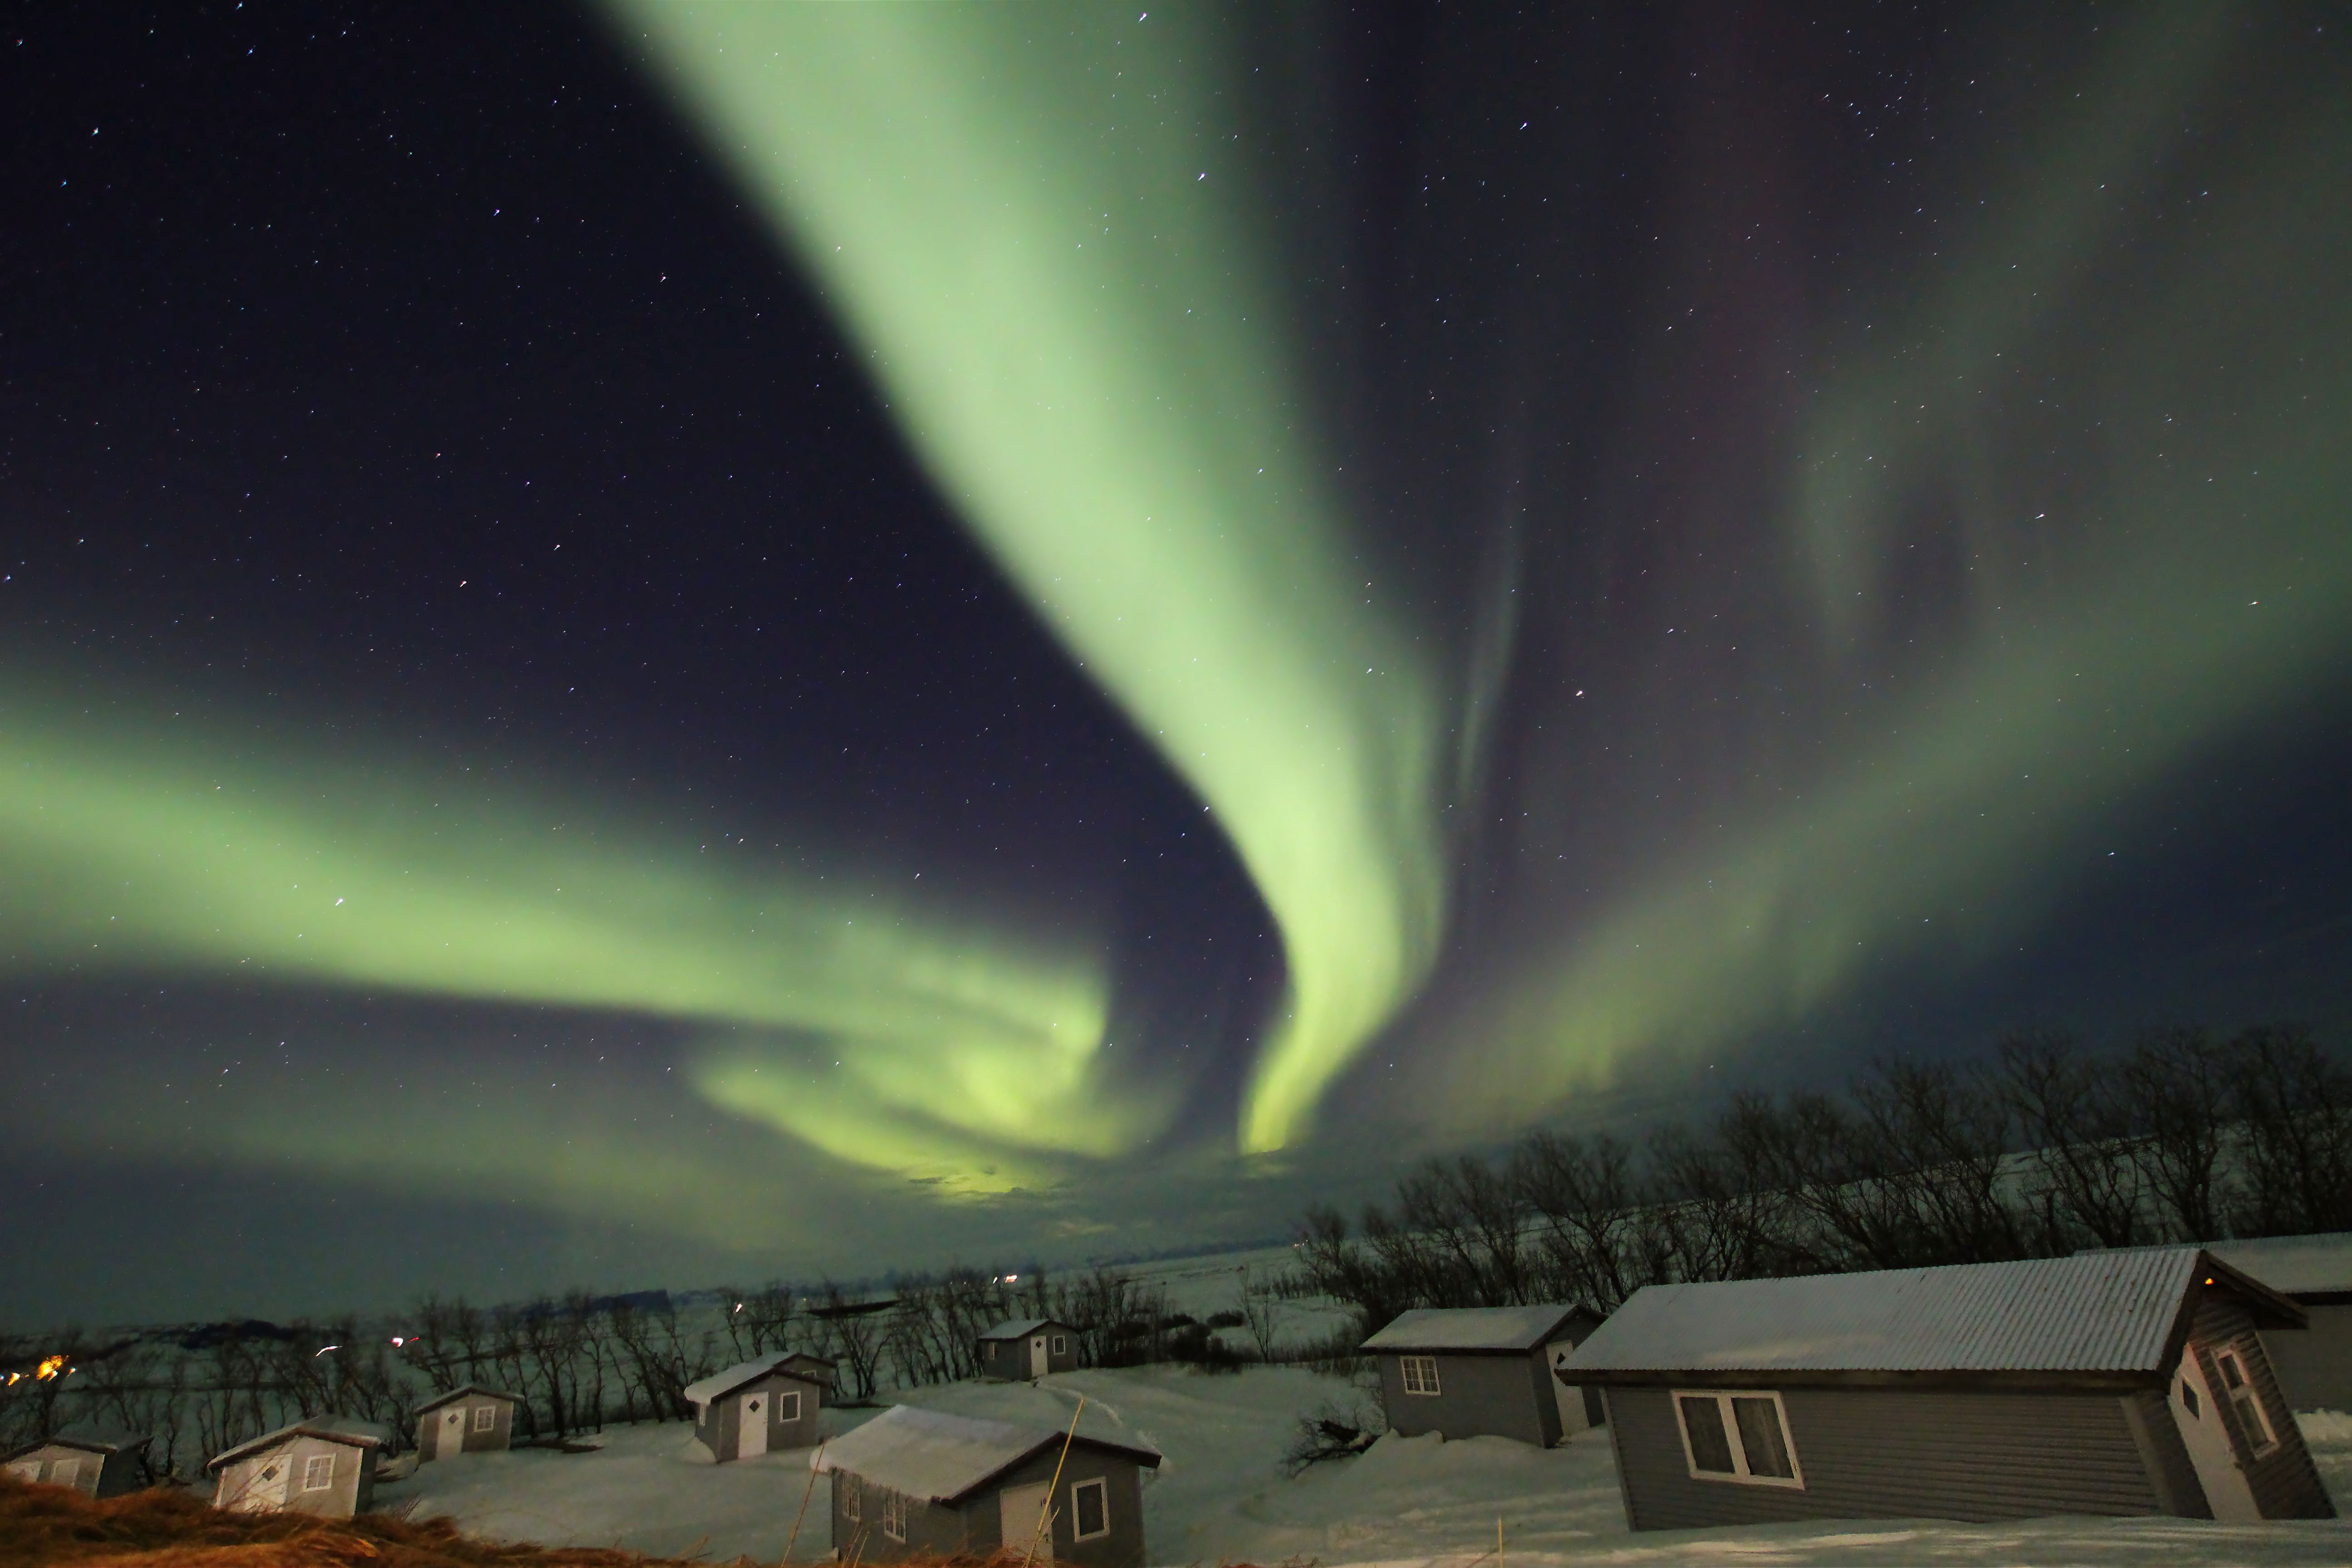
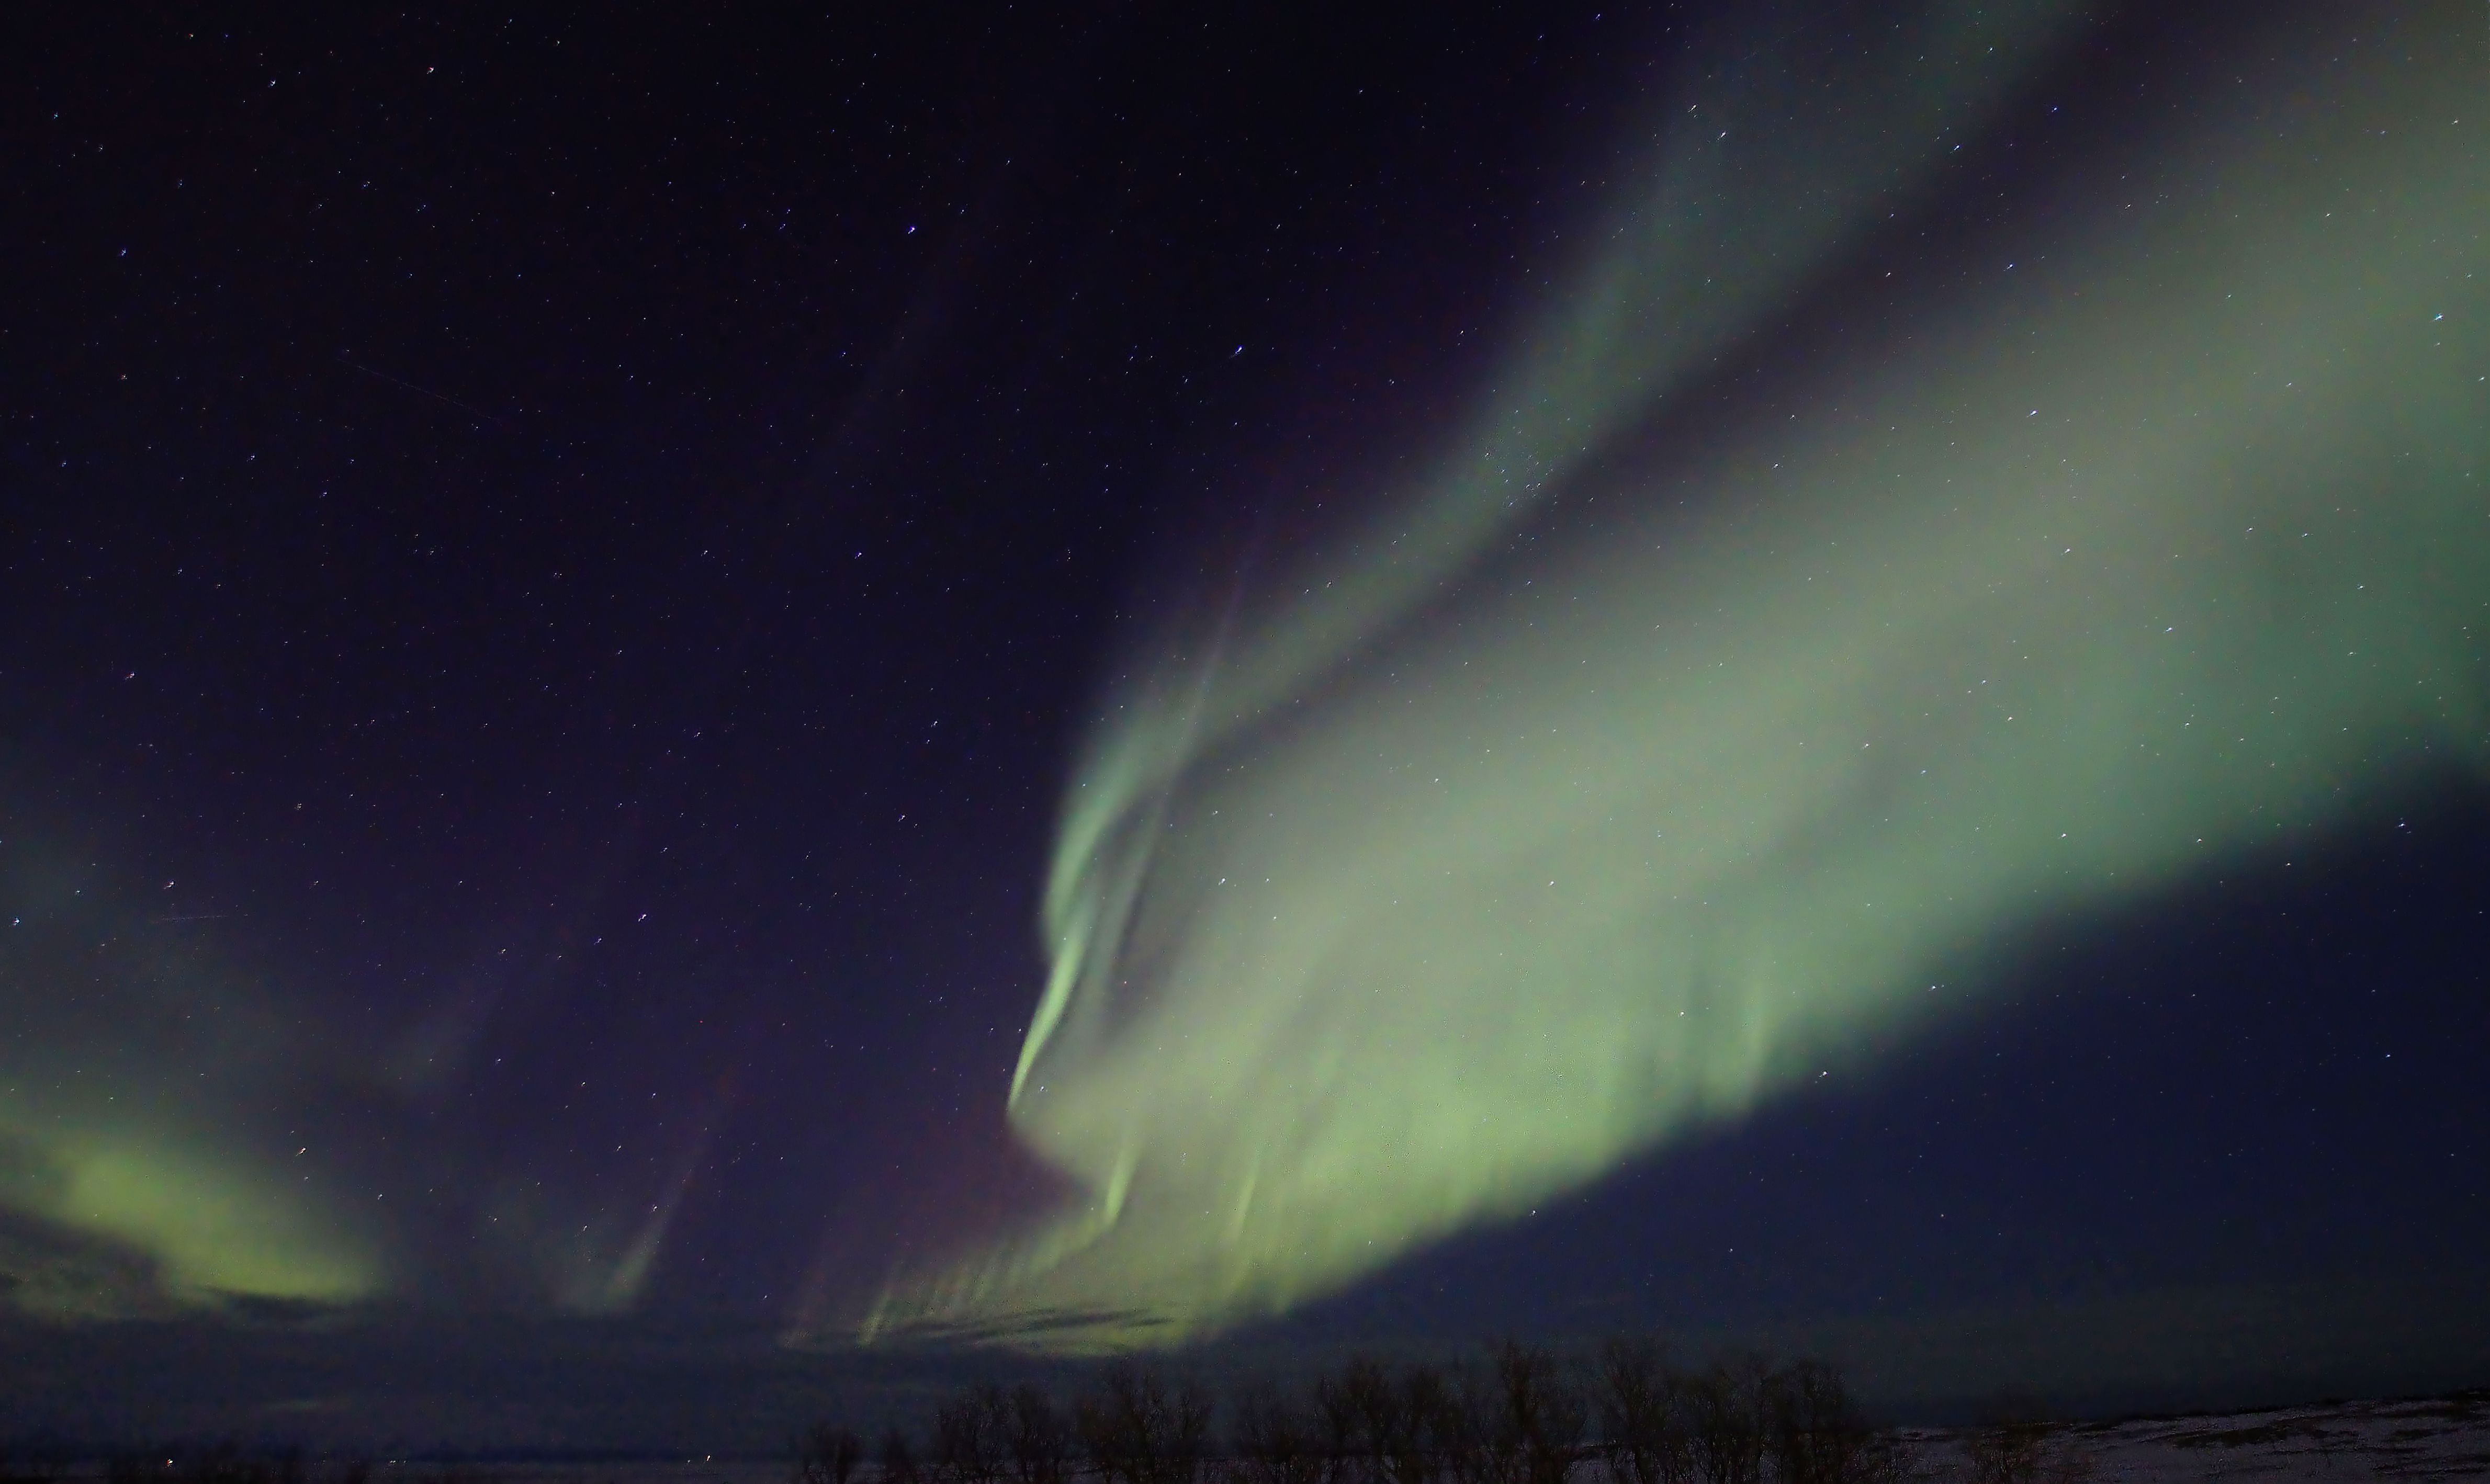
 I’ve previously worked north of the Arctic Circle in Sweden and Russia but in February I took a more relaxed ferry trip along the west and north coast of Norway from Bergen to Kirkenes, close to the Russian border. Given the time of year it was of course very cold and the nights long but the ship was comfortable and the scenery spectacular. However, once north of Tromsø the real show began in the form of the Aurora Borealis AKA the Northern Lights. This natural light show lived up to expectations and with some difficulty I managed to obtain numerous images of the spectacle – the problem being imaging from a moving ship in severe cold, which with wind chill was well below -20oC – but it was worth it and made for an exciting end to my winter astrophotography.
| No |
Date |
Type* |
Object |
Name |
| 1 |
20/01/17 |
DSLR |
M45 |
Pleiades |
| 2 |
20/01/17 |
N |
NGC 2244 |
Rosette Nebula |
| 3 |
22/01/17 |
DSLR |
M45 |
Pleiades |
| 4 |
22/01/17 |
N |
IC 434 |
Horsehead & Flame Nebula |
| 5 |
21/03/17 |
N |
NGC 2244 |
Rosette Nebula |
| 6 |
21/03/17 |
B |
M65 |
Leo Triplet |
| 7 |
24/03/17 |
B |
NGC 4874 |
Coma Cluster |
| 8 |
25/03/17 |
N |
M42 |
Orion Nebula |
| 9 |
27/03/17 |
N |
IC 434 |
Horsehead Nebula |
Record of quarterly photographic images taken in 2017
*Type: DSLR colour, B Broadband LRGB, N Narrowband Ha-OIII-SII, V Video
APRIL TO JUNE
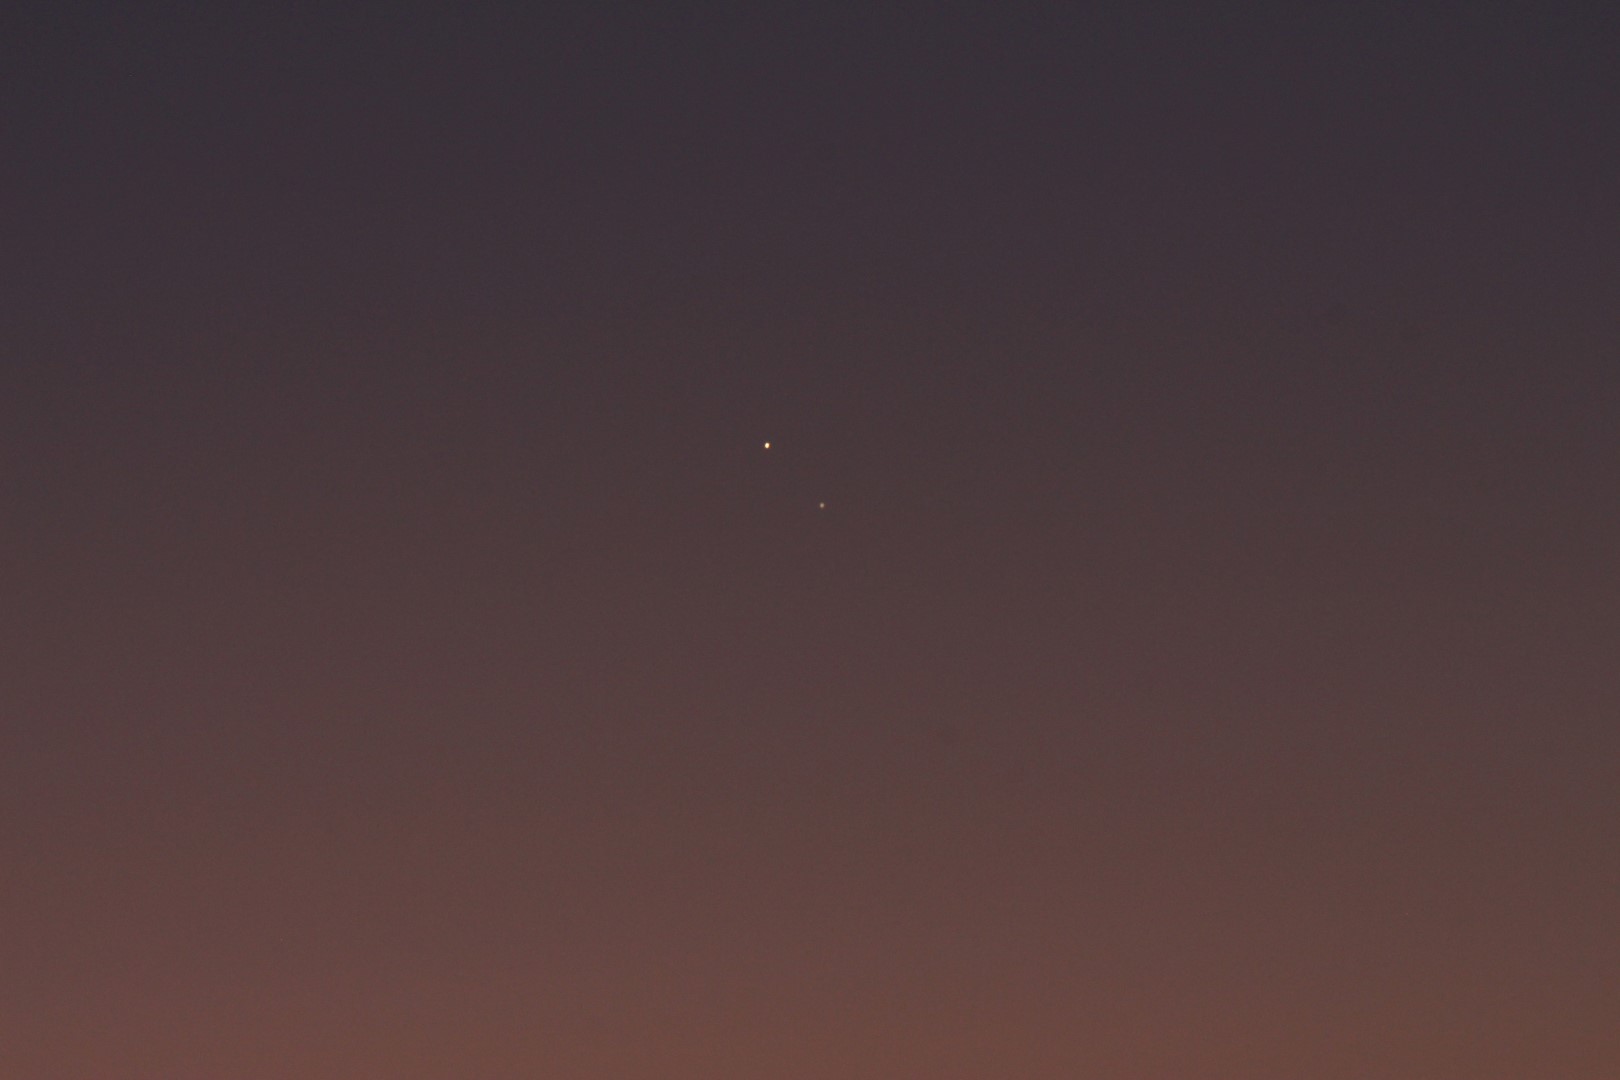
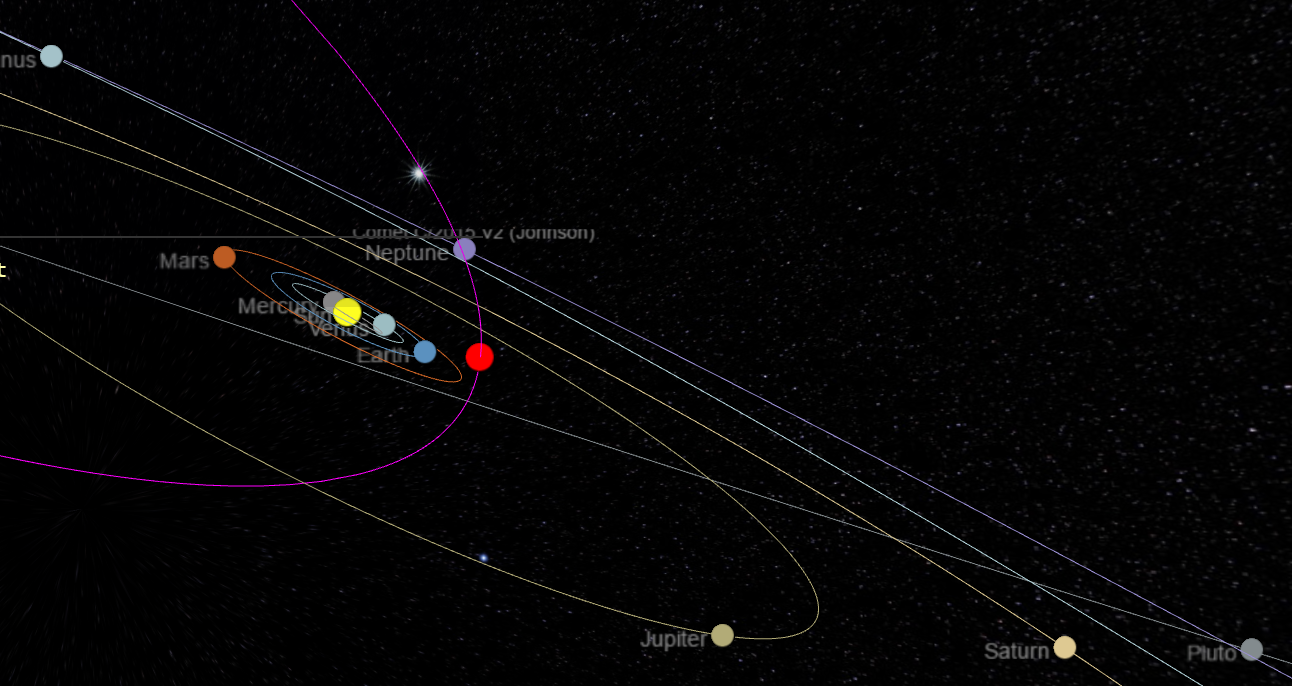
The period from April until the end of July can be a frustrating time of the year for astronomers, except those with an interest and the equipment for solar imaging. Other than just giving up for a while, the secret is to abandon normal pursuits and just make the best of whats on offer, which is exactly what I did this year. After limited success attempting some of the larger galaxies in early Spring, I moved on to webcam imaging Jupiter and Saturn, insofar as is possible with my small telescope. At about this time I also managed to capture the comet C/2015 V2 (Johnson), my second one after previously imaging C/2014 Q2 Comet Lovejoy in early 2015. As I had not attempted such objects for more than two years and was more than a bit rusty with the different imaging and processing techniques, the results were varied but is was still good fun, which I hope to repeat in 2018 depending on what’s around at the time.

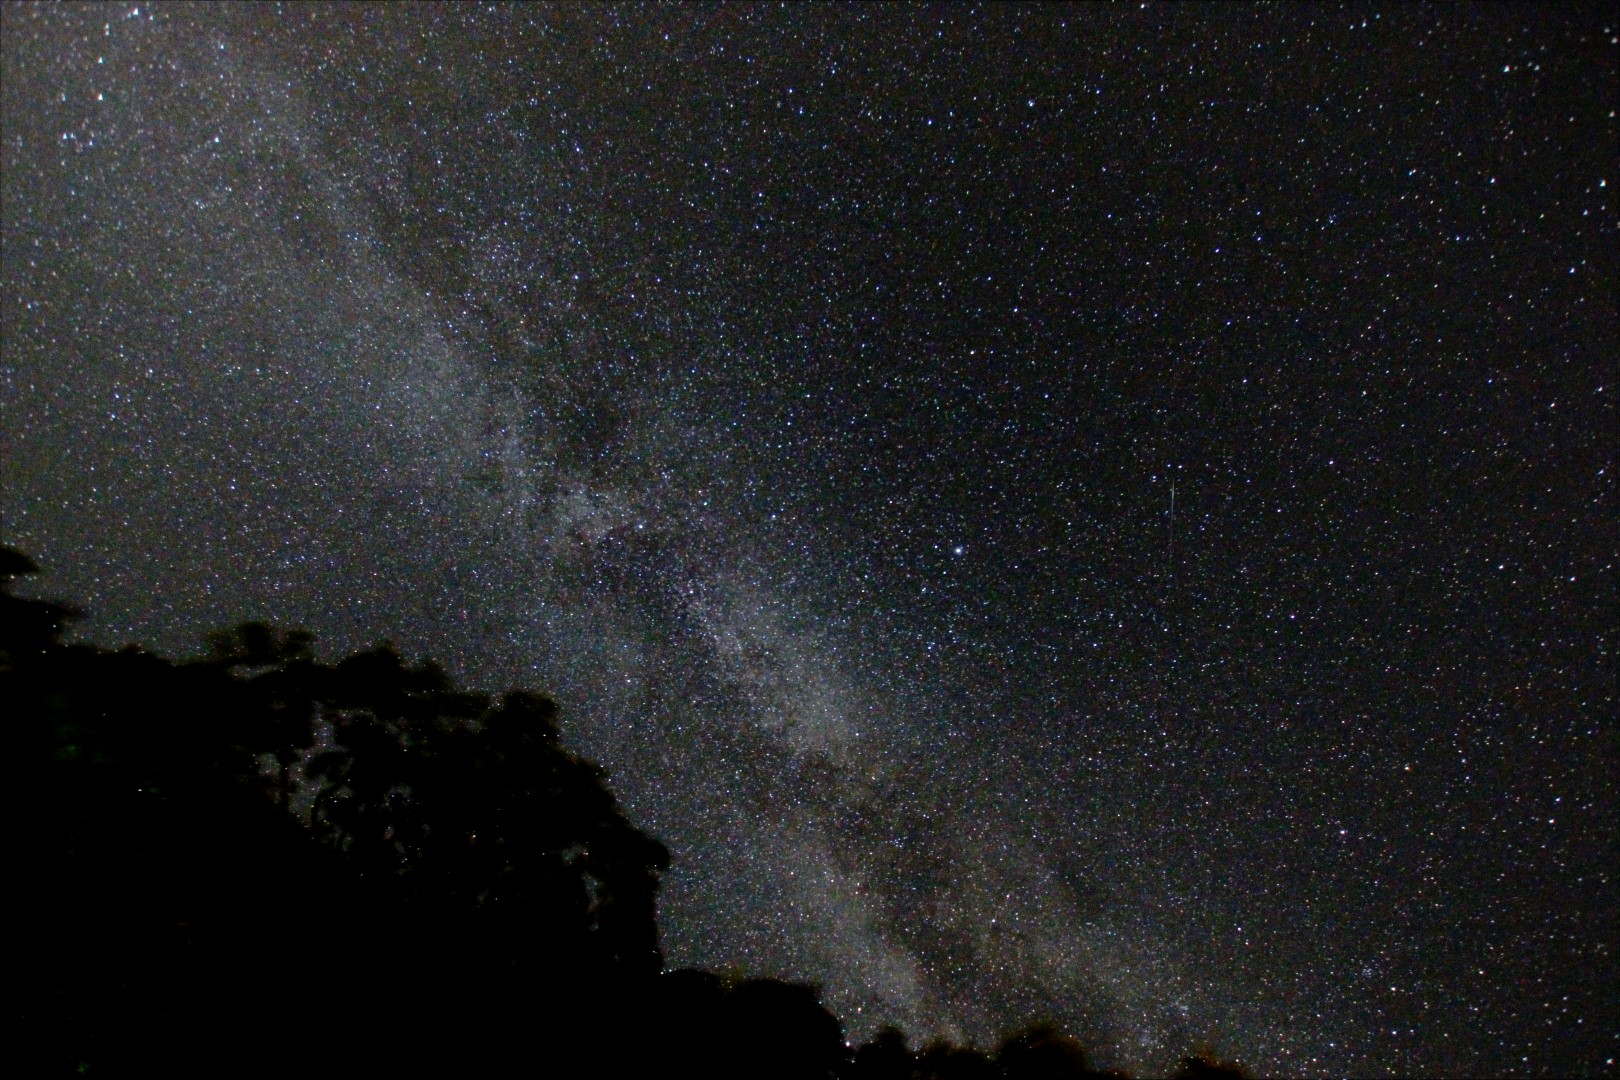
10 x 60 sec @ ISO 3,200
I also used the much improved weather and extra spare time afforded to go over the basics of my mount-telescope-computer set-up: balance, leads, equipment alignment, computer updates etc. I inspected and replaced some old cables, wherever possible using cold-resistant silicon leads. Following last year’s catastrophic camera power lead failure, I am now aware of the damage that cold can do to cables and pay greater attention in order to avoid repeating such problems. I was also aware that with the change to the ZWO camera and using autoguiding routinely there had been a noticeable increase in cables, which I therefore tidied and strapped with Velcro bands to restrict unnecessary movement and snagging.
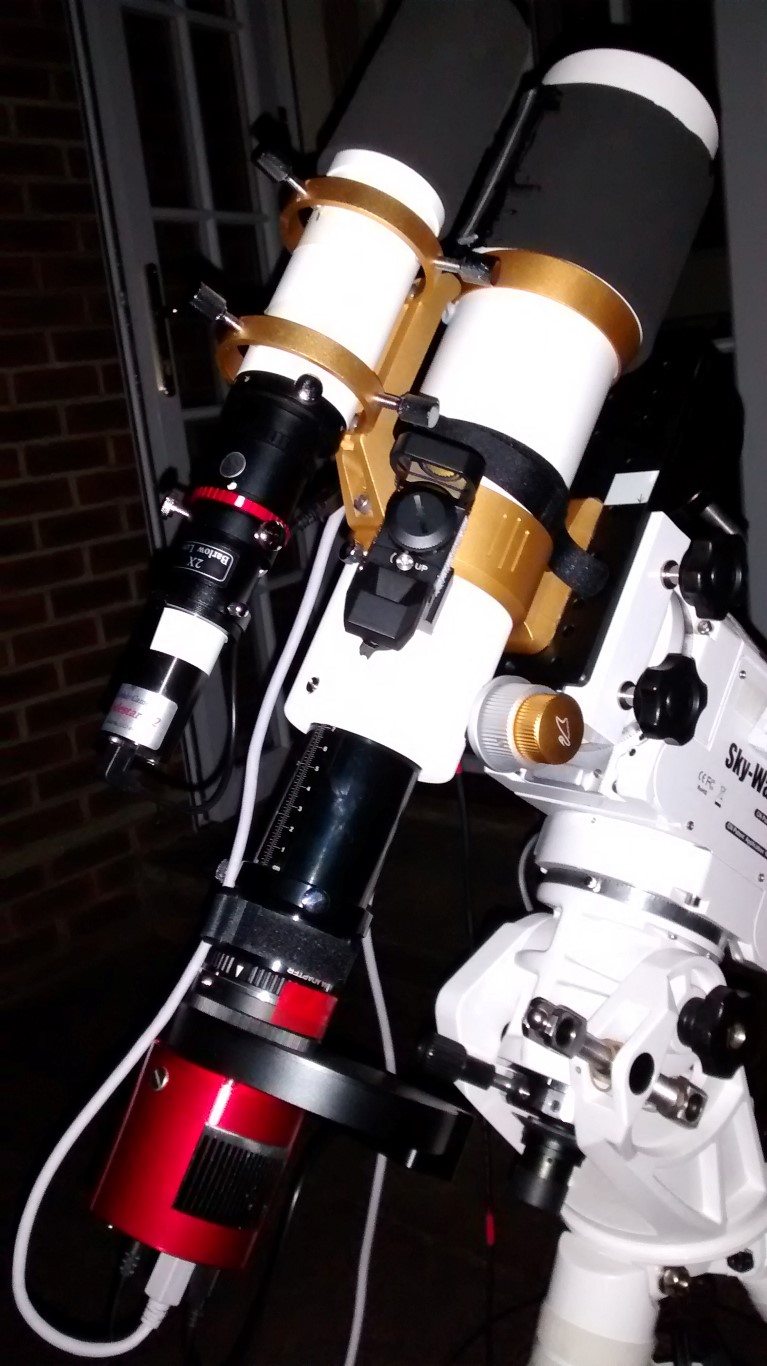 The overall impact of these changes has transformed my working practices, making set-up and dismantling quicker, more efficient and more effective, itself a huge improvement. In addition, I’ve also been able to move the mount and image capture controls indoors, which being more convenient and comfortable has made operating conditions and results much better. Astrophotography inevitably becomes more complex and working in a warm environment with access to a cup of tea really does improve the outcome when working, in particular when resolving problems. Given the significant benefits achieved from this housekeeping, in the future I intend to repeat this exercise each summer – it really pays off.
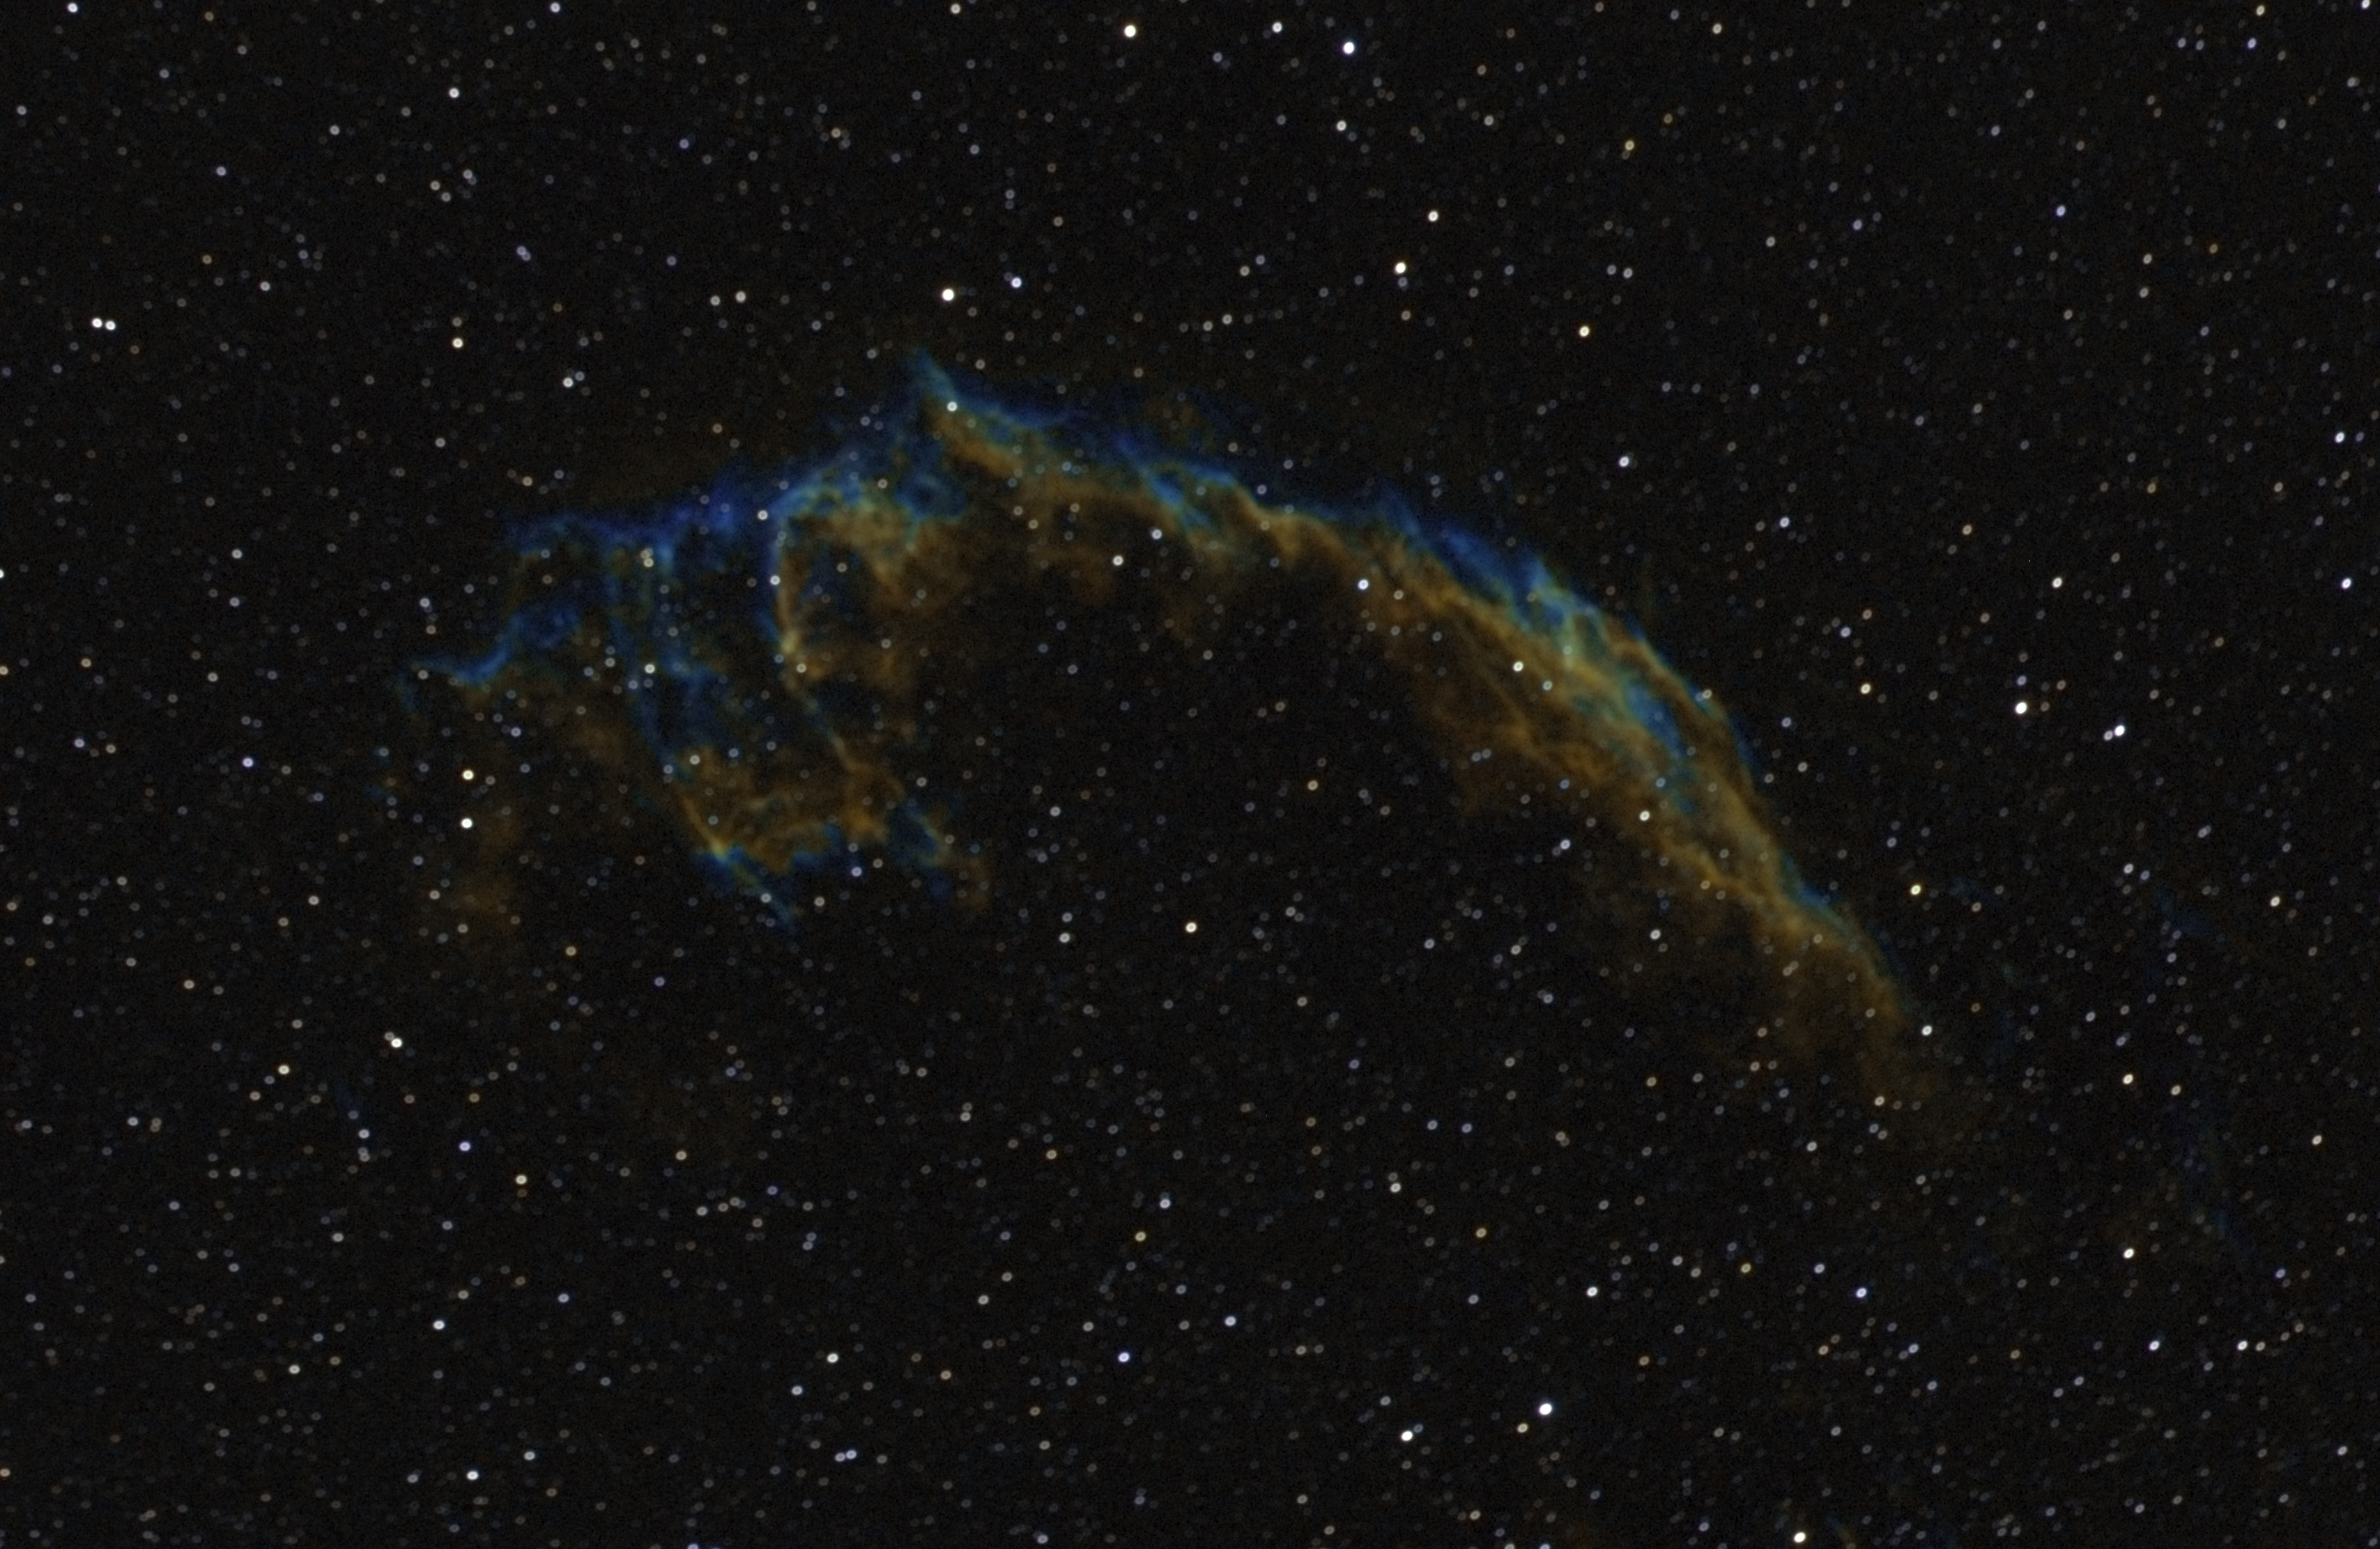
Eastern Veil Nebula in SHO – for Will| 21st June 2017
Notwithstanding these virtues, by June I was eager to start imaging again with the ZWO1600MM-Cool and with good weather and some very late nights I was able to obtain a few narrowband subs of the Eagle and North America nebulae. To my surprise on the morning of 21st June I even briefly managed to image the Eastern Veil Nebula in narrowband; who would have thought imaging the Veil on the Summer Solstice? Once again the results of just a few subs from the new camera continued to show great promise.
| No |
Date |
Type* |
Object |
Name / Type |
| 10 |
02/04/17 |
B |
NGC 2903 |
Galaxy |
| 11 |
02/04/17 |
B |
M61 |
Galaxy |
| 12 |
18/04/17 |
B |
NGC 4438 |
Markarian’s Chain |
| 13 |
14/0517 |
V |
Jupiter |
Video Sequence |
| 14 |
25/05/17 |
V |
Jupiter |
Video Sequence |
| 15 |
26/05/17 |
DSLR |
Comet |
C/2015 V2 |
| 16 |
11/06/17 |
V |
Saturn |
Video Sequence |
| 17 |
14/06/17 |
V |
Jupiter |
Video Sequence |
| 18 |
19/06/16 |
N |
M20 |
Eagle Nebula |
| 20 |
20/06/17 |
N |
NGC 7000 |
North America Nebula |
| 21 |
21/06/17 |
N |
NGC 6992 |
Eastern Veil Nebula |
JULY TO SEPTEMBER
After a taste of the ZWO1600MM-Cool at the start of the year and briefly around the Summer Solstice, the end of July finally brought the return of astronomical darkness, more suitable DSO targets and at last the opportunity to get serious with narrowband and broadband imaging. Combined with some exceptionally good weather and clear skies this period was very productive and successful. Without plate solving the maximum imaging time I can achieve at the moment is about two hours before or after the Meridian but using a high Gain of 300, 180 second exposures and autoguiding, for the first time I was able to get some very decent subs of various nebulae – now it was really getting exciting!
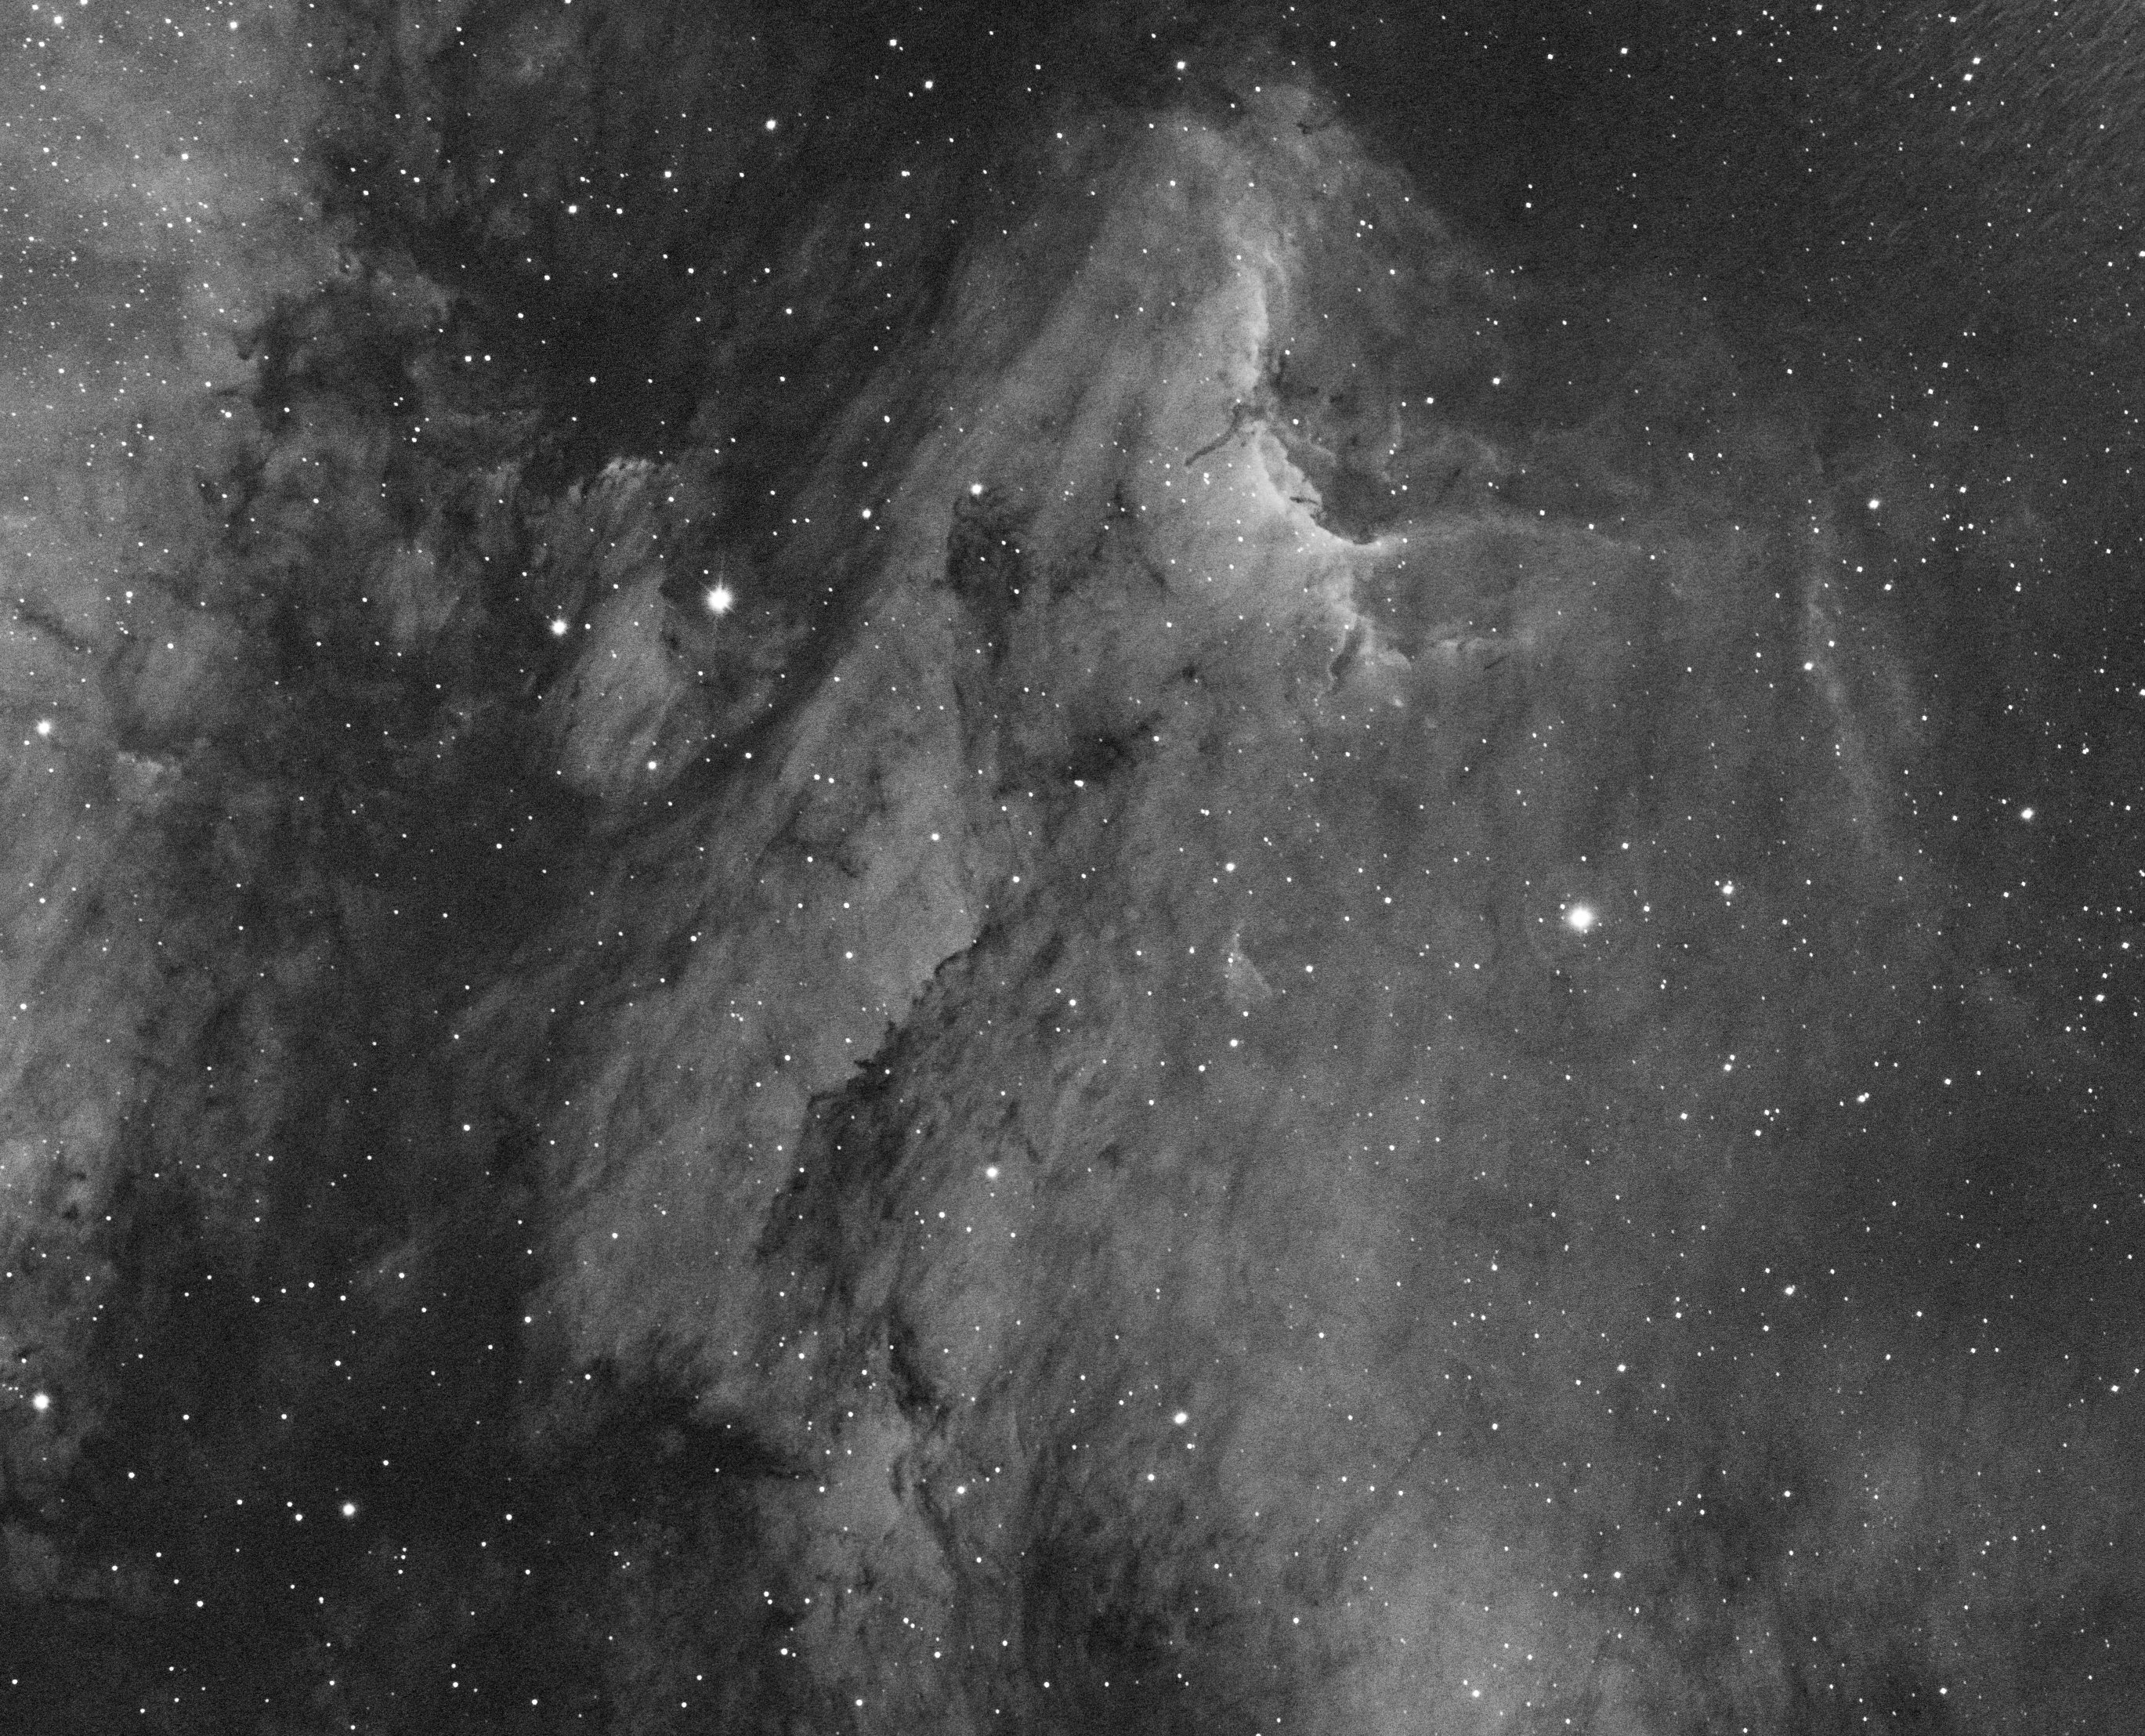
At the time of purchase I wavered between the ZWO EFW x5 filter or the soon to be released alternative x8 version and in the end waited for the larger version, together with the matched LRGB, Ha, OIII and SII filter bundle. There were initial problems controlling the EFW and camera, inevitably resolved after some time with a new driver code but in the end the x8 EFW and camera have proved to be an excellent combination. I have especially found narrowband imaging to be a revelation and when possible have so far mostly concentrated on this technique; its use when the Moon is about is an added and somewhat pleasing bonus. The detail shown in Ha-subs can often be quite spectacular and for the best results I’ve discovered that more aggressive stretching is needed.
To my surprise, I’ve so far found LRGB broadband imaging more difficult than expected, both to capture and in post-processing. It’s apparent that Gain and Offset settings are more critical than narrowband, perhaps because such objects tend to be brighter, with more contrast and often greater complexity? I had been looking forwards to imaging the Andromeda Galaxy in LRGB and as is often the case with M31, first thought that my subs were overblown. However, after dialling down Gain, Offset and exposure time the alternative result was even more disappointing. It was instructive that by returning to the original data and applying greater care during processing, I was able to tease a good image from the subs after all.
| No |
Date |
Type* |
Object |
Name / Type |
| 22 |
27/07/17 |
N |
M20 |
Trifid Nebula |
| 23 |
31/07/17 |
N |
NGC 6960 |
Western Veil Nebula |
| |
|
|
|
& Pickering’s Triangle |
| 24 |
10/08/17 |
N |
IC 5070 |
Pelican Nebula |
| 25 |
11/08/17 |
N |
IC 1318 |
SADR Region |
| 26 |
11/08/17 |
N |
NGC 6888 |
Crescent Nebula |
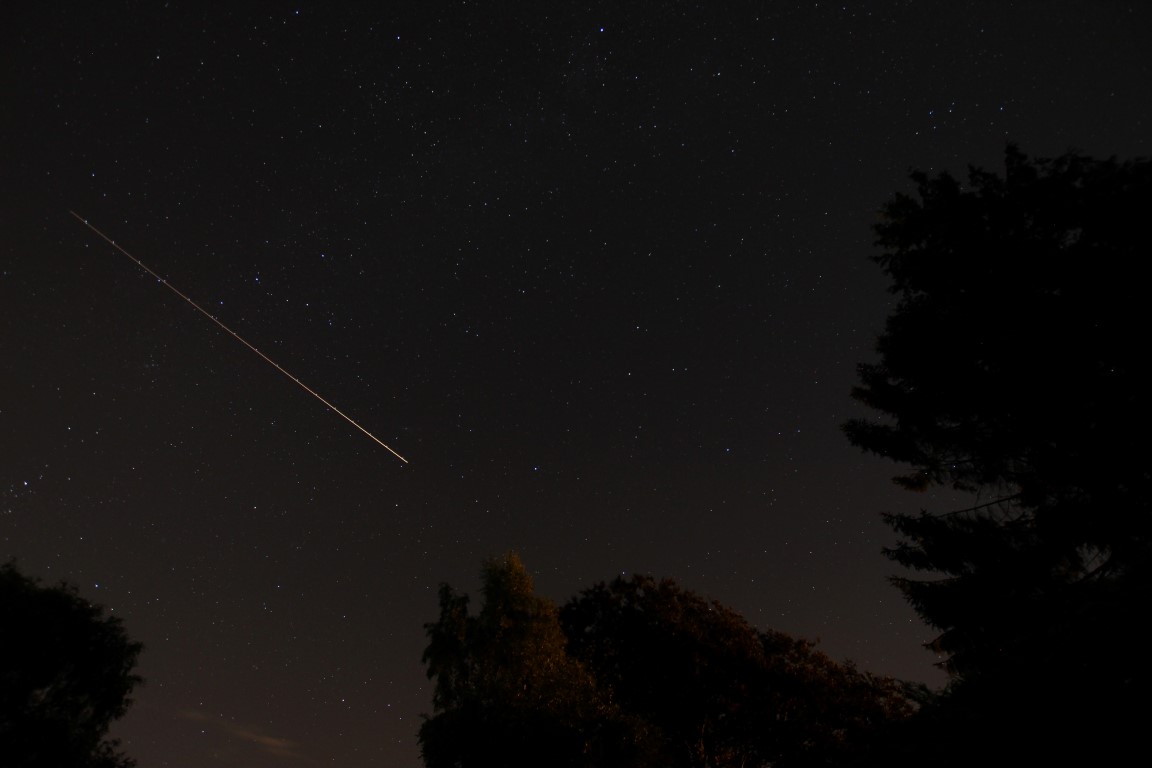
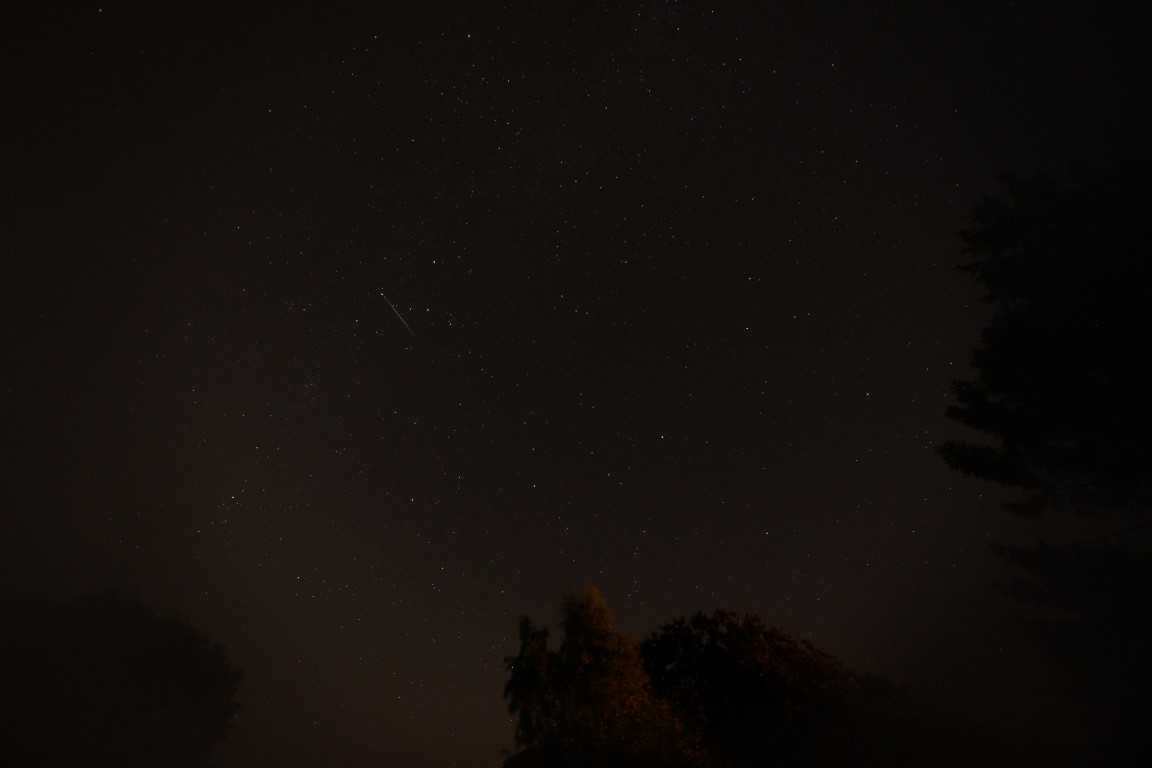
| 27 |
13/08/17 |
DSLR |
Perseids |
|
| 28 |
19/08/17 |
N |
NGC 6995/ NGC 6992 |
Eastern (Bat) Veil Nebula |
| 29 |
20/08/17 |
B |
M15 |
Globular Cluster |
| 30 |
27/08/17 |
N |
NGC 7000 |
North America Nebula |
| 31 |
28/08/17 |
B |
M31 |
Andromeda Galaxy |
| 32 |
28/08/17 |
B |
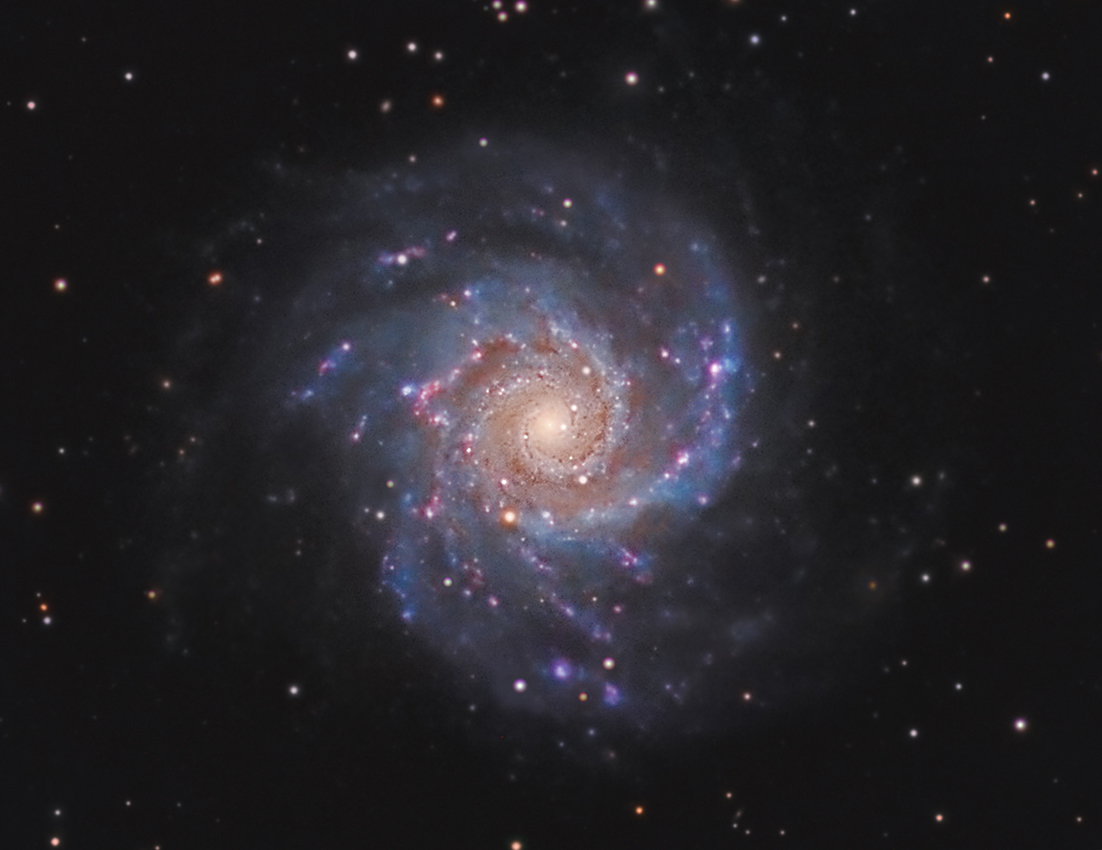
M33 |
Pinwheel Galaxy |
| 33 |
15/09/17 |
DSLR |
Milky Way |
|
OCTOBER TO DECEMBER
From the experience of the new camera to-date I had arrived at two critical questions:
- What are ‘right’ Gain and Offset settings?
- What are the ‘best’ methods for LRGB imaging and post-processing?
Imaging during the final quarter then turned out to be something of a mixed bag trying to answer these questions.
I have a general feel about Gain, Offset and the related ADU values but if I’m honest despite reading around the subject I’m still mainly in the dark – no pun intended! Such are the new challenges posed for all by the features of the ZWO1600MM-Cool it seems to me that even after 12 months the jury remains out over the answer to the first question – so it’s not just me!
The manufacturer provides value guidelines but based on experience, three schools of thought seem to have emerged from users:
- Use Unity Gain 139 setting and vary exposure times – longer for nebulae, shorter for brighter objects such as M31;
- Use low Gain for bright objects and higher Gain for faint objects + short and longer exposures, mindful of achieving a relevant ADU level across the resulting sub;
- Use very high Gain and take lots and lots of short to moderate exposures.
I’m still experimenting with each of these techniques but increasingly lean towards higher Gain and varied exposure times of between 60” and 300”. I have certainly found that lower Gain and short exposures didn’t work well for me when applied to the Andromeda Galaxy and California Nebula.
One issue when taking shorter exposures with the ZWO camera compared to a CCD is that many more subs are required, which inevitably needs very large storage and processing memory requirements – it’s a small price to pay for such quality and other advantages. My laptop was already well specced for processing, with an Intel i7 64 bit chip 16GB RAM and to store the extra data I purchased a 4Tb external hard disc at a very reasonable cost = problem solved.
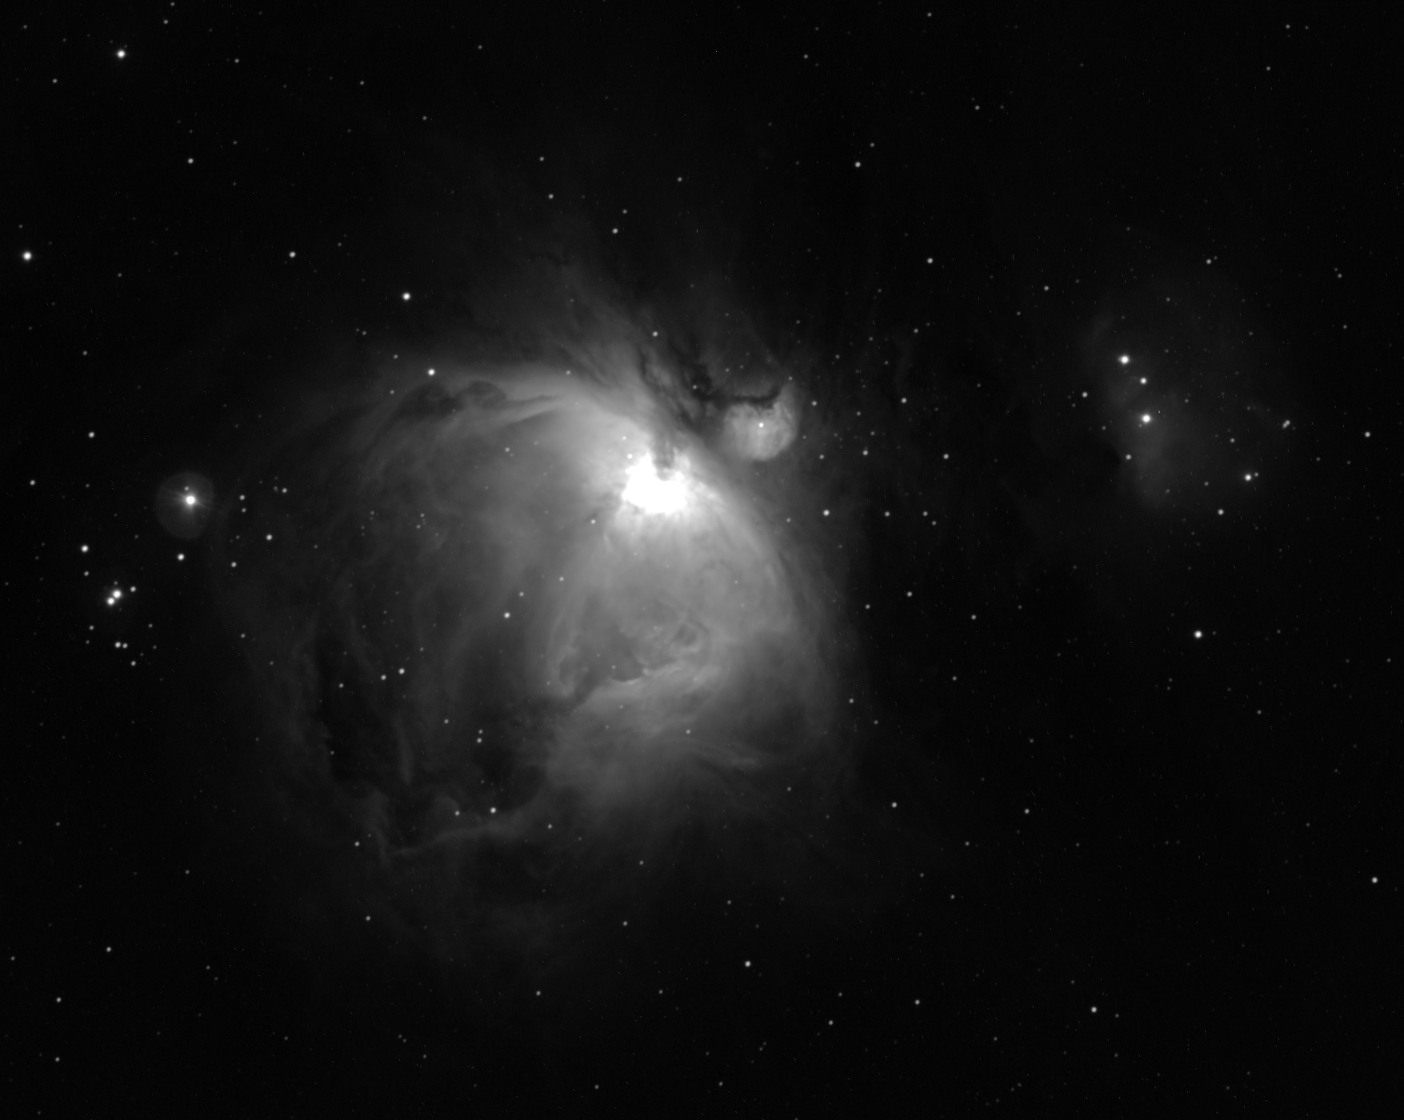 Like most people M42 has long been one of my favourites but like M31 I’m still struggling achieve a decent broadband image with the new camera and M45 is a similar problem; there’s nothing wrong with the camera, I just haven’t mastered the technique required yet. However narrowband images of M42, the Horsehead and Monkey Head nebulae all worked well at my standard default used of Gain 300 and Offset 10.
In preparation for further experimentation, at the beginning of November I took time to compile a more comprehensive calibration library at various Gain, Offset and exposure settings. Like most CCD cameras the new ZWO camera incorporates cooling to -45oC below ambient in order to reduce noise that is associated with all photoelectric sensors; I have been using the camera at a nominal temperature of -20oC. By having such control it is therefore possible to obtain the aforementioned calibration frames irrespective of the ambient temperature and at any time. Since June I’d already been successfully using another calibration set which has saved considerable time during each imaging session, unlike DSLR imaging which generally has to be undertaken at the same time + every time to ensure the same conditions.
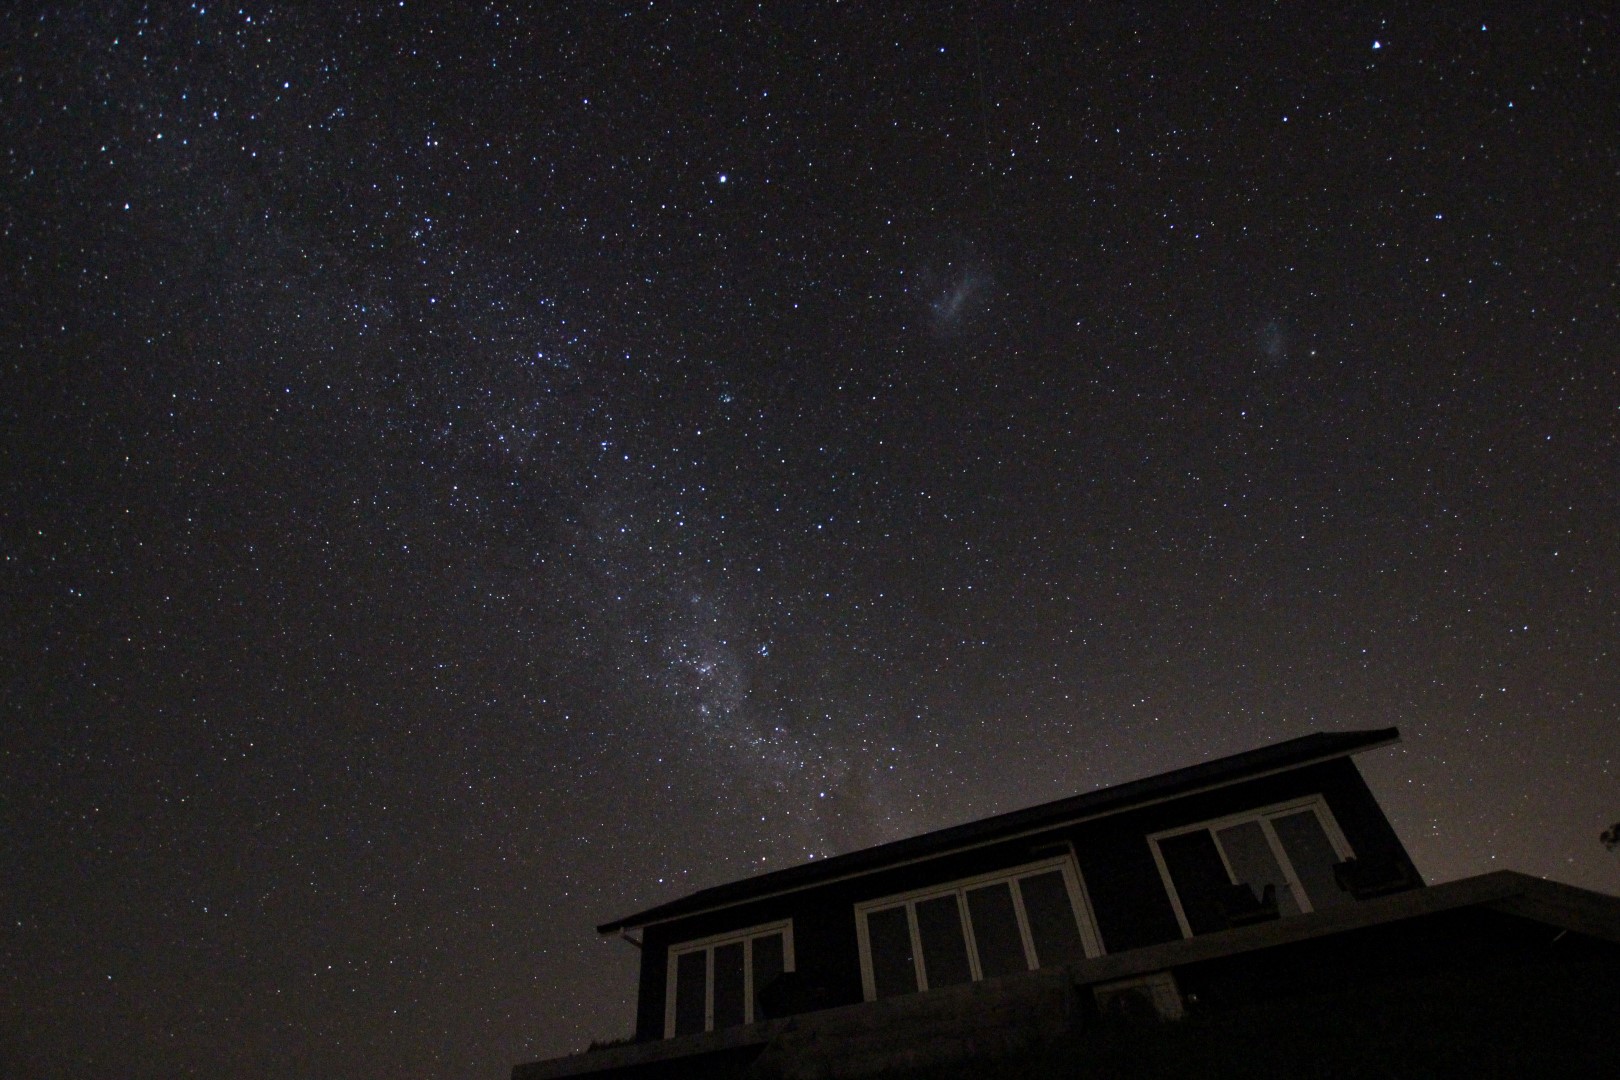
Passing Shot: I’m posting Reflections later than usual this year having just returned from a protracted trip to New Zealand over the Christmas and New Year period. The night sky down under was spectacular and I managed some good widefield imaging using a basic DSLR and tripod set-up; more on astronomy in New Zealand at a later date – Watch This Space Man! In the meantime below is a taster of the results taken whilst staying at my daughter and son-in-law’s house in Ohaupo, North Island. Other than the beautiful Milky Way itself, note the Southern Cross just above the roof line and especially the large and Small Magellanic Clouds.
| No |
Date |
Type |
Object |
Name / Type |
| 34 |
12/10/17 |
B |
M31 |
Andromeda Galaxy |
| 35 |
13/10/17 |
N |
NGC 1499 |
California Nebula |
| 36 |
28/10/17 |
B |
NGC 2174 |
Monkey Head Nebula |
| 37 |
28/10/17 |
B |
IC 434 |
Horsehead Nebula |
| 38 |
30/10/17 |
B |
M45 |
Pleiades |
| 39 |
30/10/17 |
B |
M42 |
Orion Nebula |
| 40 |
01/11/17 |
N |
NGC 1499 |
California Nebula |
| 41 |
13/11/17 |
DSLR |
Jupiter-Venus |
Conjunction |
| 42 |
25/11/17 |
B |
NGC 1333 |
Reflection Nebula / Perseus |
| 43 |
26/11/17 |
N |
NGC 2264 |
Cone Nebula |
ETCETERA
Once again my astronomy year was often shaped by other events and related matters. Throughout the first quarter I completed an online MOOC course at Edinburgh University on the Higgs Boson and Particle Physics hosted by a wide variety of relevant experts, including no less than Peter Higgs himself. It’s relevance to astronomy only came right at the end but was well worth waiting for. Based on the theories of particle physics, the Higgs Boson, scalar fields and inflation, cosmologist Professor John Peacock ably demonstrated:
- There was no Big Bang;
- The existence of a multiverse – of which our Universe is but a part.
Intuitively I’ve long wondered about such possibilities and Professor Peacock’s lectures were by far the most convincing case I have seen for such a model. Of course the implications of these conclusions are profound and I’ve continued to think about this for the rest of the year.
As previously reviewed, for two weeks in February it was my good fortune to sail along the Norwegian coastline on the Richard With, flagship of the Hurtigruten ferry line. At this time of the year it was very, very cold being mostly north of the Arctic Circle and the weather can be rough at times but overall the journey was outstanding. Like most, my personal goal was to see and image the Aurora Borealis, which I was successful in doing on a number of evenings. However, it’s got to be said that such imaging from a moving ship at -20C is both difficult and very uncomfortable. Whilst I was pleased with the photographs, next time I’d prefer to be on land, where it should be so much easier.
Inspired both by the aforementioned trip and meeting a fellow geologist on board the Richard With who worked as a guest speaker on other cruises, I subsequently attended an audition to lecture myself on astrophotography. Whilst my talk was successful and I was chosen to join the agency’s list of speakers, I have yet to be asked to join a cruise.
Favourite Images
With only a few exceptions, the outcome of my astrophotography in 2017 reflects the transition that took place from DSLR to the ZWO1600MM-Cool mono CMOS sensor camera. The new camera has in every sense been a game changer and the resulting images have shown just how much colour and detail can be achieved in both broadband and especially narrowband. Some of my personal favourites taken during the year are shown below, in no particular order:

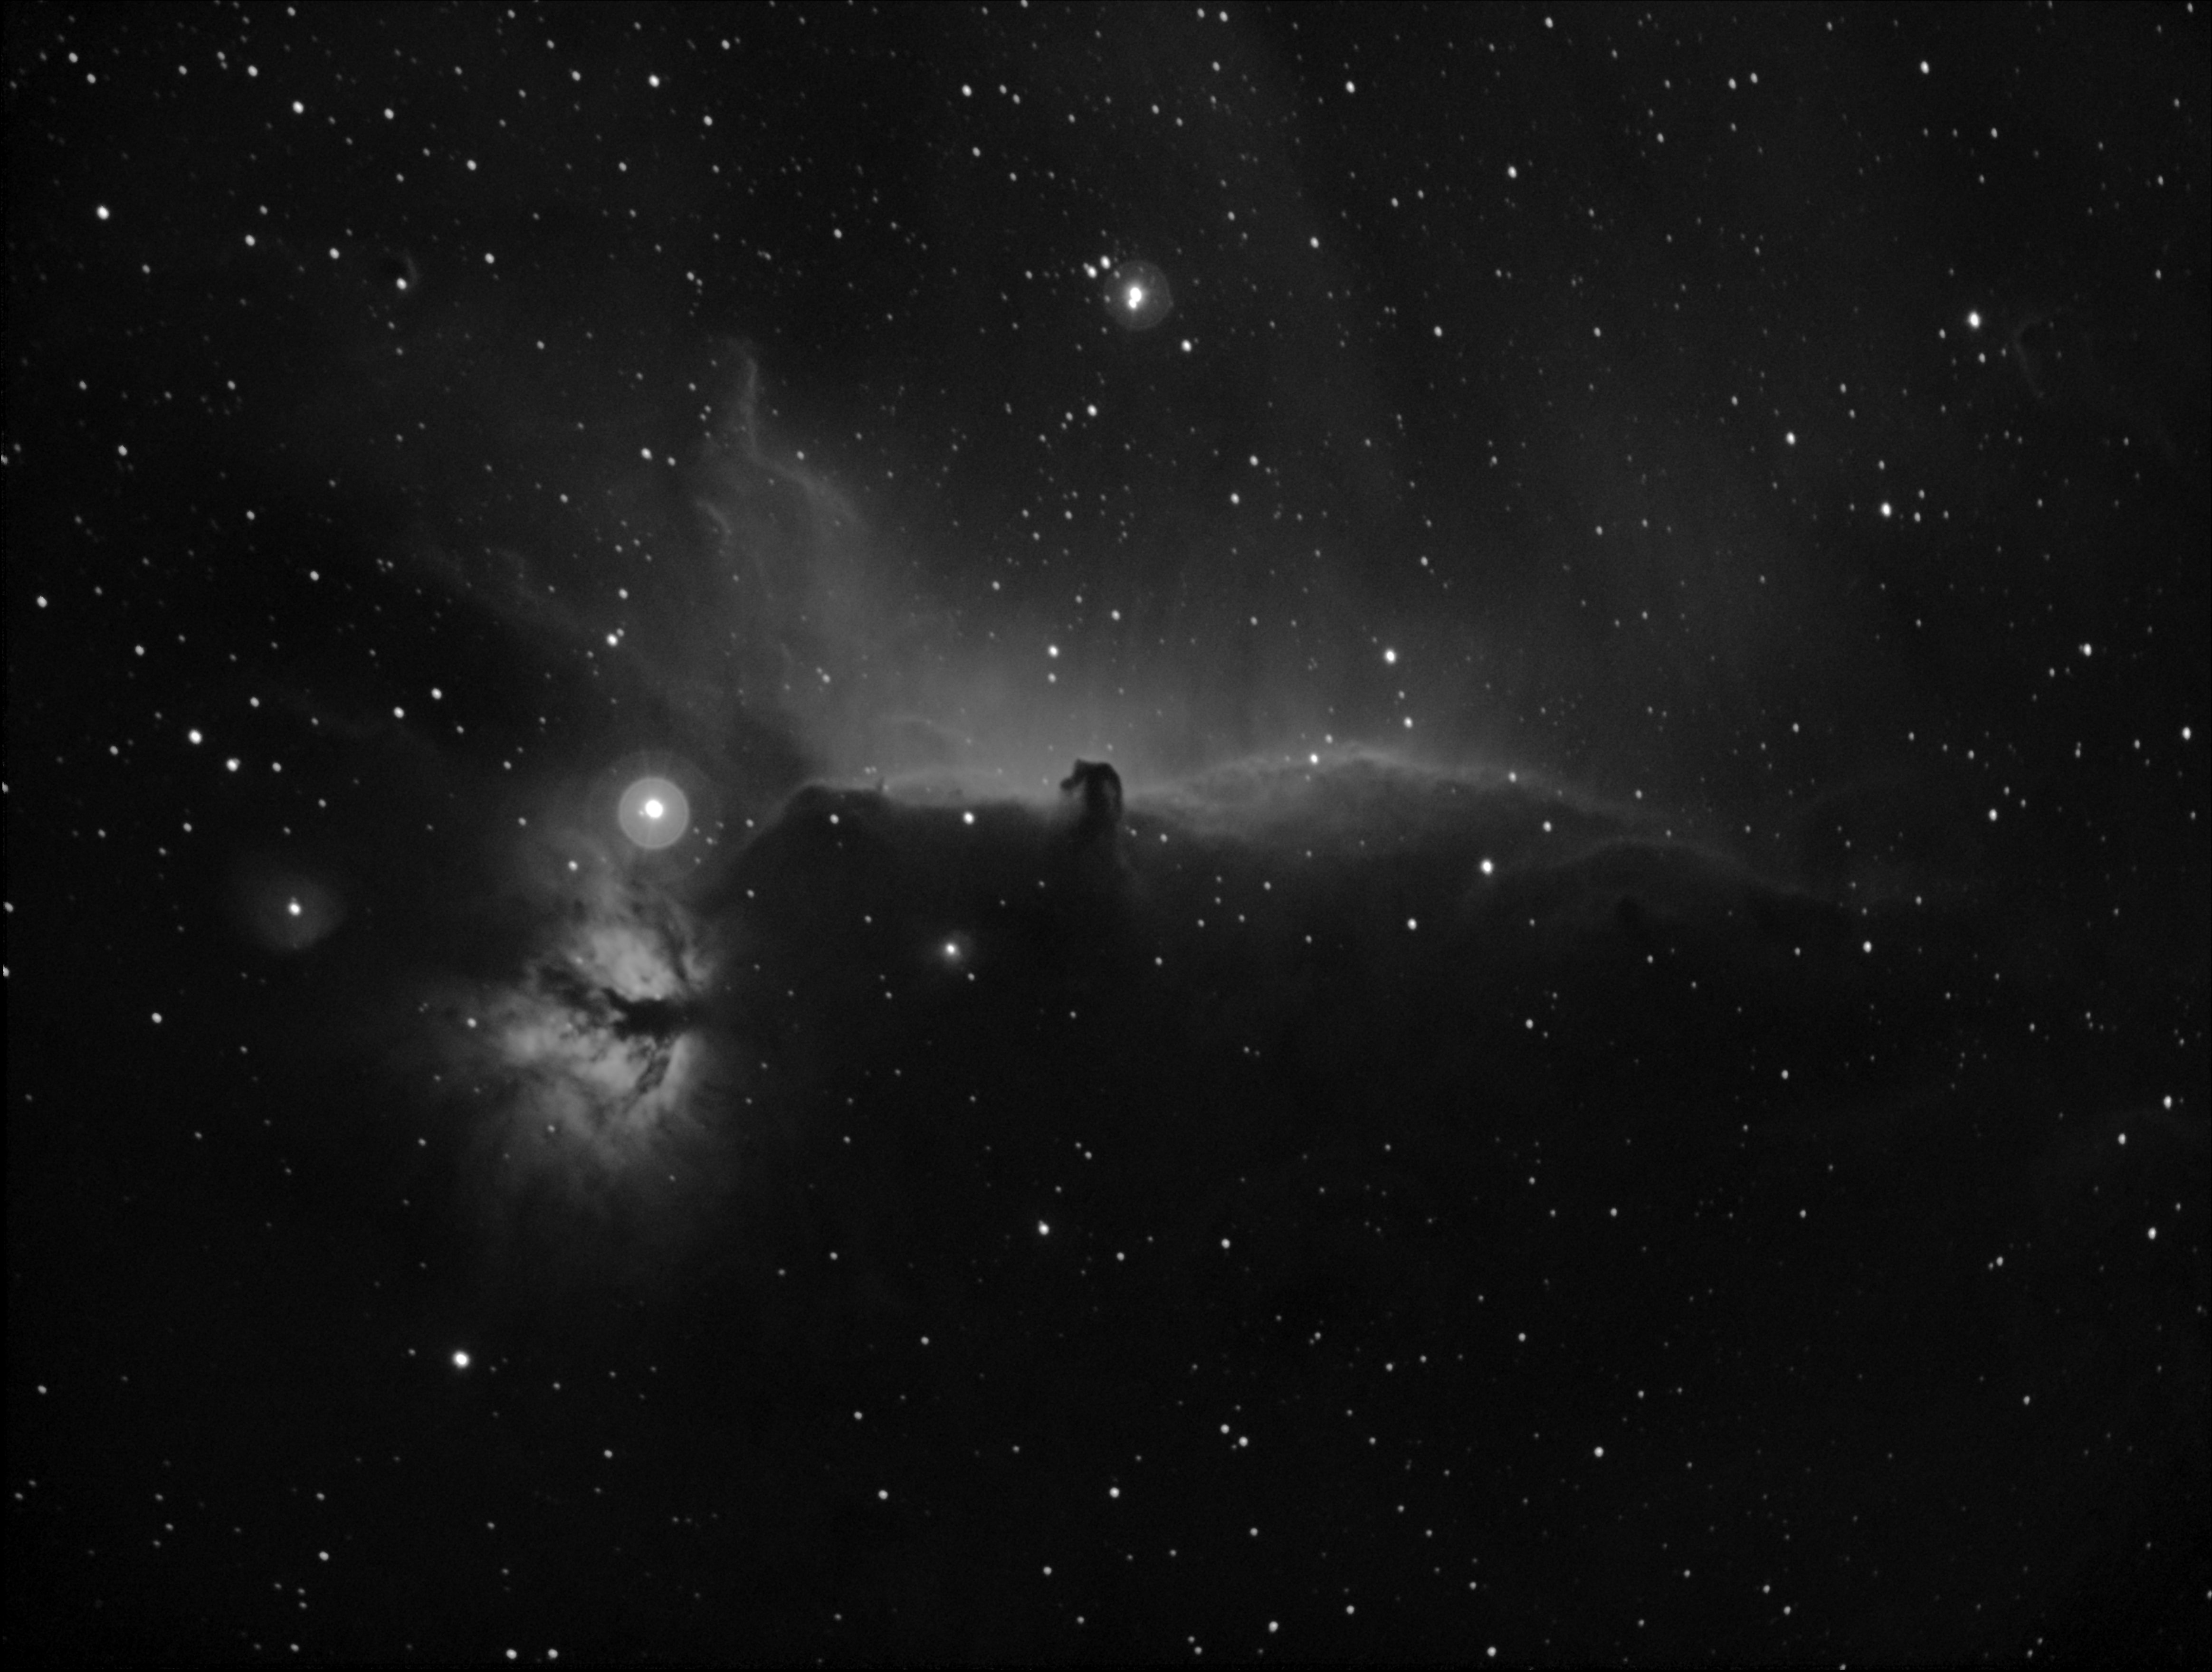
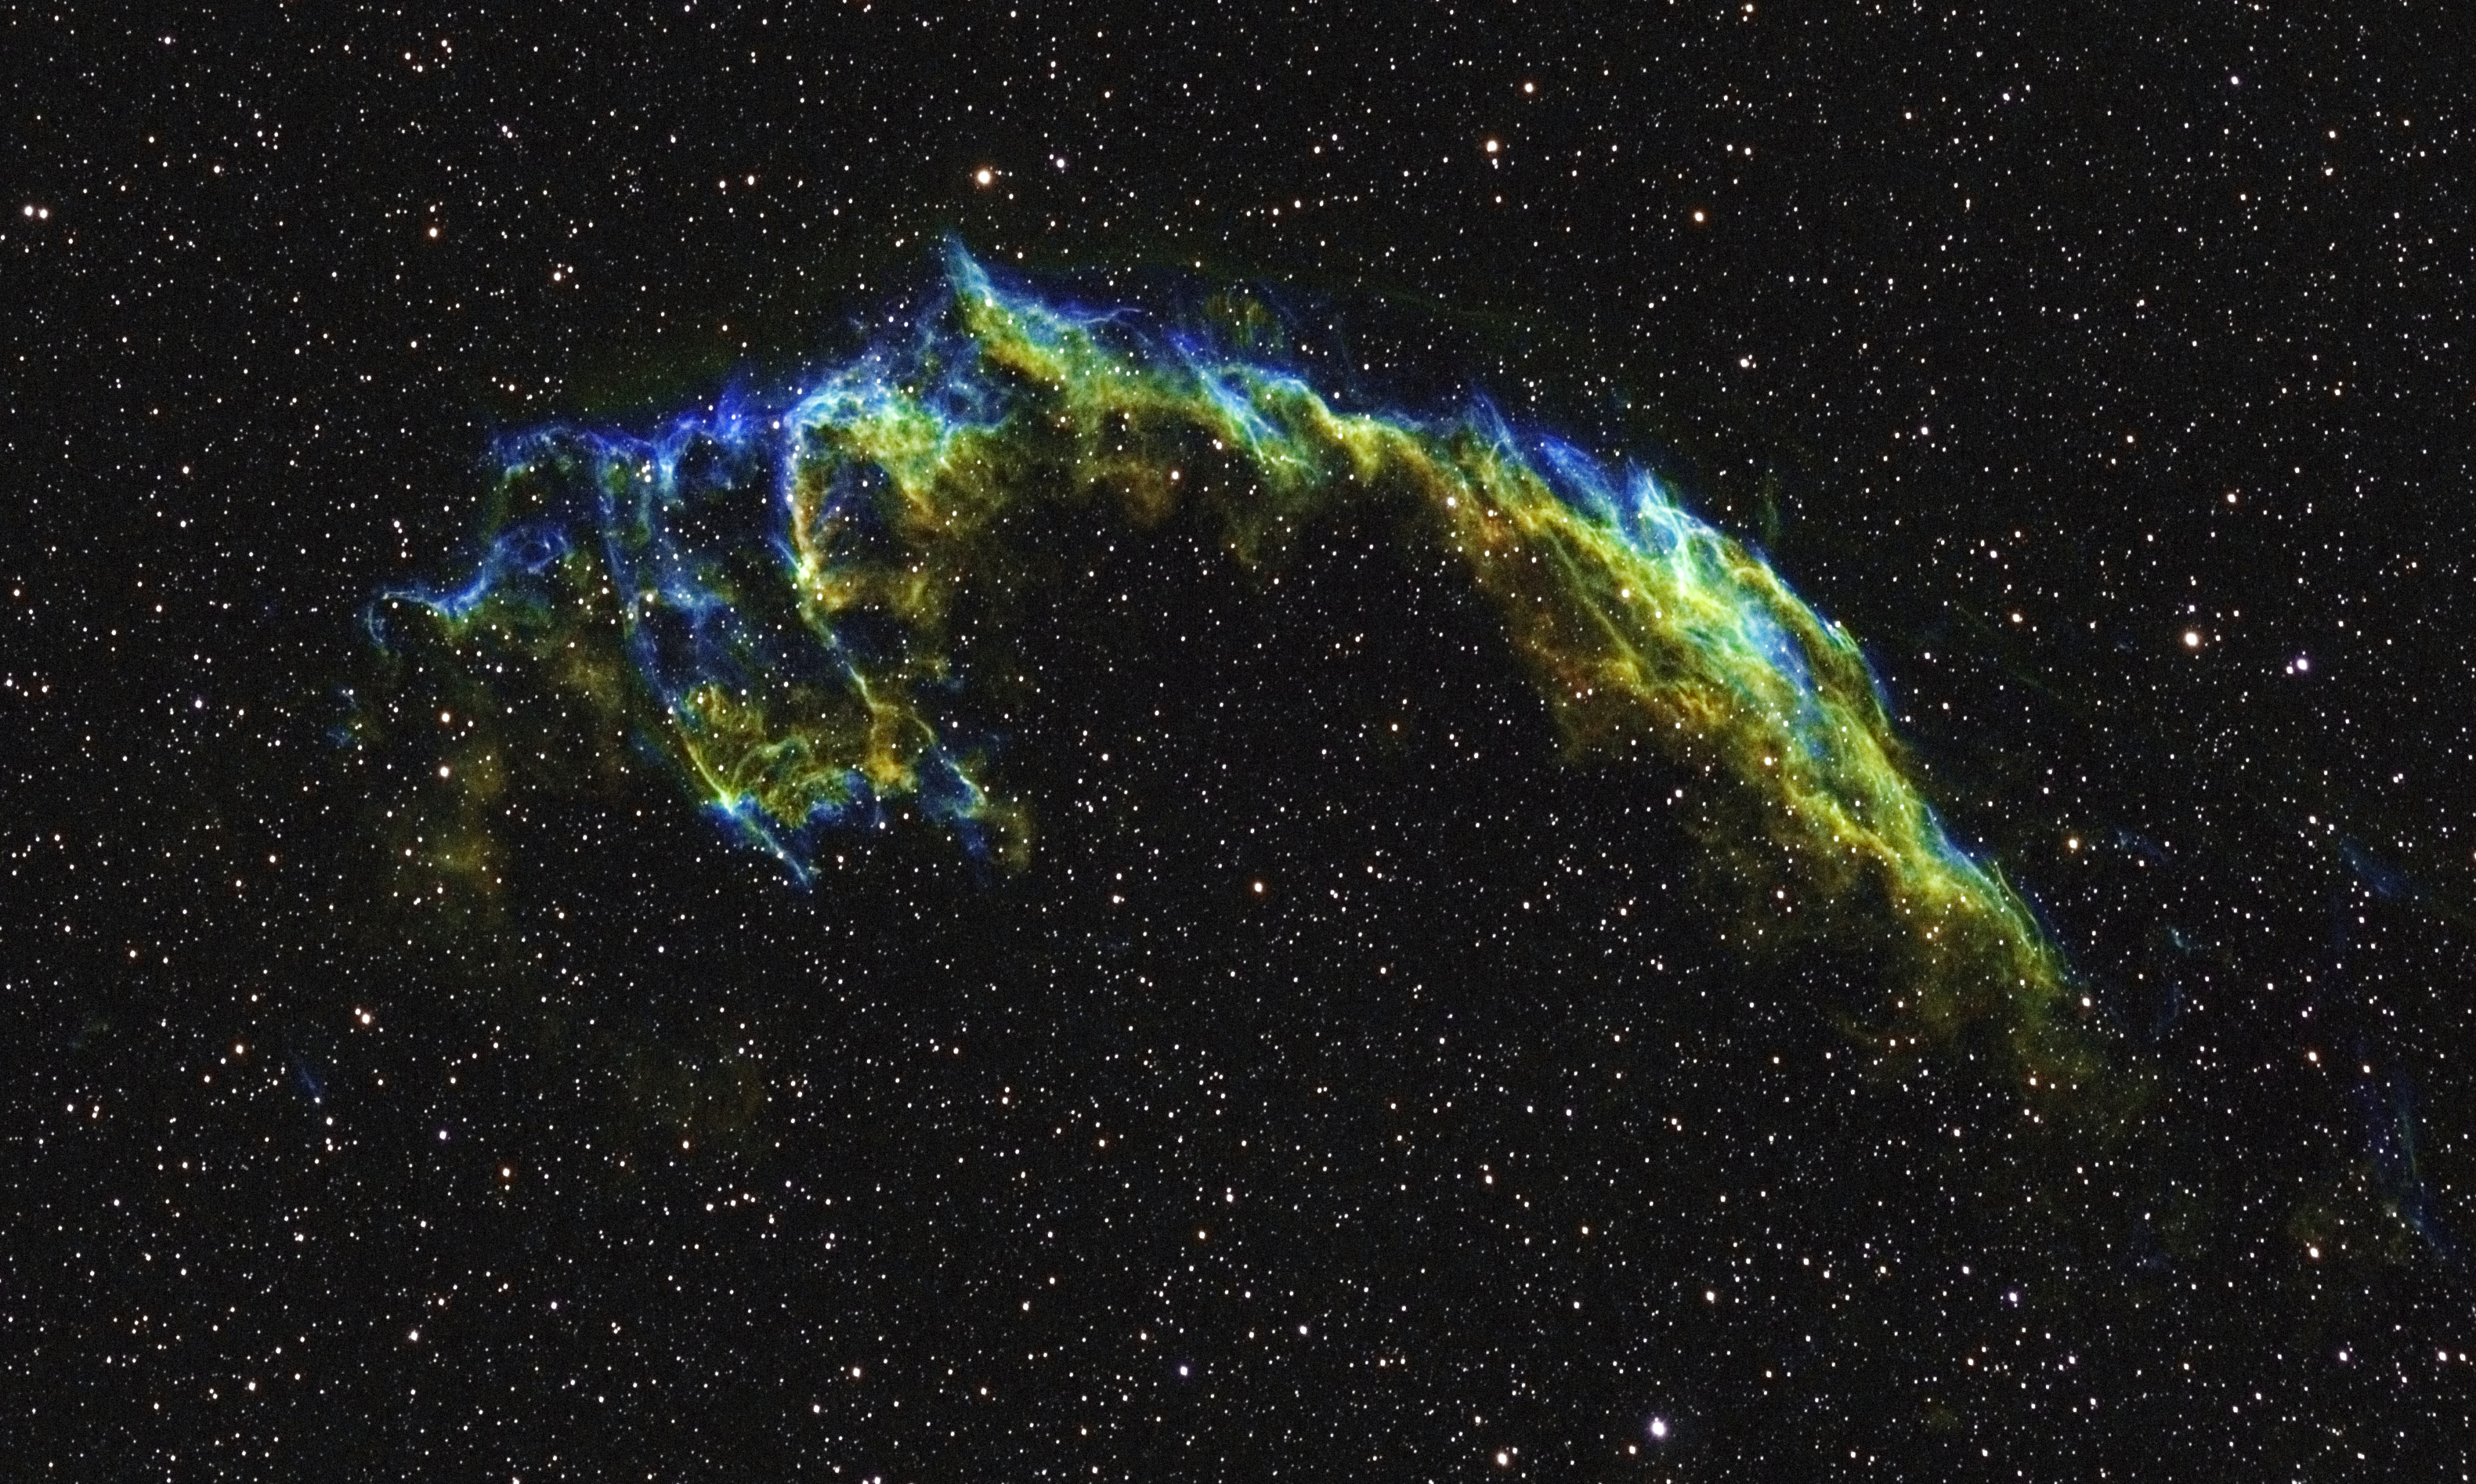
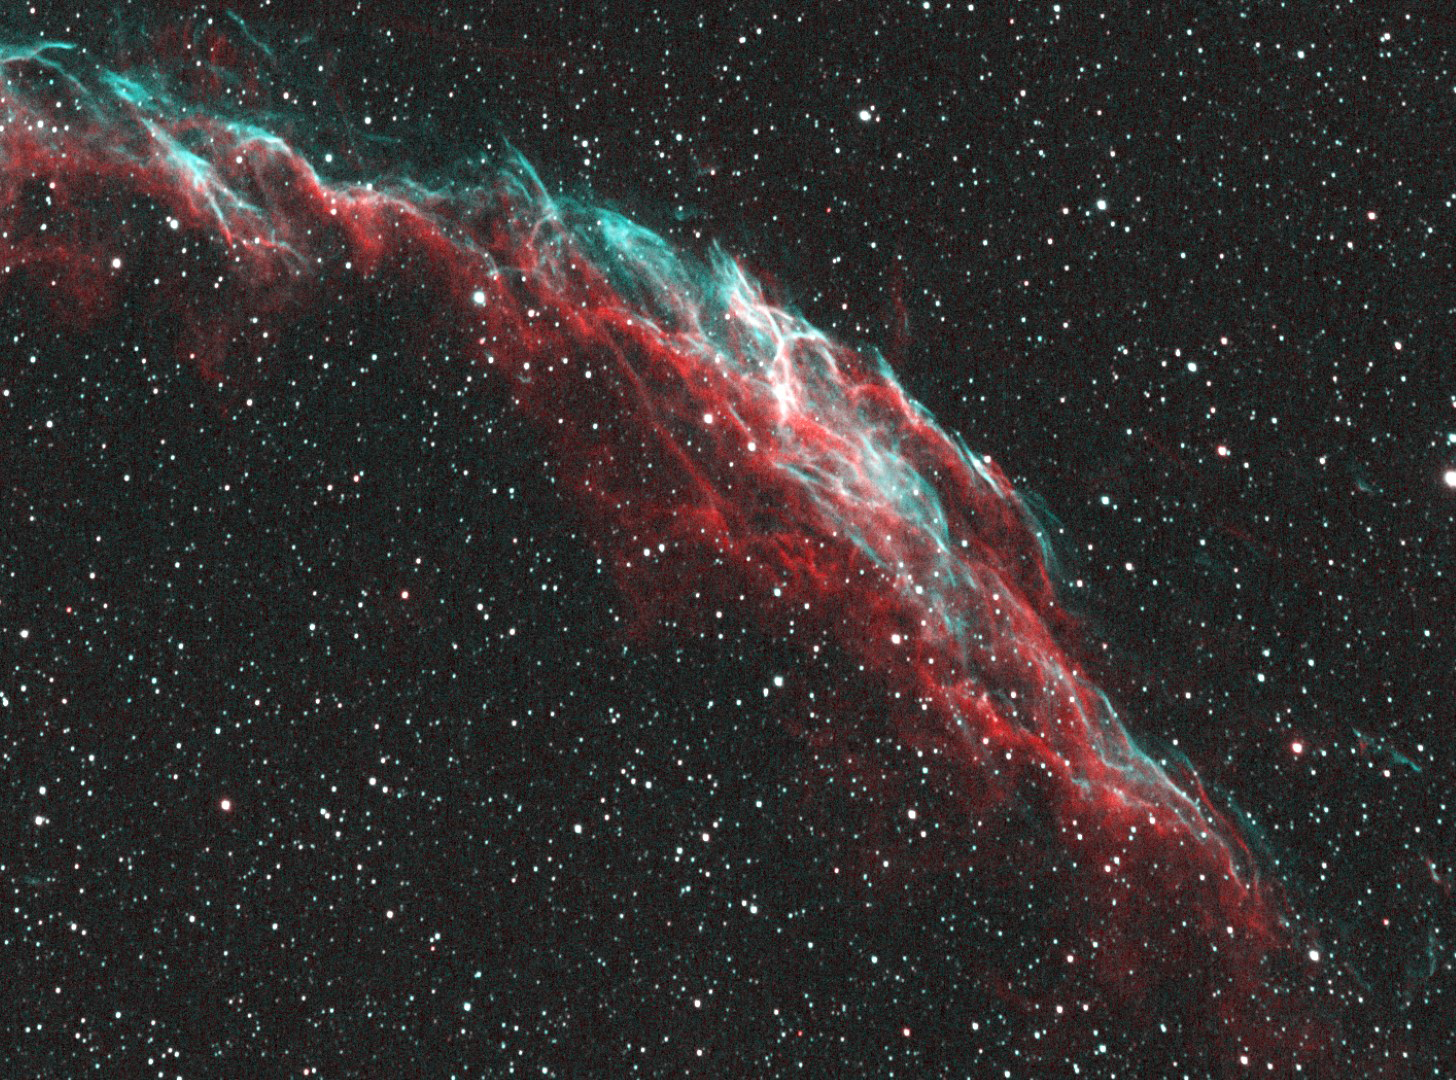

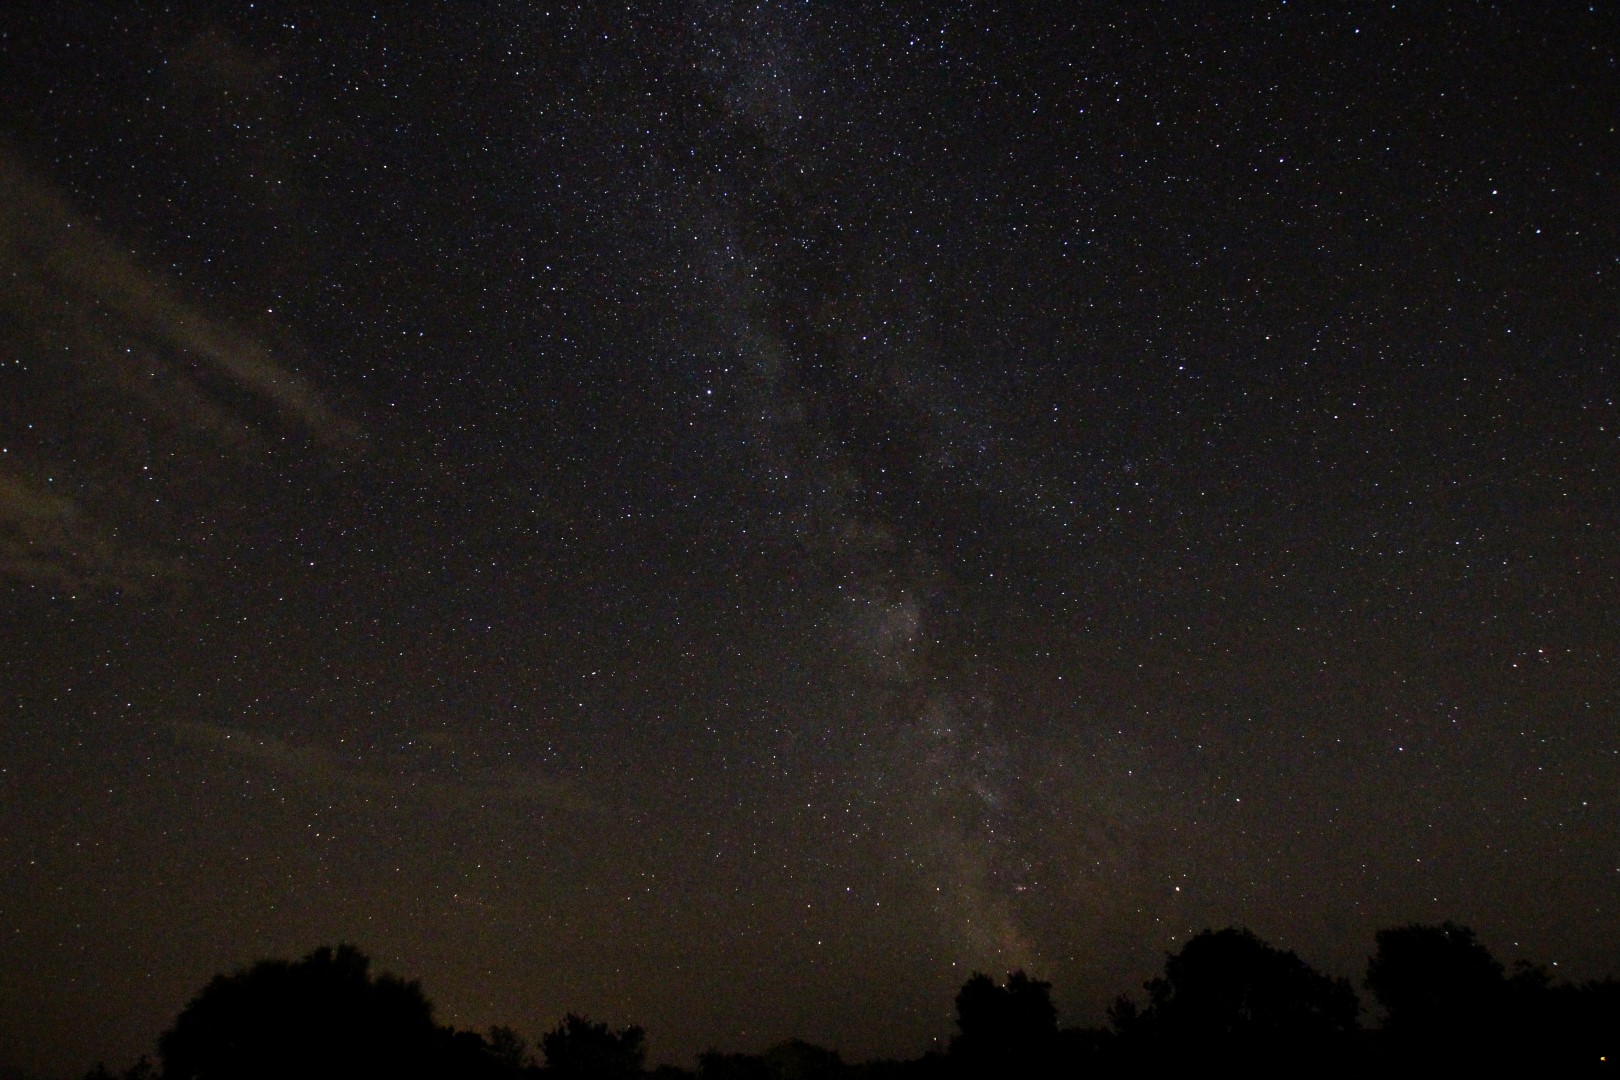
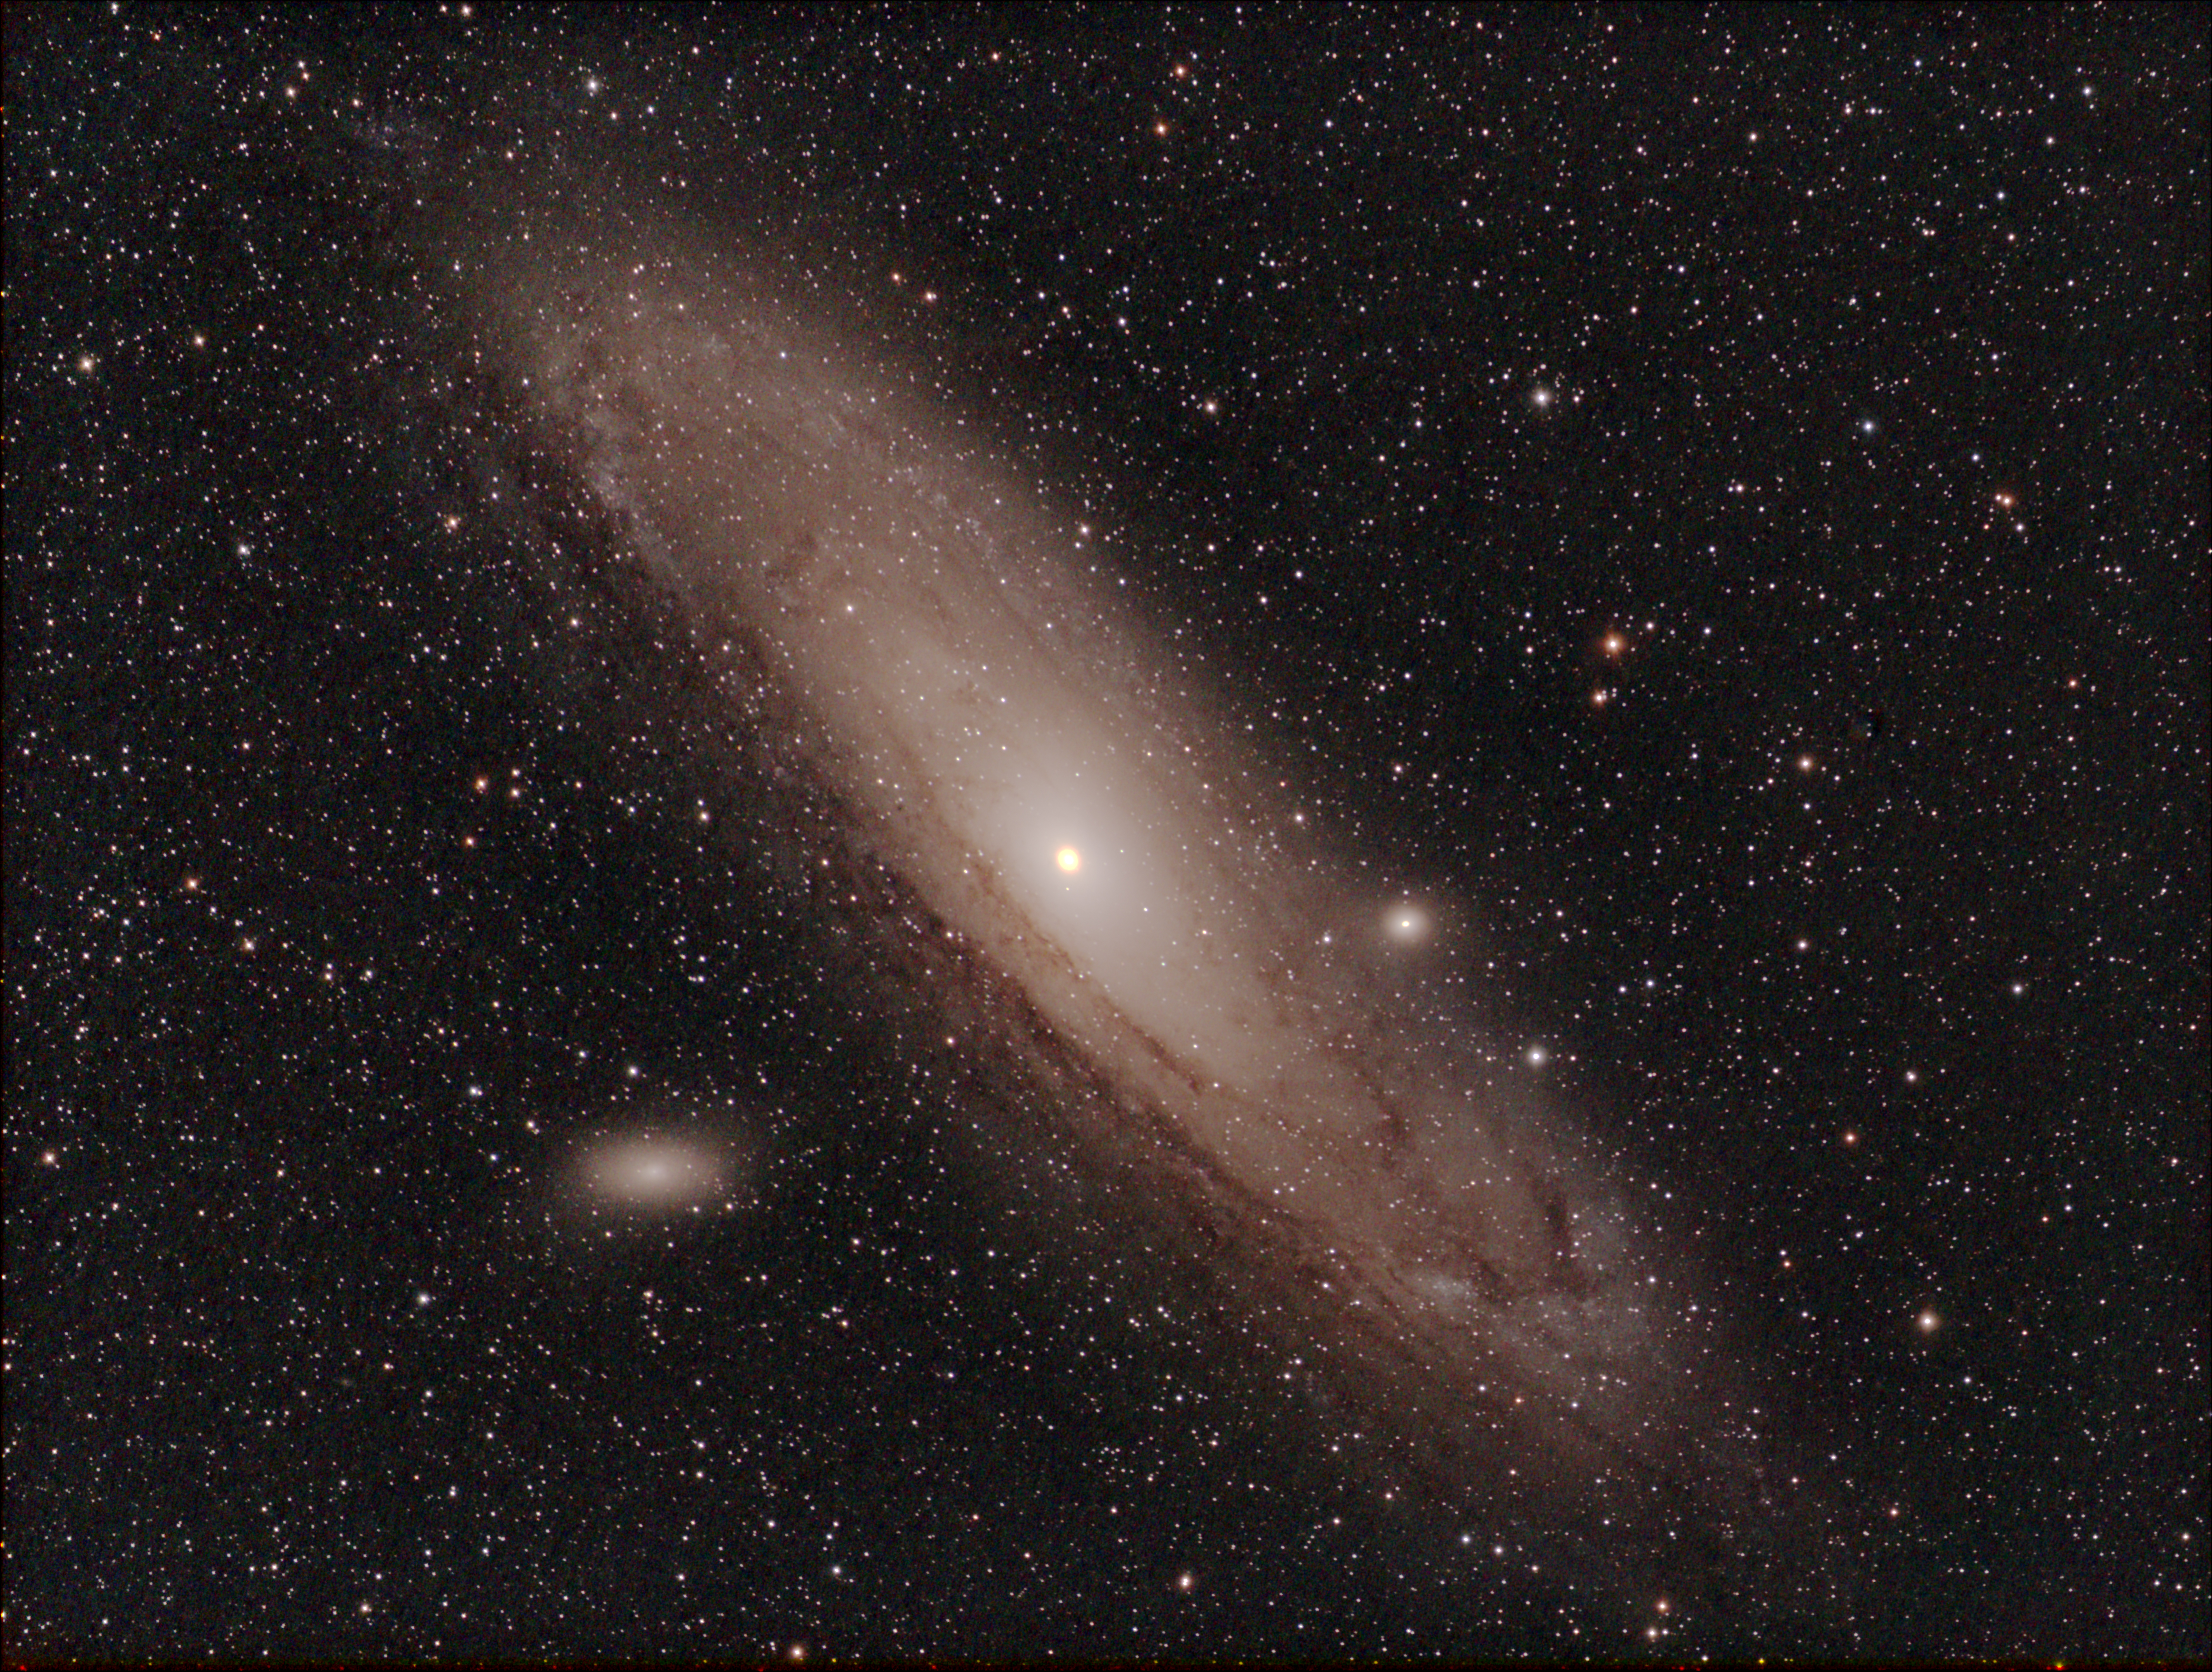
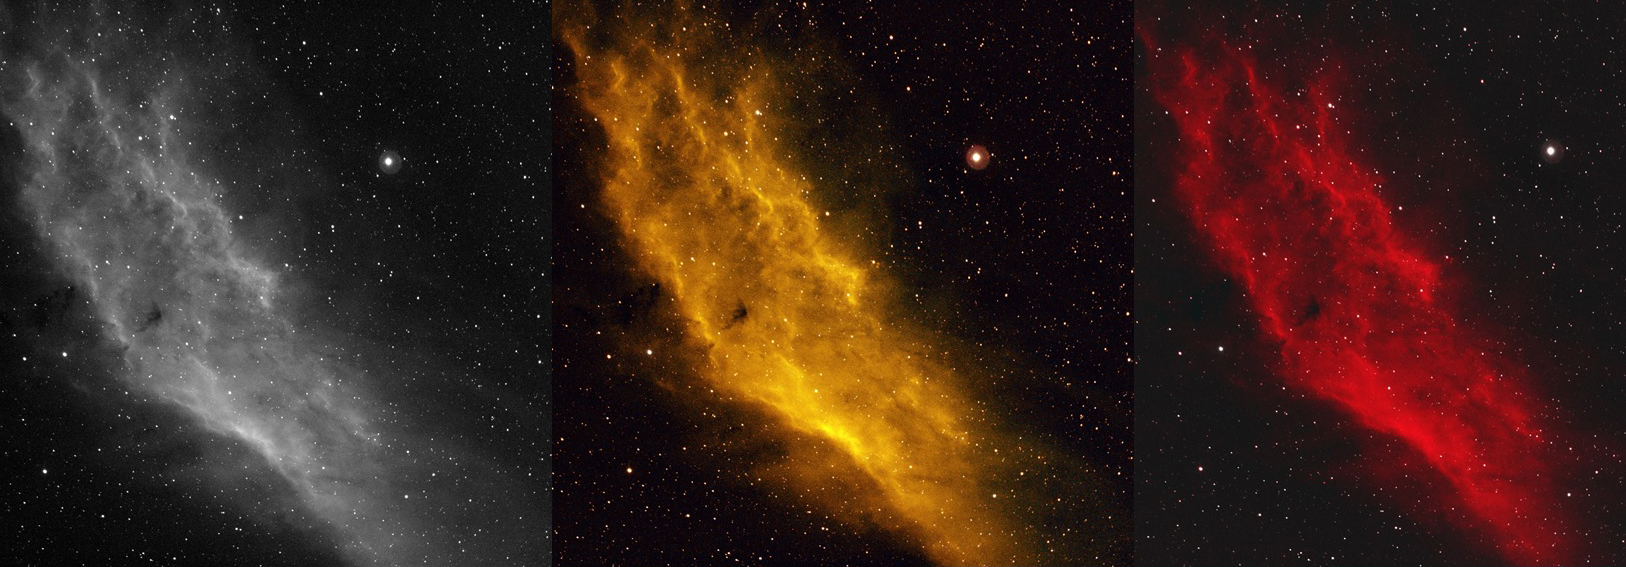


Above Images (from top-to-bottom): Aurora Borealis off Norwegian Coast – DSLR; Leo Triplet – LRGB; Rosette Nebula – SHO; Flame & Horsehead Nebulae – Ha; Eastern Veil Nebula – SHO; Eastern Veil Detail – Bi-Colour; Western Veil Nebula & Pickering Triangle – Bi-Colour; Milky Way from Isle of Purbeck, Dorset – DSLR; Andromeda Galaxy – LRGB; California Nebula – form left-to-right, Ha-SHO-Bi-Colour; North America Nebula – SHO; Cygnus Wall – Bi-Colour
Round-up & goals for 2017
Since resolving a number of critical issues in 2016 and finally getting to grips with autoguiding, I’m pleased to say the basic processes worked very well in 2017. In addition to improvements in the set-up, being able to operate from indoors has greatly improved both working conditions and the results. Not surprisingly my astrophotography last year was dominated by learning and using the new camera. Whilst the experience of DSLR imaging and related matters was helpful, I was surprised at just how different working with a mono camera, filters and especially processing has been by comparison and I’m still learning. Some of the minutiae can be very important and are frustratingly easy to miss but, with the assistance of those ever helpful astronomers online and perseverance the results are really starting to show in my work.
| RECORD CARD – 2017
|
| Goal |
Specifics / Results |
Outcome |
| Improve processing |
After some set-backs now successfully processing FITS files in DSS and compiling broadband and narrowband images in Photoshop – all very different to DSLR RAW! Noticeable improvements using more complex techniques in PS. |
MUCH BETTER
|
| Expand & Improve Widefield Imaging |
For the first time I obtained some decent images of the Milky Way but otherwise barely used the Vixen Polarie and did not make it to any other dark sky sites – disappointing. |
FAILED
|
| Start LRGB imaging |
Now using the ZWO1600MM-Cool mono camera + EFW with LRGB & Ha- OIII- SII filters with good narrowband and varied broadband results. |
GETTING THERE
|
I think it helps to set some goals for the forthcoming year, so here goes:
- Improve processing – more: Despite some noticeable improvements in 2017 there’s always more to learn whichever software is being used. I aspire to working with PixInsight or the newly acclaimed APP but will likely persevere with various more advanced Photoshop techniques.
- Expand widefield imaging: First – use the Vixen Polarie as had been intended last year to obtain nightscape images at UK dark-site locations. Second – look at ways of using a widefield set-up with the mount. Having previously failed I’m hoping to be more successful in 2018.
- Improve broadband and narrowband imaging: In considering how to progress in 2016, I came to the conclusion that the next step should be a move to a mono camera rather than a larger telescope. This has turned out to be a great decision but it’s still early days. There’s plenty more to learn and finesse but most of all after nearly a year’s learning and experimentation it’s clear that I need to improve one matter above all – increased integration time and this means learning plate solving. I’ve been very happy using Astro Photography Tool (APT) for FITS image capture, scheduling and filter control (the APT Forum has been very helpful), but I also own the much praised Sequence Generator Pro (SGP) and might switch or at least give it a try in 2018.
I’m very pleased to say 2017 was a very good year for astrophotography, perhaps my best yet, which was especially defined by two positive developments:
- In general the equipment set-up was much better after some long overdue changes and in particular operating from indoors, once all the basics are completed. With a good basic starting set-up and alignment of the guidescope-autoguiding camera with the main OTA, I’m often able to just quickly refresh EQASCOM alignment models directly from the computer = no more crawling around on the ground in the dark, or at least very little!
- Although it’s still early days and despite my reservations over the complexity (which is true) of using a mono camera and filters, it’s revolutionised and revitalised my imaging and therefore proved very worthwhile. It is a lot of fun and the improvement of my images has been both exciting and very fulfilling.
You can’t ask for more than that and holds much promise for the coming year, which I hope to record in WTSM’s Reflections at the end of 2018.
Watch this space!
POSTSCRIPT
The ones that got away: Imaged but not seen in WTSM this year (warts and all)

Picture saved with settings embedded.
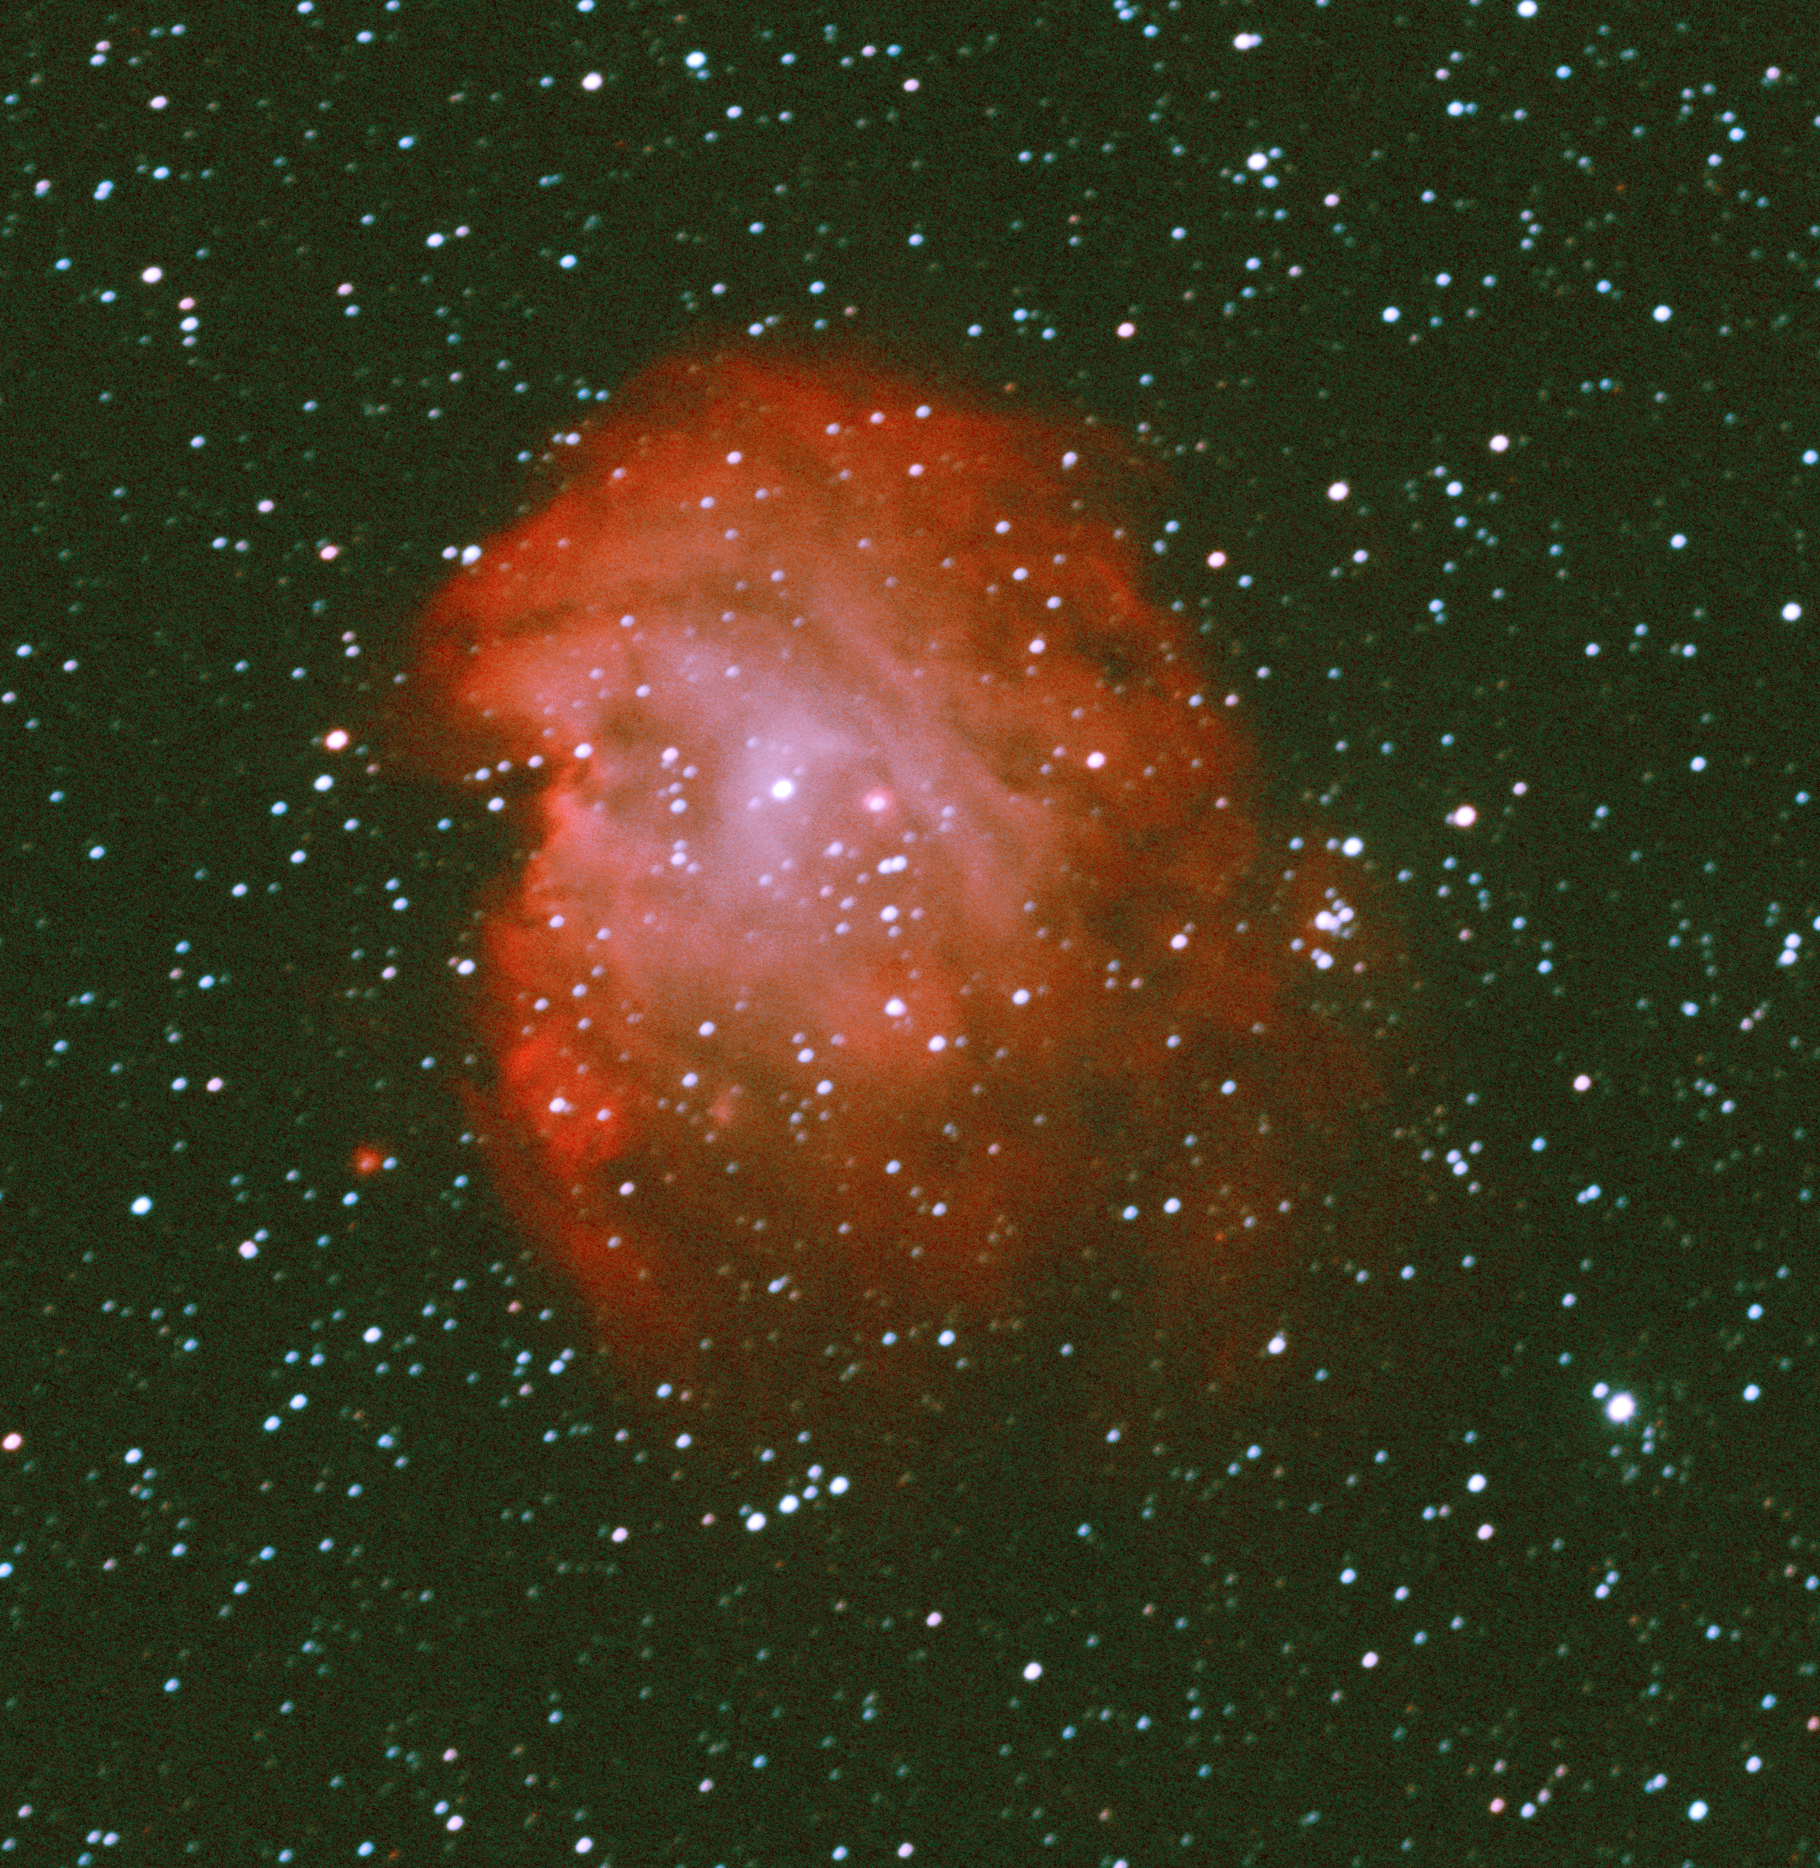
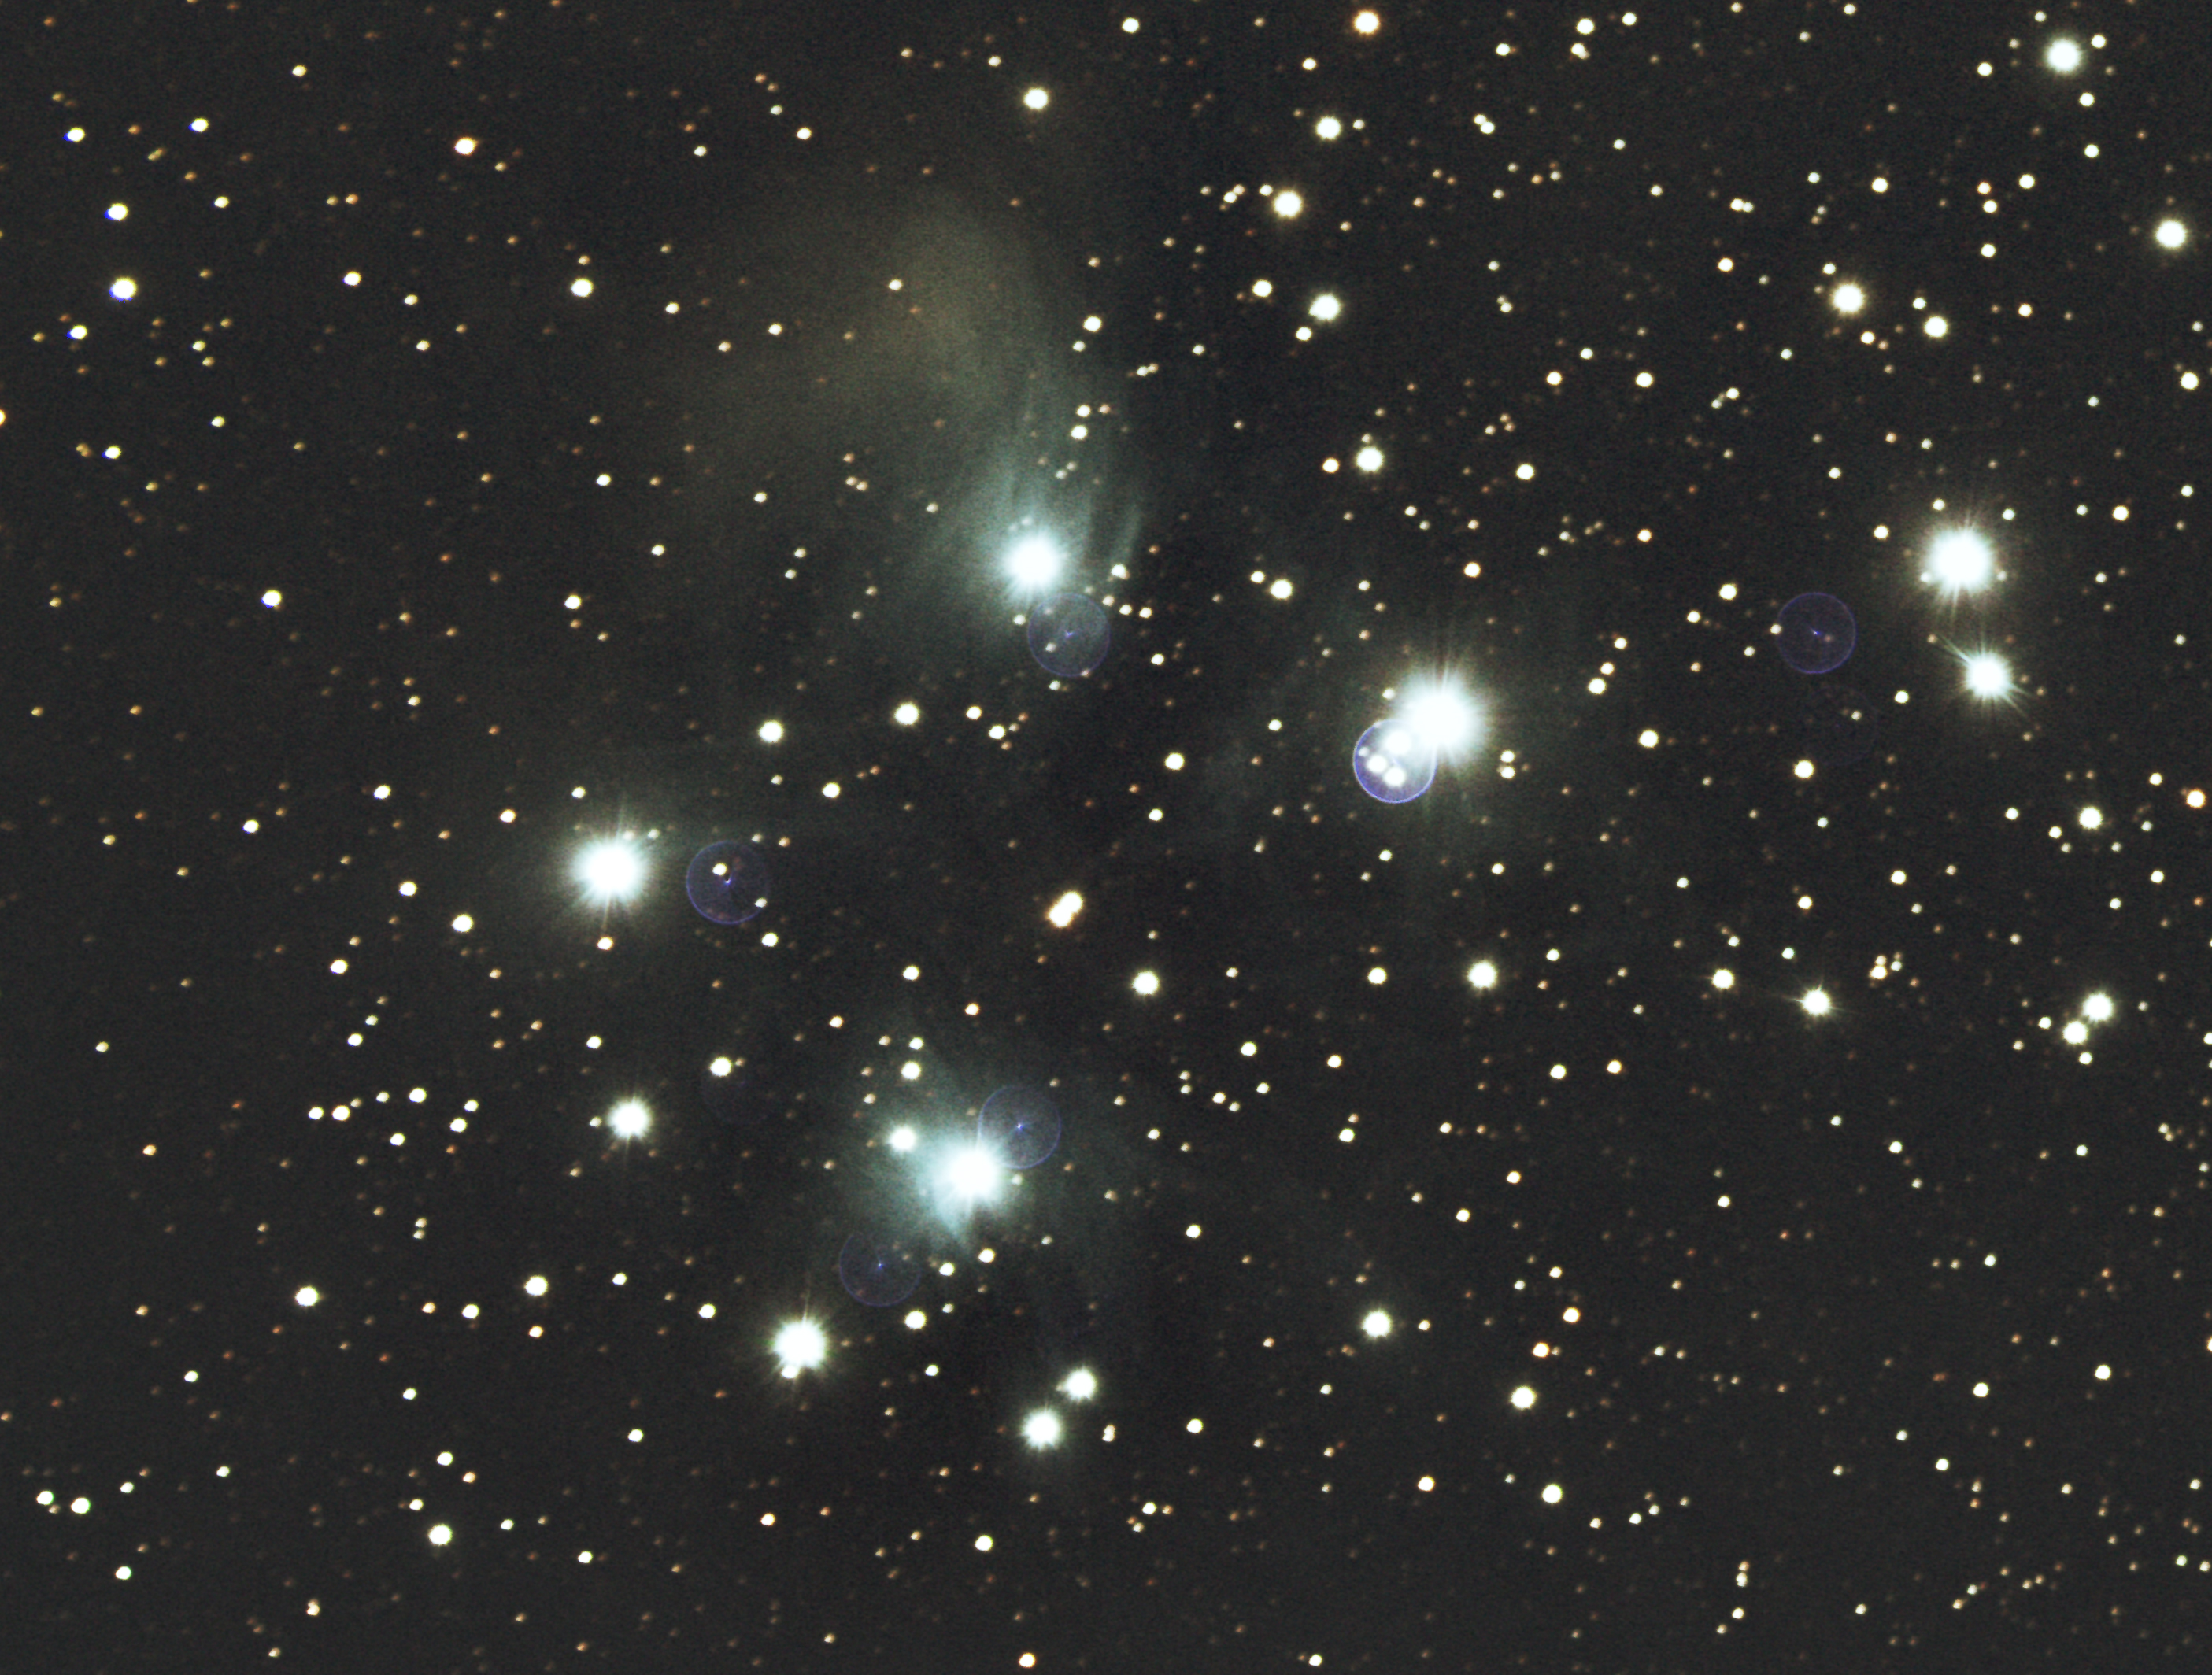

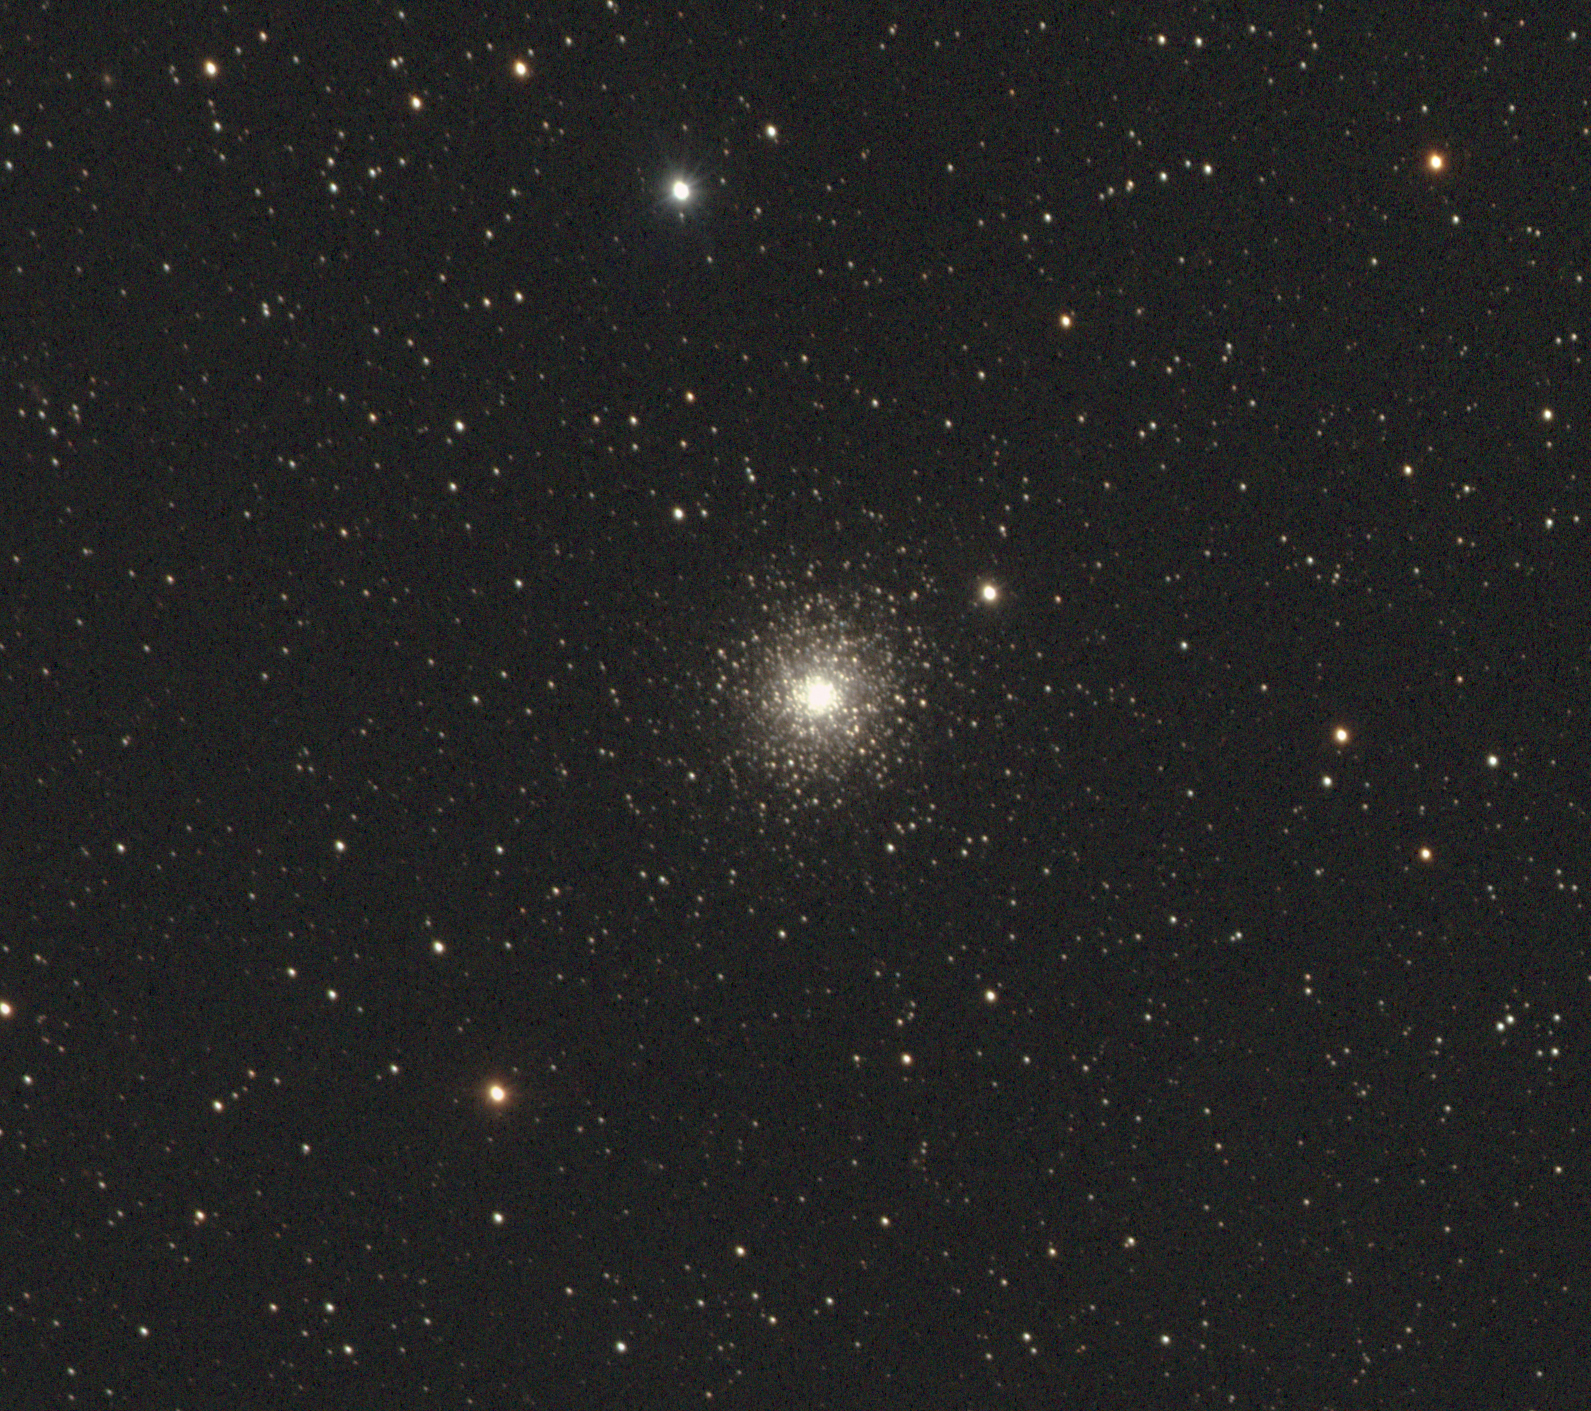
Above Images (from top-to-bottom): M42 Bi-Colour, Ha & SHO; Monkey Head Nebula Bi-Colour; Crescent Nebula SHO & Bi-Colour; Pleiades LRGB; Sadr Region Ha; M15 Globular Cluster LRGB


")
")