It still remains early days with the new ZWO 1600MM-Cool camera but the initial signs using the narrowband filters have been very promising and frankly good fun. I’ve been surprised at the benefits gained using these filters and especially the new and exciting possibilities it introduces to imaging. But there’s more.
When first using a digital camera for astrophotography it came as a surprise to discover that the colours come from an RGB Bayer Matrix placed in front of the sensor. The so-called One Shot Colour camera or OSC, provided me with many decent images and when I recently started to think about getting a better camera another OSC seemed the way to go. Their major benefit is that you are able to just take, as it says, one shot – or multiple colour shots for stacking. Of course there’s still much to learn when starting out but the process is relatively simple and a decent set of subs and calibration frames can be obtained in a few hours or less; subsequent processing is also straightforward with one set of subs and no more than three sets of calibration frames.
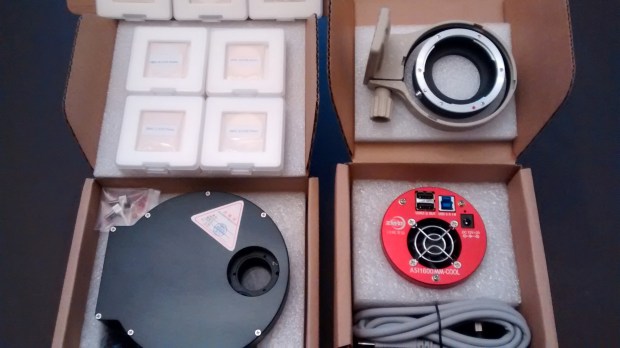
Notwithstanding, when looking at more specialized OSC cameras, it soon became clear that the benefits of moving from DSLR were limited. Another surprise with astrophotography is that the best images are obtained using a mono camera, in combination with colour and if required narrowband filters. Hitherto, this has meant precise guiding in order to obtain long exposures using a very expensive CCD camera. However, last year everything changed with the introduction of completely new technology in the form of a cooled CMOS camera, which I and the astrophotography community are currently getting to grips with – the aforementioned ZWO ASI1600MM-Cool.
Whilst more complex to use than a DSLR, this camera seems to be something of a game changer for astrophotographers in that: (a) it has a larger more sensitive sensor than a CCD camera, (b) it’s cheaper (though not cheap), (c) because of its sensitivity imaging requires only relatively short exposures, thus reducing the need for ultra-precise guiding as it gathers light more quickly than a conventional camera. It was the latter feature that convinced me to go ahead with the camera and it is already clear this was not a mistake.
I often complain about the excessive cloud cover we suffer here at Fairvale Observatory, which can often prohibit imaging for weeks or even months on-end. The advantage of imaging quickly when the clouds do eventually part is therefore a major factor for me. If the camera has one problem it’s probably the vast quantity of data generated, putting huge demand on computer memory and processing power – but it’s worth it.

LRGB imaging is the main format used by most advanced astrophtographers, after all the resulting colours and detail achieved can be spectacular and it was now time for me to give it a try. I was astonished to learn that some 80% of the detail in an image is in the luminance and only 20% colour, so the advantage of LRGB imaging becomes immediately apparent. I also purchased the ZWO x8 EFW and matching 31mm filters with the camera and initially had some problems getting it to work. However, once sorted it has been a pleasure to use and makes image sequencing with different filters a piece of cake.
At the moment I’m using Astro Photography Tool (APT) for capture and apart from my own lack of LRGB imaging experience and some misunderstandings of the software, it works very well. A full LRGB sequence is easy to set-up beforehand and after that the imaging automatically looks after itself! I carry out most of the calibration frames manually but this too is generally quite easy; I did struggle at first with the flats, which is a quite different method compared to a DSLR but once I got the hang of the APT Flats Aid – courtesy of the APT Forum members – all was OK.

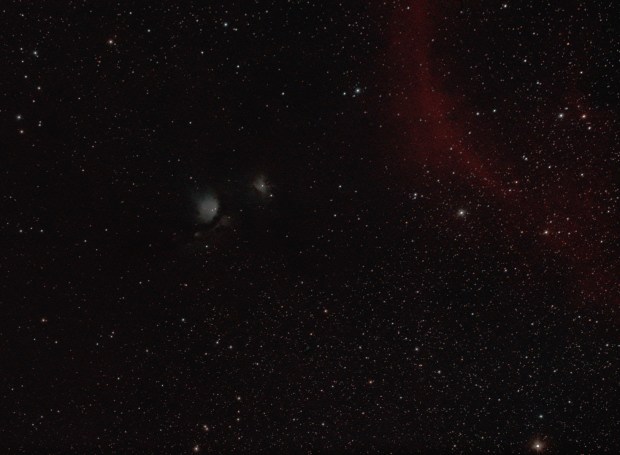
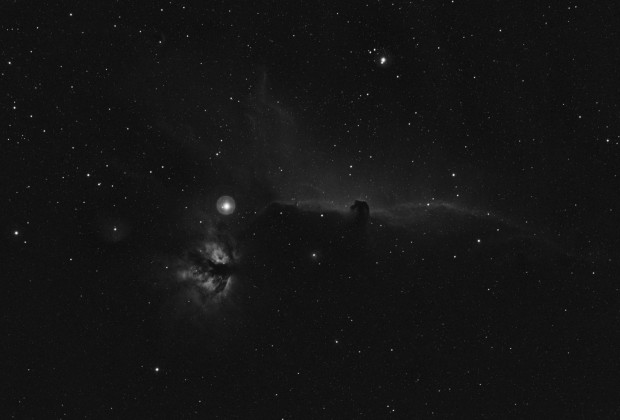
Initial flats show a halo effect

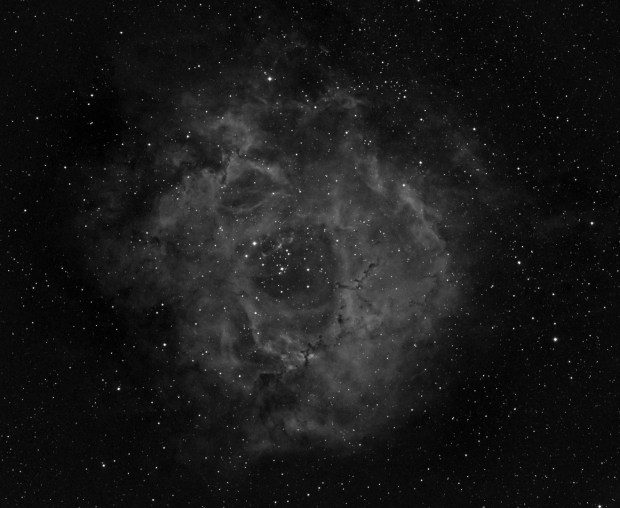
Similar halo apparent in Ha image
Notwithstanding, at first I was concerned by large concentric light and dark halos in the flats. I have long used the combination of a flowerpot, LED and T-shirt for taking flats, which has always worked well. I therefore expected the flats from the new camera using APT would not be a problem. However, as mentioned taking flats with this camera is a whole new ball game which has taken some time to master, or at least learn.

The flower pot flats set-up has always worked well before.
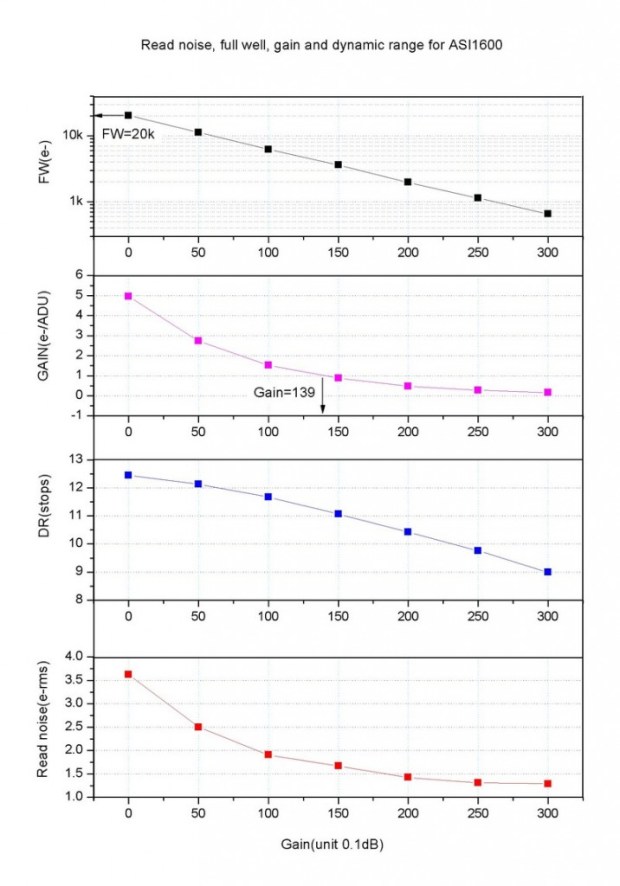
Unlike the DSLR, which just requires changing to the AV mode, it is necessary to calculate an exact exposure – to five decimal places – using a mid-range ADU setting of between 20,000 and 25,000 for each different LRGB filter. Sounds awful and it does generate a lot of frames but now I’ve got the hang of the Flats Aid it is much easier and very effective; on average I have so far found the required exposures vary from 0.00145 sec to 0.00792 sec. I did discover some minor light leakage in the optical train when testing the flats taken in daylight but by doubling up the T-shirt material and adopting a more careful set-up of the flower pot directly in front of the telescope object lens, the halos now seem to have disappeared.
The other new ‘toy’ with this camera is cooling. Despite the camera’s low noise and high sensitivity, like all digital cameras there is an inevitable amount of unwanted signal and currents created by the sensor. Apart from applying calibration frames, this problem can be significantly reduced by cooling the sensor when imaging. APT also has cooling and warming aid controls to avoid thermal shock but at first I struggled to get these working – turns out I forgot to plug the power lead in! After that it has worked like a dream and I am now routinely imaging at -30oC. The one drawback is that cooling down and warming up adds another 10 or 15 minutes to the set-up and take-down times, which can be annoying at 2.00 a.m. when you want to get to bed!
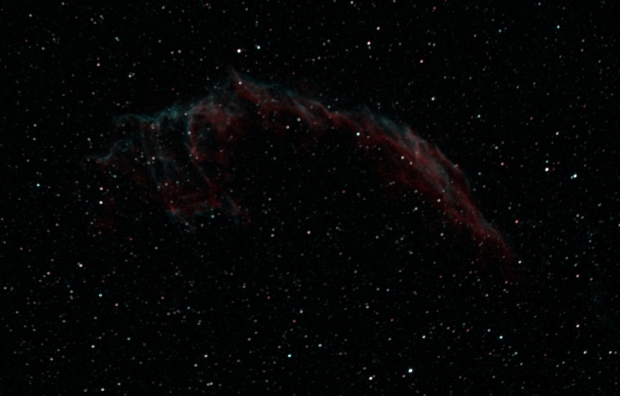
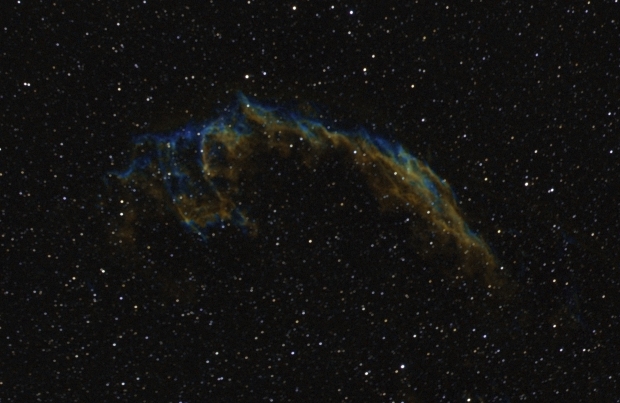
Unfortunately, now I have this camera working suitable imaging targets are in short supply for the moment. At first I was able to carry out some narrowband imaging of the remaining late winter nebulae just before they disappeared for the season but I must now wait for a few months until later in the year for similar objects to appear again. Meanwhile, whilst the night sky in spring abounds with some wonderful galaxies, most of these are really too small for my set-up to resolve properly. However, in the absence of larger DSO objects I have had to make do with these and have been pleasantly surprised by some of the results obtained.
The outcome of Leo Triplet and Markarian’s Chain were particularly good and demonstrate the superior abilities and power of the camera. Compared to the Canon 550D, when used with the William Optics GT81 refractor and a x0.80 field flattener, the ZWO 1600MM-Cool’s sensor produces a notably larger image with much greater sensitivity. As a result detail of all three galaxies that form the Leo Triplet M65, M66 and the end-on view of NGC 3628 is quite apparent and in another image, the spirals of the very small M61 galaxy can be clearly seen, though the quality is poor.

Leo Triplet – M65 (top right) M66 (centre right) NGC 3628 (lower left) Leo Constellation: William Optics GT81 & ZWO 1600MM-Cool + x0.80 field flattener | 60 sec 20 x L, 5 x RGB + full calibration, Gain 300 Offset 10 @ -20C | 21st March 2017
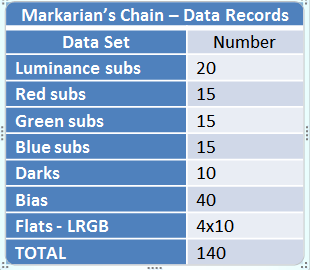
As expected the size of the data set from LRGB imaging with the camera is prodigious and furthermore, requires great care to organise before processing if mistakes are to be avoided. In the case of Markarian’s Chain I experimented with binning – only to learn later that it has no effect with CMOS sensors – which reduced the file size of the RGB and calibration images. Nonetheless, in all there were still 140 images with a combined file size of 1.6 Gigabytes! Notwithstanding, the benefits of LRGB imaging with this camera and EFW outweigh such problems and nowadays an extra storage disk is relatively inexpensive. Only processing power could perhaps be a problem if using an older PC but my 64-bit + i7 chip +16 GB RAM laptop computer has so far dealt easily with data processing very well.
The difference between imaging and processing with a DSLR and the ZWO CMOS mono camera has been much greater than I anticipated and required more adjustment which I am still dealing with – the learning curve is steep! Notwithstanding, the experience previously gained using a DSLR has proved invaluable and I would not like to take-on LRGB imaging from scratch; I’d like to think that my adage of walk before you run once again has paid off. This camera is very exciting and I am confident that when the autumn and winter skies eventually return the new palette now in my hands will reap great rewards – can’t wait.

Markarian’s Chain | Subs 60 sec – see table for details Gain 300 Offset -30C | 18th April 2017

M61 piral Galaxy in Virgo Cluster | William Optics GT81 & ZWO 1600MM-Cool + x0.80 field flattener | L 30 x 40 sec RGB 3×20 sec + full calibration Gain 75 Offset 15 -30C | 2nd April 2017

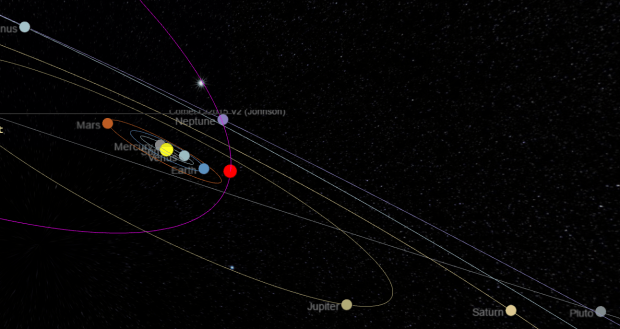


 I am pleased with the results, though they are a little noisy due to some stupid mishaps on my part along the way which left less imaging time than I would have wished. Though each comet is different, experimentation suggests that with good framing and guiding, exposures of about 2 minutes and ISO 3,200 produced the best results. Given this exciting experience, which was also good fun, I will hopefully not leave my return to comets so long as last time.


")
")