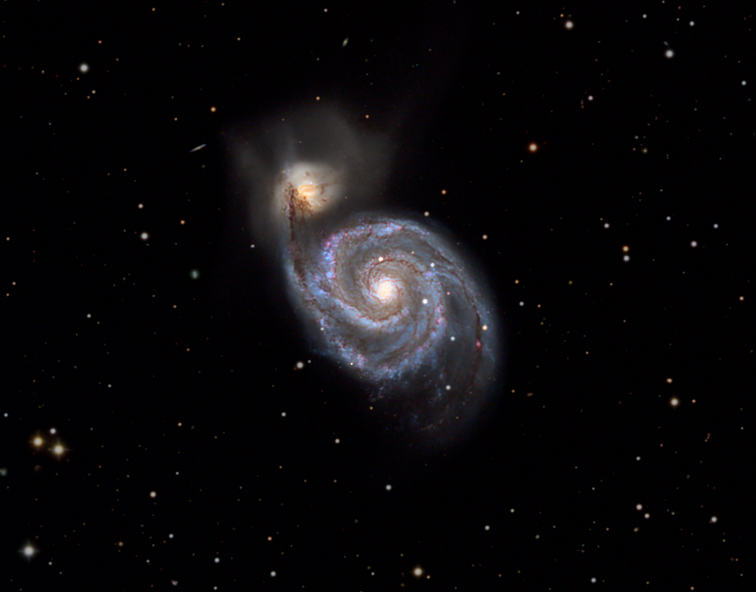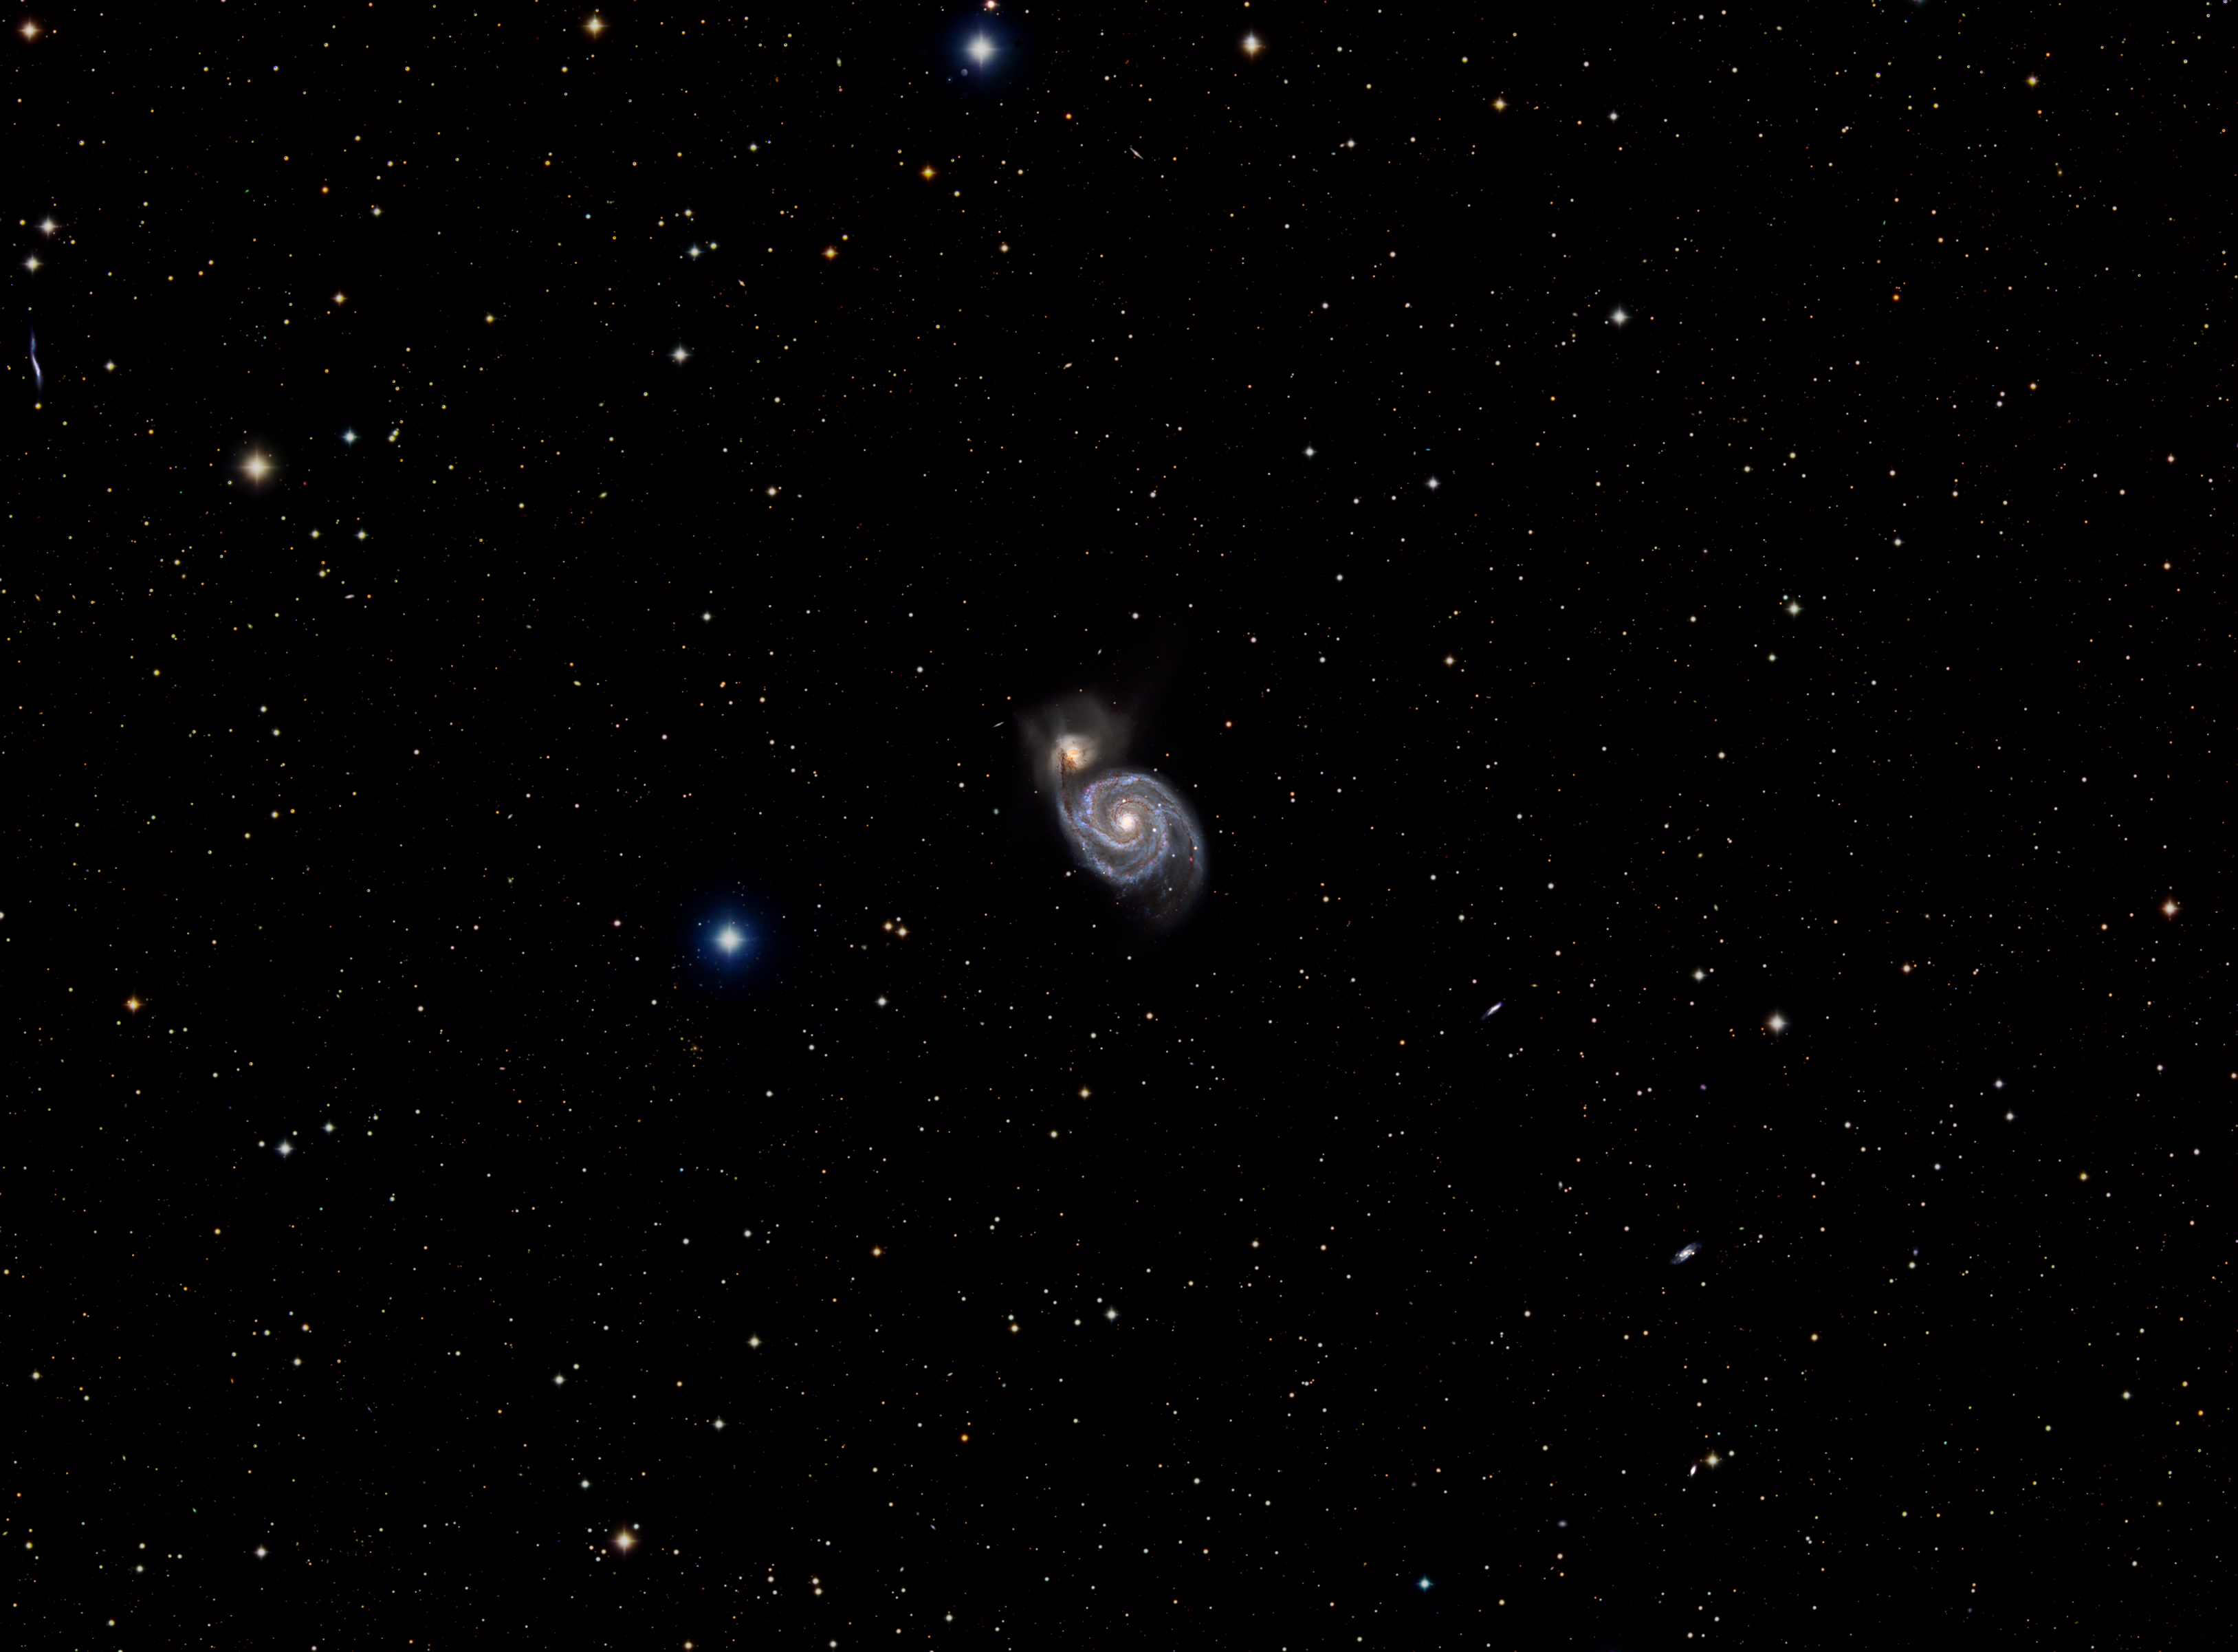
The size and diversity of the cosmos produces many wonderful features, of which M51 the Whirlpool Galaxy ranks highly amongst astrophotographers and is certainly one of my favourites. Unfortunately, it is at the limit for my equipment and location, though in 2020 I was fortunate to capture over 16-hours integration time and a reasonable image (see here). Whilst currently in the summer doldrums of limited darkness, I chose to process M51 data previously obtained using a Takahashi FSQ 106 located at Deep Sky West in New Mexico, USA.
Seen face-on from Earth, the balanced arms of this grand design galaxy contains dark dust lanes, blue star clusters and numerous pink star-forming regions rich in hydrogen gas. But it is the cosmic dance taking place between M51 and its companion dwarf galaxy NGC 5195 that makes this such an exciting and popular object.
The most popular theory of what’s happening, is that the smaller galaxy is passing behind M51 and the joint gravitational forces are interacting between the two, resulting in the misalignment of stars and unusually bright blue and pink areas across the M51 galaxy. Though not certain, it seems that their fates are inextricably linked and might eventually merge. Whatever the process taking place, it will take millions of years if not longer to play out and is likely to provide this exciting spectacle for many generations of astrophotographers yet to come!
Whilst I was satisfied with my image obtained here in Surrey at Fairvale Observatory in 2020, there’s no denying that the data set from New Mexico is in a different league and was a pleasure to process. Given the short focal length of both telescopes, Takahashi FSQ 106 (530mm f5) and William Optics GT 81 (382mm f4.72), out of the camera both set-ups inevitably produce a wide FOV but nonetheless pleasing images (see image above). However, the quality of the DSW data holds up much better when cropping out M51 and its dance partner, thus showing off the aforesaid details of this dynamic and colourful scene to great effect (see top of page).
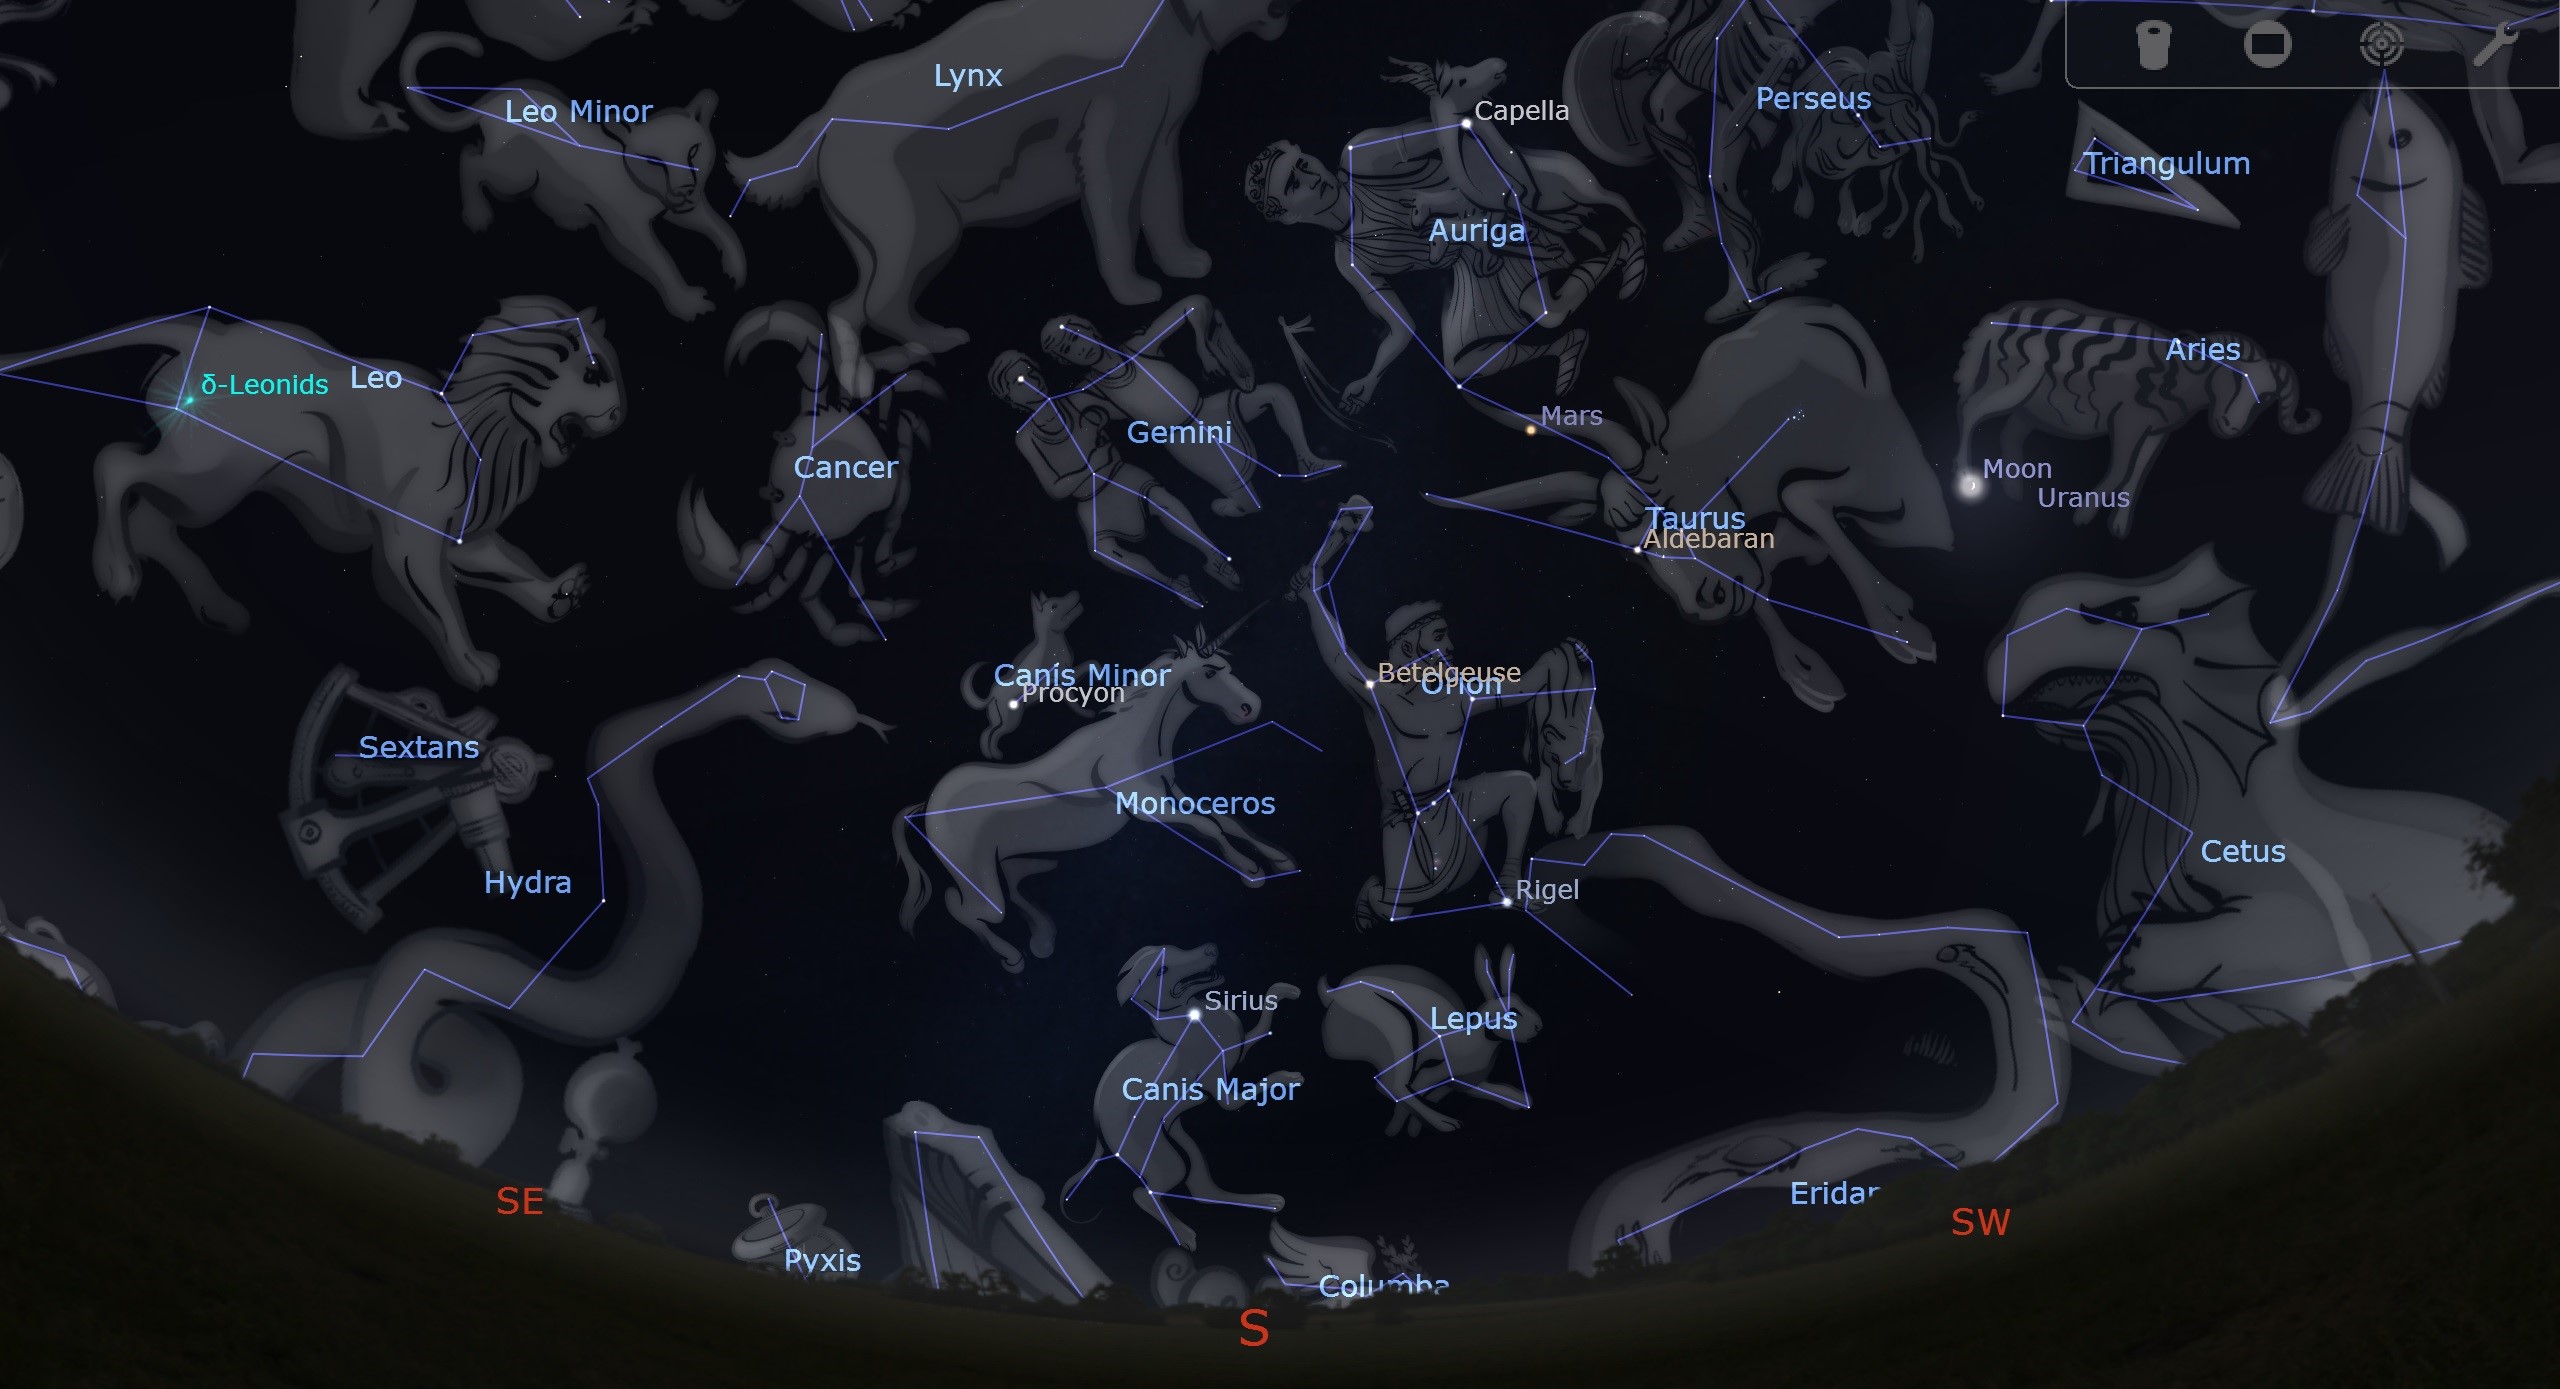
Constellation names mostly originated from ancient Middle Eastern, Greek, and Roman cultures, when they identified groups of stars and named them after their gods, goddesses, animals, and objects that were important to them. Other world-wide groups and throughout time – Native American, Asian, and African – have also made and named similar pictures from star groups based on their cultures and related beliefs. Given the number of stars observed when looking up into a clear dark sky, it is obviously helpful to ‘construct’ familiar patterns and adopt memorable names, which can then be used to identify areas of the sky in a way that can be easily identified by all. I have no problem with this long and well-established convention, which despite their antiquity works just as well in the modern world but I do have an issue with nicknames.
I’ve smiled at some of the nicknames given to popular, usually deep sky objects that have been well established by astronomers, but despite the possible use of describing their form, I am increasingly finding them a distraction when considering the merit of astrophotography images: Seagull Nebula, Running Man Nebula, Pelican Nebula etc. The problem is that they absolutely do look like the object they’re meant to depict but, like an earworm is to music, once seen they are difficult to view any other way.
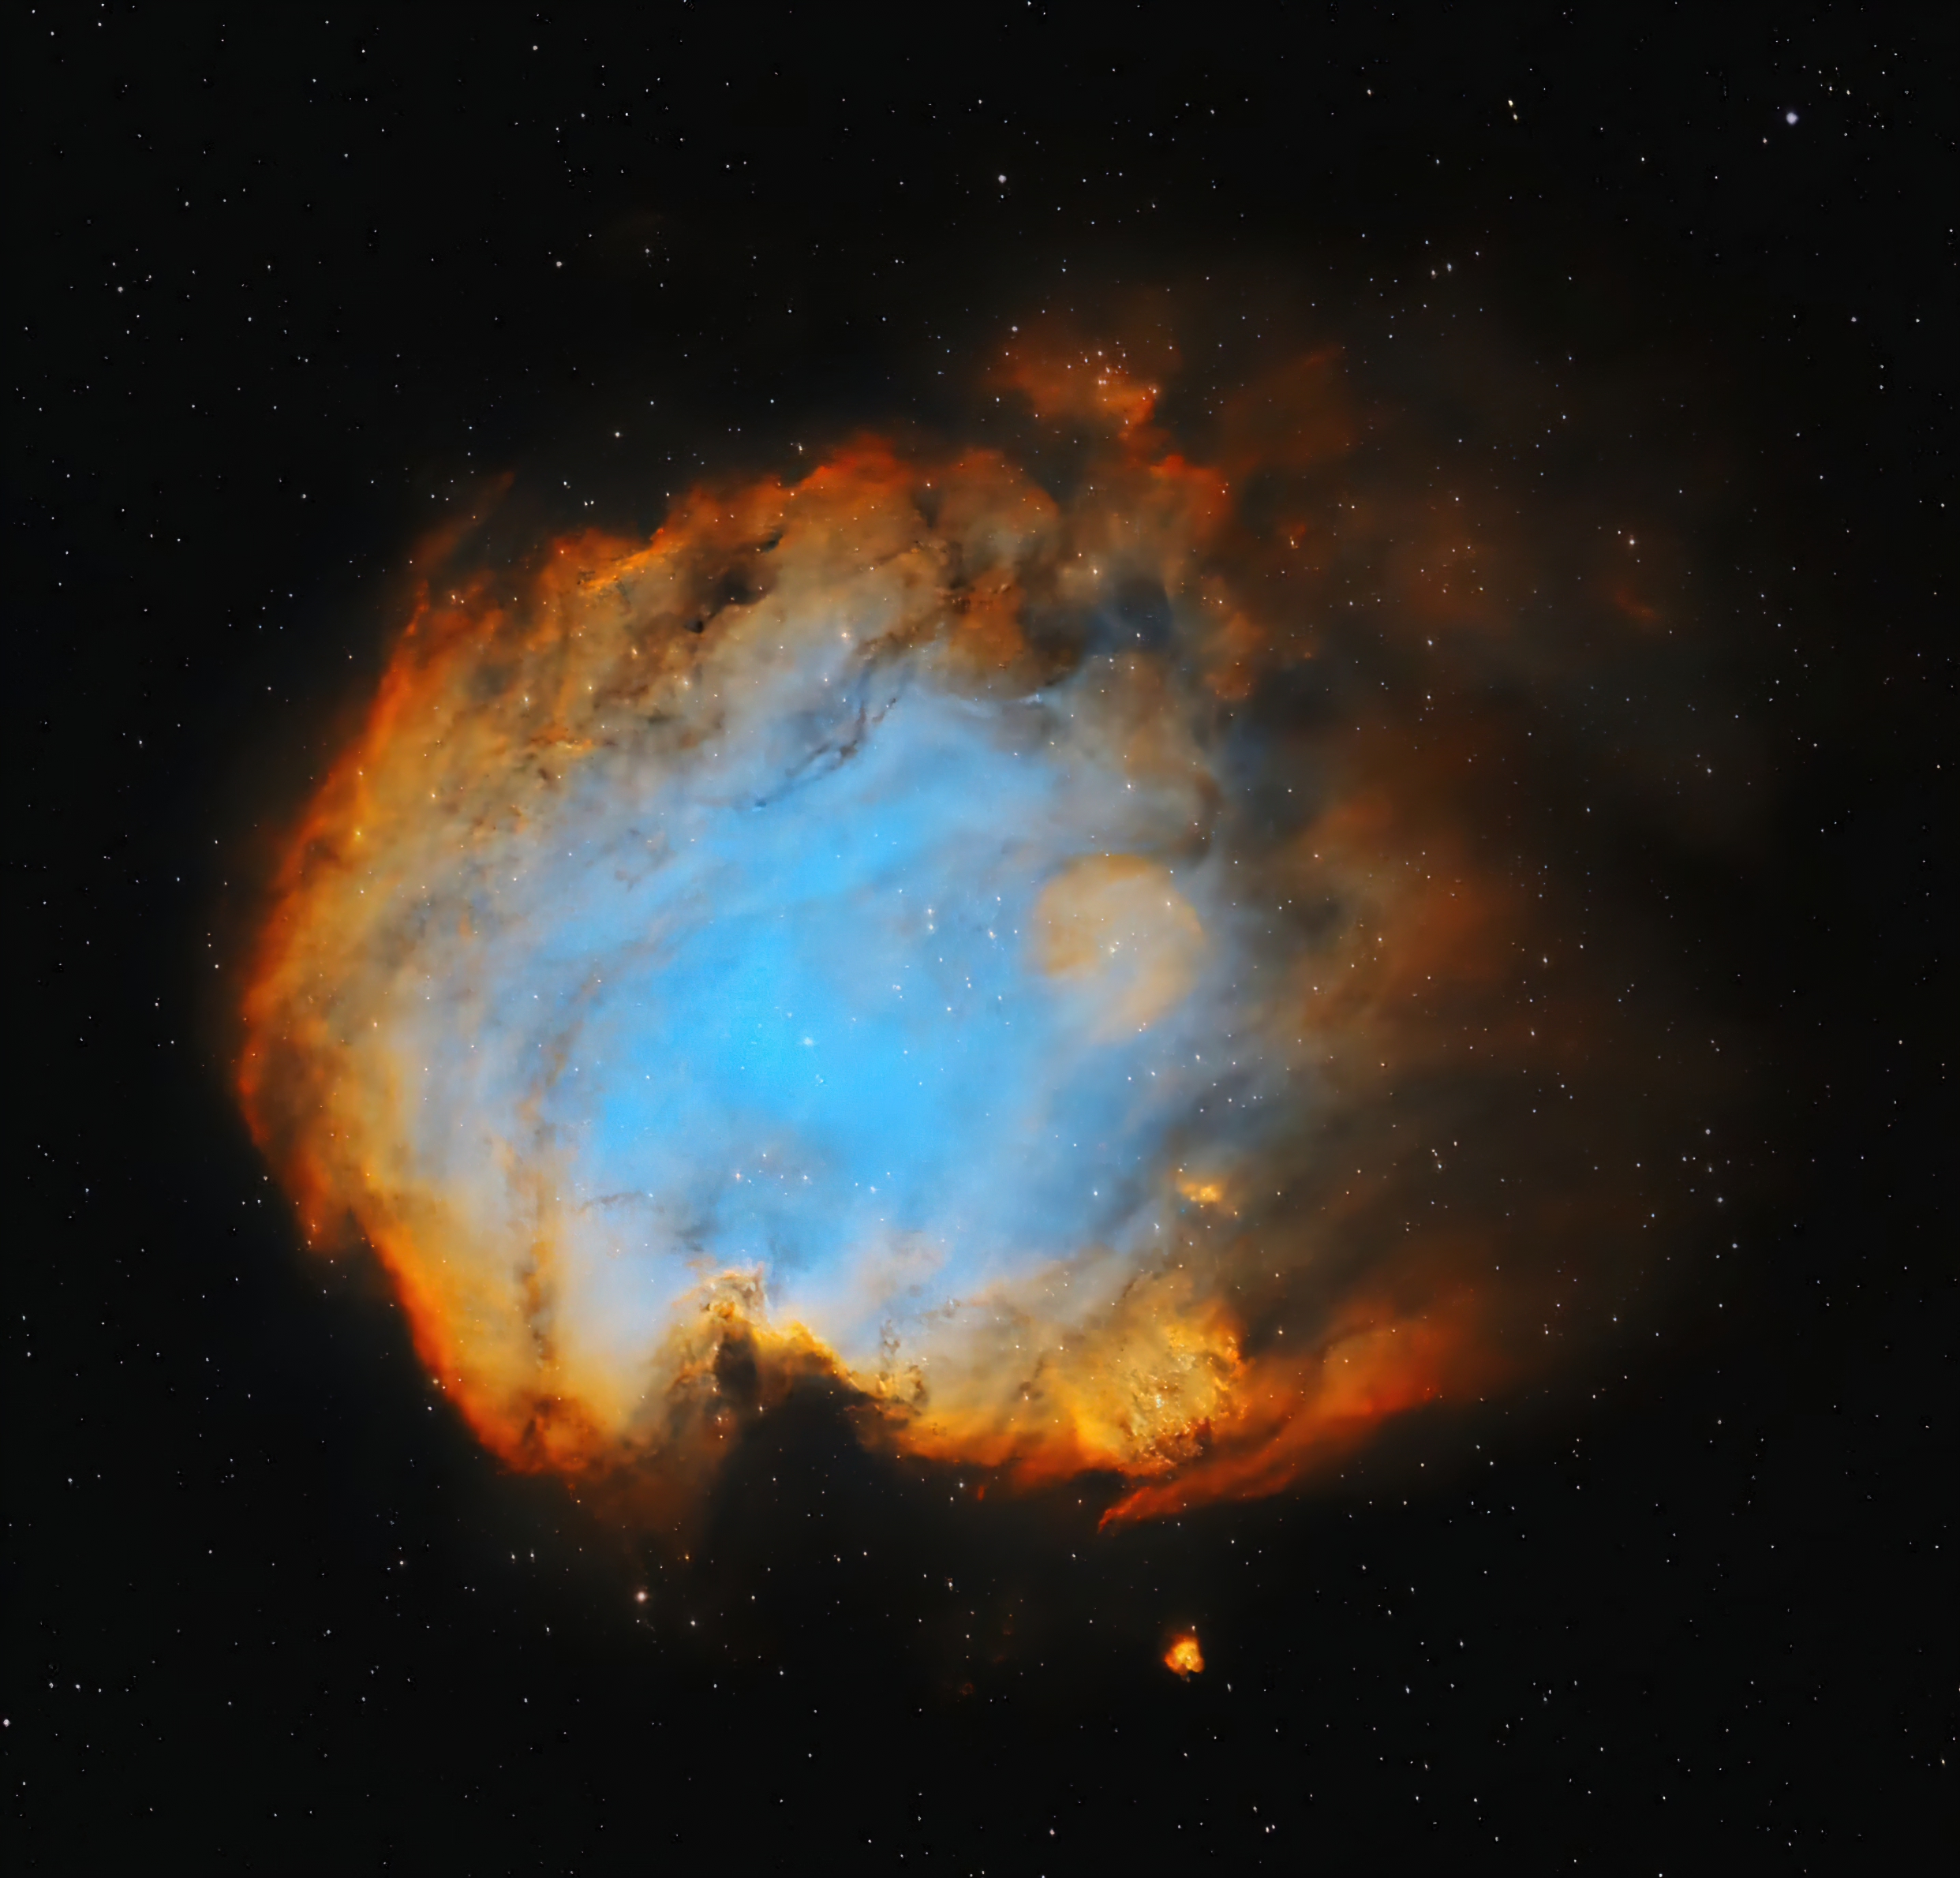
With this partly in mind, for the first time in seven years I recently chose to image NGC 2174 again. I previously used the William Optics GT81 with a modded Canon 550D DSLR camera, which resulted in an image that wasn’t too bad, except it looked like a monkey! Given its nickname of the Monkey Head Nebula, this was to be expected but unfortunately, thereafter the picture of a monkey has remained with me ever since when I view NGC 2174 images. The challenge on this occasion was therefore to limit the monkey’s impact on the image, thereby showing the object for what it really is – an emission nebula.
Using the same OTA but with a mono CMOS camera and a good set of filters, the new data set obtained was much improved, and with better processing experience it was time to see the monkey (or not) in a new light. The first thing to do was present the image in an orientation that produces a more favourable perspective (less monkey like). Using a basic SHO palette in PixInsight the initial image was promising (see below) but with an alternative PixelMath dynamic SHO palette* and then processing with autocolor script, color saturation, Russell Croman’s XT-suites and other tweaks, I was pleased to see that the monkey was nowhere to be seen in the final image (see image at the top-of-the-page), or at least to my eye.
At last, it is now possible to look at NGC 2147 and see the inherent features of this interesting emission nebula, where new stars are being born at a rapid rate. Moreover, the inner details can now be clearly viewed within, thus also showing the associated open star cluster NGC 2175 and more. As a result of this monkey make-over, the NGC 2174 image now not only looks much better but critically, I no can longer see the ape! Now where’s that Seagull?
IMAGING DETAILS
Object
NGC 2174
Constellation
Orion
Distance
6,400 light-years
Size
40 arc secs
Apparent Magnitude
+6.80
Scope
William Optics GT81 + Focal Reducer FL 382 mm f4.72
Mount
SW AZ-EQ6 GT + EQASCOM computer control & Cartes du Ciel
Guiding
William Optics 50mm guide scope
+ Starlight Xpress Lodestar X2 camera & PHD2 guiding
Camera
ZWO ASI294MM CMOS sensor
FOV 2.87o x 1.96o Resolution 2.50”/pix Max. image size 4,144 x 2,822 pix
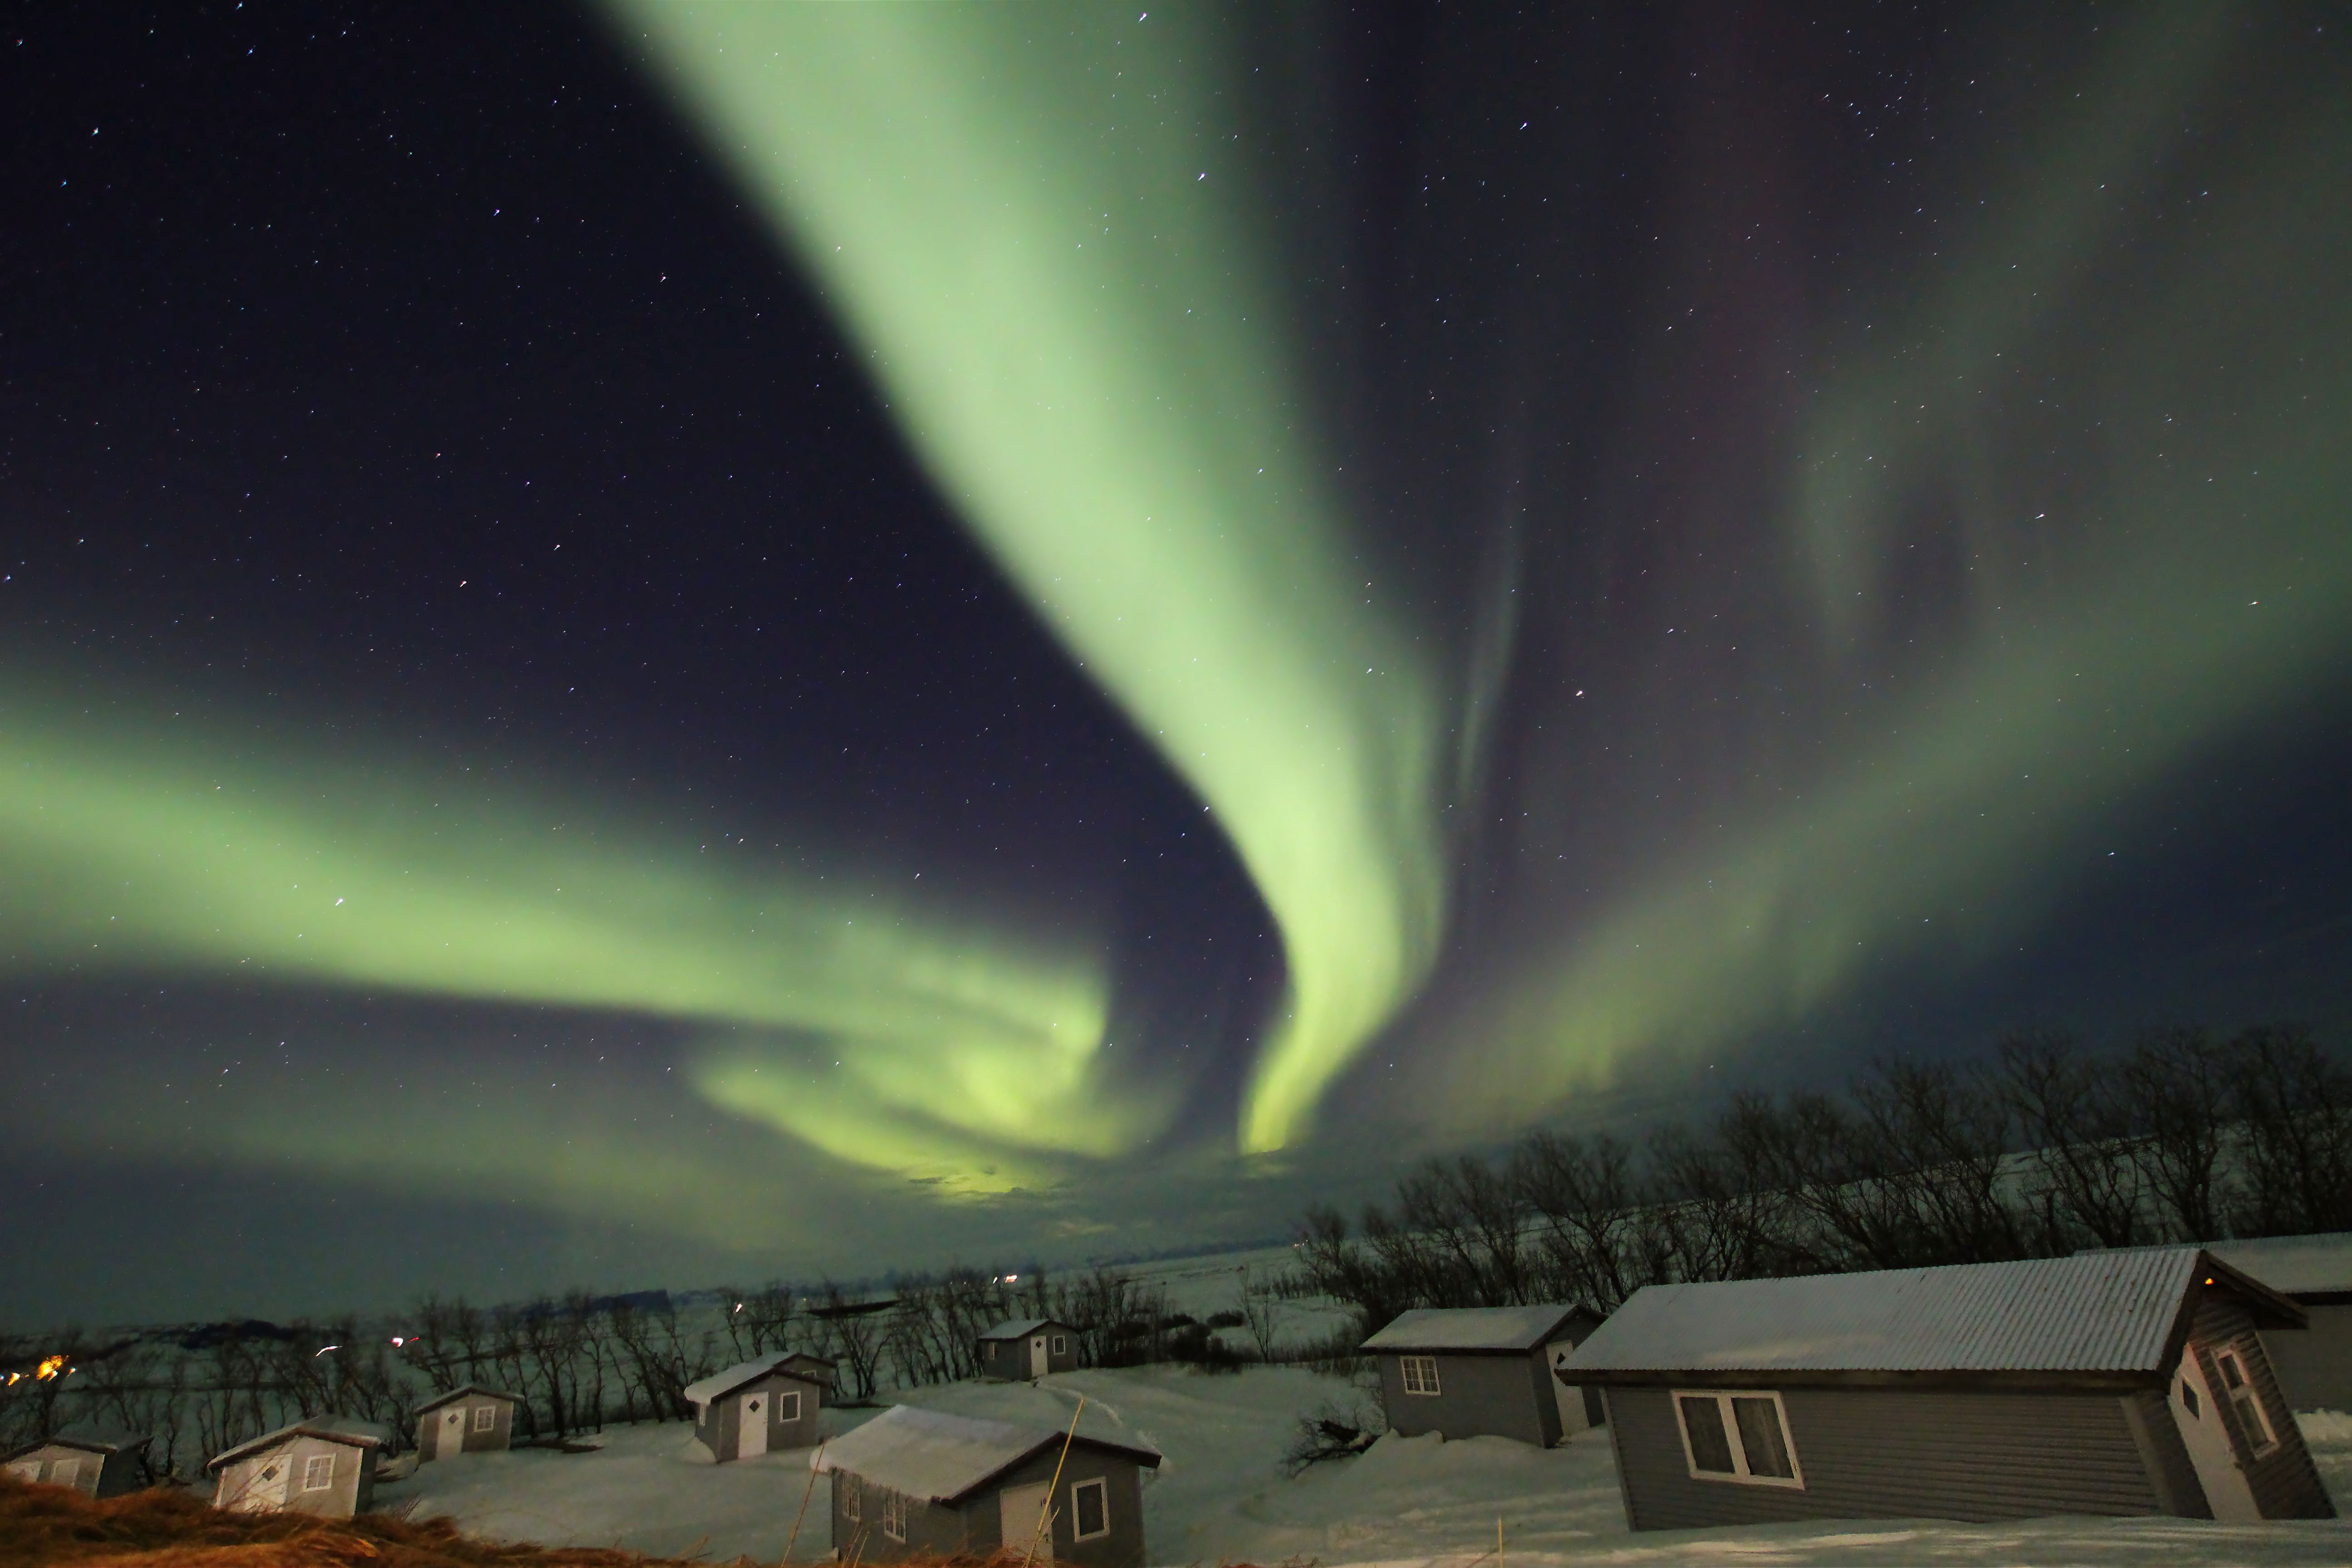
It’s just over 6-years since my last arctic adventure, which was a trip along the Norwegian coast by ship from Bergen to Kirkenes and back, stopping along the way for deliveries and pick-ups at 30-ports. On that occasion we had good views of the Aurora Borealis whilst at sea somewhere north of the Arctic Circle and with some difficulty, I was eventually able to obtain some images (see below). Standing outside on ther deck at +70o North latitude in February was incredibly cold, making camera operation difficult, whilst the ship’s movement from side-to-side and up-and-down was hardly conducive to photography of the night sky!
This time, I’m just back from circumnavigating the island of Iceland by car from mid to late-March, which is described more fully on my other website Round The Bendhere. It was timed to avoid the worst of winter conditions and, with darkness quickly disappearing as Spring / Summer beckoned, maybe still get a chance to see and image the Northern Lights again – this time on terra firma. Despite such planning, severe snow, ice and very strong winds were common for much of the time but, when it was clear the scenery was spectacular and, on a couple of evenings later in the trip, the Aurora Borealis put on a great show.
Situated just below the Arctic Circle, mostly between 64o and 66o latitude, Iceland is well known both for its geology and sightings of the Aurora Borealis or Northern Lights. As a geologist, I travelled to Iceland primarily to view the rocks and though it was getting late in the season, I was also keen to see the Aurora again if possible. Given the days of bad weather it was therefore fortunate to have clear skies and good views of the Northern Lights on two separate evenings whilst on the south coast, first at Gerdi near Jökulsárlόn and later just south of Kirkjubaejarkklaustur.
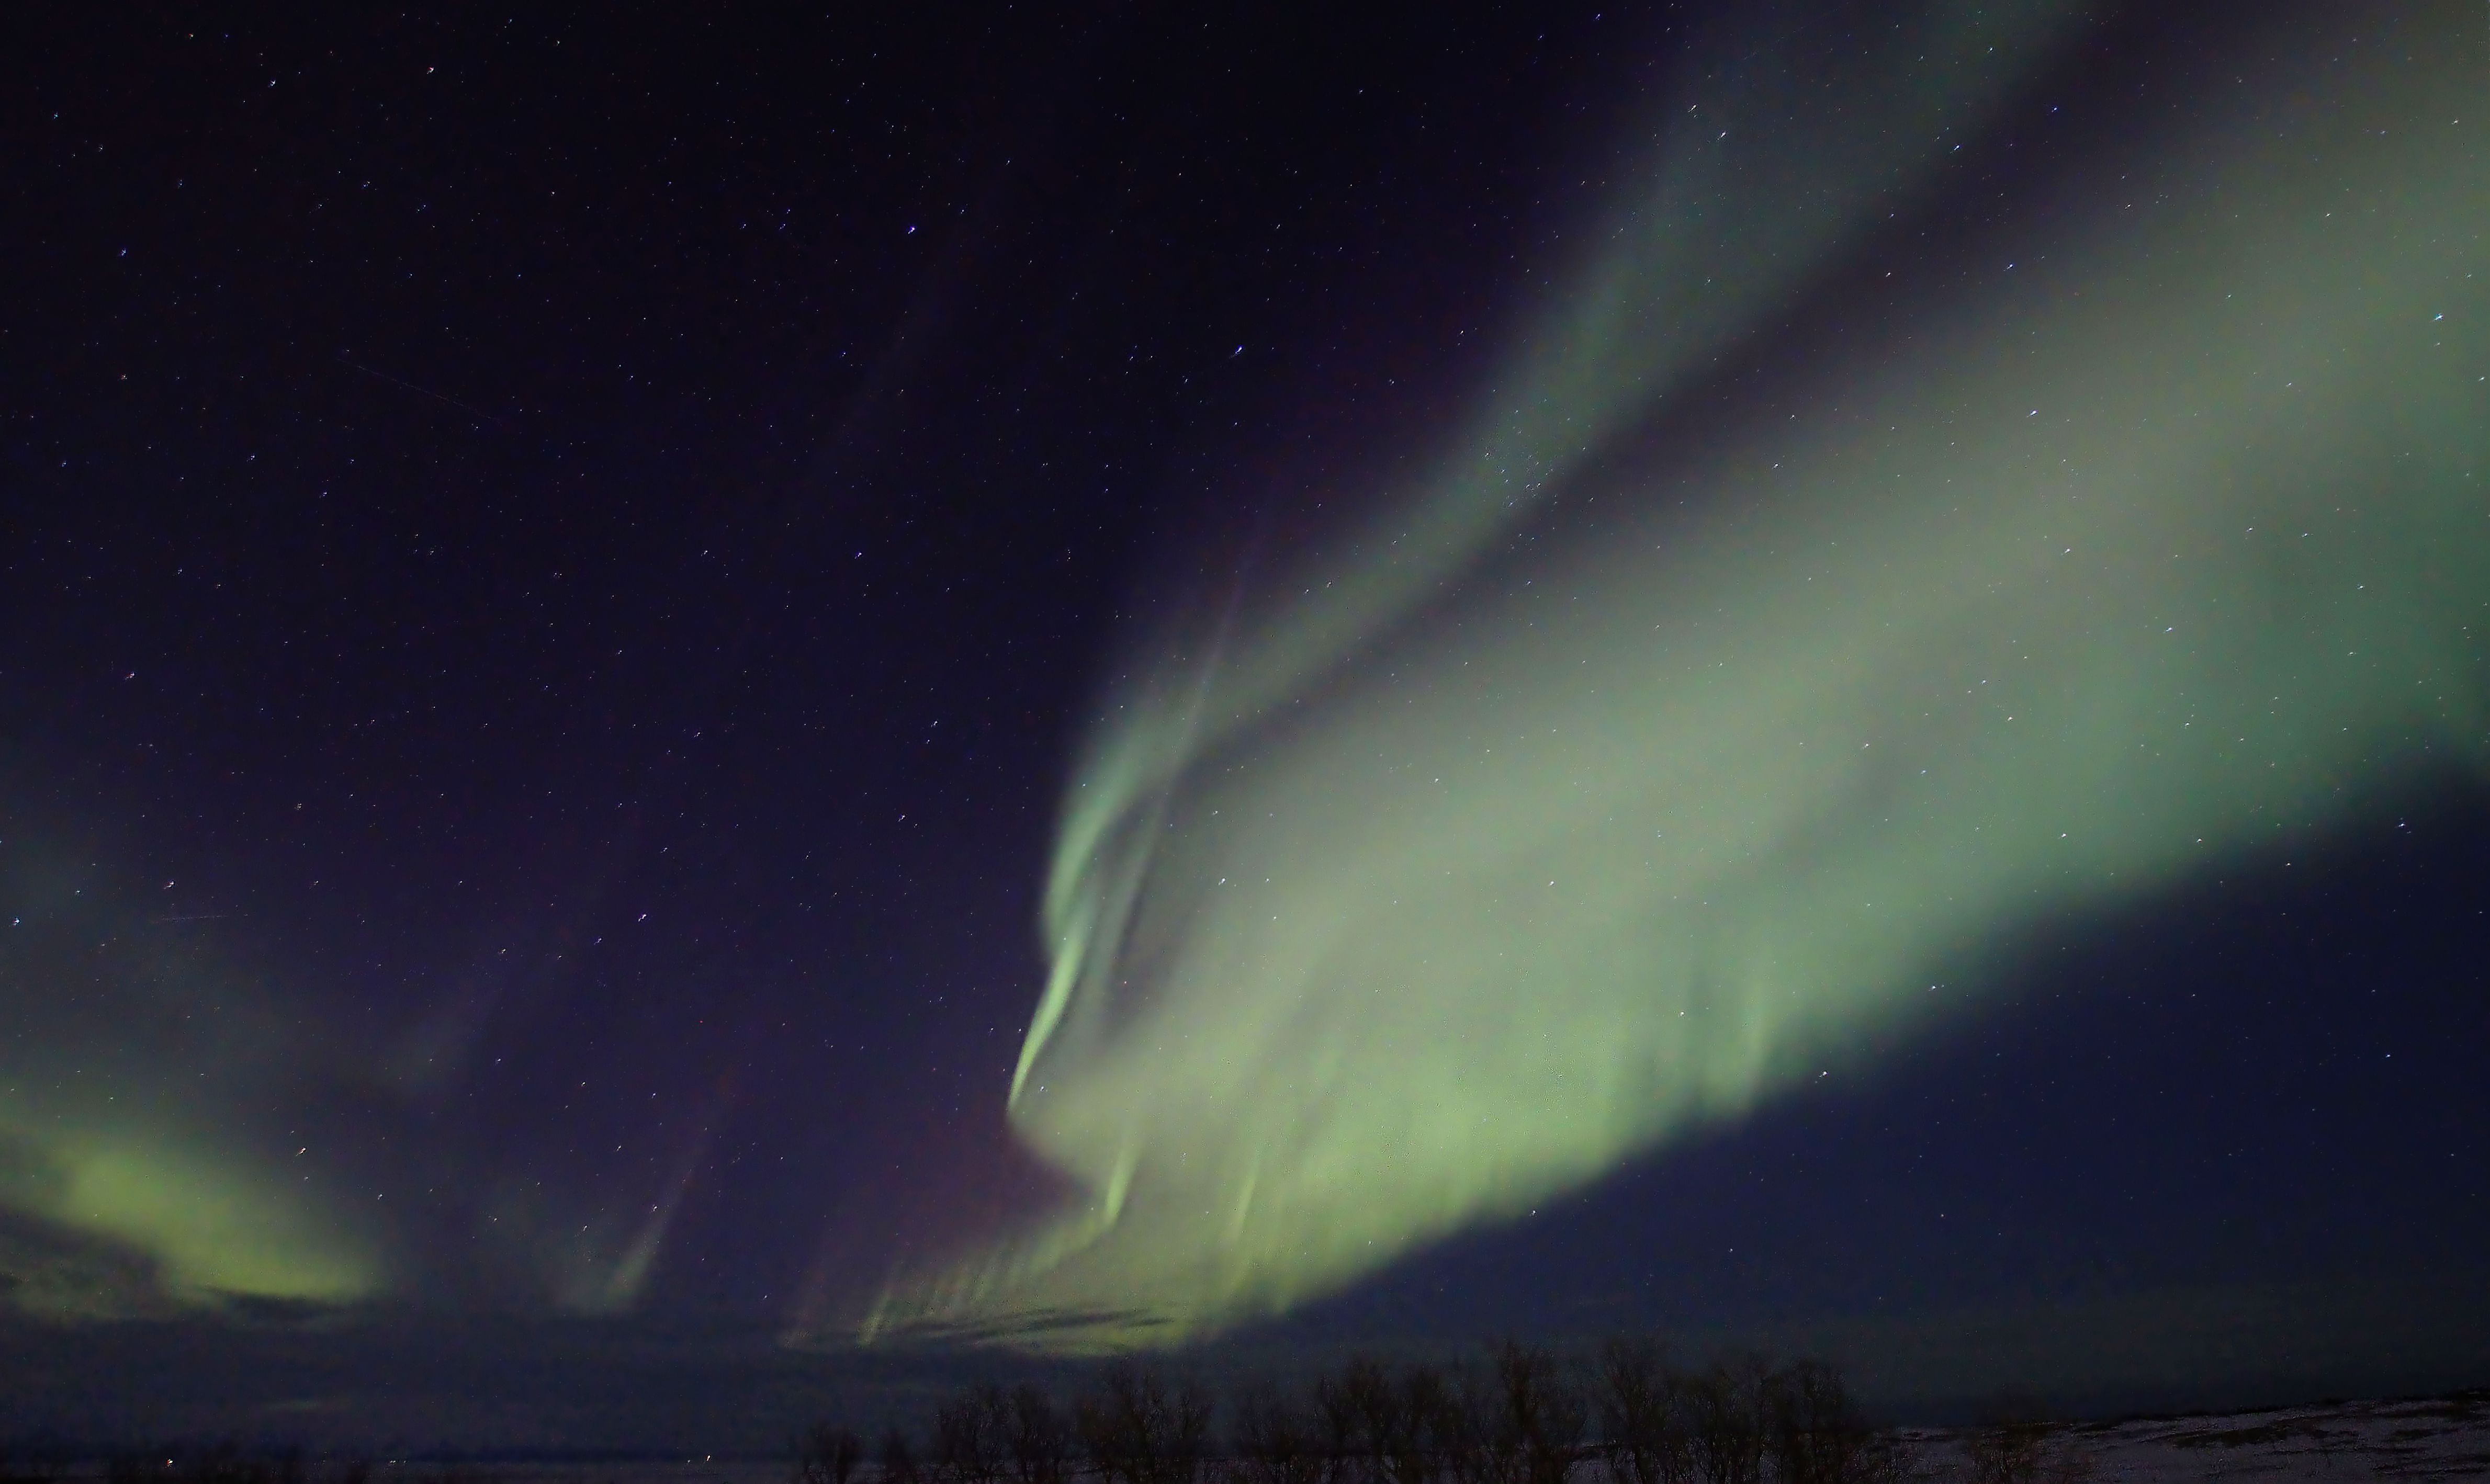
Despite my previous experience, each aurora is different and on this occasion I found using a Canon 700D DSLR mounted on a Gorilla Pod, using a Sigma wide-angle lens set at a focal length of 10mm f3.5 + ISO 3,200 and 10 second exposures generally produced a good image. It seemed that we were on the southern edge of the aurora on the first night at Gerdi (see top of the page), which was therefore weaker but exhibited a striking purple colour (helium). The following night the aurora was much stronger, this time mostly green (oxygen) with red and purple fringing (nitrogen & helium) and generally much more active, resulting in some great views with the naked eye and even better images (see below).
Nestled within the western area of the Perseus Molecular Cloud, some 1,100 light-years from Earth is the colourful NGC 1333 complex, one of the closest and most active stars forming regions of the night-sky. I have long admired this exciting object but ruled it out for imaging as unsuitable for my equipment but eventually found its allure too compelling to avoid and just had to give it a try, with a surprisingly good result.
NGC 1333 shows details of dusty regions along with contrasting hints of red emissions from Herbig-Haro objects(1), jets and shocked glowing gases emanating from recently formed stars. In fact, the reflection nebula NGC 1333 contains hundreds of stars less than a million years old, mostly hidden from view by the prevailing dust.
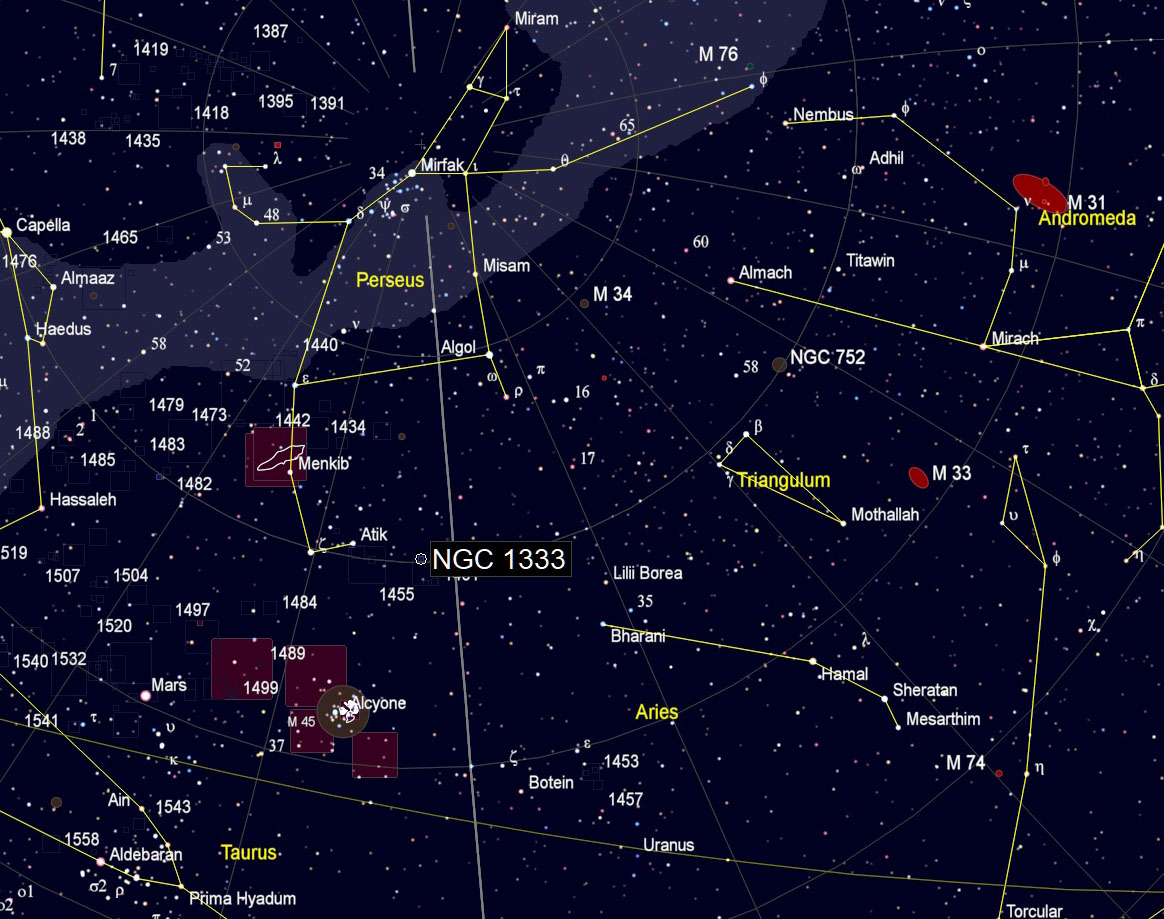
Whilst NGC1333 is clearly the main act, numerous exciting objects abound throughout this complex region, including other reflection nebulae and Herbig-Haro stars, some of which which can be seen highlighted in the plate solving annotation above. However, I’m most pleased that for the first time at this Bortle 5 / 6 area I’ve been able to capture the extensive interstellar dust and gases, which really brings the entire image to life – every cloud has a silver lining. I am blown away by the outcome of this image, in the light of which I’ll need to reassess other hitherto neglected targets.
(1) Wikipedia: Herbig–Haro (HH) objects are bright patches of nebulosity associated with newborn stars. They are formed when narrow jets of partially ionised gas ejected by stars collide with nearby clouds of gas and dust at several hundred kilometres per second.
Final Word: as always, good quality data is the critical factor for all astrophotogaphy images but processing comes a close second in importance and is something I’m continually working on. This time I was able to use two new PixInsight features that were released shortly before Christmas and played an important role in completing the final image – thanks Santa.
Spectrophotometric Colour Calibration (SPCC) – based on results of the Gaia satellite’s work creating a three-dimensional map of our Galaxy, the Milky Way, SPCC usess the astrometric data (location) of all the stars and their related spectrometric data to accurately colour calibrate the image. This is an incredible piece of work that ensures that astrophotography objects, especially broadband wavelengths, can now be properly shown in their correct colours.
Blur XTerminator (BXT) – as astonishing as SPCC is, perhaps the real game changer is Russell Croman’s BXT, which literally does what it says on the tin, very, very well, and is causing something of a riot in the world of astrophotography. Like his other PixInsight tools NoiseXTerminator and StarXTerminator (also very popular), BXT is AI based with truly unbelievable results. The removal of blur, without damaging the image integrity at a pixel level, vastly improves the image quality – significantly improving the effective image resolution, which is like transforming your telescope to a more powerful, higher quality one!
IMAGING DETAILS
Object
NGC1333
Constellation
Perseus
Distance
1,100 light-years
Size
6’ x 3’
Apparent Magnitude
+5.6
Scope
William Optics GT81 + Focal Reducer FL 382mm f4.72
Mount
SW AZ-EQ6 GT + EQASCOM computer control & Cartes du Ciel
Guiding
William Optics 50mm guide scope
+ Starlight Xpress Lodestar X2 camera & PHD2 guiding
Camera
ZWO ASI294MM CMOS sensor
FOV 2.87o x 1.96o Resolution 2.50”/pix Max. image size 4,144 x 2,822 pix
At this time of the year, I produce an astrophotography calendar for members of my family, which consists of my better images from the year just ended. In combination with the calendar, I also compile a video of the calendar images set to appropriate music, which we all watch together prior to seeing the actual calendar. It’s a great way to present the images, which look really stunning on today’s large Smart TV’s and is also fun to watch with the family.
2022 CALENDAR
Last year’s new Chroma filters, a new ZWO ASI294MM camera, further processing improvements, dark sky data from a remote Takahashi 106 telescope in New Mexico, USA (indicated by an asterisk *) and the addition of a new widefield rig built around the excellent Samyang 135 lens, contributed to a successful astrophotography year in 2022.
The said calendar video can be viewed on YouTube by clicking HERE and below is a brief overview of each image. More detailed background information and imaging details for those interested can be found in relevant blogs I posted on this website during the year. The background music is the track Leaps and Bounds from Nils Petter Molvaer’s album Re-Vision.
COVER
Pickering’s Triangle: A close-up, starless section of the Cygnus Loop SNR (Supernova Remnant).
JANUARY
M45 Pleiades Nebula: An open star cluster containing over 1,000 stars formed in the last 100 million years. Hot, blue stars are passing through an interstellar dust cloud, with the blue light from the brighter stars reflected off the interstellar dust.
FEBRUARY
Cone Nebula: Located 2,500 light-years from Earth, this rich star forming region is full of hydrogen gas, reflection, and dark nebulae. With nearly 14-hours exposure time this narrowband image shows the Christmas Tree open star cluster, Cone Nebula, and the Fox Fur Nebula to good effect.
MARCH
Barnard-22: Close to the aforesaid Pleiades, lies the dark region of the Taurus Molecular Cloud (TMC), which at 430 light-years is the nearest star-forming region to Earth. Consisting of hundreds of solar masses of primordial hydrogen and helium gas, as well as heavier elements, this vast area of dense stardust obscures almost all light from behind; Barnard-22 forms part of the TMC.
APRIL
Helix Nebula*: This iconic planetary nebula in the Aquarius constellation was formed by a star near the end of its life shedding its outer layers, which is expelling the resulting gases into space.
MAY
Thor’s Helmet*: An emission nebula, produced as a hot dying star, 20-times more massive than the Sun, emits a stream of particles expanding outwards, thus producing an interstellar bubble which here interacts with nearby molecular clouds and gives the nebula its form and glow.
JUNE
Lower’s Nebula: Located in the outer regions of the Orion constellation, between the Orion and Perseus arms of the Milky Way, the nebula mainly consists of ionized hydrogen, which is thought to be energised by a runaway star situated at its centre.
JULY
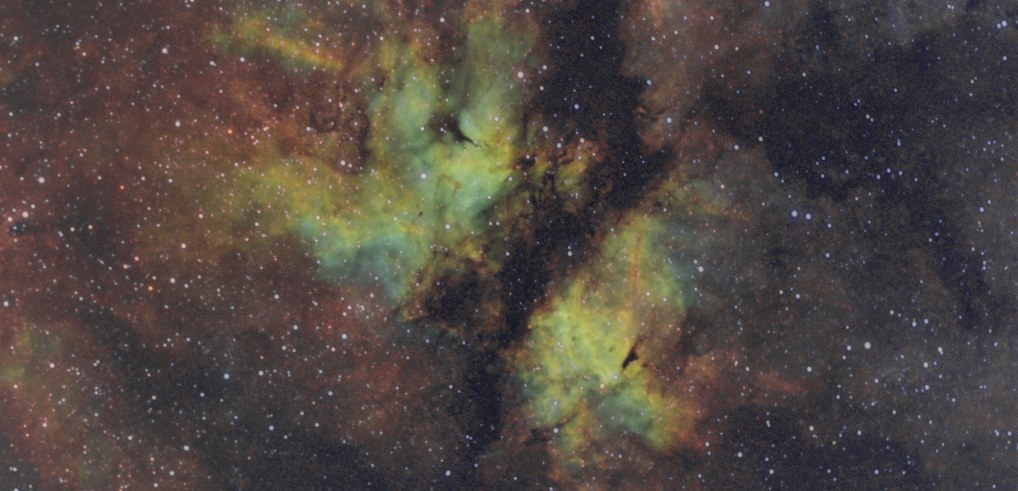
Sadr Region: This busy image uses a new widefield lens (8 x greater than my telescope’s field-of-view), framed to include some familiar objects across the very large Cygnus-X region, including the yellow-white supergiant Sadr star, Butterfly Nebula (top right) and the Crescent Nebula (centre).
AUGUST
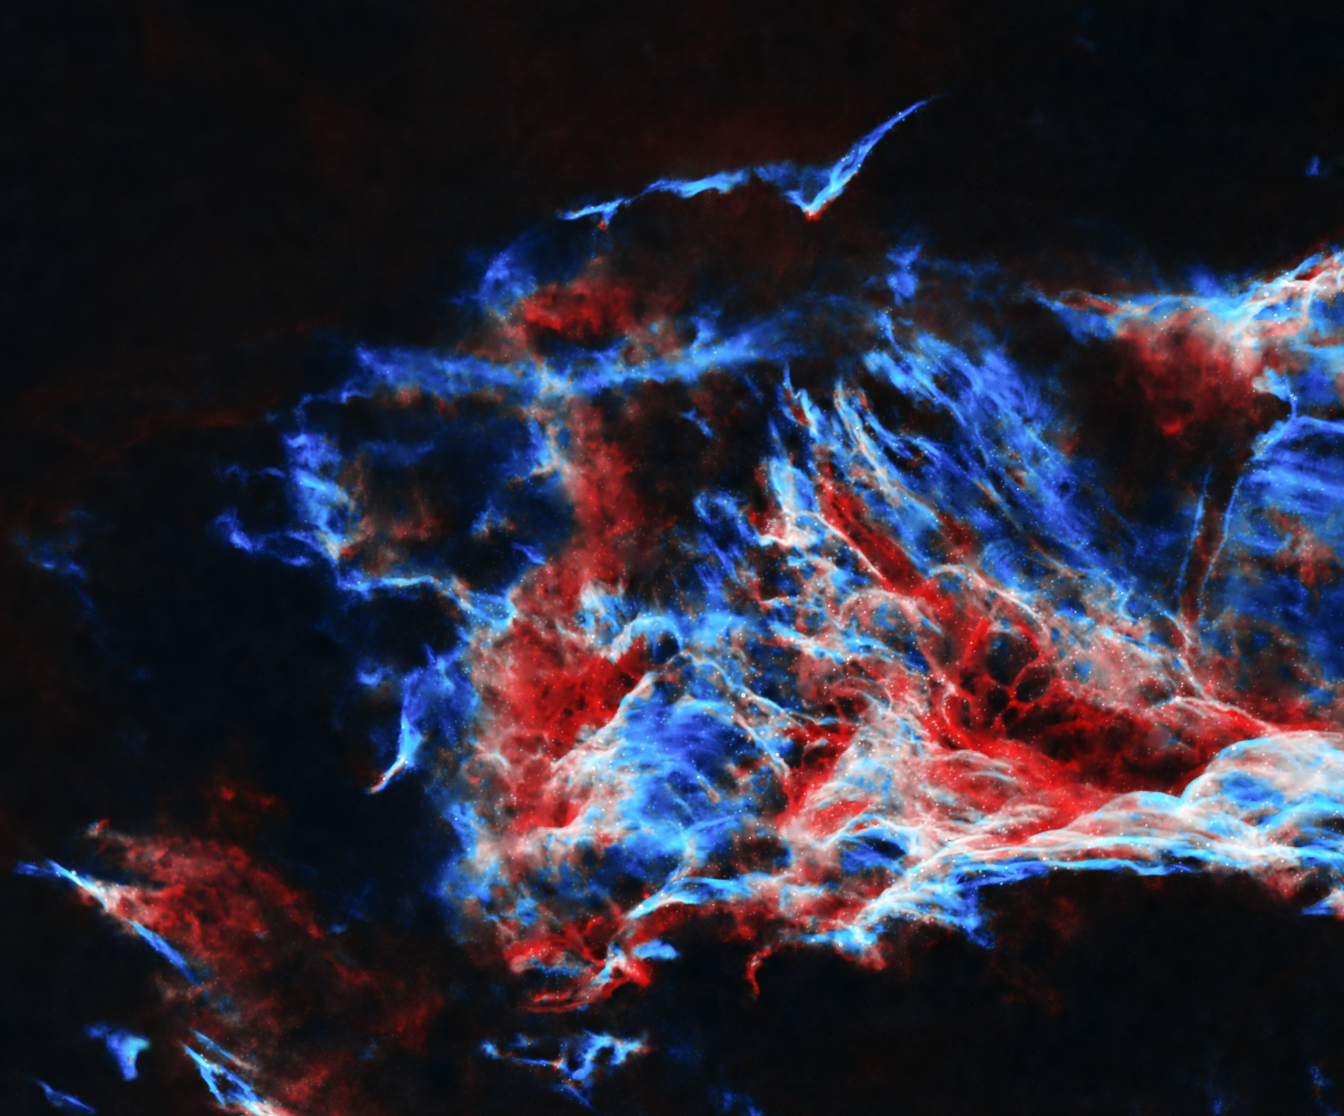
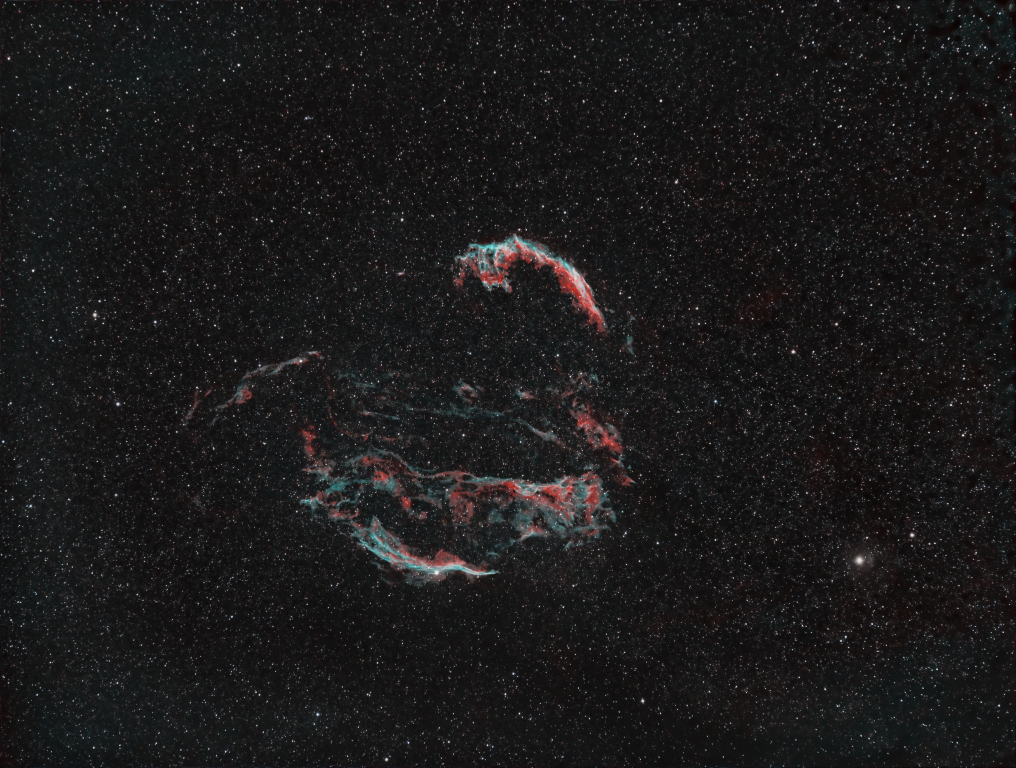
Cygnus Loop / Western Veil Nebula: Located 1,500 light-years from Earth, this supernova is still expanding at 60 miles per second. The debris cloud has been sculpted by shock waves from the star’s explosion, with the colours arising from ionized hydrogen (red) and oxygen (blue) gases.
SEPTEMBER
Bodes & Cigar galaxies*: Located in the constellation of Ursas Major, Bodes spiral galaxy and the Cigar irregular galaxy are 11.8 million light-years distant. These galaxies have a gravitational lock on each other which has affected the shape and composition of each other.
OCTOBER
Clamshell, North America & Pelican Nebula: The Cygnus constellation is rich in targets and by using the new widefield lens, it was possible to capture all three nebulae in one narrowband image.
NOVEMBER
Horsehead & Flame Nebula: An old favourite located in the Orion constellation, here for the first time imagedin LRGB wavelengths to produce this colourful and exciting image.
DECEMBER
Spaghetti Nebula: The beautiful complexity of this cosmic cataclysm is the product of a massive stellar explosion that took place some 40,000 years ago. Aptly named, the image concentrates on the southern lobe of this very large supernova remnant.
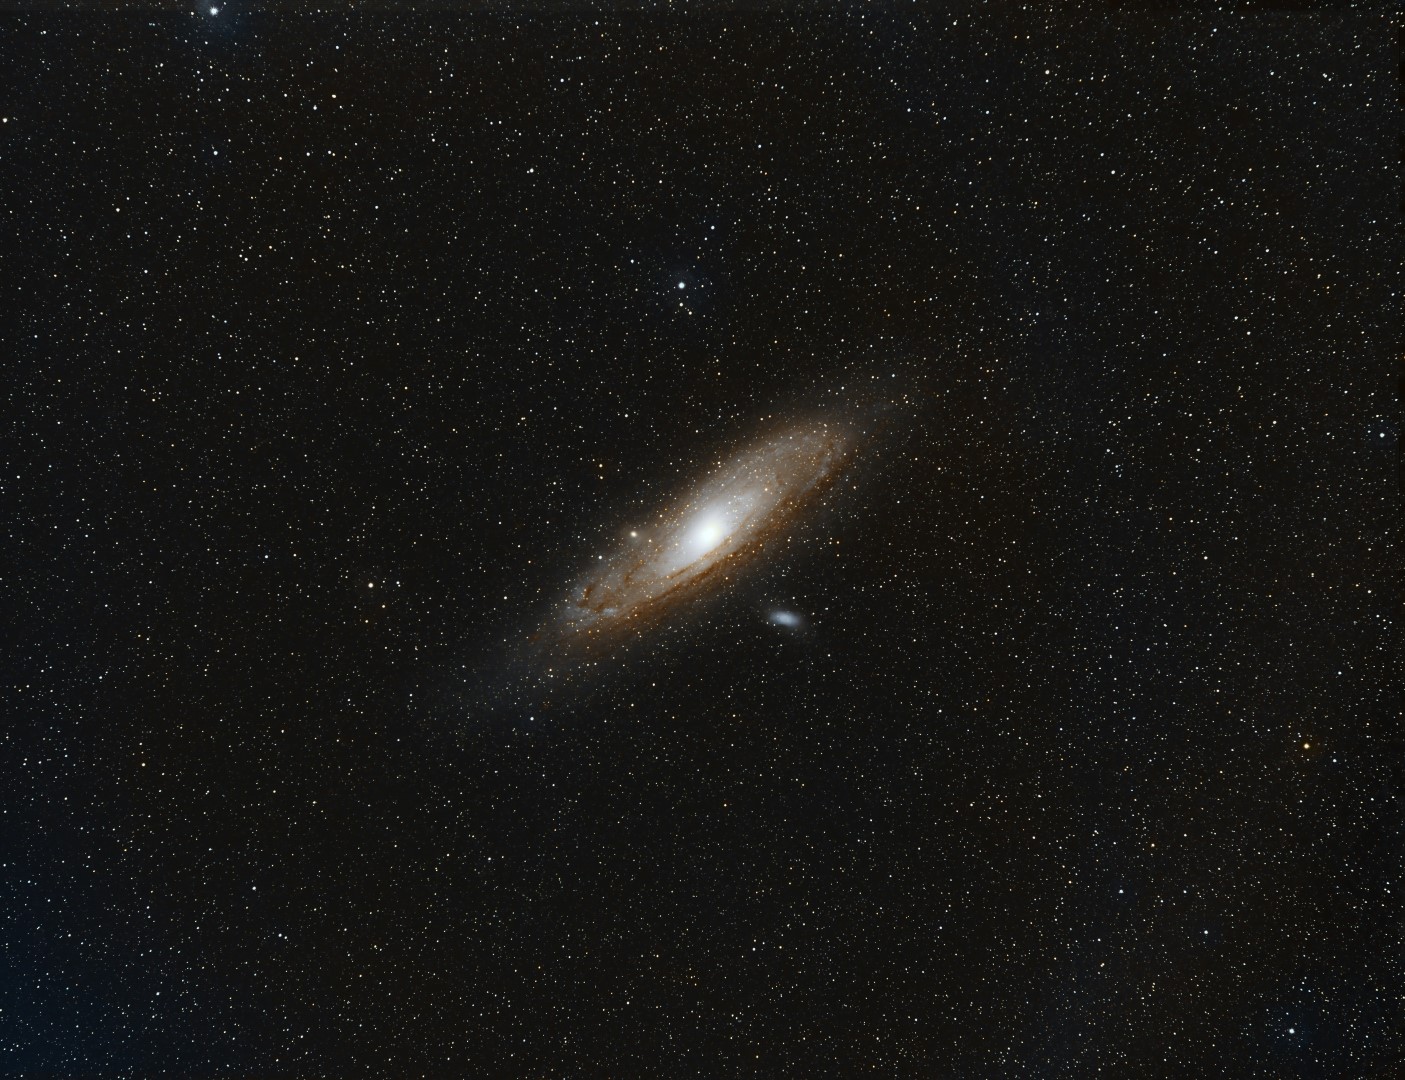
As our closest galactic neighbour, I’ve imaged M31 the Andromeda Galaxy five times since beginning my personal astrophotography journey in 2014, each time using my William Optics GT81 apo refractor – first with a DSLR, then a ASI1600mm-Cool and most recently ASI294MM cameras. Andromeda is perhaps the perfect object for my equipment, as it just fits the field-of-view of the aforesaid set-up, which produces something of an up-close-and-personal image of this alluring galaxy. But despite the success of these images, perhaps there’s an alternative view?
This year, I therefore deployed my Samyang 135 + ASI1600MM-Cool rig to capture 6 ½ hours of Andromeda, the result of which shows a whole new perspective of M31. The widefield format of this lens produces greater context than previous images, whilst still obtaining excellent details and colours of the galaxy itself. As a result, this final image (see above) better reveals the galaxy in its true glory deep in space, which in some ways I believe can be more powerful than the more popular close-up renditions of this impressive object (M31 with star reduction applied to the image below).
IMAGING DETAILS
Object
M31 Andromeda Galaxy
Constellation
Andromeda
Distance
2.5 million light-years
Size
3.2o x 1o or 220,000 light-years
Apparent Magnitude
+3.44
Scope / Lens
Samyang 135 @f2.8
Mount
SW AZ-EQ6 GT + EQASCOM computer control & Cartes du Ciel
Guiding
Sky-Watcher EvoGuide 50ED
+ Starlight Xpress Lodestar X2 camera & PHD2 guiding
Camera
ZWO1600MM-Cool mono CMOS sensor
FOV 7.5o x 5.67o Resolution 5.81”/pix Max. Image Size 4,656 x 3,520 pix
The Cygnus constellation is rich in potential astrophotography targets and since the return of astronomical darkness I’ve bagged three objects from this area with my new widefield Samyang 135 rig: Cygnus Loop, Sadr Region & Crescent Nebula, and the Western Veil & Pickering’s Triangle. As the Cygnus season now draws to a close – in my case disappearing northwards behind my house – I was ready to snap one final Cygnus object using my main William Optics GT81 rig but then looked closer and realised using the Samyang 135 rig with careful framing there was another a more ambitious possibility.
The original object in question was SH2-119 AKA the Clamshell nebula, an emission nebula somewhat overlooked by photographers. Nevertheless, imaged in narrowband there’s plenty of structure to see throughout the nebulosity that makes up the two ‘shells’, whilst the bright magnitude +5 star 68 Cygni might be likened to the pearl at the centre, which would work well with the 81mm William Optics field-of-view. But deploying with care the much wider field-of-view of the Samyang 135 and it’s possible to include the North America and Pelican nebulae as well, just!
With some difficulty (weather) I finally managed to obtain 13-hours integration time over 6-nights, which has resulted in a pleasing SHO image (see main image at the top of the page – below is a dynamic version processed using PI PixelMath), once again demonstrating the capacity of this small but powerful lens. Personally, I find bringing all three objects together within a much larger field-of-view creates greater context, resulting in a more interesting image overall – in football parlance you might call it a hat-trick of nebulae!
IMAGING DETAILS
Objects
North America Nebula (NGC7000) + Pelican Nebula (IC5070 & IC5067) + Clamshell Nebula (SH2-119)
Constellation
Cygnus
Distance
approx. 2,600 light-years
Size
3.0o
Apparent Magnitude
approx. +4 to 8
Scope / Lens
Samyang 135 @f2.8
Mount
SW AZ-EQ6 GT + EQASCOM computer control & Cartes du Ciel
Guiding
Sky-Watcher EvoGuide 50ED
+ Starlight Xpress Lodestar X2 camera & PHD2 guiding
Camera
ZWO1600MM-Cool mono CMOS sensor
FOV 7.5o x 5.67o Resolution 5.81”/pix Max. Image Size 4,656 x 3,520 pix
It’s been nearly two years since acquiring my Samyang 135 lens but since then it’s unfortunately only had limited use in combination with my modded 550D DSLR. Whilst impressed with the results from this set-up, my main objective has always been to combine it with my ASI1600 mono camera for some serious widefield astrophotography but as that was being used with my William Optics refractor it just didn’t happen, until now. After upgrading to a ASI294MM Pro camera in May, at last I was finally able spend the early part of this summer working on a new Samyang 135 + ASI1600 rig and now that astronomical darkness is (just) back I recently managed to catch a few photons with this new set-up of the large SNR Cygnus Loop.
I originally purchased a x2-ring Astrokraken 3D-printed clamping system for the lens + DSLR combination from Philippe in France but since then he’s tweaked the design. In particular x3 built-in M4 nuts have been incorporated on either side of each of the two main lens clamping rings, for the purpose of attaching ancillary equipment, which for me has been a game changer. I therefore bought a new x3-ring Astrokraken bracket, with the said bolt holes, around which to build my new rig:
The two main clamping rings that hold the lens have a shoe immediately above the lens, to which I’ve fitted a Sky-Watcher EvoGuide 50ED guidescope (not yet working), with the rear third ring holding the ASI1600 mono camera & EFW.
I swapped the Canon lens bayonet adapter for a bespoke M42 screw adapter, in order to ensure a more secure attachment, thus reducing any potential lens-camera movement at this critical point of the image train.
I’m continuing to use the excellent Astrokraken micro-focuser, which consists of a ring that clamps onto to the lens’ focus ring, with two small bolts above that make contact with either side of the guidescope shoe, so that when turned the focus ring can be adjusted either way to obtain focus, which is then locked when completed. So far I’ve found the micro-focuser to work very well with this lens, assisted by the addition of an Astrokraken Bahtinov mask which is inserted into the front of the lens casing.
Using this lens with the ZWO ASI1600MM-Cool camera and EFW, the backfocus guideline is 44mm, which I was able to achieve by adding an Altair T2 variable locking extension ring set to 17.5mm = 44mm minus 26.5 (camera + EFW).
With my Chroma filters now being used with the new ASI294MM Pro camera, I purchased another ZWO 31mm x8 EFW and brought my ZWO 31mm filters out of retirement.
Finally, using the new M4 nut holes I’ve added a Baader SkysurferIII RDF on the left-hand side of the Astrokraken bracket system to help with sky navigation and framing.
After bolting the Astrokraken with the lens, camera and said components to a Losmandy plate it makes a very nice compact rig, that is easy to handle and store. Notwithstanding, as they say – the proof of the pudding is in the eating: SEE top-of-the page for original image & below for 50% crop.
Whilst the recent heatwave produced clear skies, it was far from ideal here for astronomy and was further hampered by a full moon. However, with only just over two hours integration time and a few Dark calibration files, I’m still impressed with the outcome of this quite amazing lens. It is very pleasing to capture the entire Cygnus Loop comfortably sitting within the lens’ FOV – for information on this FOV and comparisons go to this previous WTSM blog HERE. For me context is important with astrophotography and in this regard the astronomical perspective this lens produces is outstanding, no wonder it is so popular. I just love working with this FOV and can’t wait for better conditions for greater integration time and more widefield targets to point this wicked little lens at.
IMAGING DETAILS
Object
Cygnus Loop
Constellation
Cygnus
Distance
2,400 light-years
Size
3.0o
Apparent Magnitude
+7.0
Scope / Lens
Samyang 135 @f2.8
Mount
SW AZ-EQ6 GT + EQASCOM computer control & Cartes du Ciel
Guiding – Not Used
Sky-Watcher EvoGuide 50ED
+ Starlight Xpress Lodestar X2 camera & PHD2 guiding
Camera
ZWO1600MM-Cool mono CMOS sensor
FOV 7.5o x 5.67o Resolution 5.81”/pix Max. Image Size 4,656 x 3,520 pix
It’s been over 5-years since I acquired the revolutionary ZWO ASI1600MM-Cool camera, which went on to completely transform my astrophotography. In the real world such iconic products come along only very occasionally, such as the Mini, Nokia mobile phone, computer mouse & GUI, iPod & Dyson Vacuum cleaner, all have characteristics which redefine a product and went on to literally change the world. Although by comparison astrophotography is something of a niche hobby the development of the ZWO1600 camera has had a similar impact, so much so that it too has redefined the way forwards for astrophotography cameras.
With the move from film to digital, CCD-sensors became the definitive mono camera of choice for “serious” astrophotography but the arrival of the ZWO ASI600MM-Cool camera in 2016 was set to change all that, so what made it so important? At the heart of this transformation is the CMOS sensor. Common to most conventional digital cameras CMOS technology is well proven but for the purist the CCD maintained the edge in astrophotography, until the ZWO1600 and eventually other similar cameras like it came along (see box below for CCD v CMOS background information). Perhaps three features underpin the success of CMOS-based astrophotography cameras, of which the ZWO1600 is considered the first and most successful to-date.
Very low read noise and good well depth both contribute to much shorter exposure times than CCD cameras require, which for the amateur with limited time and light pollution to tackle was a game changer. Moreover, because CMOS-based sensors were already being made for the mass market they cost much less than CCD sensors and therefore so were the cameras, making them a viable choice based on their technology and cost.
It was fortunate that when I was looking to move from DSLR to a mono astrophotography camera at the end of 2016 I was able to purchase a ZWO ASI1600-Cool, just 7-months after its initial release (See First Light for more information). Although an experienced photographer, including +30-years of underwater photography, the difference between what might be called conventional photography and mono astrophotography cameras was like night and day, which took some time to understand and eventually pick-up. Notwithstanding the learning curve, it’s been worth the effort as the impact on my images has been profound. During the intervening period since I brought my camera only a few minor developments have been made (now sold as the Pro version), until in September 2020 a much-anticipated successor to the ZWO ASI1600MM-Cool camera was finally released, the ZWO ASI294MM Pro (see images below).
I waited until now to purchase this camera because at the time I just didn’t need it (the ZWO1600 served my needs very well and still does) and I also wanted to see how the new camera worked out with early users. Apart from a few niggles, the overwhelming response has been very positive and as I now have another use for my ZWO1600, I finally purchased a ZWO ASI294MM Pro and obtained First Light in early April.
CAMERA
ZWO ASI1600MM-Cool*
ZWO ASI294MM Pro
Sensor – CMOS 4/3”
Sony IMX492
Panasonic MN34230ALJ
Sensor Size + Diagonal
19 x 13mm 23.1mm
18 x 13mm 21.9mm
Pixel Size
4.63nm (Bin2) or 2.135nm (Bin1)
3.80nm
Resolution
4144 x 2822 px Bin1 8288 x 5644 px Bin2
4656 x 3520 px
ADC
14bit
12bit
Full Well Capacity
66,000
20,000
QE Peak
90%
60%
Readout Noise
1.2 -7.3e
1.2 – 3.6e
Sensor Illumination
Back Lit
Front Lit
Cooling
-35C
-40C
Data Buffer
No
Yes
File Size
22MB (bin1) 85MB (bin2)
32MB
Back Focus
6.5 / 17.5mm
6.5 / 17.5mm
Before commenting on my albeit limited experience of this new camera so far, it’s worth comparing the main features of each camera that are summarised in the accompanying table. Not surprisingly there are many similarities, which make for an easy swap of the two cameras when using the same optical train but there are also some important new developments which make this camera a real step-up from the ZWO1600.:
Greater quantum efficiency (QE) means that 90% of the total light that reaches the sensor is converted into data, compared with 60% with the ASI1600. Thereby for the same integration time the ASI294MM Pro will gather 50% more light than the ASI1600 or put another way in half the time!
Increased full well capacity from 20ke to 66ke means longer exposures without saturation.
Higher 14bit ADC provides more dynamic range of two more stops compared with the ZWO1600.
A choice of Bin1 or Bin2 changes the equivalent pixel size from the basic 4.63nm (Bin2) to 2.315nm.
Sony’s back-illuminated CMOS image sensor (see below) improves sensitivity and noise reduction but perhaps more importantly stops microlens diffraction artifacts of bright stars which has been one of the biggest bugbears of the ZWO1600, particularly when using ZWO’s own filters.
Physically the new camera is identical to the ZWO1600 and changing the cameras over is essentially just a swap, in my case using the same setup of a William Optics GT81 & 0.80 focal reducer + ZWO x8 EFW & 31mm Chroma Filters + just a minor focus adjustment. Using the excellent Astro Photography Tool (APT) for image capture I did encounter some issues setting up the new camera but after some liaison with other users and the APT developer Ivo it was sorted quickly and ready to run!
Unfortunately, by late March / early April most of winter’s exciting objects have moved on but I did manage to quickly grab 60 minutes of the Rosette nebula (HOO + dark calibration only, below) and later the M44 Beehive open cluster (top of the page: 40mins 10x 60secs LRGB + fully calibrated ), the results of which were good clean images that did not disappoint and hold great promise when better objects become available again.
Because of the subsequent seasonal change of clocks and diminishing presence of astronomical darkness as we approach the summer solstice, I’ve been unable to continue using the ZWO ASI294MM for now but at least I know it all works well. As has become normal in recent years, I’m therefore taking a short break from imaging, though have a plan to repurpose the ZWO1600 which I’m working on but that’s for another day – Watch this Space!
First light with the ZWO ASI294MM Pro – 6 x 5mins Ha & OIII + dark calibration
The dark silhouette of the Horsehead Nebula against the surrounding rich HII-region, is one of astronomy’s most iconic images. Surprising then that I’ve never imaged this object in broadband wavelengths before with my mono camera: the first image was in February 2015 using a modded Canon 55OD camera, then in January 2019 with the ASI1600MM + narrowband filters and most recently in January 2021 using a widefield Samyang 135/f2 rig and modded Canon DSLR. Therefore, somewhat belatedly and with the benefit of unusually long spells of clear skies, this February I set out to rectify this omission from my astrophotography repertoire.
Whilst B33 the Horsehead Nebula gets most of the attention, this large HII-region contains many other exciting objects which a broadband image shows off well, aided here by additional Ha-data (see below) to enhance the breath-taking detail that abounds across the area. Situated in close proximity to Orion’s Belt, controlling bright stars such as Alnitak is key to achieving a good image and in this regard my new Chroma filters proved helpful. The final image shows a good rendition of the Horsehead at the centre, framed against the striking red curtain of Ha-rich nebulosity and two other interesting objects nearby.
Within the large molecular cloud, located just below and to the left of the Horsehead, is the emission and reflection nebula NGC 2023. Discovered by William Herschel in 1785, at 10 x 10 arcminutes it is one of the largest reflection nebulas, illuminated at its centre by the Herbig Ae/Be starHD 37903 (a pre-main-sequence star). Then, just to the left (north) of NGC 2023 is the dramatic NGC 2024 Flame Nebula, an emission nebula energised by the adjacent and very bright Alnitak star and a cluster of young stars within. I was keen to preserve its more natural colour during processing and am very satisfied with the outcome, which captures its relationship with Alnitak to best effect.
Overall, I’m very happy with the resulting HaLRGB broadband image of the Horsehead and its neighbours. Armed with better filters, guiding, integration and processing I feel the long wait was perhaps worth it, so that this image does justice to one of winter’s most spectacular views. As the Horsehead now moves out-of-sight over the western horizon for another year, I trust my next image of these objects will be sooner than it took this time!
IMAGING DETAILS
Object
B33 Horsehead Nebula + NGC 2023 & Flame Nebula
Constellation
Orion
Distance
1,375 light-years
Size
Horsehead only approx..8.0’ X 6.5’
Apparent Magnitude
Varies, Horsehead +6.8
Scope
William Optics GT81 + Focal Reducer FL 382mm f4.72
Mount
SW AZ-EQ6 GT + EQASCOM computer control & Cartes du Ciel
Guiding
William Optics 50mm guide scope
+ Starlight Xpress Lodestar X2 camera & PHD2 guiding
Camera
ZWO1600MM-Cool mono CMOS sensor
FOV 2.65o x 2.0o Resolution 2.05”/pix Max. image size 4,656 x 3,520 pix