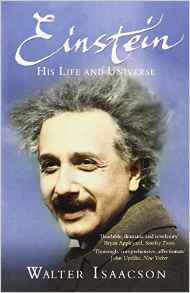
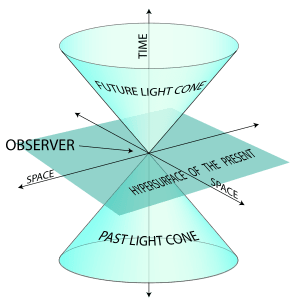
I spent the first half of this year reading Walter Isaacson’s biography of Albert Einstein, which apart from providing a fascinating insight into the man and his work, whetted my appetite to understand better the science. Following previous success studying astronomy courses online, I set out to find a suitable programme to achieve this goal. As a result I enrolled for Understanding Einstein: the Special Theory of Relativity run by Professor Larry Lagerstrom of Stanford University, USA, which after two months I have just completed.
The course is a good mix of qualitative and quantitative information, which at times has been quite challenging but nonetheless proved very worthwhile. The lecturer is very clear and thorough, an essential quality when dealing with this difficult and often bewildering subject. Einstein’s paper On the Electrodynamics of Moving Bodies outlines the Special Theory and was just one of four published at about the same time in 1905 (“The Miracle Year”) which included: Brownian motion, Mass-energy equivalence (E=Mc2) and The Photoelectric Effect, the latter of which won him the Noble Prize. At the end I now feel I understand the basics of Einstein’s ground breaking science properly, which apart from being interesting provides valuable insight and understanding of the Universe and related issues of space and time.
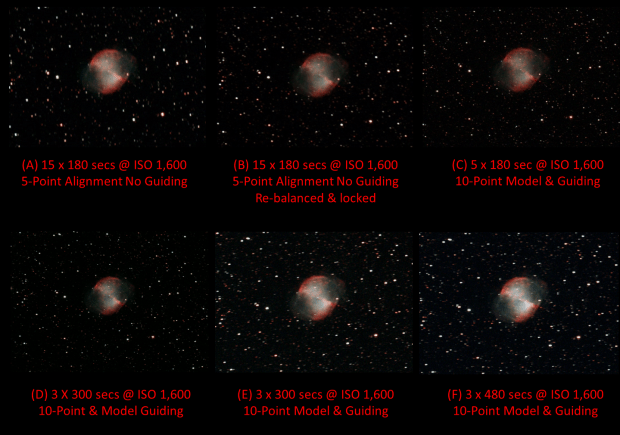
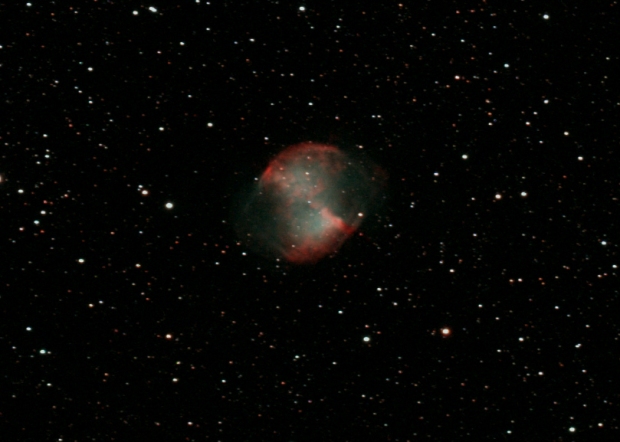
During this period I have also been thinking about how to improve my astrophotography and the way forwards. I’ll be on the learning curve for years to come and accept that there’s much I can still improve on using current equipment and processes but after more than 2-years astroimaging, mostly with a DSLR camera, I feel I have reached something of a crossroads and need to change tack in order to achieve more meaningful advances once again. Inevitably this is likely to mean new equipment and most likely a move to LRGB / Narrowband format. In the interim, whilst I consider the options, I have also been researching suitable capture / sequencing software, post-processing techniques and programmes. I am concerned that this will result in another level of complexity but I think it has to be done in order to progress – watch this space.
Continuing a trend that’s been apparent for the past year, clear nights have been something of a rarity since mid-September; this is a concern if I am to pursue astrophotography to the next level. However, high pressure was unusually dominant over Fairvale Observatory during the last days of November and cold, clear skies have provided good conditions for astronomy at last.
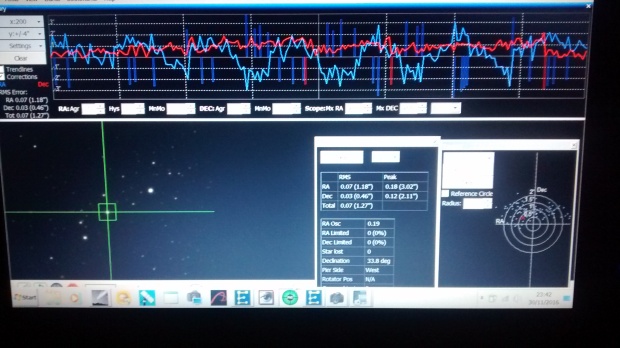
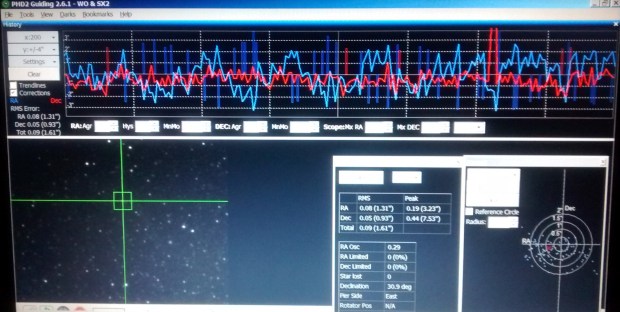
Getting better – PHD2 screen 30th November 2016: DEC is good but room for improvement with the RA settings. The impact on tracking and image quality is noticeable.
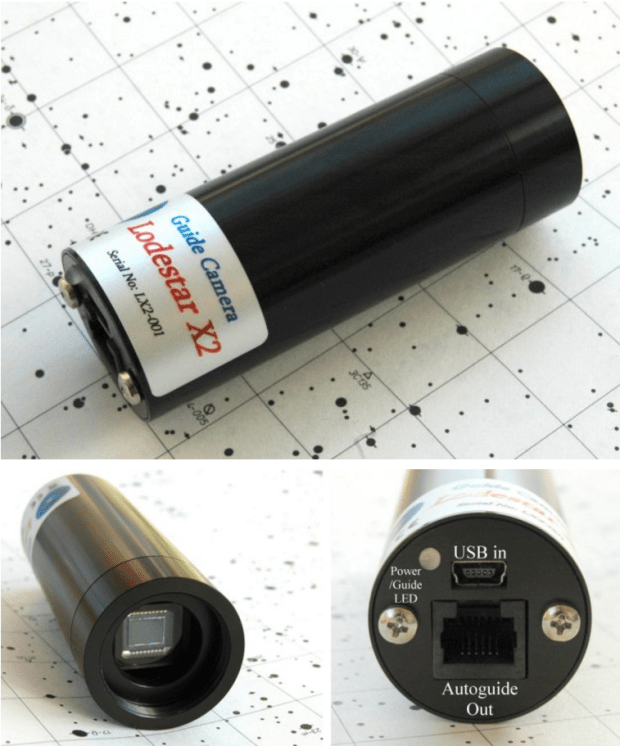
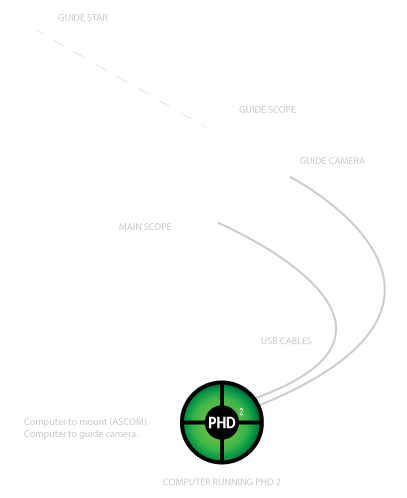
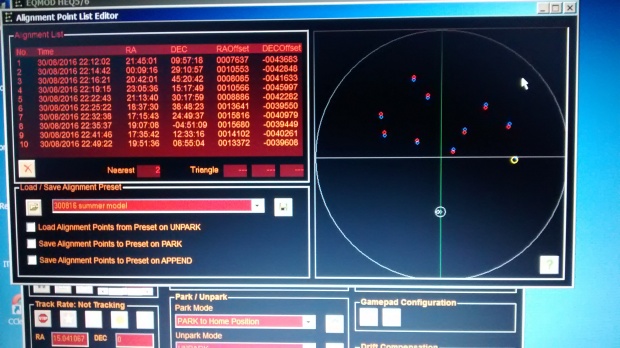
Whilst I have certainly not fully mastered guiding I am now routinely using PHD2. This in itself has probably been the major breakthrough this year, which with the aforementioned clear skies I wanted to take full advantage of. Hidden within PHD2 I have also discovered and am now starting to experiment with the on-screen drift align routine, with reasonable results; using the gamepad for mount control and a new wireless link with my tablet computer, I can also make focus and alignment adjustments at the mount without returning to the computer each time.
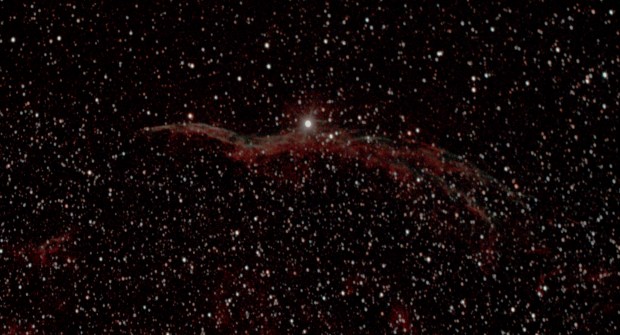
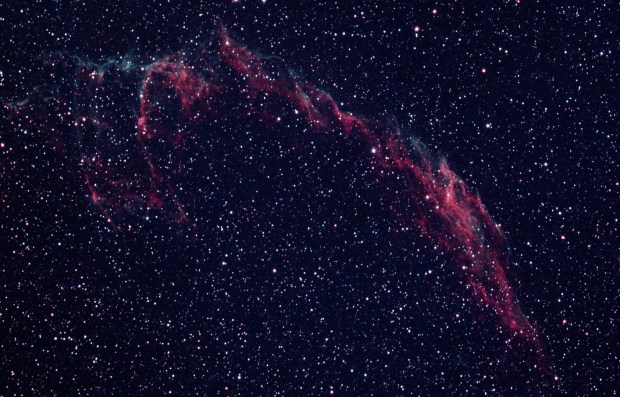
As a result I have dispersed with the SynScan handset for alignment and can now completely set-up and control imaging with the computer and tablet; this is nothing short of a revolution which I am hopeful will greatly increase set-up time as well as improving control and tracking accuracy – yipee! Even with average guiding results I am now achieving good exposures of 5-minutes or more and therefore decided to put this success to work and re-image some winter wonders over three, yes three, consecutive nights at the end of November.
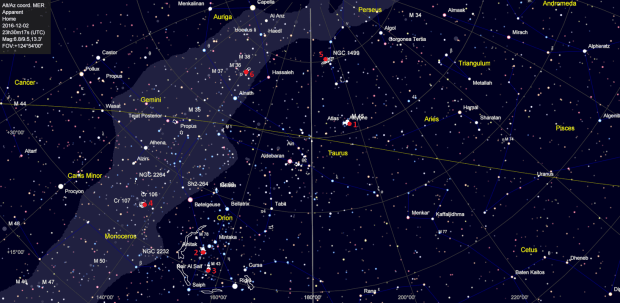
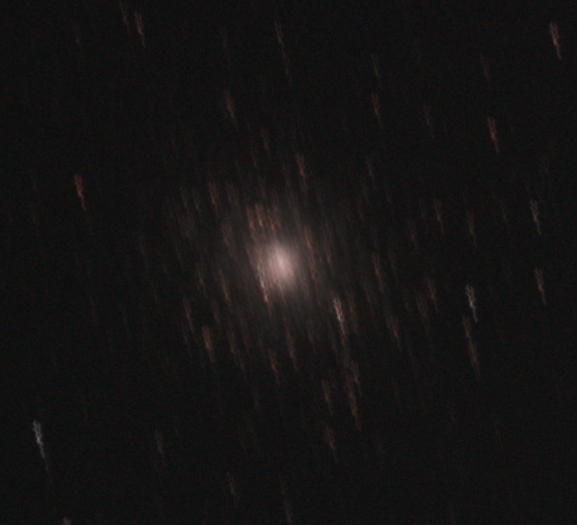
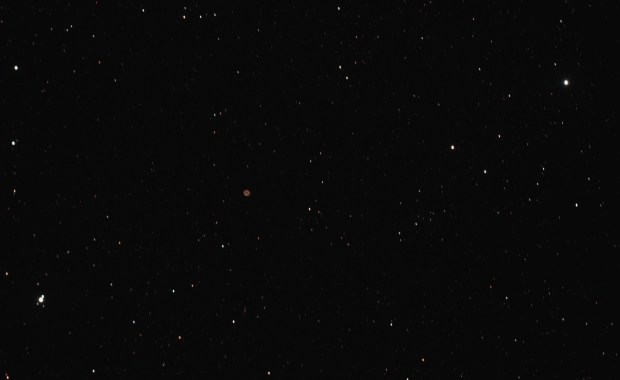
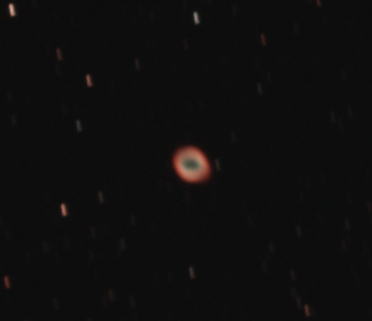
Imaging targets between 28th & 30th of November 2016 – for descriptions & previous images taken of these objects click on the following list of names: (1) M45 Pleiades (2) Barnard 33 The Horsehead Nebula & NGC 2024 Flame Nebula (3) M42 Orion Nebula (4) NGC 2244 Rosette Nebula (5) NGC 1499 California Nebula (6) IC 405 Flaming Star Nebula
The night sky at this time of the year contains many of my favourite objects, but surprisingly I had not imaged some of the chosen targets for more than a year or two and it was both enjoyable and pleasing to reacquaint myself again. With a new perspective gained from this exercise, the progress I have made with equipment and techniques is more apparent. Notwithstanding, it’s time to move on – everything’s relative.
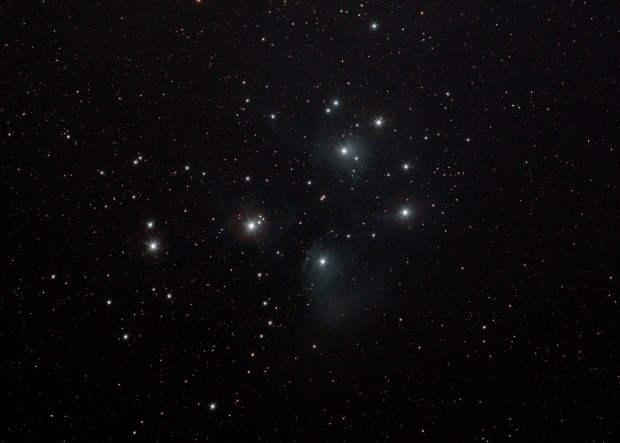
M45 Pleiades, Taurus constellation: 12 x 300 sec @ ISO 800 | 28th November 2016
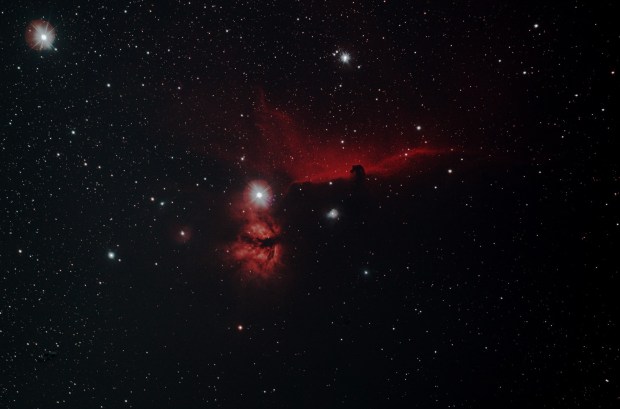
NGC 2014 Flame Nebula & Barnard 33 Horsehead Nebula, Orion constellation: 15 x 300 sec @ ISO 800 | 28th November 2016
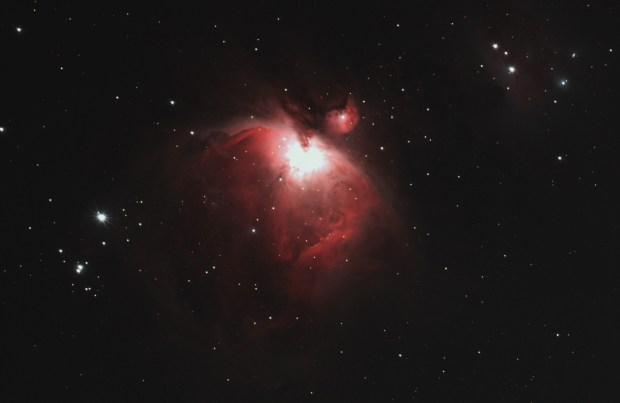
M42 Orion Nebula & M43 De Mairan’s Nebula, Orion constellation: 2 x 300 sec @ ISO 800 | 28th November 2016
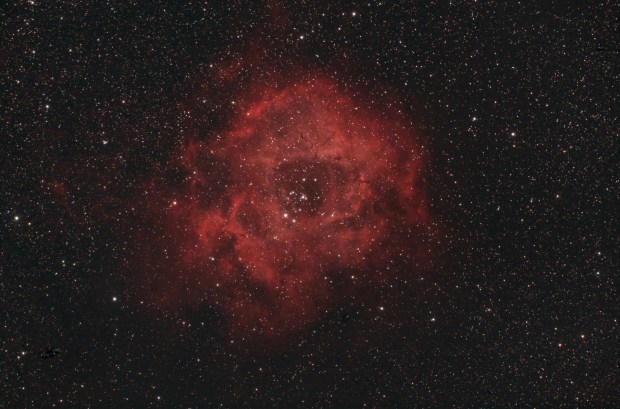
NGC 2244 Rosette Nebula, Perseus arm of Milky Way, Monoceros region: 21 x 300 sec @ ISO 800 | 29th November 2016
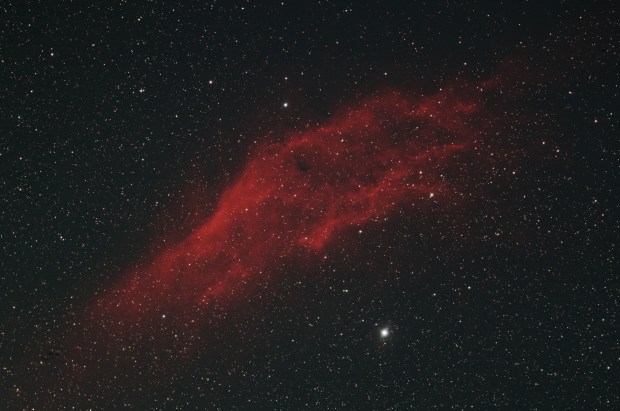
California Nebula, Perseus constellation: 12 x 300 sec @ ISO 800 | 30th November 2016
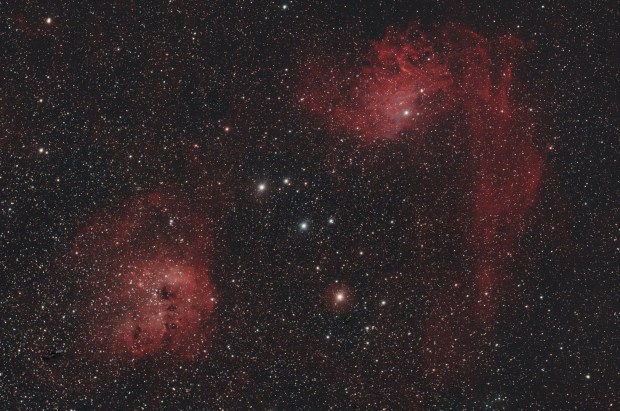
IC 405 & 410 nebulae: 15 x 300 @ ISO 800 | 30th November 2016
Notes: all images taken using a William Optics GT81 refractor telescope + PHD2 guiding + modded Canon 550D DSLR & x0.80 field flattner @ ISO 800 with full darks + bias + flats calibration and processed in Deep Sky Stacker & Photoshop CS2


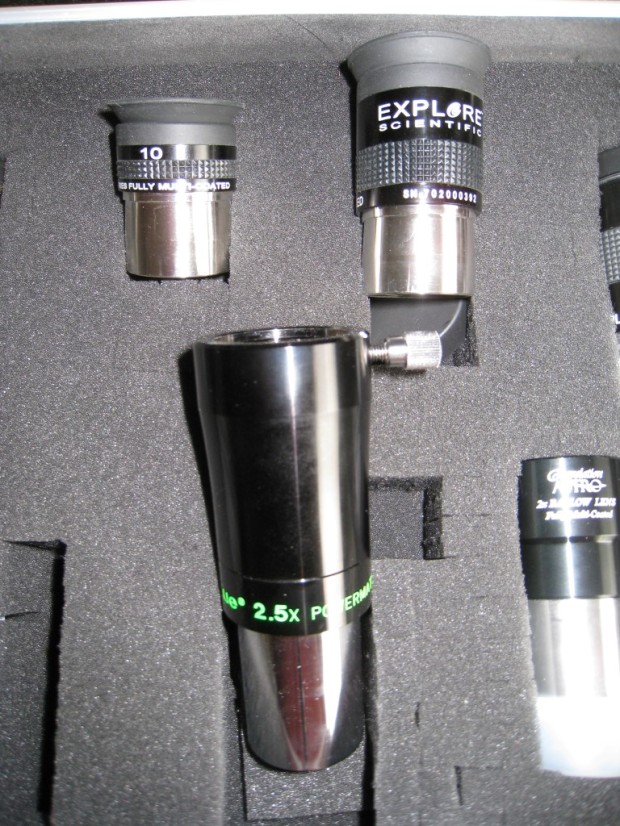
 For a while I have been thinking about getting a larger telescope, in order to get to those faint fuzzies that are beyond the capabilities of the otherwise excellent William Optics GT81. As usual the choice is a minefield of possibilities, each with inevitable imaging pros and cons! I started thinking about a Ritchey Chrétien or Schmidt Cassegrain but I have really appreciated the qualities of the aforementioned WO GT81 and am now erring towards a larger refractor. However, after further consideration I am now considering a change of priorities.
 Following Nik’s talk and listening to others, the penny that has now dropped is that for the moment it’s not the telescope but the camera that needs changing. After careful thought it’s apparent that I already have very good set-up, yes a bigger aperture would be good for those smaller fuzzies but the 81mm apochromatic refractor I already own is an outstanding telescope that still has much potential when combined with the AZ-EQ6 mount and now autoguiding.