2014 has been my first full year of astronomy and I thought it would be useful (for me) to recap, thereby hopefully providing some encouragement and momentum for 2015. It’s been a good year which I have enjoyed but it only gets a little easier, slowly, and I can see many challenges ahead.

JANUARY TO MARCH

At the start of the year I was still getting to grips with my original basic equipment, purchased in 2013 as an introduction to astronomy to see if I liked it: EQ3-2 mount, Skywatcher 150PL telescope and two basic Plössl eyepieces and Barlow. Though good, the shortcomings of the equipment quickly became apparent even for modest viewing tasks, so I soon made some important additions. In no particular order these were: RA and DEC motor drives, a Telrad finder and two better quality, wide-angle eyepieces. All of these items made a noticeable improvement to my astronomy and eventually my growing interest in astrophotography.
As a result, at the start of the New Year I decided to purchase a Canon 700D DSLR camera, which has since opened up a whole new world, literally. I have considerable SLR experience and had been using a compact digital camera for some years but the need to understand and use the technology embodied in a DSLR for astrophotography is, as they say, a whole new ball game.
At this stage, my approach to astronomy was to try and learn the basics first by using basic equipment, thereby understanding the nuts and bolts of astronomy before moving on to more technical processes and software driven equipment. Moreover, I hoped such an approach would provide a good, long-term foundation of knowledge to undertake more ambitious tasks one day; walk before you run.
Although a member of the Flamsteed Society, its location at Greenwich does not lend itself to regular, on-the-ground astronomy from which I might otherwise learn first-hand from other members. Unfortunately more local clubs are also absent, so the learning curve has been steep and mostly personal and hands-on, though I must recognise the extensive and generally excellent help gleaned from the internet and various astronomy blogs, noteworthy of which has been Stargazers Lounge. I have often been disappointed by some of the retailers who, in my experience don’t relate well to customers and / or provide clear, helpful guidance or adequate aftersales support. My interpretation is that they consist of persons who have probably started astronomy shops as an extension of what was previously a hobby and often lack the commercial and personal skills required for such a business. Thankfully there are exceptions and it is they who I shall return to with my business in the future, whenever possible.
| Date |
Object* |
Feature / Name |
| Feb |
Jupiter |
Afocal Images |
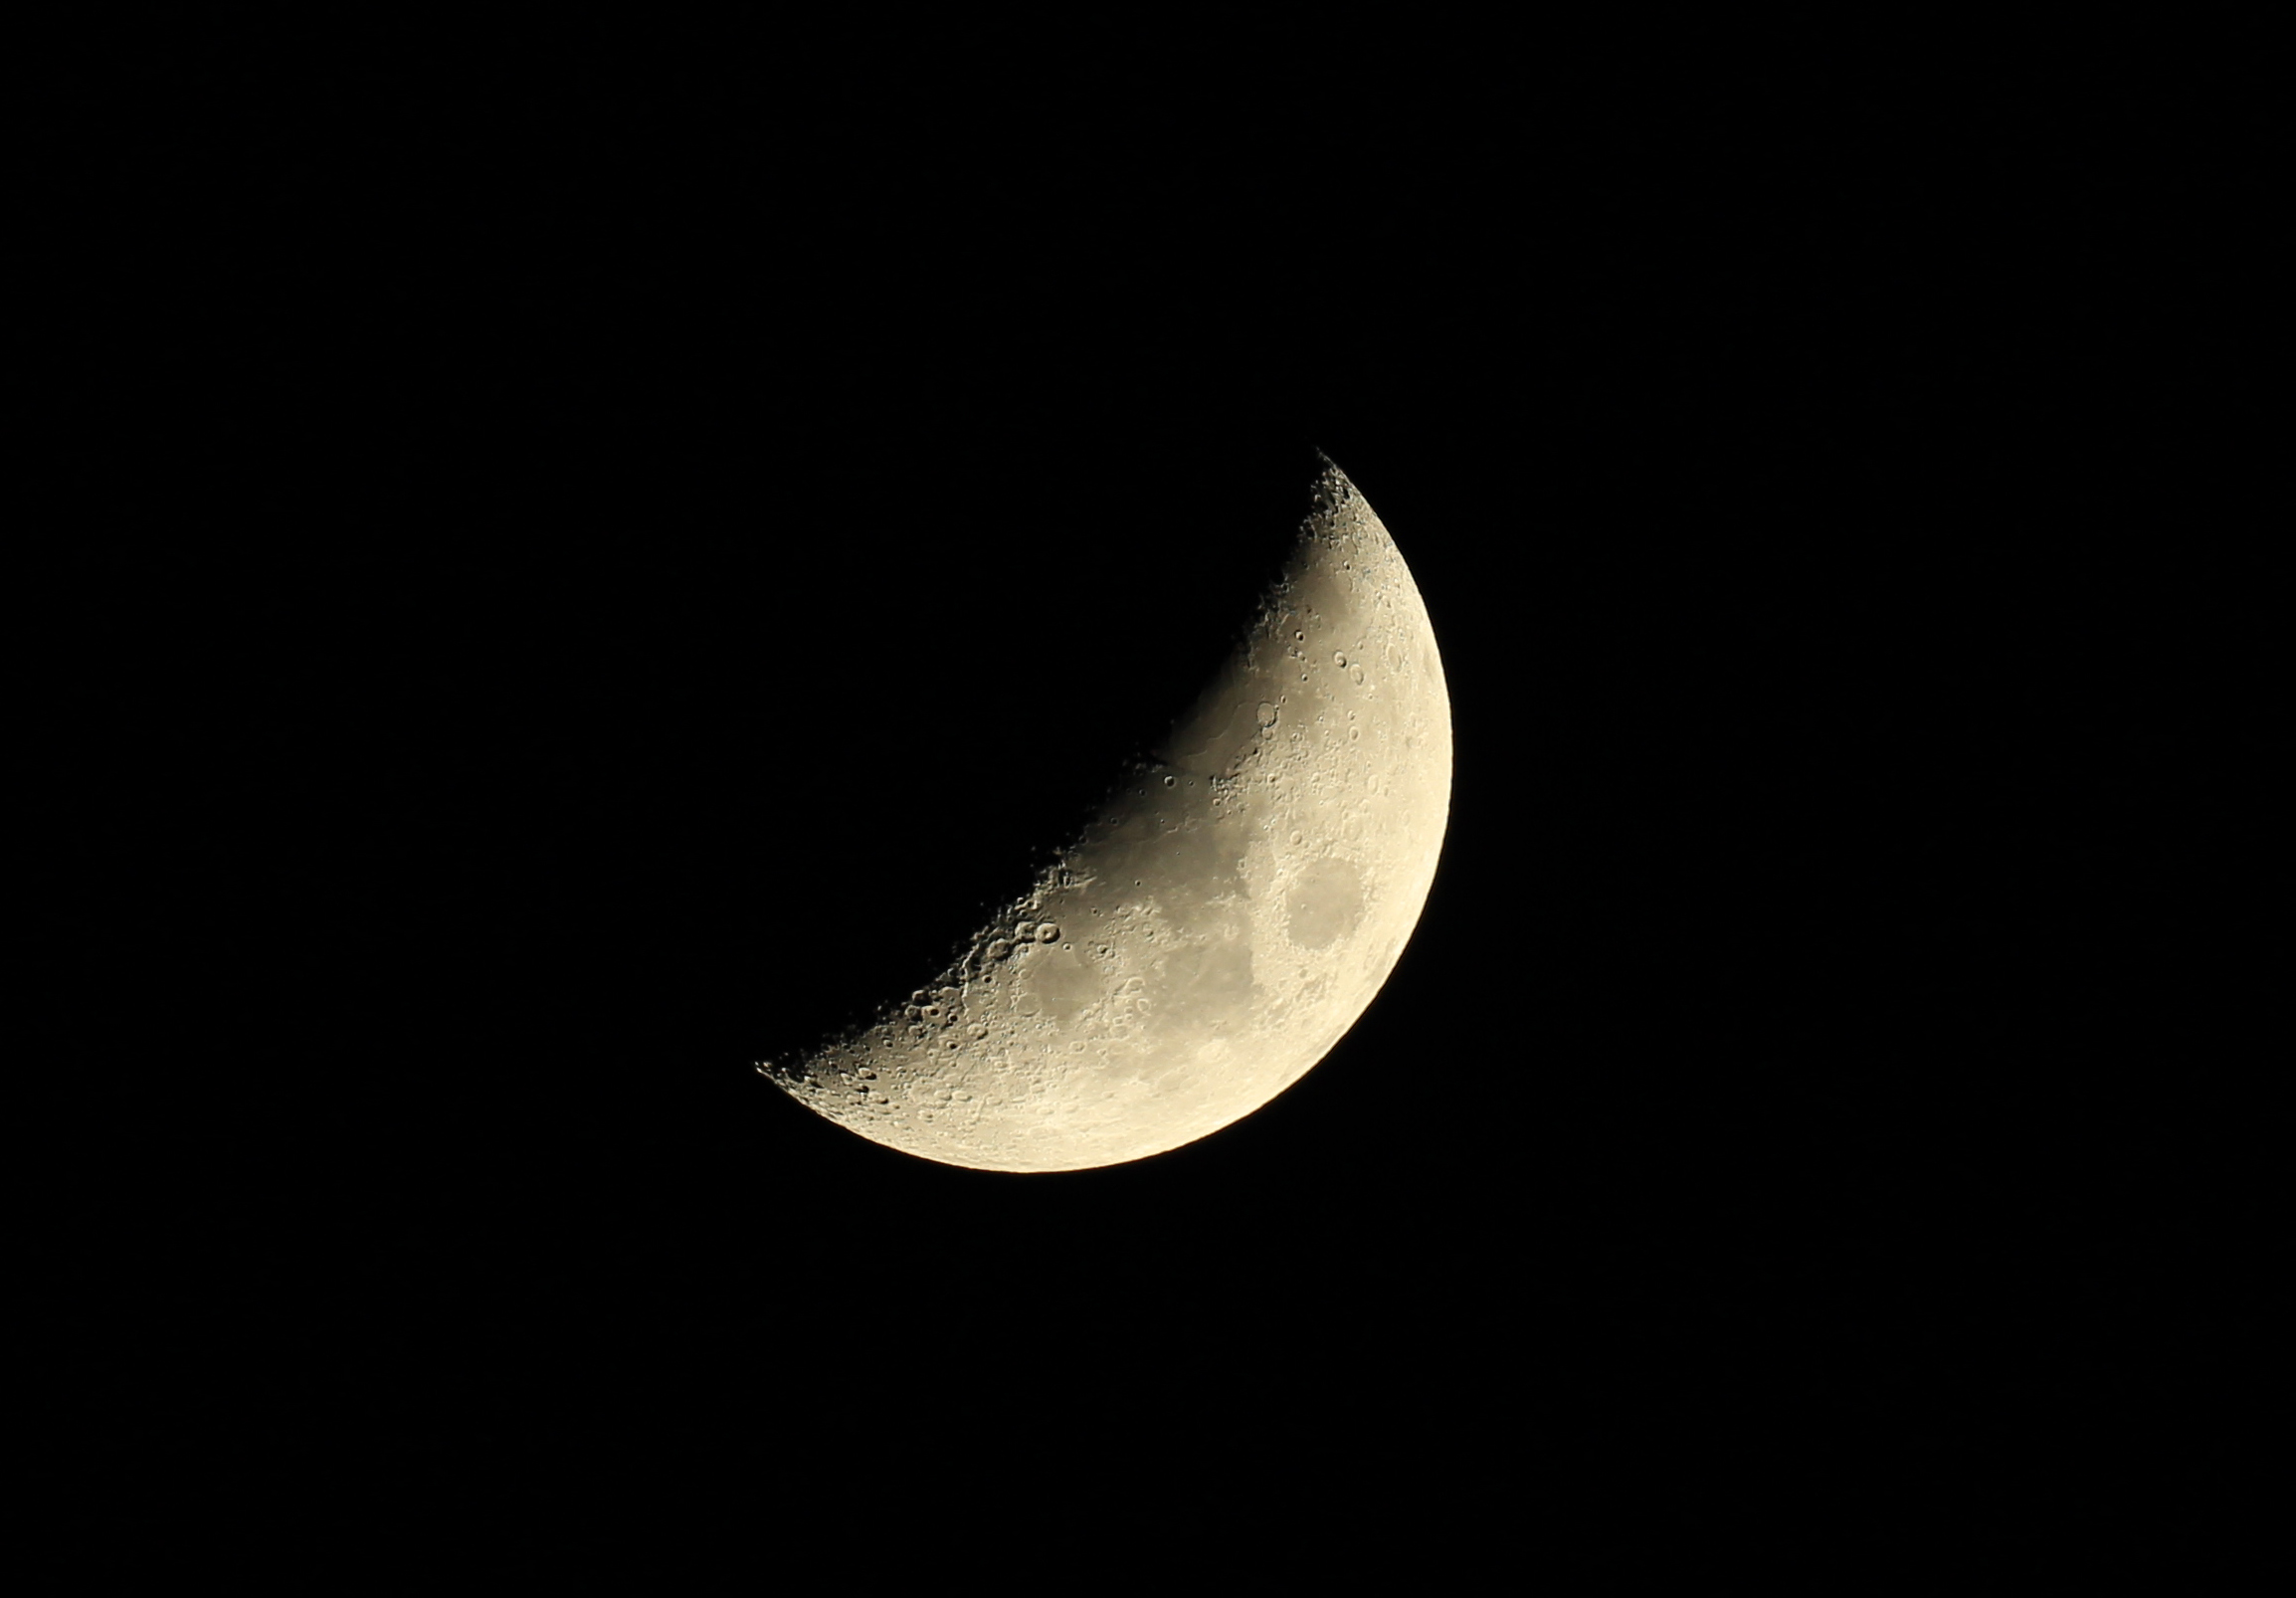
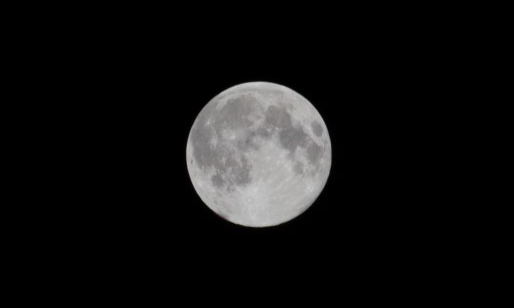
| Moon |
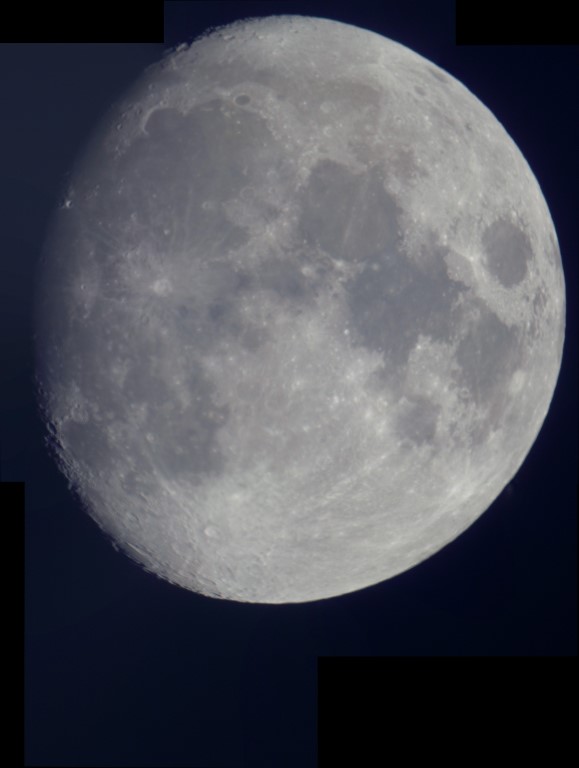
DSLR mosaic |
| Greta Orion Nebula |
Afocal Images |
*Record of photographic images taken in 2014
APRIL TO JUNE
By now I knew I wanted to pursue astronomy as a hobby and, in order to fast track my learning process and experience the subject at a higher level, I undertook a one week astronomy course at the private Tacande observatory in La Palma. The equipment there was outstanding and so was the night sky and guidance provided by the owner, Joan Genebriera. Afterwards I was hooked and my aspirations were sky high, literally.

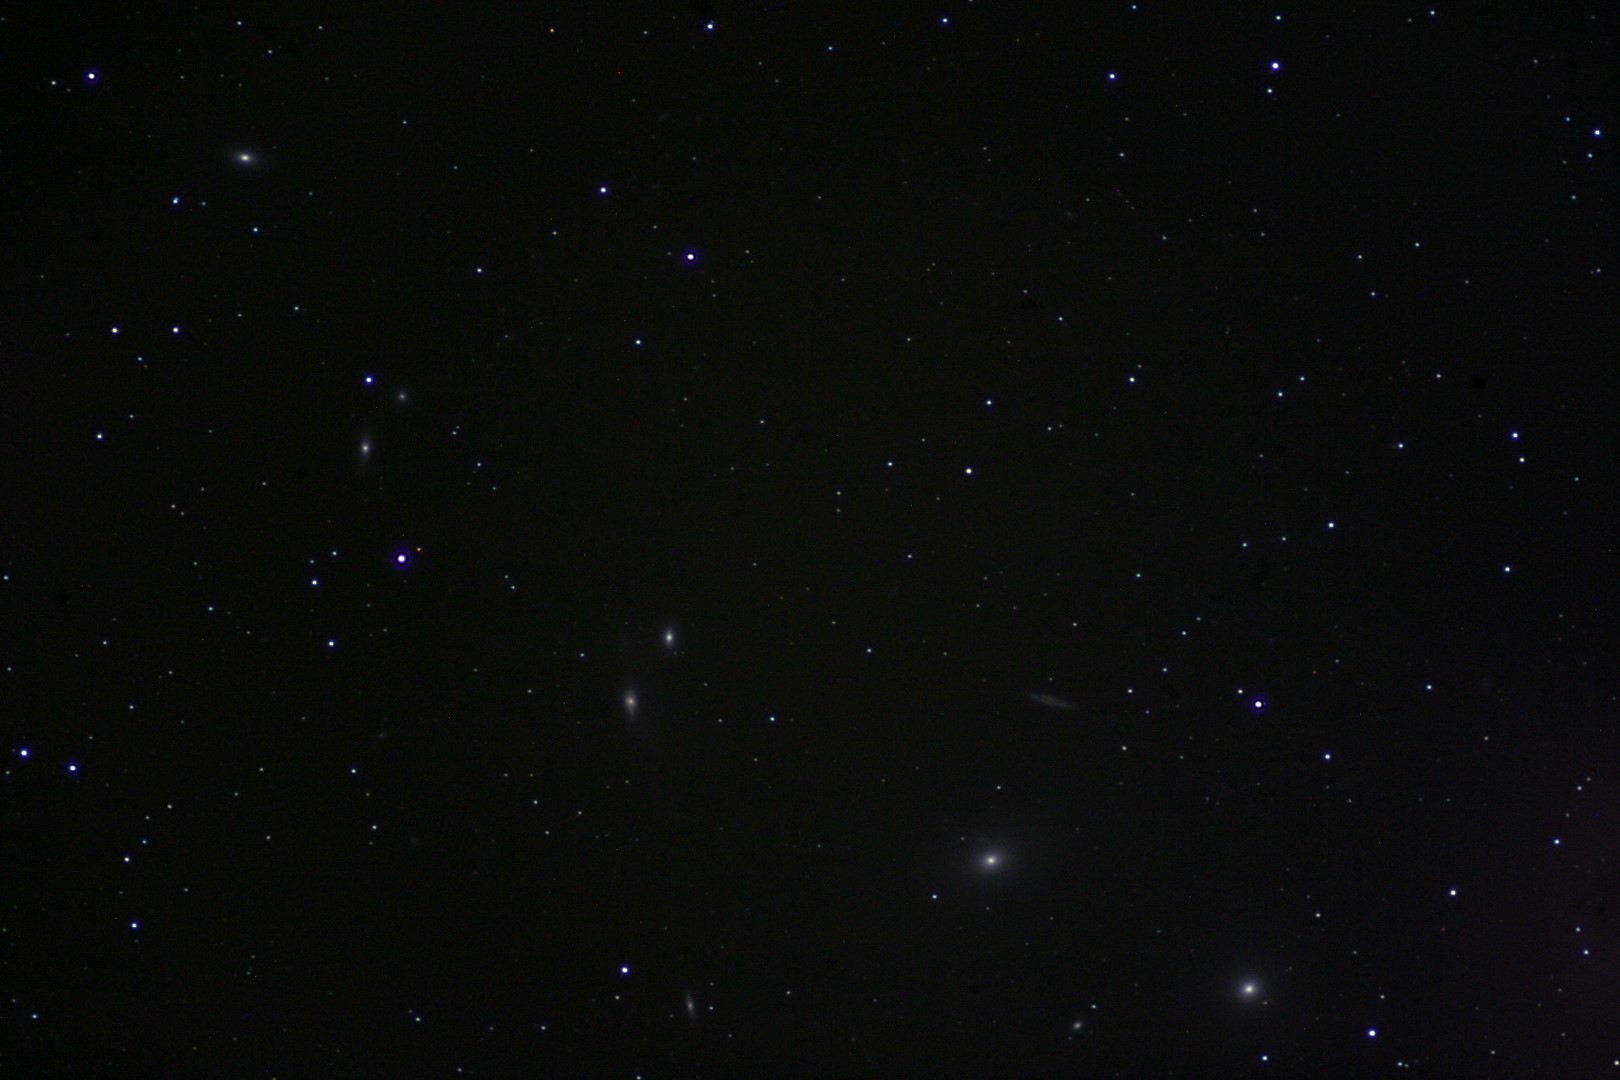
Virgo Group – Galaxy Supercluster| Canon 350D from Tacande Observatory, La Palma
Returning from La Palma brought me back down to Earth, however, undeterred I felt it was time to try my hand at webcam planetary imaging. On the face of it easy but, as usual, looks can be deceiving. Online advice indicated that it was possible to adapt and rig-up an old webcam for such purposes but my attempts to do so using a spare Logitech webcam only ended in misery. I therefore decided to bite-the-bullet and purchase a more suitable, off-the shelf one. The Holy Grail for entering webcam imaging is apparently the Philips Toucam but alas it is no longer made and finding one second-hand is very difficult. I therefore soon realised that it would be necessary to purchase a new webcam and, furthermore, it made sense to get one which was specifically made for astrophotography, the theory being it would work out-the-box. As a result I purchased the ZWO ASI 034 MC colour webcam but, despite my best efforts was unable to get a picture and decided to visit the retailer in person, determined to find out if it was me or the camera; as it turned out it was neither.
The first problem turned out to be the camera software SharpCap, which despite assurances, would not work with the camera. Next, for reasons I still don’t understand, the alternative FireCapture software would also not work until a more up-to-date version was downloaded. Notwithstanding, it also became evident that the camera would not work through a USB 3.0 port – though at the time this was not specified anywhere in the accompanying literature. Finally, with the camera plugged in to the USB 2.0 port and the up-to-date version of FireCapture, it worked! Getting to this point took me countless hours at home, a long trip to the retailer (who was very helpful) and then still some 2-hours to get it working. So much for working out-the box! This again seems to be a feature of astronomy.
From this and other experiences with equipment, software and manufacturers I have concluded that the world of astronomy is fraught with unnecessary problems often arising from just inadequate advice (see previous comment). It is assumed, by others: manufacturers, retailers or more technically minded astronomers, that the user will possess similar skills to make things work but, as many /most of us are newcomers this is, to say the least, an unhelpful assumption. I have therefore learned that the internet is your friend. Through the use of various online sites and blogs, other astronomers have given their very helpful and often not inconsiderable time and advice, for which I am eternally grateful.
Whilst this was all happening at the retailer, I took the time to review the camera I had purchased more closely and at the last moment decided to exchange it for the inevitably more expensive ZWO ASI 120 MC version, which unlike the 034 MC version can be used for autoguiding – I hoped futureproofing the purchase, time will tell. It is interesting to note that the current version of this camera (a) comes with different software and (b) has been upgraded to work with USB 3.0 – well why wouldn’t it in the first place, as most computers now use this specification? This suggests to me: did they really think about the camera’s design and operation properly at the beginning? However, following this breakthrough using the webcam for imaging was still to provide its own problems, which I am still grappling with.

SW 150PL x2 Barlow & ZWO ASI 120 MC
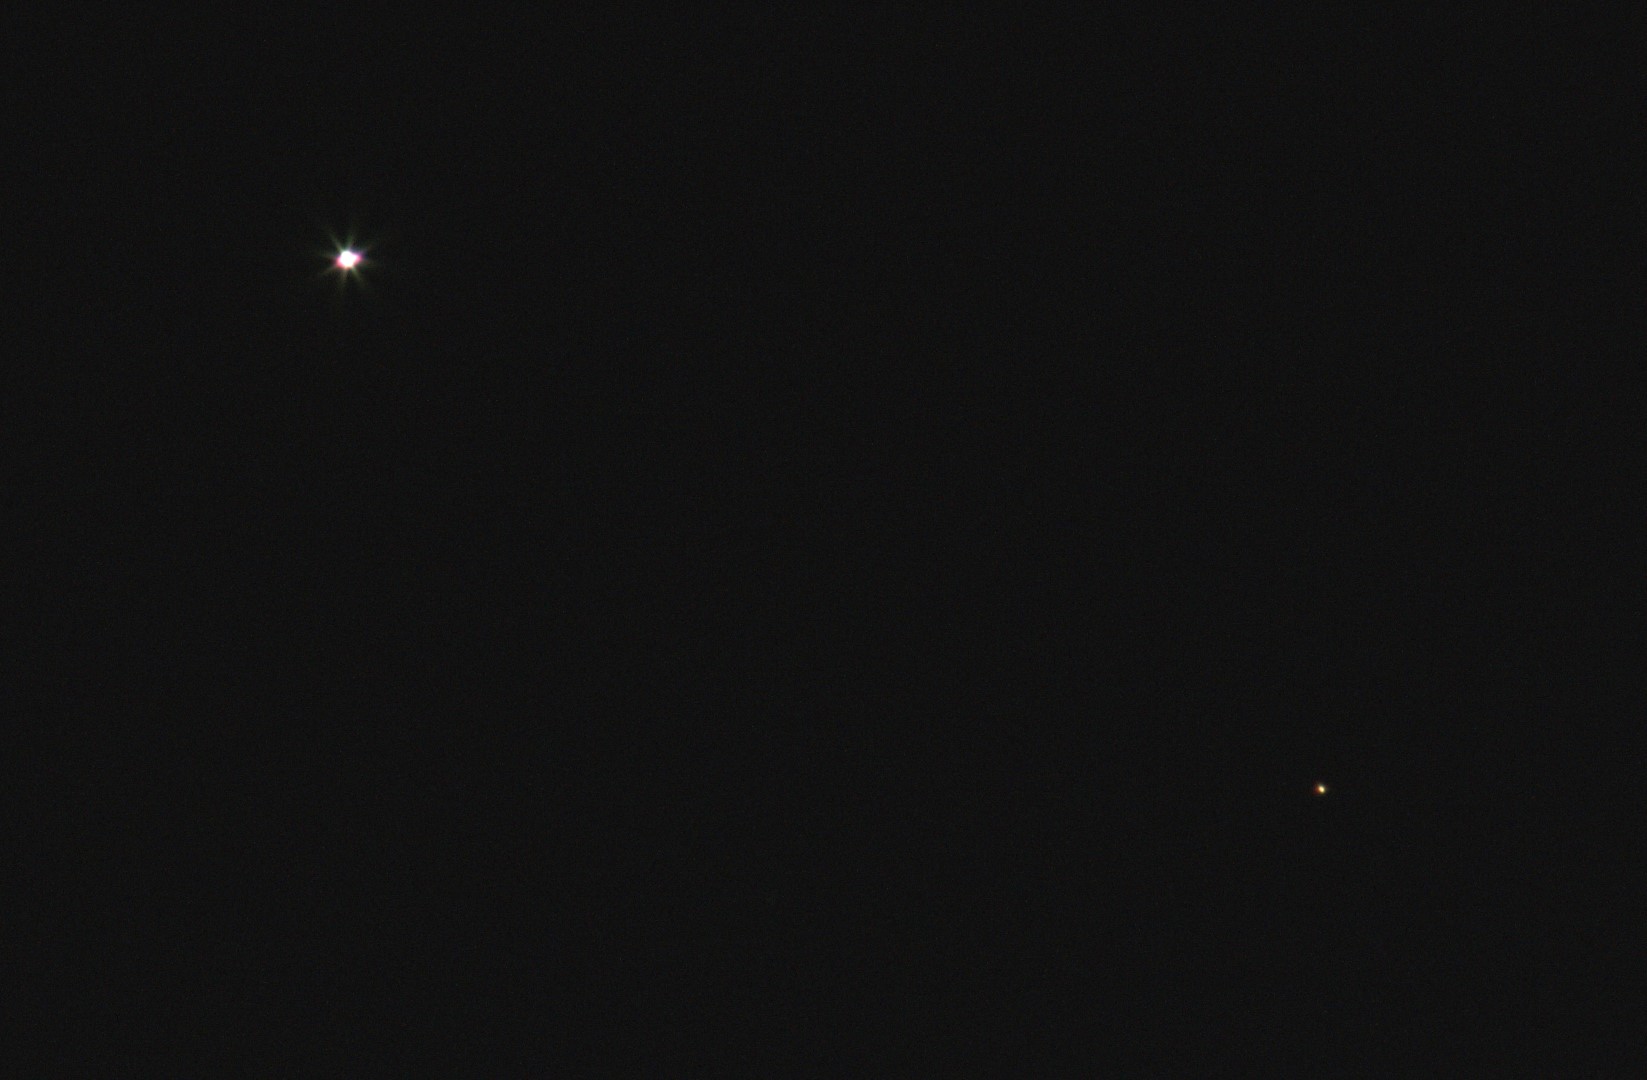
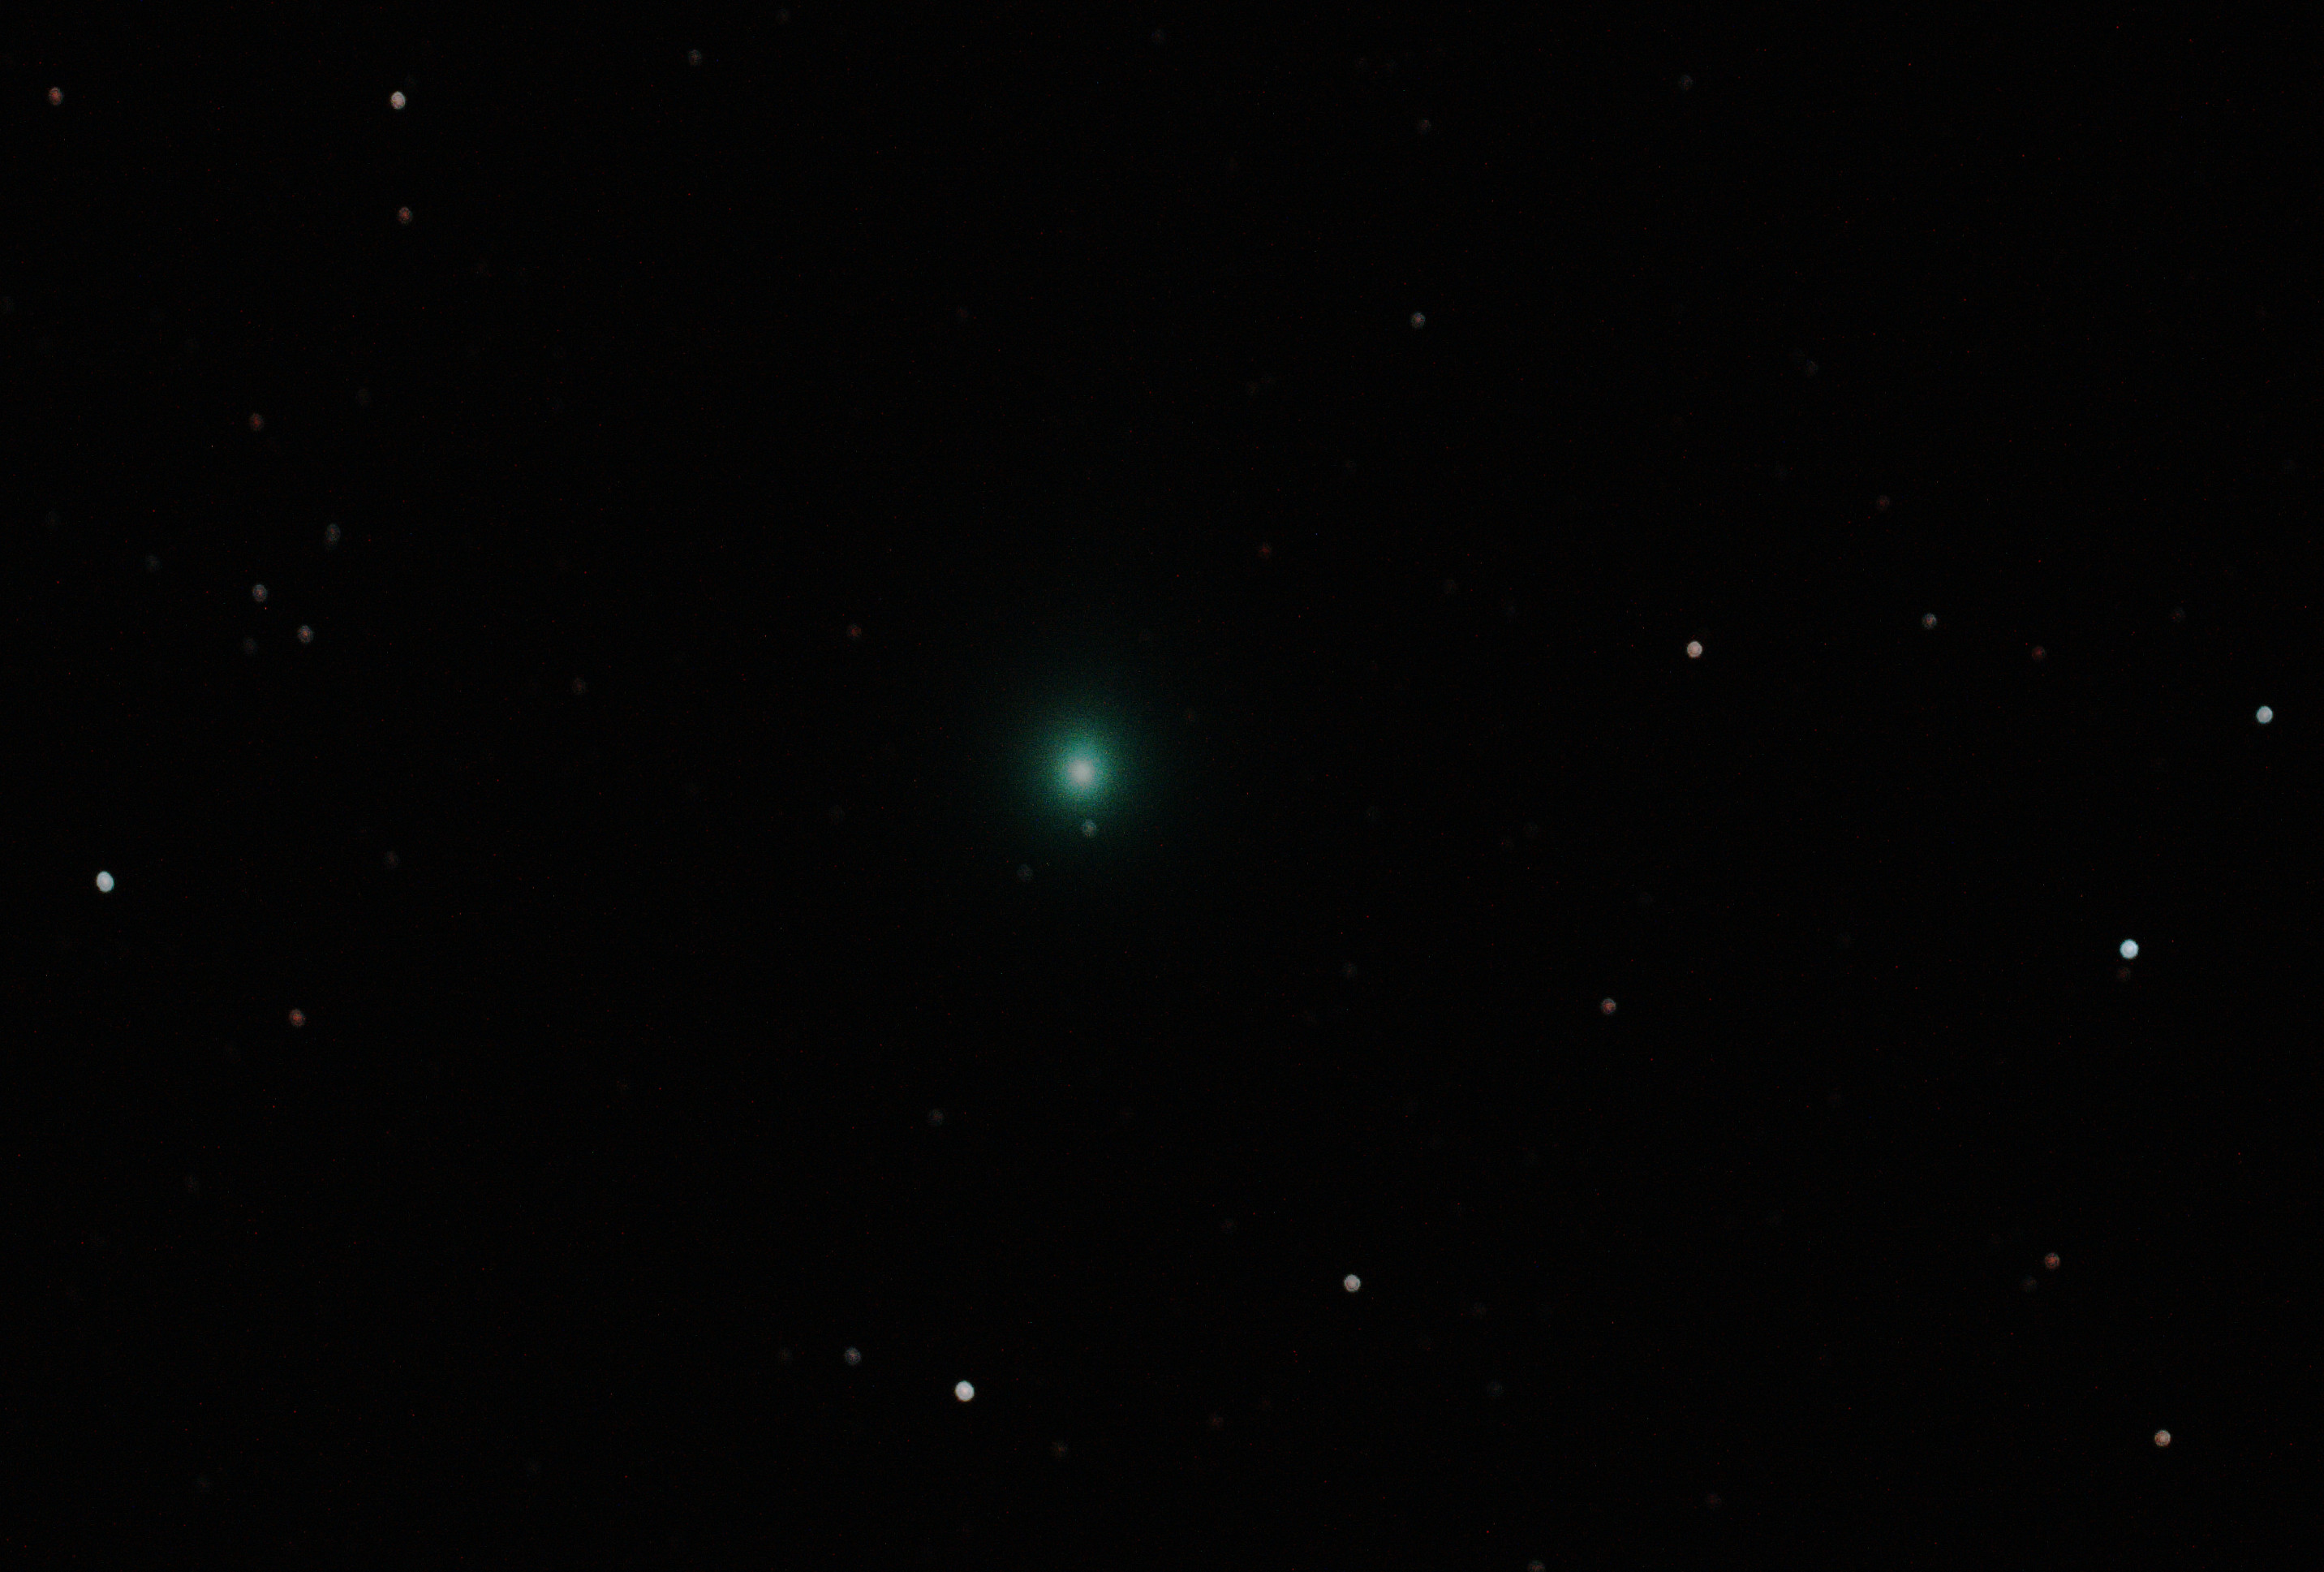
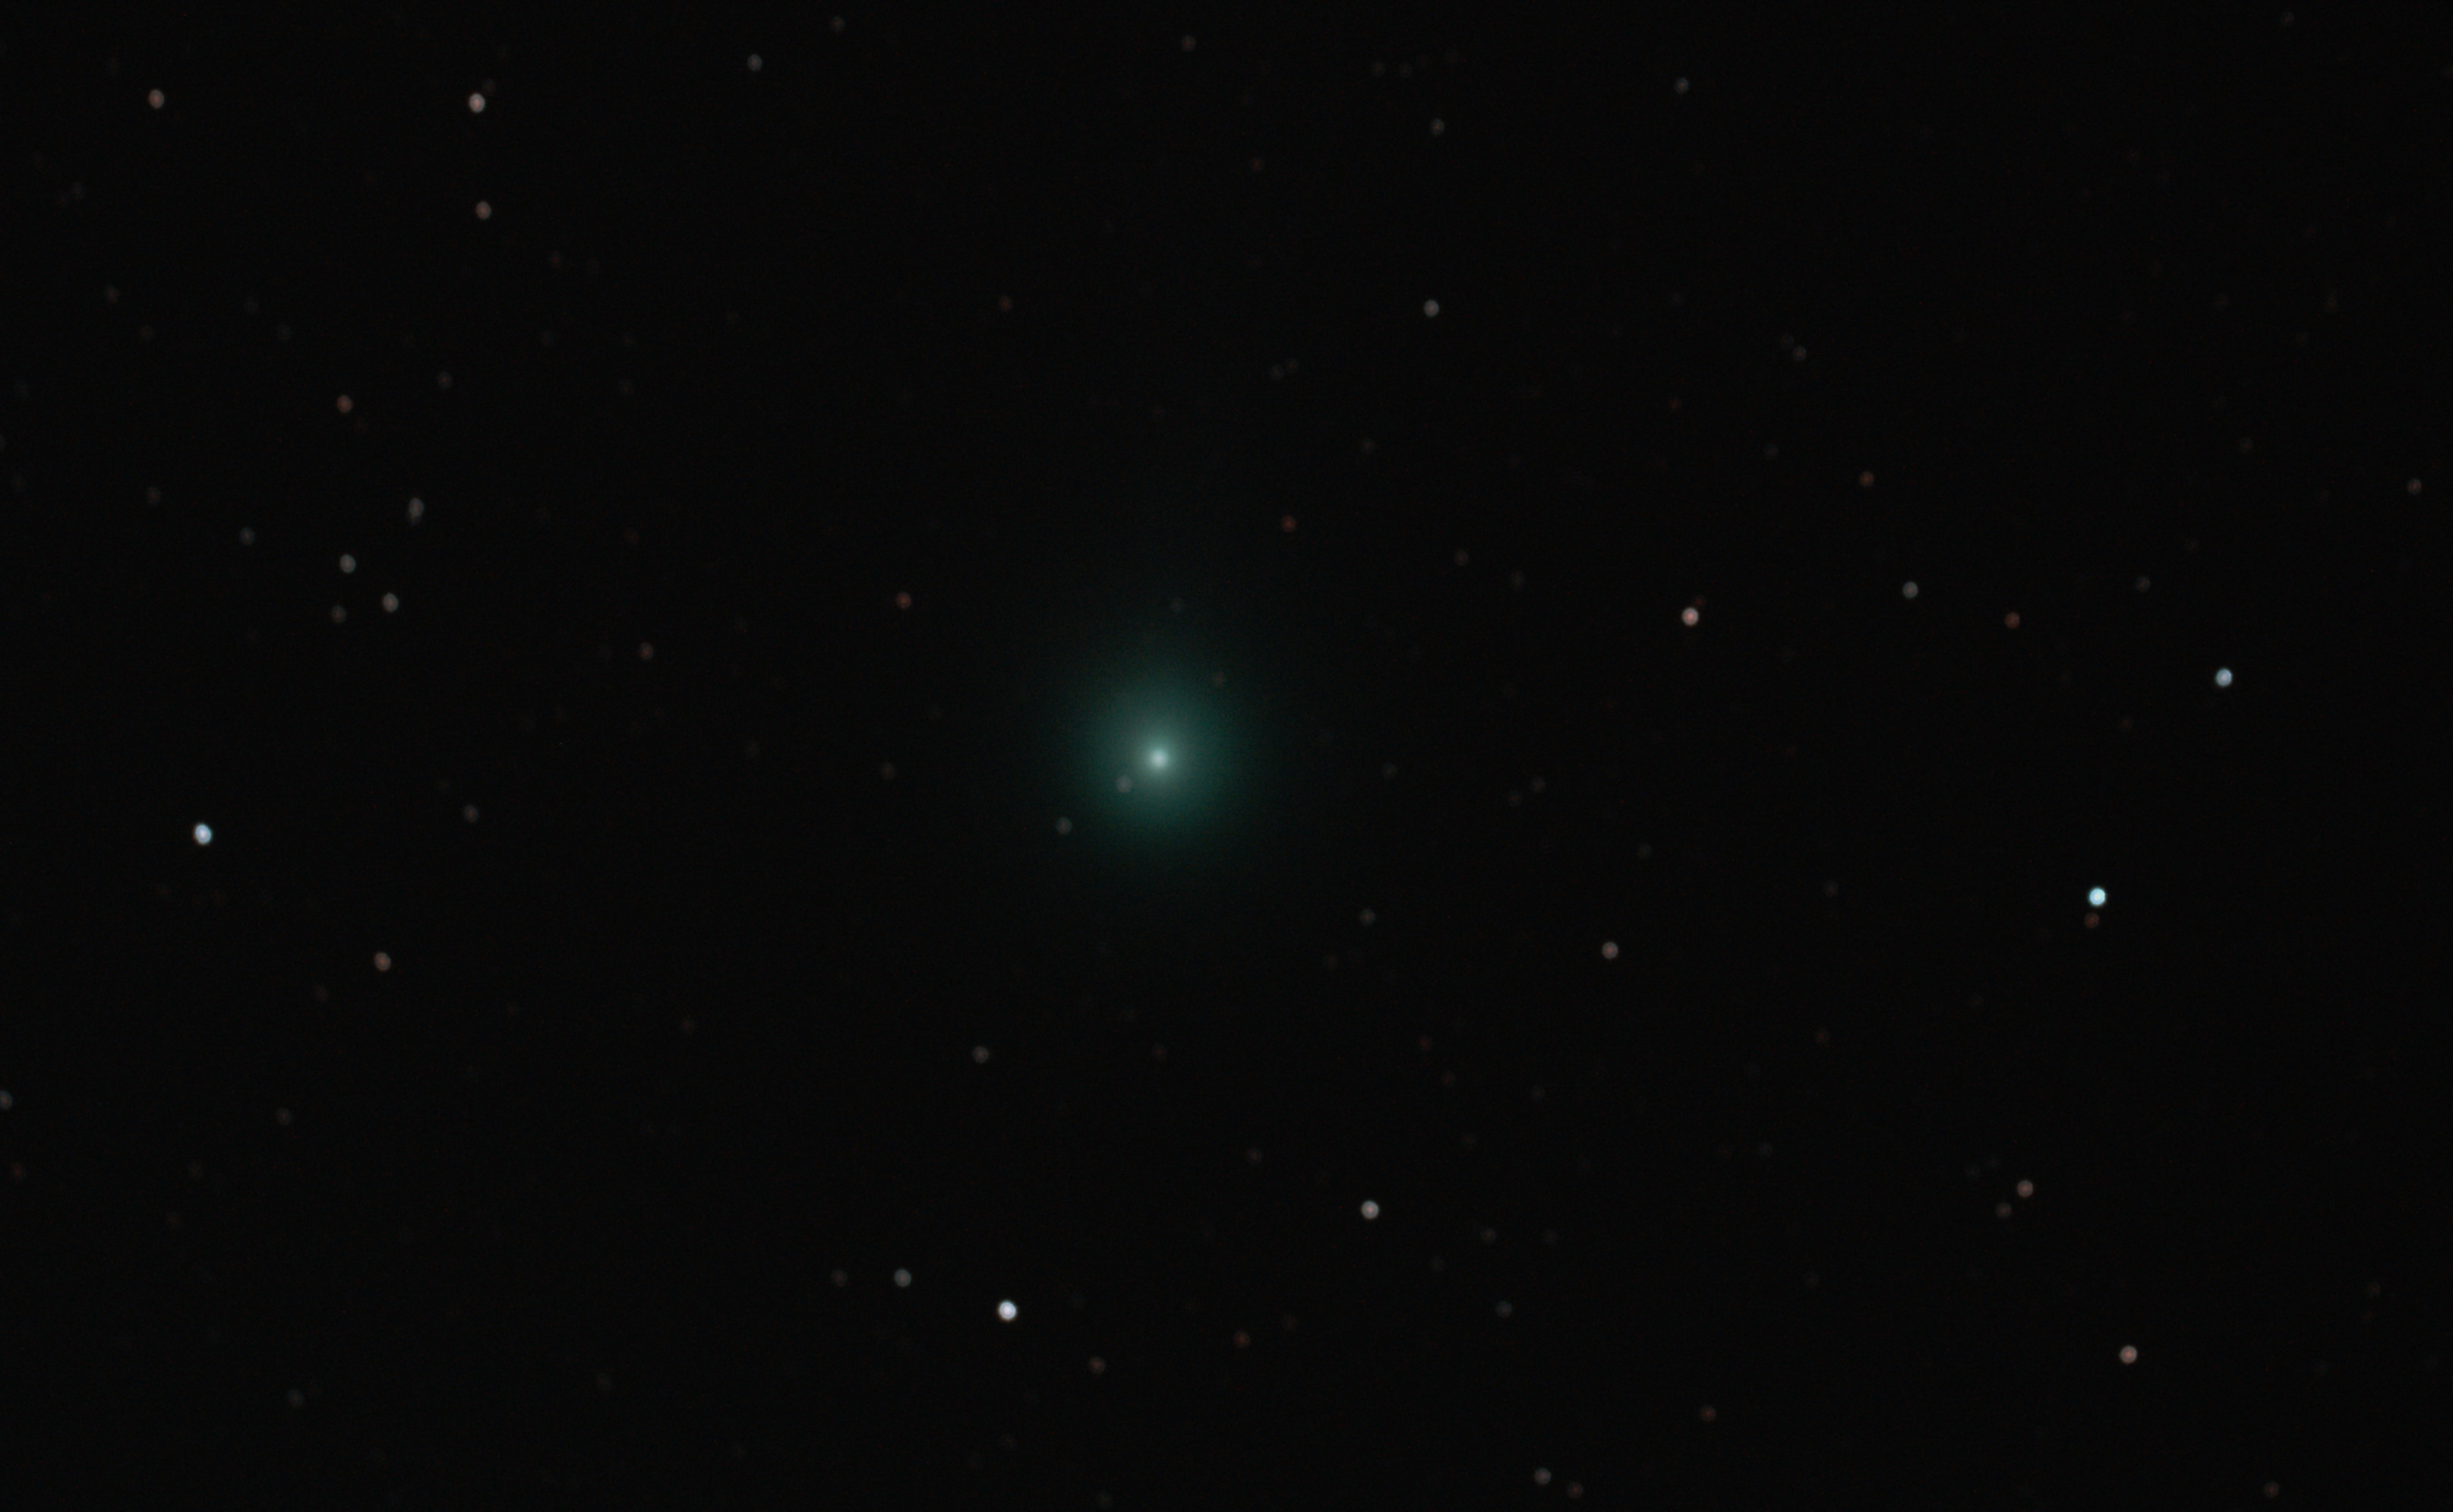
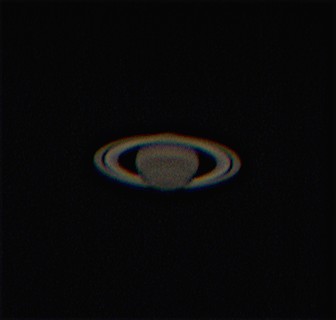
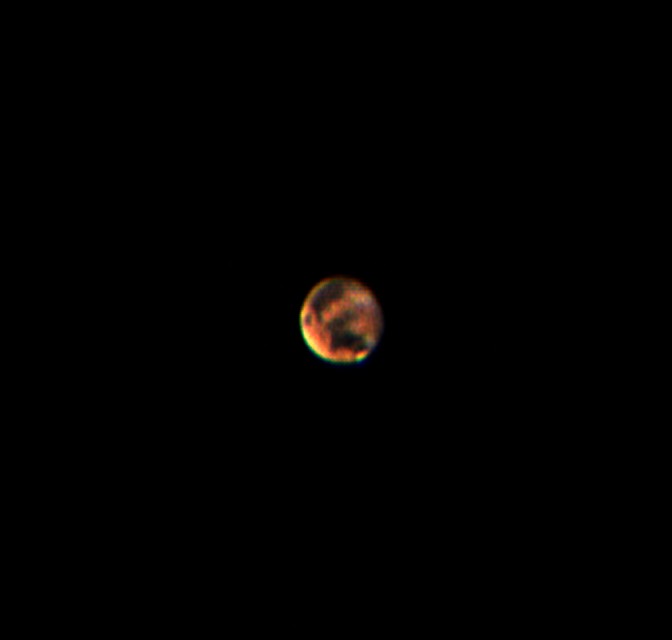
Using the ZWO ASI 120 MC I first started imaging Saturn, with some success. However, using the EQ3-2 mount to find, focus and image was very difficult, especially when I tackled Mars. In this case the size of the planet makes all the aforementioned issues even more difficult but, after lots of attempts I managed to get an image – altogether with plenty of room for improvement but satisfying nonetheless. I subsequently discarded the webcam in favour of the DSLR, with which I am more comfortable and due to the lack of suitable, mostly planetary objects through the summer period. With the return of Jupiter in recent weeks and the prospect of using the ZWO webcam for autoguiding, I have returned to using it again but given the time that has since elapsed, I need to relearn its use all over again!
At this point I had concluded that I wanted to pursue astronomy and astrophotography. I was also drawn inexorably towards astroimaging DSO objects; they provide numerous, albeit more difficult targets at all times of the year and I have found their combination of otherworldly beauty and science fascinating – I am now on a slippery slope that I feel will last for years! The implications of this conclusion and based on what I had learned over the preceding year about my basic equipment had only one consequence, I needed better equipment. There are astronomers who will say this hobby can be done cheaply, frankly I don’t believe it. Even buying second hand and generally making-do, the need for another piece of equipment never seems to stop – ask my wife.
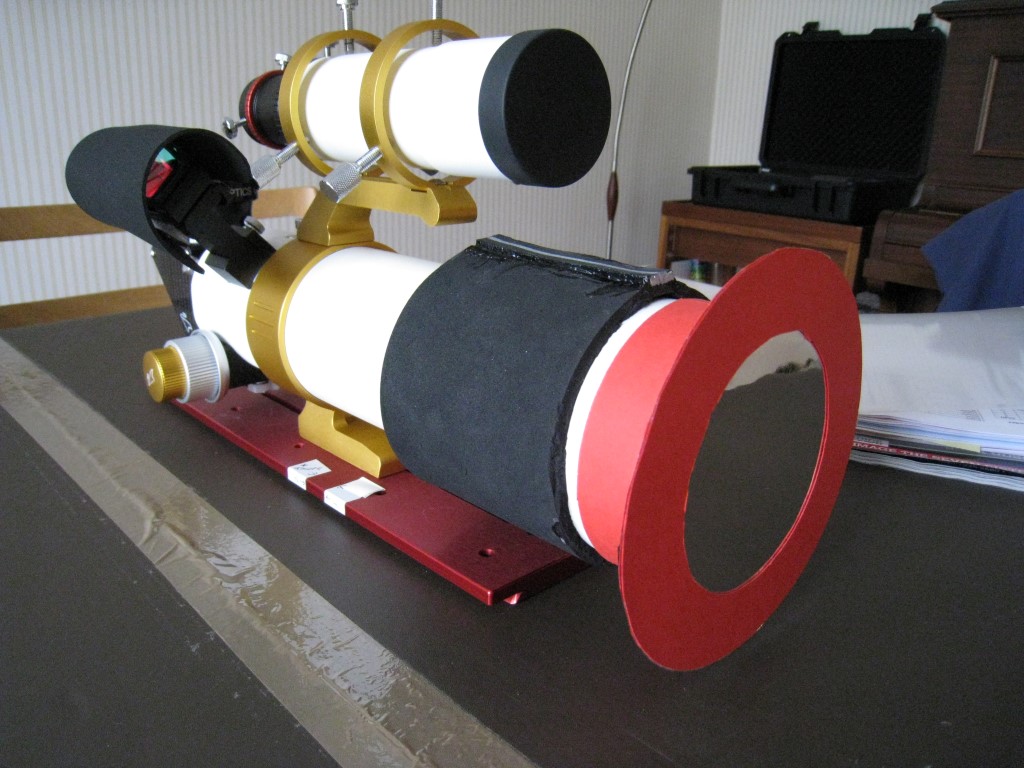
Resigned to this course of action and the inevitable extensive analysis of what equipment was best suited, I reached a conclusion of what equipment I needed surprisingly quickly, though still prevaricating over innumerable makes and models available. In the end I purchased an AZ-EQ6 GT mount and William Optics GT81 FPL3 triplet achromatic refractor. I could have shaved £400 to £500 off the cost by purchasing other very good but cheaper makes and models but the WO is a beautifully tactile piece of obviously very well made equipment, which is a pleasure to own and use. I had originally intended to purchase an HEQ5 mount but on taking the long view (no pun intended) and considering the superior and critical payload capacity decided to move up to the EQ6, which then became the AZ-EQ6 GT for its superior belt driven mechanism and even better payload.
| Date |
Object* |
Feature / Name |
| April |
M104 |
Sombrero Galaxy |
| M1 |
Crab Nebula |
| M3 |
Globular Cluster |
| M84 |
Lenticular Galaxy |
| M95 & M96 Group |
Spiral Galaxy |
| Virgo Group |
Supercluster of Galaxies |
| NGC 4435/38 |
The Eyes (Nonet) Galaxies |
| May |
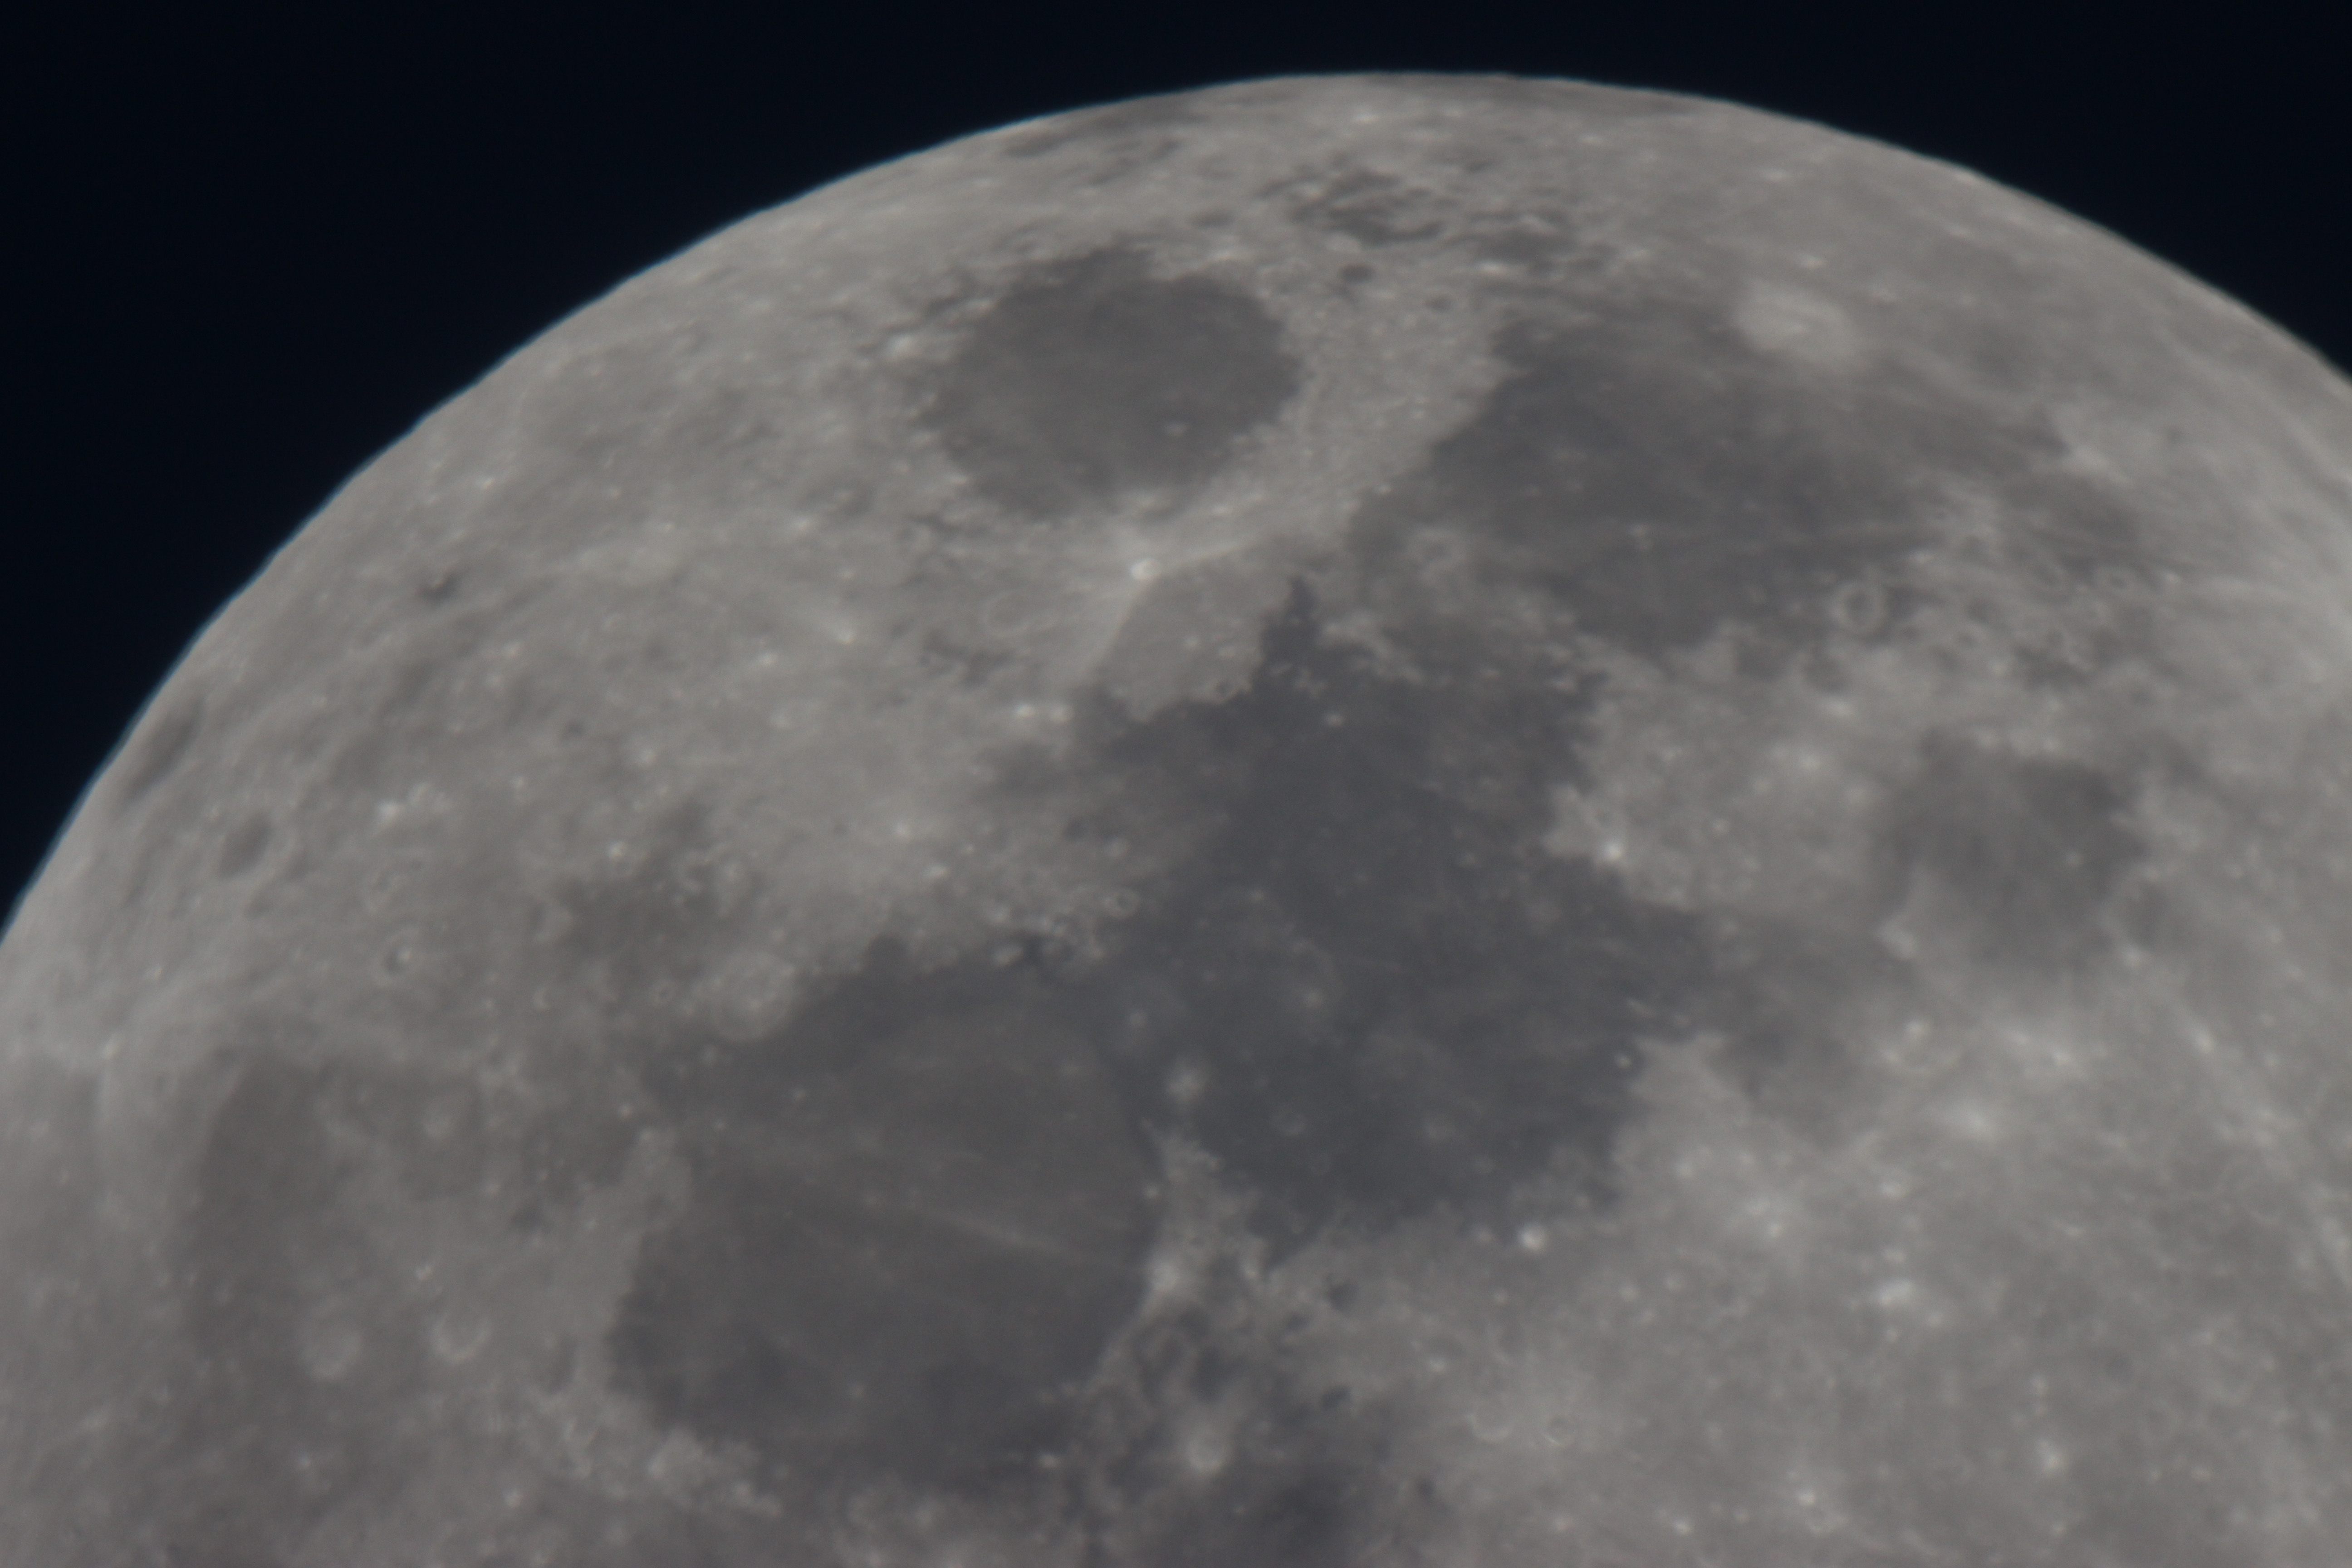
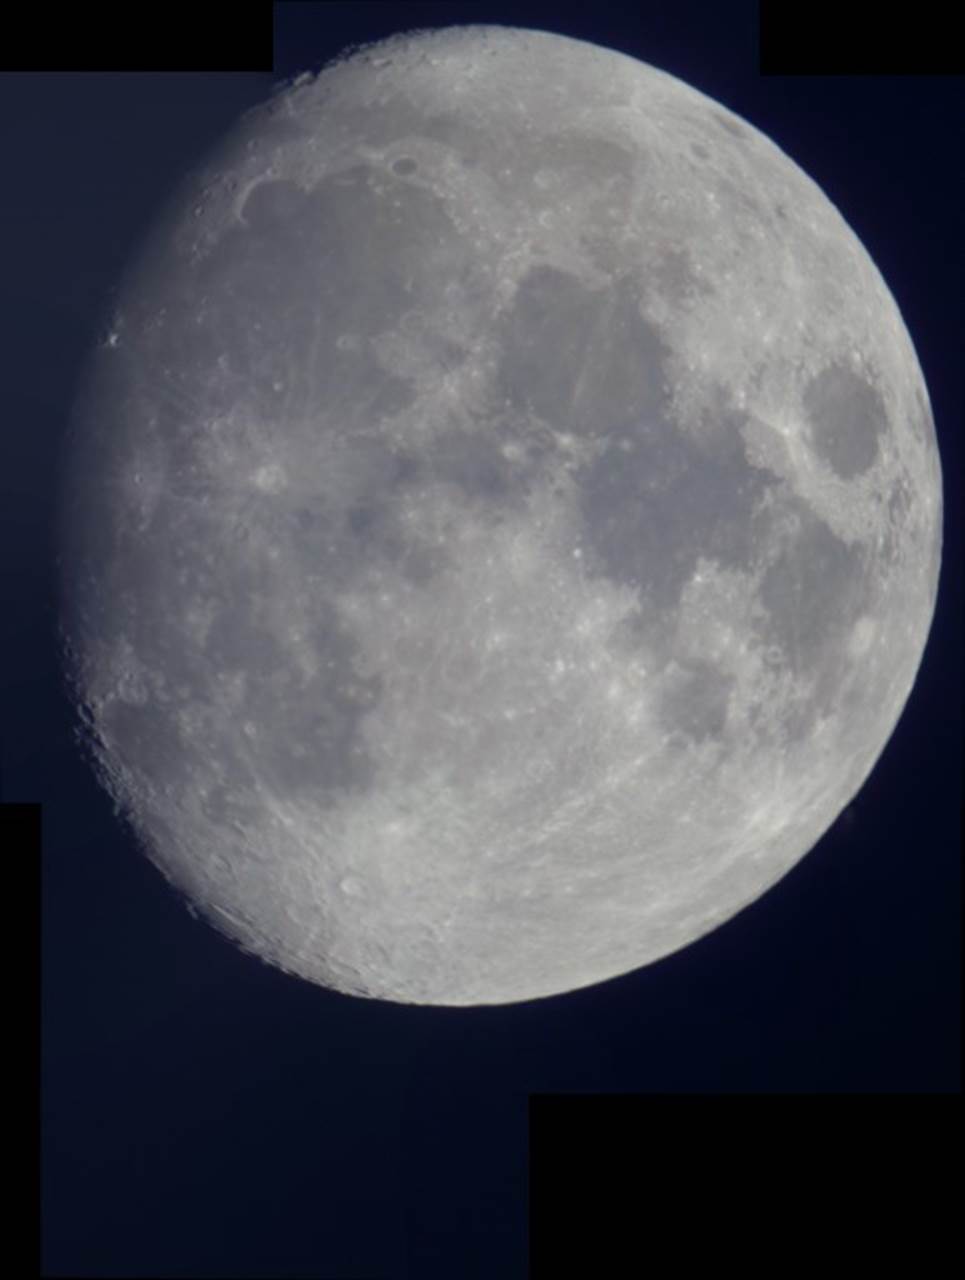
The Moon |
|
| Mars |
|
| Saturn |
|
JULY TO DECEMBER
The absence of good astronomical darkness approaching the Summer Solstice at the end of June and onwards until later in August, makes imaging difficult at this time of the year. Furthermore, the summer skies are generally less interesting and altogether provide limited opportunities. As a result the one object remaining, that hopefully dominates the sky at this time of the year, is the Sun. It was therefore time to start solar astronomy.
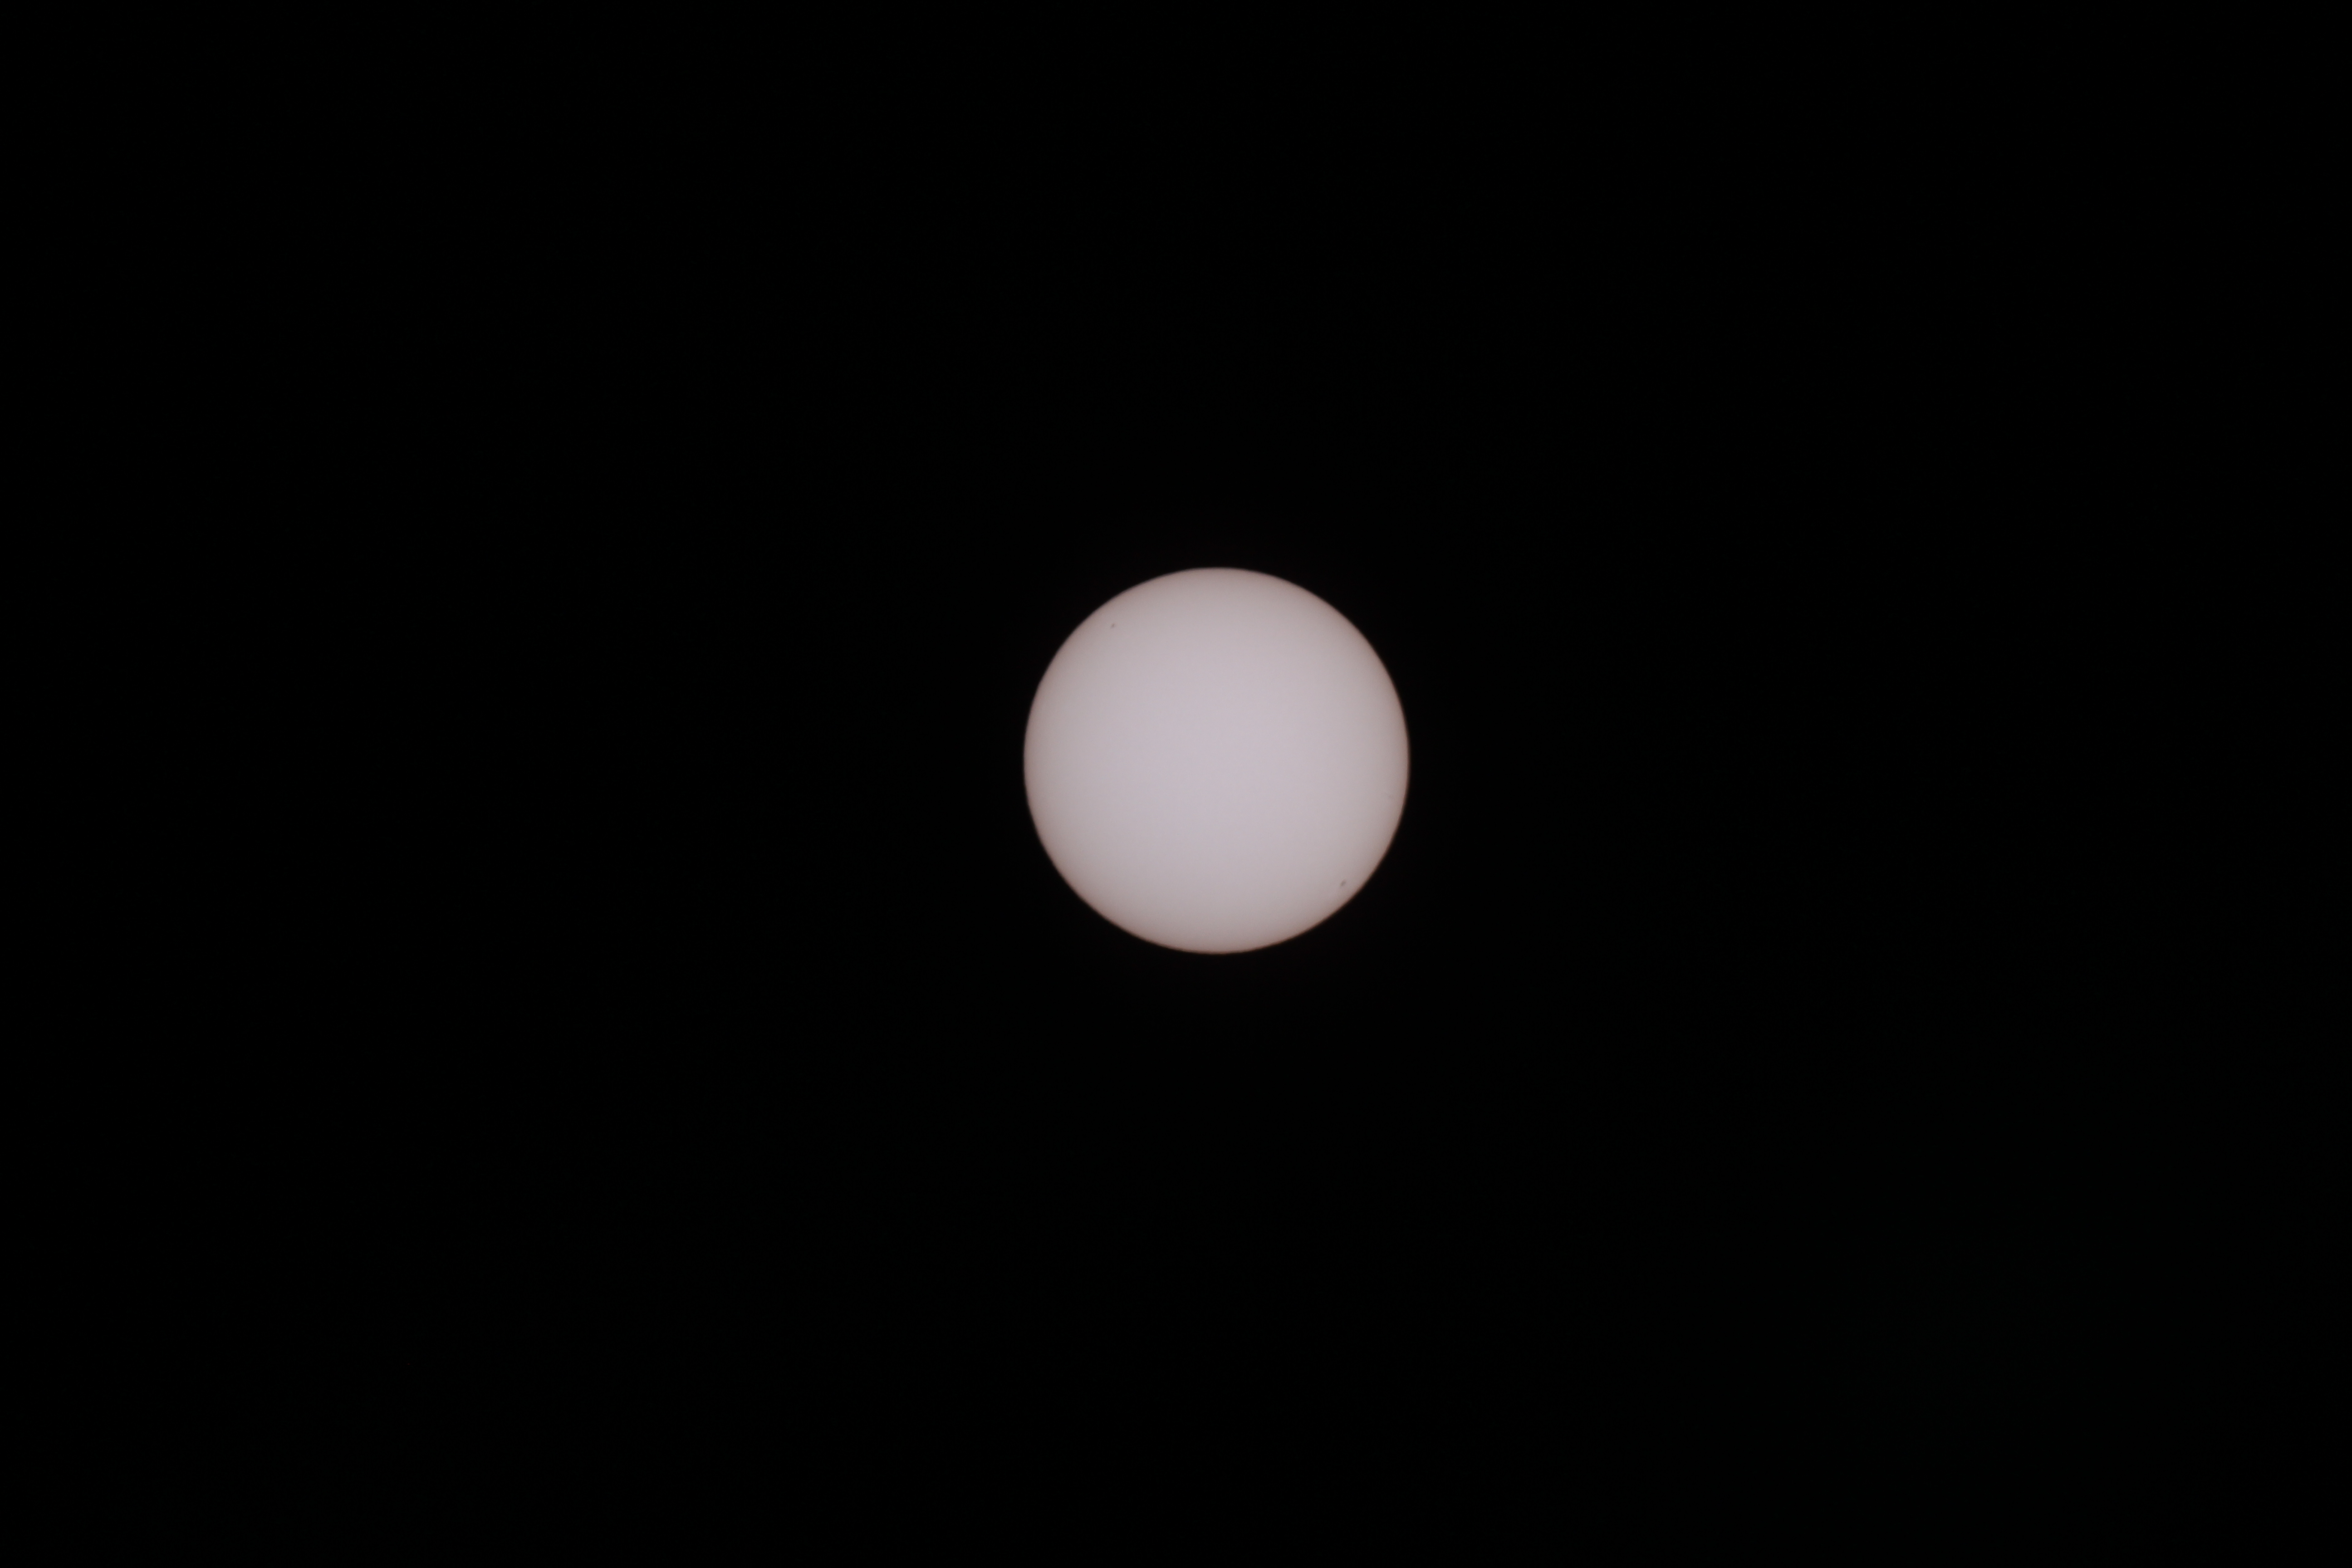
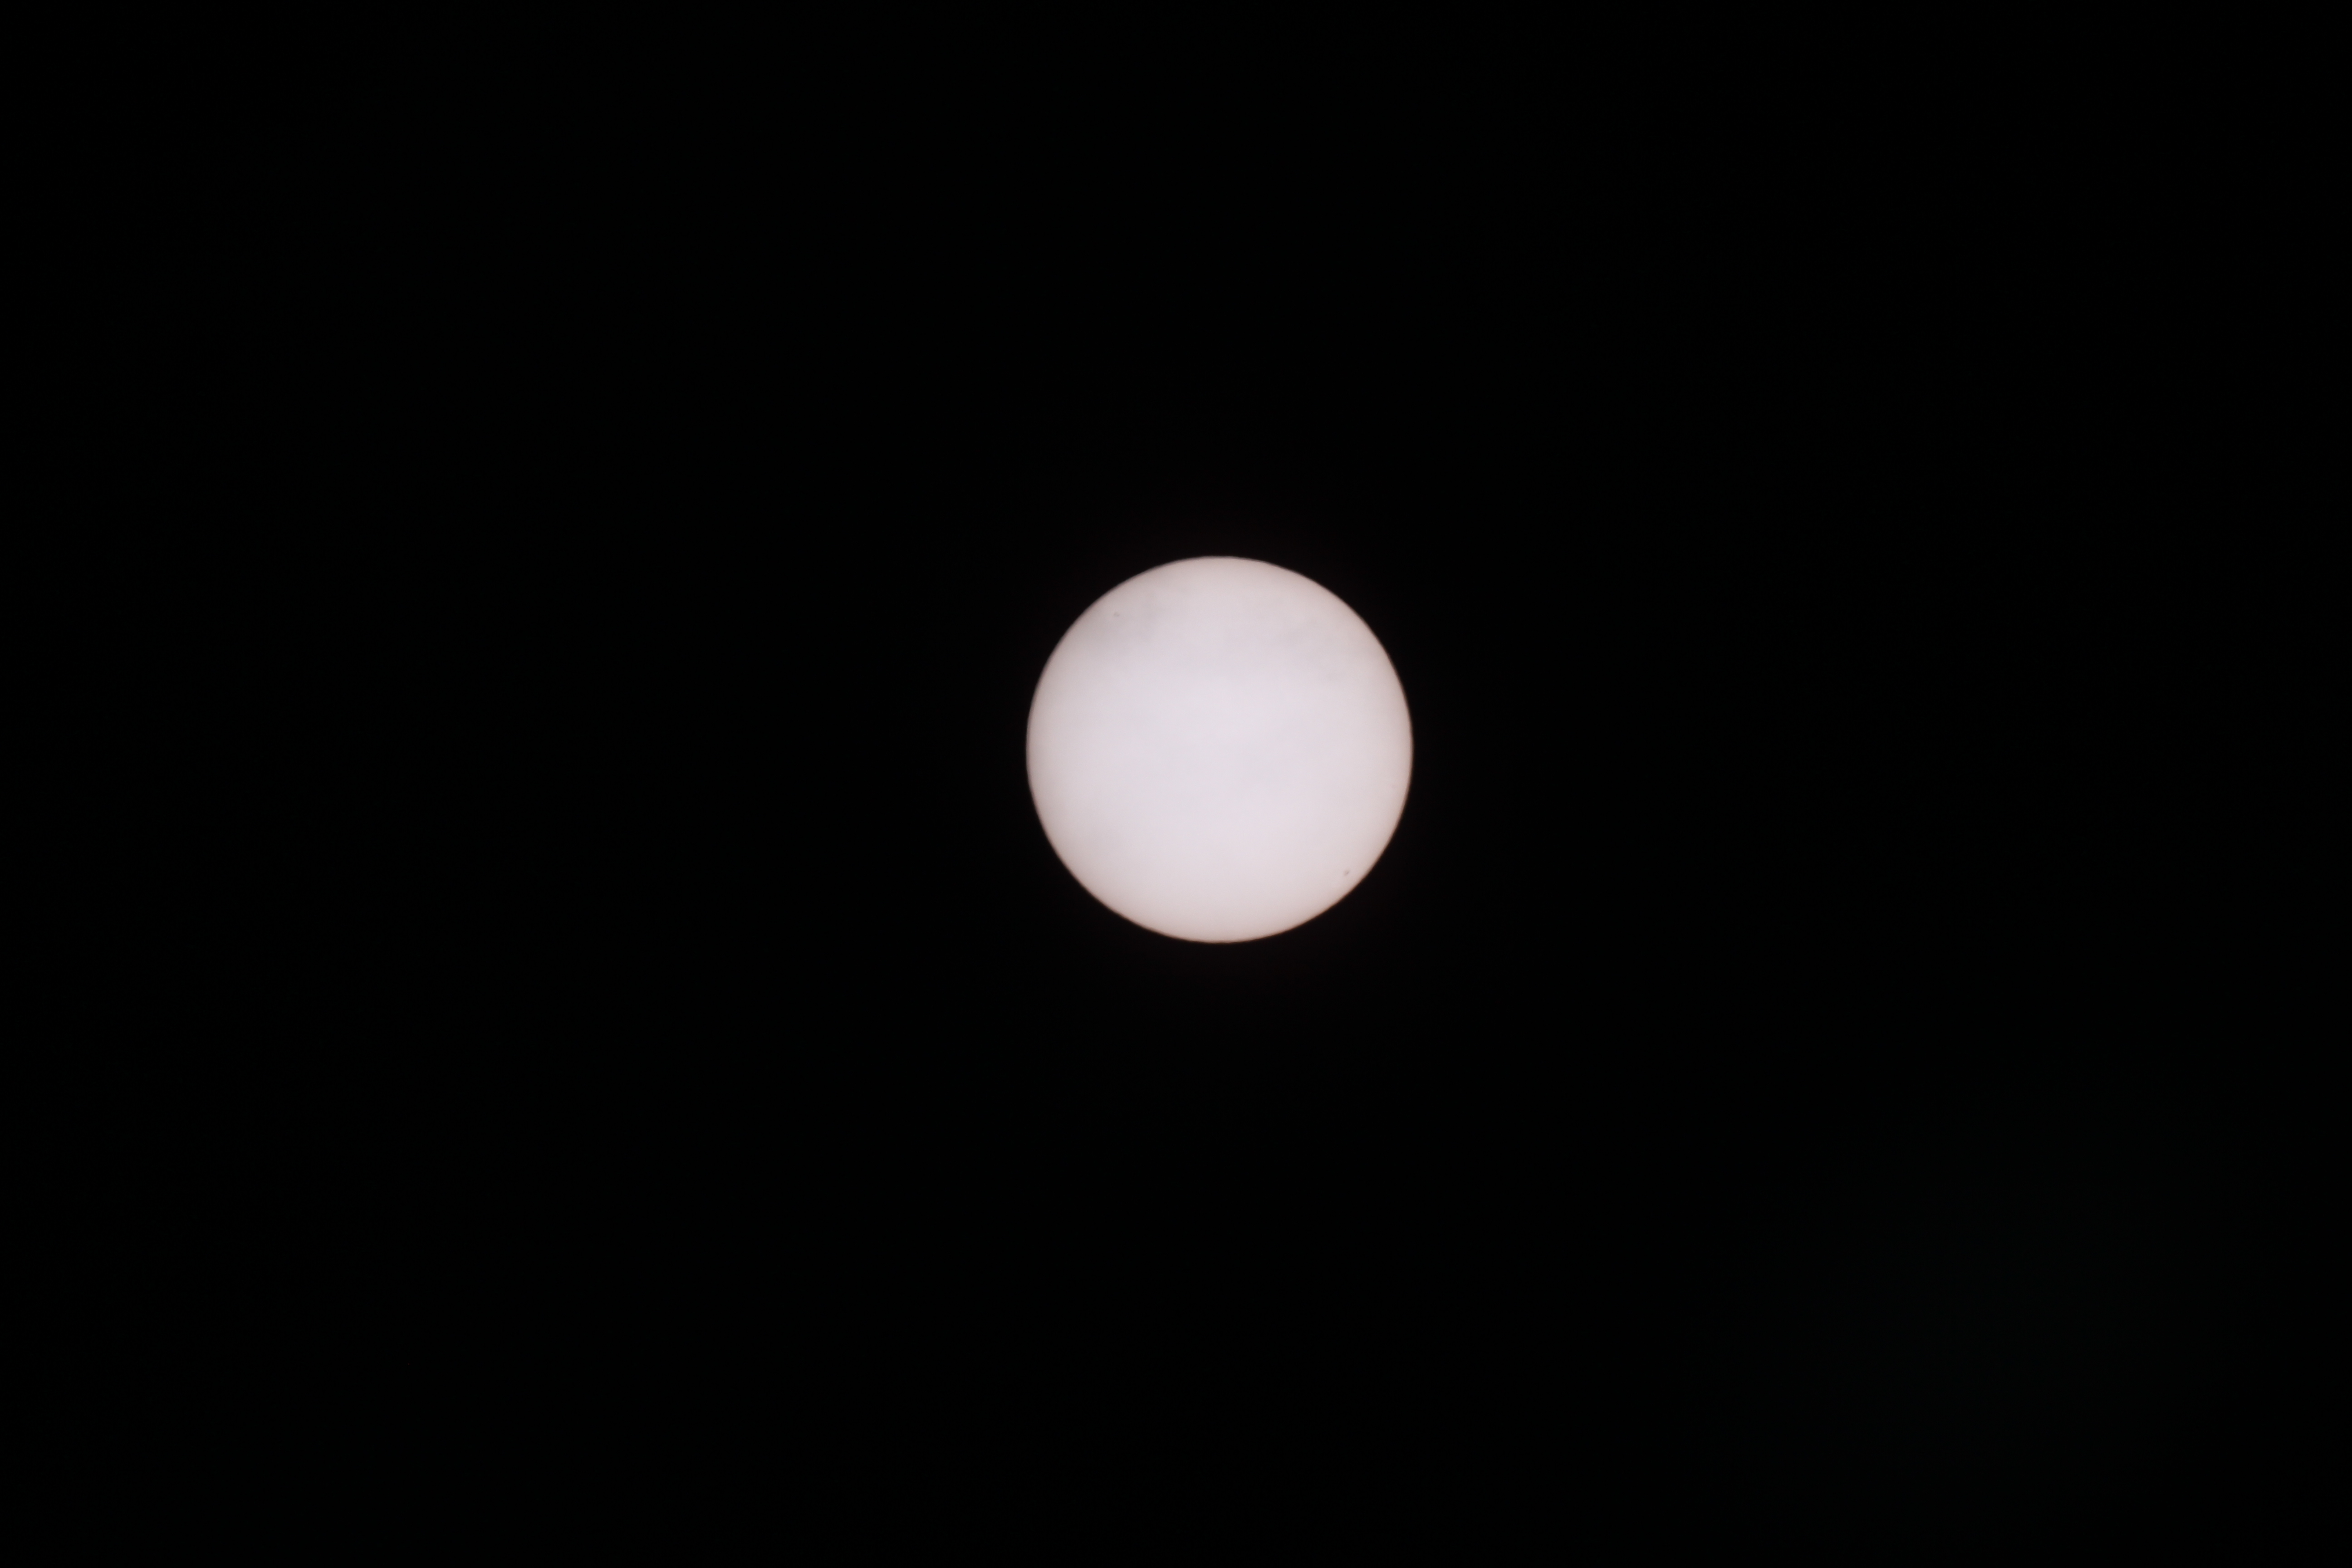
Given the obvious dangers I approached the task carefully, getting a made-to-measure Baader Astro Solar filter for use with the Skywatcher 150PL. Rightly or wrongly, at this initial stage I decided to use the 150PL as I figured the larger, open design of the Newtonian reflector would help cooling. The result was fascinating, with sun spots and general surface granulation clearly visible. However, the set-up has two drawbacks: (i) the resulting FOV is small and requires six or more images to cover the whole of the Sun, and (ii) such a filter only produces a view of white light, not allowing the more spectacular features evident at a other wavelengths, such as prominences, to be viewed. For this a considerably more expensive solar telescope or highly specialized filters are required – such is the fascination of our local star I can see the time I will want to pursue this branch of astronomy further.

Sun Mosaic
SW 150PL + Baader Astro Solar Filter + Barlow x2 | Canon 700D DSLR
Having since used the new equipment for nearly six months now I have no regrets – you get what you pay for. However, as usual there have been problems to overcome. The mount is very solid and was a real pleasure to use but from the outset I have faced one big problem – polar alignment. With no view of Polaris or any of the northern sky, as my house is in the way, combined with restricted views to the south, east and west due to adjacent housing and trees, the only options were drift alignment or the polar alignment routine that I latterly discovered in the SynScan handset. For the moment the SynScan method has become my preferred technique but it can still be problematical, as it is quite fiddly and often the stars chosen by SynScan are not always visible e.g. it is not uncommon that at times all the alignment stars provided by Synscan are located in the northern sky and cannot be seen because of the aforementioned problems. However, I am getting better and with diligence and patience can now get to within 30” or less of true polar alignment, which has allowed exposures of up to 180 seconds. I have tried drift alignment a few times but have difficulty finding suitable stars on the horizon, as I basically don’t have an horizon! Going forwards I am considering the use of Alignmaster software, which looks very useful for this purpose, though the lack of a northerly view might still be a problem. In addition, I hope the ultimate goal of autoguiding should further enhance tracking accuracy even without perfect polar alignment – we shall see.
The second problem initially encountered was achieving an image when using the William Optics field flattener / focal reducer. Try as I may, I could not get an image with the William Optics GT81 + field flattener + camera combination and after a few evenings trying became desperate. How could it be so difficult? All this money for top-end equipment and not even a lousy image, let alone a good picture. With the help and encouragement from members of Stargazers Lounge, I had another go. This time I was more diligent with the set-up and at first using a very bright, easy to see star, was at last able to achieve a camera image and good focus using a Bahtinov mask. In a nutshell, the problem was that the point of focus is very, very critical, just a fraction of a millimetre out and the image disappears. Now I know this it’s quite easy but nobody points this out, least of all the manufacturer or retailer, who provided little to no instructions – I am learning this is also something common in the world of astronomy, which I find quite unacceptable.
So, after some weeks of trials and tribulations, the new equipment is mostly working very well and I have been able to successfully image a wide variety of objects. There’s plenty of room for improvement but I have obtained some enjoyable and often quite exciting photographs. Now for the next challenge, which has just started: computer control and autoguiding.

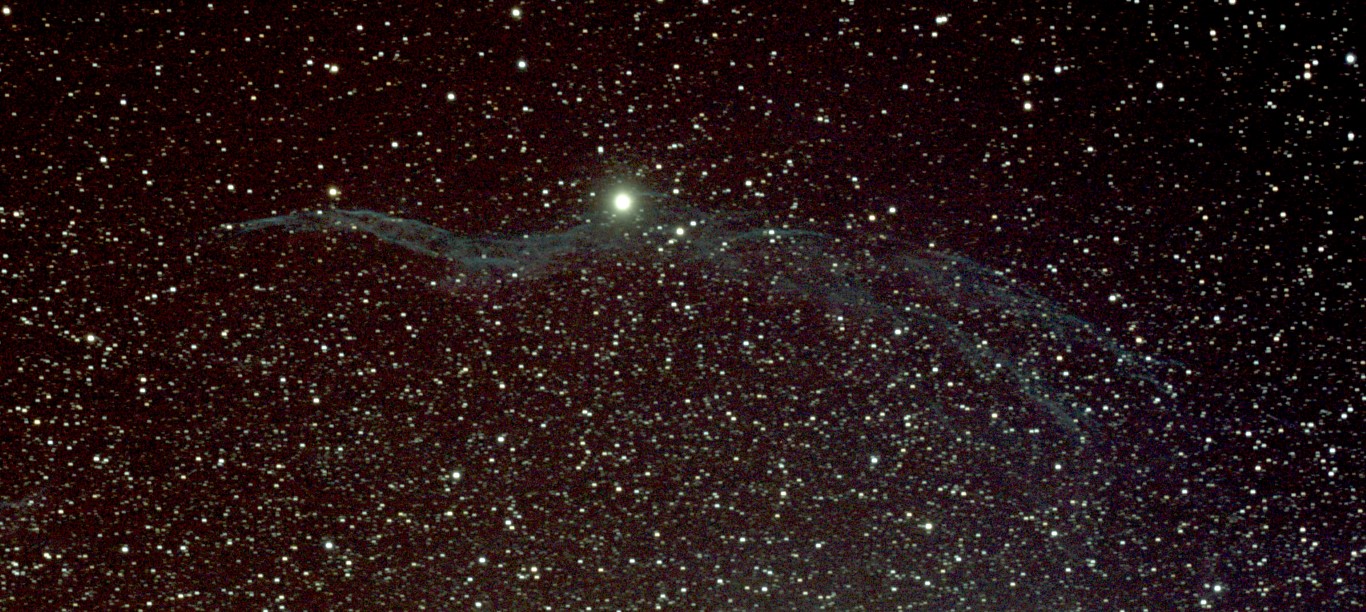
NGC 6960 AKA The Witch’s Broom
Canon 700D | 20×90 sec + darks.bias/ flats @ ISO 800
With DSLR or CCD / webcam imaging, processing is at least equally important as the original image capture. In the later part of the year I have therefore also started to tackle this dark art. Whilst compilation software such as Deep Sky Stacker and Registax requires some understanding to set-up, it is with post-processing that the final image can be made or lost. As a result I am using the extra time indoors to try and master the various techniques, with mixed success.
I should also note that during this period my elder daughter, Alison, persuaded and then helped me set-up this website. It has proved a useful discipline for organising my thoughts and images. I am very grateful for her help and have surprisingly enjoyed recording my astronomy endeavours. Although intended as a personal record, I note from the underlying website provider that it has been read far-and-wide across the world – 36 countries this year – which is also gratifying. I would love to hear from anybody via the WTSM site: questions, what are you doing, comments & feedback etc?
| Date |
Object* |
Feature / Name |
| July |
M57 |
Ring Nebula |
| M13 |
Globular Cluster |
| M15 |
Globular Cluster |
| Aug |
M27 |
Dumbbell Nebula |
| M31 |
Andromeda Galaxy |
| M11 |
Wild Duck Cluster |
| ISS |
International Space Station |
| NGC 6888 |
Crescent Nebula |
|
The Sun |
| Sept |
NGC 7000 |
North America Nebula |
| NGC 6960 |
Western Veil Nebula & Witch’s Broom |
| NGC 7380 |
Wizzard Nebula |
| M31 |
Andromenda Galaxy |
| IC 1396 |
Elephant’s Trunk Nebula |
| M2 |
Globular Cluster |
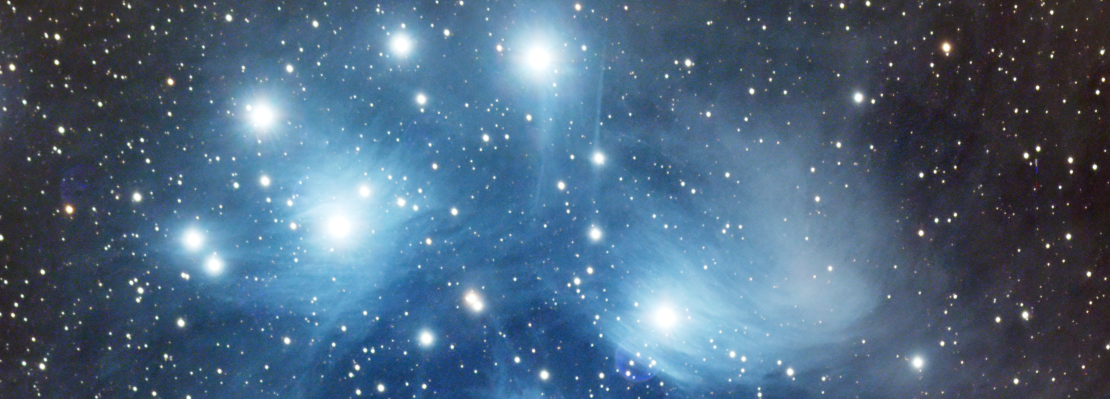
| Oct |
M45 |
Pleiades Open Star Cluster |
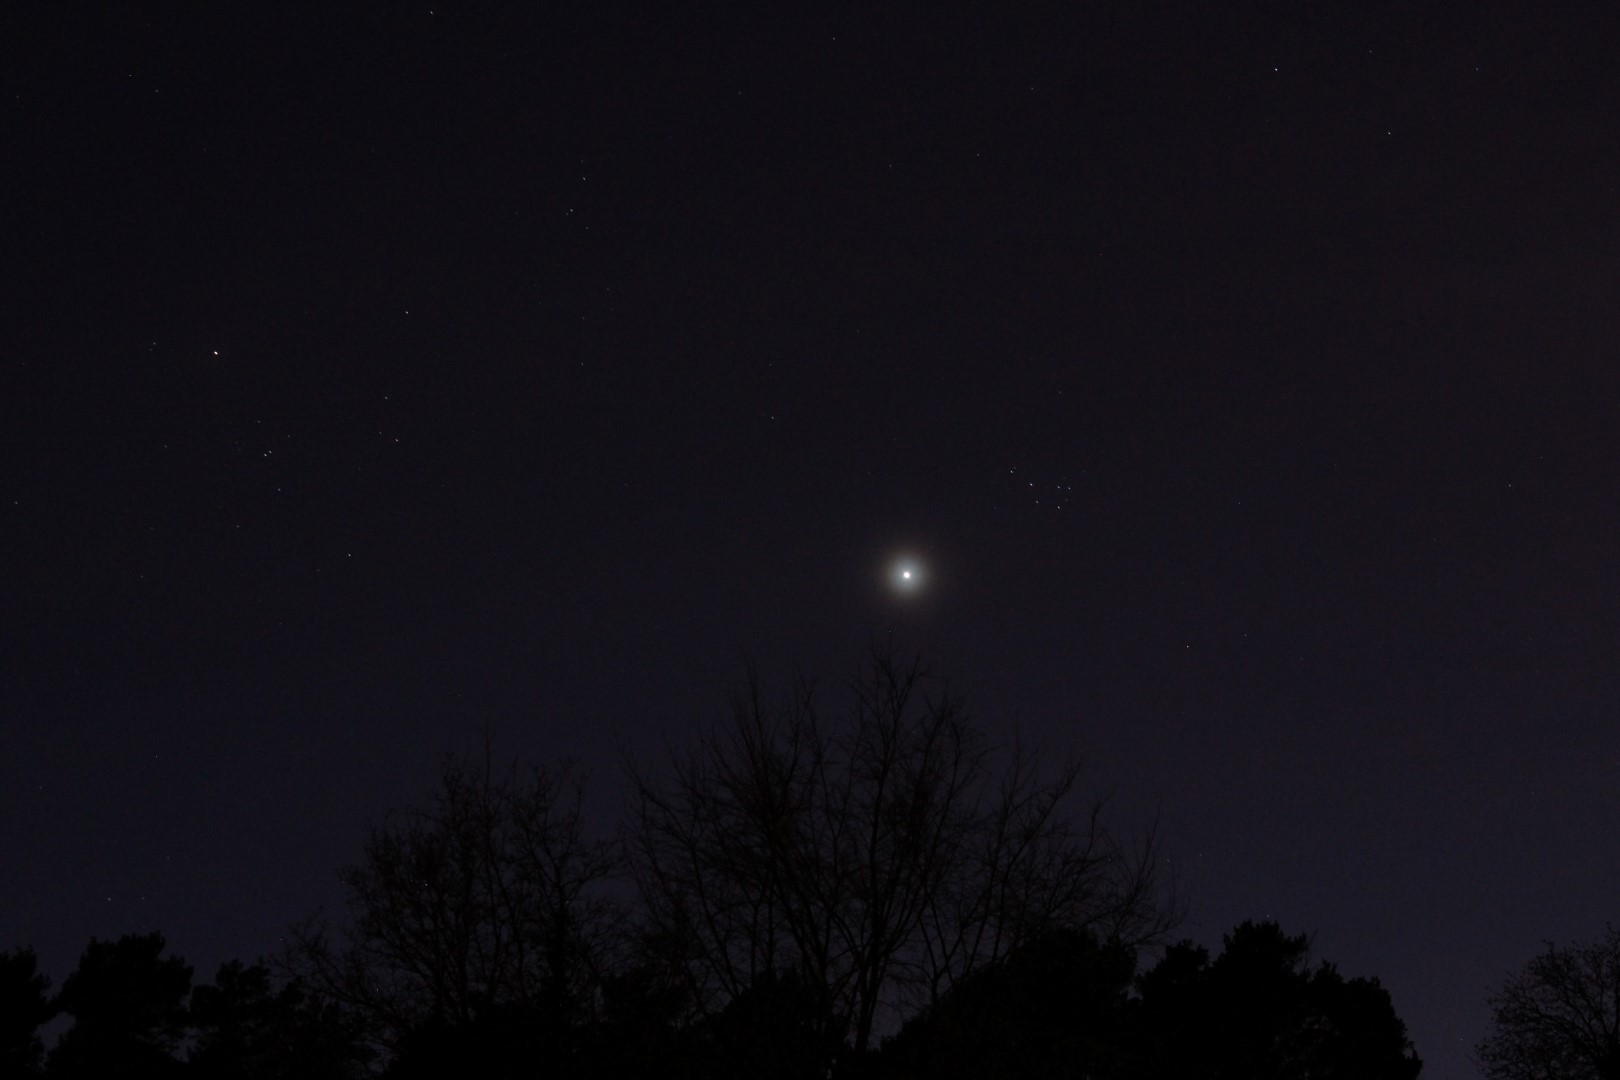
| Uranus |
|
| M33 |
The Pinwheel Galaxy |
| NGC 6992 |
Eastern Veil Nebula |
| NGC 6995 |
Bat Nebula |
| M42 & M43 |
Great Orion Nebula |
| NGC 7320 |
Stephen’s Quintet (Galaxies) |
| NGC 7331 |
Deer Lick Group (Galaxies) |
| NGC 7814 |
Spiral Galaxy |
| Nov |
NGC 1909 |
Witch Head Nebula |
| IC 434 |
Horsehead Nebula |
| NGC 2024 |
Flame Nebula |
| NGC 1973/75/77 |
Running Man Nebula |
| Dec |
M1 |
Crab Nebula |
| ISS |
International Space Station |
| NGC 2264 |
Christmas Tree Cluster & Cone Nebula etc. |
| NGC 2261 |
Hubble’s Variable Nebula |
| NGC 19818 |
Open Star Cluster |
| NGC 2244 |
Rosette Nebula |
| M35 |
Open Star Cluster |
| M78 |
Reflection Nebula |

Goals for 2015 are:
- Transfer the mount to EQMOD computer control – I have already linked the equipment indoors, together with Cartes du Ciel, but have yet to use it outside live.
- Upgrade camera control software – again I am already trialling Astrophotography Tool (APT) indoors, which looks good and provides lots of flexibility, though in some ways I still like the EOS Utility software, which uses more simple and therefore reliable control choices.
- For astrophotography this is the Holy Grail and, if successful, should enable significantly longer exposures and thus better detail and sharper images to be achieved. At the time of upgrading my equipment in the summer I also purchased a William Optics 50 mm guidescope – all I need to do is get it working! This will require two further pieces of software: (i) Push Here Dummy or PHD, which is responsible for controlling the interaction between the guidecope and the mount, and (ii) Astro Tortilla, which undertakes a process called ‘plate solving’, whereby using actual pictures taken at the time of set-up, it then recognises the section of the sky it (the telescope) is looking at, identifies the object in the field of view and using this information ensures that the telescope (and thus camera) are pointing exactly towards the chosen object by iteratively interacting with the other guiding software. As a fan of the KISS principle, I must admit to being somewhat intimidated by all this but am assured by others that it is not so bad to use (famous last words) and once up and running, will have a major impact. We shall see!
Even at this stage, I can already see the need for additional equipment. With numerous Ha-emitting nebulae a modified DSLR camera is beginning to seem essential and probably a more powerful computer for image processing. I am sure this list will grow as the year progresses.
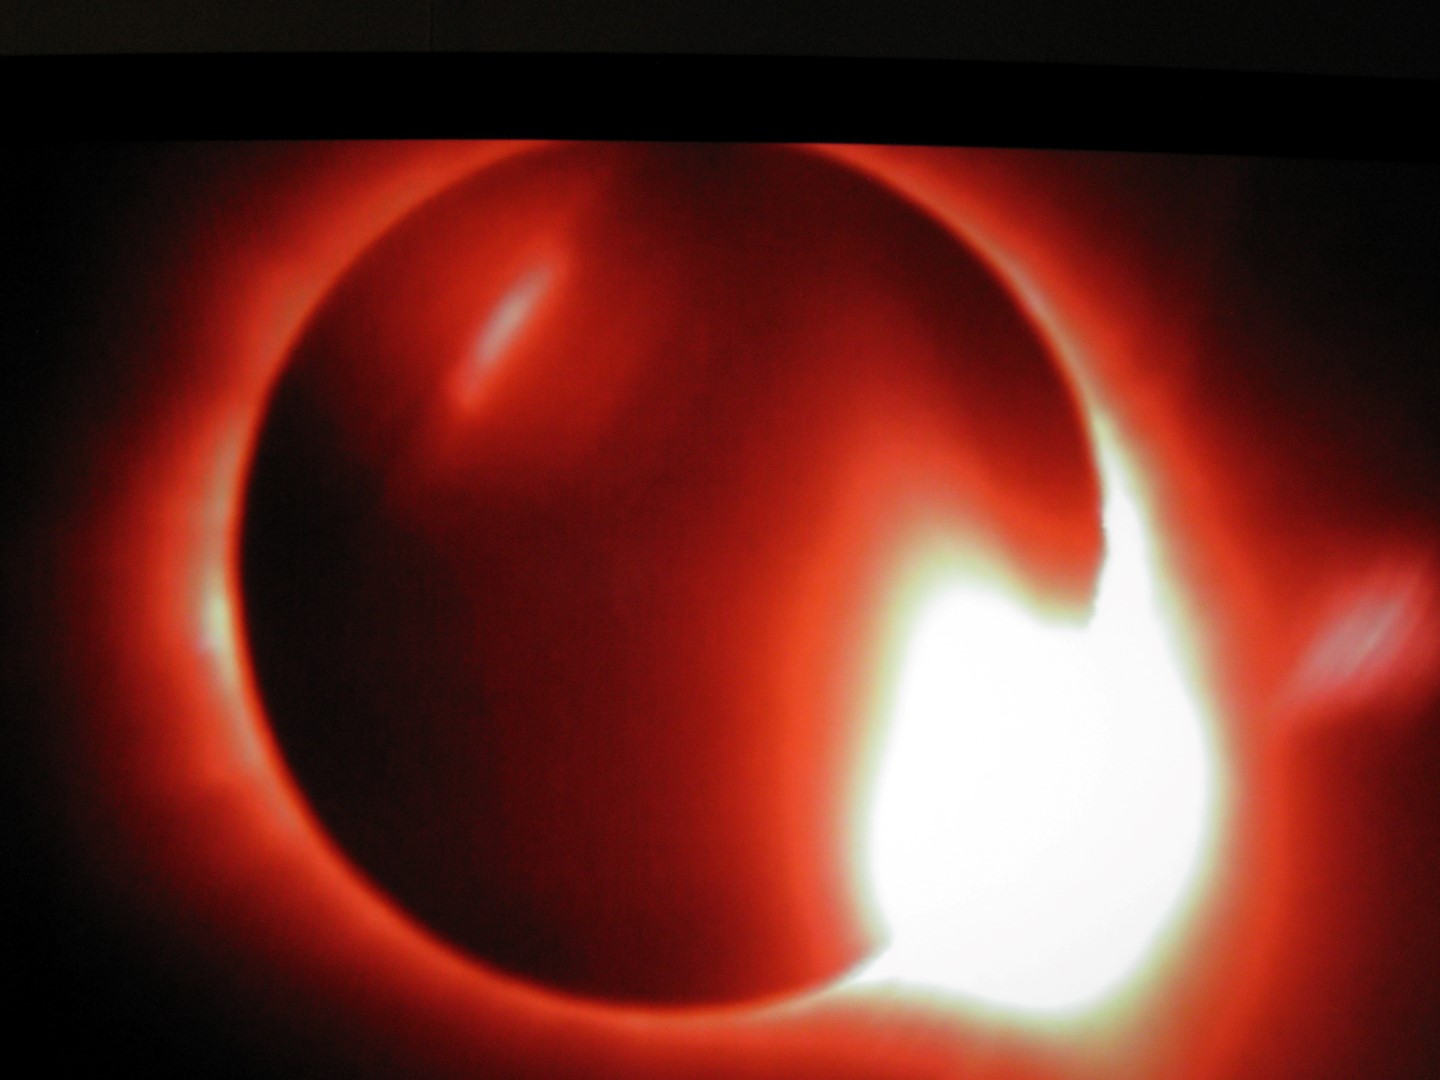
All-in-all, I am pleased with my progress during the past year, with a noticeable improvement since acquiring the new equipment. There have been more highs than lows and, I suppose, that’s a result in itself. It is very exciting when you first see Saturn, Jupiter or Mars and then image them but I have discovered that my metier and main enjoyment comes from DSOs, in particular nebulae. I find their very nature beguiling; beautiful to view, challenging but very rewarding to image and scientifically fascinating. I am therefore sure that in 2015 they will remain my main targets but, notwithstanding, there are many other objects worthy of attention, including in the UK a partial eclipse of the Sun in March.
Watch this space!

My picture of the year: Orions Sword. Top to bottom: NGC 1981 Open Star Cluster, NGC 1973/75/77 Nebulae, M42 & M43 Great Orion Nebula & the binary star Hatsya.
WO GT81, Canon 700D + FF | 30 x 120 secs + darks/bias/flats @ ISO 800