After starting astronomy in 2014, Watch This Space (Man) was launched shortly thereafter as a personal record of my then nascent astronomy journey. Apart from the main blog about my progress or otherwise, links to other astrophotographers, astronomy tools, astronomy weather, scientific papers etc. can also be found on this website; I was suprised to see that to-date 152 items have been published on this site.
I always like to hear from others – comments, questions, help or just to say hello – and can be contacted via: graham.s.roberts@gmail.com or just leave a comment at the end of any item if you prefer.

REFLECTIONS is a review of my astronomy and astrophotography during the past year, together with some thoughts on possible future developments.
2020 Overview, Images & Goals for 2021
For the world 2020 was a year like no other. Notwithstanding the obvious problems and dire consequences of Covid-19 for everyone, there have been surprising benefits for astronomy. Although I am retired, under lockdown there was even more time available for hobbies. Furthermore, as I live close to Gatwick and Heathrow airports + underneath numerous high altitude long-haul overflight paths, a massive reduction in air travel resulted in a very obvious improvement in seeing conditions, which was confirmed by guiding results. Located in a Bortle 5 to 6 area I ordinarily achieve at best average RMS error guiding of 0.90” to 1.50”/pixel, guiding improved markedly during lockdown to between 0.50” to 0.75”/ pixel. Of course such seeing conditions also resulted in better quality imaging itself and on a number of occasions I was able to achieve integration times of 10-hours or much more over a number of nights. The result was better images but less of them and inevitably, a lot more cloud throughout the rest of the year!
Having previously got to grips with plate solving, using the new CdC planning function I intended to develop the use of mosaics this year. However, such is the weather in the UK (see above) that it’s obvious to me that creating mosaics is probably not the best use of what imaging time we get. Undeterred, during January I planned and shot a 15x panel mosaic of Barnard’s Loop in Ha-wavelength. Unfortunately the unpredictable occurrence of patchy cloud invalidated some of the panels, though I was finally able to compile a 7x panel mosaic of the upper easterly section of Barnard’s Loop – see below. Notwithstanding, there were lessons learned: (i) restrict mosaics to one or two panels and / or (ii) where wider view images are required use a wide FOV set-up rather than a large mosaic.
Most of my other objectives for 2020 turned out to be pipedreams e.g. a new observatory or perhaps a larger telescope or dual rig. Despite this there were important developments on other fronts.
After eventually coming to the conclusion that mosaics were probably an unwise way to go considering UK conditions, it became clear that a suitable high-quality camera lens might produce similar coverage with less imaging time and hassle. Thus also inspired by the images of others on the SGL Forum using such equipment, I set out to build a new rig based around the excellent Samyang 135 f2 lens. This project remains work-in-progress but so far using the lens with a bespoke 3D printed rig and micro focuser made by Astrokraken and a modded DSLR, it’s apparent that this lens produces excellent widefield images in a relatively short time.

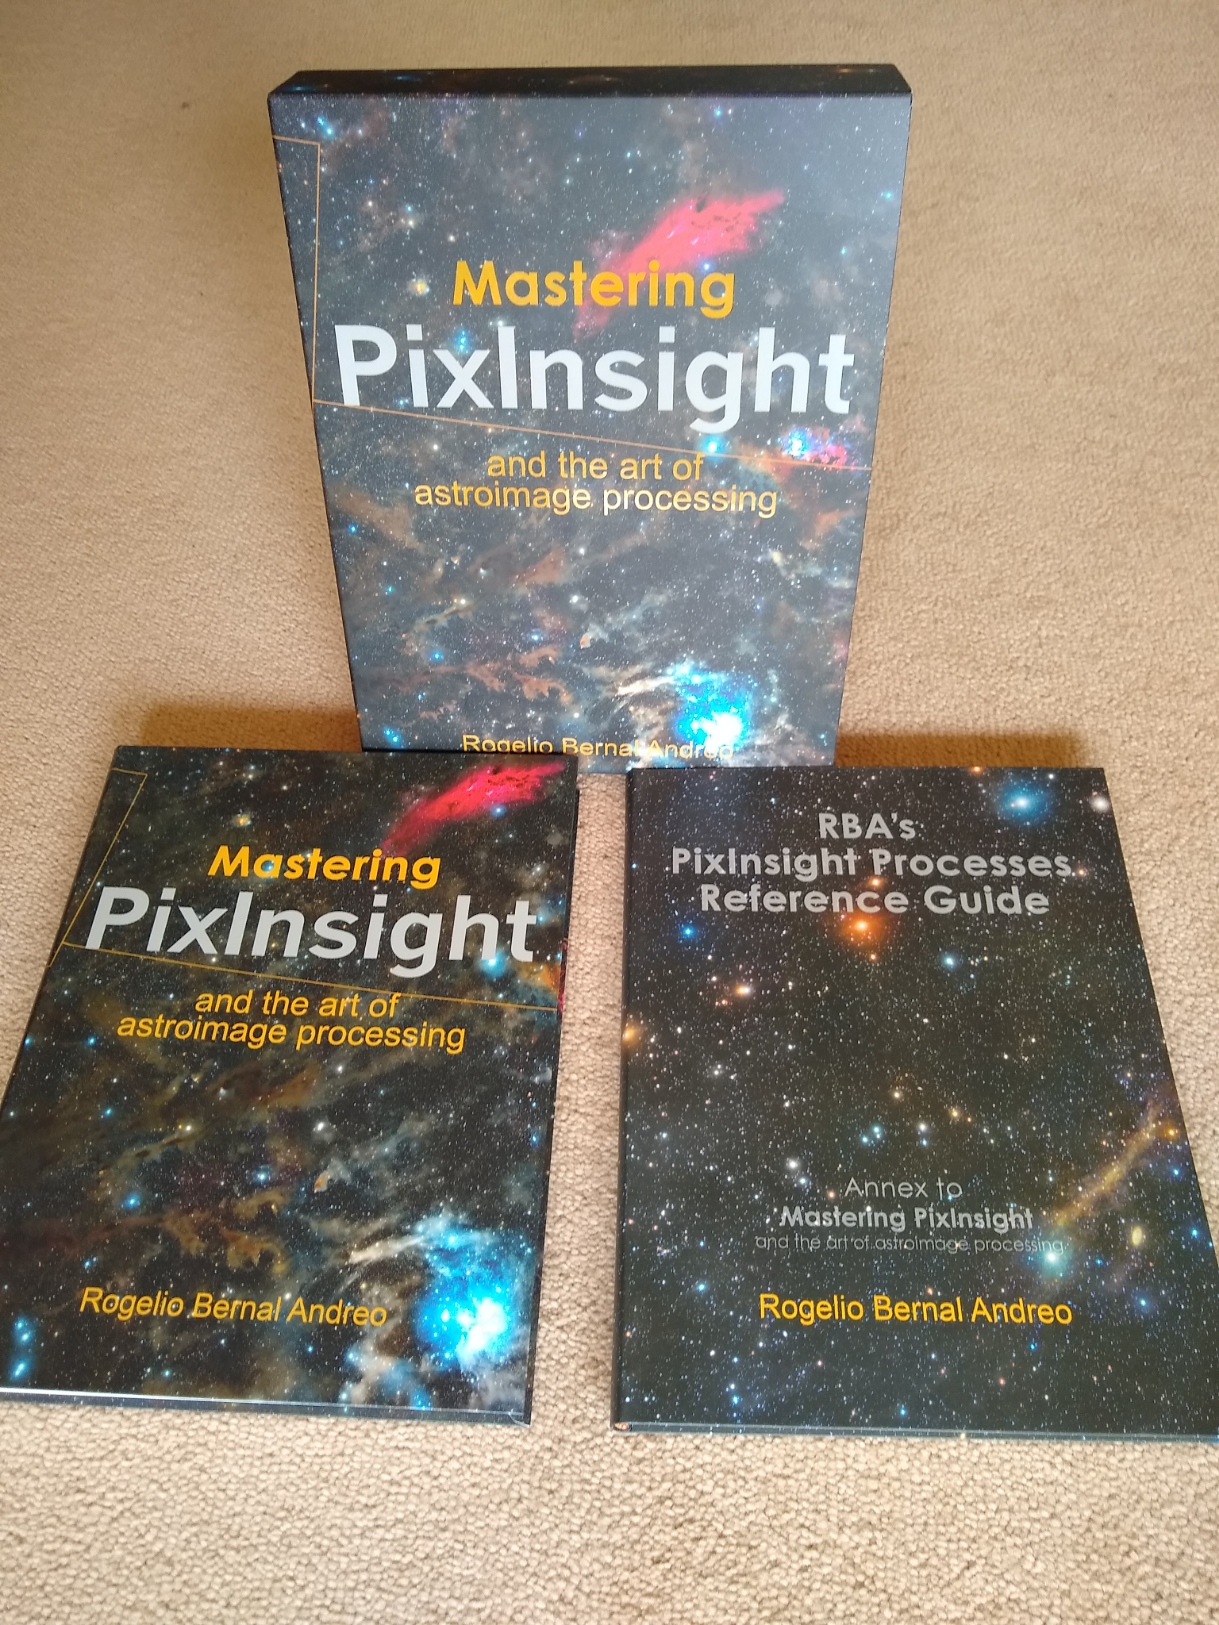
With the time and ‘opportunity’ afforded by lockdown throughout most of the year, I finally decided to do something about improving my processing, namely learning PixInsight. Unfortunately the rumours were correct – it is a steep learning curve and altogether a less than user friendly software. However, after many weeks of toil and expletives I’m pleased to say I can now process an entire image with PixInsight, the impact of which has been nothing less than profound. However, whilst PixInsight is an excellent processing facility, I’ve come to the conclusion that it is often best used together with other process software where appropriate for specific tasks:
- Deep Sky Stacker for calibration, alignment and stacking; the equivalent PixInsight process is just too complicated and time consuming;
- Photoshop can be very helpful finessing colours and stretching (Levels & Curves);
- Starnet++ is useful for creating starless images, which then help to get the best from processing nebula separately before re-combining with the stars;
- Topaz AI Denoise has been very effective and easy to use for noise reduction and sharpening at any point during the workflow.
This combination for processing has turned out to be something of a game changer and almost certainly was the most important astrophotography development of the year for me, which augurs well for 2021 and beyond.
Favourite Images
Continuing with the theme of less is more, I imaged just 13 objects this year – of which three were experimental & three with a DSLR – but still with a total integration time of 80 hours (2019 17 objects & 65 hours, 2018: 25 objects & 43 hours). Having worked through many of the astronomer’s favourites by now, images in 2020 consisted of: a new approach to old favourites, difficult / small objects for my equipment e.g. galaxies or less popular and widefield targets.
I’m pleased to say that most of these images turned out well and it’s difficult to choose a favourite. The so-called ‘favourites’ below therefore represent those images from this year that portray an important development in my astrophotography journey. More detailed reviews of these and all other images from 2020 can be found in specific articles that can be accessed using the links found below or via the Blog Index, located under the dropdown menu ABOUT.
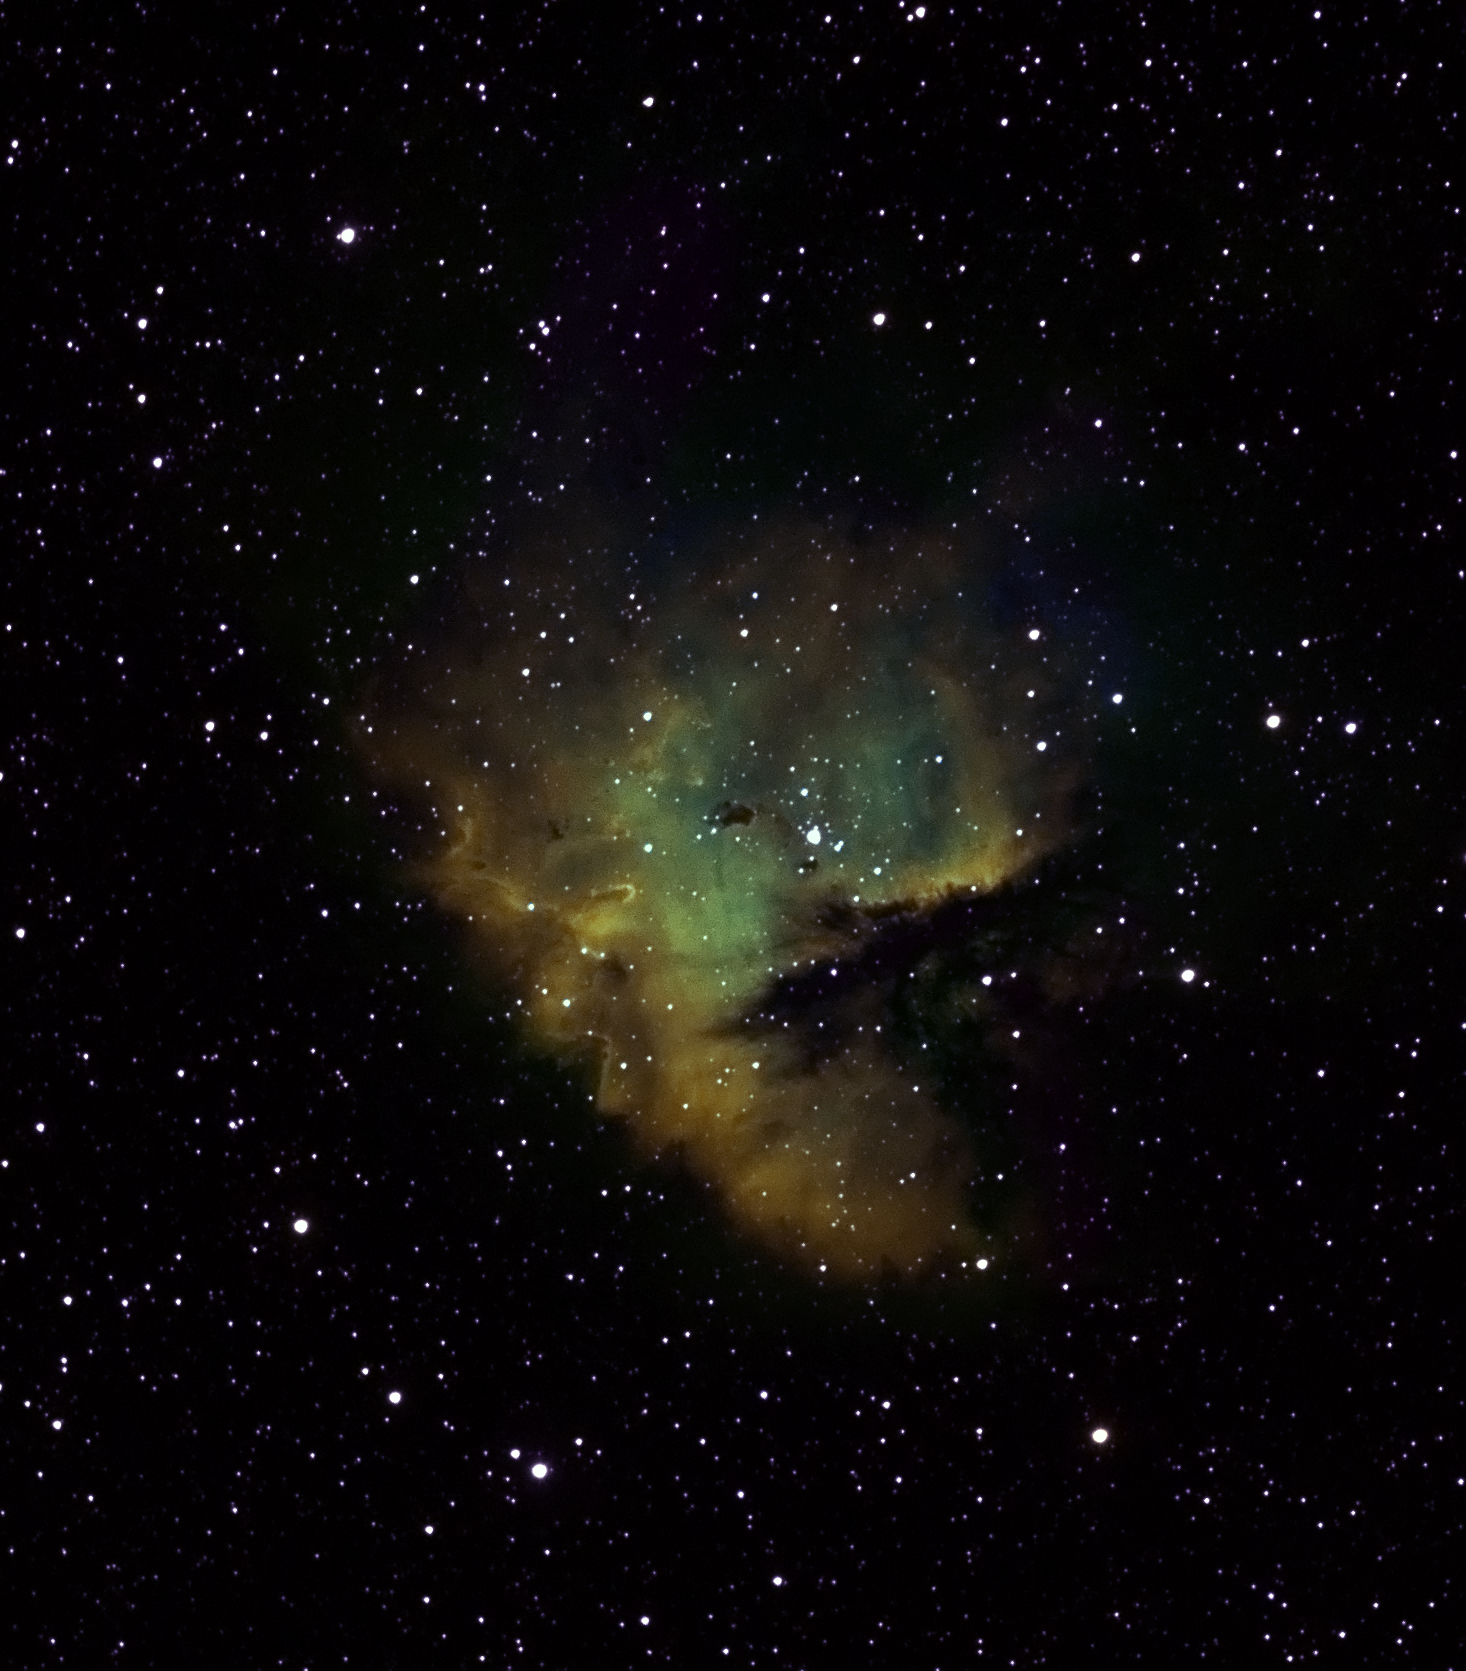
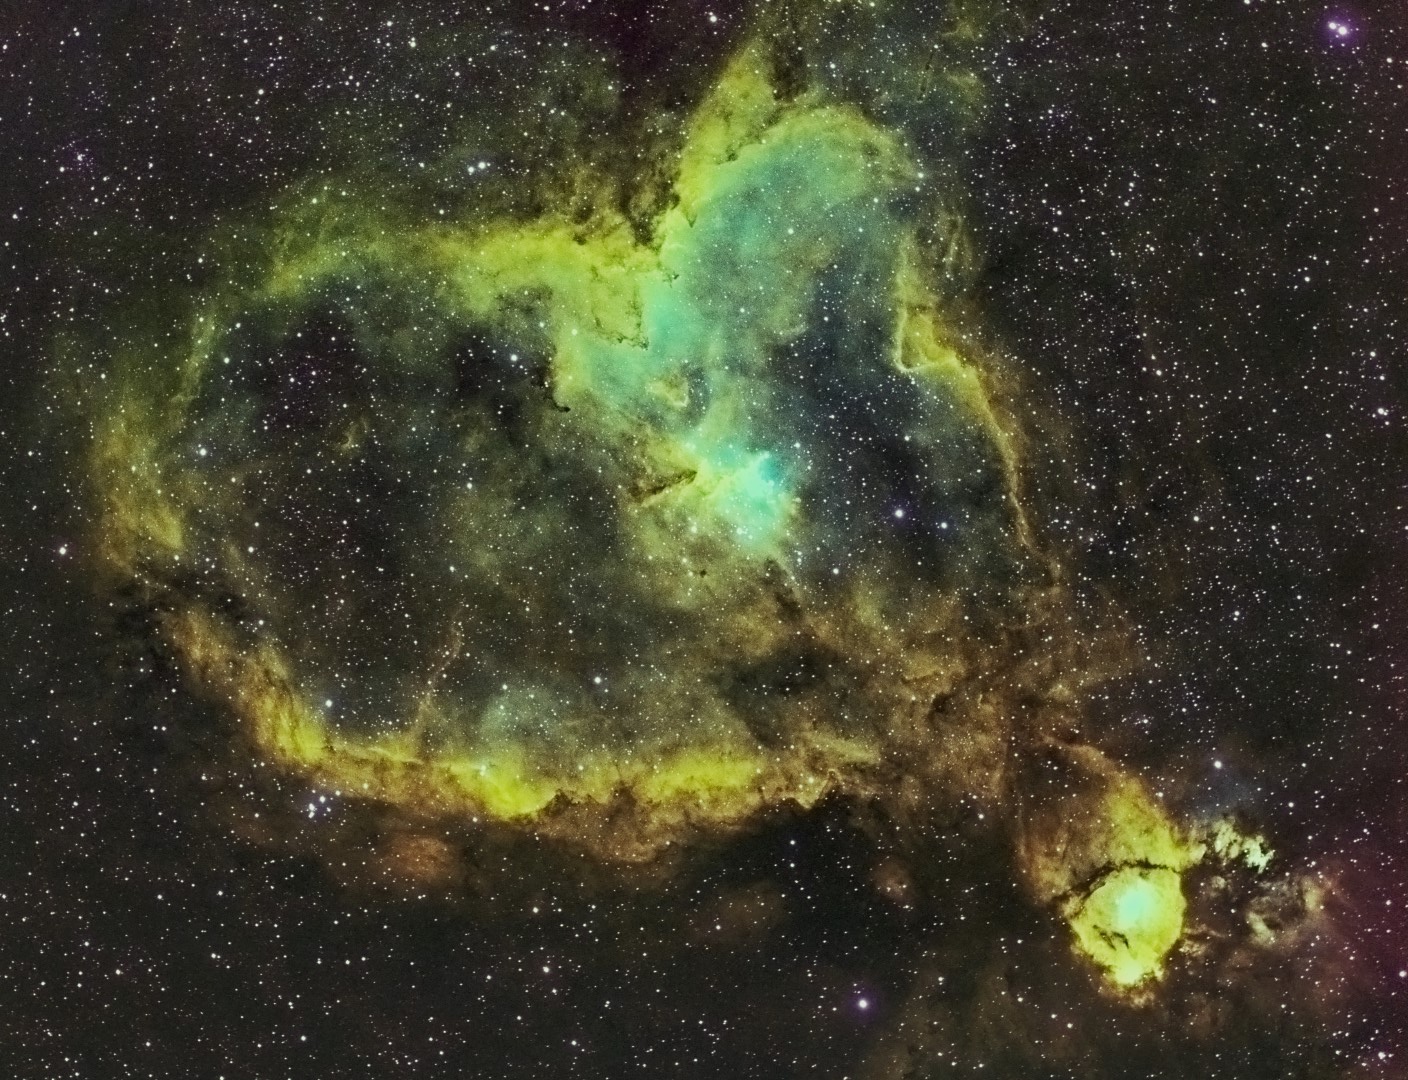
Heart Nebula: Although imaged in 2018, this version has been re-processed using mainly PixInsight, thus transforming the original SHO Hubble Palette image from something rather dull to one with warm, vibrant colours, as well as much great detail – demonstrating the significant impact of my new PixInsight based processing abilities.

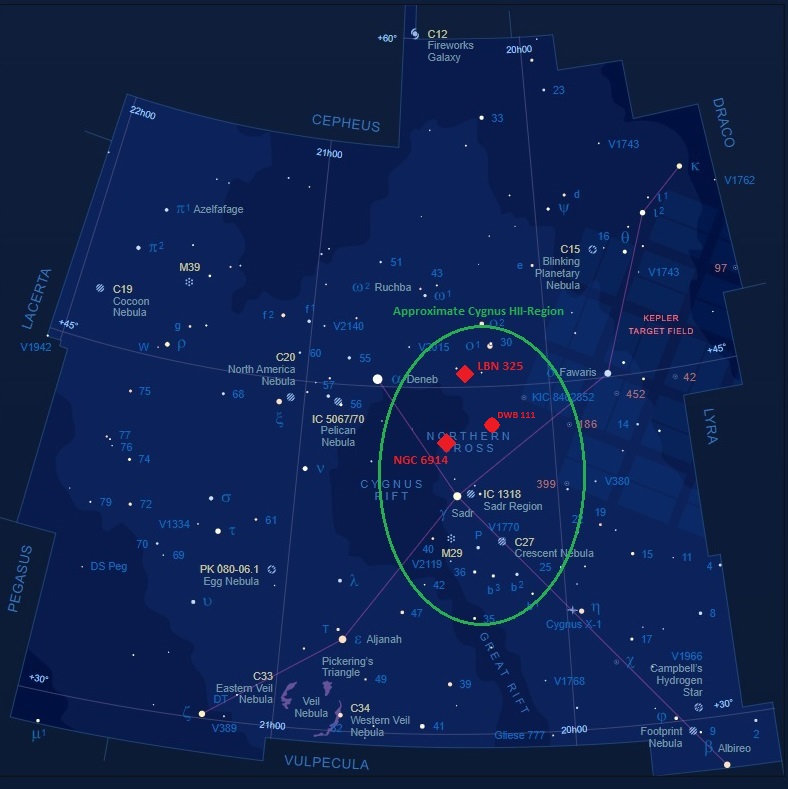
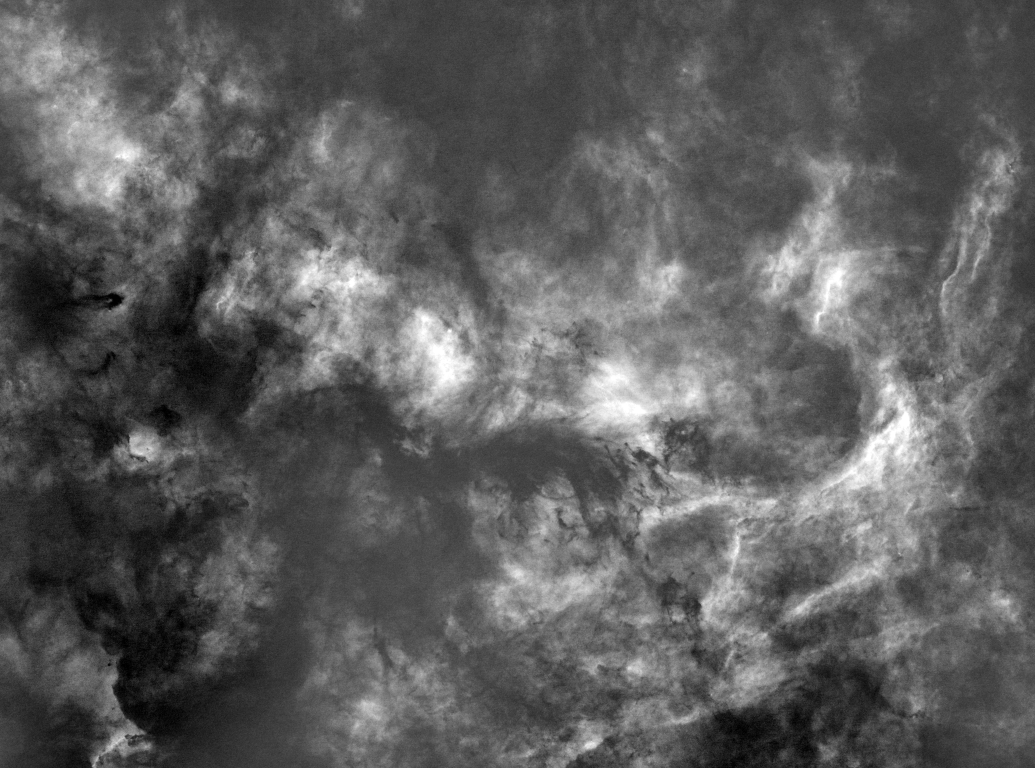
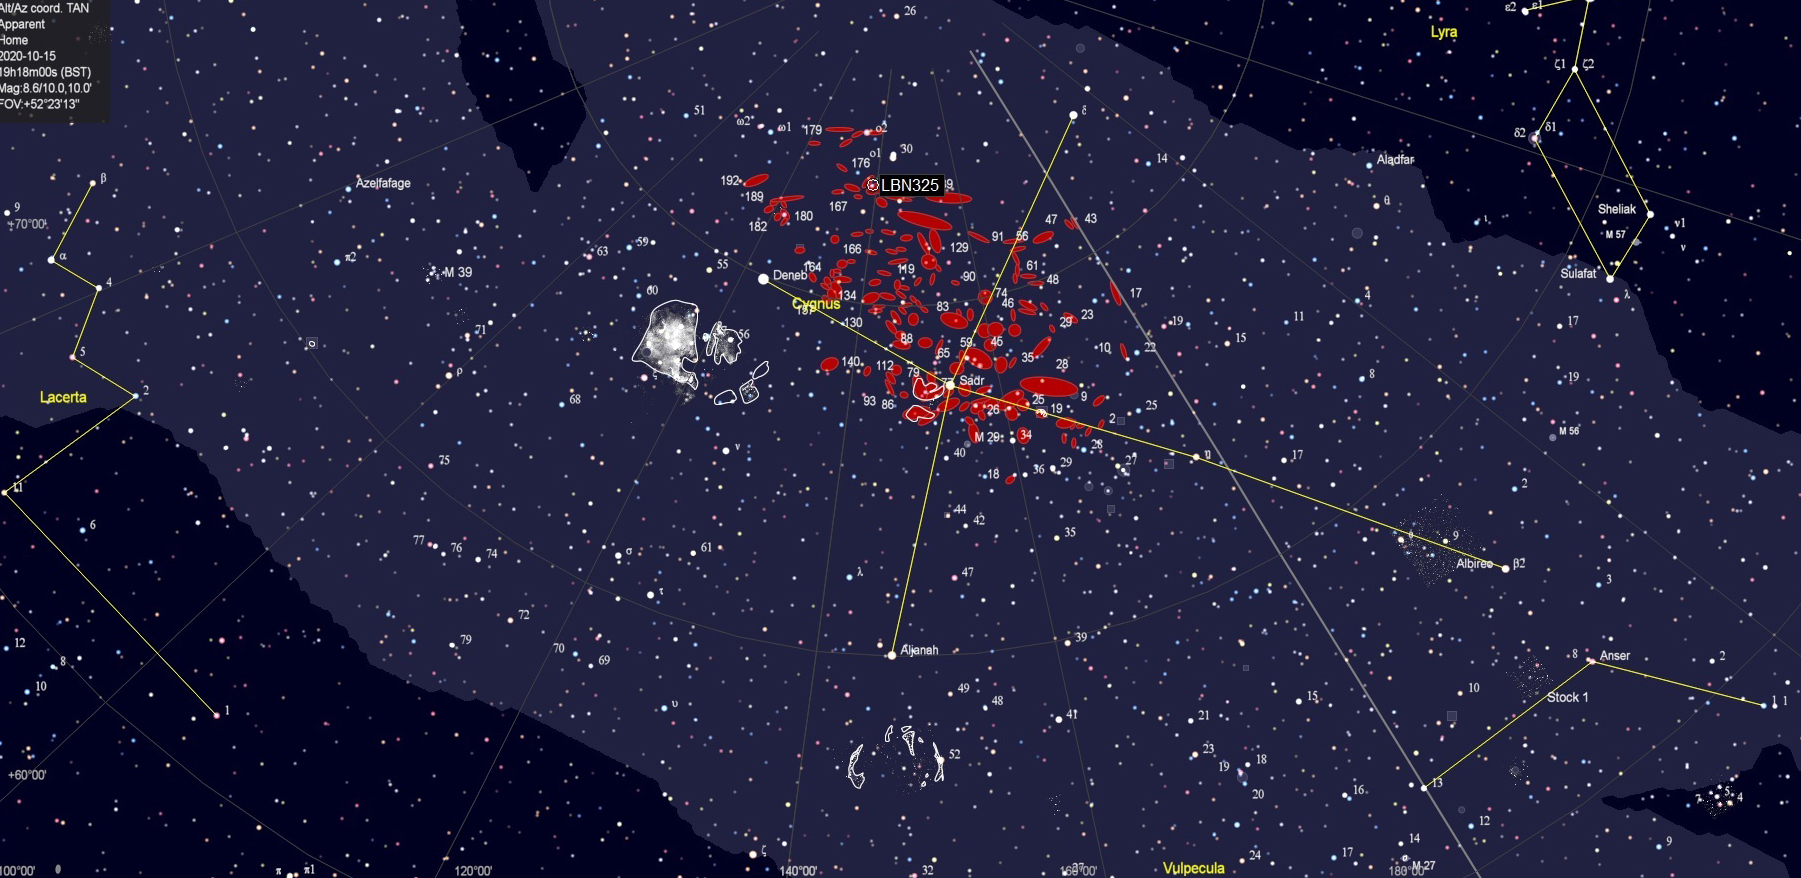
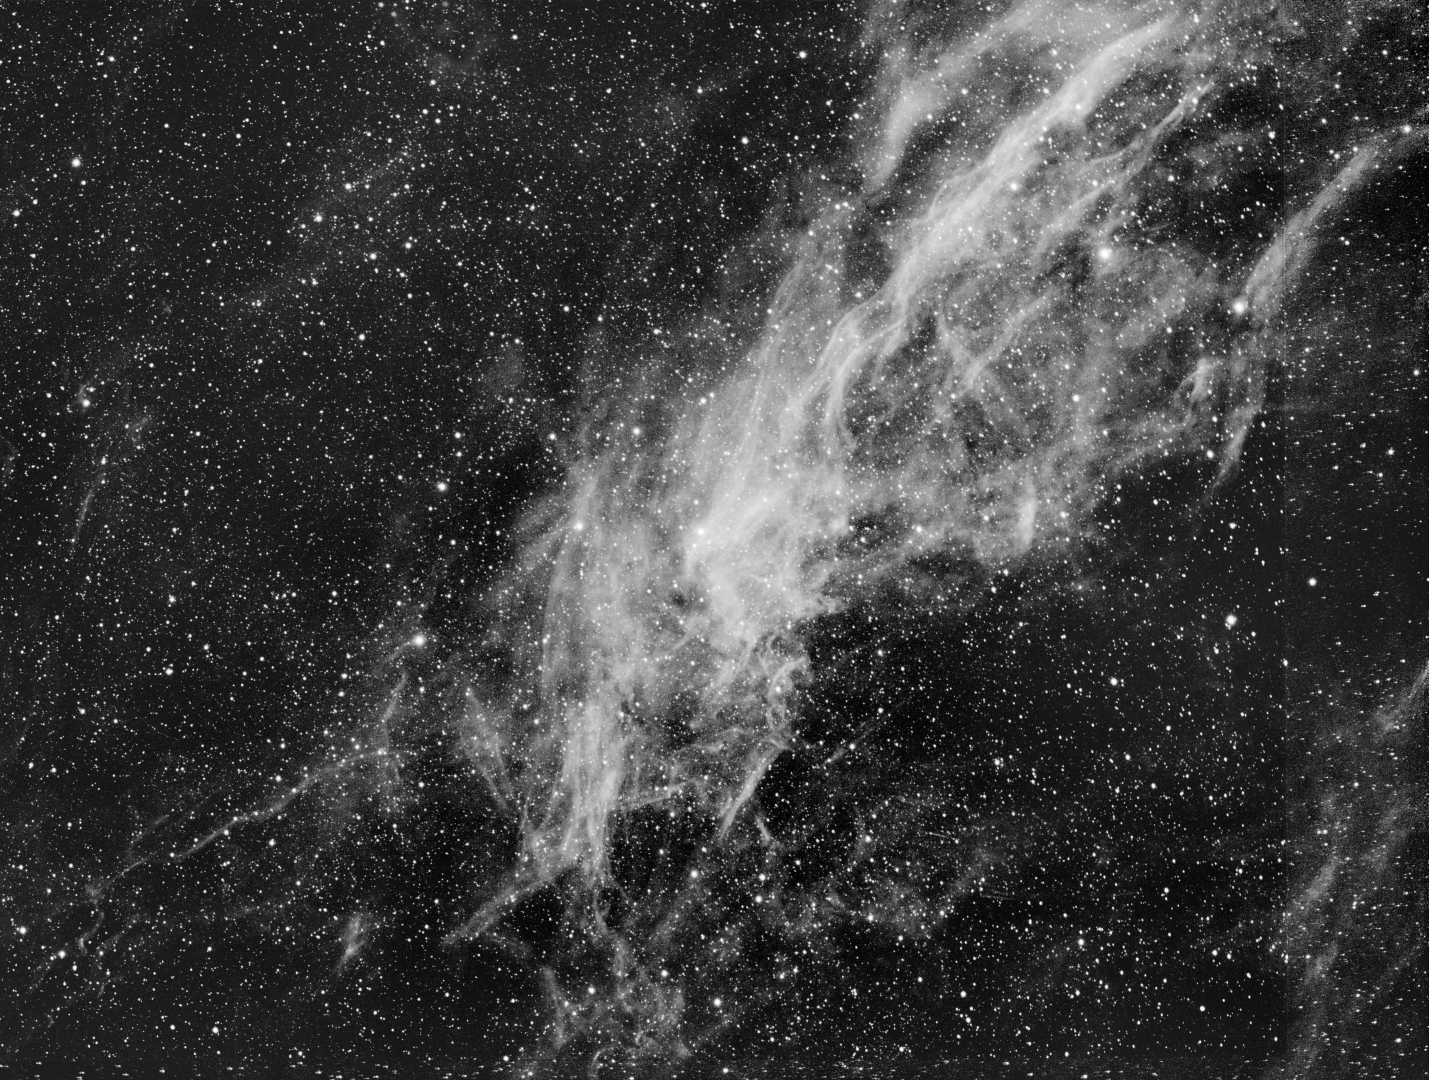
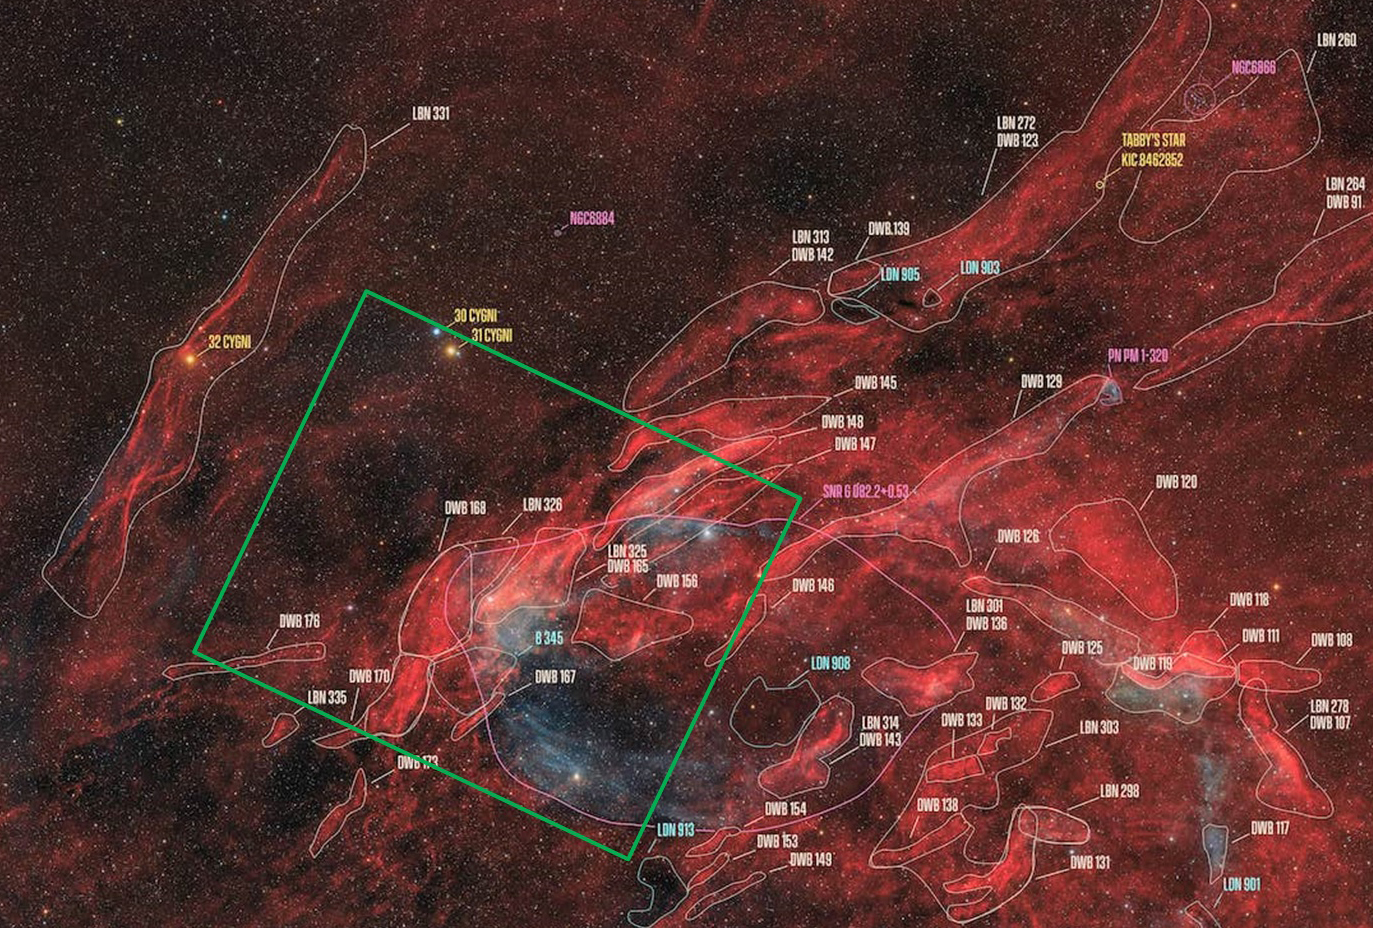
LBN 325: Numerous emission nebulae populate this small part of a very extensiveHII-Region, which forms an exciting LRGB image. Processing was complex and difficult, in order to bring out exciting features that abound in this spectacular but less popular area of the Cygnus constellation. Integration time of 10-hours was obtained over three nights and is my first LRGB image processed using PixInsight.

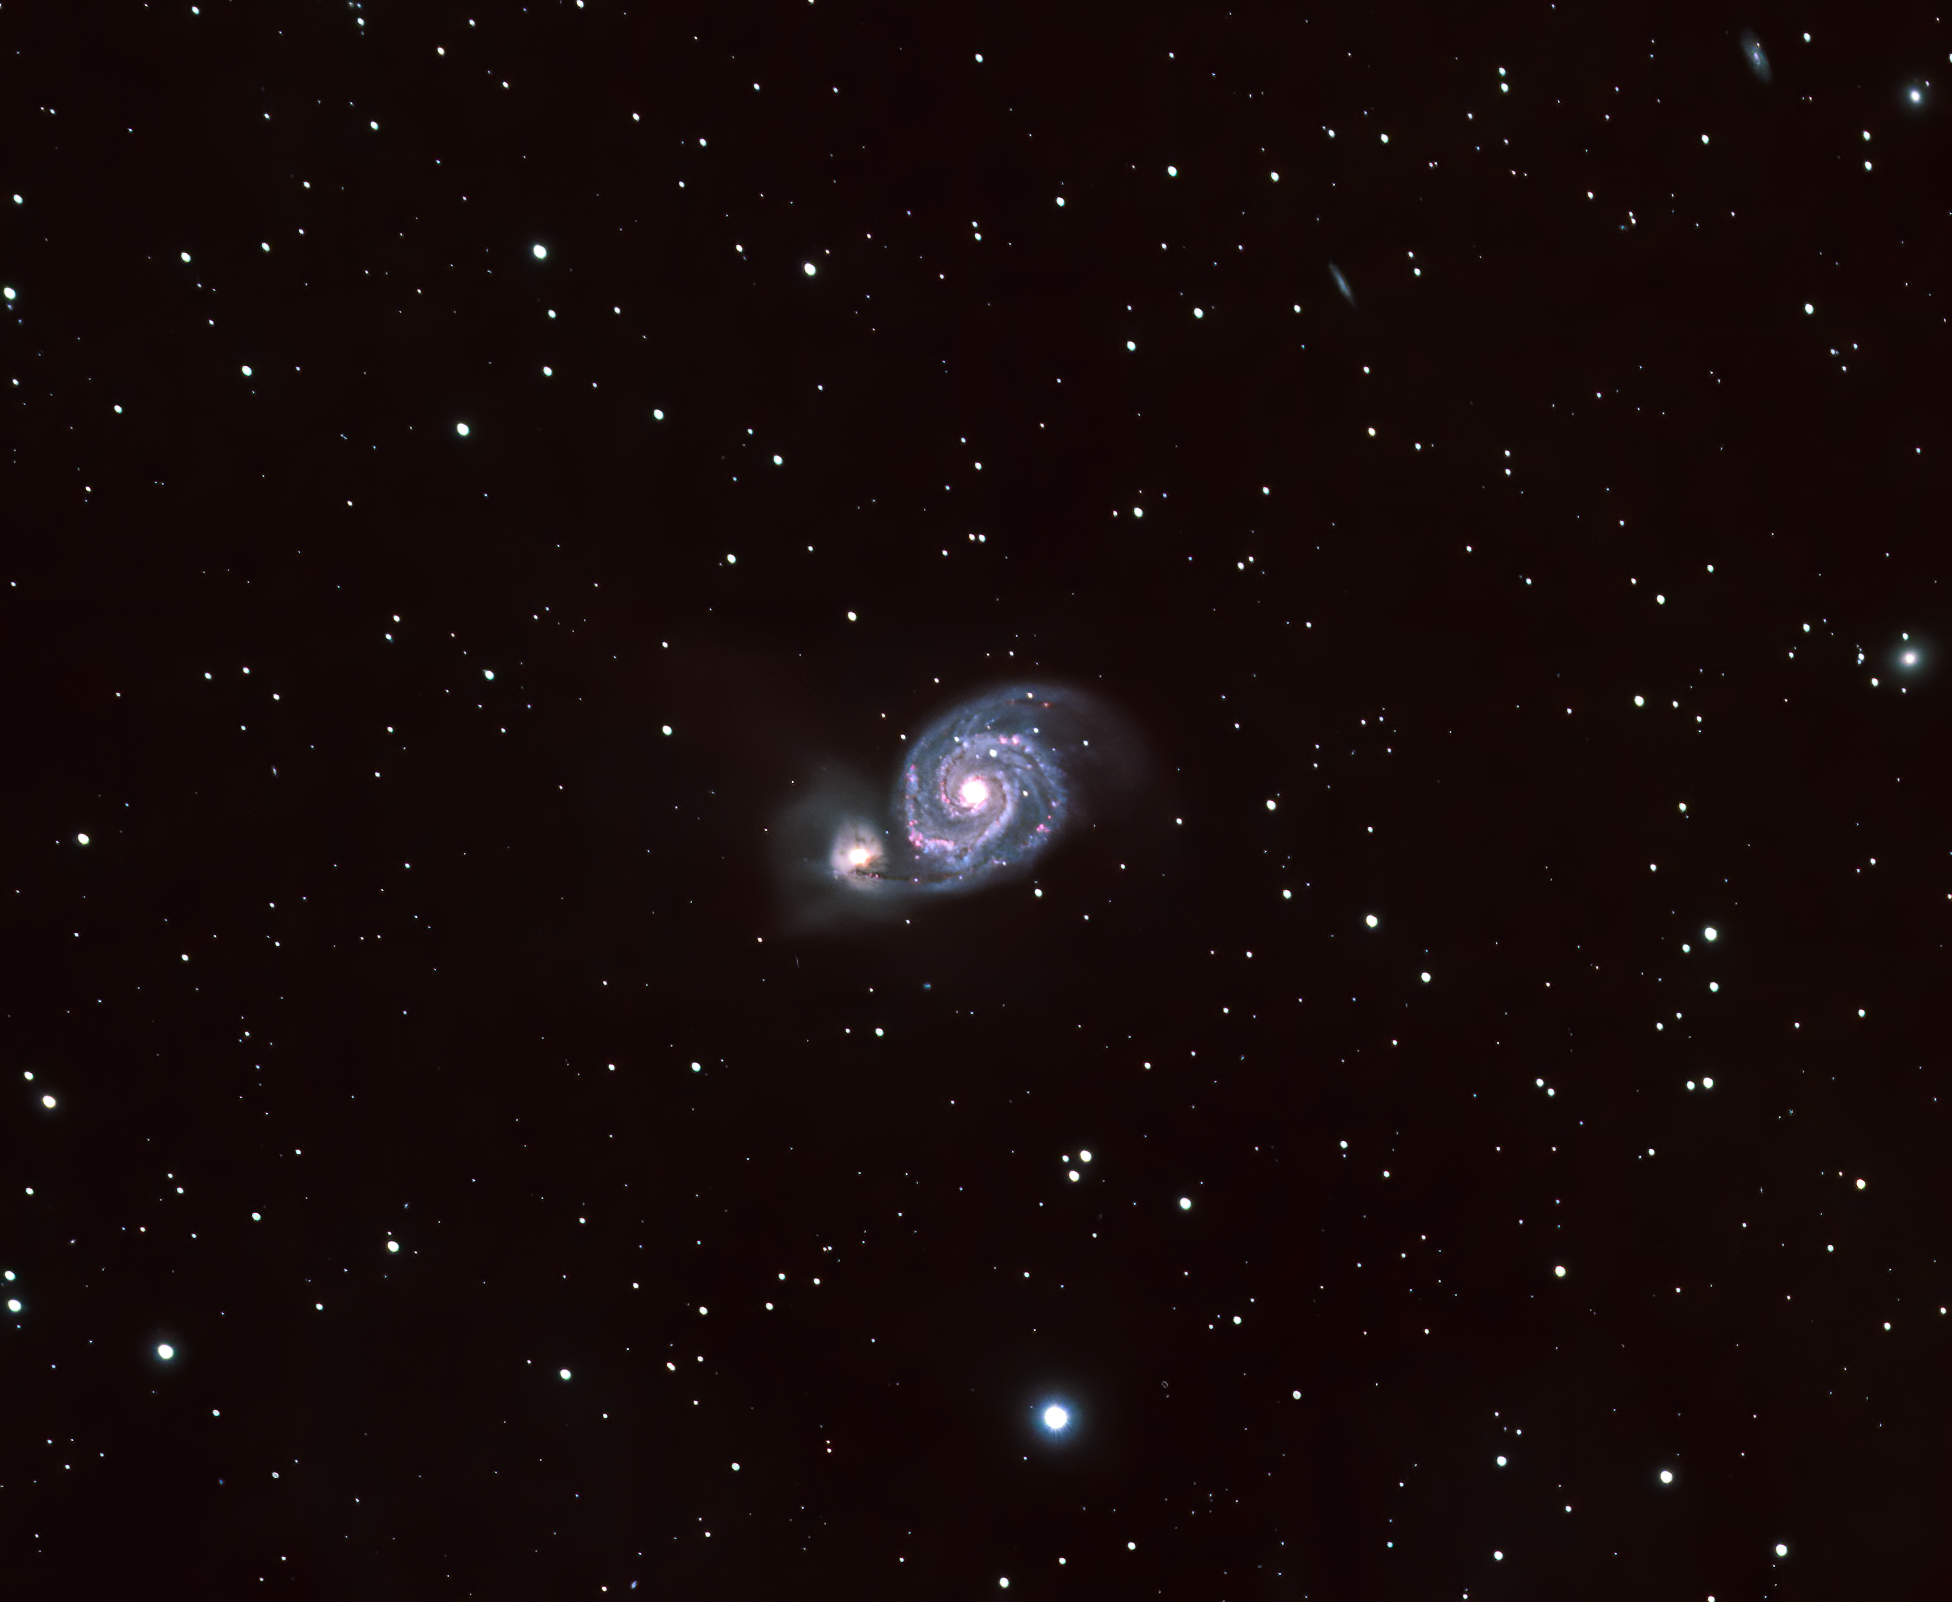
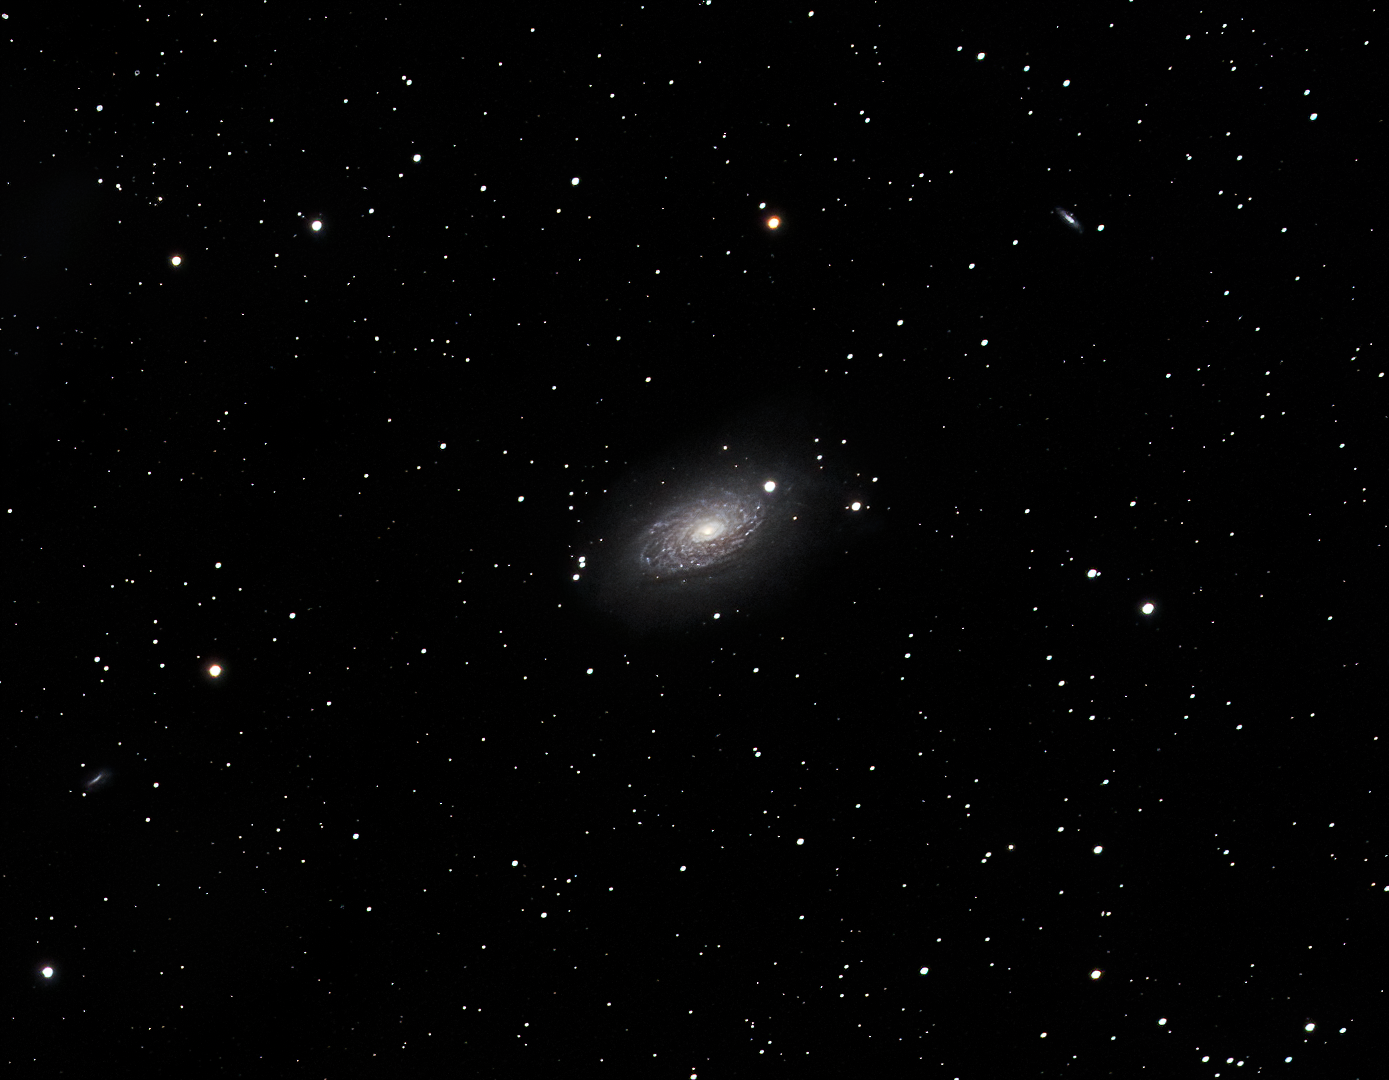
M63 Sunflower Galaxy: At 12.6’ x 7.2’and apparent magnitude of +9.3,this small flocculent galaxy in the Canes Venatici constellation is a challenge for my equipment. However, with 8 hours 20 minutes exposure over three nights in April and careful processing, the all-important detail within the galactic disc is clear. Topaz Denoise AI and Gigapixel software played an important role in maintaining the colour and delicate detail in this +50% cropped image.
Taken from last year’s REFLECTIONS 2019:
“Although you never know, I don’t see any major breakthroughs in the coming year”. Just goes to show what I know, fewer but better images were obtained in 2020:
RECORD CARD 2020
| Goal | Specifics / Results | Outcome |
| Improve image capture | Further Improvements in overall quality + much longer integration times + better guiding accuracy = less but better images. | MUCH BETTER |
| Better processing | Using PixInsight software combined with Photoshop, Starnet++ and Topaz Denoise AI has led to major processing improvements and much better final images. | MUCH MUCH BETTER |
| Widefield Imaging | Initial results from new imaging rig based around Samyang 135 f2 lens were very promising but there’s more to do. | BETTER |
My main objectives for 2020 were largely fulfilled (see above), so what about 2021?
- Imaging: Other than maintaining the aforesaid improvements achieved over the past two years – guiding & longer integration times – two items that still need to be addressed are: (i) upgrade filters to remove star bloating and all round better images, (ii) improved focussing.
- Widefield: Complete Samyang-rig build and switch from DSLR to CMOS mono camera.
- Consolidate processing improvements: Whilst the move to PixInsight and other software was very successful in 2020, I’m still only scratching the surface of what’s possible.
- Upgrade mono camera – there’s a new generation of colour CMOS cameras starting to appear, hopefully soon to be followed by their mono equivalents !
Hardly a year I and the rest of the world will want to remember, though more than ever astrophotography played a big role in providing relief from the trauma going on around us all.
The major increase of integration times achieved and the use of PixInsight has proved transformative for my astrophotography and will justify returning to reimage some old favourites in future years. I had often thought about upgrading my OTA to something bigger but given the lack of a permanent observatory here at Fairvale Observatory, combined with long periods of bad / cloudy weather, the penny finally dropped and I now have high hopes for the little wonder that is the Samyang 135 f2 lens when I complete its set-up in 2021.
Looking back I have to be happy with my astrophotography in 2020 but more importantly, look forwards to an even better year which holds great promise building on the positive developments of the past 24-months. Moreover, I hope for the sake of everyone that we will be able to deal with Covid-19 soon and return to something of a normal life once again. These are big ambitions and I hope that WTSM’s Reflections 2021 will record such success.
Watch this space!
ASTROPHOTOGRAPHY INDEX OF 2020
To access each blog, click on the title required below highlighted in RED:
JANUARY & FEBRUARY – Jinxed: Barnard’s Loop Mosaic (+ NGC 1333 reflection nebula & LDN 1622 Bogeyman Nebula)
MARCH – Nice but Dim: Medusa planetary nebula / Abell 21
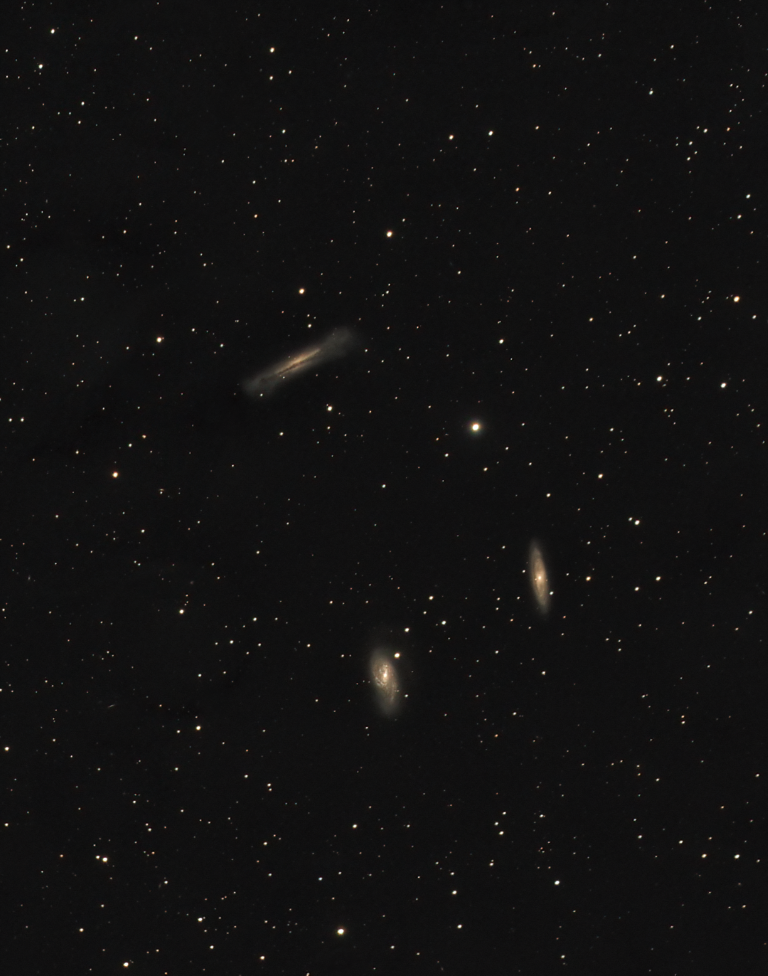
MARCH & APRIL – Return of the Lion: Leo Triplet M65, M66 & NGC 3628
MAY – Galactic Bloom: M63 Sunflower Galaxy
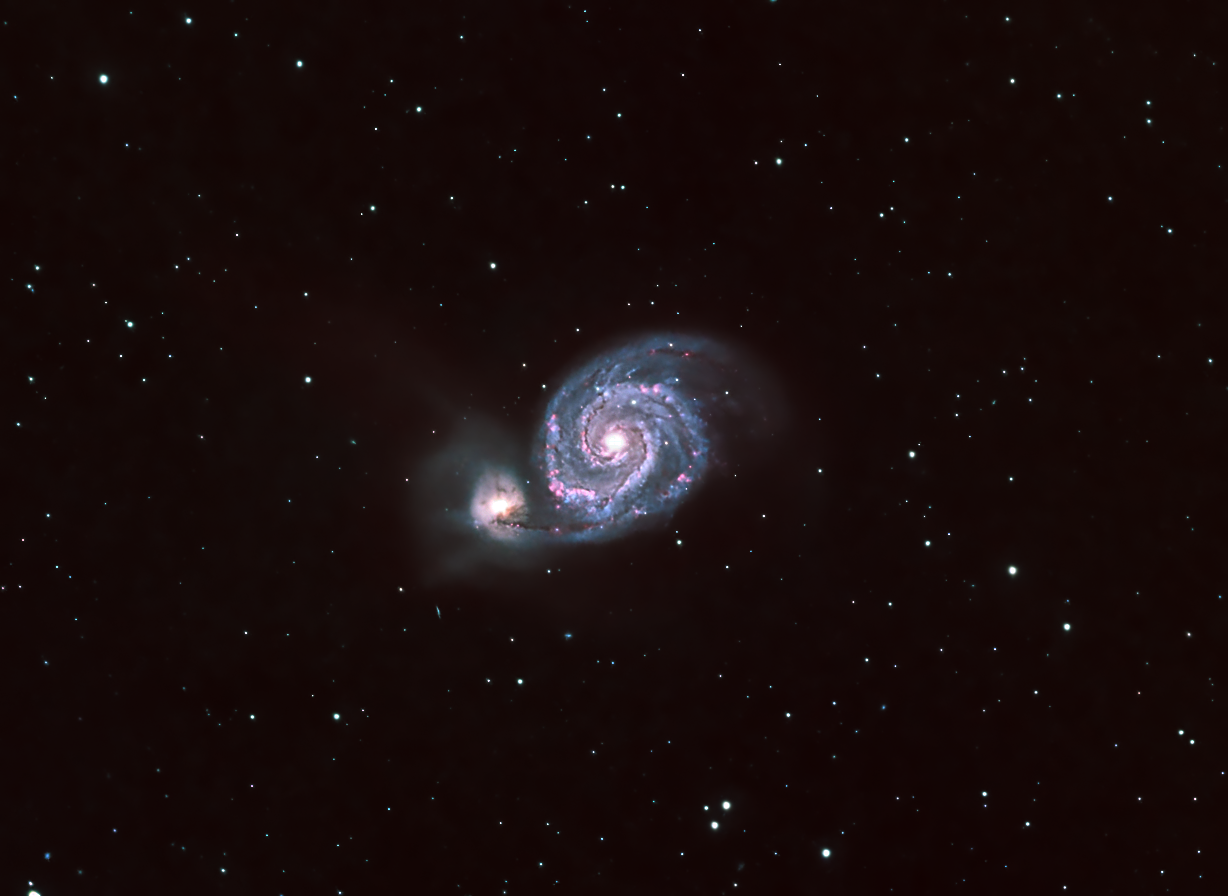
JUNE – Canine Capers: M51 Whirlpool Galaxy
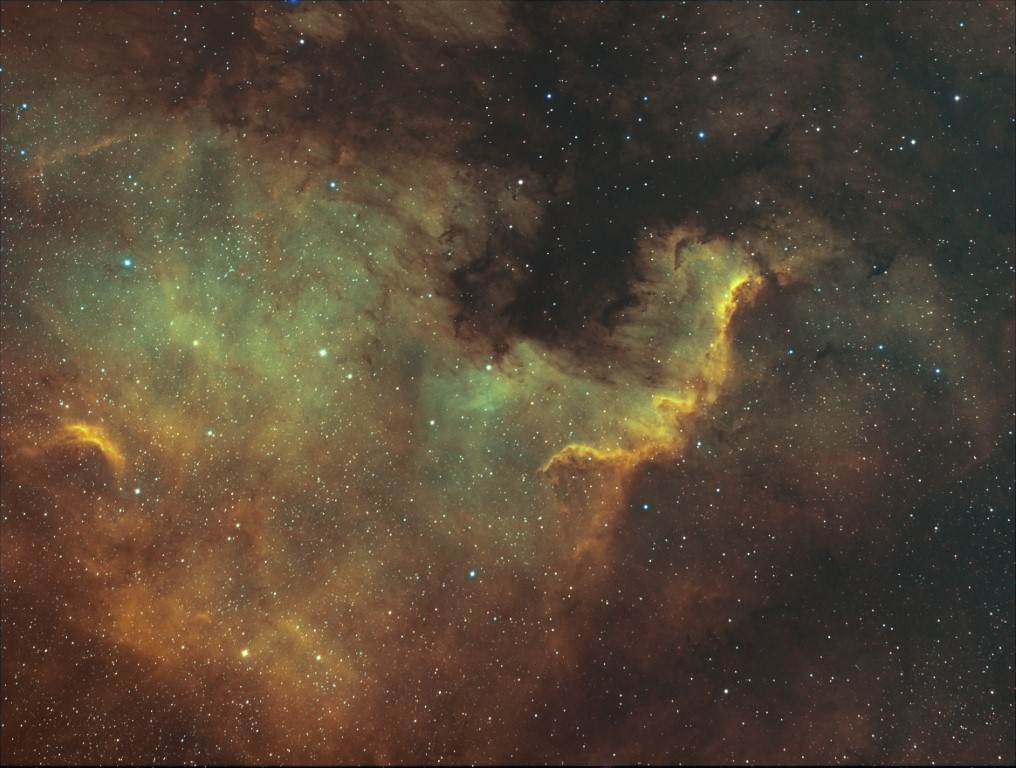
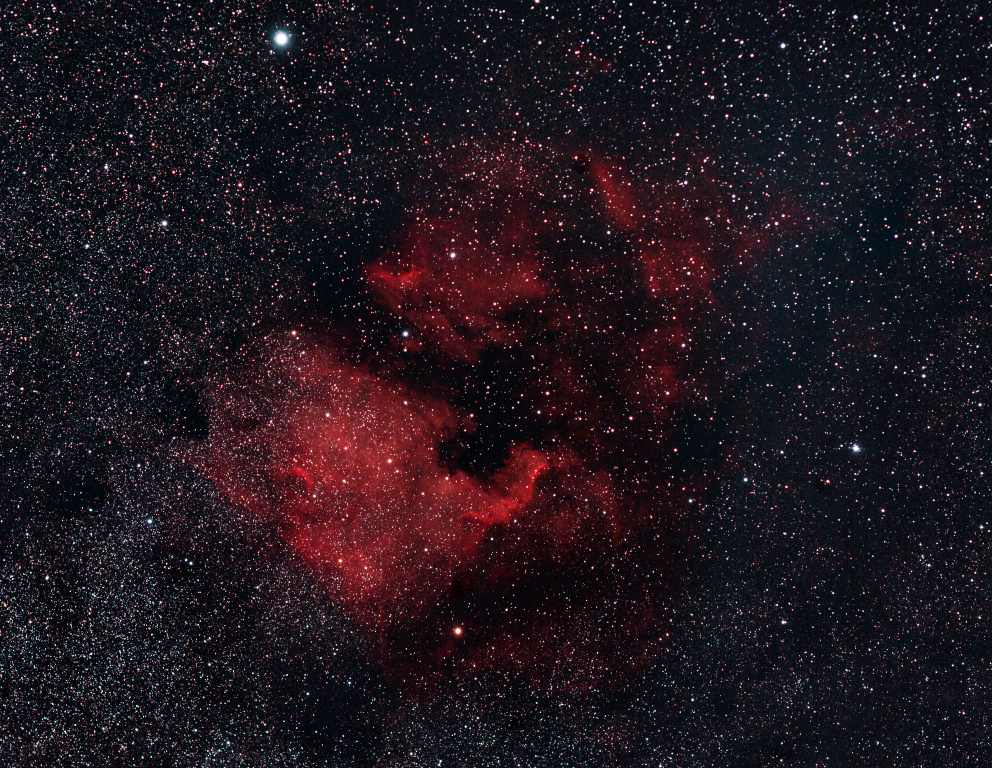
AUGUST & SEPTEMBER – The Big Picture: First Light Samyang 135 f/2 NAN, Cygnus & Veil Nebula
OCTOBER – Reach For The Sky: LBN 325 emission nebula
NOVEMBER – Swan Adventures: NGC 6914 reflection nebula
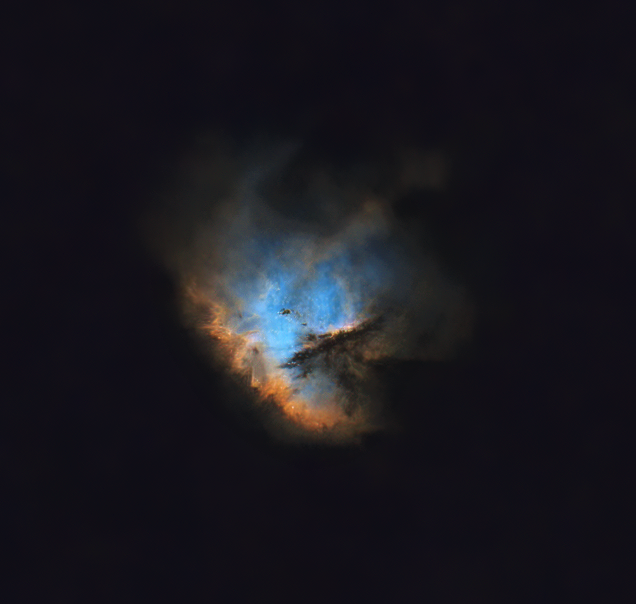
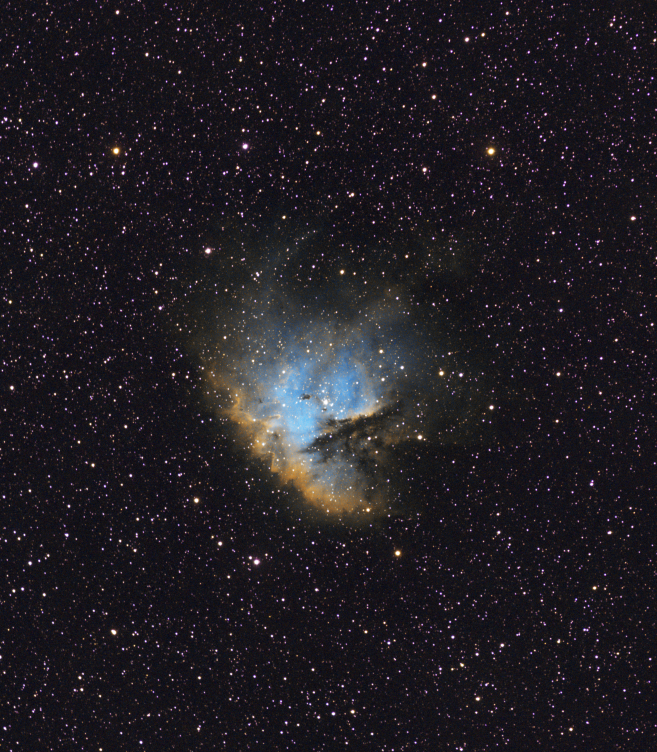
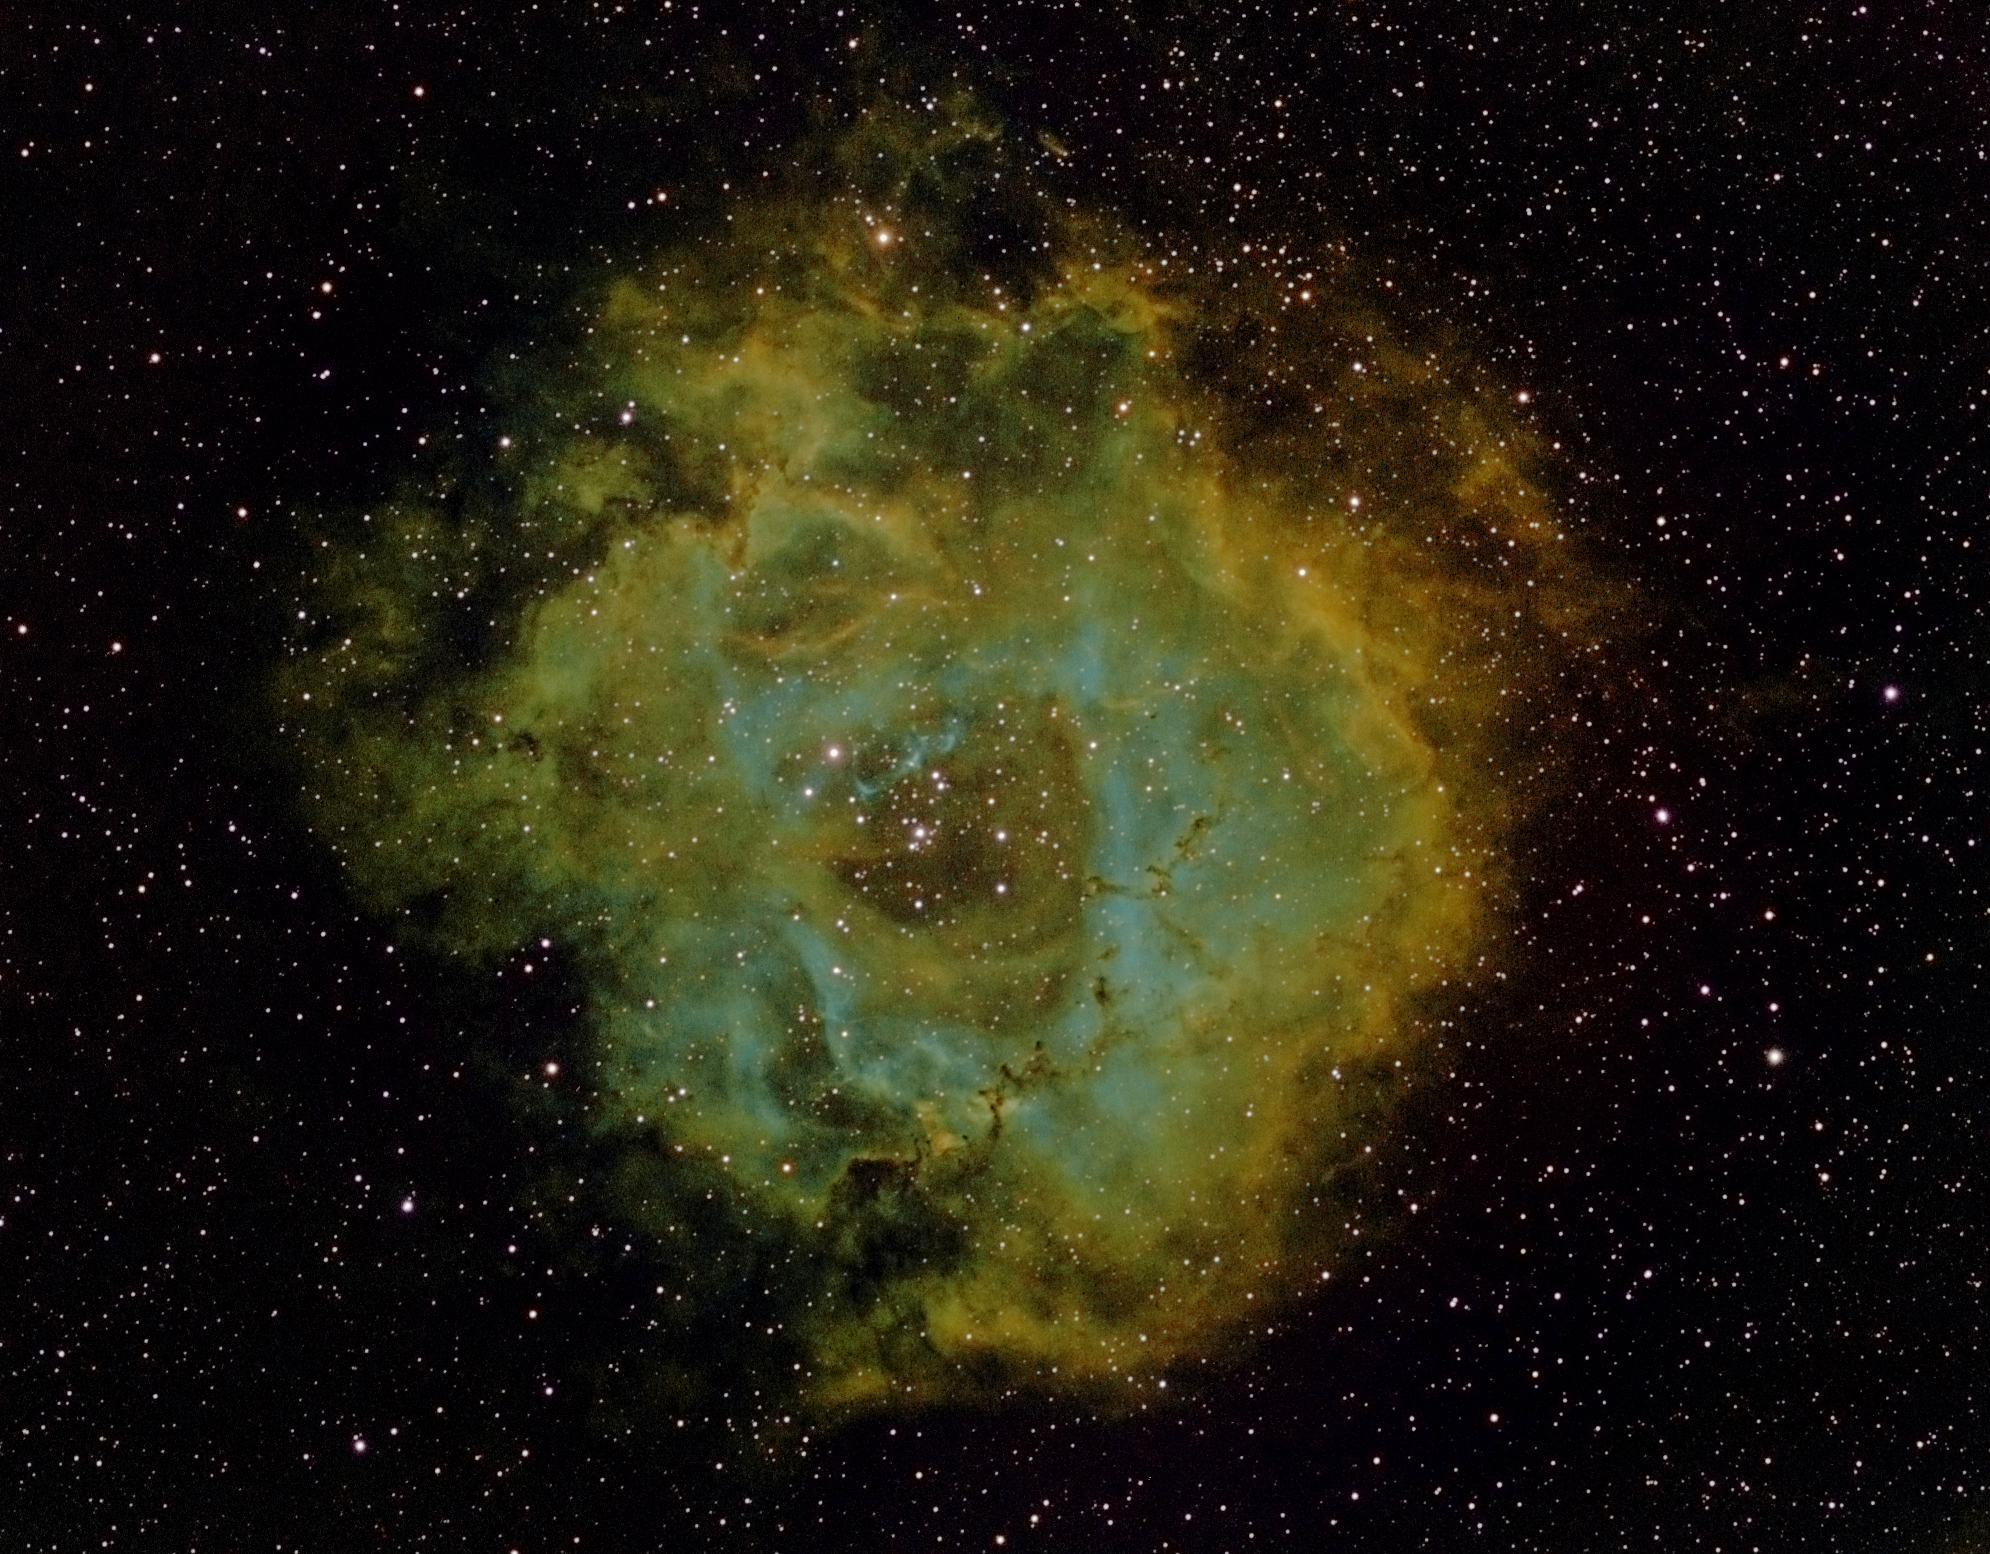
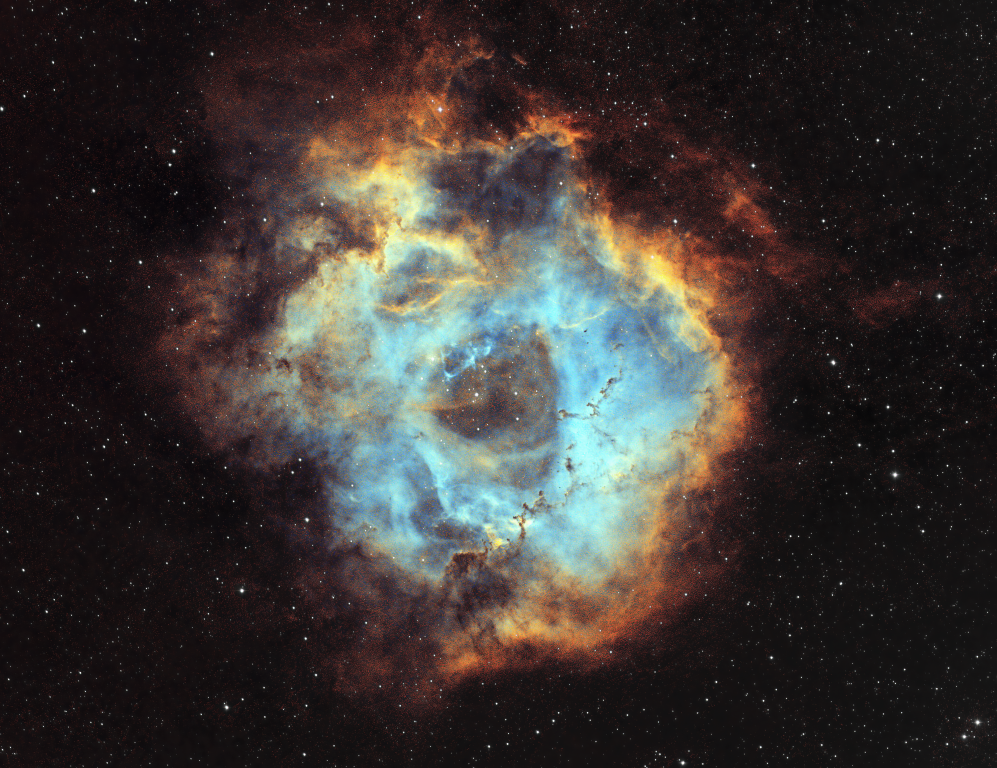
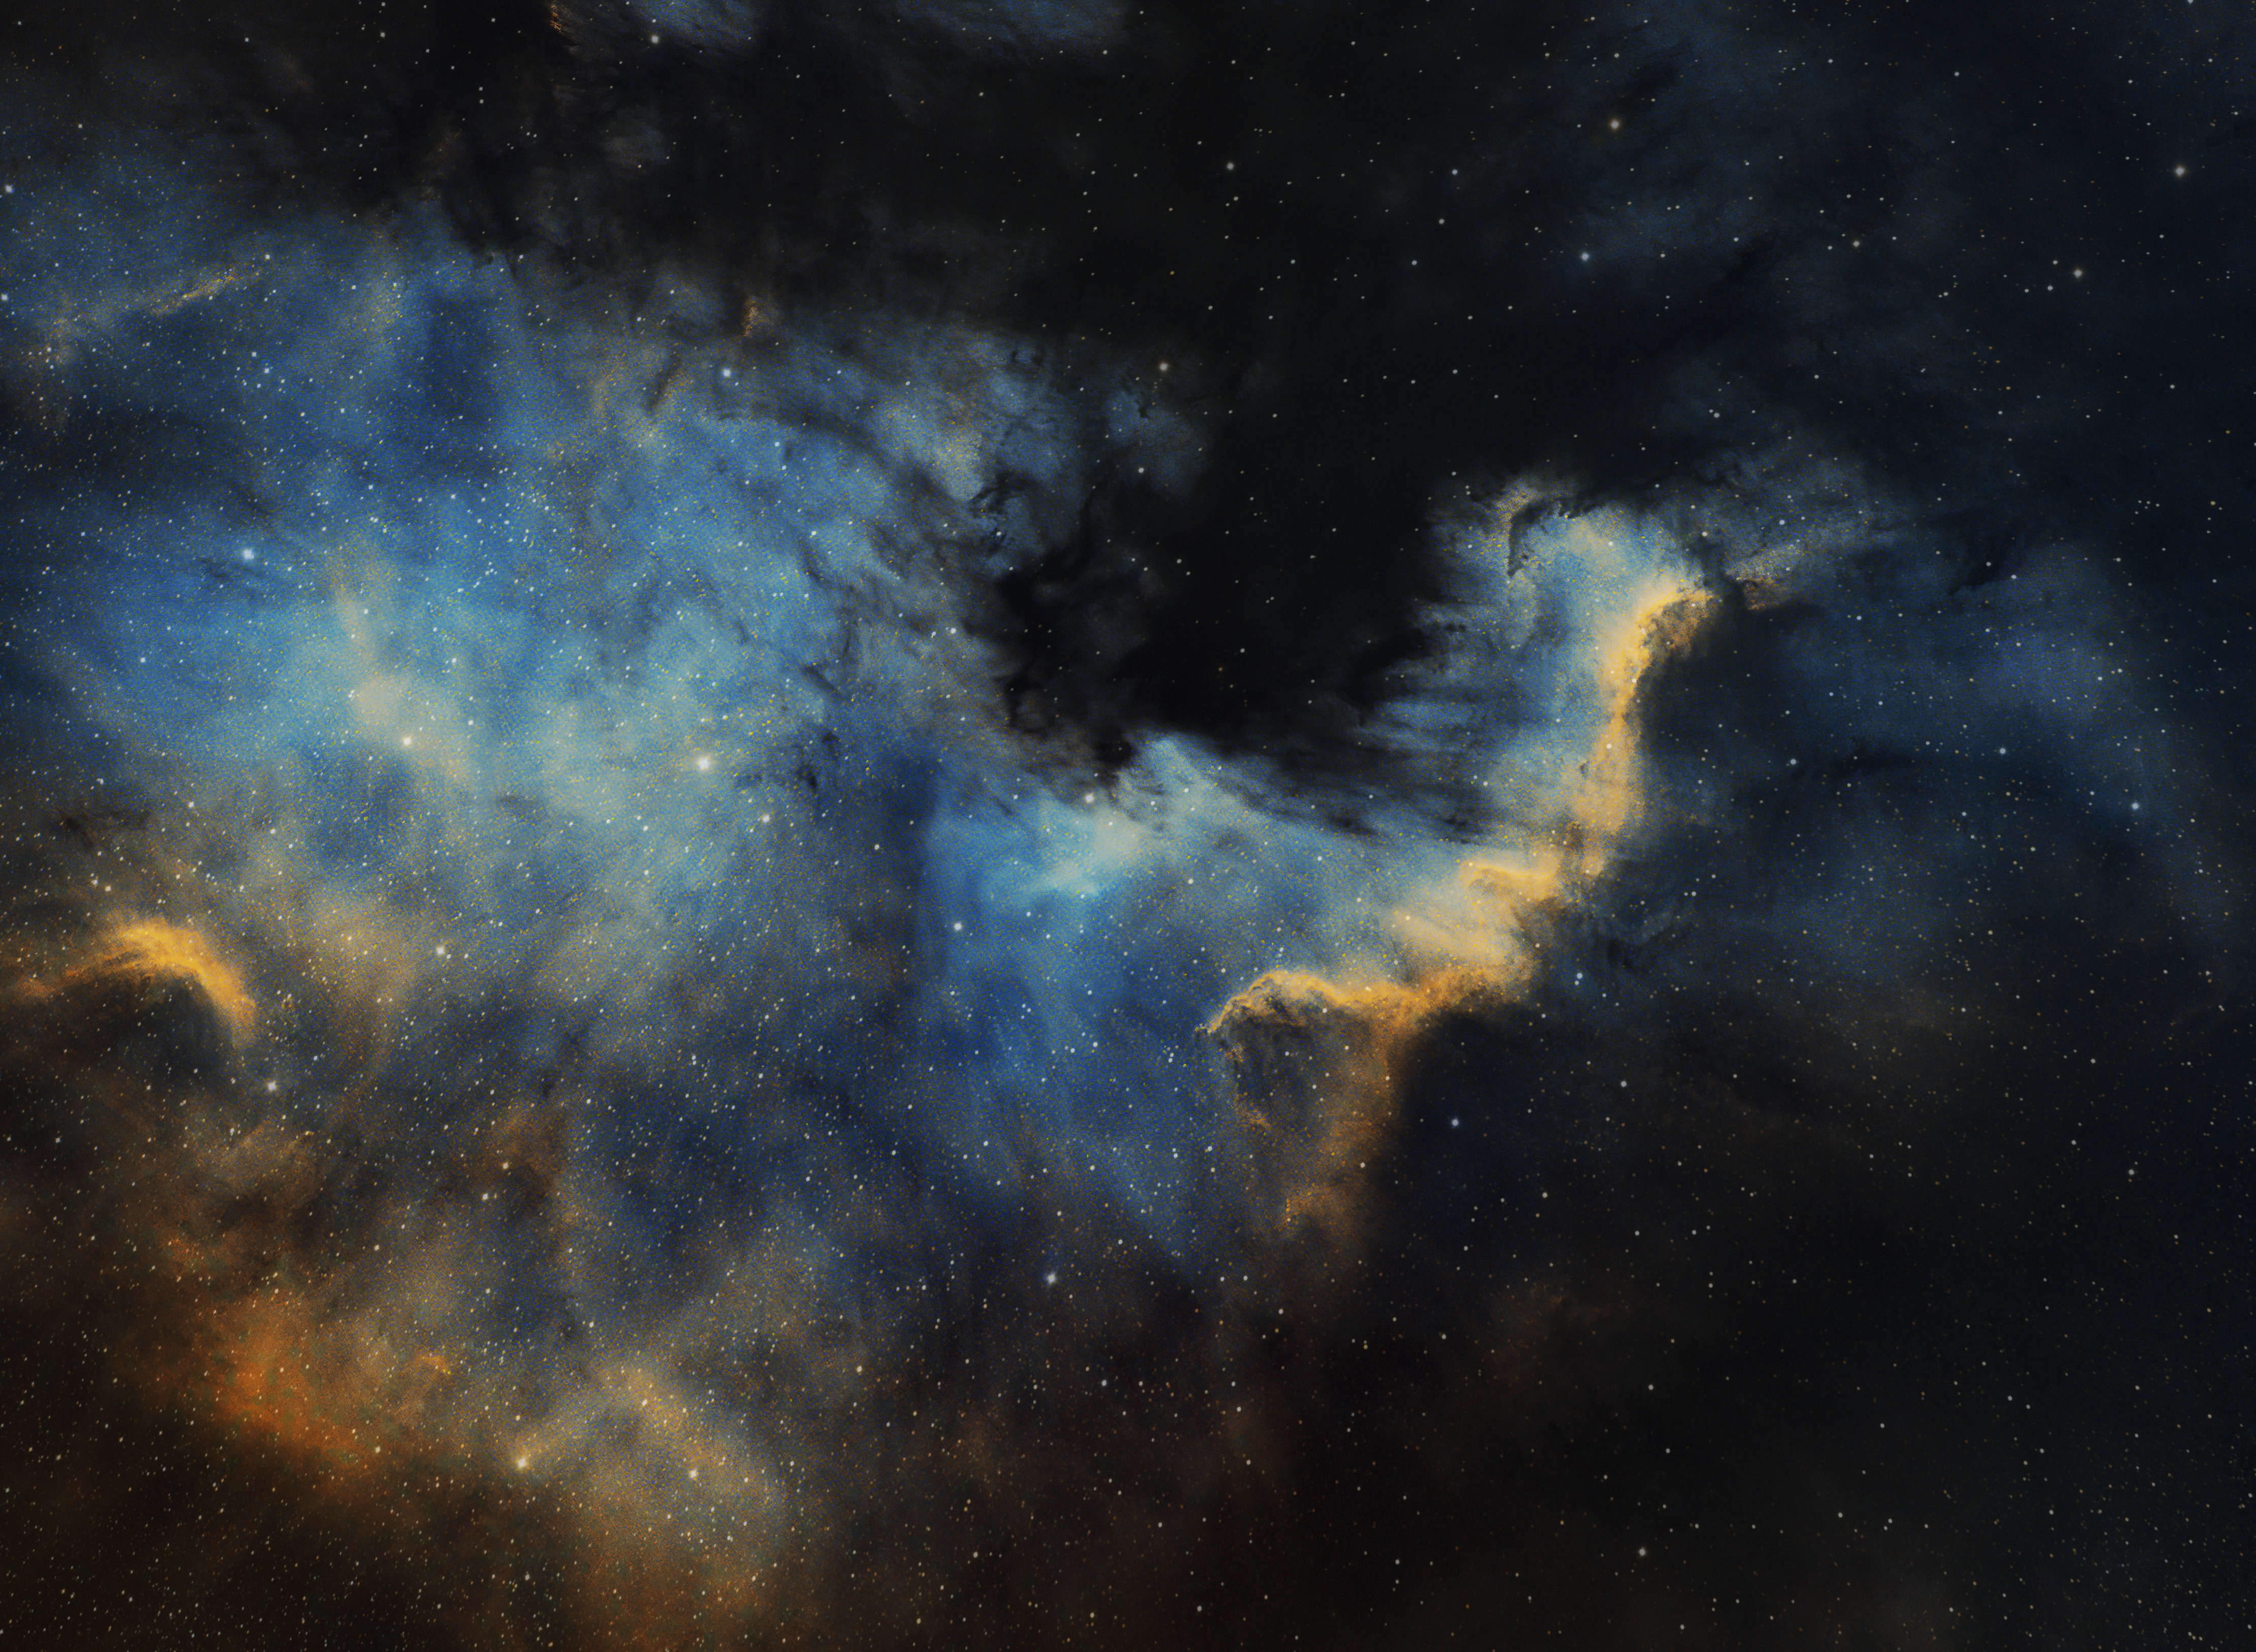
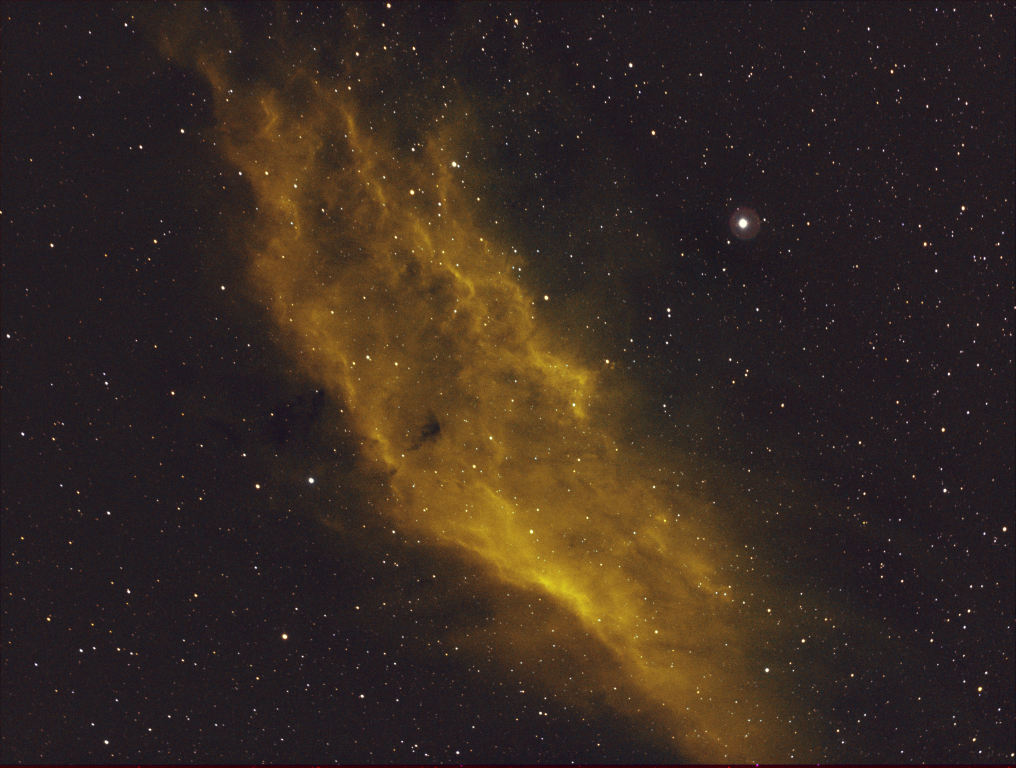
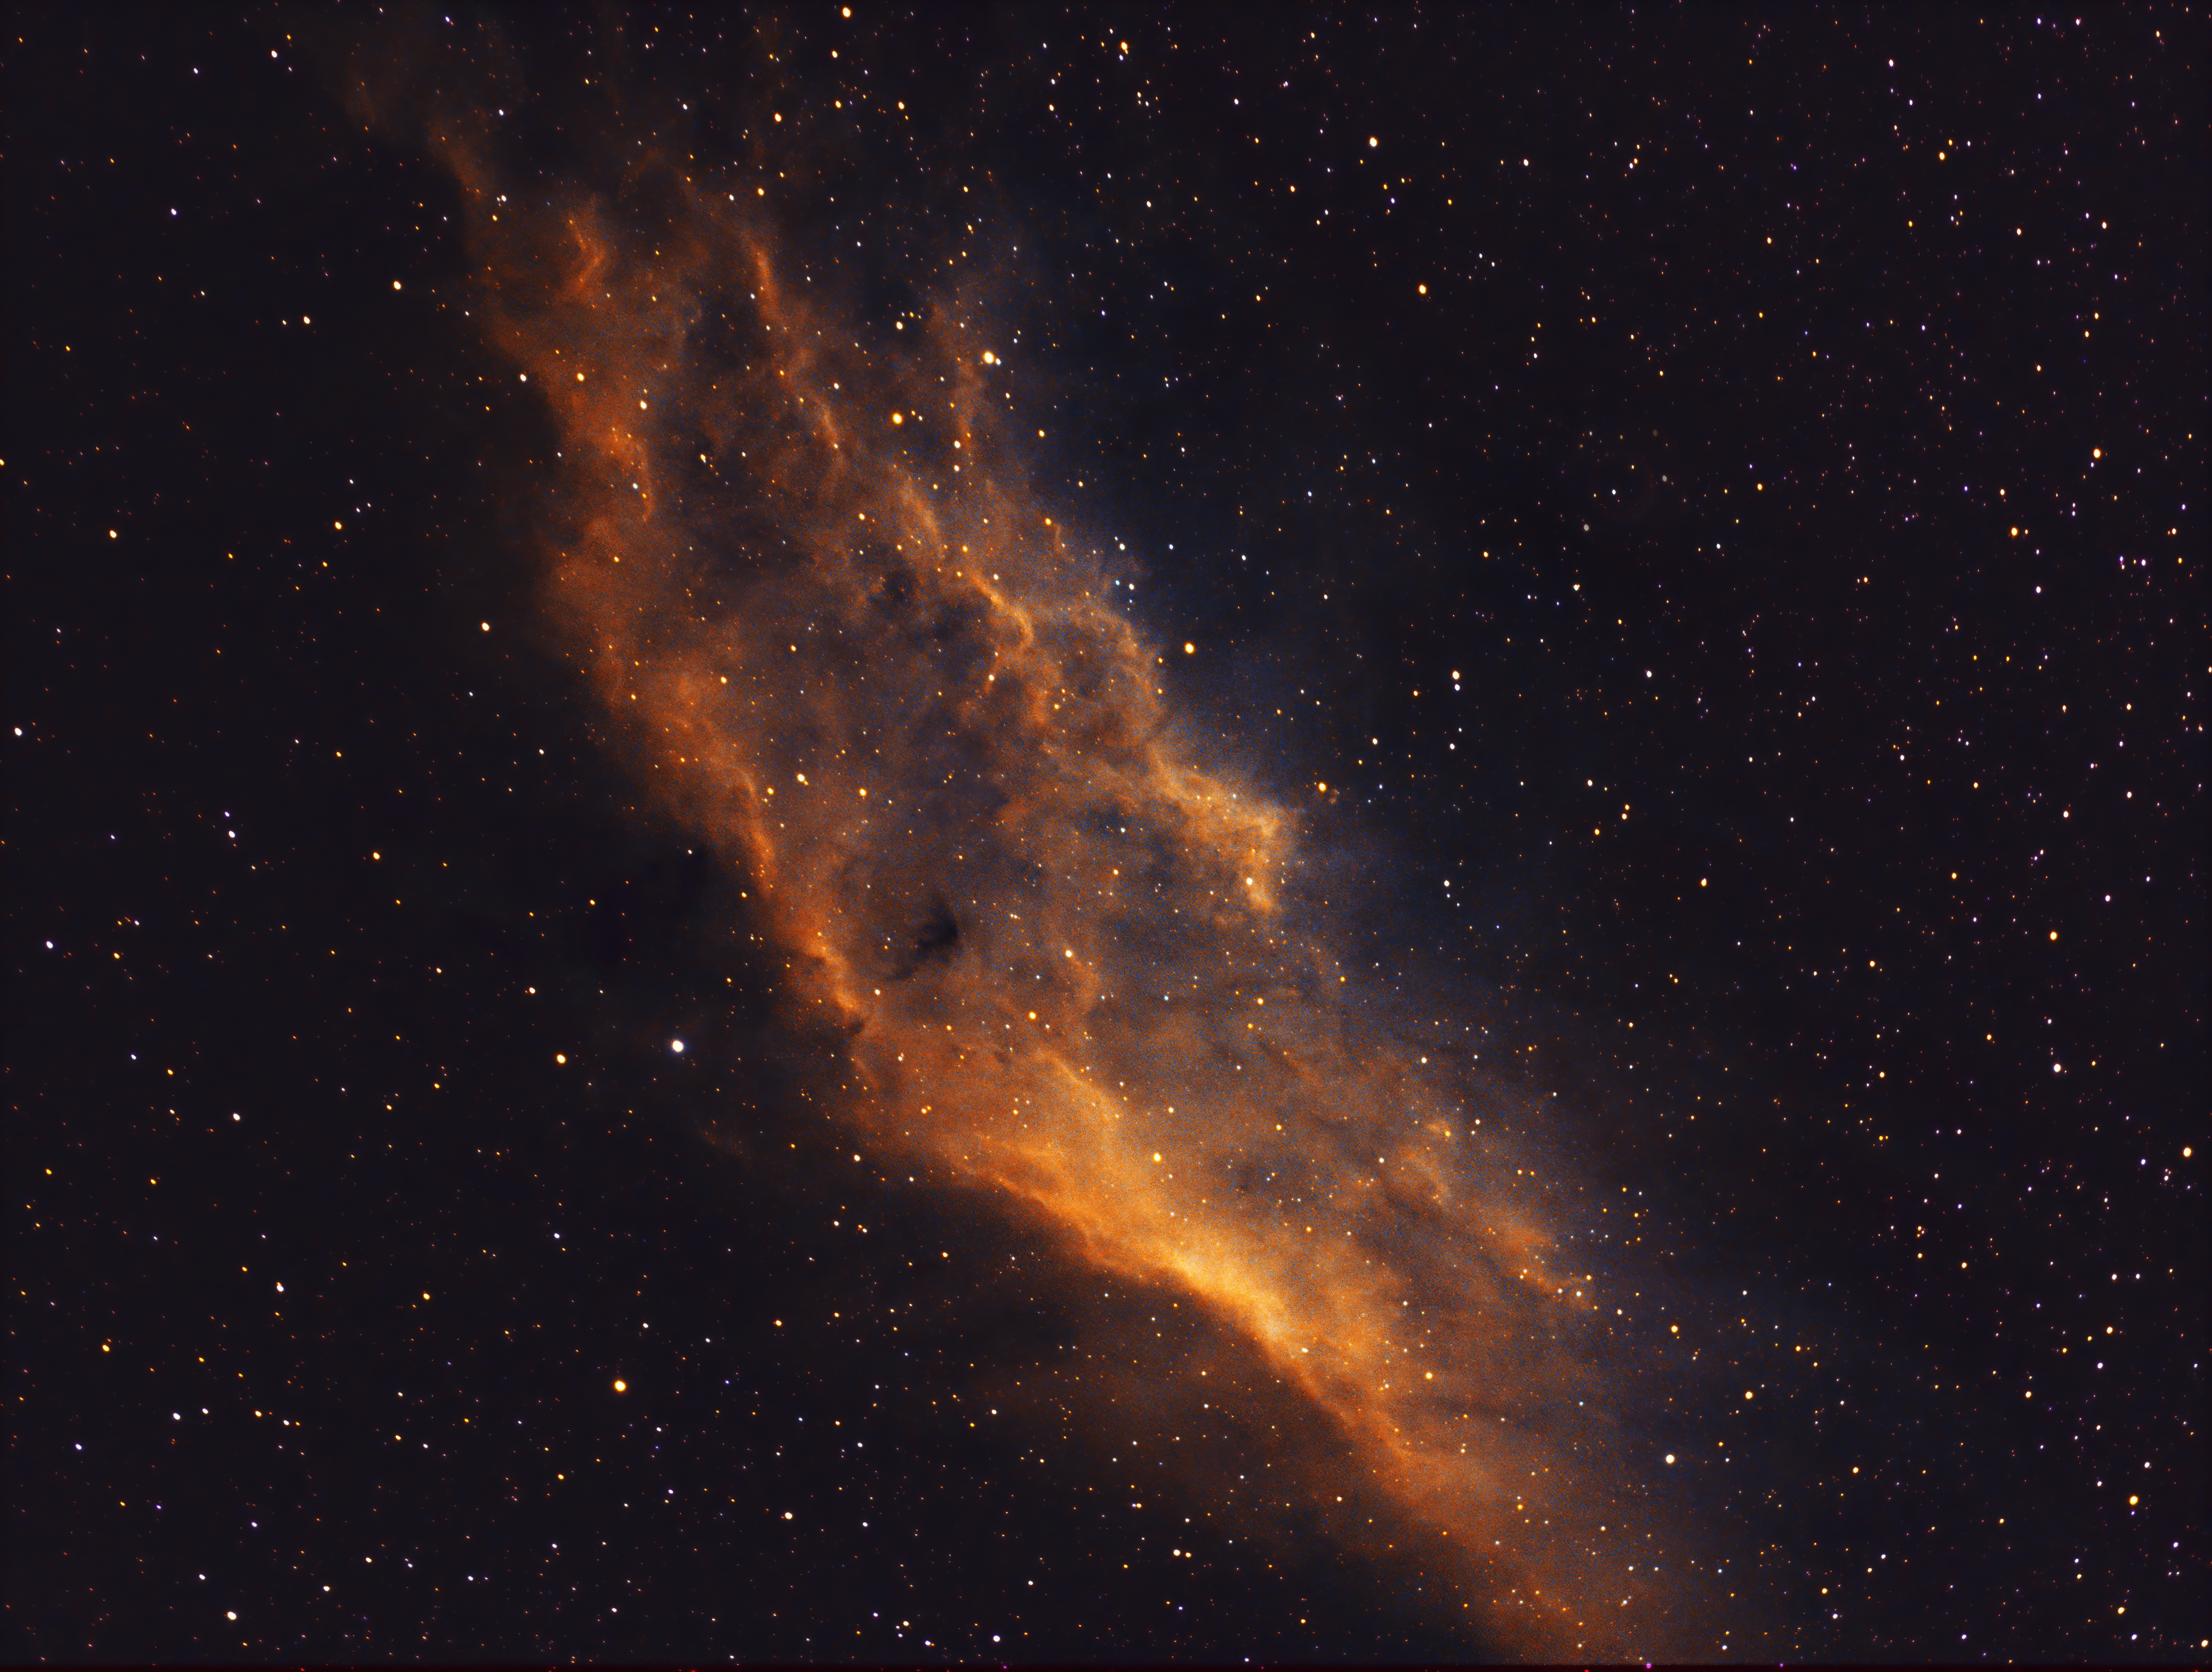
DECEMBER – Image Redux: HST re-processing – Pacman, Heart, Rosette, NAN & California Nebula


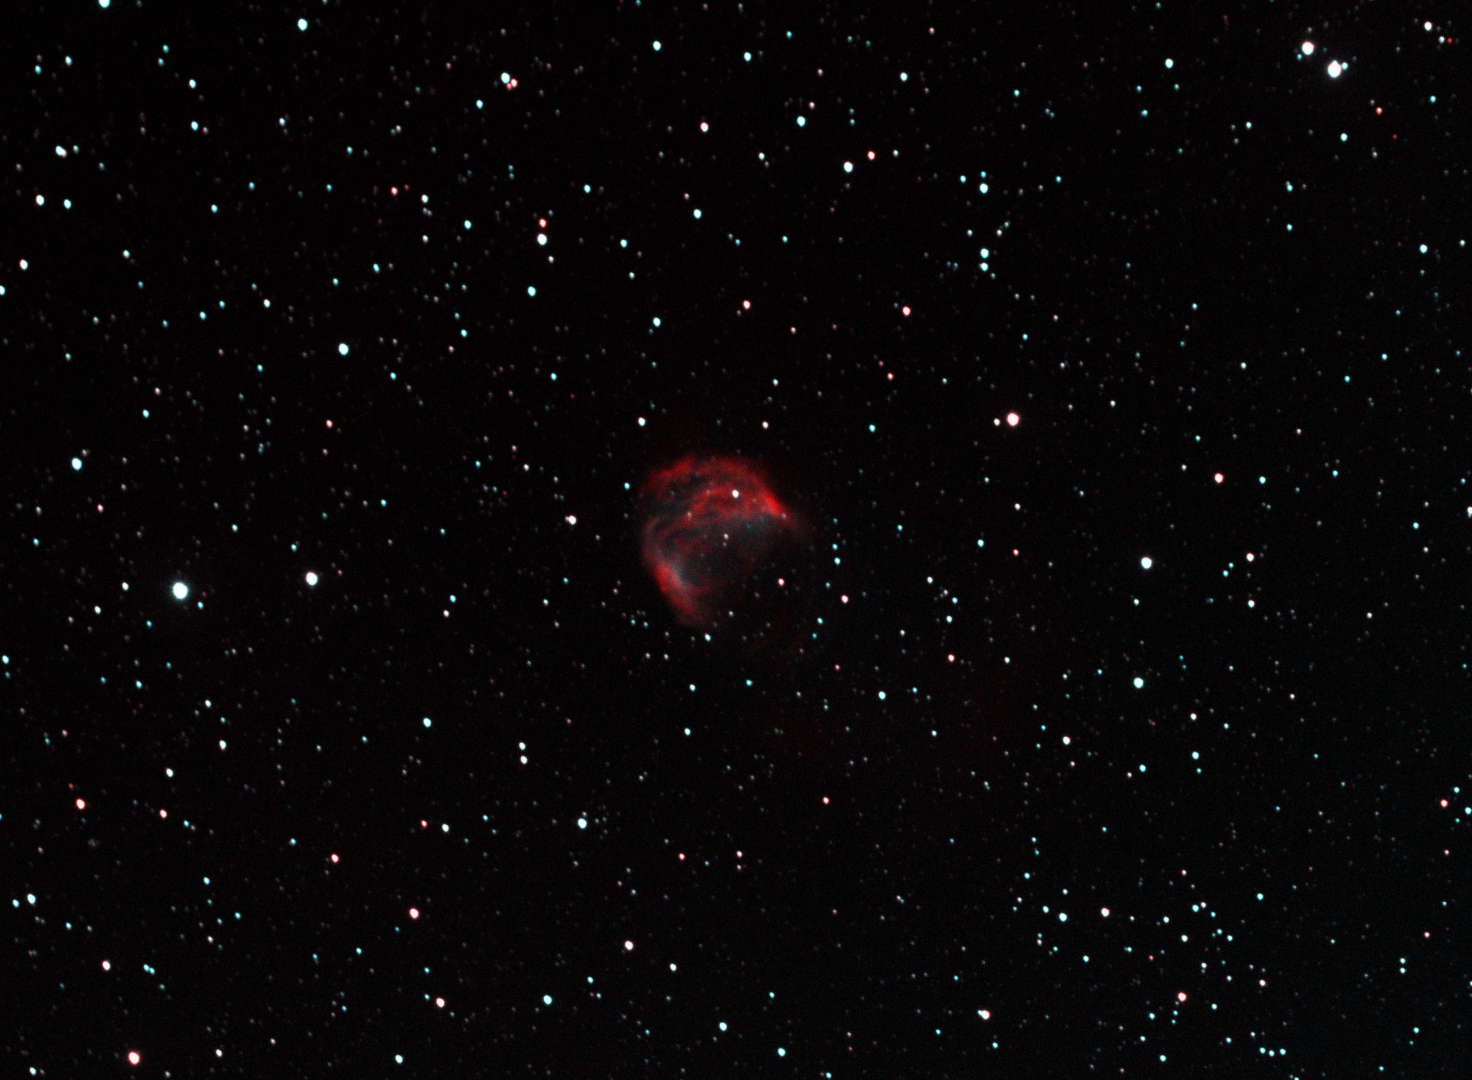
 Such objects are usually short lived and unfortunately small and faint, making them a challenge for smaller telescopes and Bortle 5-6 skies, such as I have at Fairvale Observatory. However, I recently decided to return to the Medusa Nebula, a planetary nebula which I previously had imaged as a test in
")
")