Looking Up

Having been unable to set-up Fairvale Observatory since April, it has been frustrating with almost no hands-on astronomy taking place.  However, last night the march of time and serendipity played their part; by chance I glanced out of the window and lo and behold saw the International Space Station (ISS), which was then scheduled to pass almost directly overhead again 90-minutes later at 11.17 p.m.  Now six weeks past the Summer Equinox sunset is coming increasing earlier, currently 8.45pm and by the time the ISS would be back the night sky was almost at astronomical darkness.  This would provide a favourable setting for viewing and imaging – furthermore, the sky was almost clear and the temperature a comfortable 180C, far from the sub-zero conditions back in February.

I have just purchased a second-hand EFS 55 – 250mm Canon IS telephoto lens, so what else was there to do but get outside and get ready to image the ISS next time round, thereafter one thing led to another!  Being a more mobile set-up I was able to venture further from the house than usual and thereby obtain images of some constellations and asterisms which I cannot usually achieve from the Observatory.

Though not as spectacular as the Planets and DSO images, I found the simple sky photographs satisfying to shoot and enjoyable to look at.  The beguiling night environment, exciting subjects, improving darkness conditions and my increased mobility, suggests things are looking up – in more than one way.


ISS Western view: 6 minute transit from West to East at 850

ISS Western view: 6 minutes total transit time from West to East at 85 degrees elevation.

ISS Overhead view

ISS Overhead view


ISS Eastern view

ISS Eastern view

Summer Triangle – signature asterism of the summer night sky: clockwise from top left: Deneb - Vega – Altair.

Summer Triangle – signature asterism of the summer night sky: clockwise from top left: Deneb – Vega – Altair.

The W-shaped asterism of the Cassiopeia straddles the Milky Way in the northern sky and is made of  5-stars: Segin, Ksora, Cih, Schedar and Caph.  The constellation contains a number of star clusters, most notable being M52 and close to Ksora, M103.

cassiopeia


Cassiopeia

Cassiopeia

Ursa Minor –  Like the Plough in Ursa Major, Ursa Minor has a ‘dipper-like’ shape and they are therefore respectively known as the Big and Little Dippers.  Ursa Minor’s main significance is the North or Pole Star, AKA Polaris.  Situated very close to the Celestial Pole, alignment of the telescope mount with Polaris is essential to achieve accurate tracking; unfortunately Polaris is obscured from Fairvale Observatory but can be seen from the garden.

ursaminor


Ursa Minor - Polaris star indicated by red arrow, with the 'dipper' to the right.

Ursa Minor – Polaris star indicated by red arrow, with the ‘dipper’ to the right.

By Jove

As a visual and photographic spectacle, in my opinion Jupiter comes a close second to Saturn among the planets.  The so-called ‘King of the Planets’, Jupiter is more than twice as massive as all the others combined. Notwithstanding its size, Jupiter has the shortest ‘day’ of any planet, rotating fully in just 9-hours and 50 minutes – as a result creating a significant equatorial bulge that measures 88,760 miles in diameter and 83,082 miles from pole-to-pole.  However, as a gas giant the planet does not rotate en masse, with the outer regions moving slower than the equatorial region leading to a series of distinctive belts and zones, most notable of which is the Great Red Spot – a massive storm on the edge of the South Equatorial Belt.

Partly because of its vast size and resulting gravitational field, Jupiter is thought to have played a dominant role in shaping the present Solar System.  The planet we see today is not alone, with 67 moons so far identified, the four largest discovered by Galileo 400 years ago being easily visible from Earth.  In order of distance from Jupiter the moons of Io, Europa, Ganymede and Callisto are extremely diverse in nature – ranging from the highly volcanic Io to the frozen world of Europa, whilst Ganymede and Callisto may have sub-surface oceans and are bigger than the planet Mercury.


Despite being by far the largest planet in the Solar System and the fourth brightest object after the Sun, Moon and Venus, my attempts to image Jupiter and its Jovian neighbours have so far met with only mixed success.

Most people’s first view of Jupiter is likely to be through binoculars or a basic telescope, which will   show the very bright planet accompanied by a number of its Gallilean moons, depending on their orbital position i.e. when located behind the planet they will, of course, not be visible.  Having viewed Jupiter a few times like this, my first attempt to image the planet and its moons was just such a view simply using the William Optics 81mm refractor, a x2 Barlow and my Canon 700D DSLR.  Compared to Jupiter the moons are not as bright and to capture their presence it is necessary to boost either the ISO or exposure time, which then overexposes the bright planet resulting in loss of detail – in this case the distinctive coloured gas bands. Conversely, with a lower ISO or exposure this detail once again becomes apparent but some or all of the moons are then lost in the image.  The way round is to combine two sets of images taken at different camera settings, thus obtaining the best of both worlds, literally.  For the moment however this remains work in progress.

Jupiter  - overexposed but  shows all four Gallilean moons.

January 2014, Jupiter – overexposed but shows all four Gallilean moons | 1 sec @ ISO 400


upiter - lower exposure shows the gas belts but the moons, though there, are now very difficult to see.  1/3rd sec @ ISO 800

Jupiter – lower exposure shows the gas belts but the moons, though there, are now very difficult to see. 1/3rd sec @ ISO 800

Personally I like the wider view of Jupiter and its moons but inevitably the holy grail has to be a close-up image showing details of the planet’s characteristic gas belts, which requires the use of a CCD video, in my case a ZWO ASI 120MC camera.  Having mostly concentrated on DSO photography to-date using a DSLR, my use of the ZWO camera is limited and with mixed success.  Using this camera and the Skywatcher 150PL reflector telescope I have previously managed images of Saturn, Mars and the Moon but this time I used the William Optics refractor instead.

CCD imaging is a very different technique to DSLR and it’s fair to say that I still have much to learn. Notwithstanding, using Registax for processing I obtained some reasonable first-time Jupiter images but will need more practice to improve the detail; the quality might also be improved using WinJUPOS software during processing, which applies a de-rotational programme to the fast moving planet thus reducing blur – however, I have yet to understand let alone master this software.  Also, whilst the quality of the William Optics telescope is far superior to the Skywatcher 150PL, it is obvious that its relatively short focal length is not really adequate for good planetary imaging.

21st February 2015. Jupiter up close WO 81GT81 | ZWO 120 MC

21st February 2015. Jupiter up close
WO 81GT81 | ZWO 120 MC

So far this year Jupiter had already provided a number of different opportunities for imaging.  Between February and April the planet moved across the southern sky in all its glory, whilst more recently it moved into close conjunction with Venus at the end of June and there’s more to come.

On 26th August from our vantage point on the Earth, Jupiter will appear very close to the Sun in the sky as it passes around the far side of the solar system from the Earth.  At closest approach, Jupiter and the Sun will appear at a separation of only 0°52′, making Jupiter totally unobservable for several weeks while it is lost in the Sun’s glare.  At around the same time, Jupiter will also be at its most distant from the Earth – receding to a distance of 6.40 AU – since the two planets will lie on opposite sides of the solar system.  Over following weeks and months, Jupiter will re-emerge to the west of the Sun, gradually becoming visible for ever-longer periods in the pre-dawn sky. After around six months, it will reach opposition, when it will be visible for virtually the whole night, by which time I have hopefully mastered some new techniques for imaging this Jovian King of the Planets.

The Pinwheel

Just under two weeks until Guy Fawkes Night, which commemorates Guido Fawkes failed attempt to blow up Westminster Palace (The Houses of Parliament) on 5th November 1605 – a very British (English) event.   In its own way the Universe has a myriad of its own fireworks and it therefore seemed a fitting moment to attempt an image of one last week, which given their spectacular form and similarity to the popular Catherine wheel, AKA a Pinwheel firework, had to be a spiral galaxy.

The firework is named in commemoration of a Catholic martyr and is worth describing here before returning to matters of astronomy, simply because of it’s graphic nature.  Catherine of Alexandria lived during the fourth century A.D. but in a male dominated society, was unusually well educated and successfully converted many highly placed individuals to Catholicism.  As a result, she was condemned to “breaking the wheel”, which involved having one’s limbs broken and threaded through an abundantly spiked wheel.  The victim would succumb to his or her injuries, but only after several days.  However when Catherine touched the wheel it miraculously flew into pieces, so she was beheaded instead!

A human Catherine Wheel (Pinwheel)!

A human Catherine Wheel (Pinwheel)!

Having researched the current night sky using the Cartes du Ciel planetarium programme and taking account of the weather, it seemed feasible to image both Andromeda and M33 galaxies in a three hour period around midnight.  However, despite my thorough preparations I was to succumb to the best laid plans of mice and men and a return to previous frustrations.  

I have recently added a number of excellent widgets to the front page of WTSM: the current Moon phase, real-time world daylight map and Moon position, live sunspot activity and the excellent astronomy weather site Clear Outside, developed and maintained by First Light Optics.  There are also other weather sites listed under the Favourites menu.  All these indicated clear skies on Tuesday from 9pm and onwards throughout the night – so I planned to set up at 10pm and by 11pm, as Andromeda approached the Meridian would start imaging, followed by M33 shortly after midnight.  Contrary to the forecasts, at 10pm the clouds rolled in and did not clear until well past 11pm. Next, whilst my initial polar alignment wasn’t too bad but on a second iteration it got worse and after altogether five separate x2-star and subsequent polar alignments was not much better.  My new found skill had deserted me and by now it was past 1am – Andromeda had passed, so I just had to have a go at M33 before it too moved well past its optimal Meridian position.

For this session I decided to use my new CLS light pollution filter and subsequently tried to apply some of the processing advice gleaned from two excellent astrophotography books: Long Exposure Astrophotography by Allan Hall and Making Every Photon Count by Steve Richards.  I bought both these books earlier in the year, read them cover to cover at the time and then hadn’t picked them up since, which was a mistake as they’re full of good advice and information relevant to my current issues and problems; they are now required bedtime reading.

The CLS filter works by removing the wavelengths associated with light pollution but, as a result, leaves a dominant blue hue to the camera’s image, making it is necessary to rebalance the colour afterwards during processing.  A useful SGL blog points the way on how to do this by setting the Background Calibration (bottom left) in the Stacking Parameters ‘Light’ tab of Deep Sky Stacker (DSS) to RGB Channels.  DSS then normalises all three colour channels to the same value during stacking, producing a natural dark rather than blue background http://stargazerslounge.com/topic/82975-astronomik-cls-clip-canon-7d-very-blue-images/ .  The result is quite effective, though I am not completely sure that the process has not introduced a slight red shift which subsequently needed to be dealt with in Photoshop.

This time, on the Advice of Allan Hall, I also adopted a number of other settings using DSS:

  • RAW Process settings – (1) turn off all White Balance choices (2) set the Bayer matrix transformation to Adaptive Homogeneity-Directed (AHD) rather than Bilinear Transformation – changing the way the RGB Bayer weightings work (3) set the Black Point to zero.
  • Stacking Settings – this determines the type of stacking i.e. which algorithm is used to interpolate between one pixel and another. I have previously been using Average but this time, on the advice of Allan Hall, Steve Richards and others adopted either (1) Kappa-Sigma Clipping or (2) Auto Adaptive Weighted Average for each set of images, Lights, Darks, Bias & Flats. Some further experimentation of other settings in this area, such as Alignment, will probably be worthwhile at a later date.
M33 - initial RAW image using CLS filter

M33 – initial RAW image using CLS filter

M33 - x20 90secs @ ISO 1,600, stacked with background calibration applied and Kappa- Sigma  Clipping, pre-stretching and post processing

M33 – x20 90secs @ ISO 1,600, stacked with background calibration applied and Kappa- Sigma Clipping, pre-stretching and post processing

Finally, following further advice from the aforementioned books, Mrs G and other sources I am also starting to delve deeper into the dark art of post processing using Photoshop.  The scope here to change images is almost endless and I am concerned about where reality stops and the software takes over, particularly with colour choices.  Notwithstanding these concerns it is a great programme, almost indispensable (GIMP is also a good & free alternative which I subsequently use for JPEG compression), the main purpose of which is to stretch the image and thereby reveal information otherwise hidden in the data – the impact is incredible and totally transforms the image.

And so despite numerous setbacks and a very late night I finally arrived at an image of M33, AKA the Pinwheel or Triangulum Galaxy; confusingly M101 is also known as the Pinwheel Galaxy.  A  mere 3 million light years from Earth, it is one of the most distant objects that can be seen with the naked eye, though requires exceptional dark sky conditions, so unfortunately not much chance of seeing it on 5th November from here.  I’d like to think that I can do better once I can achieve longer exposures but for the moment it’s my first spiral galaxy.

M33 - The Pinwheel Galaxy WO GT81 Canon 700D + FF | x20 90 secs @ ISO 1,600 | Kappa-Sigma Clipping

M33 – The Pinwheel Galaxy
WO GT81 Canon 700D + FF | x20 90 secs               @ ISO 1,600 | Kappa-Sigma Clipping stacking

M33 - The Pinwheel Galaxy As above + Auto Adaptive Weighted Average stacking

M33 – The Pinwheel Galaxy
As before + Auto Adaptive Weighted Average stacking

Très Bon

My astronomy has been limited over the past couple of weeks as a result of the aforementioned cycle tour of the Loire.  After an 11 hour night crossing of Le Manche from Portsmouth, we headed south from Saint-Malo along the River Rance via Rennes and thence to the Loire, just east of Nantes.  Thereafter, just like the river, we meandered slowly upstream taking in vineyards and chateau, eventually reaching Blois before returning to Tours to take the easy way to the Ouistreham ferry by train.  All-in-all we cycled 428 miles and had a great time, in no small part due to fantastic weather the whole time.

One of the advantages of cycle camping and the inevitable call of nature during the night, is that you get to see the sky and what a sky! From the first night at Tinténiac the night skies were crystal clear, with wonderful horizon-to-horizon views not unlike that seen at home at the moment but without the clouds and light pollution – with such clarity the great spectacle of the Milky Way was always present.  The downside of cycling is that you can’t take astronomy equipment with you.  However, on the first night by laying my compact camera on the ground pointing upwards and set manually, I managed to get a good picture of the sky (it’s about 2am and I was a bit sleepy).  Such skies and better continued throughout the whole trip.

The night sky at Tinténiac

The night sky at Tinténiac

t’s therefore interesting and not unsurprising, that the following night sky map of France shows that much of the country is free from excessive light pollution.  It is however surprising that they were only awarded their first dark sky status last year – the Pic di Midi International Dark Sky Reserve  in the Pyrénées.

http://ftapissier.free.fr/pl/zoom.html

I wonder if the nobility of the Loire appreciated the great skies they had – they would have (theoretically) had the use of a Newtonian telescope for a while before the revolution put an end to their indulgent lifestyles?

Challain-la-Potherie Chateau - nice place if you can affofd it!

Challain-la-Potherie Chateau – nice place if you can affofd it!

About the same time (1730 – 1817) Charles Messier certainly put the quality of the French skies to good use when he catalogued 110 Messier objects, consisting of nebulae, galaxies and star clusters, which today still forms a fundamental platform for astronomers.

My own ambitions over the coming winter months will be to view and image many of the Messier objects, which makes his work nearly 300 years ago seem all the more incredible – but then he did have clear skies. Très Bon.

Loire cycle team in Angers.  Chapeau!!!

Loire cycle team in Angers. Chapeau!!!

Astronomers do it in the dark

We are lucky to have dark sky parks in the UK, which are defined as: an area, usually surrounding a park or observatory that is kept free of artificial light e.g. Exmoor National Park, Galloway Forest Park and Kielder Forest, Northumberland.  The transformation of the sky through the absence of man-made light is truly incredible – apart from the greatly increased clarity with which the stars can be better seen, it is the emergence of otherwise feint or nearly invisible DSO objects experienced in these conditions that is exciting for astronomers.

During my life I have been fortunate to see a number of really exceptional ‘dark skies’ around the world, which in my opinion significantly beat the dark sky parks here in the UK.  The most memorable were in the Kalahari Desert and the middle of the Red Sea during a scuba diving trip, which were to use a phrase straight from the sixties (I was there but can’t remember it!) – mind blowing!  Living on Earth probably the most striking feature of a dark sky is the ability to look clearly through the Milky Way galaxy in all its wonder, which thus appears as a creamy band crossing the sky – we are in fact looking edge-on through the millions of stars that make up our galaxy.  Without wishing to overly digress at this point, our Solar system within which we live is on the edge of the spiral Orion Arm, located about two thirds of the way from the centre of the galaxy – 25,000 light years away. http://www.universetoday.com/65601/where-is-earth-in-the-milky-way/

Given such an amazing setting it is disappointing to live in South East England here at Fairvale Observatory, with London just to the north and Gatwick airport to the south, thus significantly reducing the light quality of the sky and making astronomy hard work.  Just to make matters worse, I have to contend with houses and trees obscuring the sightline in almost every direction, passing aircraft (see previous blog on the ISS) and the ubiquitous street light.  Furthermore, even on a clear night for much of the month the Moon poses a significant obstacle to astronomy as it floods the sky with its reflected sun light.

Notwithstanding, good nights (relatively) do occur and last Sunday was one of them.  It was completely clear from dusk until late in the night, the Moon (last quarter) obligingly did not rise until almost midnight and, thanks to the aforementioned houses and trees, did not impact on Fairvale Observatory until after 1.00 a.m.  Furthermore, as the temperature was unseasonably cool as a result of dominant northerly winds, the air was still; which all added up to a great night for astronomy and imaging in particular.  And so it was that I set about trying to image my next set of targets with mixed but generally good results.  I have learnt that planning is everything in astrophotography, so using Stellarium I previously sought out those objects that would be high in the sky and were located on or about the celestial meridian; such a position reduces the thickness of the Earth’s atmosphere through which the light has to pass on its way to the camera sensor and thus improves the image quality.

I tried, once again unsuccessfully, to image NGC 7000, the North American Nebula – not through lack of photographic prowess but, I think, because I had not located it properly in the sky – another day then? Similarly I failed to capture NGC 6888, the Crescent Nebula.  However, against what was a good, dark sky at Fairvale Observatory I had better luck with M27, the Dumbbell Nebula and, photographed my first galaxy, at last! I will deal with the galaxy in my next blog so, for now, will focus (pun intended!) on M27.

My first image of a nebula taken by DSLR was only a couple of weeks ago, M57 or the Ring Nebula.  This time the target M27 was another Planetary Nebula (nothing to do with planets) of similar size but at 1,360 ly distance is almost 1,000 ly closer to Earth than M57, providing better imaging conditions; that’s 1,000 ly the light does not have to travel before reaching the camera.  At the moment I am still experimenting with the new equipment and seeking out new objects just for fun and, as a result, mostly taking a small set of short exposures (<=60 seconds) subs (pictures) and darks before stacking  and processing – in this case about 10 each.  The resulting picture quality leaves plenty of room for improvement when I eventually get the guide scope working, together with other planetary and alignment software but in the meantime I am very happy and excited by these results.  The wider, original photograph perhaps shows the Nebula best, which is also known as the Apple Core Nebula, a form that is just discernible from these images.  For the moment, my quest to capture new objects is going well, assisted greatly by the dark skies we are fortunate to have at the moment here at Fairvale Observatory.

Wide sky view - M27 the Dumbbell or Apple Core Nebula is located just off-centre at about 2 o'clock

Wide sky view – M27 the Dumbbell or Apple Core Nebula is located just off-centre at about 2 o’clock  Canon 700D | EO GT81 + FF | 10x40secs @ ISO 800

M27 cropped from previous photograph; it will be interesting to see how much clearer pictures can eventually be obtained with better alingment and longer exposures

M27 cropped from previous photograph; it will be interesting to see how much clearer pictures can eventually be obtained with better alignment and longer exposures

ISS: Gotcha!

For the past couple of weeks the International Space Station (ISS) has been orbiting close to my house.  This great App, the ISS Detector Satellite Tacker, provides a forecast (date, time, and trajectory) of when the ISS will pass close to your location and a graphical guide, operating in real time, indicating where to look https://play.google.com/store/apps/details?id=com.runar.issdetector&hl=en.  I have been using this App for over a year and it is excellent, the only thing it can’t help with is cloudy skies!  As a result of cloud and rain I have been struggling to photograph the satellite during this period, until last night when we had great viewing conditions from dusk until late in the night (more on that in a later blog).  At just past 9.30 p.m. last night the ISS passed nearby again, so that I was at last able to record its path on my camera.

Of course nothing is straight forward and living close to Gatwick airport doesn’t help.  In the first two exposures the ISS track was interrupted by aircraft crossing its path – at a much lower altitude of course.  However, it makes for some interesting pictures.

ISS track intersected by a passing aircraft

ISS track intersected by a passing aircraft                                                                                   Canon 700D | 200mm telescopic lens | 46secs @ ISO200           

And again!!

Better

The ISS is an amazing achievement.  Constructed in modular form by the USA and Russia since 1998, it measures approximately 73m x 109m x 20m, with a crew of 6, to date drawn from fifteen different countries.  The ISS travels around the Earth in a circular orbit between an altitude of 205 miles and 255 miles, at a speed of 17,227 mph, thus orbiting the Earth every 93 minutes!  As a result of this orbit it passes over or close to all the Earth’s surface, which means we all get a chance to see it (clouds permitting) every now and again – this is made possible by the Sun’s reflection off the station producing a bright golden flash as it passes.

At last, a clean shot of the ISS as it heads on its way towards the south east and out of view - back again in 93 minutes having traveled around the world!

At last, a clean shot of the ISS as it heads on its way towards the south east and out of view – back again in 93 minutes having travelled around the world!

Last night’s pass was from the west to the south east, at an inclination of about 45o, producing a very good view for about 5 minutes.  Similar views of other manmade satellites are also common but, of course, they don’t carry people.  What a great human achievement and an awe inspiring sight which I never tire of.  Fortunately, once the aircraft had passed I was able to get a ‘clean’ shot of the ISS, unfortunately this will be the closest I’ll ever get to travelling in space.

Fairvale Observatory Part-2: The next stage – equipment upgrade

Fairvale Observatory Part-1 dealt with my initial entry into astronomy and, in particular, my equipment.

I have established that I enjoy astronomy and, more so, determined that the way forwards for me should be Deep Sky Objects (DSO) and their imaging.  I can now see that imaging is not just a means of acquiring what are often beautiful, indeed spectacular pictures of features and objects in space but it is a tool with which to see what otherwise is at best elusive and most of the time, invisible to the eye – even viewing through a telescope.  As a professional geologist, it is comparable to my hand lens with which to open doors of knowledge and wonder in rocks and fossils, or my hammer with which to split rocks and unlock time capsules of the earth and its history. The comparison with astronomy is, in my opinion, very close and probably one of the reasons I have now decided to pursue astronomy. Given the scale of the Universe it is inevitable that DSO objects form the majority of what’s out there and therefore the quest to observe and understand them seems a natural, almost necessary way forwards.  And so it is that to pursue this new goal it has become necessary to upgrade my equipment.

The shortcomings of my initial equipment, a Skywatcher 150PL and EQ3-2 mount, helped in understanding what I was looking for in upgrading:

  • OTA too slow – for DSO objects the scope speed needs to be at least f6 or lower;
  • OTA open – a closed OTA reduces the impact of cold (dew) and warm (thermal currents) air on the light path and thus the eventual image, as well as requiring less maintenance;
  • Focus mechanism too coarse – to achieve focus when DSO imaging, in particular when using a field flattener, requires a focus to within a fraction of a millimetre – the 150PL lacks such finesse;
  • The mount is too light – in order to take long exposures a stable mount is essential, inevitably this requires sturdier, heavier equipment;
  • RA / DEC motor drives lack accuracy – to find, lock onto and finally track DSO objects a high degree of alignment and tracking precision is needed;
  • EQ3-2 mount cannot be programmed – both to improve the accuracy of finding and tracking, feedback loops between the mount, the OTA, the guidescope and various planetarium software is desirable.

OTA (optical telescope assembly) – William Optics GT81 FPL3 Triplet ED APO

Reading around I quickly came to the conclusion that an 80mm ED APO refractor was the best way forwards.  A refractor telescope might be thought of as a ‘typical’ telescope, in that the light passes straight through the object lens, which is then viewed directly at the other end or, for convenience using a diagonal.  With the introduction of glass lenses the problem that now needs to be overcome is chromatic aberration (coloured light ‘fringing’), caused by bending the light as it passes through the object lens to focus at the other end of the scope where it is viewed; such bending causes the light to ‘split’ like a rainbow.

The solution is to use a series of lenses, ground in different ways so that as the light bends through one lens it is corrected in the next and so on an so forth, until as near as possible white light is viewed at the point of focus (viewing) without the effect of chromatic aberration.  As might be expected the success in achieving such a result is mixed and not surprisingly directly linked to price.  Of course there is no shortage of ED APO refractors and my shortlist was narrowed down to Explore Scientific or William Optics (WO). The elimination of chromatic aberration is such an important feature that I chose the WO GT81 f5.9 triplet refractor with five lenses of extra-low dispersion (ED) glass; triplet is the holy grail object lens made of three lens elements.  Once focused, the result is a crystal clear view or image of the object – beautiful.  I chose WO as reviews were unanimously positive and it seemed that WO had a better range of accessories suited to imaging – I have not been disappointed.  The manufacturing is exquisite, beautifully finished and the scope is a pleasure to handle and use.

William Optics GT81 FPL3 Triplet ED APO Refractor attahced to a 4" Losmandy plate

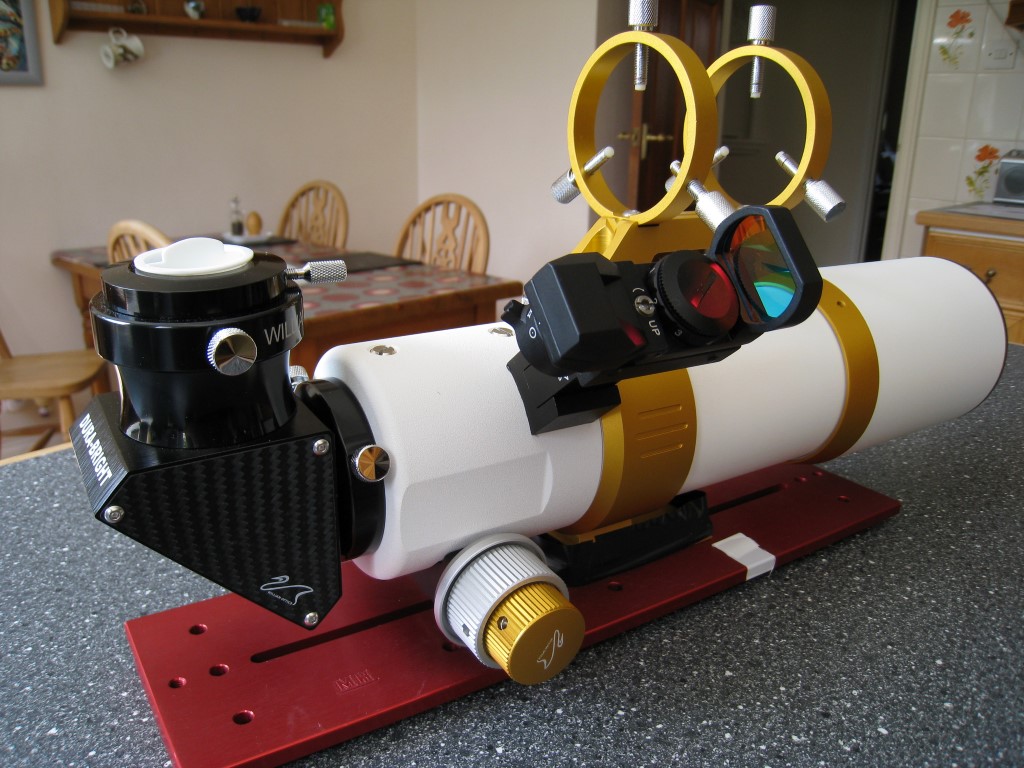
William Optics GT81 FPL3 Triplet ED APO Refractor attached to a 4″ Losmandy plate

Aside from the optics, the rack and pinion focus mechanism provides fine or, through a secondary gold coloured knob, very fine adjustments, which can subsequently be locked to ensure there it does not shift as the scope is moved around or a camera is attached, thus changing the balance.  It comes with a base / foot that will attach directly to a standard dovetail slot, such as that on the EQ3-2 mount, though such is the excellent overall anodised finish it seems I pity to rough it up – I’ve therefore taped it over.  However, for regular use with the new mount the scope is bolted to a Losmandy plate, which has a number of holes and slots in order to vary its positon depending on requirements, which slots neatly into the head of the new mount with robust plastic topped screws to secure the plate.  The GT81 comes with two anodised top rings for a guide scope, the fixing screws of which are brass and plastic tipped to protect the finish of the guide scope – a thoughtful touch which says all you need to know about the attention to detail which is evident throughout. Finally, I purchased a WO RDF which fixes neatly on either side of the OTA and does the job nicely.

All in all, the WO GT81 is a great piece of equipment, which is a pleasure to use and delivers great results.  It is significantly smaller than the 150PL scope but delivers a much bigger punch, in all respects.

The Mount – Skywatcher AZ-EQ6 GT

The mount was always going to be one of the more advanced Skywatchers but which one?

I started with the EQ5 Pro in mind, as it seemed to have most of the technical facilities of its bigger brother the EQ6 but was lighter, which makes it easier to handle and move about – an important consideration given I have to move this out and in from the house all the time.  However, the EQ6 is not the choice of many experienced astronomers for nothing and, on closer inspection, it was apparent that its better technical credentials and larger payload capacity for greater stability made it the obvious choice.  By comparison the EQ6-EQ5-EQ3 capacities are respectively 18.2kg-13.7kg-5,5kg.  Finally when it came to purchasing, I went the next step and got the AZ-EQ6 GT Pro which, amongst other better features, is belt driven and therefore smoother when tracking and takes an even larger payload of 20kg.  I’m not sure if I will get any use from the alternative Alt-AZ function, as the Equatorial mode is more suited to imaging, but it is a great mount – works beautifully with excellent features.

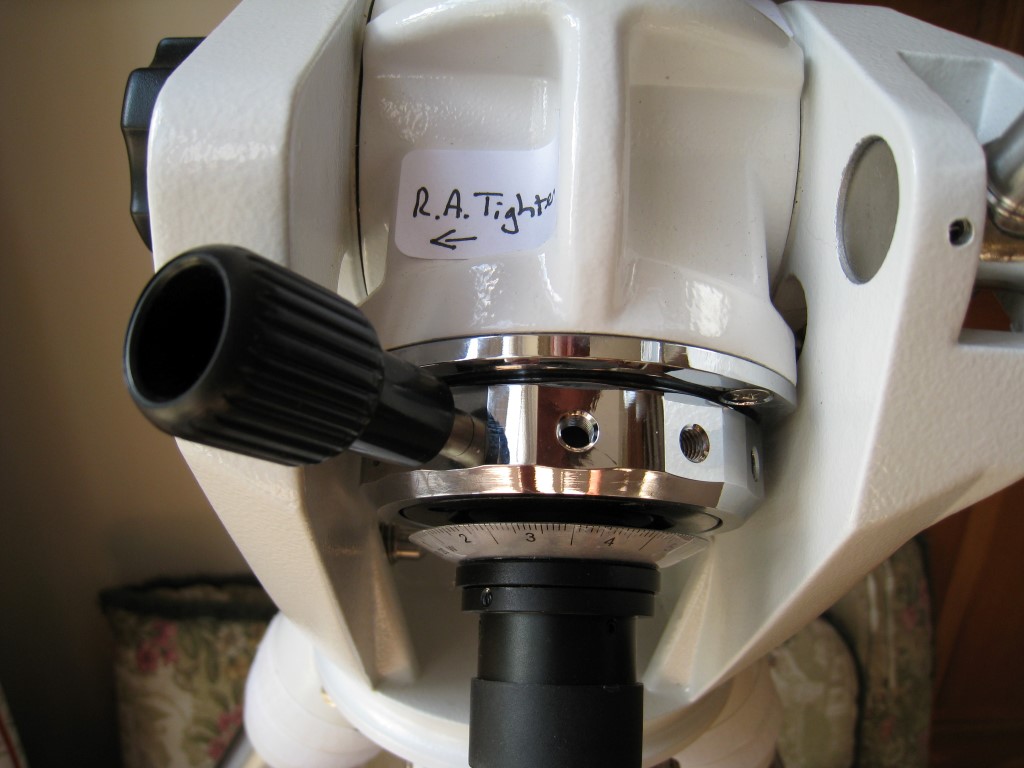
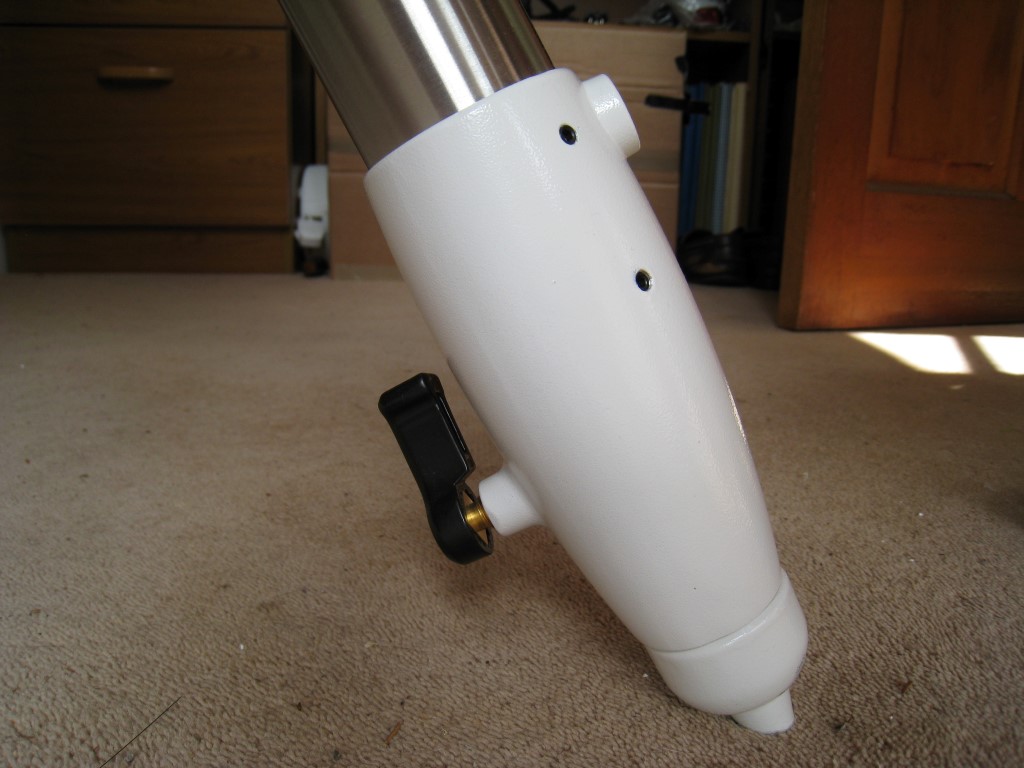
In use the general balance of the mount is easy to adjust thanks to a lever operated clutch for the RA and a capstan-like wheel located at the top of the counterweight rod for DEC, which are both simple to release and secure at any time. The mount comes with two saddles, so that two telescopes can be used in parallel if required. Dual-coder technology usefully allows the telescope to be moved manually in either axis without the mount losing its positional information! Although not yet used, the mount has an autoguider port and periodic error correction (PEC).  Level and height are adjusted by means of adjusting and locking the stainless steel legs with well-made metal screw clamps, unlike the flimsy EQ3-2 equivalent. The RA and DEC motors and belts are contained in the main body and work accurately and smoothly, with the power source provided by a separate DC power unit; I’ve placed this in a water resistant box with the various power leads sitting neatly on top.

RA clutch - simple and easy to use

RA clutch – simple and easy to use

DEC clutch

DEC clutch

Saddle with Losmandy plate fitting

Saddle with Losmandy plate fitting

Stainless steel legs with robust adjustment clamp, unlike its younger brother the EQ3-2, you get what you pay for

Stainless steel legs with robust adjustment clamp, unlike its younger brother the EQ3-2, you get what you pay for

AZ-EQ6 Mount: Power & control centre

AZ-EQ6 Mount: Power & control centre

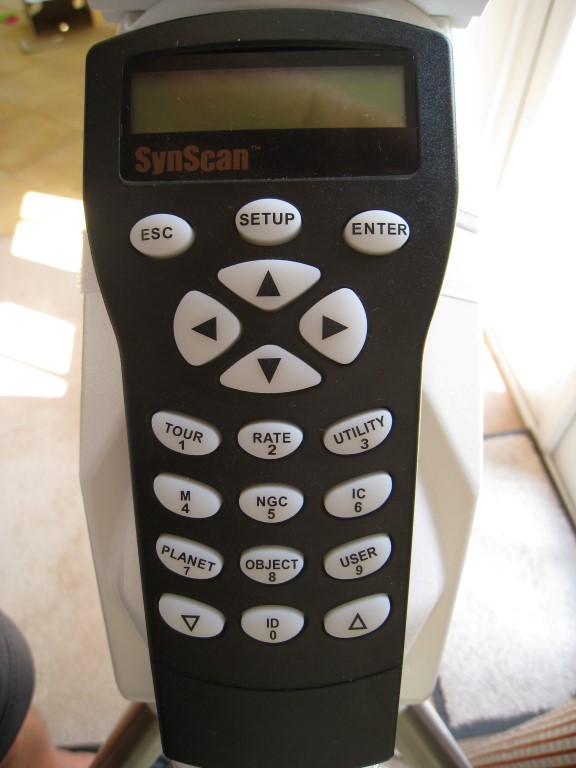
Control of the mount is via a handheld Synscan handset, the results of which are nothing short of amazing with over 42,900 celestial objects programmed!  Following a built-in 1, 2 or 3-star alignment process, a vast array of viewing or imaging opportunities can be programmed though the handset and then located, with the mount moving gracefully with a sinister whirr at a rapid slewing speed of 4.2”/sec and a tracking accuracy of 0.1436 arc minutes. Having previously undertaken this by hand with the EQ3-2 mount it is a new and delightful experience.

Synscan handset - the world (or in this case the Universe) at your fingertips, literally!

Synscan handset – the world (or in this case the Universe) at your fingertips, literally!

Accessories

All the existing lenses and other basics can be used with the new set-up.  However, following advice I did purchase three other items:

1. A 50mm William Optics guide scope, which will be clamped above the main OTA using the existing rings which, together with the ZWO 120MC webcam, will assist in tracking and maintaining a fix on objects during imaging – I have not yet put this to use.

2. A 2” William Optics dielectric diagonal, to make observing more comfortable; the ‘dielectric’ part is a mirror coating process, reputed to increase reflectivity and be more resistant – we shall see.

2. A William Optics field flattener, which is used for DSLR imaging, in order to ‘remove’ any apparent distortion of the image at the edges, with excellent results; though I found it very, very difficult to find the focus point at first.  Furthermore, the optics of the field flattener also acts as a x0.8 focal reducer, thereby changing the scopes speed from f5.9 to f4.7, which places it into the ‘serious’ category for DSO imaging.

All-in-all, the new equipment is a joy to use, with good results and holds great promise once all the features and software are fully up-and-running.

William Optics GT81 + AZ-EQ6 Mount set-up & imaging.  Nice one!

William Optics GT81 + AZ-EQ6 Mount set-up & imaging. Nice one!

Comments

Since taking up astronomy just over a year ago I have made good progress and now feel, with the new equipment, that this will keep me more than busy before the next upgrade needs to be made.  However, such is the quantum leap the new equipment provides, I expect that such changes in the future will be more incremental, such as scopes for specific tasks and various ‘must have’ accessories; notwithstanding, I can see that astronomy retailers are likely to do well for some time to come!

Summary of Equipment currently at Fairvale Observatory           

Scopes: William Optics GT81 FPL3 Triplet APO refractor f5.9, William Optics 50mm f4 guide scope & Skywatcher 150PL f8 Newtonian & 30mm finder scope

Mounts: AZ-EQ6 GT & EQ3-2 (+RA & DEC Motor Drive)

Lenses: Barlow: x2, Plössl 32mm, 25mm Wide Angle, 10mm, 6mm Ultra Wide Angle

Bins: Helios Naturesport Plus 10×50 wide-angle; Cameras: Canon 700D, ZWO ASI 120MC

Filters: Baader ND0.9 Moon, UHC, Light Pollution, Baader Astro Solar Safety Filter

Other Stuff: William Optics Field Flattener x0.8 Focal Reducer, William Optics 2” dielectric diagional, William Optics RDF, Telrad, Bahtinov Masks, Canon EOS T-piece, intervalometer, afocal camera bracket, Manfrotto binocular clamp, binocular RDF, Samsung laptop + numerous leads and connectors

Copernicus was right!

OK it’s not news but a tribute to the man who opened our eyes to the way the Solar System works.

Like most newcomers to astronomy viewing and imaging starts at home and that is the Solar System. So it was with my Skywatcher 150PL Newtonian scope last year – first the Moon (of course) and then on to the planets, in this case it had to be Saturn – surely the most exciting / beautiful planet? Despite my growing years it was only in April 2013 I got to see Saturn for the first time through the 13″ Astrographic Refractor at Herstmonceaux  http://www.the-observatory.org/telescopes. WOW I am hooked and following much previous prevarication over what to buy now rapidly sought to purchase my first telescope in the form of the aforementioned 150PL with a basic EQ3-2 mount.

The early summer of 2013 was very good for viewing Saturn and so it was I spent many late nights and early mornings gazing at this wonderful planet. Of course I had to get a photograph but this was easier said than done. Despite years of SLR photography I did not own a DSLR, considering them too bulky and inconvenient for day-to-day use, I therefore resorted to my trusty Canon Ixus 860IS to try my hand at afocal photogrpahy i.e. holding the camera up to the eyepiece.  The results were awful so I purchased a camera bracket that clamped to the eyepiece and held the camera more steady, unfortunately this too was little better. I came to the conclusion that this wasn’t going to work and in some shape or other I would need to take a video instead, with subsequent processing through Registax (more about this another time) which is able to sort and stack the best frames to produce a final, single image.

I tried the cheap route first by adapting an old Logitech webcam I already had (this involves removing the front lens so the light fall directly on the sensor) but could not get an image and therefore in the end decided to purchase a ZWO 120 MC http://www.365astronomy.com/zwo-asi120mc-colour-13-cmos-usb20-camera-with-autoguider-port-p-3536.html which also provides an autoguiding function, as yet not tested. Again I encountered major problems getting an image but after visiting the retailer Zoltan at 365 Astronomy, who also had great difficulty getting it to work by using a more up-to-date version of Firecapture, I was finally up and running – all I needed was a clear sky and an object to image. Of course, it had to be Saturn.

As I have now learnt every facet of astrophotography is difficult and this was no exception. The problems this time fell into two categories: the general capture settings and that old thorn in the side, focus.  It took a while but eventually I had Saturn  on film which, after some Registax processing I successfully turned into a picture.

ZWO 120MC

ZWO 120MC

Still plenty of scope for improvement but it is clearly Saturn and to my eyes looks great.

With this success under my belt, earlier this year I tried Mars which, as I was to find, is a notoriously difficult subject – the problem being size i.e. it is small. Depending on their respective orbits relative to Earth, the angular diameter  http://en.wikipedia.org/wiki/Angular_diameter of Saturn varies from 14.5″ to 20.1″, with Mars 3.5 to 25.1″.  Notwithstanding, I eventually managed to capture some video, which looked awful, but thanks to Registax emerged looking like, well ….Mars!  It has been described as ‘pizza looking’ but for the moment I’m happy.

223242_castr

ZWO 120 MC + Registax

I had hoped to get Jupiter too but for various reasons (which I can’t remember) it didn’t happen, so that’s on the ‘to-do’ list next time it comes around.  And thanks to Nicolaus Coperincus we will be able to predict when that is.

The Moon: Up close and personal

Last night was the so called “Supermoon” of 2014 as, in its eliptical orbit, the Moon passed at its closest point to Earth for this year. Its relative closeness to Earth, plus atmospheric lensing, caused by the Moon’s location in the southern part of the Zodiac, means that for observers in the higher latitudes of the Northern Hemisphere the Moon appears particularly large at Full Moon on 10th August. As a result it is possible to get good photographs without the use of a telescope so, in my case, I shot this using a 200mm telephoto setting:

Supermoon from Fairvale Observatory 10th August 2014 Canon 700D | 200mm telephoto | 1/160th f11 ISO200

Supermoon from Fairvale Observatory 10th August 2014
Canon 700D | 200mm telephoto | 1/160th f11 ISO200

Of course, since getting my telescope last year the Moon has been a frequent subject for viewing and imaging, with some very close-up results in some cases almost seeming to take you there. Viewing the Moon is best during the early stages of a new “waxing” Moon, particularly along the edge where the dark section meets the light section – the so called “terminator”. Views of this can be stunning, with the WO GT81 and a x2 Barlow an 10mm eyepiece it almost seems like you are about to land on the surface!  Very soon after first looking at the Moon I got a Moon filter, which I have found essential as the Full Moon approaches and the light is almost otherwise blinding; the filter reduces the glare and makes observing more comfortable.

Whilst a good view of the entire Moon can be obtained, such is the optics of the 150PL (and I think the WO GT81) that to get focus the DSLR camera has to be used in conjunction with a Barlow lens. Unfortunately this results in such magnification that the Moon can only be imaged in parts, rather than as a whole but the image is nonetheless exciting:

The Moon 11th February 2014 Canon 700D | SW 150PL 2xBarlow | 1/100th ISO 400

The Moon 11th February 2014
Canon 700D | SW 150PL 2xBarlow | 1/100th ISO 400

Notwithstanding, using a suitable computer programme these individual images can be stitched together to produce a photo mosaic, such as this one made from x6 separate sections of the Moon.  The result is impressive:

Photo mosaic 11th February 2014

Photo mosaic 11th February 2014

Finally and probably most amazing is using a webcam / CCD to video the Moon.  Once again this needs to be undertaken using a Barlow and the resulting magnification is even higher but with spectacular results as can be seen with this video taken with the ZWO 120 MC in May this year(the shimmering effect is the Earth’s atmosphere): https://www.youtube.com/watch?v=13Nb_lBBaxk&feature=youtu.be

Snapshot of Moon video (see above link) ZWO 120 MC

Snapshot of Moon video (see above link)
ZWO 120 MC


Zen and the art of Nebulae astrophotography

Wow, the title should get your attention. Of course it’s a corruption of Robert Pirsig’s famous book, Zen and the art of motorcycle maintenance, which in turn formed the basis of a new philosophy, that of the Metaphysics of Quality. Heavy eh?

The link is Cosmology or the metaphysical study of the origin and nature of the universe and, in this case, capturing evidence of what might be going on out there in the form of astrophotography. Unfortunately, whilst this blog might have high ambitions, you will not find the answer here to – Life the Universe and Everything.  However, my first half-decent picture of the M57, the Ring Nebula, does make you think.  Of all the features in the universe I find these most fascinating.  As the end and beginning of stars and other matter, they are, as far as we can know the origin of life itself ultimately. OK I am getting carried away but just look at the Wikipedia description of M57:

The Ring Nebula (also catalogued as Messier 57, M57 or NGC 6720) is a planetary nebula in the northern constellation of Lyra.[5] Such objects are formed when a shell of ionized gas is expelled into the surrounding interstellar medium by a red giant star, which was passing through the last stage in its evolution before becoming a white dwarf.


That in itself is mind boggling and last week I was able to capture some of its photons on my camera in Redhill; sureal even, except it’s not. Nebulae are somewhat elusive, look at NGC 7000 the North American Nebula in the earlier post; look up and there’s nothing – apply some technology and PING, out jumps a nebula. In time I hope to capture far bigger and wonderful such features buried deep in the universe but this is my first, so it’s special.

On taking the initial images and only on close inspection on the computer screen, could I see a small but clear and yet anomalous blue spot. It could, at first glance, be another blue earthly like planet, except it is M57 in the constellation of Lyra some 2,283 ly from earth, with a diameter of 2.6 ly, that’s 15,280,000,000,000 miles, a temperature of 125,000K and is 200 times more luminous than our Sun.  However, through the vast distance of space it is insignificant to the eye.

M57 The Ring Nebula. WO GT81 + FF 10x30 sec at ISO 800

M57 The Ring Nebula, just to the right of centre of the two stars at 2.00 o’clock and 8.00 o’clock.
Canon 700D ; WO GT81 + FF ; 10×30 sec at ISO 800

A bit more work by Mr GIMP and all is revealed:

M57 The Ring Nebula, cropped from the main image above.

M57 The Ring Nebula, cropped from the main image above.