About this time of the year as astronomical darkness is lost for a few months I tend to take it easy, astronomically speaking. However, this year’s an exception as I have a large backlog of image processing to complete courtesy of the Photon Factory. With continuously bad weather prevailing across Europe back in February, it was more than four months since I’d been able to undertake any astrophotography here at Fairvale Observatory – of course such problems go with the hobby but this was ridiculous and somewhat disheartening. There were three solutions to the situation: continue waiting, give up all together or look further afield where the skies are reliably clear and dark, which like many others nowadays is what I did and thus joined the ever increasing band of remote imagers.
About 2-years ago I considered establishing equipment at one of the growing number of astrophotography host sites in southern Europe. However, after some research I concluded that whilst such a facility would be great to have it was probably too expensive for now and moreover, I first needed to spend more time improving my processing techniques before embarking on such a plan. Thus having since taken steps towards this goal, which included learning PixInsight, I felt the time was right to sign-up with Deep Sky West (DSW) situated in the state of New Mexico, USA. DSW were one of the early remote hosting observatories established and have a good reputation, reasonable prices and a wide choice of quality equipment. I therefore signed up for one year’s imaging with the following set-up:
- Takahashi FSQ 106 FL 530mm f/5 + Moonlight Nightcrawler focuser
- QSI1683-WSGA camera 5.4 nm pixels & Astrodon 5nm filters
- Paramount MyT mount

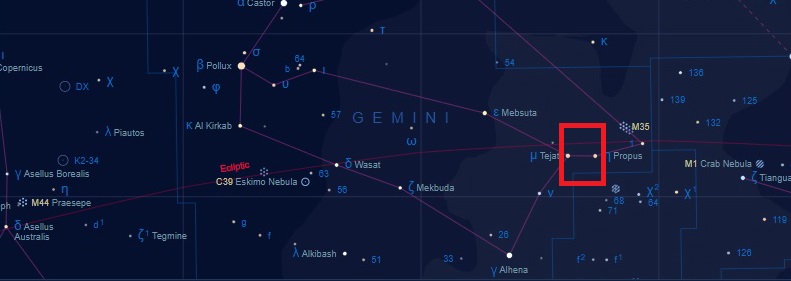
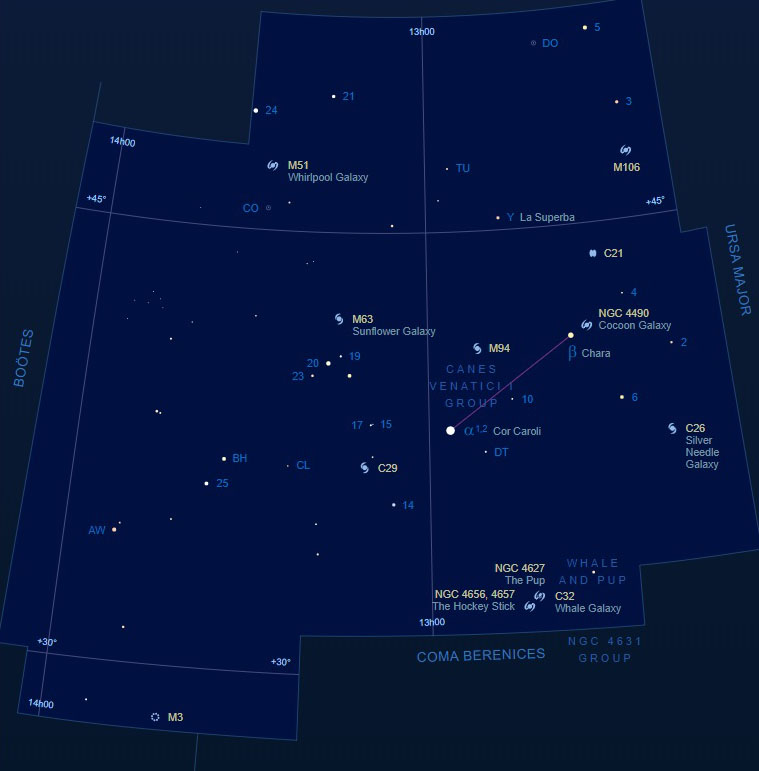
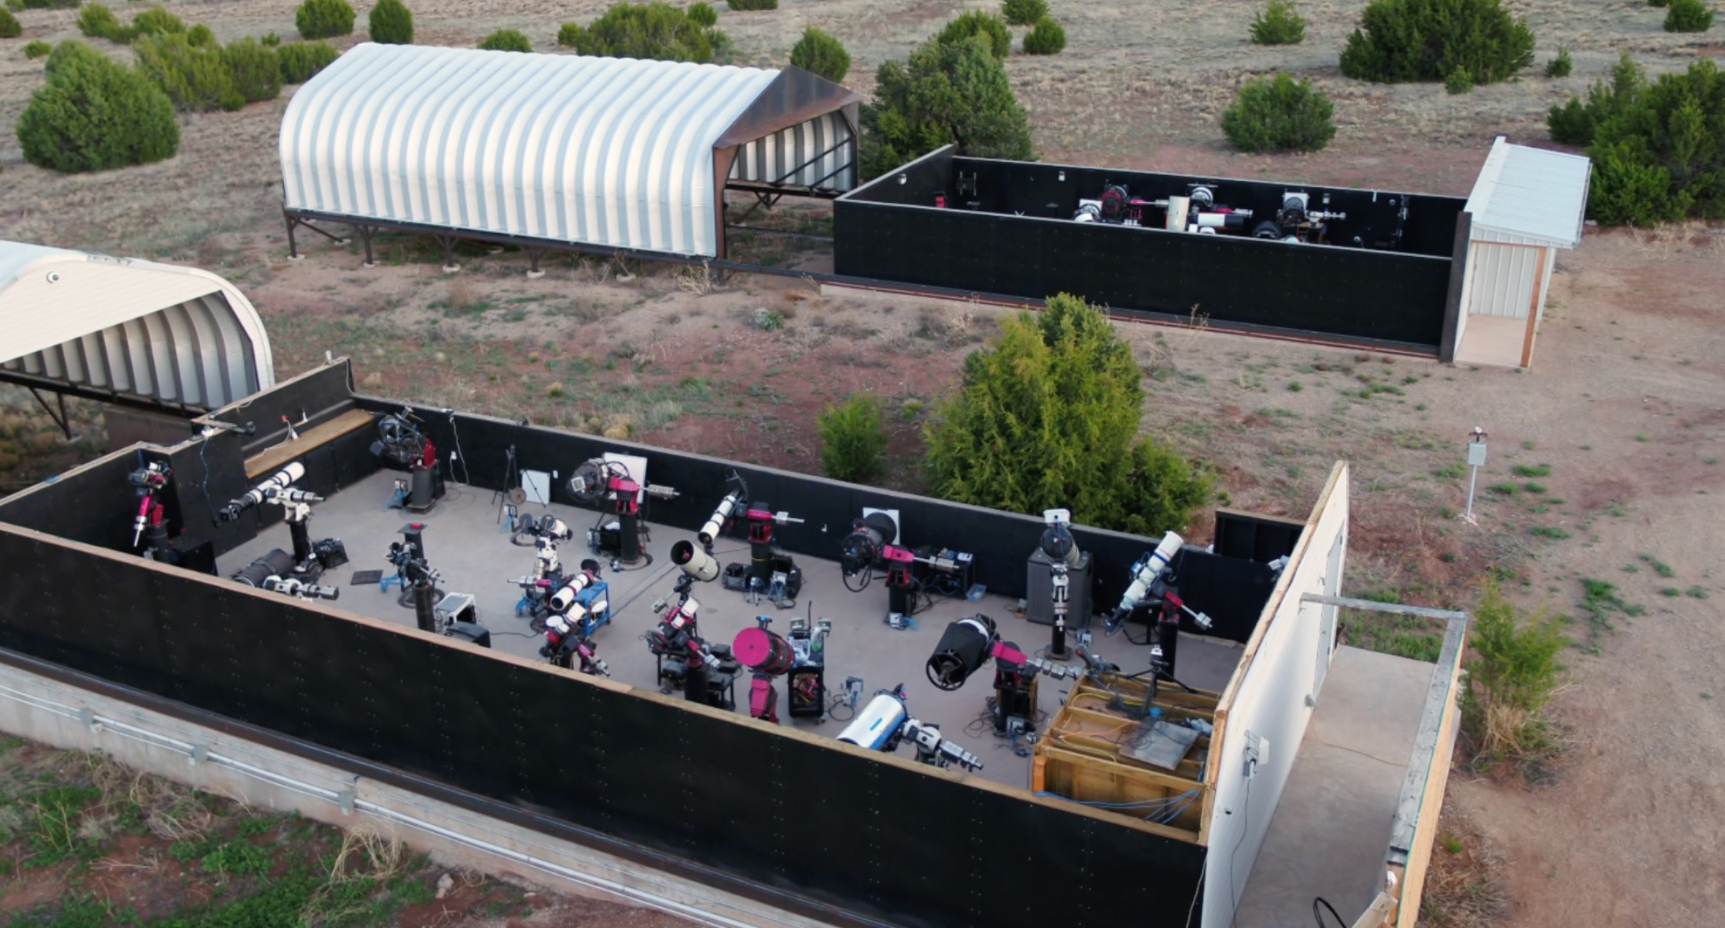
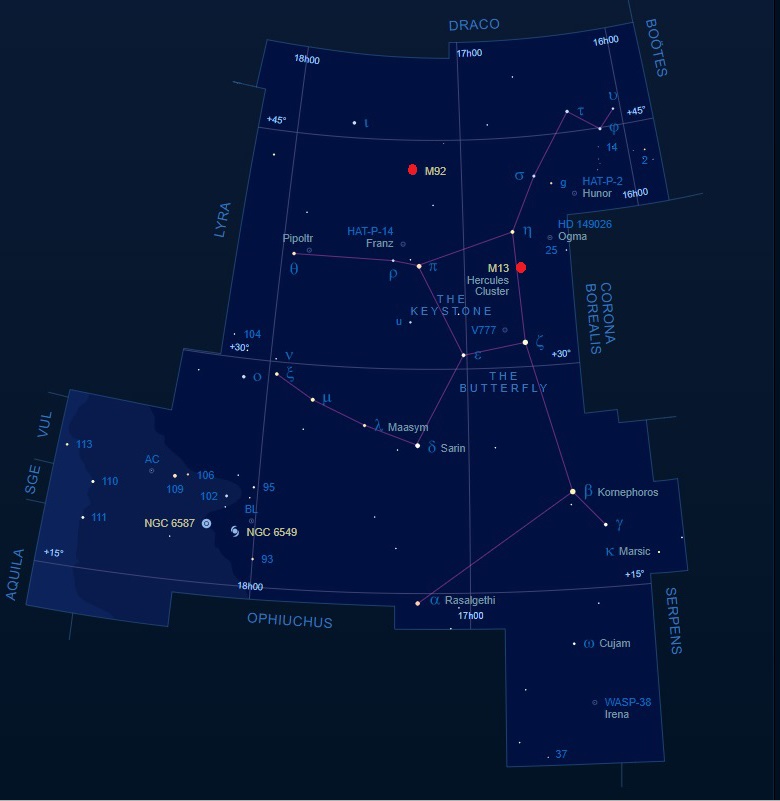
Deep Sky West is located about 35-miles south east of Santa Fe, at an elevation of 7,400ft on the Glorietta Mesa (see above map). Established by Lloyd Smith and Bruce Wright in 2015, there are now two large bespoke roll-off sheds (Alpha & Beta – see picture below) housing up to nearly forty rigs which are used by astrophotographers from across the world – you could call it a photon factory. DSW has since established a premier reputation as an observatory producing high quality data. Building on this success and the burgeoning demand for remote imaging, DSW are now expanding their service into Chile.
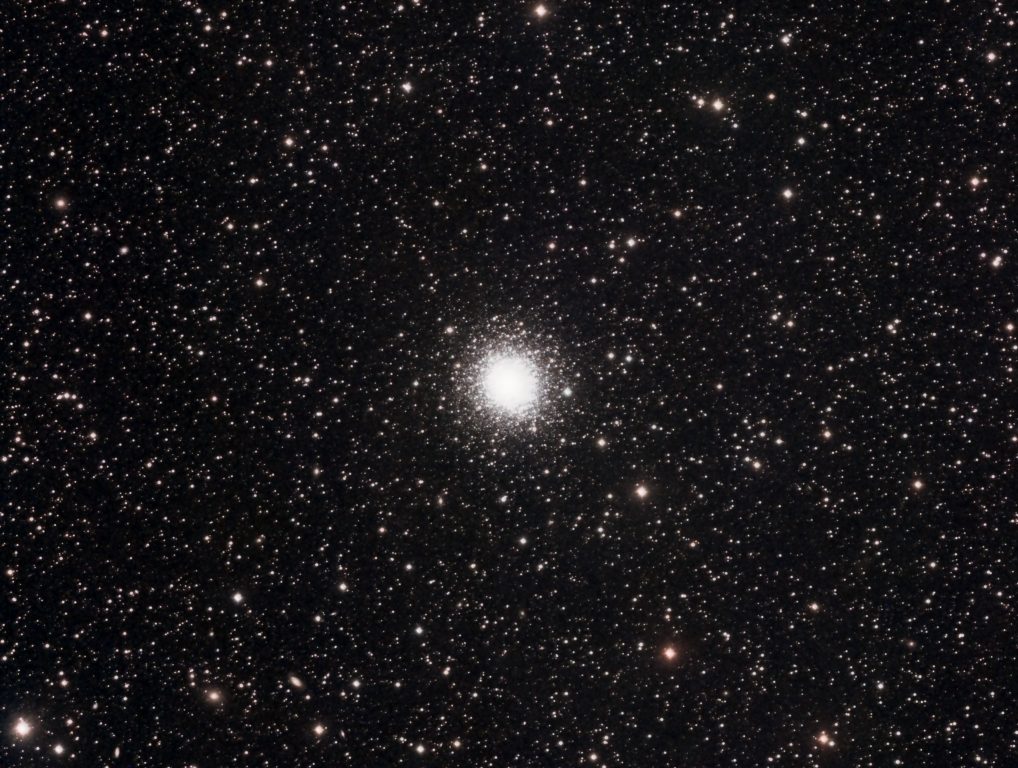
After imaging the globular cluster M53 from Fairvale Observatory in early April, it was opportune to be able to continue the same theme with my first two DSW images taken during Q1 and Q2 – the globular clusters M13 and M92, both located in the constellation of Hercules. With an angular separation of just 9o 33’, spatially the two clusters appear as neighbours but in reality M13 is some 4,560 thousand light-years closer. Spanning some 145 light years in diameter, M13 consists of several hundred thousand stars and as the brightest globular cluster in our galaxy it is generally considered to be the finest in the Northern Hemisphere. Whilst somewhat overshadowed by its more famous neighbour, M92 is still one of the brightest globular clusters orbiting the Milky Way and at +11 billion years is one of the oldest.
Since moving to mono imaging in 2017 I’ve only used a CMOS camera and therefore this is my first experience of working with CCD data, hitherto considered as the best, though more recent development of CMOS sensors suggests this is now likely to be the way forwards for amateur astrophotography. Whilst most of the techniques are the same there are minor differences such as using bias frames instead of dark flats with my CMOS camera for calibration.

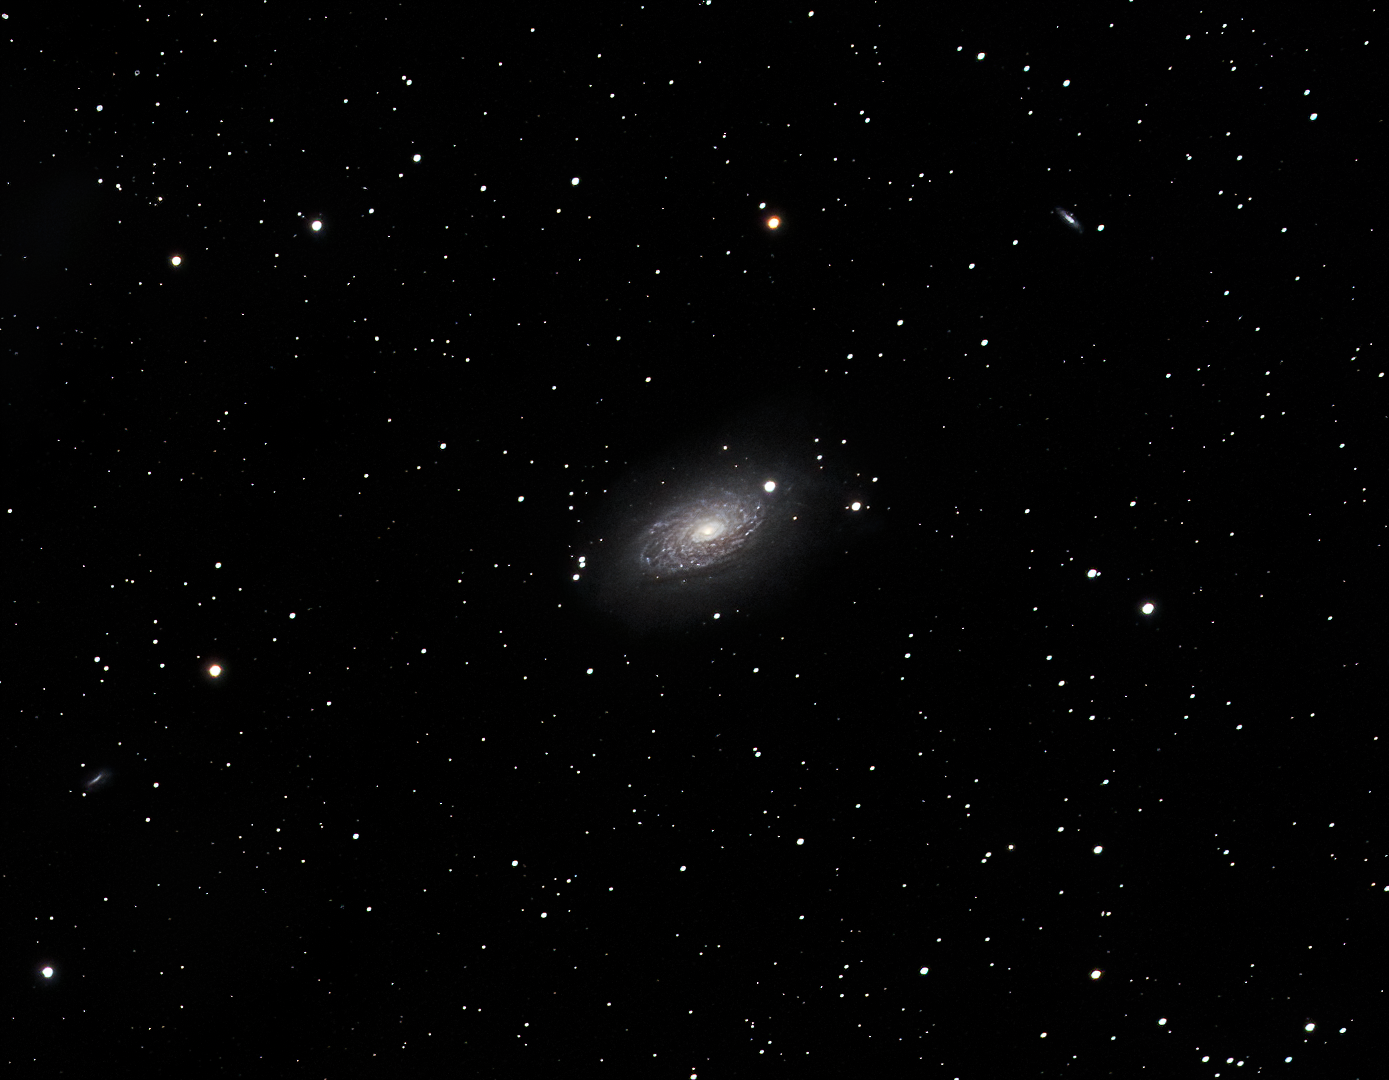
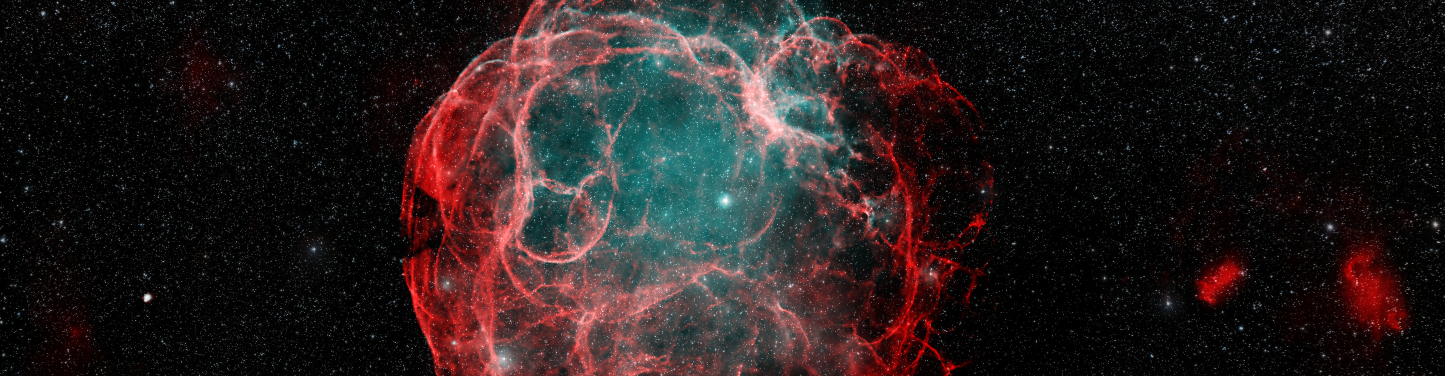
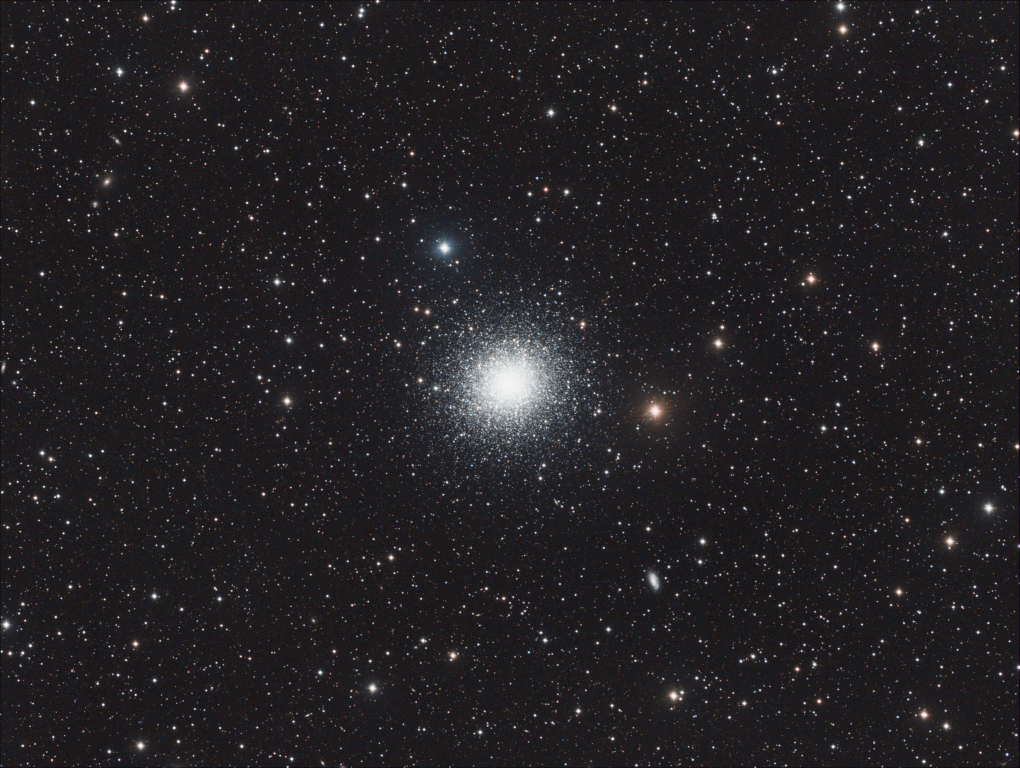
The DSW equipment combination produces a field-of-view nearly 50% less than my equipment at home but with a similar resolution, thus improving the magnification and image details of smaller and/or complex features such as globular clusters. Notwithstanding, I was pleased with my previous image of M13 (above) taken from Fairvale Observatory in 2018, which after cropping compares well with the new DSW version (see main image at the top of the page). This is my first image of M92 (below), which though OK probably needs more attention, as I’m not convinced the combination of the 600 secs + 300 secs + 60 secs data has worked to its full potential.
The Takahashi 106 is one of my dream scopes and with up to 250 clear nights a year historically, the DSW location in New Mexico provides an opportunity to work with top level equipment in outstanding night sky conditions – what’s not to like with remote imaging? However, with a growing cadre of remote imagers this has become a something of a contentious issue amongst astrophotographers – there’s no doubt it produces excellent data which leads to outstanding images but as a hobby it’s still good to be hands-on. So far I’m really enjoying working with the remote data produced under optimum conditions but strangely there’s much to be said for imaging in the backyard even with or perhaps because of the problems it involves. Funny old world!
| IMAGING DETAILS | |
| Object | M13 The Great Globular Cluster in Hercules |
| Constellation | Hercules |
| Distance | 22,180 light-years |
| Size | 20.0 arc minutes |
| Apparent Magnitude | +5.8 |
| Scope | Takahashi FSQ 106 FL 530mm f/5 + Moonlight Nightcrawler focuser |
| Mount | Paramount MyT |
| Guiding | Yes |
| Camera | QSI 683-WSG8 with KAF-8300 full frame CCD sensor and 5.4nm pixels |
| FOV 1.94o x 1.46o Resolution 2.1”/pix. Image array 3326 x 2,507 pix | |
| Processing | Deep Sky Stacker, PixInsight v1.8.8-7, Photoshop CS3, Topaz Denoise |
| Image Location | Centre – RA 16:41:41.701 DEC +36:27:34.927 |
| Exposures | 49 L 34R 36G 36 B x 300 secs @ -15C Total Integration Time: 12hr 55min |
| Calibration | 48 x 900 secs Darks* x47 Bias & x20 LRGB Flats *scaled to 300sec |
| Location & Darkness | Deep Sky West – amateur hosting facility near Rowe, New Mexico, USA SQM Typically >= 21.7 |
| Date & Time | Q1 2021 |
| IMAGING DETAILS | |
| Object | M92 Globular Cluster |
| Constellation | Hercules |
| Distance | 26,740 light-years |
| Size | 14.00 arc minutes |
| Apparent Magnitude | +6.3 |
| Scope | Takahashi FSQ 106 FL 530mm f/5 + Moonlight Nightcrawler focuser |
| Mount | Paramount MyT |
| Guiding | Yes |
| Camera | QSI 683-WSG8 with KAF-8300 full frame CCD sensor and 5.4nm pixels |
| FOV 1.94o x 1.46o Resolution 2.1”/pix. Image array 3326 x 2,507 pix | |
| Processing | Deep Sky Stacker, PixInsight v1.8.8-7, Photoshop CS3, Topaz Denoise |
| Image Location | Centre – RA 17:17:07.165 DEC +43:08:10.267 |
| Exposures | 20L 12R 12G 18B x 600 secs @ -15C 0L 23R 22G 23B x 300 secs30L 30R 30G 23B x 60 secs Total Integration Time: 17hr 53min |
| Calibration | 48 x 900 secs Darks* x47 Bias & x20 LRGB Flats *scaled to 600, 300 & 60 secs |
| Location & Darkness | Deep Sky West – amateur hosting facility near Rowe, New Mexico, USA SQM Typically >= 21.7 |
| Date & Time | Q2 2021 |