It was towards the end of last year I realised what I was missing in my images. Hydrogen alpha (Ha) is a deep-red spectral line created by energised hydrogen gas, with a wavelength of 656.28nm, such light is a dominant feature of emission nebulae. However, terrestrial cameras are made with an infra-red (IR) filter placed over the sensor in order to achieve the red-green-blue colours that typify what the human eye see as life on Earth. Unfortunately by filtering out some of the red wavelengths this has a negative impact on DSO astroimaging, as it will block the aforementioned Ha light. The result is that imaging such Ha features with a DSLR camera, as I have been doing with a Canon 700D, can significantly reduce the colour and even detail – in some cases where Ha is the principal light source the camera sensor may almost completely fail to register the object at all.
I had been aware of this problem from the outset when I purchased the Canon 700D but decided to make-do in order to see, (a) how I got on, and (b) if I even liked astrophotography. Nearly one year on and maybe I made a mistake then but I also enjoy using the camera for terrestrial photography. Here’s the catch: to improve the camera’s sensitivity to Ha it is necessary to remove the IR filter, to become what is then known colloquially as a modded camera, however, in doing so the camera becomes useless for terrestrial photography. Removing the IR filter allows more red light wavelengths to reach the sensor and, as a result, terrestrial pictures then acquire an overall pink-red hue! There are some ways round this but, as always with implications – but it was now clear I needed a modded camera.
There are three basic ways to ‘restore’ a modded camera for terrestrial use:
- Adjust the custom white balance – each time the white balance needs to be set manually, depending on the type of prevailing light and subject. It will work but, in my opinion, makes the process of day-to-day photography something of a chore and certainly reduces the scope for spontaneity, something I like when I am out-and-about photographing.
- Restore the colour balance during post-processing – basically this requires adjusting each photograph individually using processing software, such as Photoshop, to remove excess red that is reaching the sensor without the IR filter.
- Use an OWB (Original White Balance) filter – like the CLS light pollution filter I already use, this filter fits snuggly in front of the mirror / behind the camera lens (if fitted) and essentially acts like the original IR filter that has now been removed for astrophotography. Although quite expensive, this is by far the most convenient solution but there’s a problem: the back-focus section of the standard Canon EF-S lens I use is too long to accommodate the filter. An EF or other manufacture’s lens would overcome this problem (at further expense) and I was about to go down this route when serendipity paid a visit.
Not to be taken literally, but sometimes I would rather be lucky than smart. Whilst researching the aforementioned issues and seeking out other possible solutions, such as purchasing an already modded camera, I registered on the excellent Astronomy Shed forum and posted a question on how to deal with my problem. By the next morning, together with other advice on how to proceed, my attention was drawn to a Canon 550D for sale that had just been posted on the forum that very moment. Furthermore, the price was good and the seller would modify the camera for a small charge; it requires a degree of expertise to carry this out but, as a professional photographer with an interest in astronomy, the seller had undertaken this successfully many times before, though I obtained references to be sure. Therefore, after a few online exchanges, I became the new owner of a modified Canon 550d camera, together with some other bits and pieces – leads, intervalometer and a Canon battery grip.
Apart from the fact that this was a good camera, at a good price, it had one other very useful attraction – it is a close relation of my other camera, the Canon 700D (about three years older in development terms) and thus I immediately knew my way around and, furthermore, all my existing accessories would fit. Like I said, I had just got lucky – in more than one way. It’s early days but, with a clear sky last Friday and plenty to image at the moment, I just had to try it out and was not disappointed.

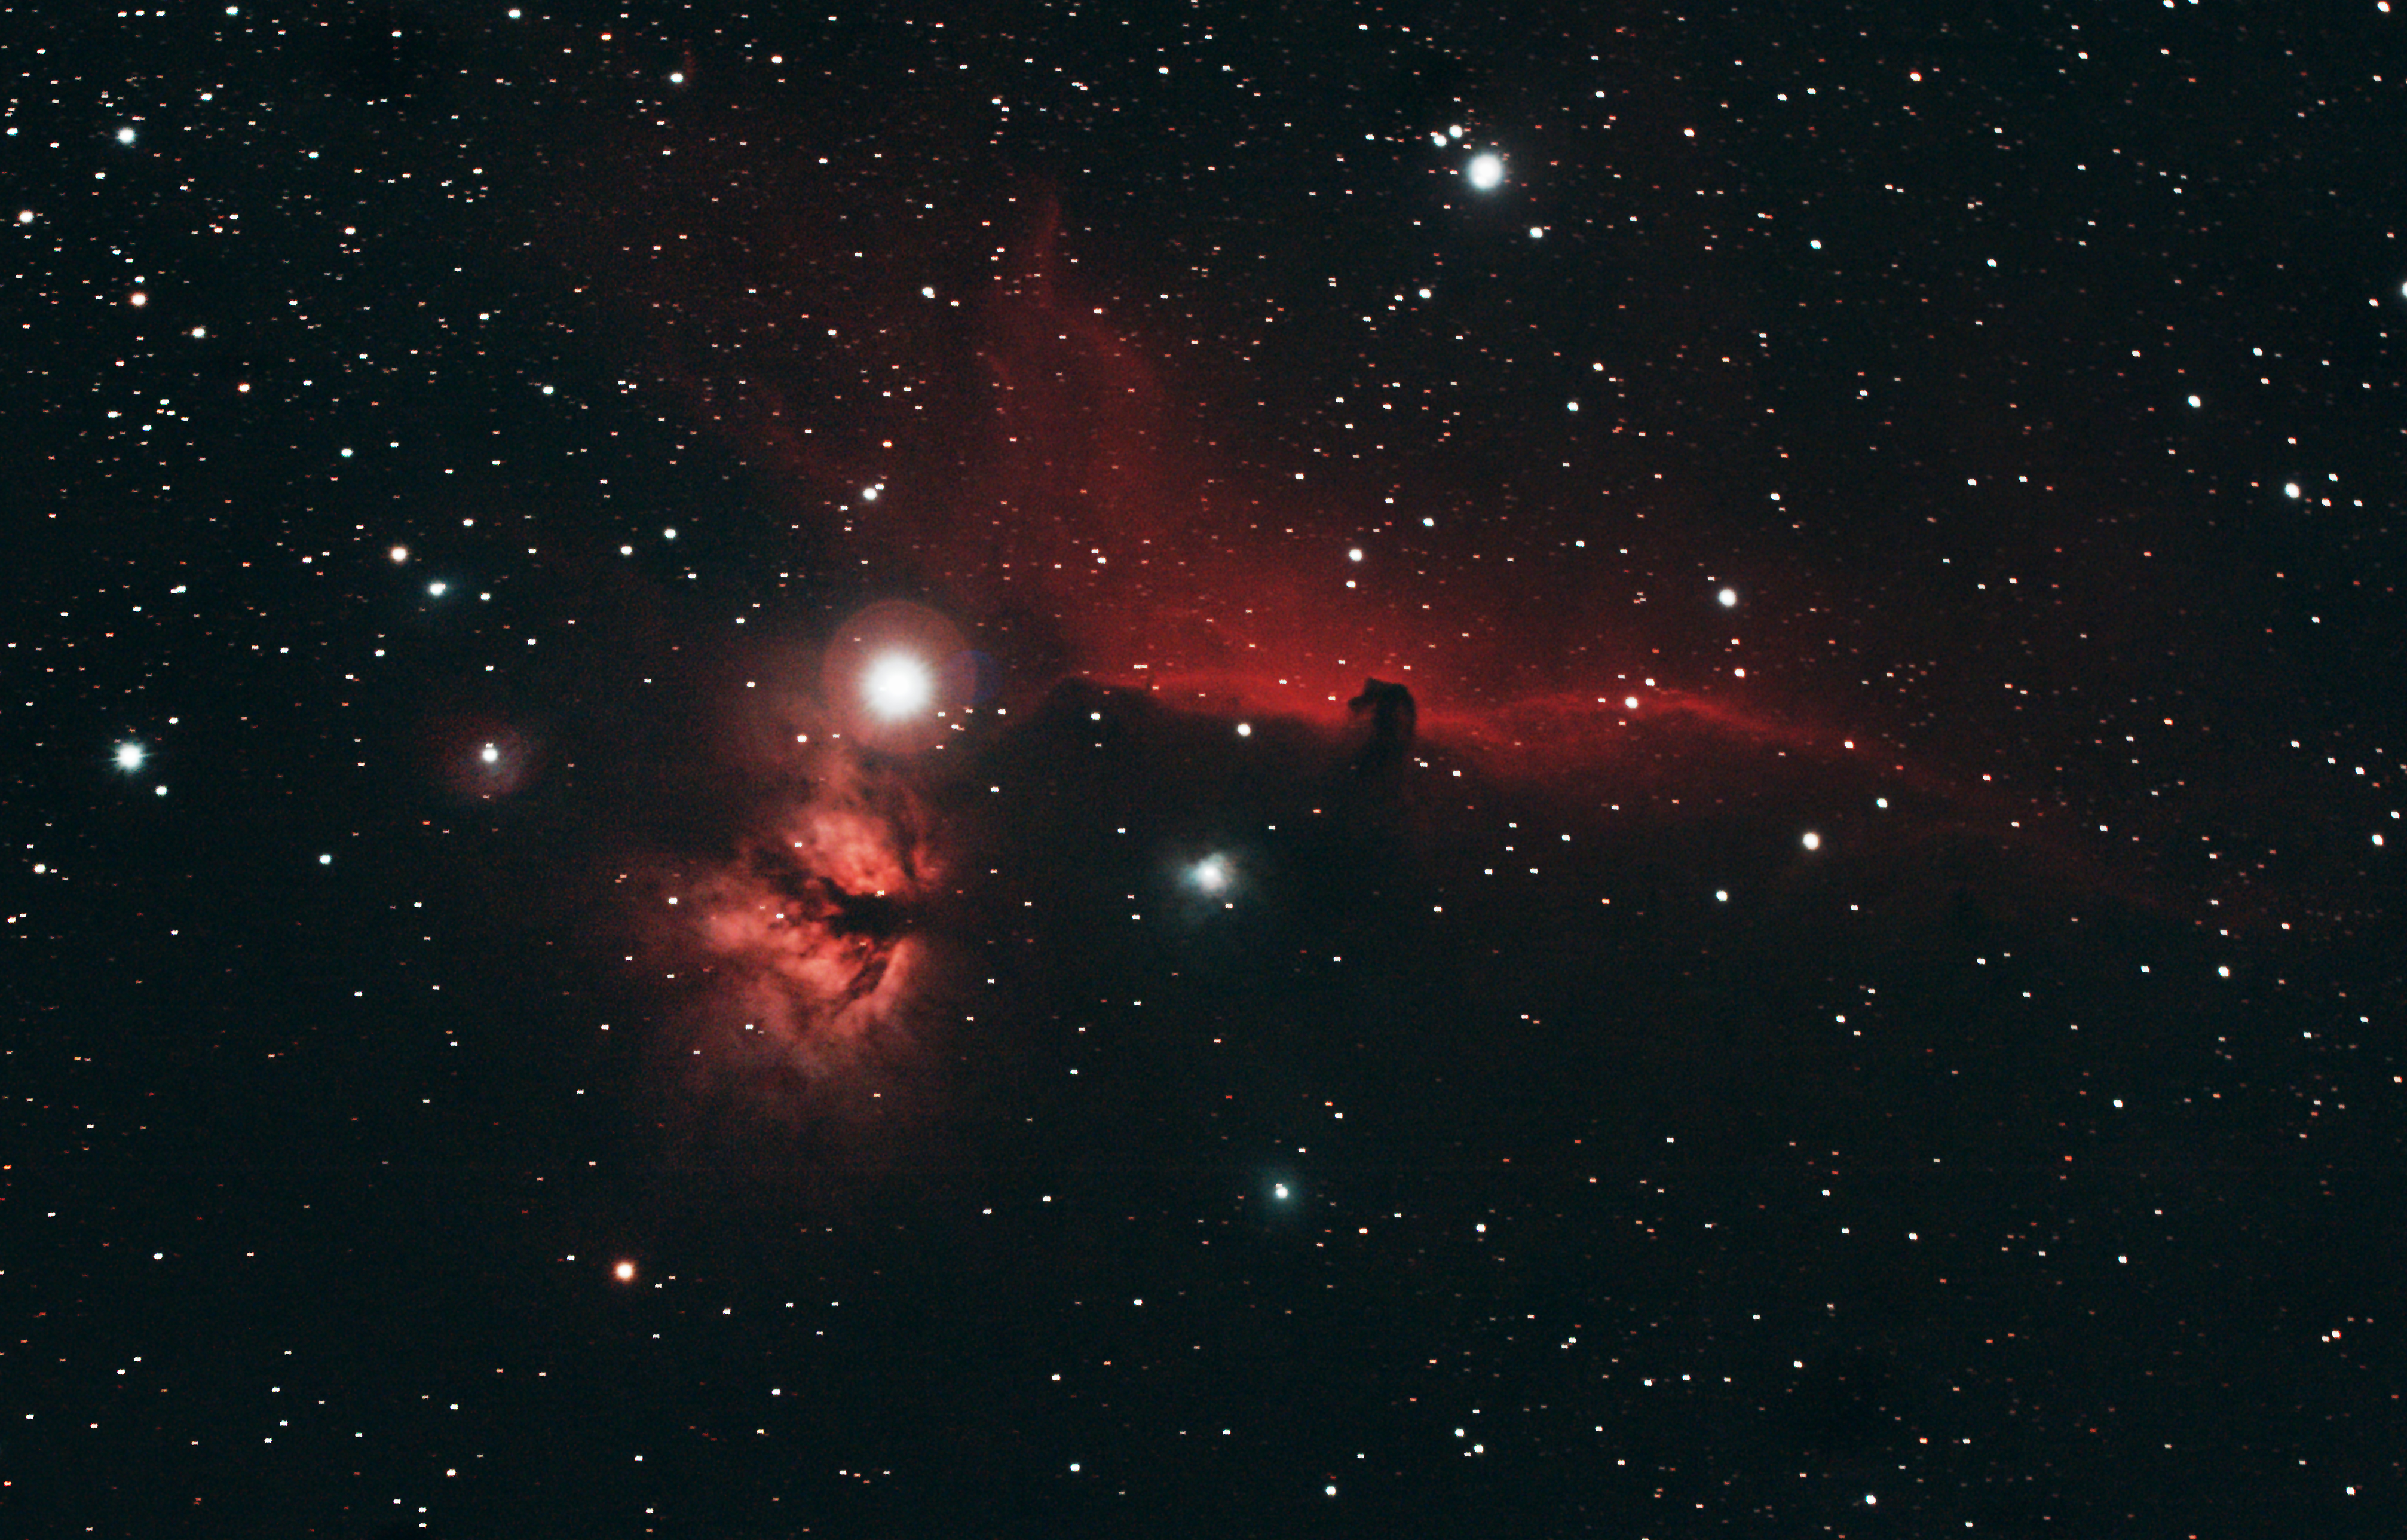
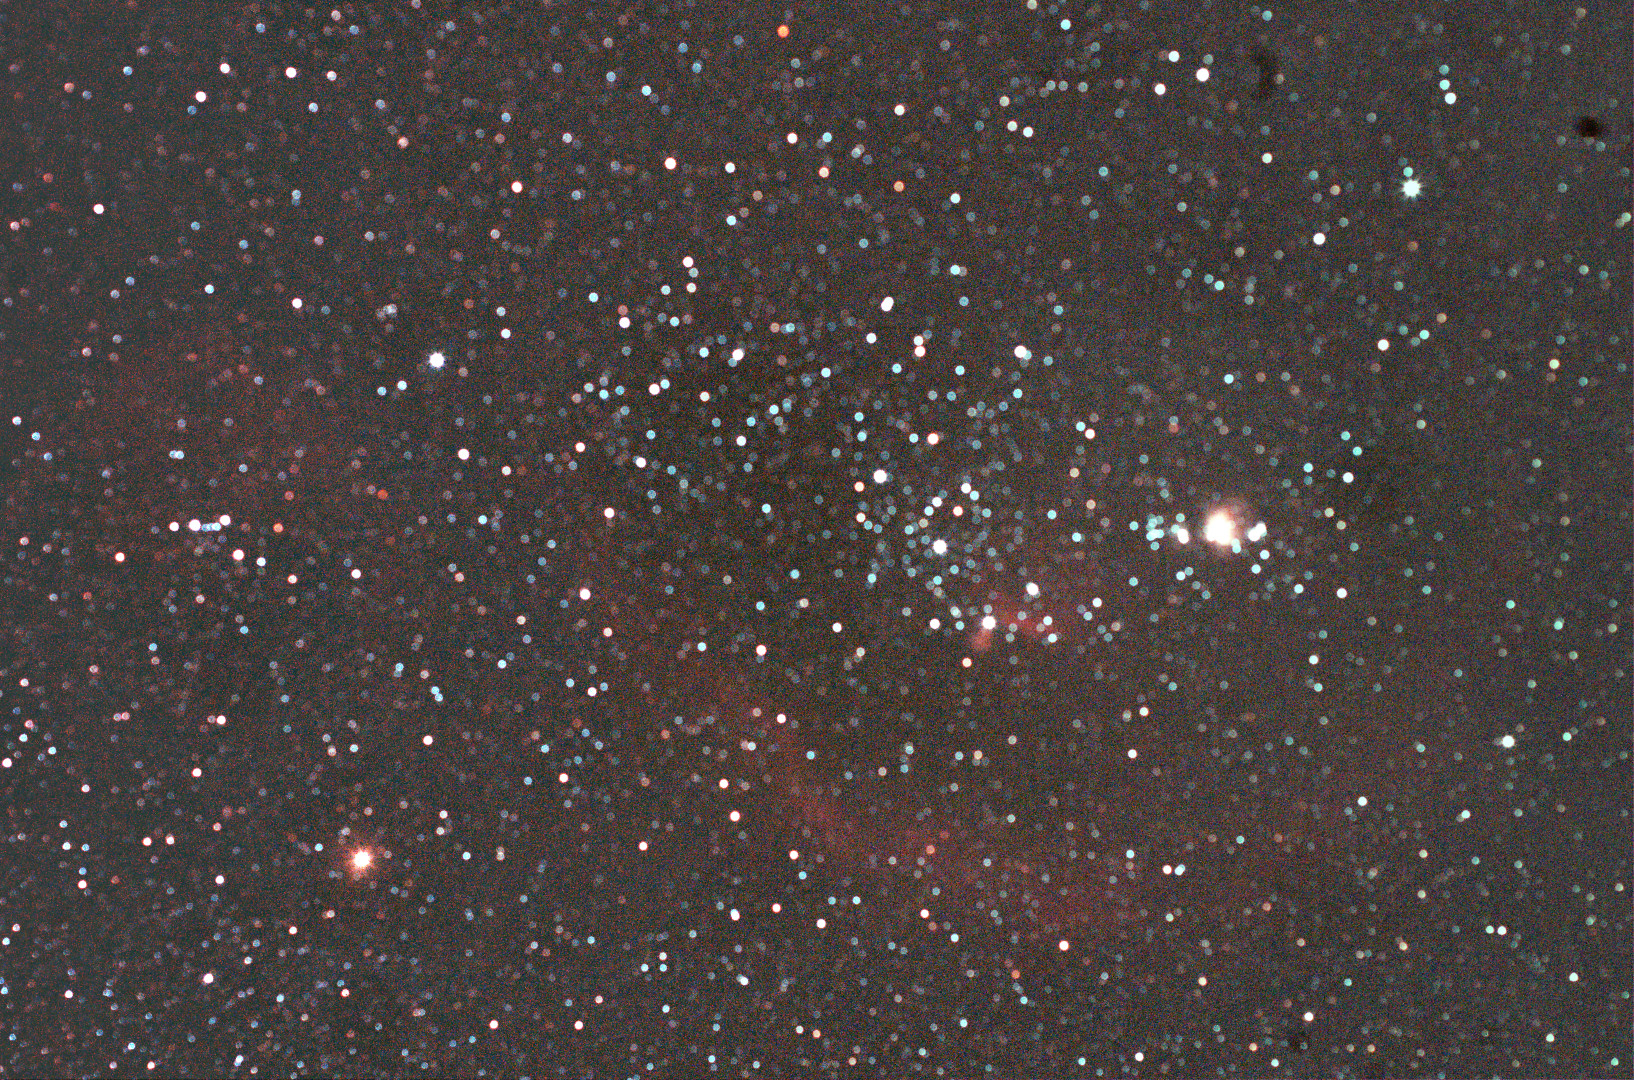
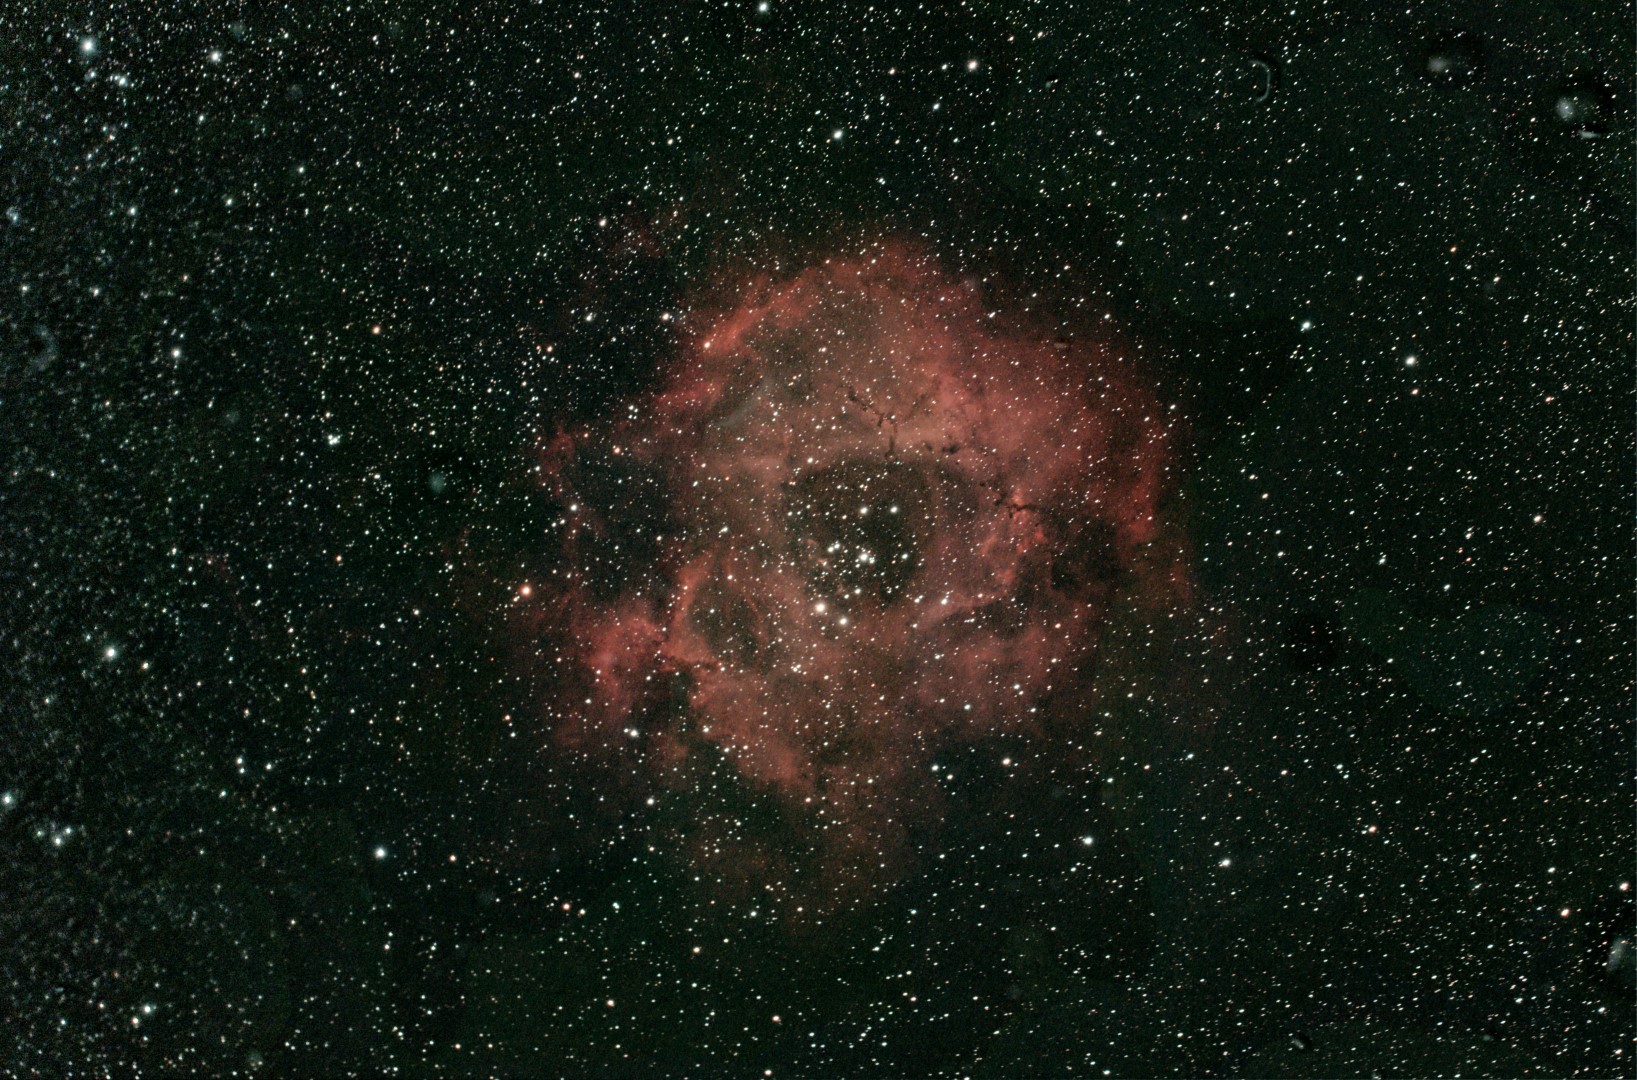
Rosette Nebula
WO GT81 + Canon 550d (modded) + FF | 15 x 120secs @ ISO1,600 + darks/bias/flats | 16th January 2015
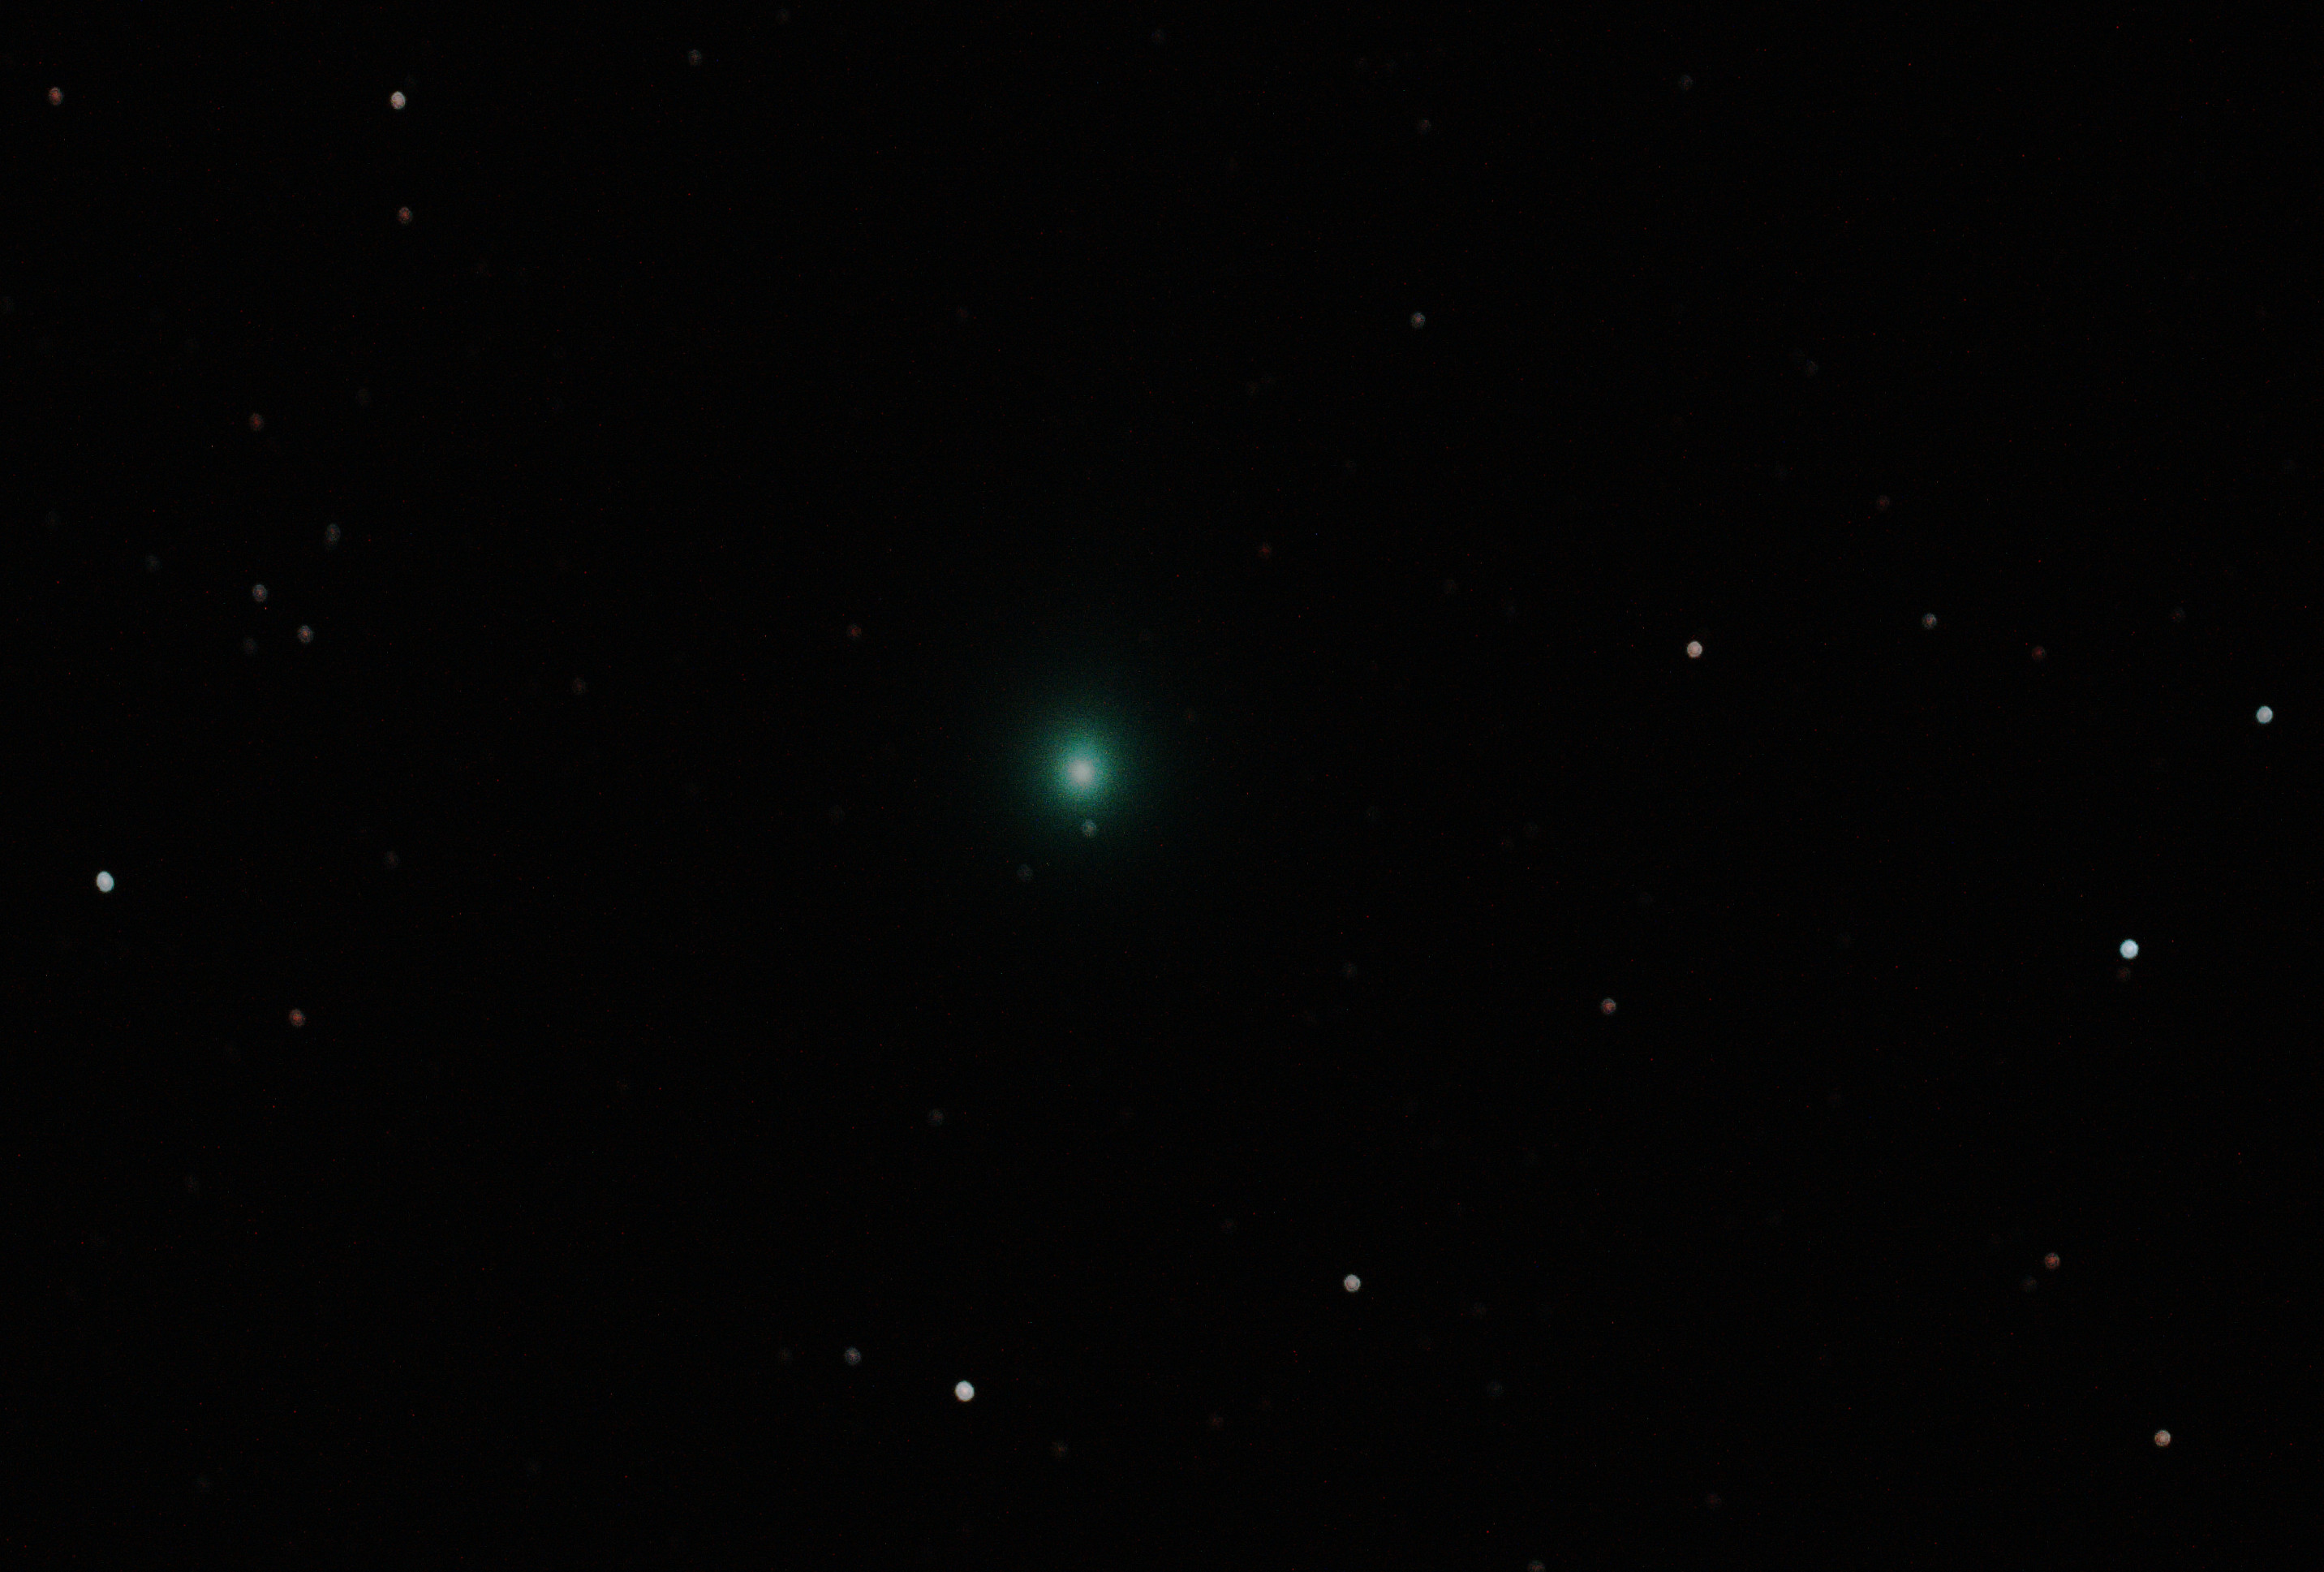
The evening’s targets were Comet Lovejoy, The Rosette Nebula and the Great Orion Nebula, of which the latter two showed off the camera’s new capabilities best. The difference was there to see immediately with the images straight out the camera and stacked, with a noticeable increase of red colour present. The benefit after post processing is perhaps more subtle but, I suspect, will become more apparent when I move on to objects where Ha is more abundant, such as NGC 2264 AKA The Christmas Tree Cluster & Cone Nebula, which when imaged just before Christmas showed just what I was missing – a shortage of red light and thereby significant detail of these beguiling astronomical objects. Hopefully this issue will now become a thing of the past and in the future I will be literally seeing red, for all the right reasons.

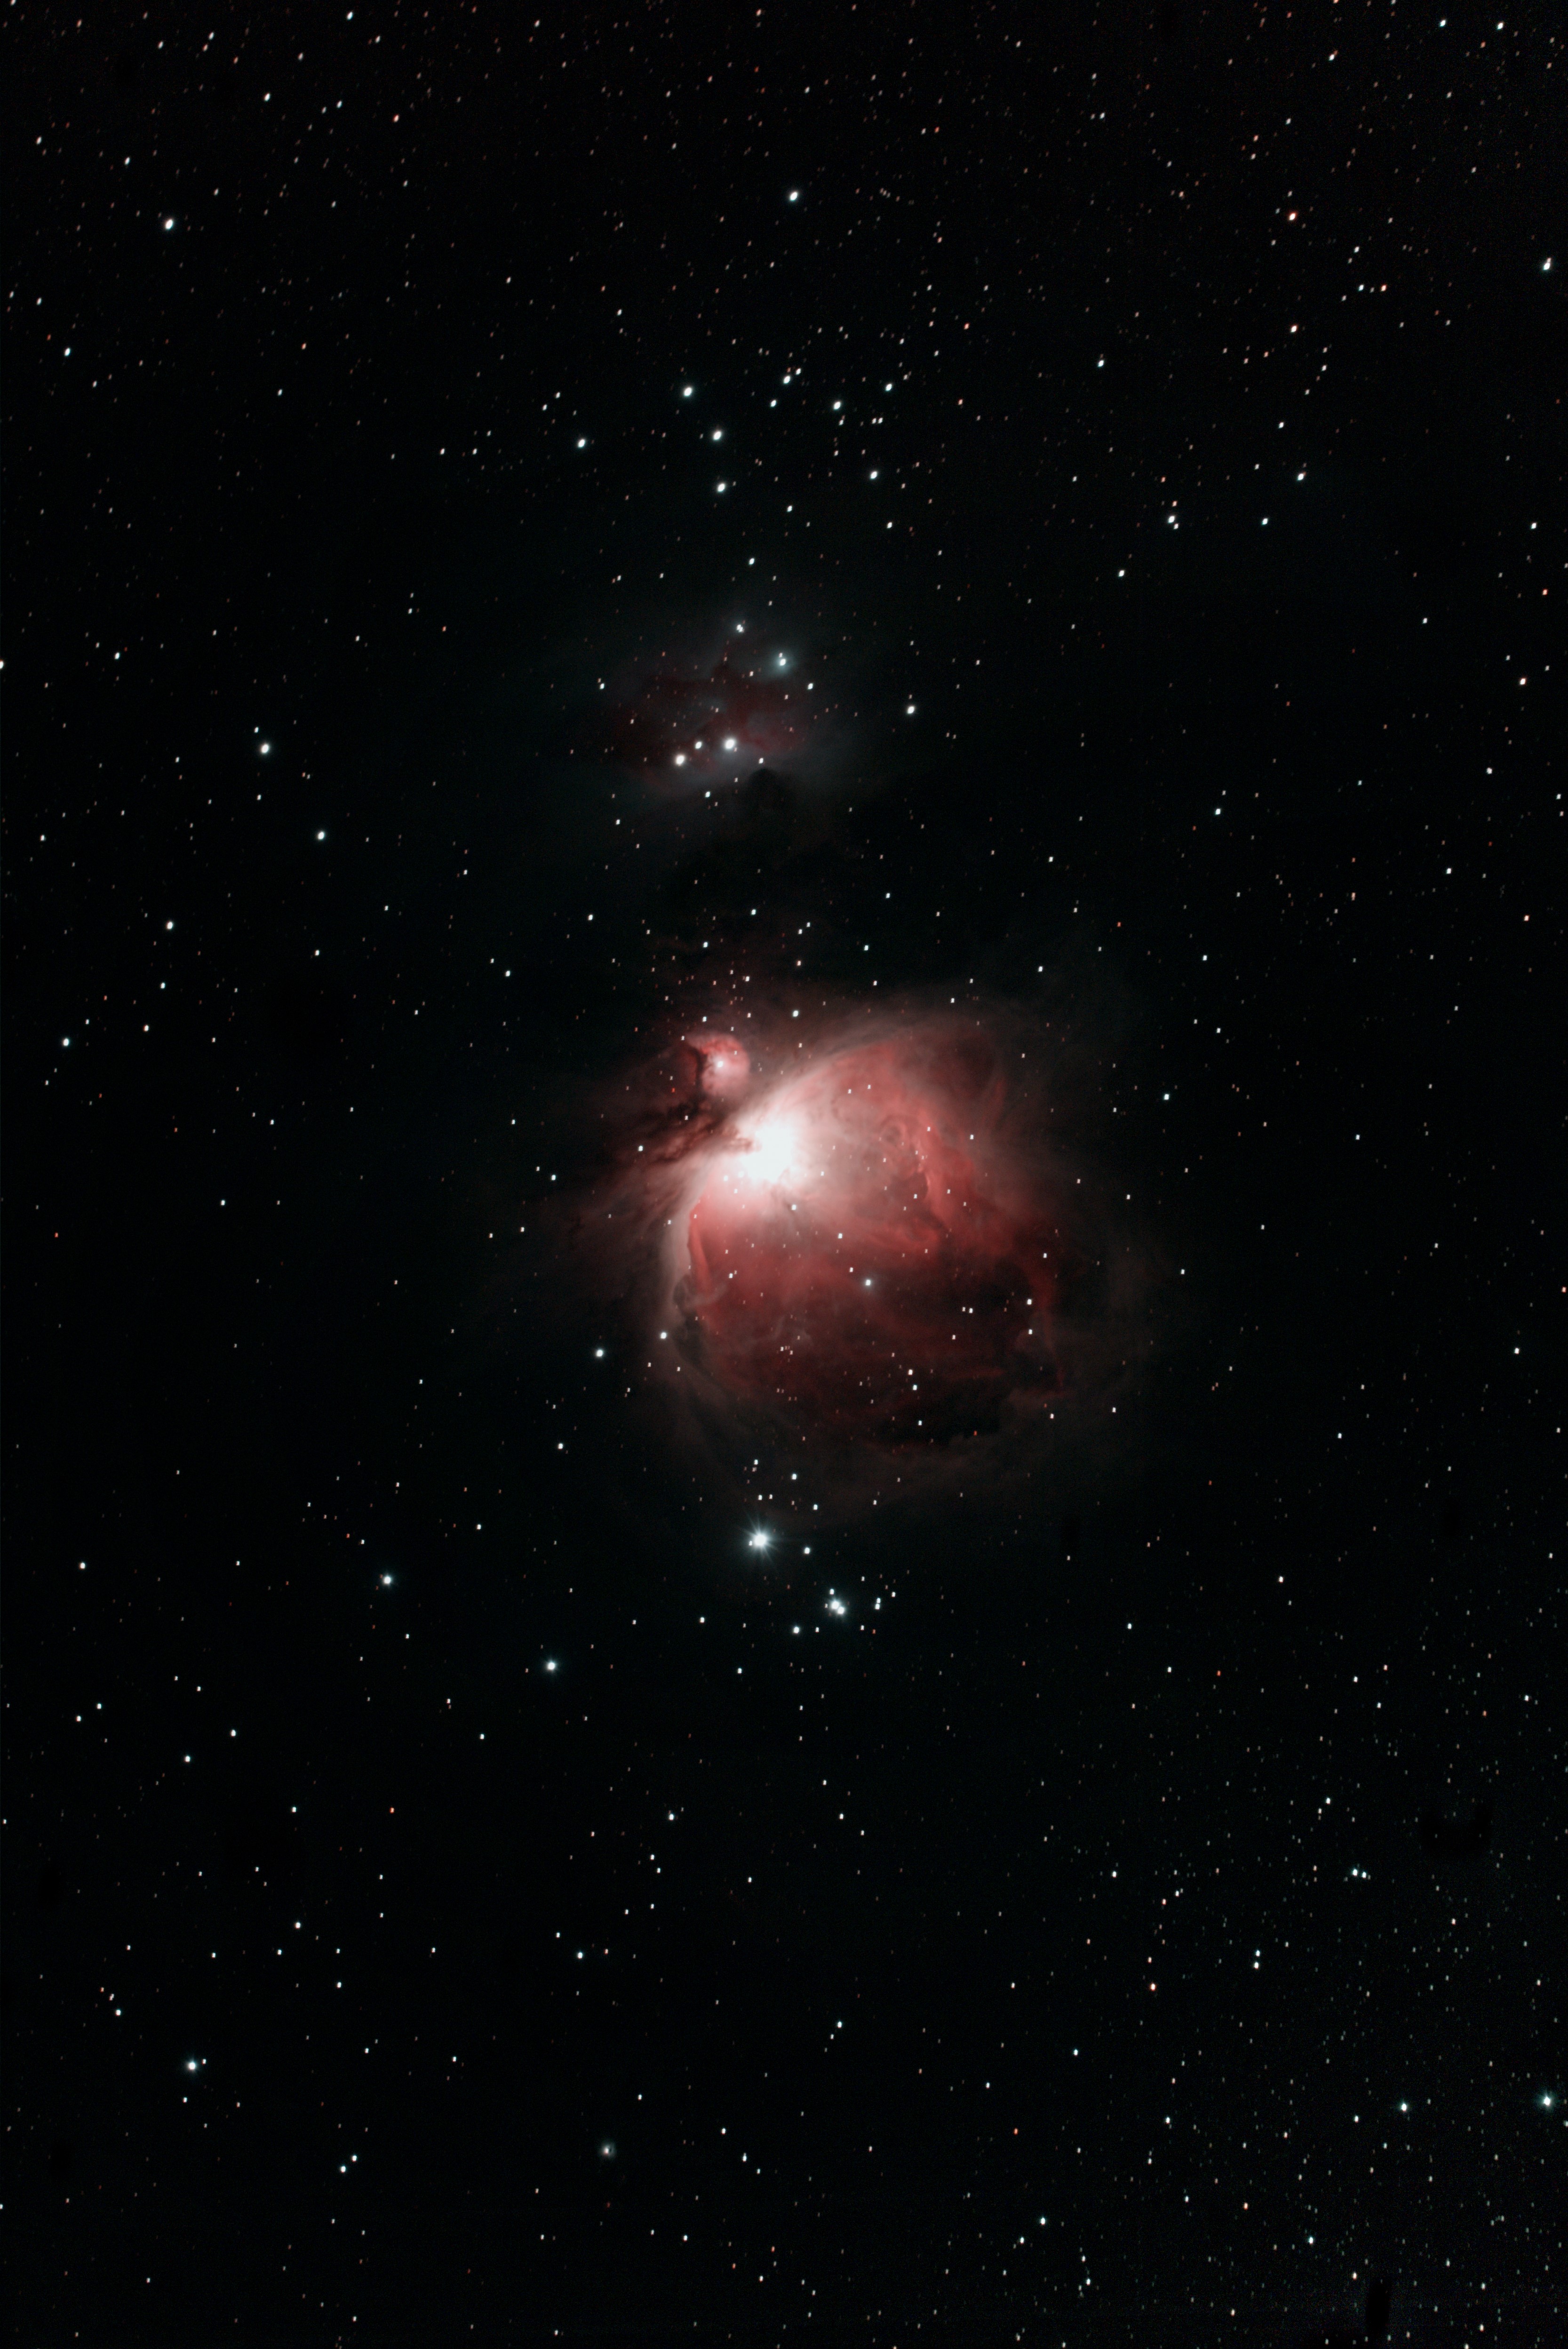
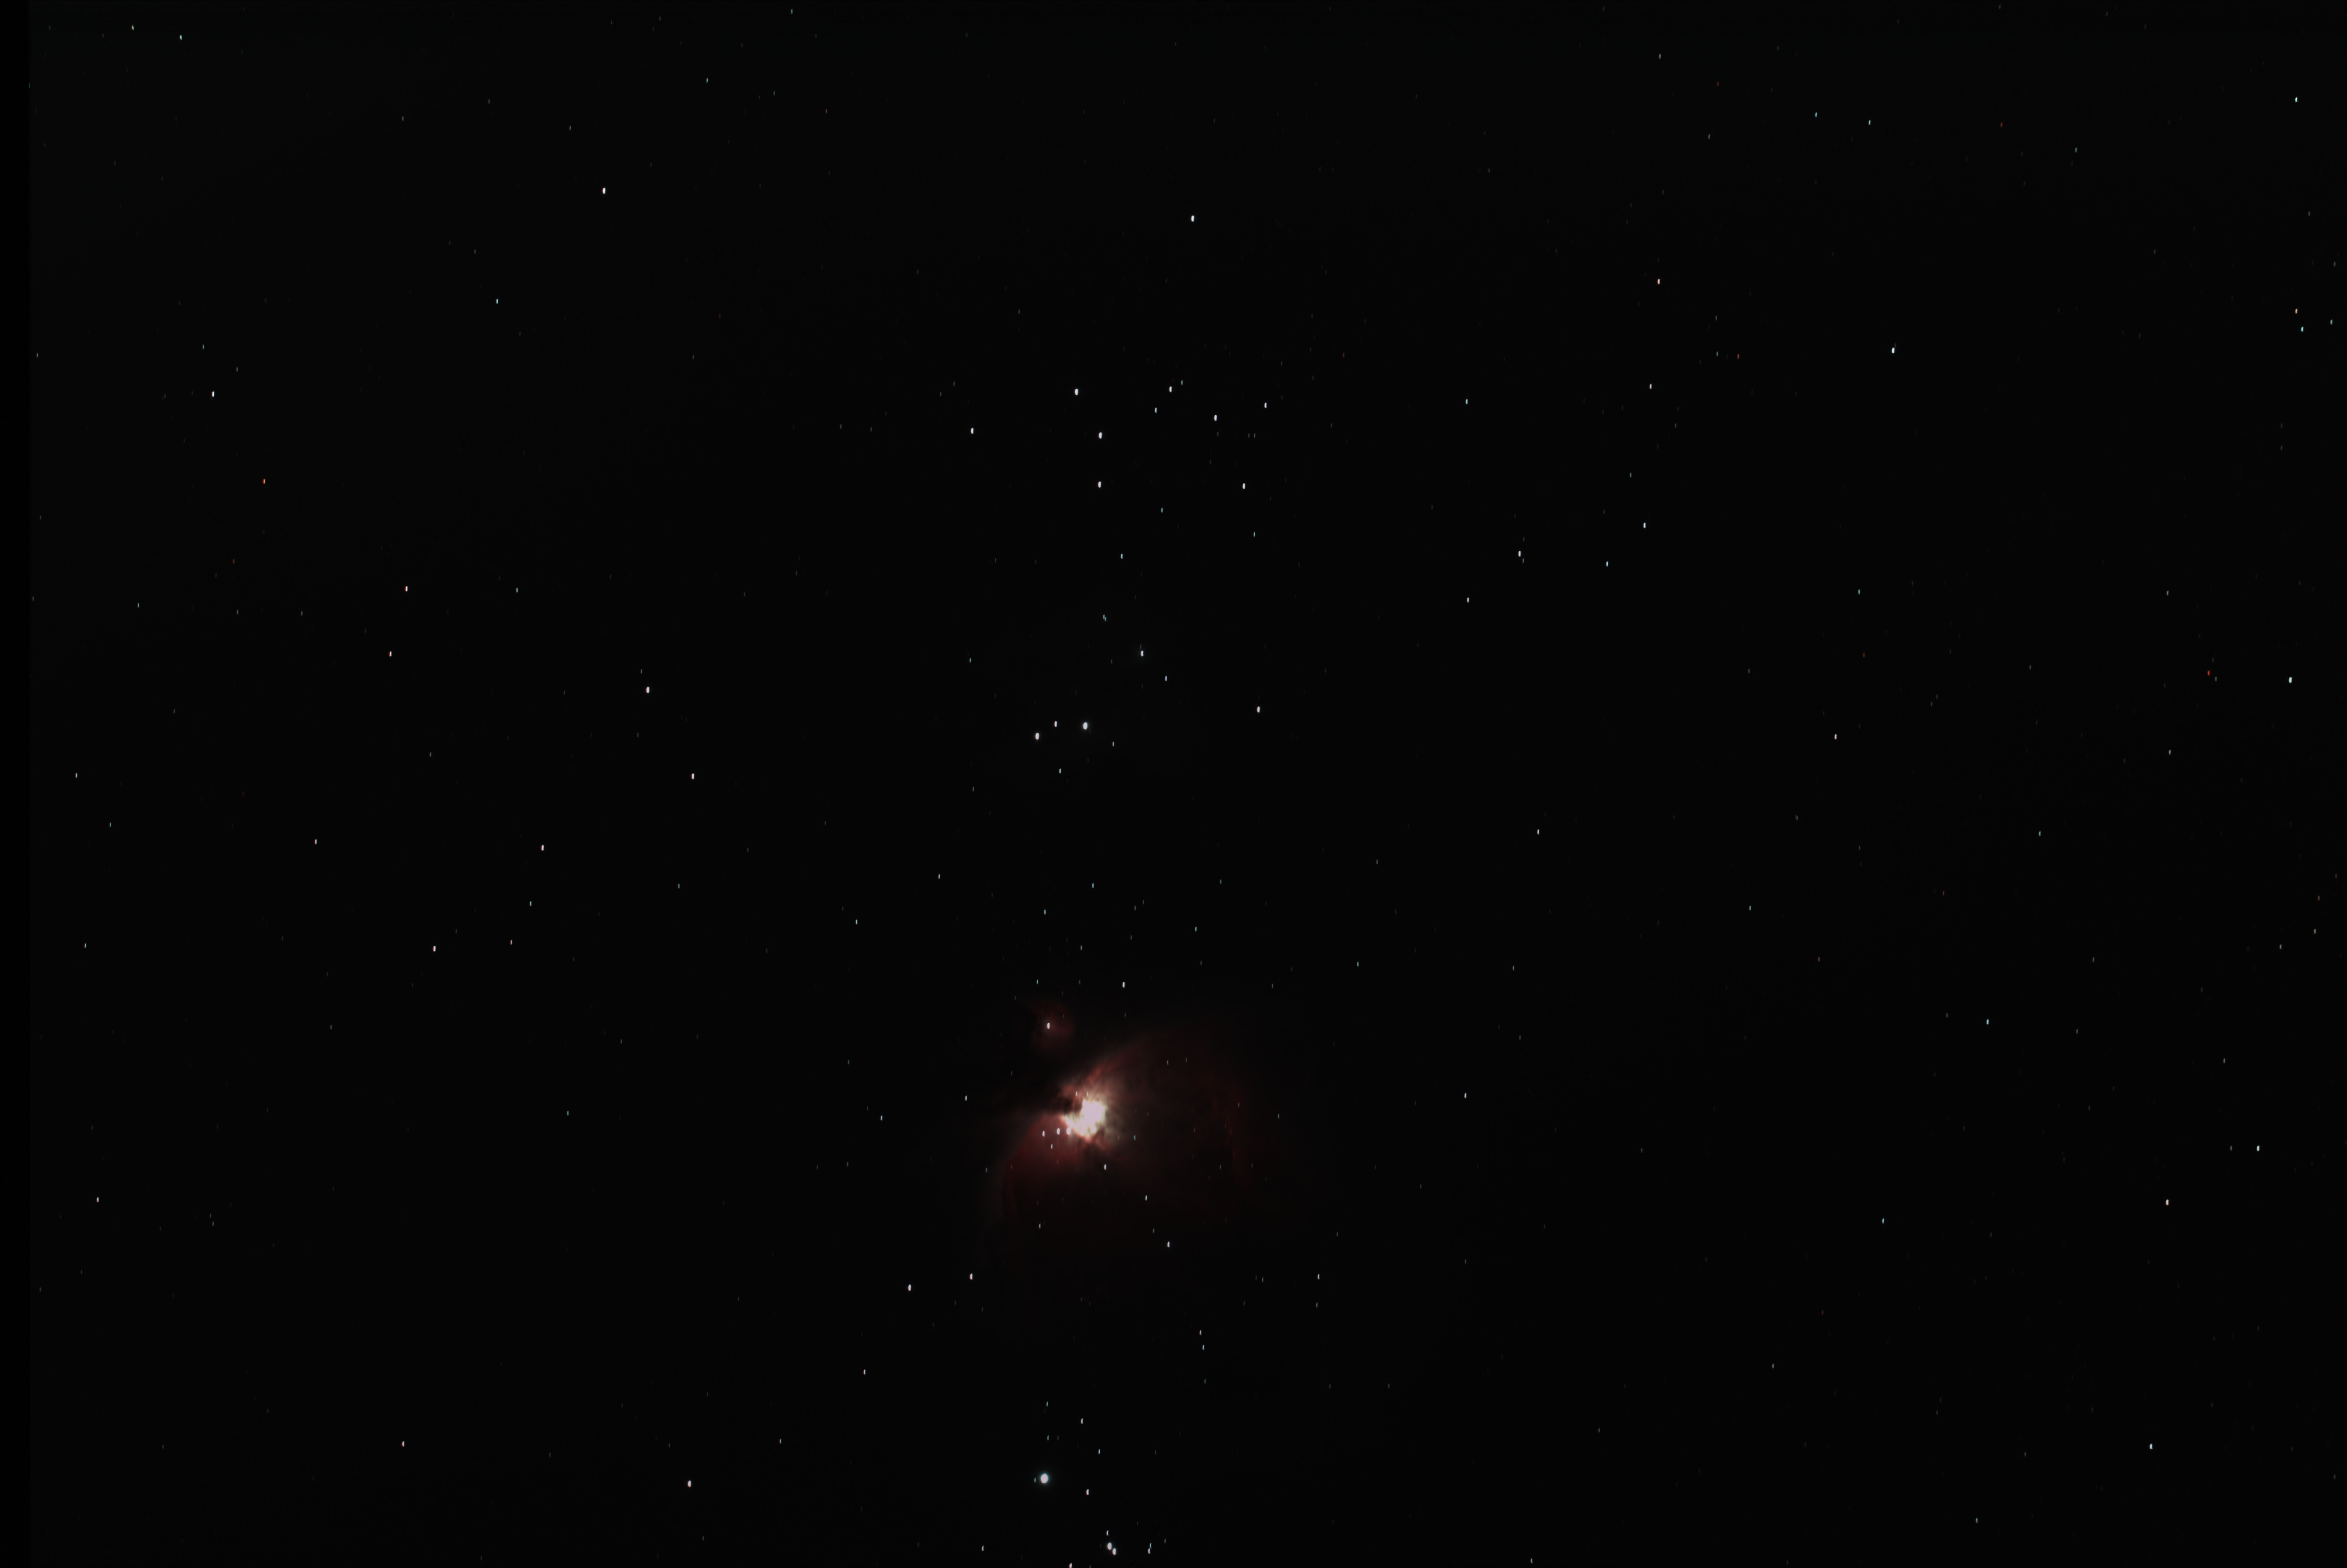
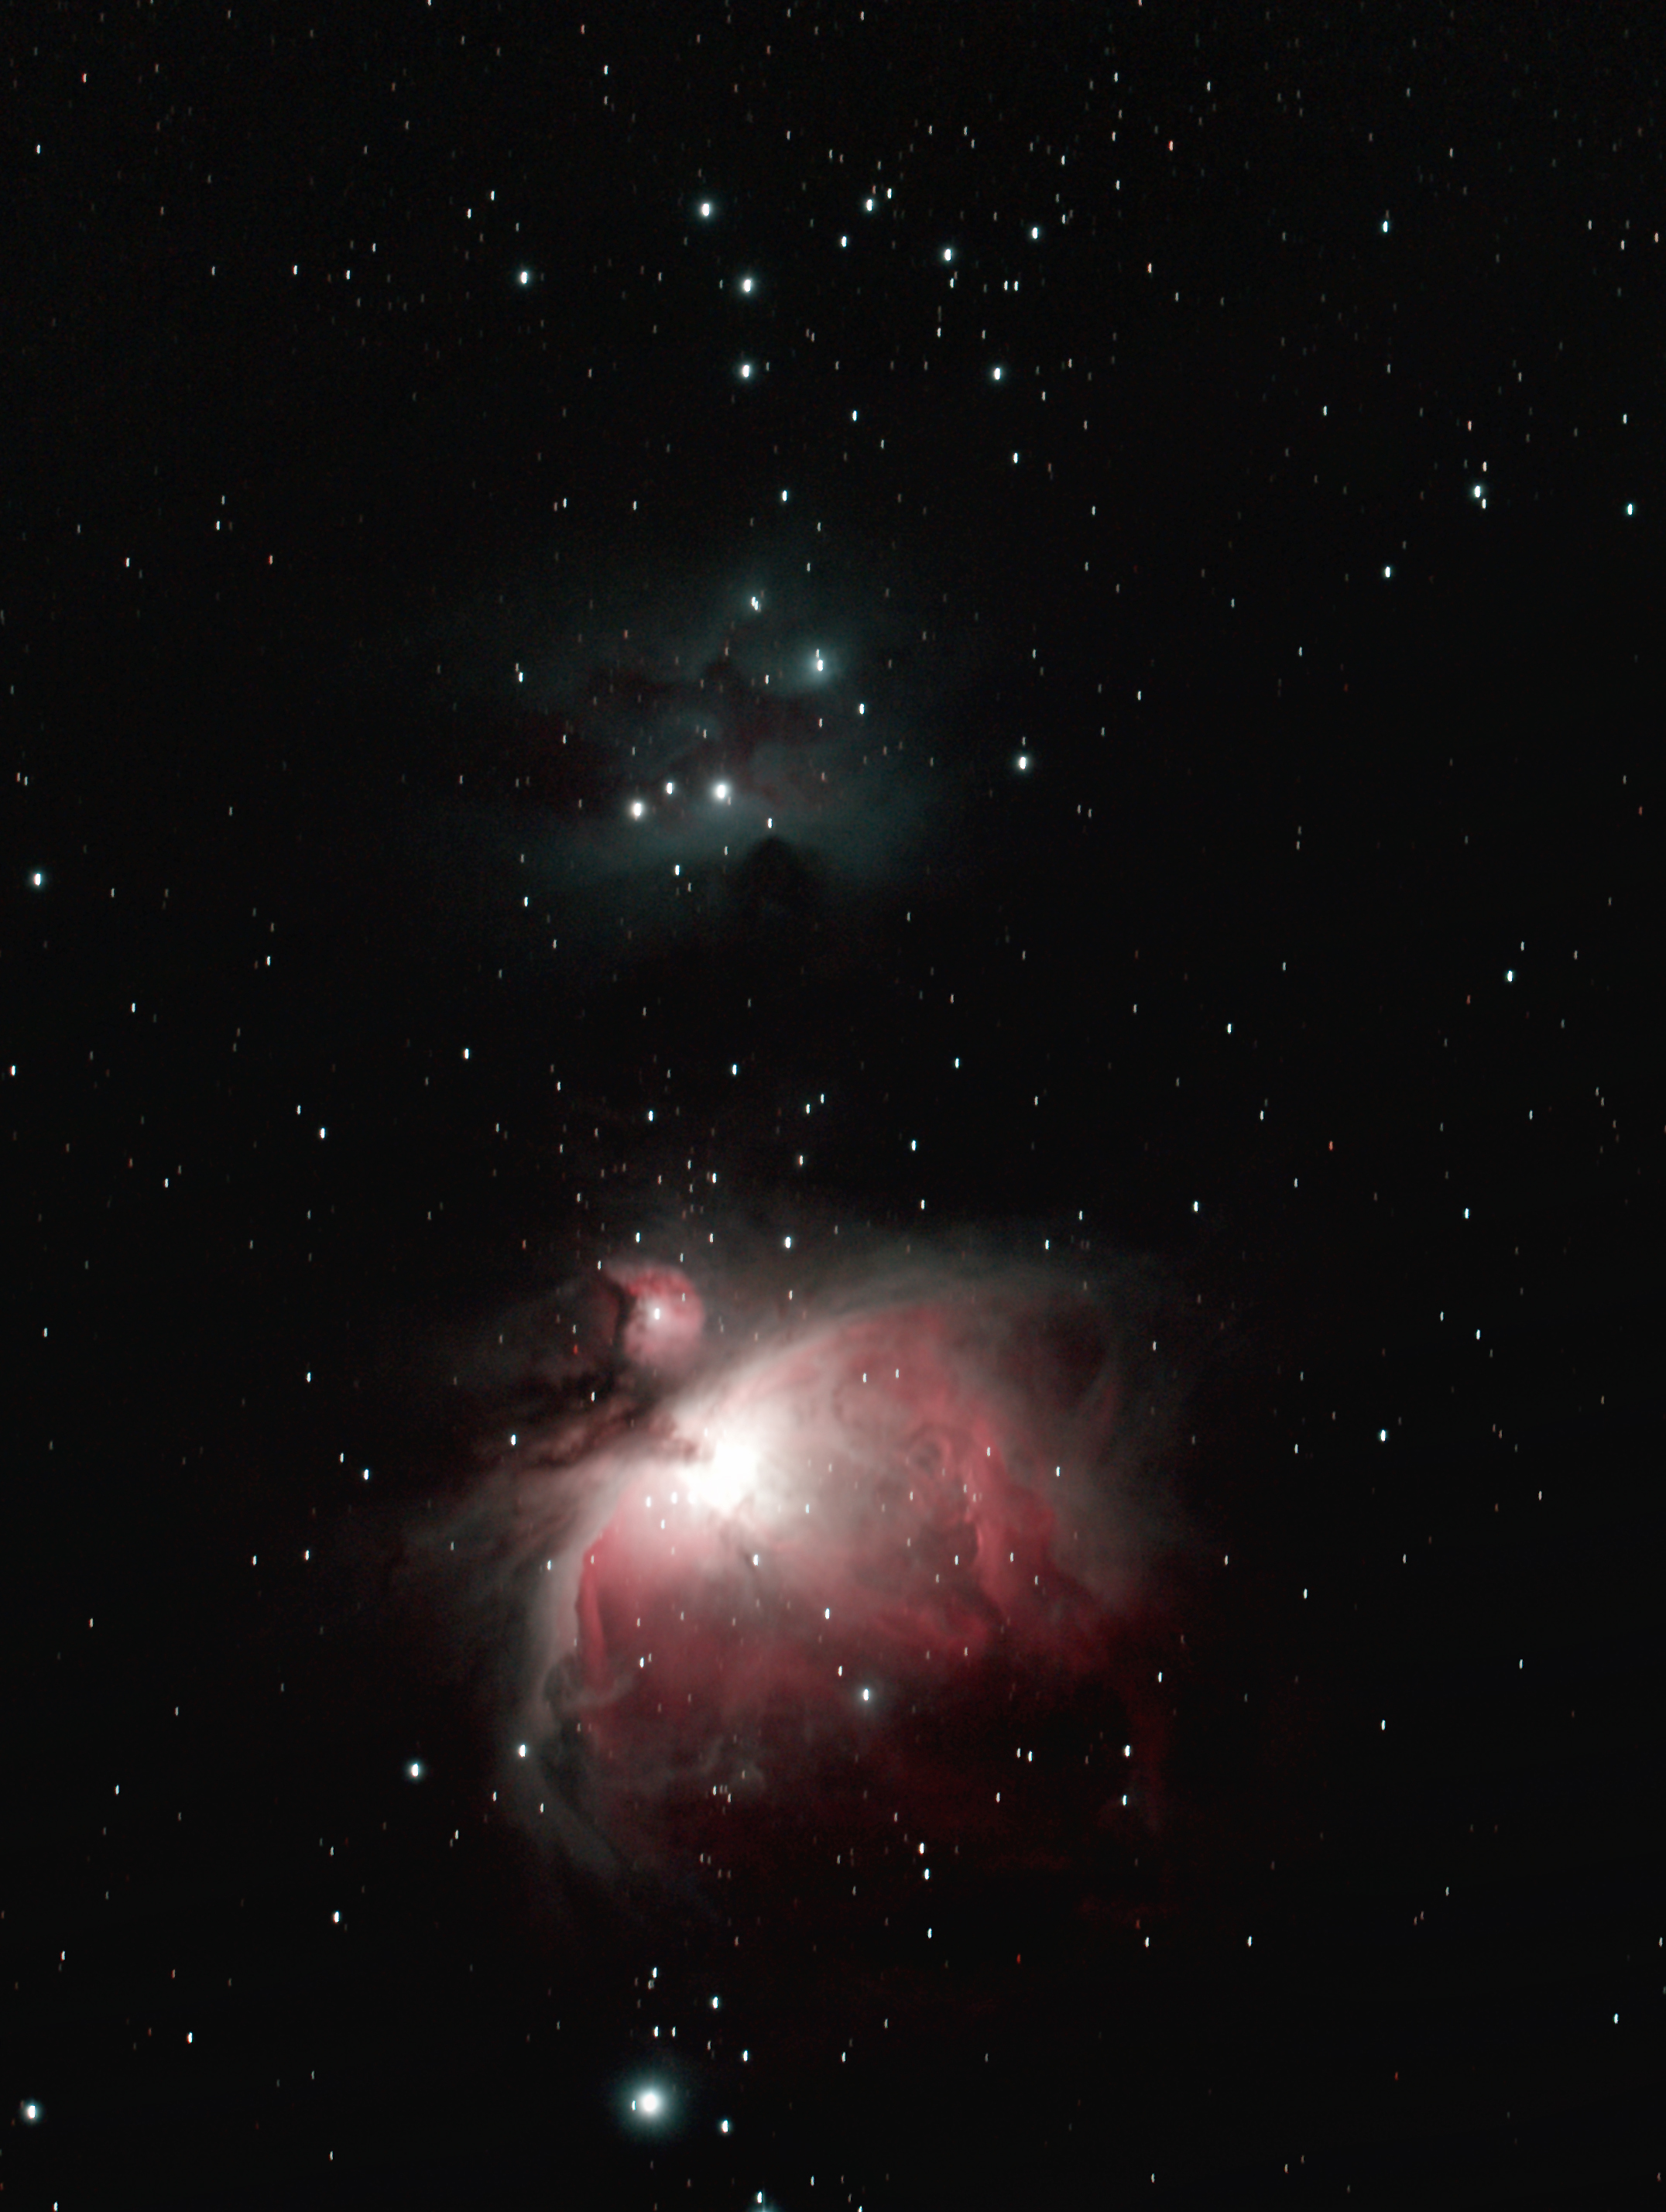
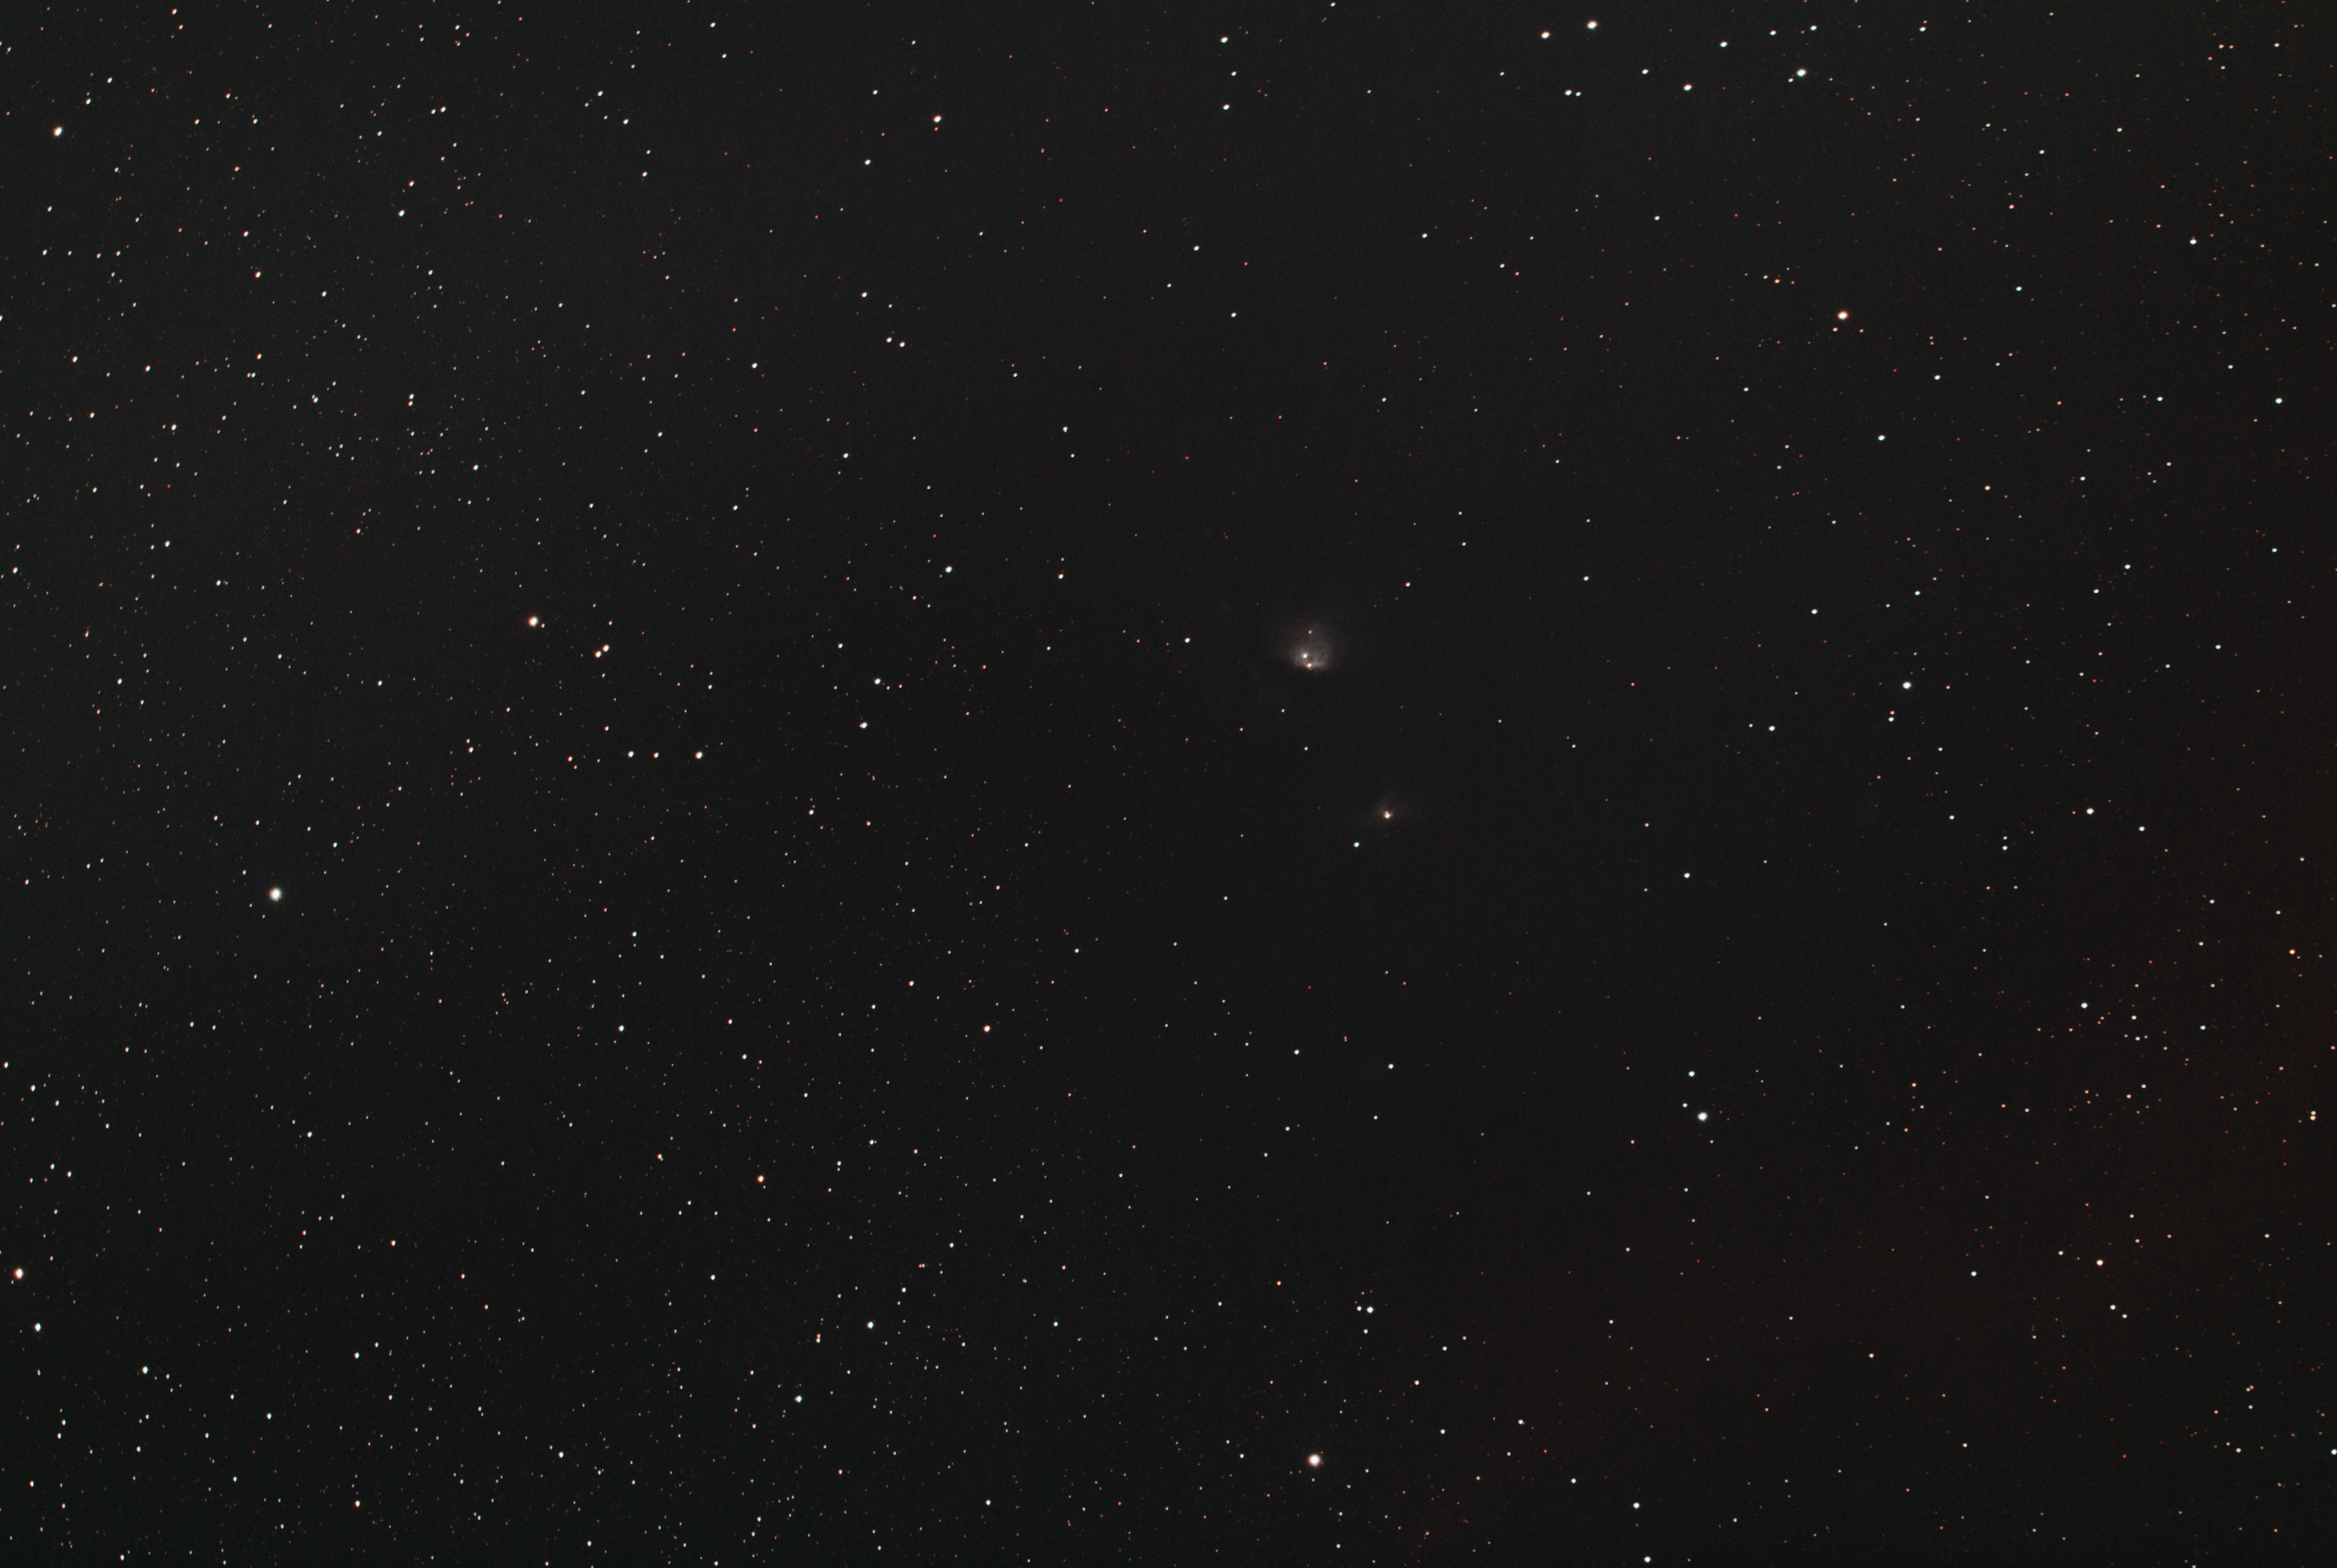
M42 & NGC 1977 After DSS stacking only
WO GT81 + Canon 700D (unmodded) + FF | 15 x 120secs @ ISO800 darks/bias/flats

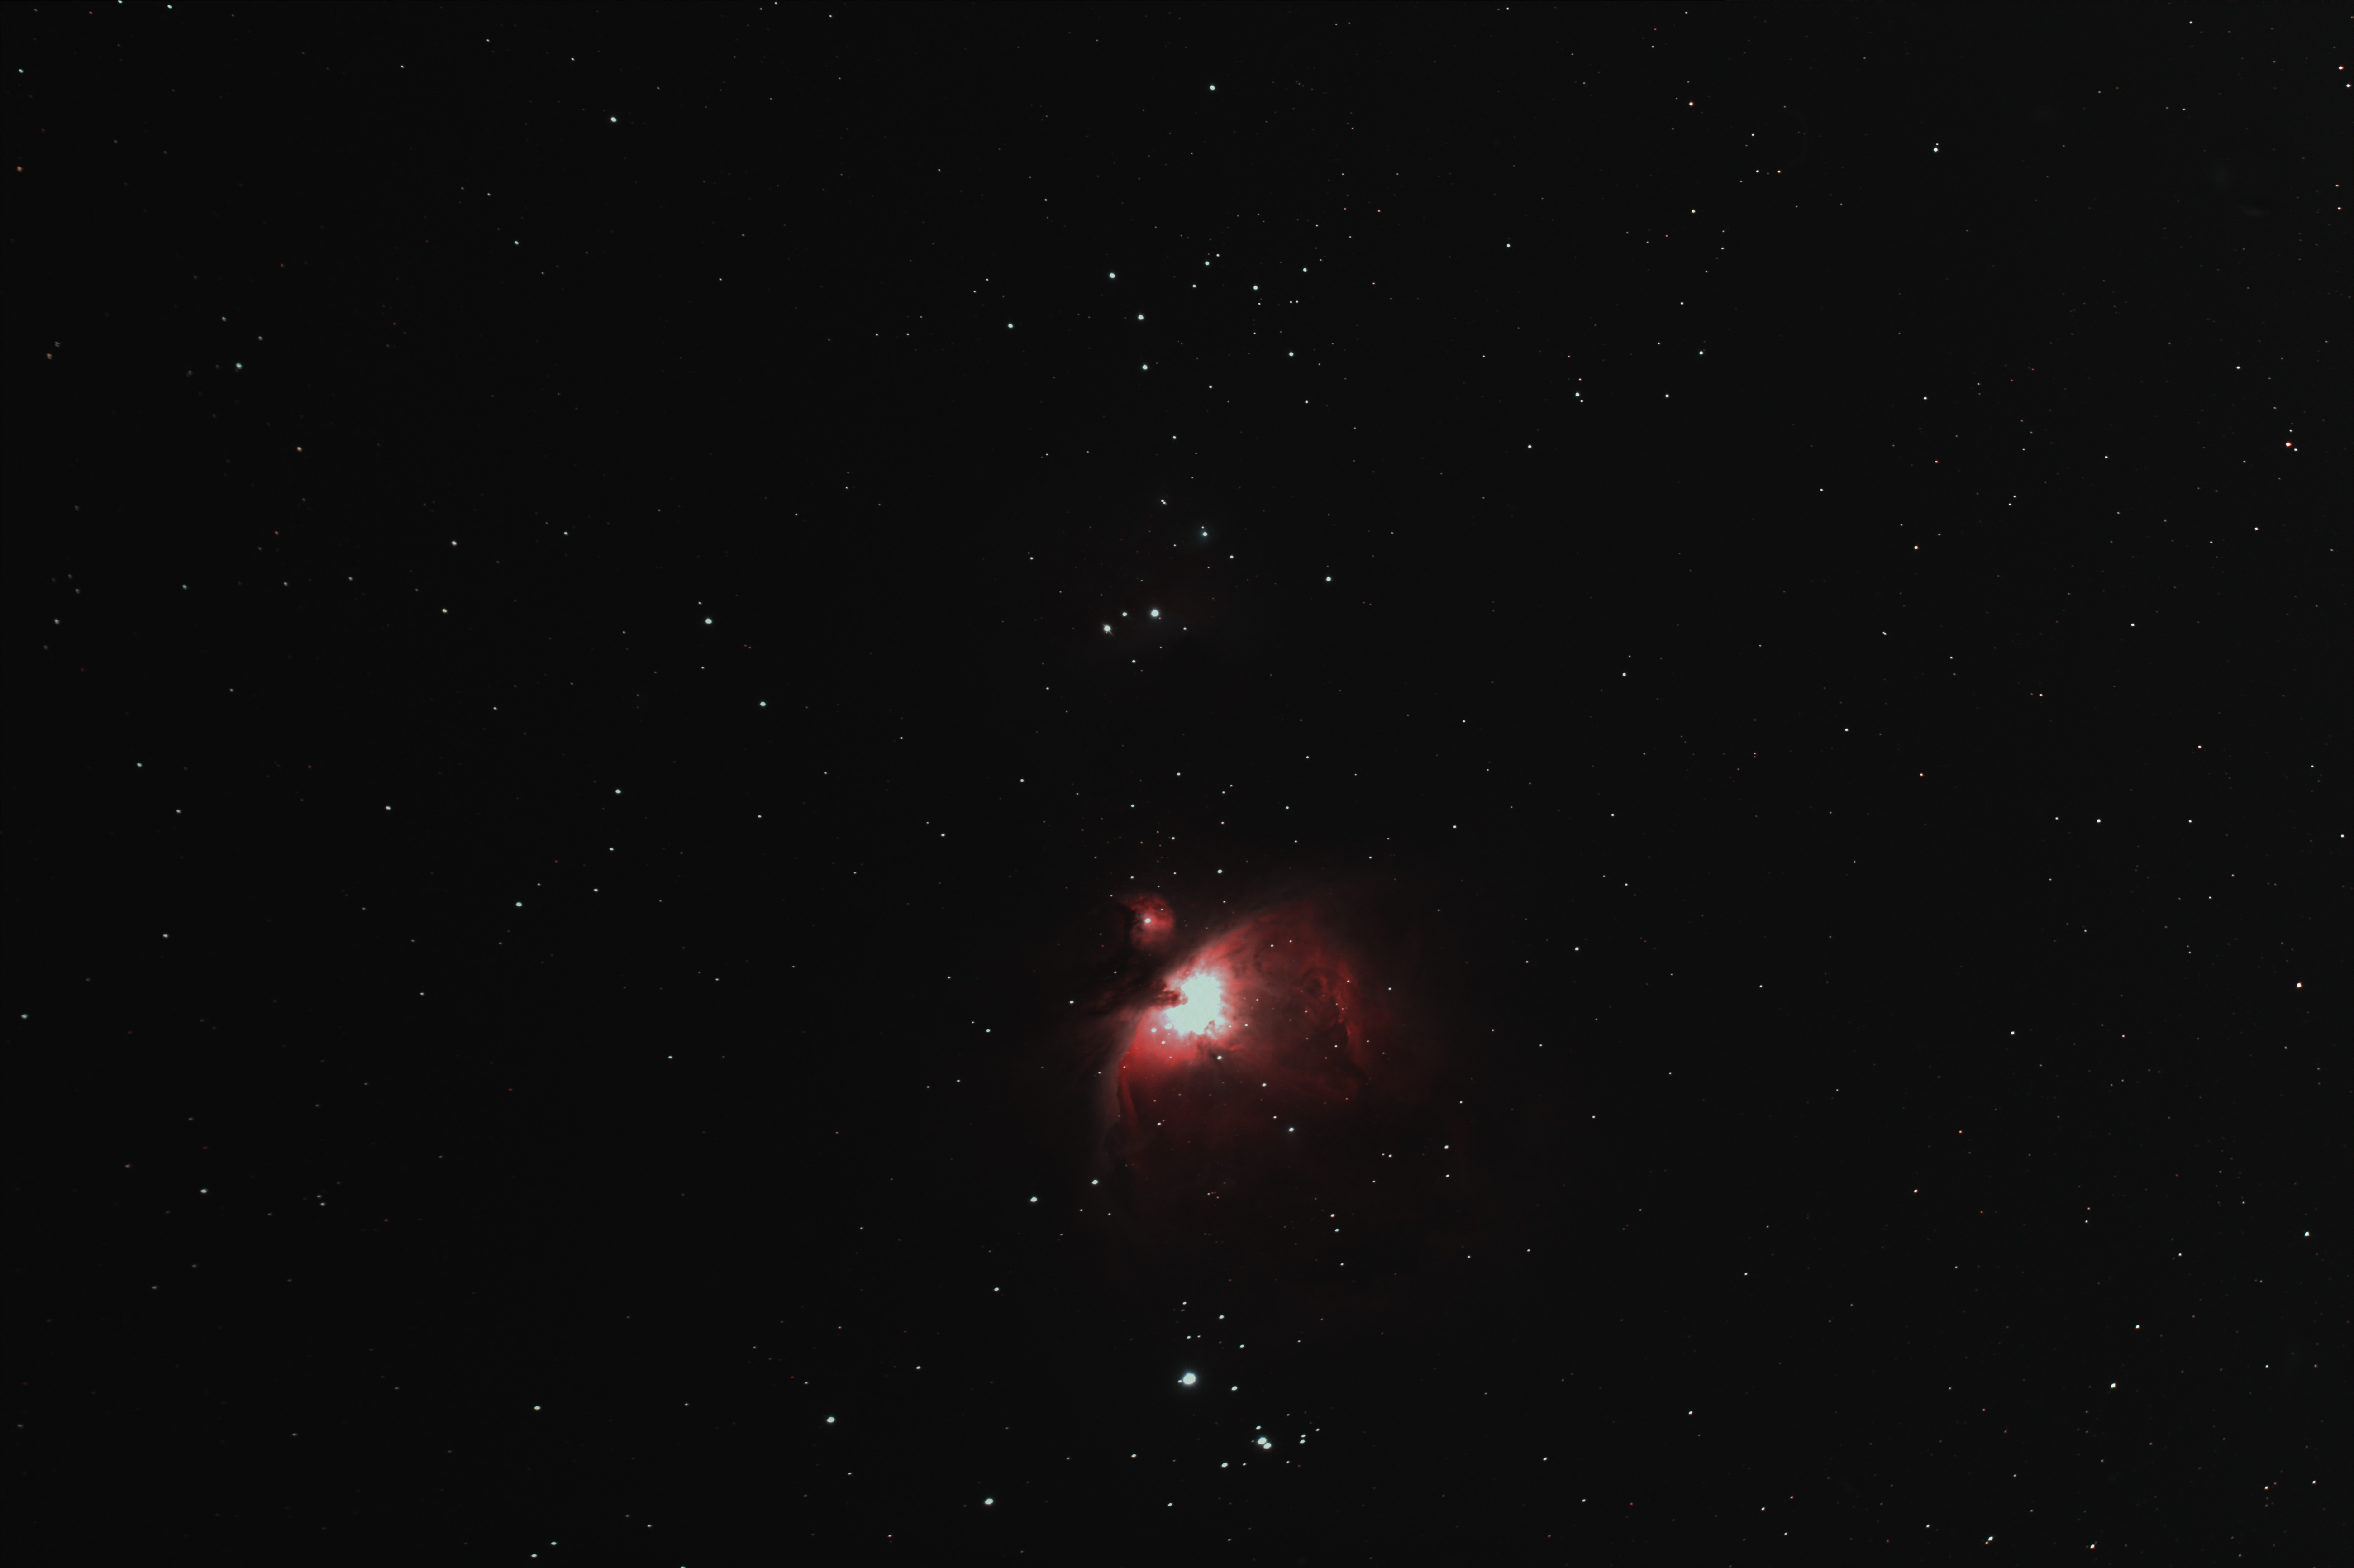
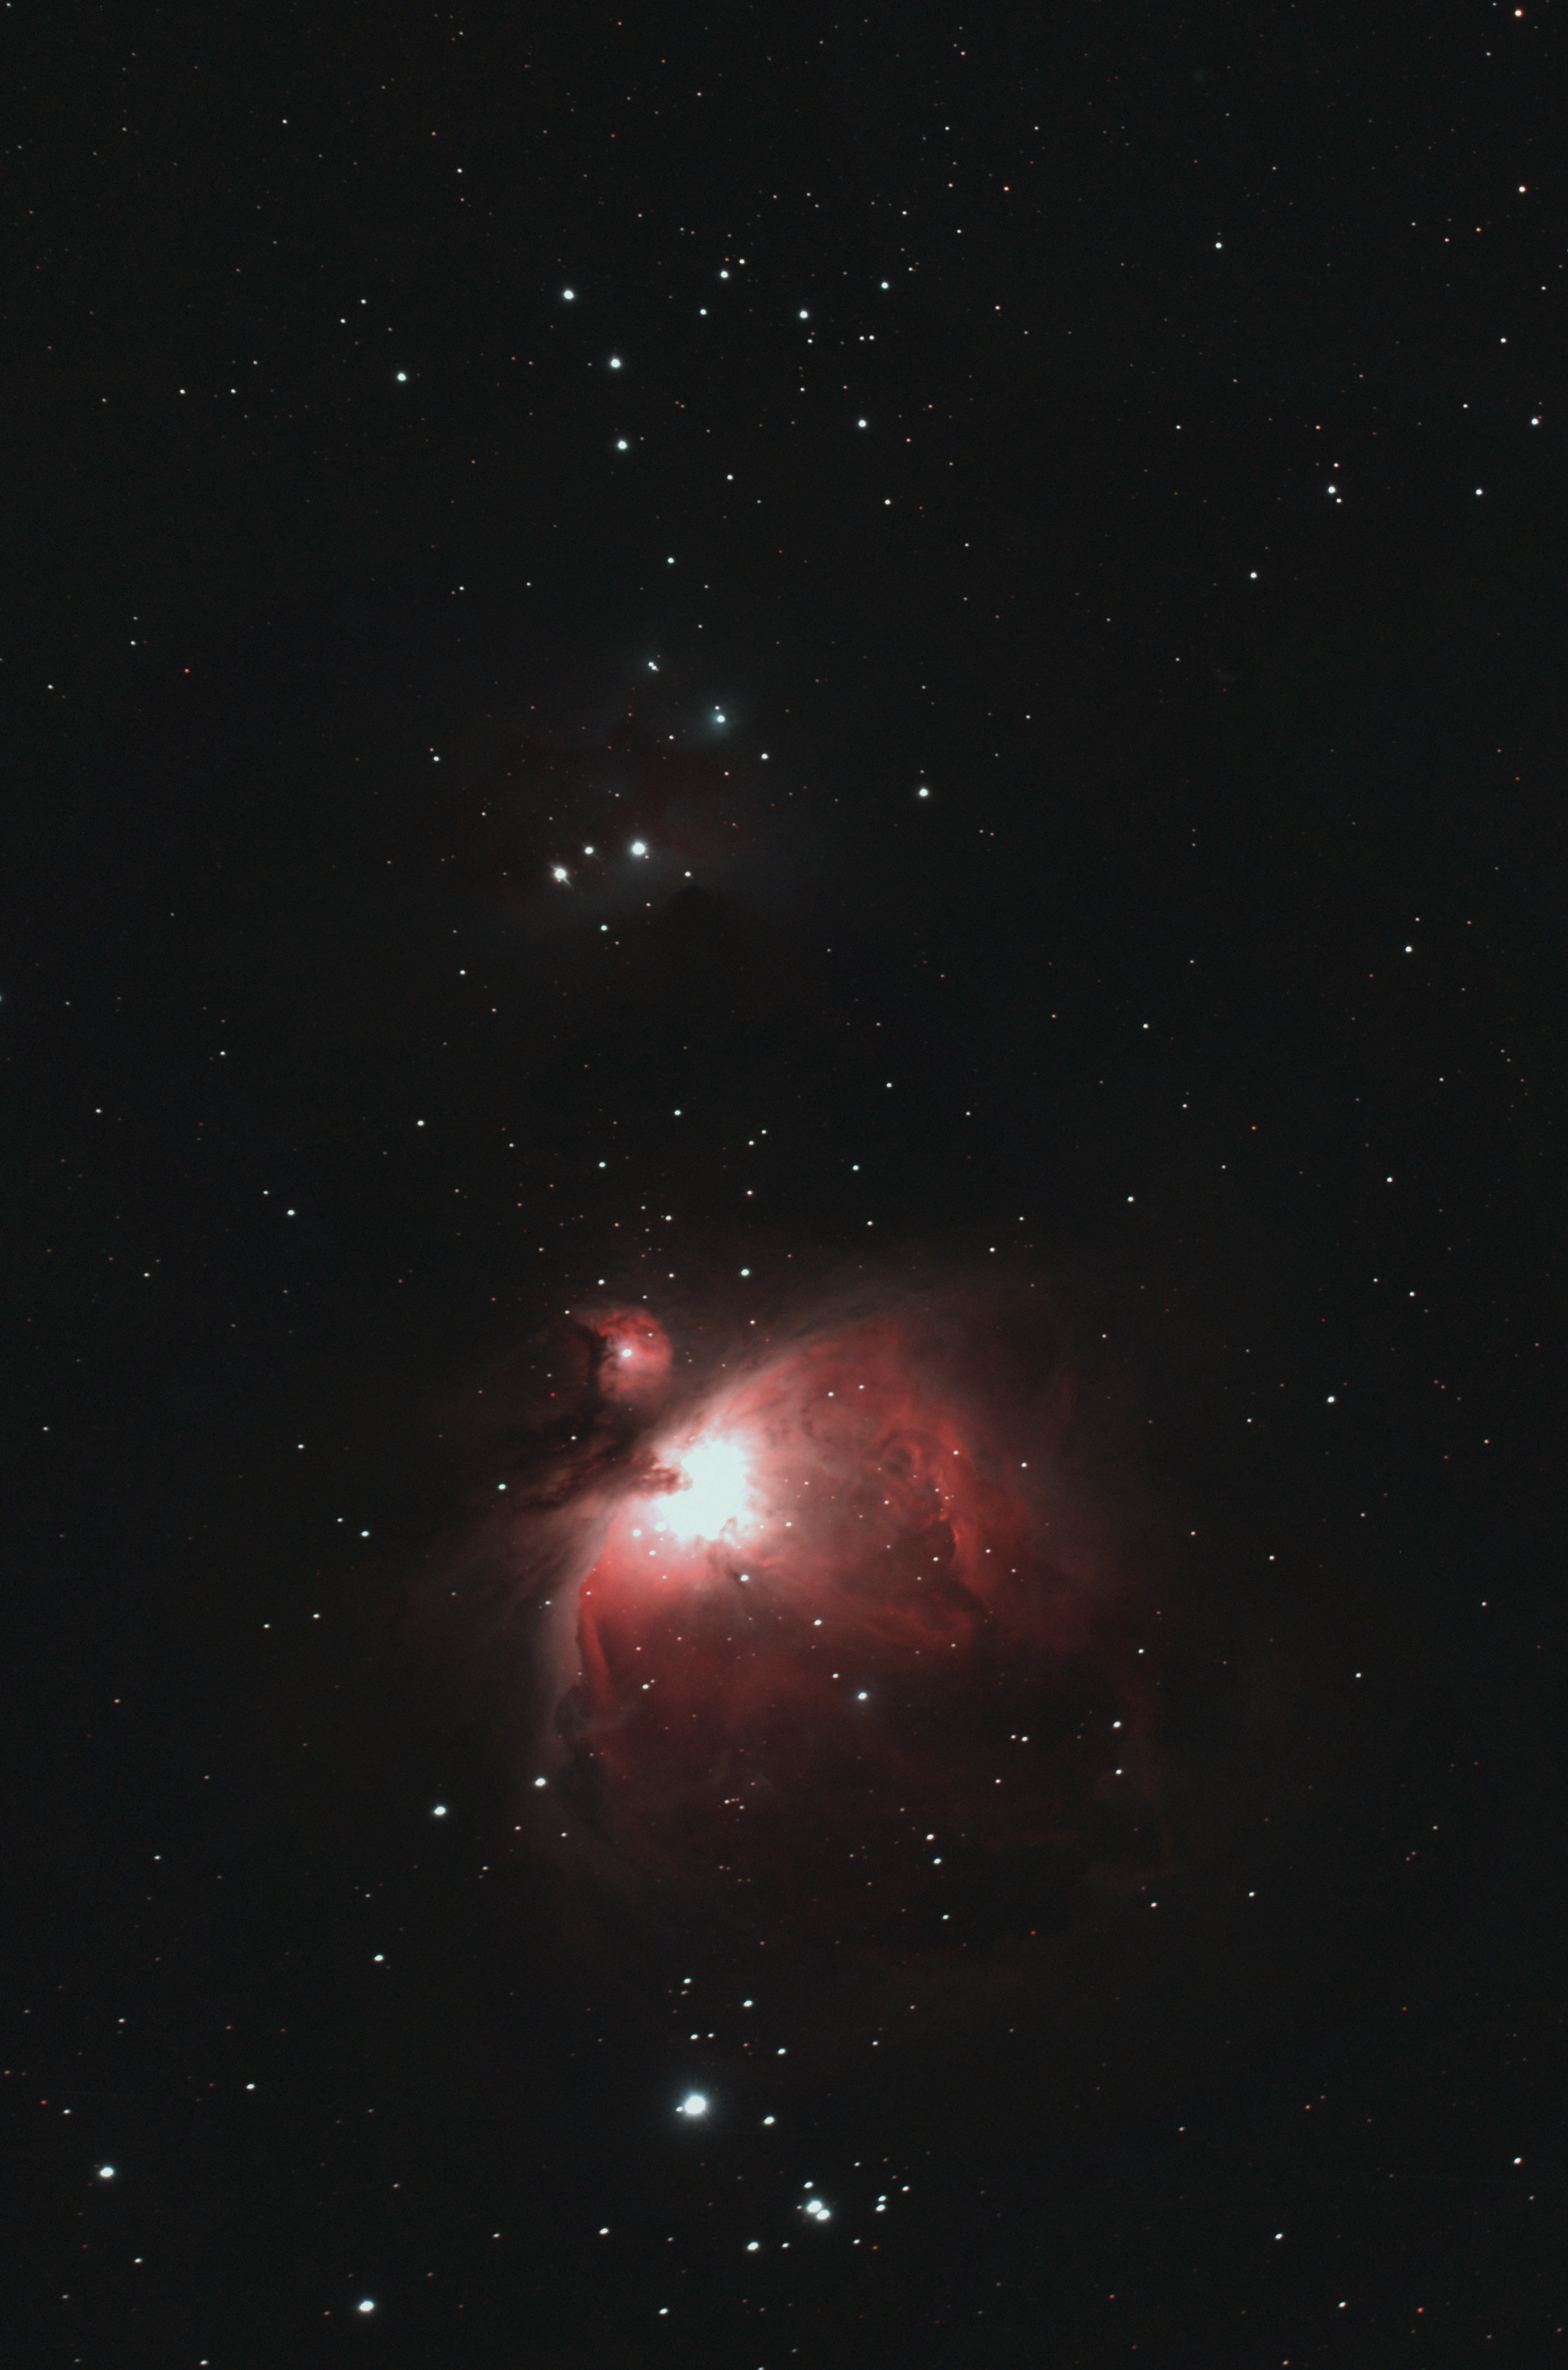
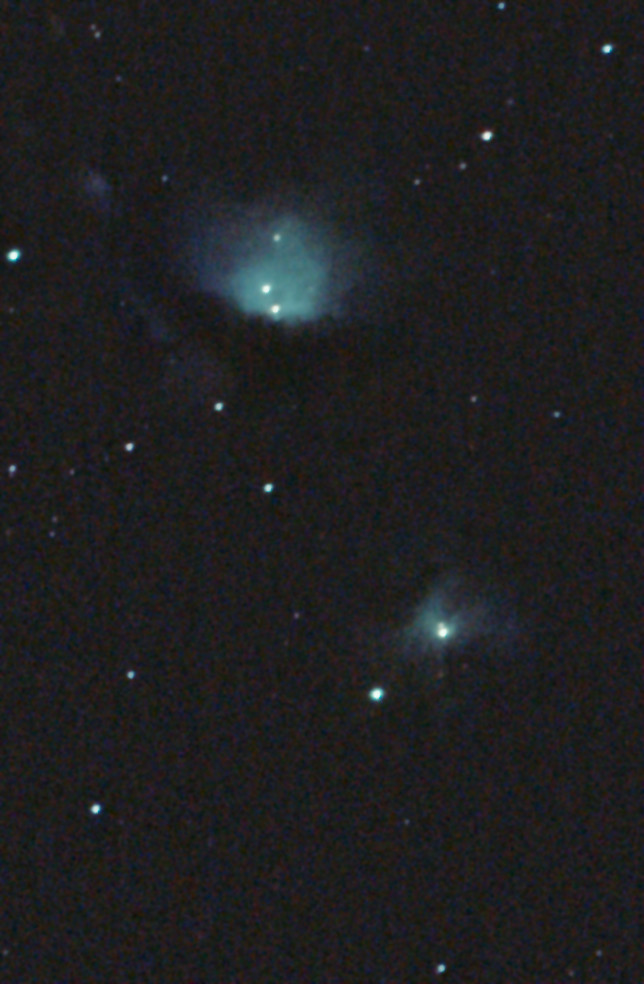
M42 + NGC 1977 After DSS stacking
WO GT81 + Canon 550D (modded) + FF | 5 x 120secs @ISO1,600 + darks
The above stacked, pre-post processing images are the same objects shot with unmodded (Canon 700D) and modded (Canon 550D) cameras, showing a marked increased in red light using the modded camera following the removal of the IR filter. Below, the same images after post-processing.

Final, post-processing image from unmodded camera

Final, post-processing image using modified camera


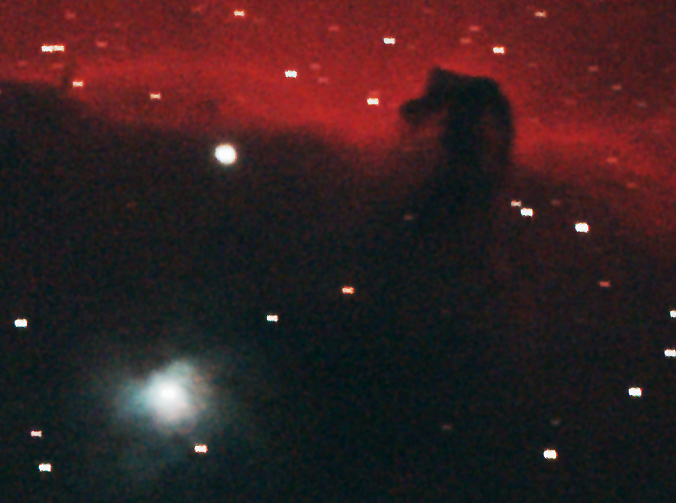


%26rotation%3d86.169372544%26name%3dHorsehead%2b%26%2bFlame%2bNebula%2bfrom%2bSurrey%26reverseparity%3dFalse%26scale%3d5.42531032437%26thumb%3dhttps%3a%2f%2ffarm9.staticflickr.com%2f8706%2f16866837535_195d26f29c_q.jpg%26ra%3d85.3006658728%26y%3d540%26x%3d844%26dec%3d-2.25939577878%26wtml%3dtrue)