Another night, another lesson learned, the hard way.
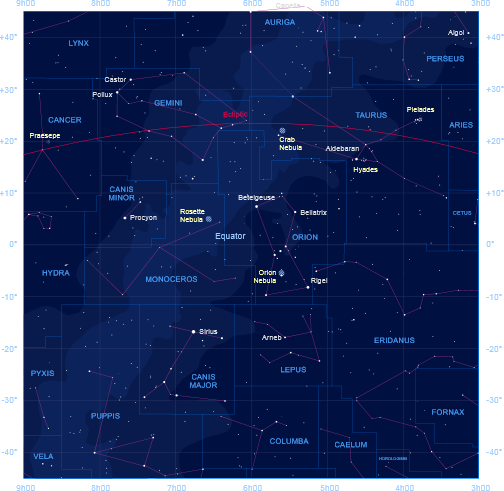
A good, clear sky on Saturday meant the prospect of a long and productive imaging session before the frost came down. Whilst Orion has now moved to early evening, the light pollution from Gatwick airport to the south is bad at that time, so I’ll grab what I can but later is better when the light pollution starts to subside; from experience I presume they start to turn off the airport lights gradually from about 10pm, so that by midnight the sky is noticeably darker and much better for astronomy – though nothing like a true dark sky. I therefore look more to the south east at about 8pm to line up potential imaging targets for about one to two hours later when objects will be located at their best position, towards the Celestial Meridian and preferably high in the sky; such a location reduces the thickness of the atmosphere and improves tracking accuracy as the telescope’s angle with the object is less extreme. At the moment this means something in or around the constellation of Gemini and later at night Cancer; Canis Major, Pupis and Hydra also fit the bill except for one critical problem, they are too low in the sky and are mostly obscured by houses and trees, grrrrr!
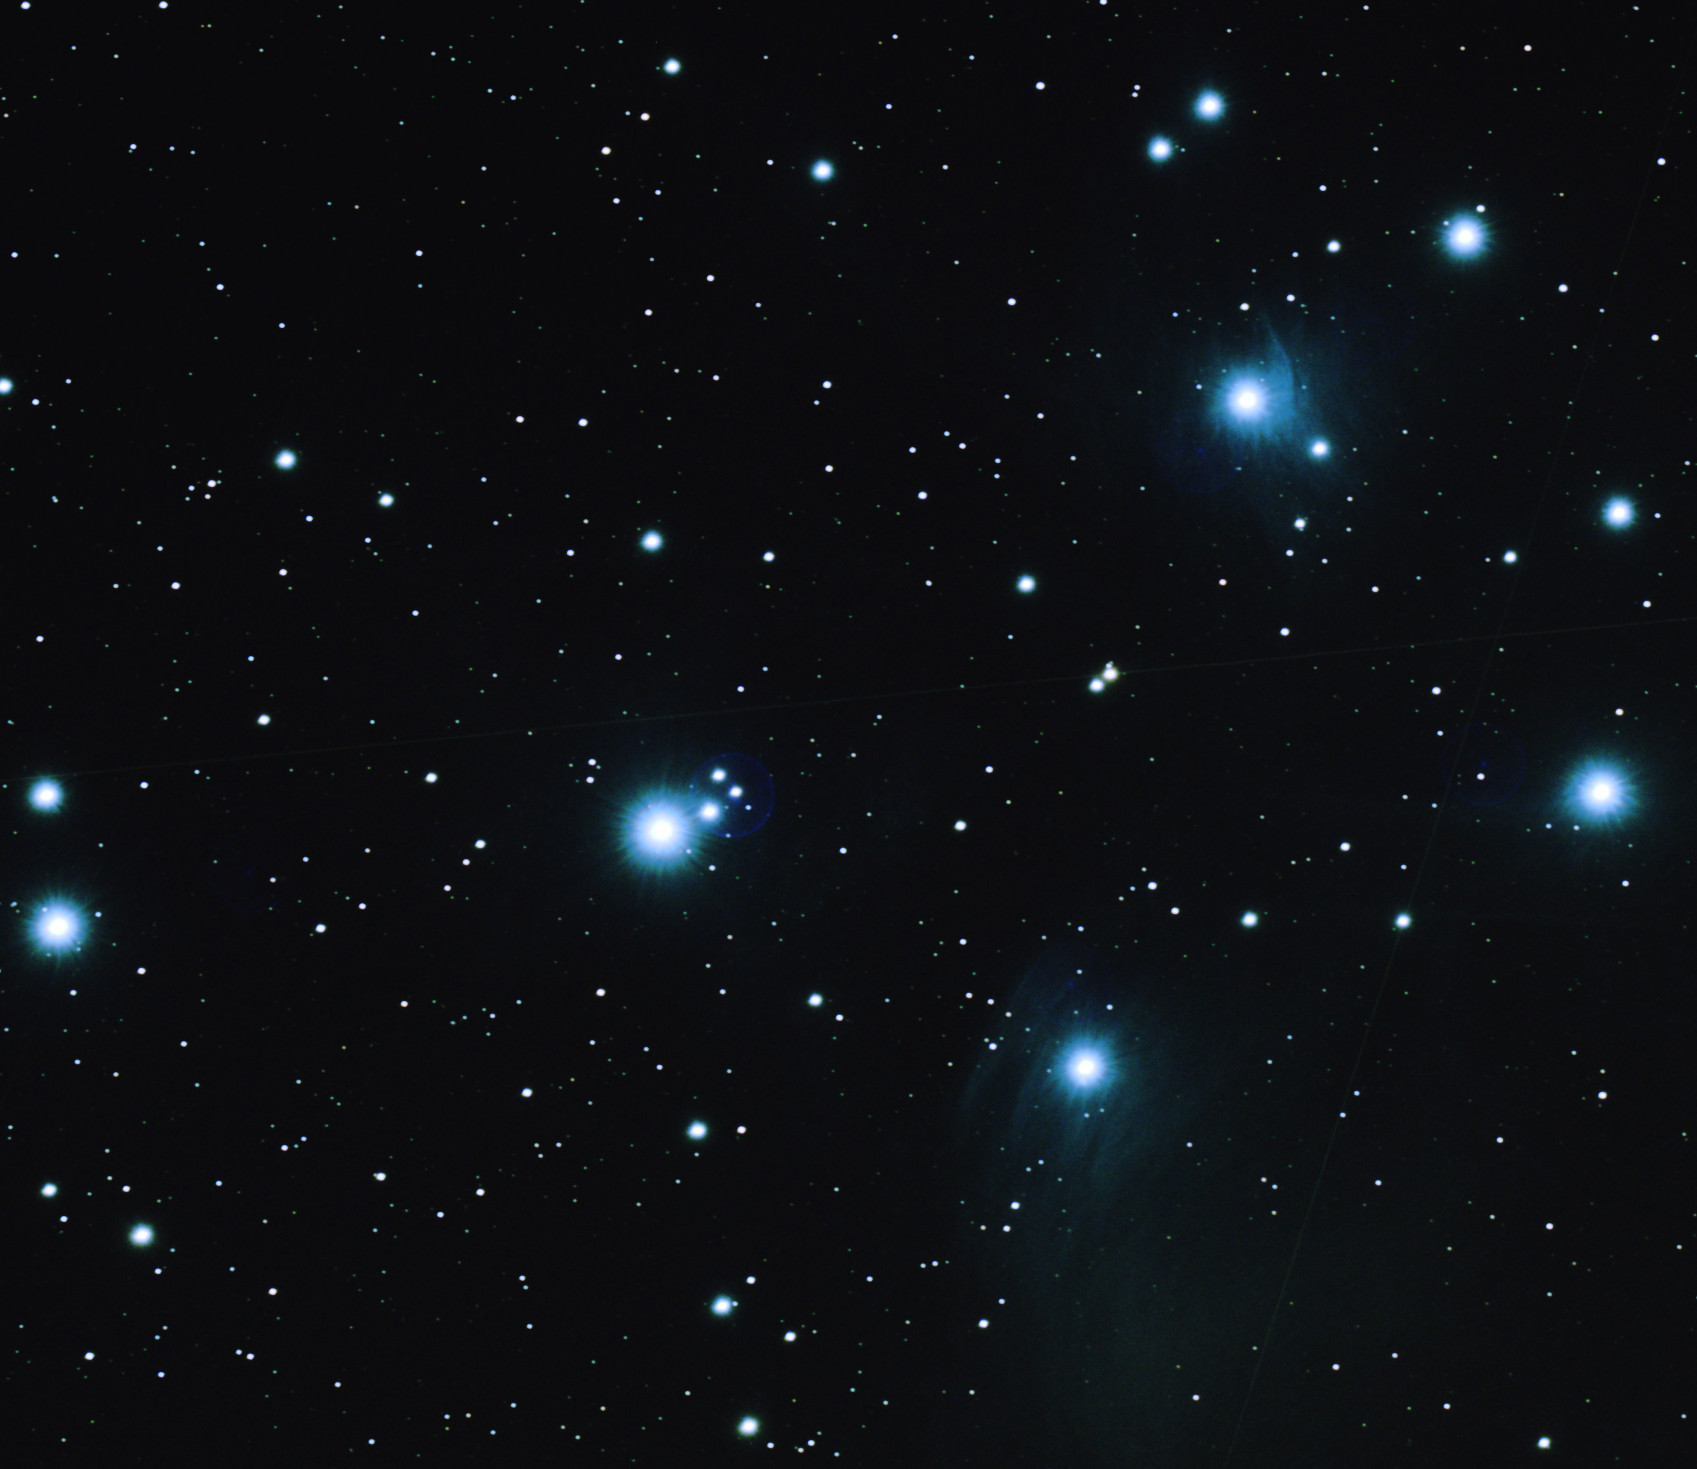
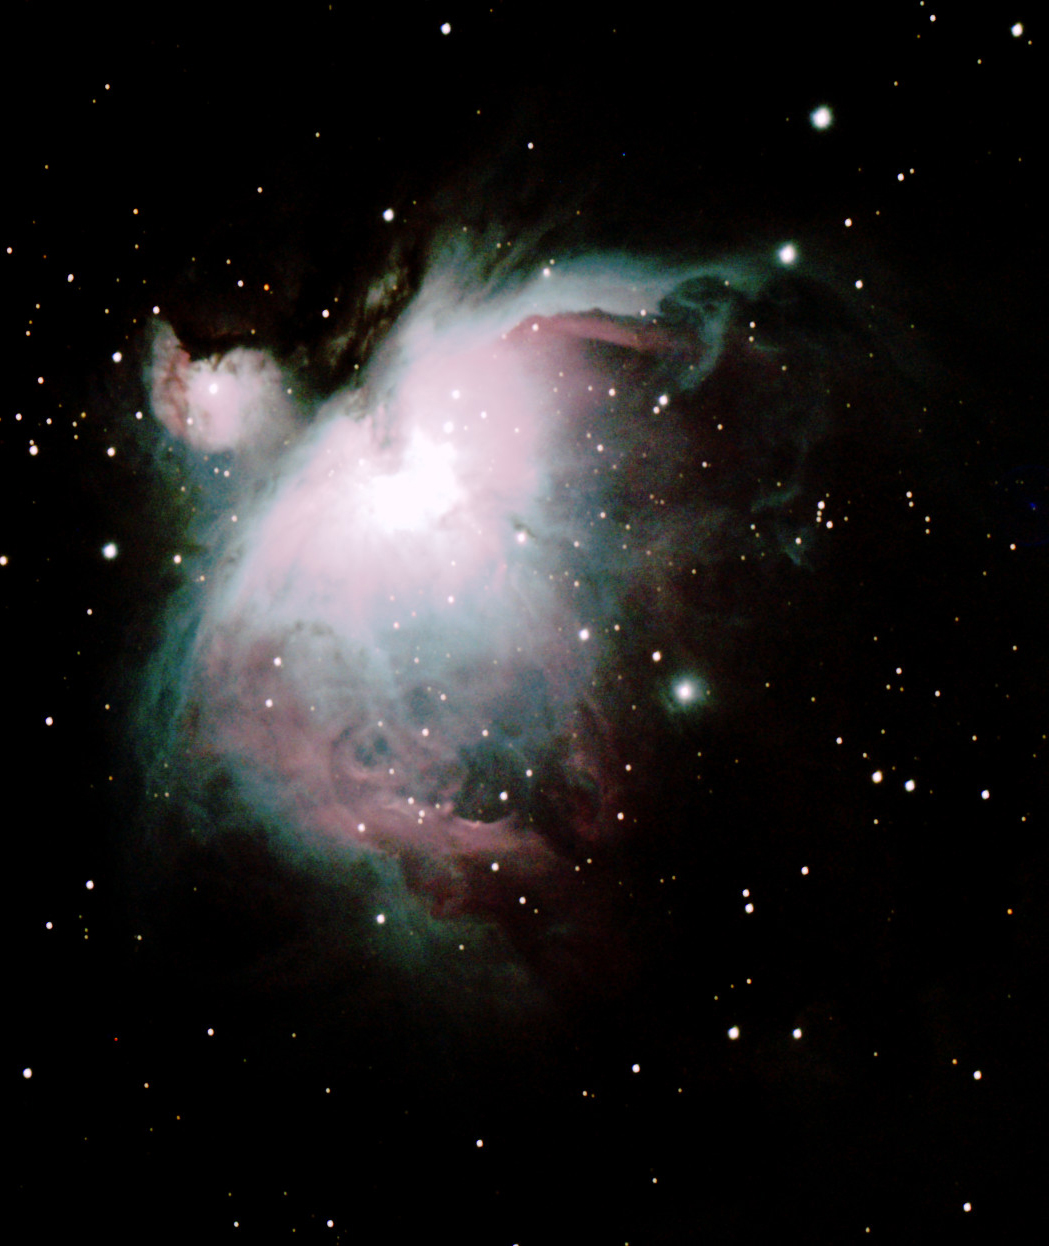
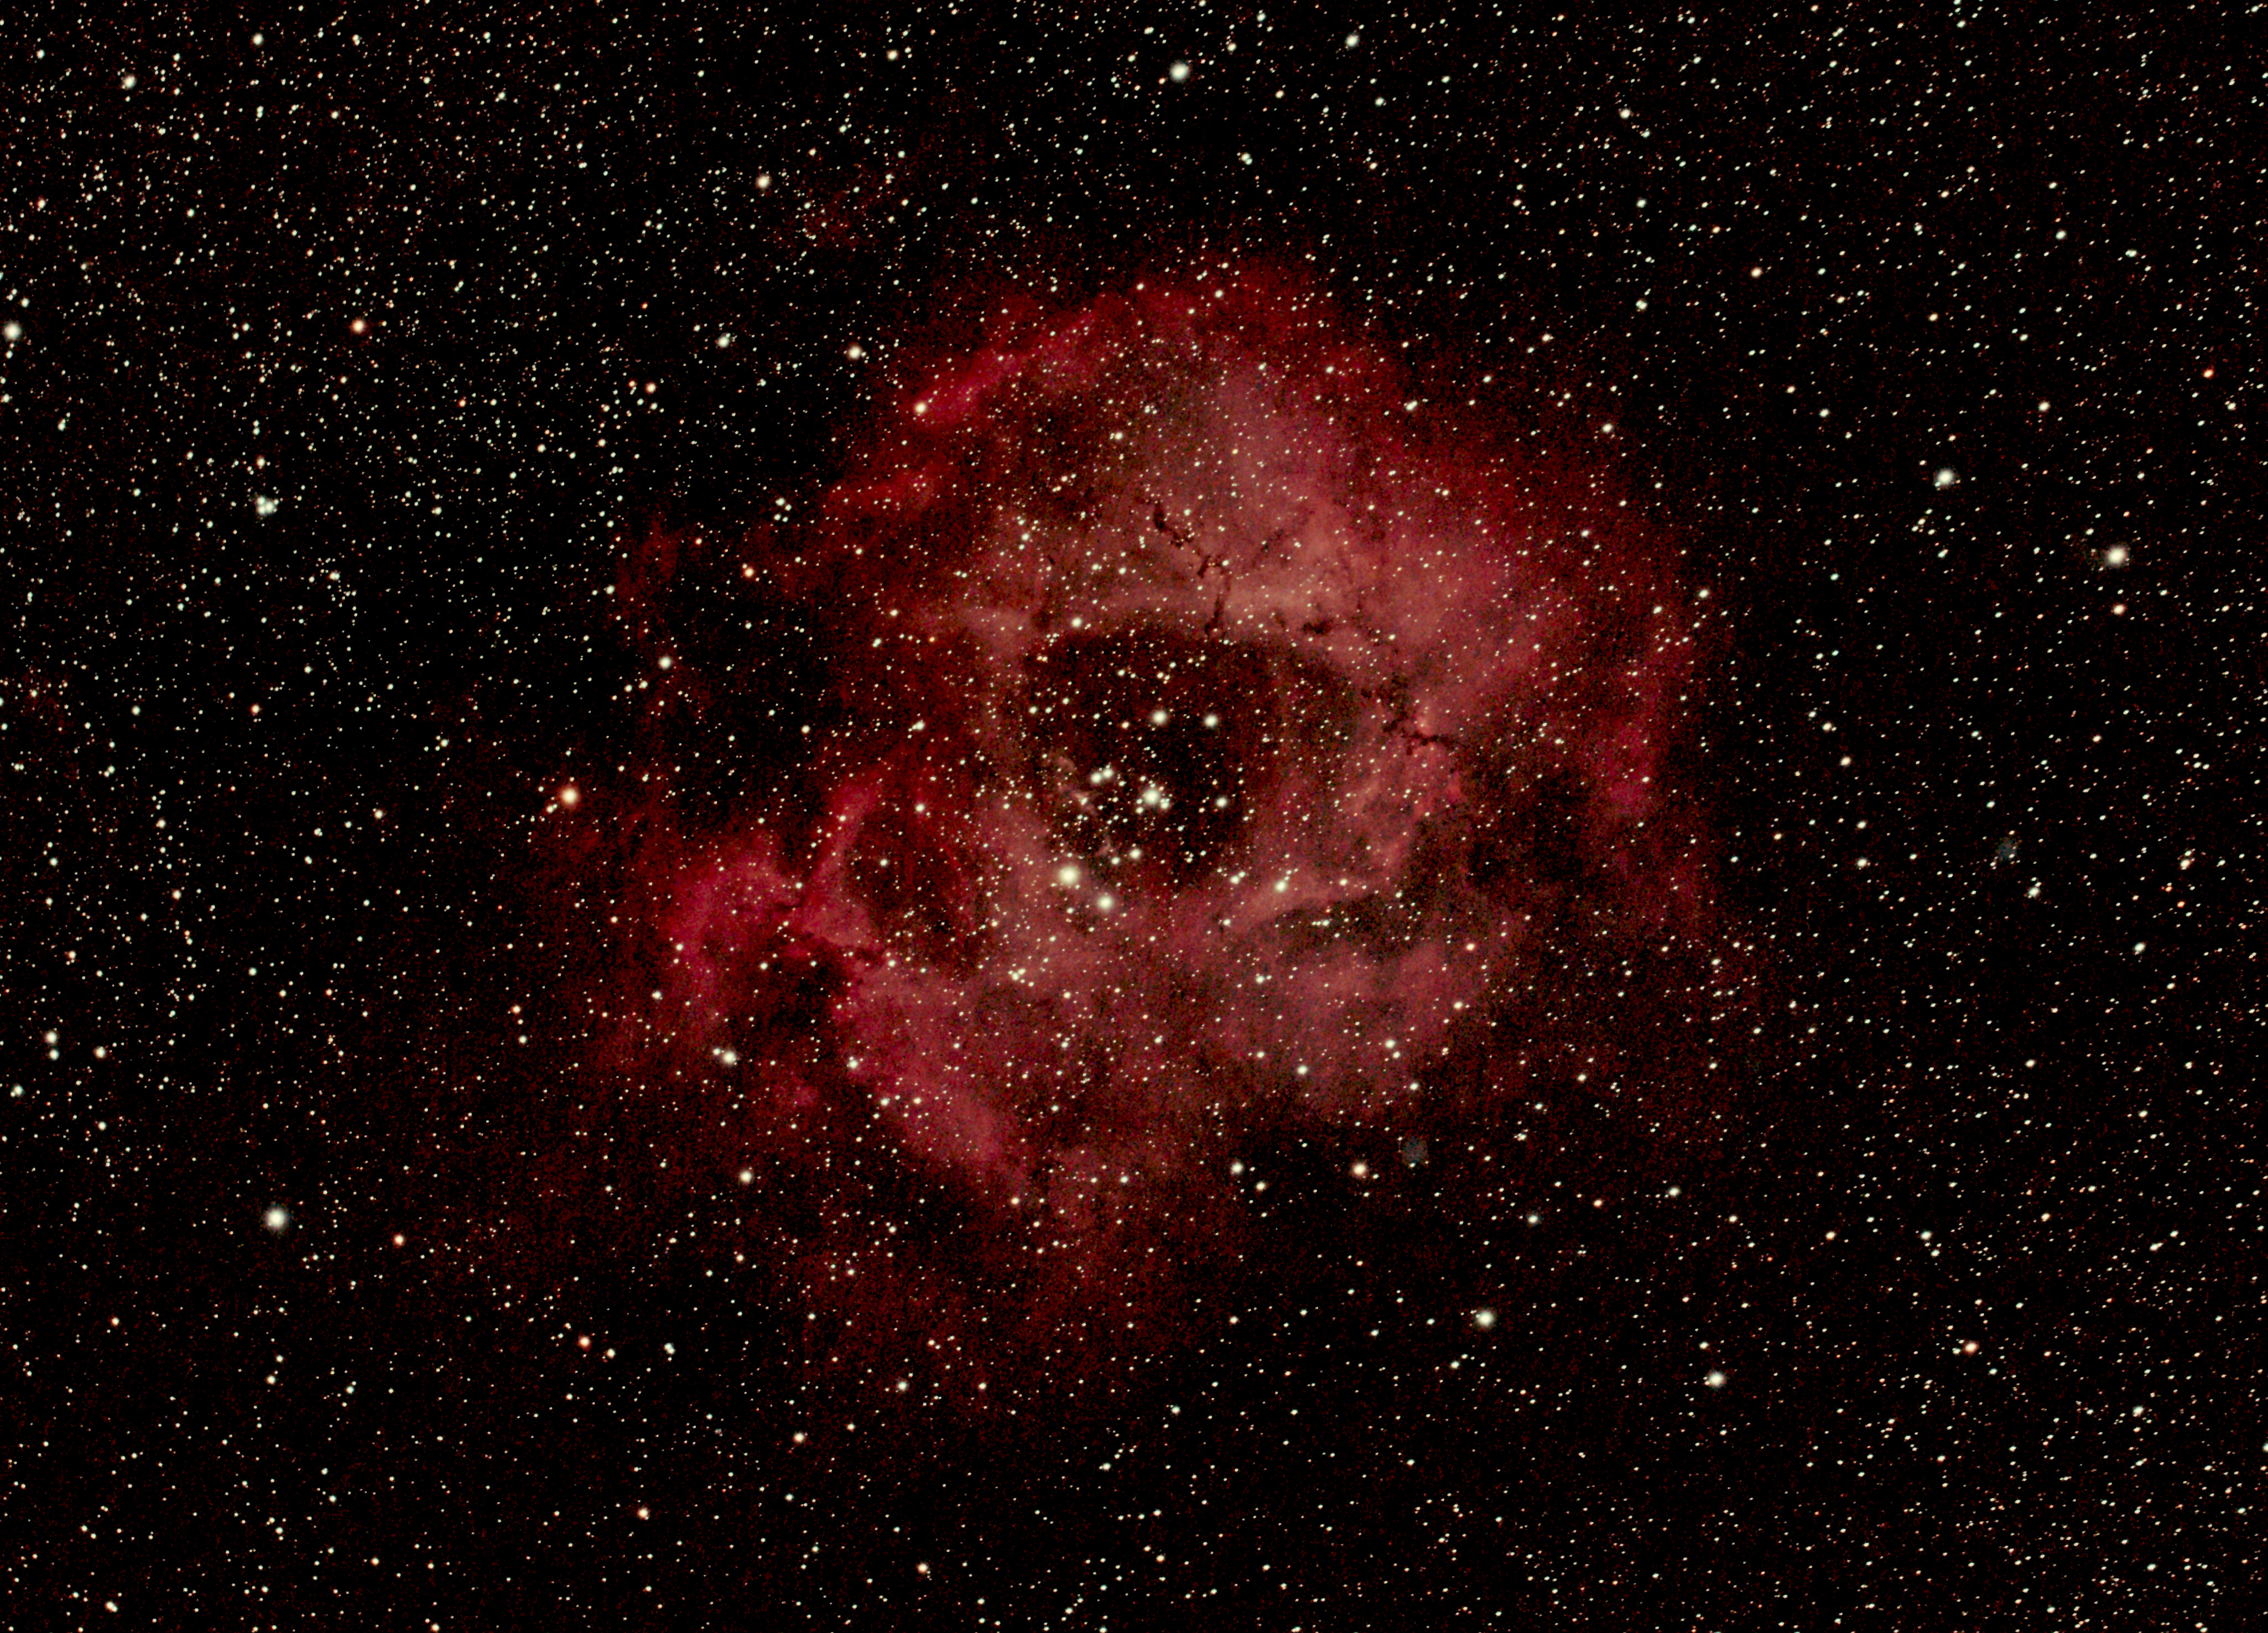
Having imaged three, mostly easier objects earlier in the evening, at about 10pm I then turned my attention to something more challenging. Though large at some 100 light-years in diameter, the wonderfully named Jellyfish Nebula in the Gemini constellation (not far from the M35 open star cluster), with an apparent magnitude of +12 is quite faint and would be difficult to photograph. Notwithstanding, my first test image showed it was already in my field-of-view, though as anticipated faint, which I then set about adjusting to optimize its position within the frame before starting imaging. In this regard two bright, dominant stars flank the nebula – to the left or East, Tejat Posterior and to the right or West, Propus – thus assisting on screen identification and the approximate position of the nebula on the camera’s sensor.
At this time the nebula was very close to the aforementioned Celestial Meridian and it was clear that during a 1-hour imaging run would actually cross the Meridian, thus requiring a so called ‘Meridian Flip’. When setting-up the EQ-mount and telescope at the start, it is essential that they are aligned parallel with the Celestial Meridian in order that the mount and scope will then exactly track the movement of the night sky during subsequent viewing or imaging. However, due to the physical nature (internal gears) and resulting constraints of the mount and tripod, as tracking proceeds from east to west and eventually encounters the Celestial Meridian, it is necessary to carry out a Meridian Flip, manually or automatically. Such a flip requires that the mount and thus telescope and camera are swung from the west side of the tripod to the east, thereby ensuring that in continuing to track the object as it proceeds westwards they do not come into contact with the tripod.
Using the guide stars of Tejat Prosper and Propus to mark the East and West limits of the nebula and expecting the bulk of the other associated nebulosity to extend upwards, I positioned the stars towards the bottom of the frame. However, the nebula had by now crossed the Meridian and the telescope and camera was switched (flipped) to the other side of the mount before I completed framing. In-so-doing and, in my defence operating in the dark, I had overlooked that as a consequence of flipping across the Meridian, the camera had been inverted. Oblivious to this change of the camera’s attitude, I continued to frame the stars and thus hopefully placing the nebula towards the bottom of the image, when instead I should be moving them towards the top of the frame as the camera was now upside down. The result was that the final image unfortunately misses some of the associated nebulosity, though thankfully not the Jellyfish itself.
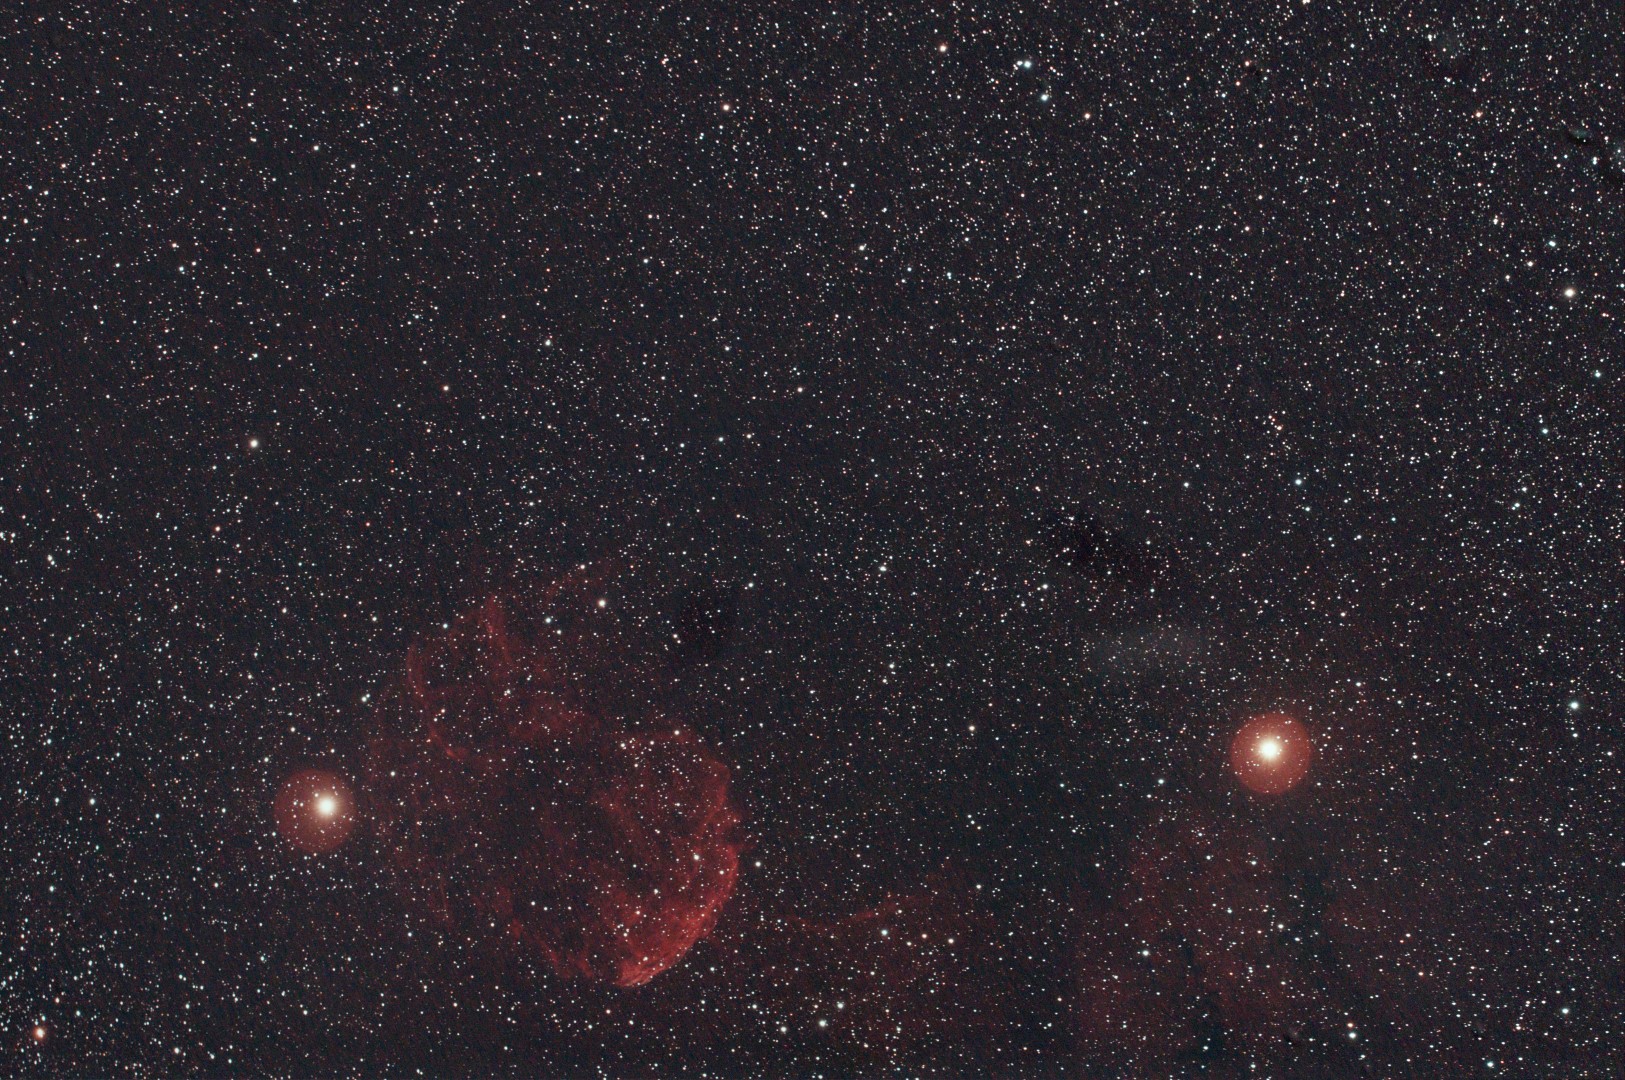
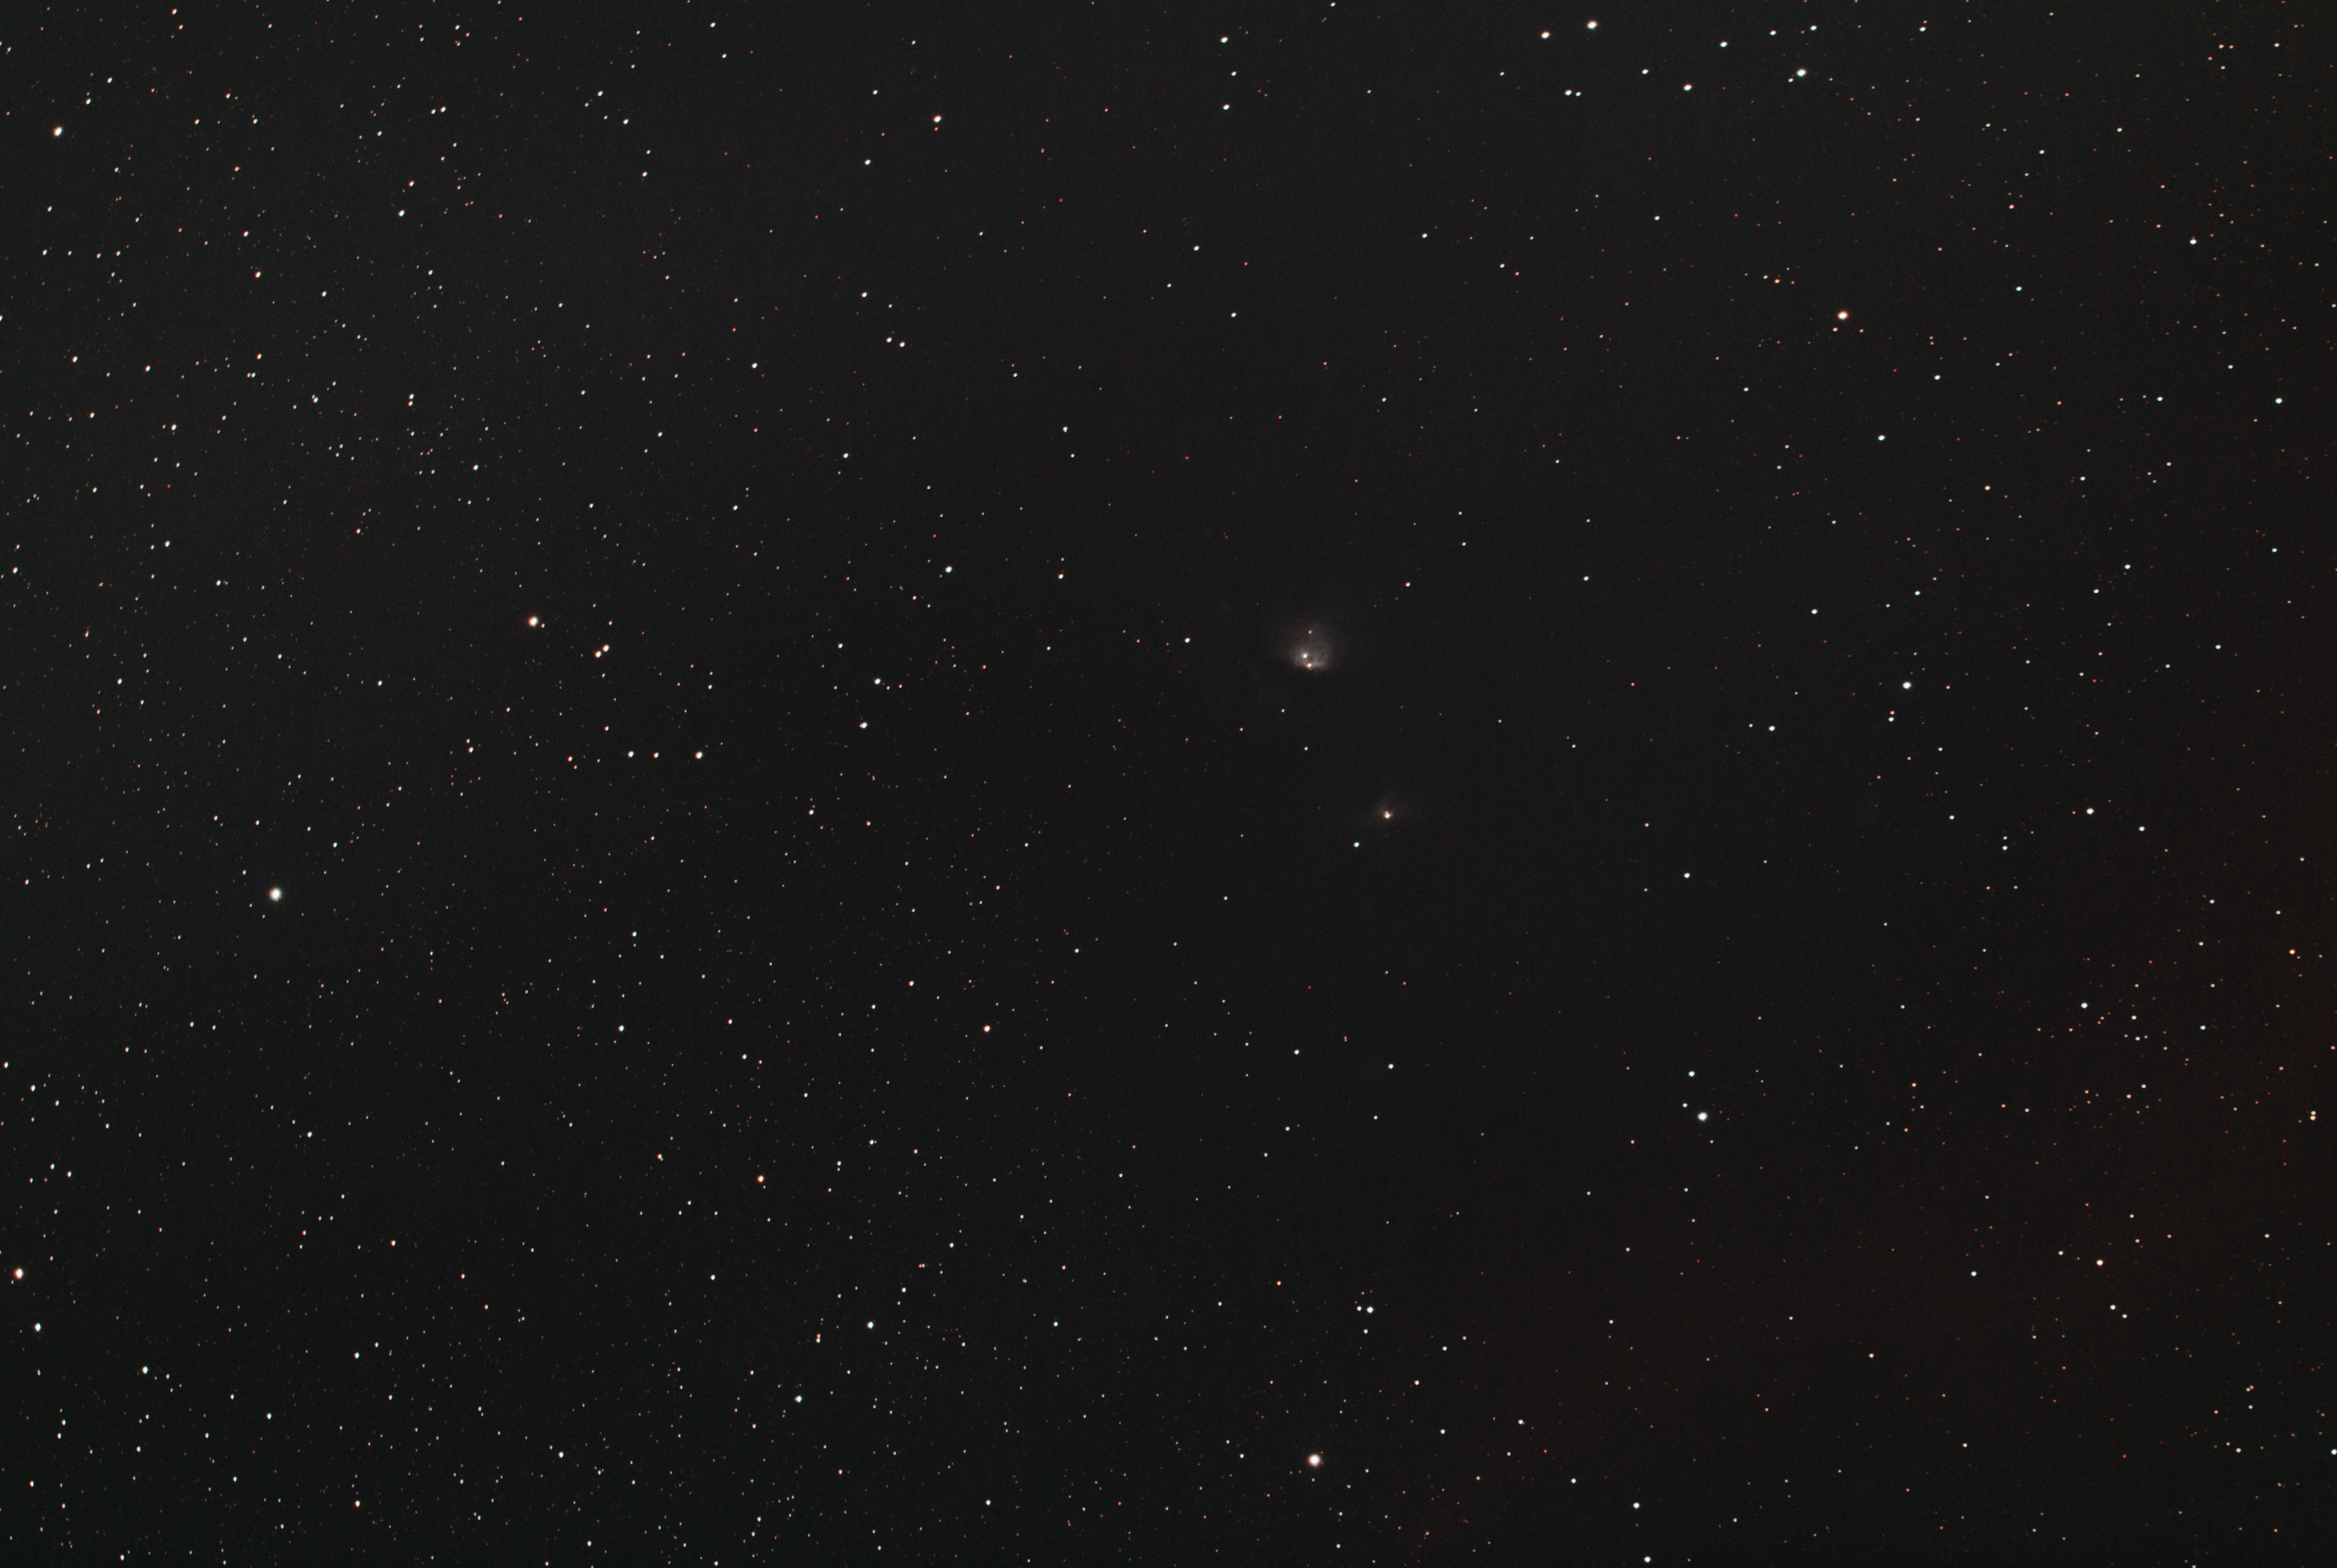
IC 443 The Jellyfish Nebula, with Propus to the left and Tejat Prosper to the right after a Meridian Flip inverted the camera before framing. As a result much of the interstellar cloud illuminated by interaction with the nebula is lost outside the bottom of the image.
WO GT81 + Canon 550D + FF | 20 x 180 secs @ ISO 1,600 + calibration | 24th January 2015
The Jellyfish Nebula is considered to be the remnant of a supernova that took place between 3,000 and 30,000 years ago and is now interacting with surrounding molecular clouds. Like similar supernovae such as M1 the Crab Nebula, the Jellyfish also harbours a neutron star within, indicating a collapsed stellar core. The main Jellyfish is some 100 light-years across and 5,000 light years away from Earth.

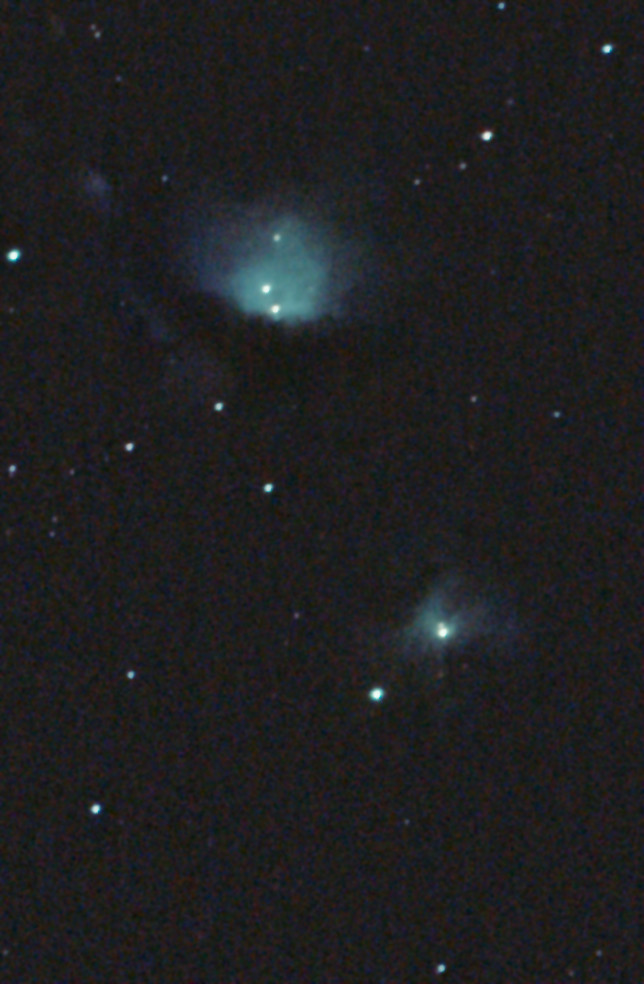
IC-443 Jellyfish Nebula, correctly orientated Propus is now to the right.
The denser, though still delicate nebulosity of the main ‘Jellyfish’ feature, is located immediately east of Prospus but most of the entire field between the two aforementioned stars and an equal area above is also occupied by extensive, though more faint nebulosity – it was this which was lost in my final image due to the framing error noted above. Even with the new modded camera and 180 second exposures at ISO 1,600, the sensor has struggled to capture all the light but I am fascinated and pleased nonetheless with the result. A better image of IC-443 AKA the Jellyfish Nebula will have to wait until I am able to undertake much longer exposures, which I hope to do one of these days soon. In the meantime, I will be more aware of the Meridian Flip and its associated problems.