An astrophotography image is clearly the sum of its parts, which can broadly be defined as: Equipment – Image Capture – Processing. Much attention and money is given to the first two items but it’s easy to overlook the importance of processing, I should know I’ve done it for years! With time on my hands this year during Covid-19 & lockdown, I have at last turned my attention to this most critical of items to very good effect. Hitherto I’ve used Deep Sky Stacker (DSS) for calibration & stacking, before moving to Photoshop for all other processing, which has usually produced satisfactory results. However, I’ve often thought more might be obtained from the data by using more powerful software combined with an improvement of my overall skills.
On taking up astrophotography it’s a shock when first looking at the camera’s data, which will usually produce a dark almost featureless image, represented by a very narrow, steep image histogram – a graphical representation of the tone and light collected by the exposures. This is because most of the image of the night sky will of course be dark, with precious few photons arriving from distant objects being photographed contained only within the said narrow histogram – the trick is to tease them out during processing in the so-called digital darkroom, thereby revealing the image within.
In the right hands Photoshop is an excellent tool for post processing but it’s no coincidence that most accomplished astrophotographers are using PixInsight (PI), for good reason: it is dedicated to astrophotography, is very powerful, whilst at the same time being very flexible. Unfortunately the learning curve for PixInsight is steep but from my recent experience very much worth the effort. Metaphorically speaking, I’m in the foothills of using PixInsight but now with sufficient knowledge to process images from start to finish, I have already successfully tackled complex LRGB images LBN 325 and NGC 6194. Subsequently I’ve turned my attention to re-processing old narrowband data, which first time round produced unsatisfactory results using Photoshop; this being as much the user as anything else.
Whilst PixInsight was the principal software for this re-processing, it was used in conjunction with Photoshop to achieve certain affects and other newly acquired dedicated software for specific tasks: Starnet++ to produce starless images and Topaz Denoise AI for noise reduction and sharpening. Using the HST palette in all cases, the workflow (see table at the end) was adapted for each image depending on the characteristics of the object. Before (top) and after (below) images are shown beneath, together with links to the original blogs for more background and imaging information.
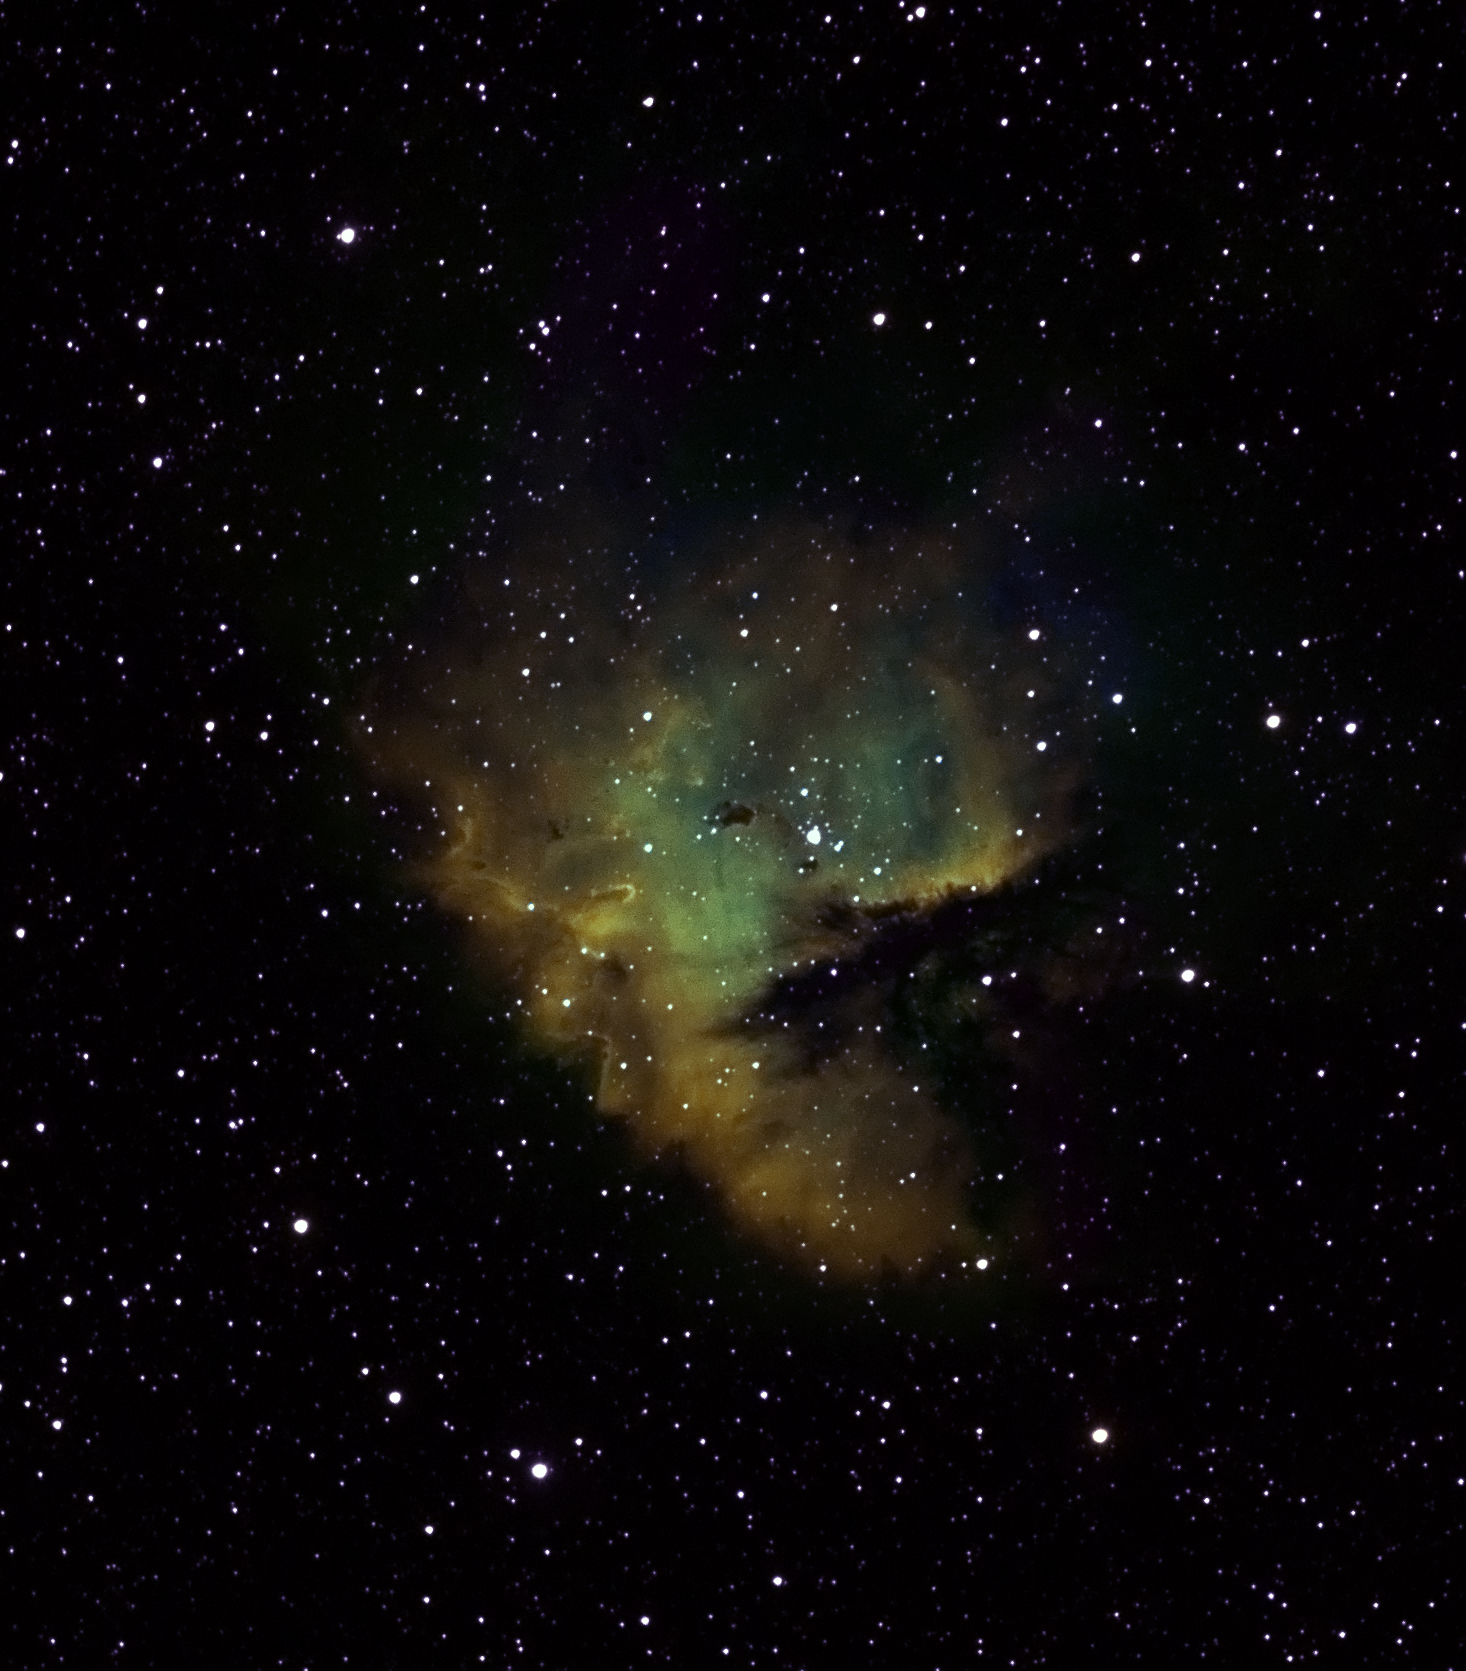
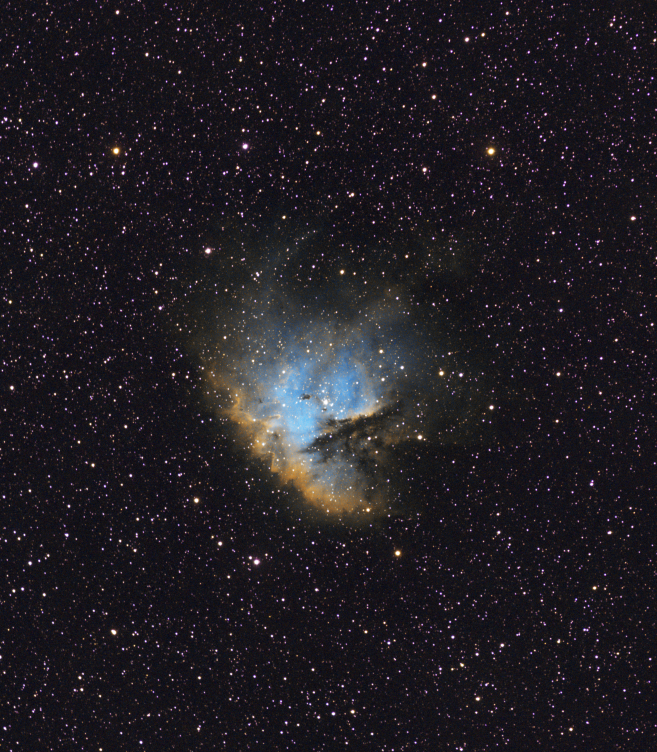
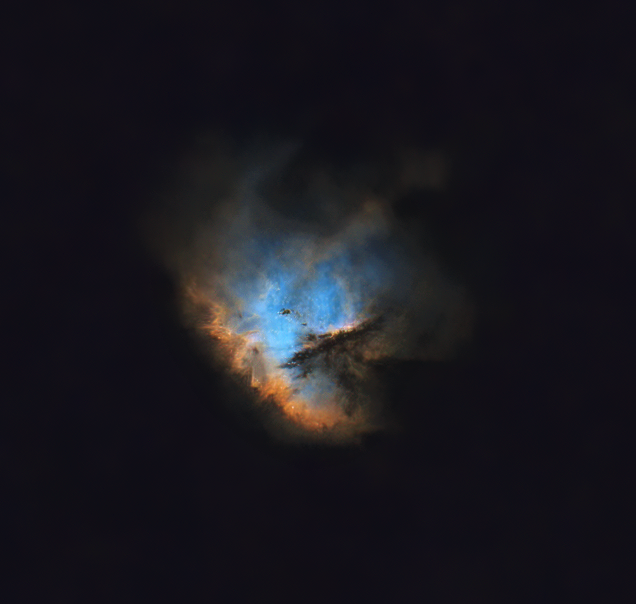
NGC 281 Pacman Nebula, August 2019: Whilst the initial HaOO bicolour image looked good I struggled to do the same with the SHO version. However, the transformation after re-processing with PI is, as they say – a whole new ballgame. Vibrant colours have emerged from the previous somewhat gloomy image, together with detailed internal structures. Although somewhat artistic in character, I particularly like the starless version which is shown at the top of the page.
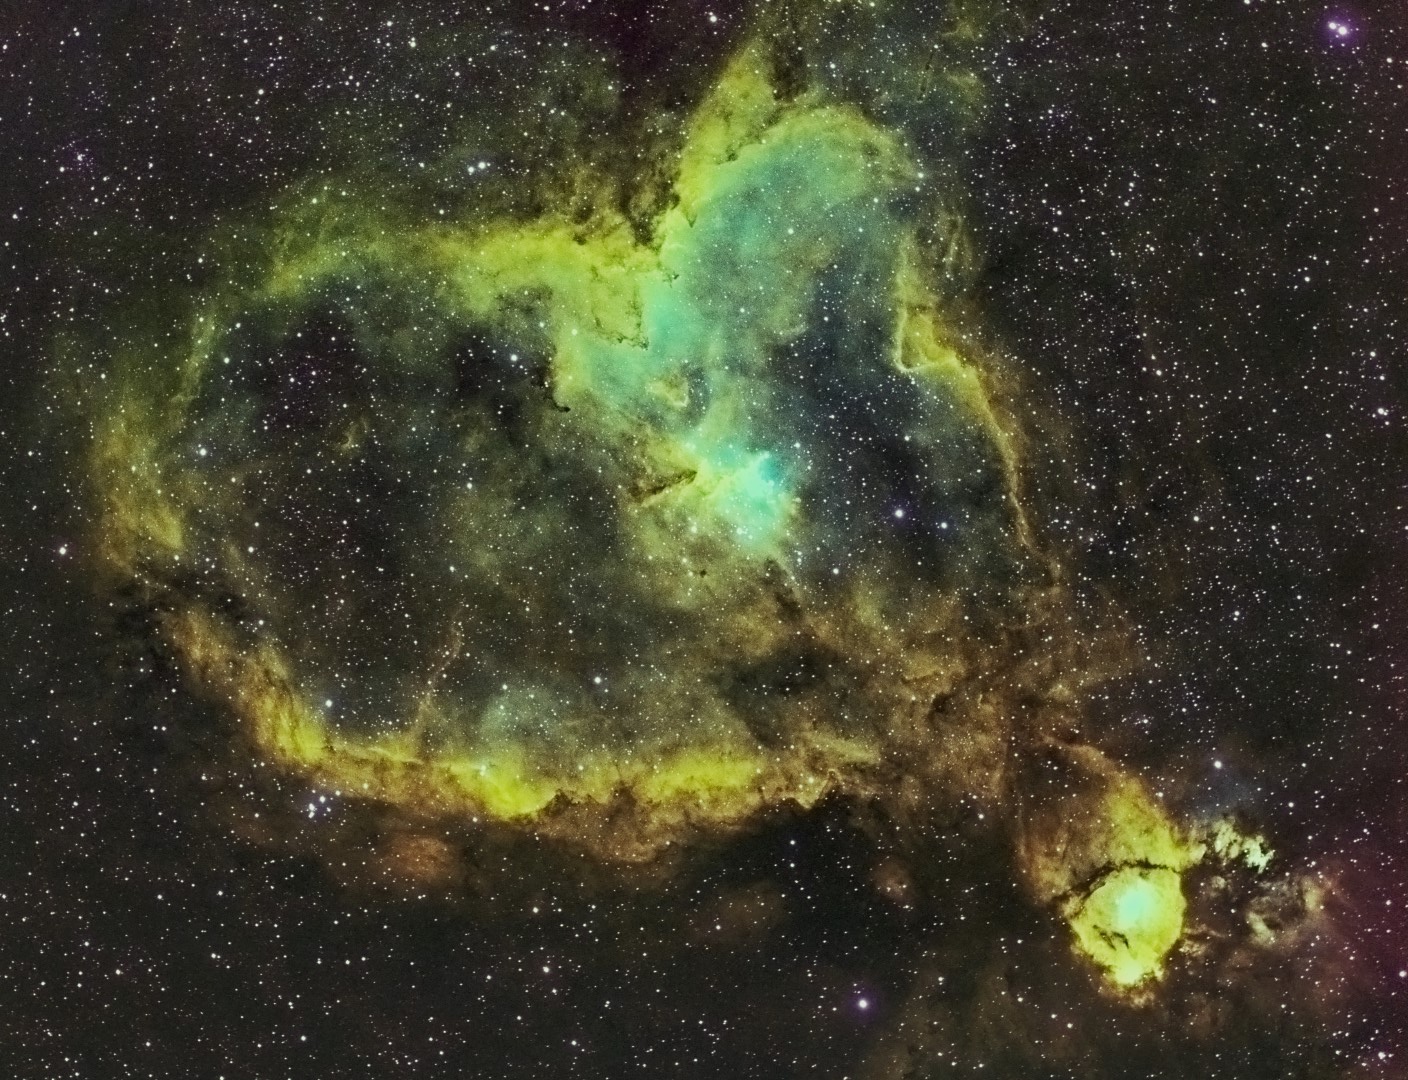
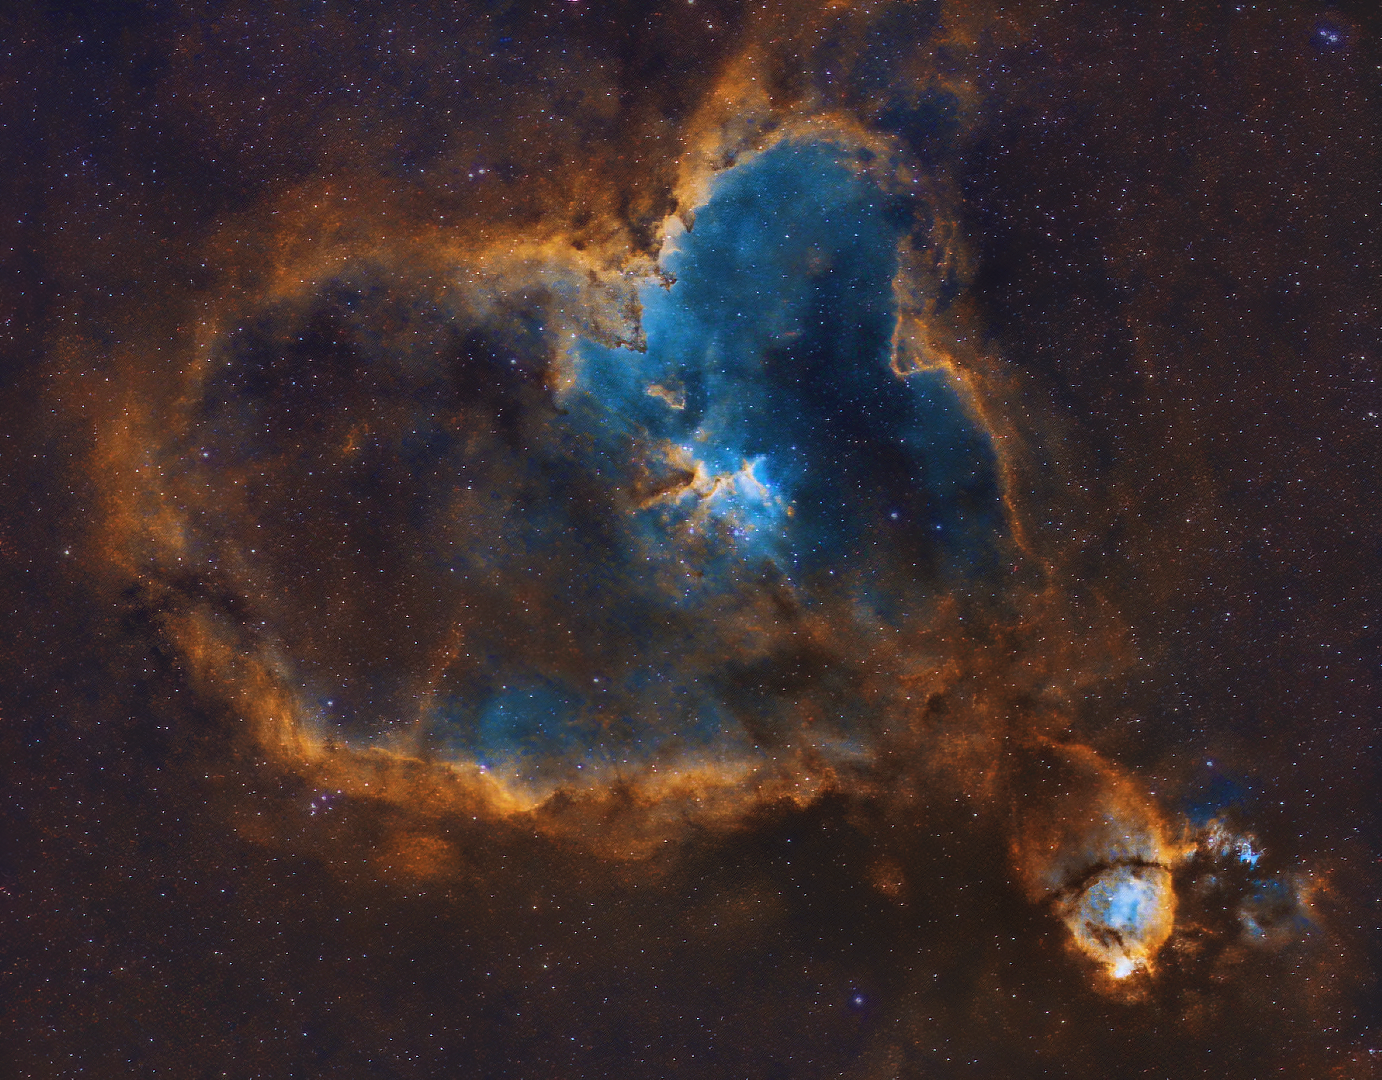
IC 1805 Heart Nebula, August 2018: Like Pacman the original bicolour processing was also successful but SHO much less so. Re-processing has brought out warm colours and details around the inner edge of the heart-shaped nebulosity but it is the striking blue inner region which highlights Melotte-15 at the centre that steals the show. Here fierce stellar forces associated with superhot, young open star clusters, model the adjacent dust clouds into features analogous to those of the Eagle Nebula’s Pillars of Creation.
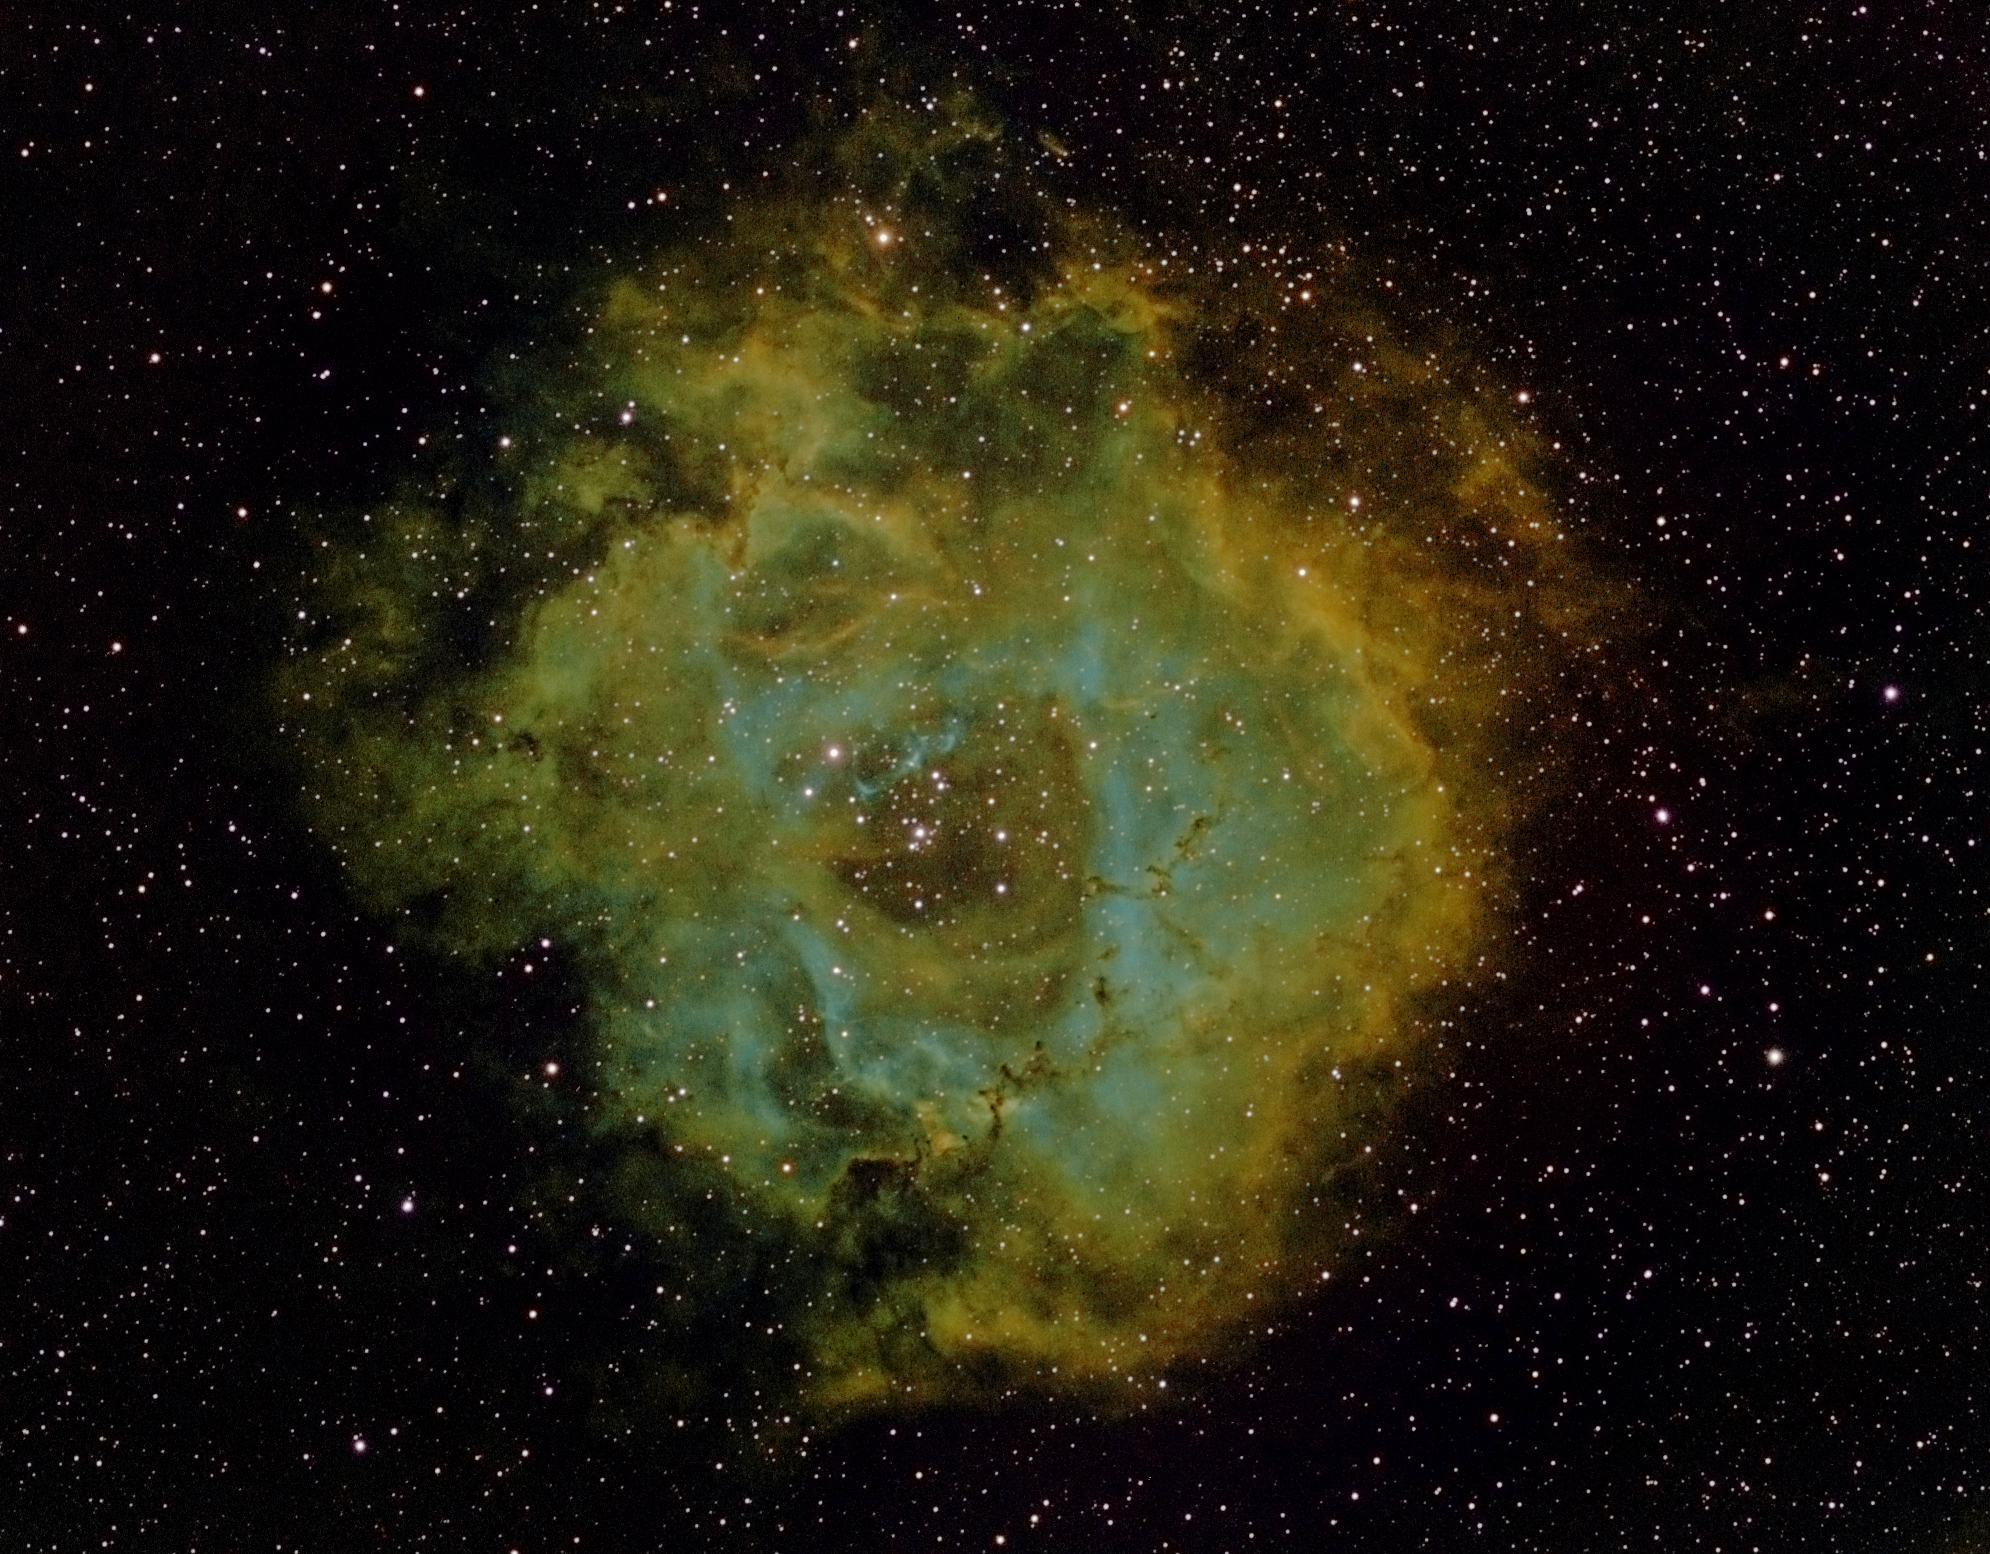
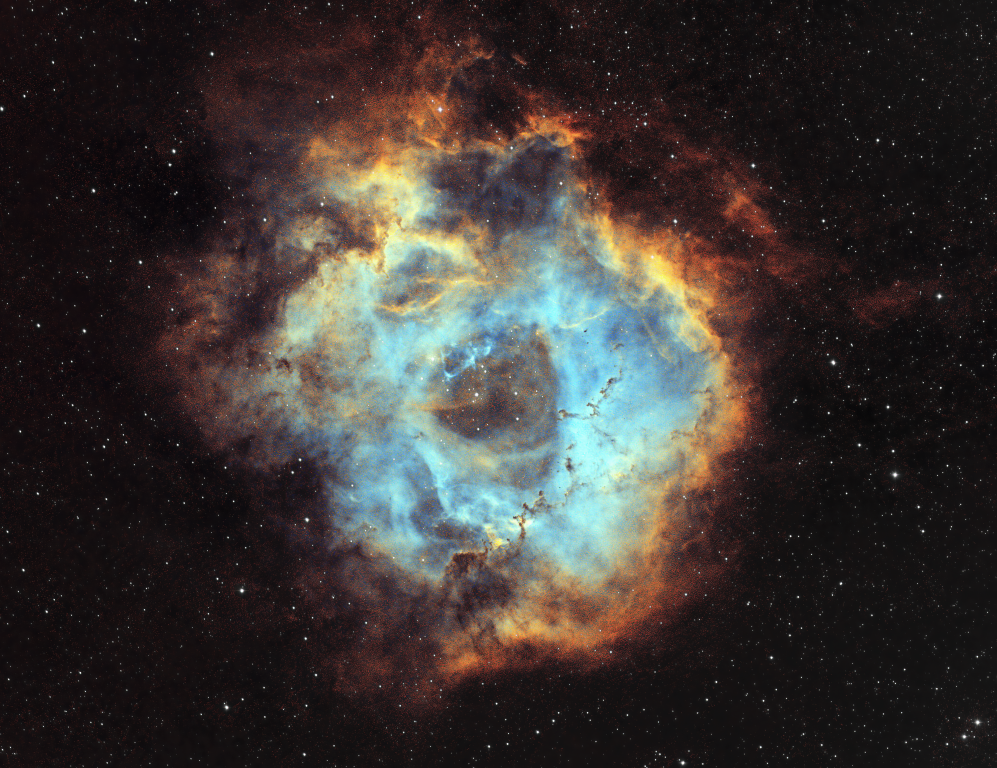
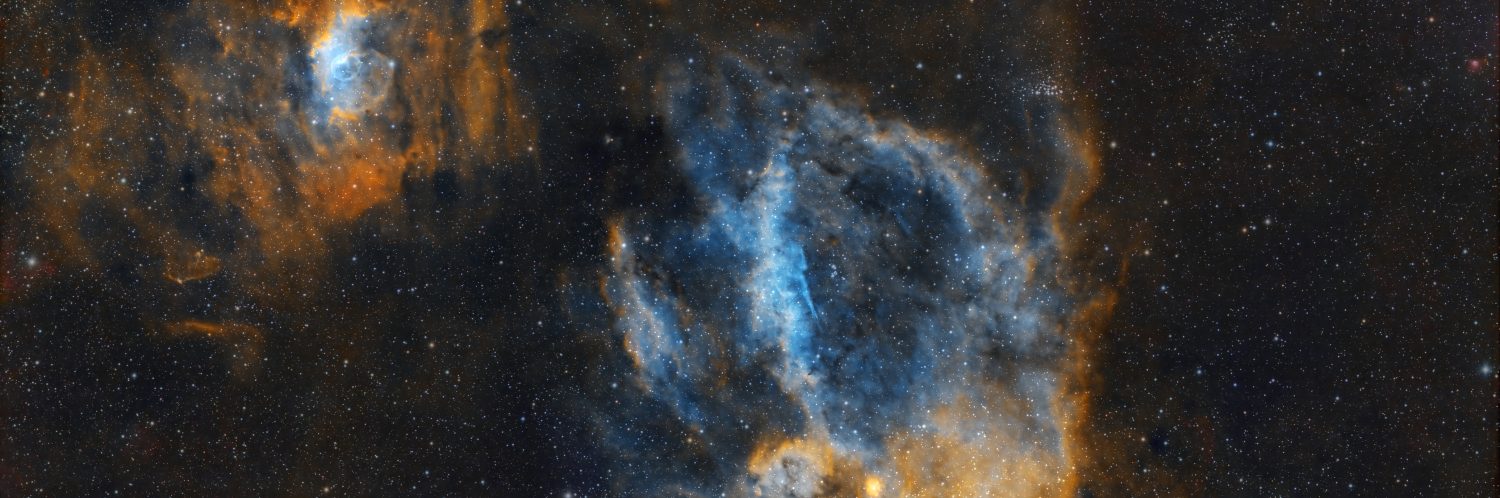
NGC 2244 Rosette Nebula, February 2018: The Rosette was the most difficult data to re-process and therefore turned out to be the most satisfying. Similar to the Heart Nebula, the rose-like dark nebulous outer region and bright inner edge frames the dramatic, somewhat translucent pale blue inner area. Therein billowing, cloud-like blue nebulosity shows off various internal features, which include an open star cluster at the centre and the so-called Carnival of Animals marching across the lower right quadrant. Altogether new processing has transformed this image into something rather special.
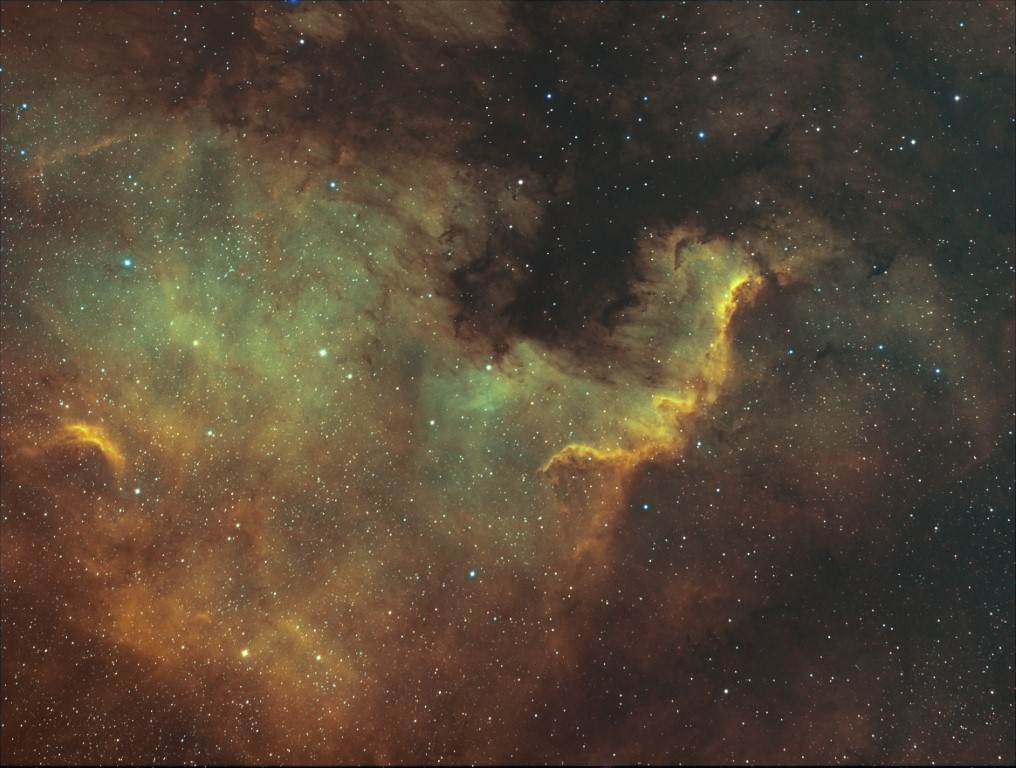
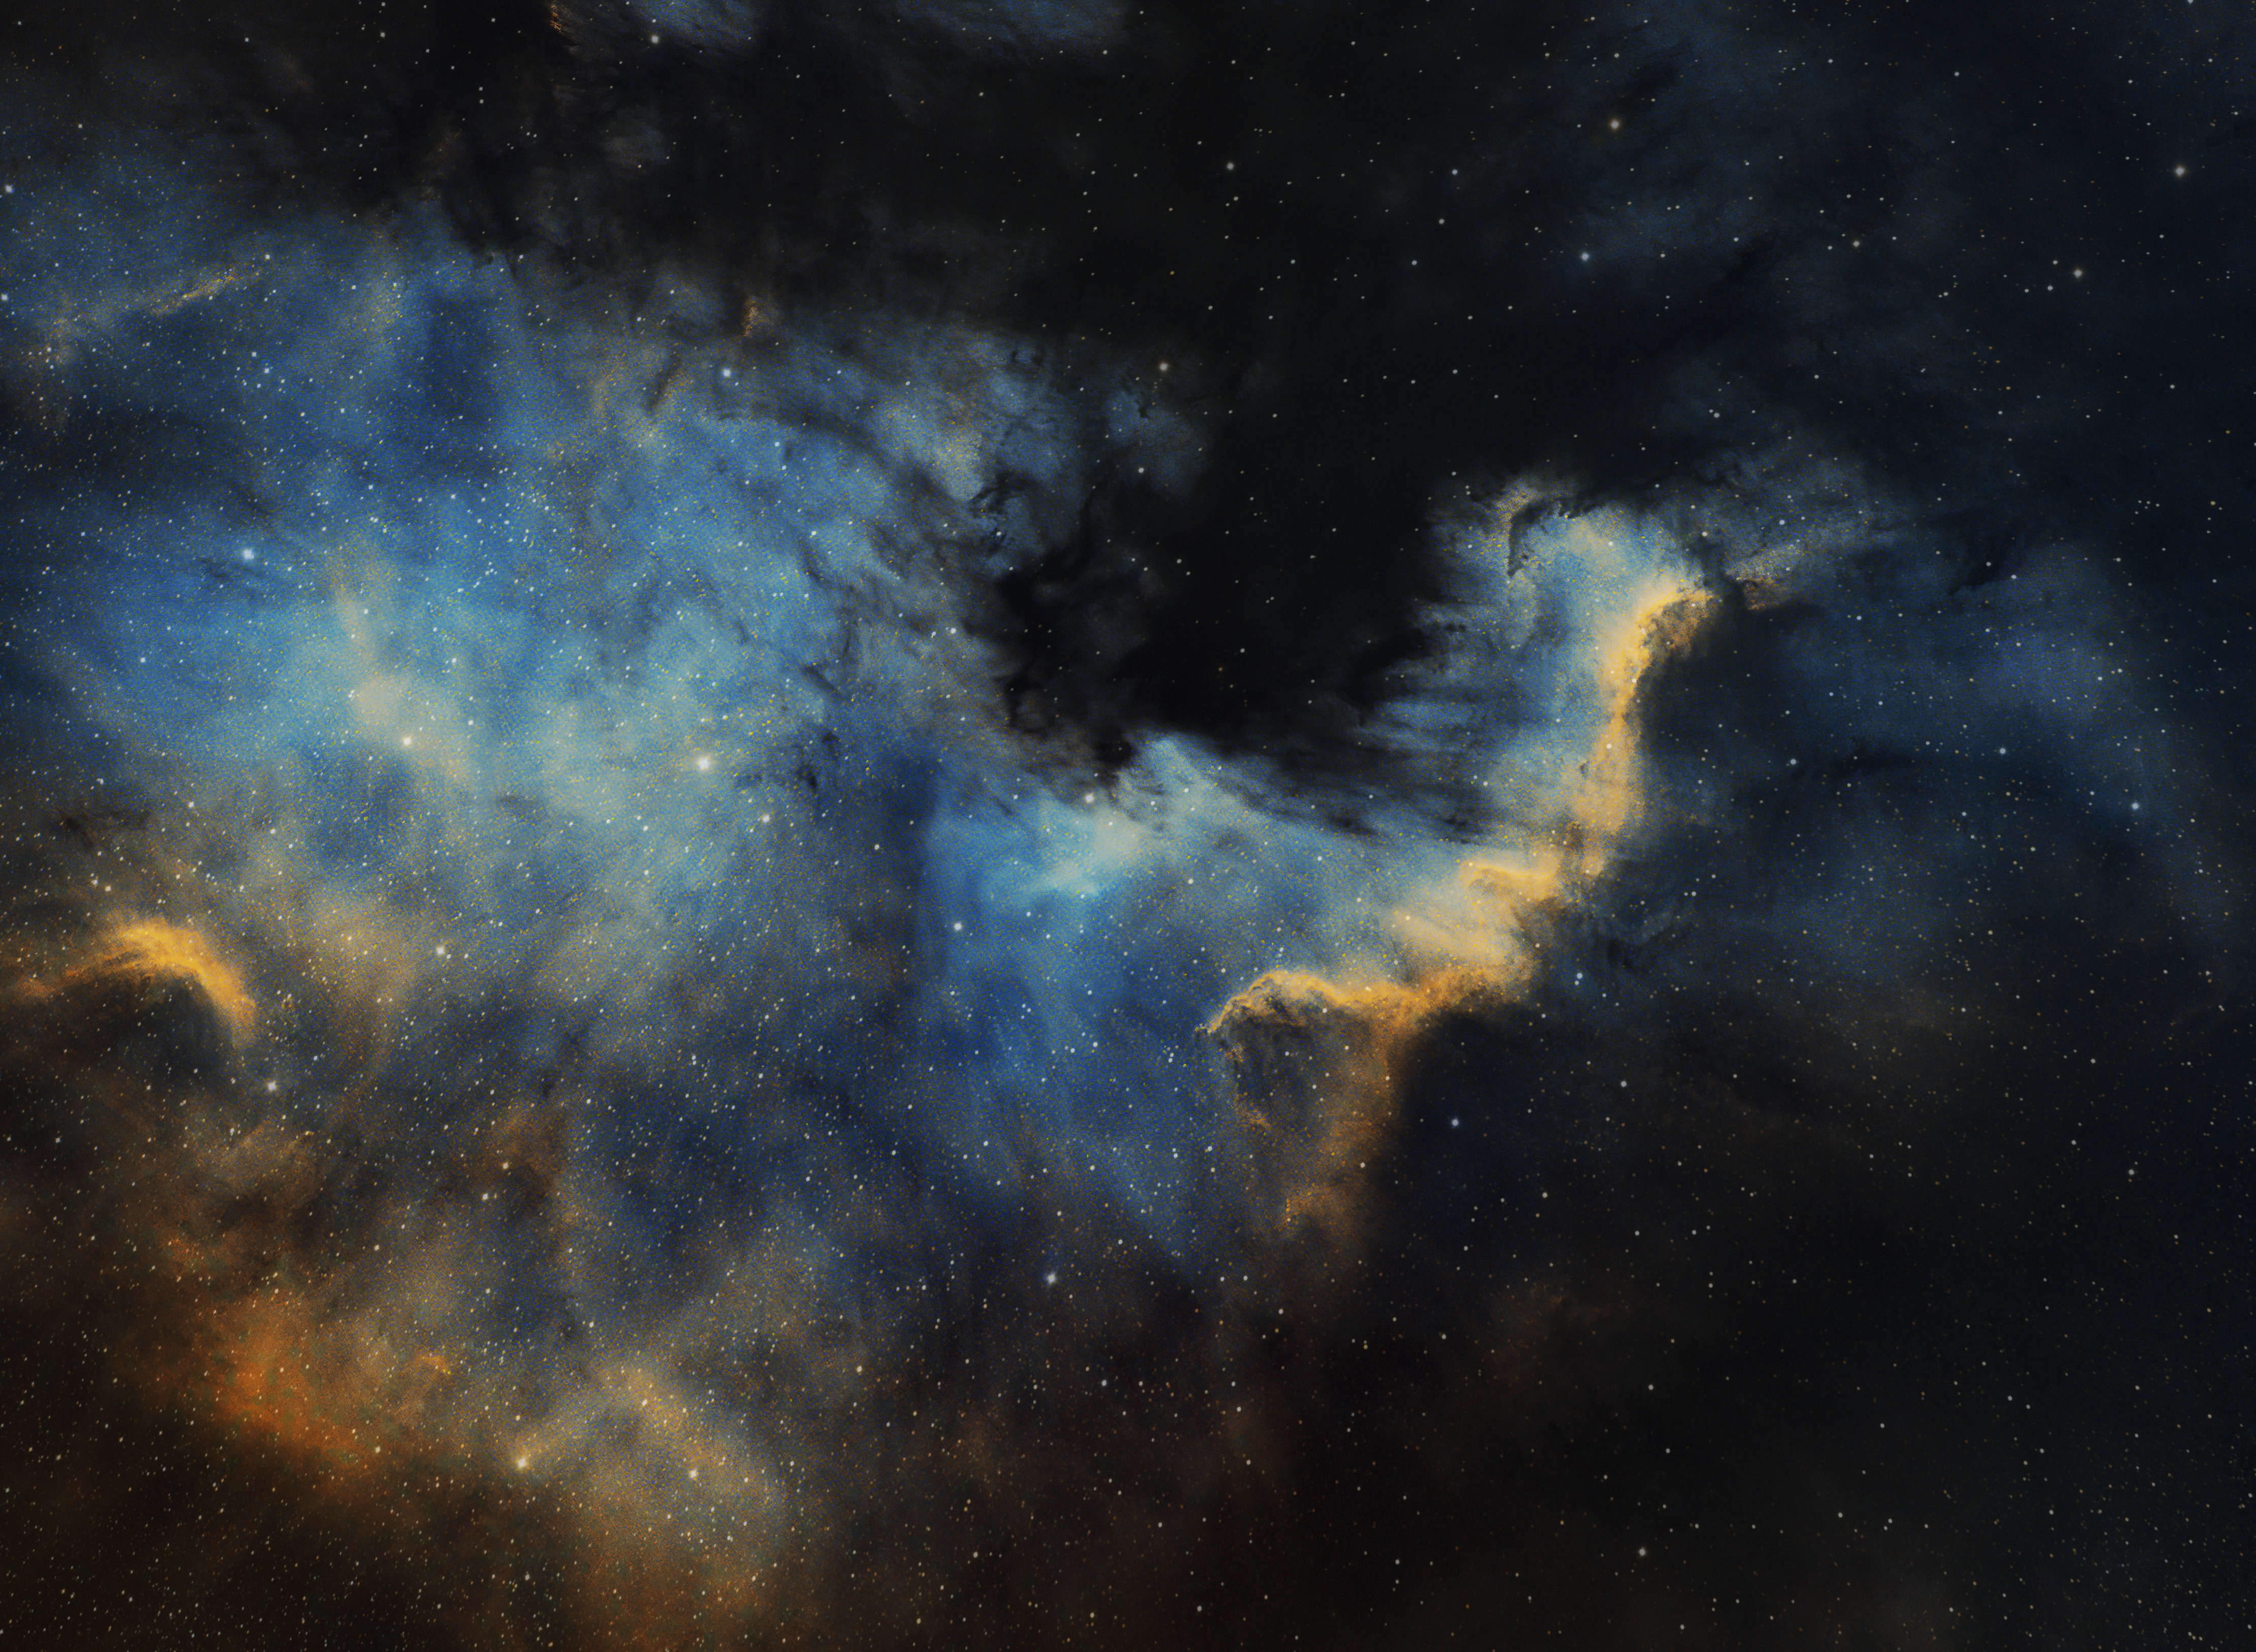
NGC 7000 North America Nebula, August 2017: Although very happy with the original SHO image processed using Photoshop, the revised version is not so much better but different. Use of the SCNR function and subsequent PI and Photoshop colour adjustments have introduced greater detail overall, as well as produced more delicate colours, especially the diaphanous blue nebulosity around the ‘Gulf of Mexico’
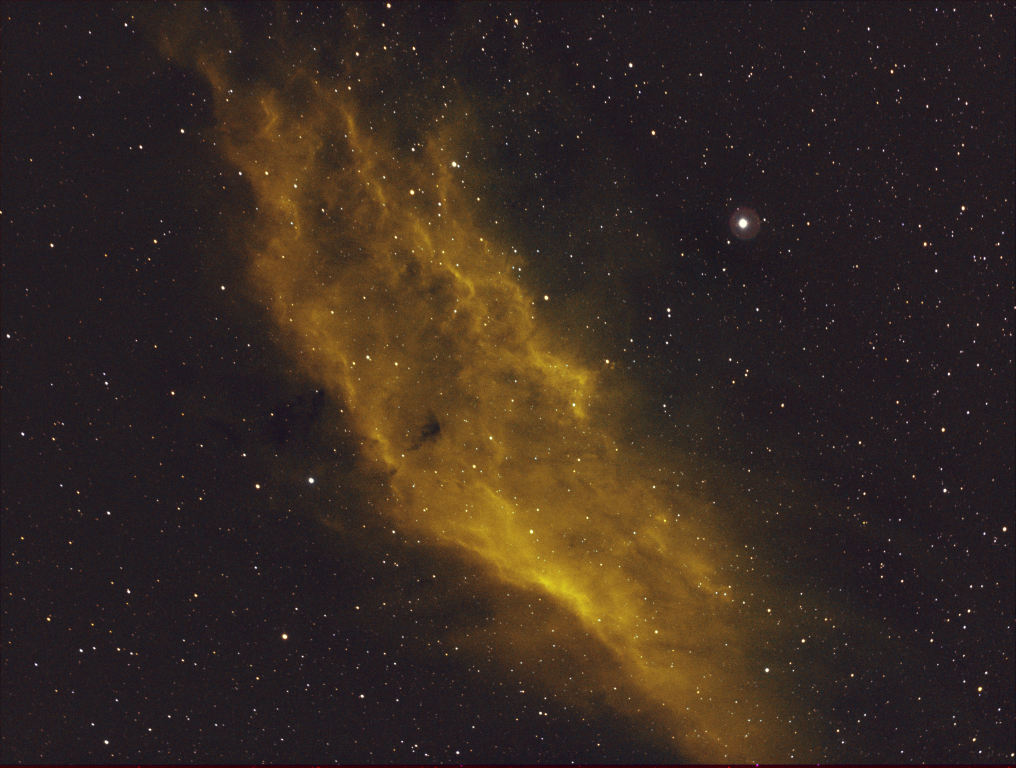
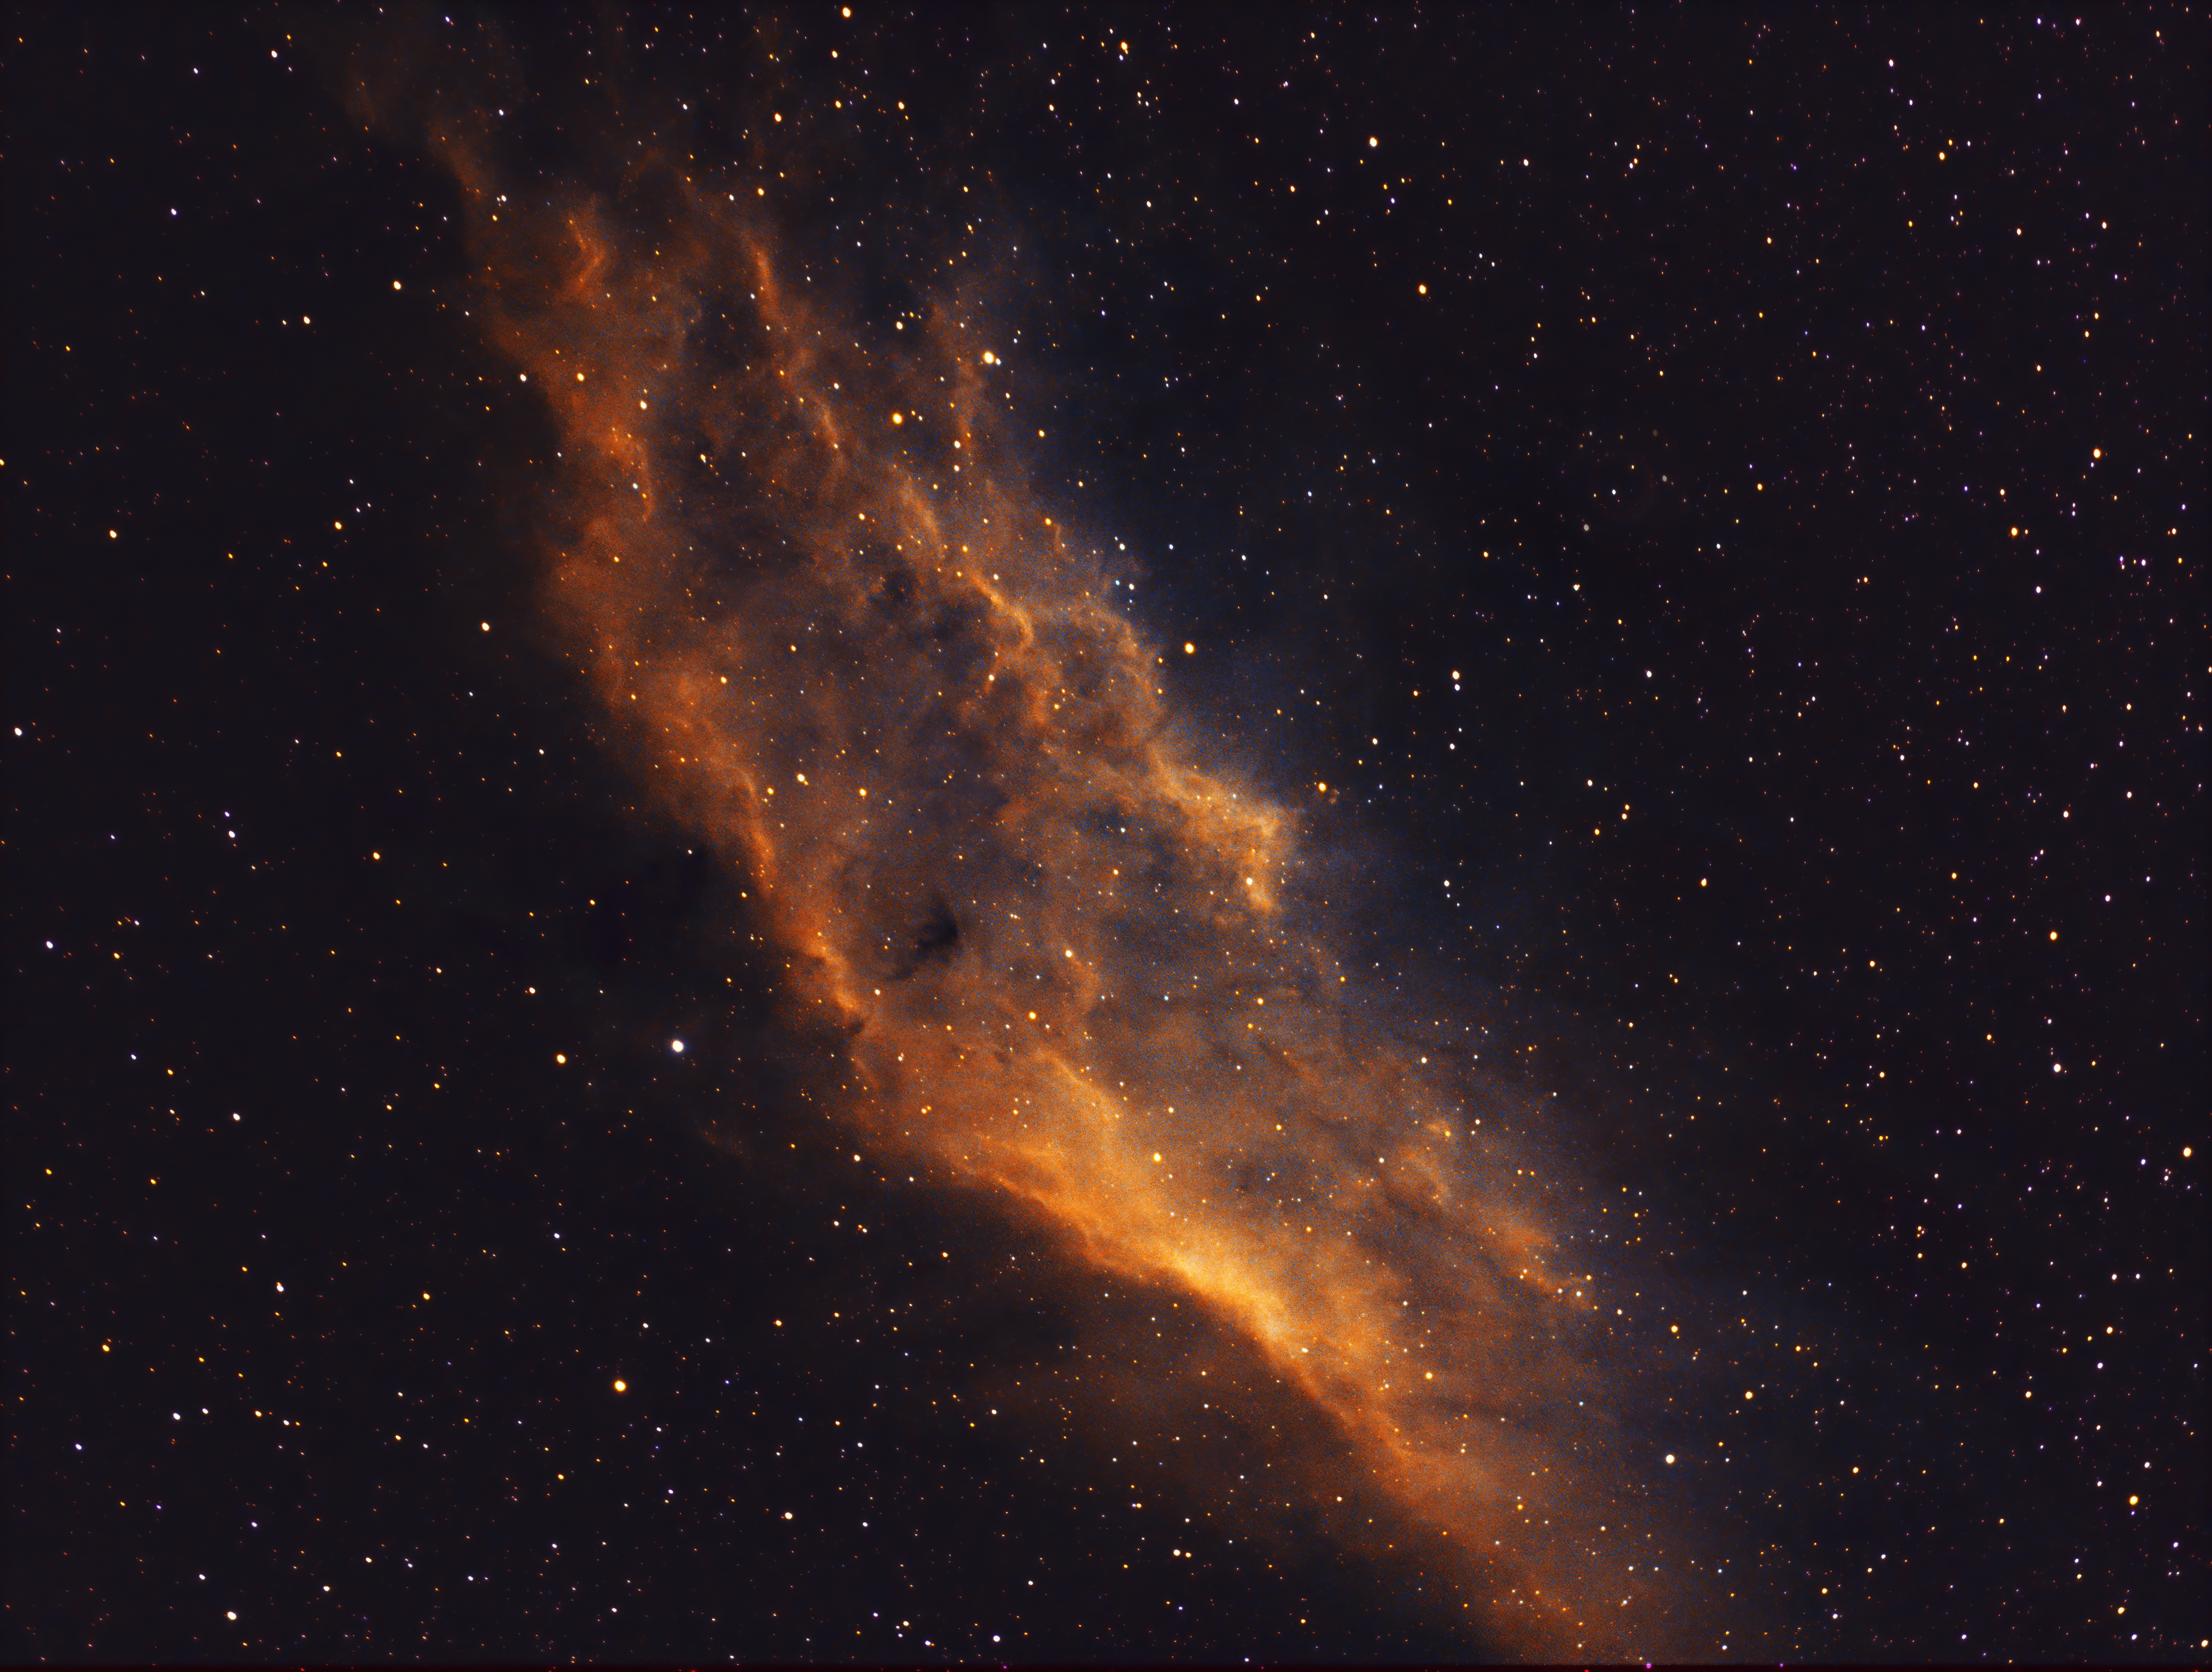
NGC 1499 California Nebula, October 2017: In this case re-processing has brought out greater structure throughout the nebula and, to a lesser degree, improved the overall colour. However, the nature of the object, limited integration time and relative lack of what is faint OIII and SII data has probably limited the final impact.
Frankly I found PixInsight a complete pain to understand and use initially, however, with the help of online videos, tutorials and the recently published excellent Mastering PixInsight book, I believe the results more than justify the effort and speak for themselves; overall I’m very pleased with the outcome, which far exceeds my expectations. Notwithstanding, going forwards I can’t see PixInsight being my only processing software (though it could be) but it almost certainly will now become my main choice for post processing, where necessary supplemented by Photoshop and other packages dedicated to specific tasks. It’s a case of using the right tool for the job and the wider combination outlined provides much more flexibility, as well as producing excellent results. All I need now are clear skies!
OUTLINE HST NARROWBAND WORKFLOW*
| ACTION | COMMENT |
| Alignment & Stacking | Deep Sky Stacker |
NON-LINEAR PRE-PROCESSING | |
| Dynamic Crop | All stacks |
| Dynamic Background Extraction (DBE) | Gradient removal |
| RGB Combination | SHO Hubble palette |
| Linear Fit | |
| Background Neutralisation | |
| Colour Calibration-1 | |
| Deconvolution (sometimes) | Not used here but can be if necessary |
| Noise Reduction | Use ACDNR or Topaz DeNoise AI |
| Histogram Transformation | Non-linear stretch |
LINEAR PROCESSING | |
| Curves Transformation (CT) | Preliminary to bring out colours but not too strong |
| Colour Calibration-2 | |
| SCNR | Remove Green Hue |
| Magenta star adjustment | If present + use PixelMath script |
| Starnet++ | Separate Nebula & Stars |
| (a) Curves Transformation & / or (b) Colour Saturation | Colour punch Apply Range Mask to accentuate specific areas |
| Photoshop – selective colours | Further specific colour adjustment |
| Re-combine starless & stars images | PixelMath script + experiment with proportions |
| Final adjustments where necessary | DBE + CT + ACDNR or DeNoise AI + Linear / Curves adjustment |

Pingback: Reflections 2020 | WATCH THIS SPACE(MAN)